2
1. Safety Precautions
WARNING: TIPPING OVER
Lower the mast if using in strong wind that causes the lamp fitting to sway severely.
Although the mast can withstand wind speeds up to 15 m/s when the mast is
completely extended (with the balloon standing vertically), the balloon fabric can
become deformed in wind speeds of 12 to 14 m/s and entangled in the lamp guard.
Never use this equipment in wind speeds of 10 m/s (roughly the wind speed at which
the balloon fabric starts to deform) or more in order to prevent damage from lamp
heat and provide safety by preventing the lamp from tipping over.
Use on a level surface with a solid foundation. If it is absolutely necessary to use on
an inclined surface, adjust the tower light so that it is level by setting blocks under the
wheels to make sure that the mast is not at an incline (standing vertically).
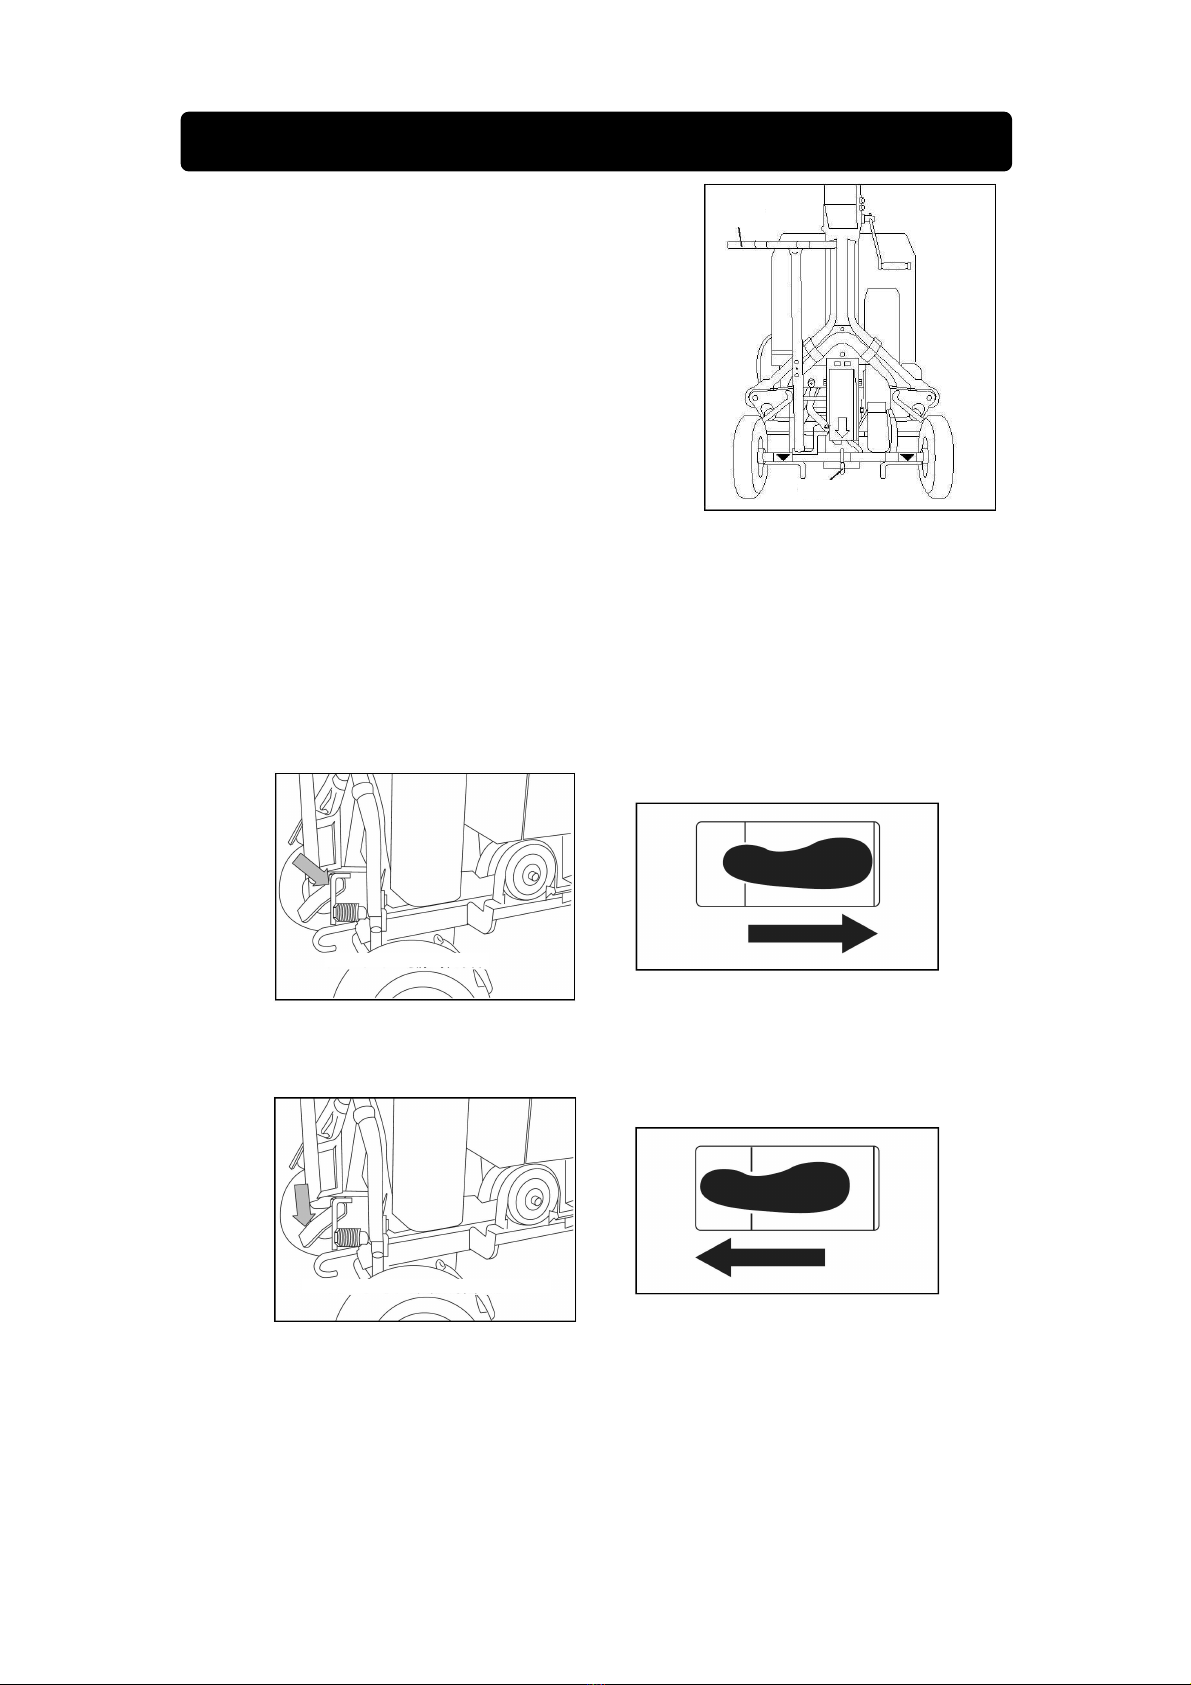
Be sure to always apply the wheel brakes so that the dolly does not move. Place
wheel chocks also.
Use the outriggers to secure the tower light. Adjust the tower light so that it is level at
this time.
Always be sure to lower the mast to the lowest position when moving or transporting
loaded on a vehicle.
When loaded on a vehicle, set so that the generator side is facing towards the
direction of travel (mast is in the back). Setting the generator in the opposite direction
can readily result in it tipping over if the brake is suddenly applied.
Be sure to always apply the wheel brakes and tie with rope to secure the tower light
when loaded on a vehicle. Set the dolly handle to the right or left and place wheel
chocks to stop the front wheels from moving in order to prevent the rope from
becoming loose.
As the tower light brake function cannot be used when adjusting the brake, always be
sure to position the tower light on a level surface with a solid foundation, place wheel
chocks and lower the mast until it is at the lowest position.
WARNING: DROPPING/INJURY
If moving the tower light generator by use of a forklift, be sure to always lower the
mast to the lowest position with the generator loaded before inserting the forks
completely into the tower light.
Be sure to always use the lifting lug to lift up the tower light.
Securely tighten the bolts and nuts securing the generator when loading a generator
that has been removed from a dolly.
WARNING: ELECTRIC SHOCK
Do not touch this tower light during operation if it or your body is wet.
Be sure to always stop the engine before performing any check or maintenance of
the lamp and other parts.
WARNING: TIPPING OVER/INJURY
Be careful of the outriggers when they are in use. You could trip and fall.
WARNING: IMPAIRED EYESIGHT
Do not work for an extended period of time near the lamp and do not look directly into
the lamp.
CAUTION: INJURY
Do not touch the mast, winch drum or wire when the mast is moving up/down.
To change the direction of the lamp fitting, hold the lamp fitting lever with one hand
and support the lamp fitting while loosening the fixing handles (rotation and tilt
handles).
Do not adopt an unnatural posture when adjusting the direction of the lamp fitting.
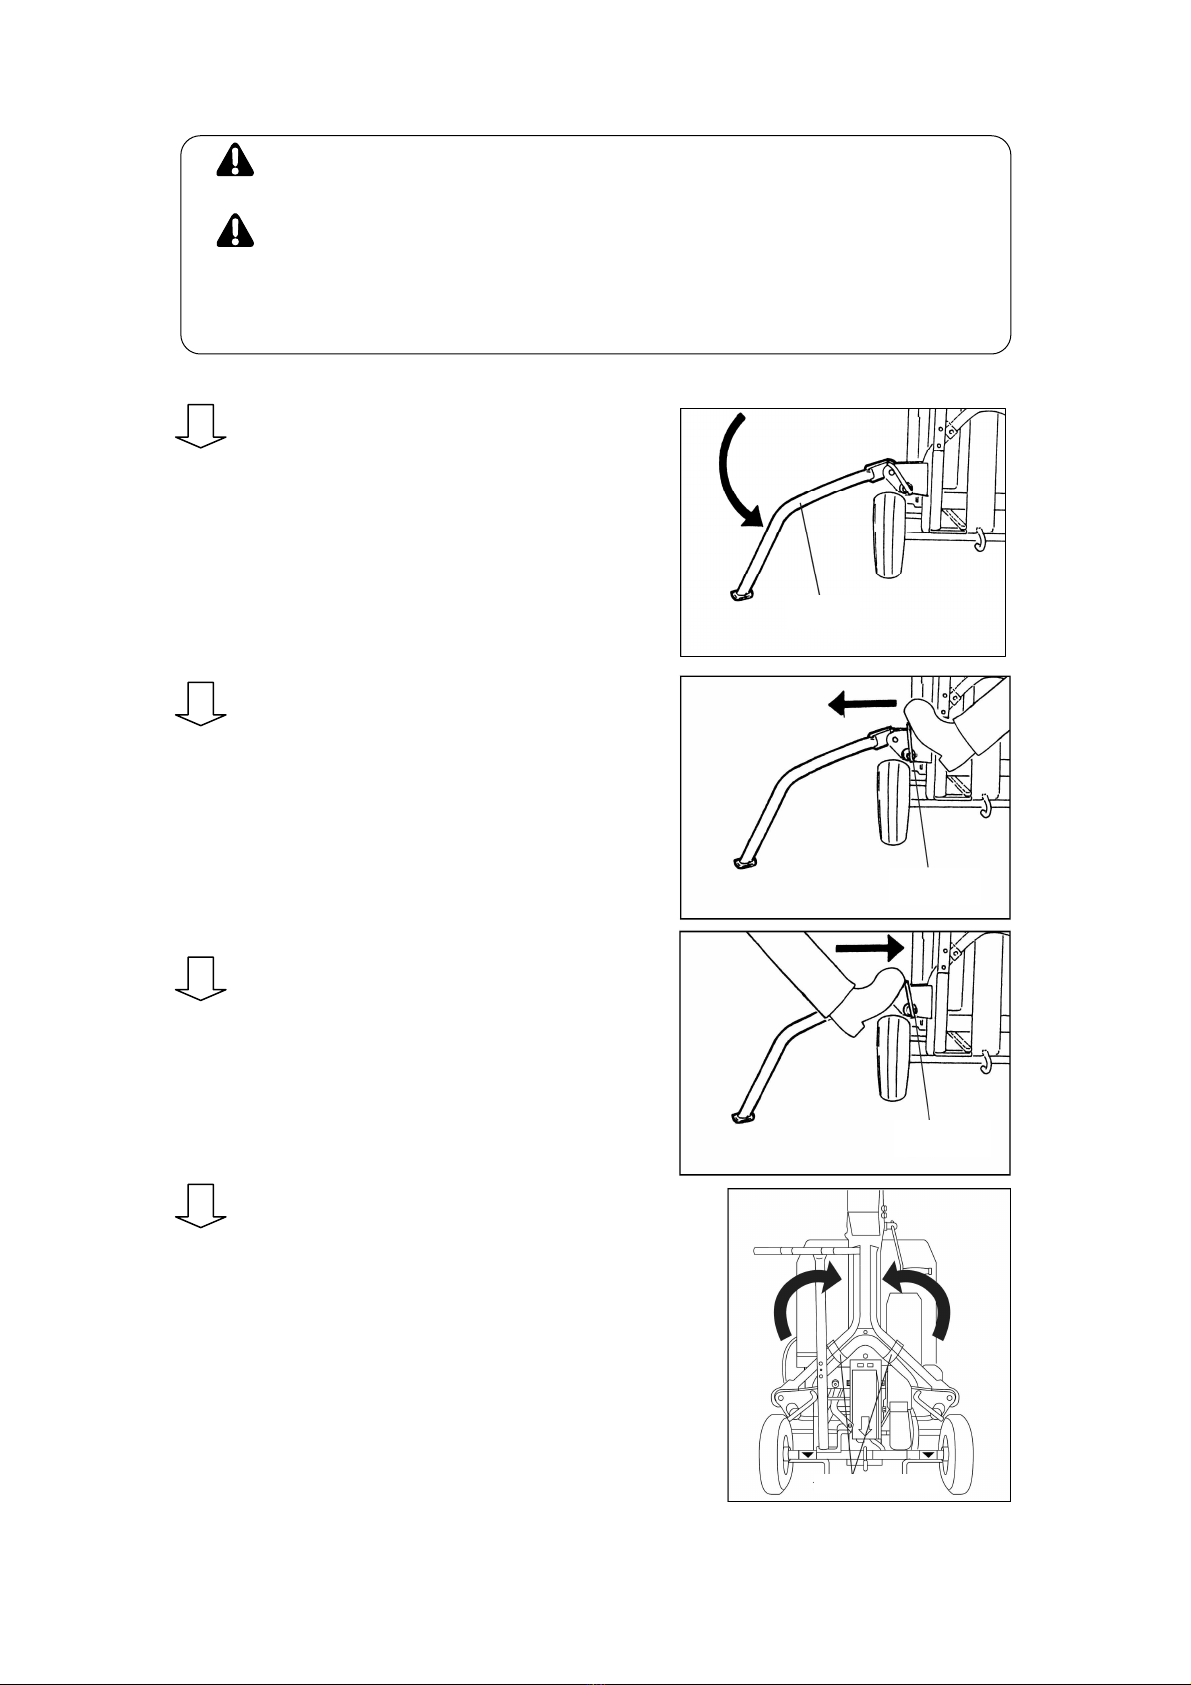
Be sure to always support the outriggers with one hand when setting and storing
them.
Be careful that your hand supporting the outrigger does not get pinched or caught by
the mast or winch handle when setting and storing the outriggers.
Do not tighten the lamp with excessive force. Doing so could damage the lamp.
Do not modify the tower light and do not operate with parts removed.