Siemens-Allis LA-600A User manual


WARRANTY
Allis-Chalmers
"LA"
air
circuit
breakers
are
warranted
to
be
free
of
defects
in
material
and
workmanship for a
period
of
one
year
from
date
of
initial
operation
but
not more
than
eighteen
months from
date
of
shipment
by
company.
This
warranty
is limited to
the
furnishing
of
any
part
which
to
our
satisfaction
has
been
proven
defective.
Allis-Chalmers
will
not
in
any
case
assume
responsibility for
allied
equipment
of
any
kind.
(See
Allis-Chalmers
W
arranty
Form
5992-23.
)
Typical Shipping Methods Used With
"LA"
Breakers
,I .
Courtesy of NationalSwitchgear.com

r··
-TABLE OF
CONTENTS
WARH.ANTY
. . . . . . . . . . . . . . . . . . . . . . • . . . • . 1
REC1£VJNG
A~
.Ll
i
l\SPE
C'l'ION . . . . . . . . . . . . . . . 3
Introdu
ct
io
n . . . . . . . . . . . . . . . • • • . . 3
P..eceiving and lnspt>c
tion
for DamagP . . . • . • . . . . 3
St.crag~
. . . . . . . . . . . . . . . . . . . . . . • . . . . . . .
;;
INS'
fALLATlON
..
. . . . . . . . . . . . . . . . . . . . • . . . 3
Installation
Sequen
ce
. . . . . . . . . . . . . . . . . . . . . 3
Cautions
to
be
Observed in Installa.t
jon
and
Op<
!
ration
............
, . . . . • 4
OPERATION
. . . . . . . . . . . . . . . . . . . . . . . . . . . . 4
De
sc
riptio
n
..
...
.
..........
.
..
.
..
.
..
. . .
{A) Manually
Opera
t
~d
Circuit. B
reak
ers . .
..
.•.
..
(B) Electrically
Operat
ed
Circuit Break
er
s .
..
.
..
.
(C)
Comb
ina
lion E.O. & M.O.
Opera
t
ed
4
6
6
Ci
rcuit
Break
~ rs.
. . . . . . . . . . . . . . . . . . . . 9
Ora
woul
Int
erl
ock
. . . . . . . . . . • . . . . . . . . . . . . 9
Rllcklng Mechanism . . . . . . . . . . . • . . . . . . . . . . 9
Spring
Discharge
In
te
rlo
ck ...
..
. . . .
..
.
......
JO
Li!ting
Bar . . . . . . . . . . . . . . . . . . . . . . . . . . . .
11
Handling
In
struct
i
ons
. . . . . . . . . . . . . . . . . . . 11
MAINTENAN
CE
AND
ADJUSTMENT
S .
......
.
..
12
Maintenan
ce . .
.....
.
..
....
...
....
. .
..
. .
L
ubrication
........
. .
....
.
..
. . .
......
.
Maintenan
ce Closing
....
.
..
..
.
..
. .
..
.
....
.
Adjustme
nts
.
.......
.
..
. . . •
.....
.
....
..
Trip-Latch
Engageme
nt
.....
• .
..
..
...
..
. .
Main
Contact
Make
.....
....
..
.
..
......
Arcing
Co
nt
act
Make
.......
.
..
.
...
.....
12
13
14
16
16
17
17
Contact
Repla
ce
m
ent
. . . . . . . . . . . . . • . . . . . .
18
Ms
in
Contact
Fing
er.
. . . . . . . • . . . . . . . . . . . 18
Stationary
Arcing
Contact
. . . . . . . . . . • . . . . .
111
Hinge Cont.act Fingers
....
. .
..
..
....
· · · · · 18
Movable Arching
and
Main
Contact
. . . . . . . . .
lB
Ttlpping
Actual.or . . . . . . . . . . . . . . . . . . . . . . . 18
Motor
Cutoff
g,.;tch
. . . . . . . . . . . . . . . . . . . . . 19
Se
condary
Disconnect
Assembly
Option
. . . . . . 25
Auxiliary
Switch
Option
. . . . . . . . . . . . . . . . .
26
Shunt
Trip
Option
. . . . . . . . . . . . . . . . . . . . . 27
FUSE
FUNCTIONS
.....
.
.•
.
..
. .
....
....
...
20
Current
Limiting
Fuses . .
.....•....
.
.......
20
Open
Fuse
Trip
Device . . . . . . . . . . . . . . . . . . . . 23
ACCESSORIES . . .
...
.
.........
.
......
.
..
. 2
4.
Current
Sensors
-
Li
mi
Tri
p
........
. . .
... ...
24
Tripping
Transformers
-St.atic
Trip
Il.
. . . . . . . . . 24
OPTIONAL
DEVICES . .
..
.
........
...
......
25
Secondary
Dis
conne
ct
Assembly
Option
. .
.......
25
Auxiliary Switch
Option
. . . . . . . . . . . . . . . . . . .
26
Undervolt.age
Trip
Device
Option
...........
. . 21
\Shunt
Trip
Option
..
.......
. .
...
.........
27
Stati
c
Trip
Option
.......................
27
Bell
Alarm
Switch
Option
. . . . . . . . . . . . . . . . . .
28
LUBRICATION
INSTRUCTIONS
...............
28
INSTRUCTION
BOOK
REFERENCES
. . . . . Back
rover
ILLUSTRATIONS
Figure 1.
Flgur
e 2.
Flgut10
3.
_,Figure
3A
.
Fl&Urf
4.
Figure 5.
Flgurt>
6.
F1gure
7.
Figure 8.
Figure 9.
Figure
10.
F1gure 11.
Figure 12.
Figure
13.
Figure
14.
F1gure
15
.
Figure
16
.
F1gure
17
.
Figure
18
.
Typical
Shipping
Method
used
with
"LA"
Breakers . . . . . . . . . . . . . . . . . . . . . . . . . . . . . . . . . . . . . . 1
Fused
&
Unfused
Breakers with
Static
Trip
II
and
LimiTrip
Overcurrent
Trip
Devices . . . . . . . . . . . . . . . . 2
LA-6
00
A,
LA·800A
and
LA-16
00
A O
perator
. . . . . . . . . . . . . . . . . . . . . . . . . . . . . . . . . . . . . . • . . . . 7
Typical
Wiring Diagram - El
eclricaliy
Operated
Brea.
kers
. . . . . . . . . . . . . . . . . . . . . . . . . • . . . . . . .
..
. 8
Detail of Typical
Rac
king
Me
chan
ism
an
d
Drawout
Interlock
. . . . . . . . . . . . . . . . . . . . . . . . . . . . . . . . 9
Typical Racking Mechanism
and
Dr.twout
Interlock
..
....
.
...
.
.....
.
.....
.
...
• .
....
..
..
. . .
10
Typical LA·
1600A
Br
eaker
Ouliine .
..
.
..
.
....
.
.....
. . .
.........
..
•
............
.
..
.
..
12
Typical
LA·600A
and
LA·80
0A
Breaker Out(ine
...................
•
....
• . •
...
•.•..
......
13
Maintenan
ce Closing .......
.....
. .
..
.............
.
....
. .
..
...
.....
.......
. .
....
15
Typical
Ope
rator
Assembly. . .
....
..............................
. .
...........
.
.....
.
16
Contact
ASM!m
bly
....
..
....
.....
..
. .
..
.
..
.....
.
..................
. .
..........
.
17
Fuse
Atta
ch
me
nt
Group
LAF-600A,
LAF-800A
Breakers
...........
.
.......
......
.
..
....
.
..
21
Fuse
Attad1ment
G
rou
p
LAF
-1
600A
Breaker
.
.......
..
..........
.
...................
.
..
22
LAF-600
A, LA
F-800A
and
LAF·1600A
Open
Fiise
Trip
Device,Trigger
Fuse
Assembly
...............
23
LA·600A
,
LA-800A
and
LA
-
1600A
Sccon
.
dary
Disconnect
Group
..
. .
.........................
25
LA-600A
,
LA-800A
and
LA-
1600A
Auxiliary
Switc
h
Group
.................................
26
Undenolla
.ge
Trip
with
or
wit
hout
Time
Delay
. . . . . . . . . . . . . . . . . . . . . . . . . . . 27
LA·
600A
,
LA-800A
and
LA·l600A
Shunt
Trip
Group
.
.....
. .
.....•.
..
.
..
.
..
. . .
..
.
..
.
..
.
..
27
LA-
60
0A,
LA·
OO
OA
and
LA
·1600A
Alarm
Switch
Group,
Bell
Alann
.........•..............
.
..
28
Lubricati
on
Cha
rt
..
..
....
.
.....
.
.........
.
.......
.
....................
. . .
..
.
..
29
Lubrication
Points
on
.Breaker .
.........
.
..
...
....
.
........
.
..
.......
.
.......
.
.....
30
TABLES
'Tlble
1.
Ci
rcuit
Breaker
Rating
8
at
60
Hertz
. . . . . . . 5
Table
2.
Fused
Circuit
Breaker
Ratings
at
60
Hertz
. . . 5
'fible
3. Opera.ting
Procedure
-Manually
'fible
5.
Main
tenance
Closing . . . . . . . . . . . . . . . . .
14
'fible
6.
Static
'nip
II
Rating
'fible
-
Amperes
. . . . . 24
'fible
7.
limiTrip
Rating
Table
-
Amperes
. .
....•.
24
Operat
ed Breakers . . . . . . . . . . . . . . . . . 6
Table
4.
Operatin
g
Procedurt
-Electrically
Operated
Breakers . . ,. . . . .
..
...
..
, . . 6
\
The
info
rm
ation
cont
si
nod
within
is
int
ended
to
assist
operating
pe
r
.onnel
by
providing
information
on
th
e
general
c
haracteris
tics
of
l
equipment
of
this
ty
pe.
It
does
not
reliev
e
the
us
er
of
responsibility
to
use
sound
engineering
practices
In
the
installation,
epplicetion
,
operation
and m
eintenanc
e
of
the
particular
<>quipment
purch
a
sed.
I\
drawings
or
other
sup
p
lemt>ntar
y
in
struc
tion
s
for
specific
applications
ere
forwarded
with
thi
s
manual
or
s
ep
o
rata
ly,
they
take
preceden
cej
o
vor
any
confli
cting
or
incom
p
lete
Information
in
t
his
manual
.
-.
' I
i
Courtesy of NationalSwitchgear.com


I
INSTALLATION
AND
INSPECTION
Introduction
....
. .
..
.
...
·
..
Receiving
and
Inspection
for
Damage
Installation
. .
Storage
....
Maintenance.
OPERATION
.
Description
.
Manually-Operated
Breaker
Electrically
-Operated Breaker .
Racking
Mechanism,
Drawout
Interlock,
and
Lifting
Bar
......
. . . .
Spring
Discharge
Interlock
.
MAINTENANCE
AND
ADJUSTMENTS
Maintenance . . . . .
Lubrication
. . . . .
Maintenance Closing
Adjustm
ents . . . . .
Trip-Latch
Engagement
Main
Contact
Make
..
Arcing
Contact
Make.
Fig. 1
Typical
LA-1600A
Breaker
Outline.
Fig. 2
Typical
LA-600A
Breaker
Outline
.
Fig. 3
LA-600A/LA-1600A
Operator
. . .
Fig.
4
Typical
Wiring
Diagram -
Electrically
Operated Breakers
......
.
..
Fig. 5
Typica
l'
Racking
Mechanism and
Drawout
Interlock
.
..
Fig. 6 Maintenance Closing . .
Fig. 7
Typ
ical Panel Assembly
..
..
..
Fig. 8 Fuse
Attachment
Group
LAF-600A
Breaker
Fig. 9 Fuse
Attachment
Group
LAF
-
1600A
Breaker.
Table
1
Operating
Procedure -
Manually-
.1
.1
.1
.1
.2
.2
.3
.3
.3
.4
.5
.6
.8
.8
.9
.9
.
10
.
10
.
10
. 11
.
18
.
18
.
19
.
20
.
21
.
22
.
23
.
24
.
25
Operated Breakers . . . . . . . . . . . . . . . . . . . .
..
4
Table
2
Operat
ing Procedure -
Electrically-
Operated Breakers . . . . . . . . . . . . . . . . . . . . . . . 5
Contact
Replacement
..
. . .
Main
Contact
Fingers
...
.
Stationary
Arcing
Contact.
Hinge
Contact
Fingers .
..
Moving
Arcing
and
Main
Contact
.
Tripping
Ac
t
uator.
FUSE
FUNCTIONS
Current
Limit
Fuse .
Trigger
Fuse .
....
TRIPPING
TRANSFORMERS
OPTIONAL
DEVICES
. .
...
Secondary
Disconnect
Assem.
Option
Auxiliary
Switch
Option
......
Shunt
Trip
Option
...
. .
..
. .
Undervoltage
Trip
Device
Option
.
Bell
Alarm
Switch
Option
Static
Trip
Optio
n . . . .
..
.
..
Fig.
10
LAF-600A/1600A
Anti-Single
Phase
Device,
Trigger Fuse Assembly
.....
.
.......
Fig.
11
LA-600A/1600A
Secondary Disconnect
Group
.
Fig.
12
LA-600A/1600A
Auxiliary
Switch
Group
...
.
Fig
.
13
LA-600A/1600A
Shunt
Trip
Group
.......
Fig.
14
LA-600A/1600A
Under
Voltage
Trip
Attachment
.
Fig.
15
LA-600A/1600A
Alarm
Switch
Group,
Bell
Alarm.
Fig.
16
Motor
Cutoff
Switch
Action
..
Fig.
17
Lubrication
Points
on
Breaker.
Fig.
18
Lubr
i
cation
Chart.
. . . . . . .
Table
3 Maintenance Closing
..
.
..
.
Table
4
Trip
Rating
Table
-
Amperes
.
.
11
.
11
.
11
.
11
.
12
.
12
.
14
.
14
.
14
.
15
.
15
.
15
.
15
.
15
.
15
.
17
.
17
.
26
.
27
.
28
.
29
.
30
. 31
.
32
.
33
.
34
.
10
.
16
The
information
contained
within
is
intended
to
assist
operating
personnel
by
providing
information
on
the
general characteristics
of
equipment
of
this
type.
It
does
not
relieve
the
user
of
responsibility
to
use
sound
engineering
practices
in
the
installation,
application,
operation
and
maintenance
of
the
particular
equipment
purchased.
If
drawings
or
other
supplementary
instructions
for
specific
applications
are
forwarded
with
this
manual
or
separately,
they
ta
ke precedence
over
any
conflicting
or
incomplete
information
in
th
is manual.
Courtesy of NationalSwitchgear.com

/
INSTALLATION
AND
INSPECTION
INTRODUCTION
The
type
"LA"
air
circuit
breakers
may
be
furnished for mounting in
any
one
of
three
ways.
They
may
be
used in
metal-enclosed
switchgear
of
the
drawout
type,
in
individual
enclosures
(drawout
type),
or
for
stationary
mounting in a
customer's
own
enclosing
case
or
switchboard.
All "LA
...
breakers
are
completely
assembled,
tested,
and
calibrated
at
the
factory
in a
vertical
position
and
must
be
so
installed
to
operate
properly.
Customer's
primary
connections
should
be
ad-
equately
braced
against
the
effects
of
short
circuit
currents
to
prevent
overstressing
the
breaker
terminals.
RECEIVING
AND
INSPECTION FOR DAMAGE
Immediately
upon.
receipt
of
this
equipment,
carefully
remove
all
packing
traces
and
examine
parts,
checking
them
against
the
packing
list
and
noting
any
damages
incurred
in
transit.
If
such is
disclosed,
a
damage
claim
should
be
filed
at
once
by
the
customer
with
the
transportation
company
and
Al
I
is-Chalmers
notified.
Two shipping methods
are
used
with
11
LA
11
breakers:
l.
Individually
with
protective
covering.
2.
Within
a
cubicle
when
part
of
a
switchgear
lineup.
Breakers shipped.in
their
cubicles
are
,·
'·;:.
")
-
--
blocked
to
prevent
accidental
tripping
during
shipment.
Note
al
I
caution
tags,
remove 1 .. :
1.
blocking
bolts,
and
open
breaker
contacts
before
installation.
\
"11
INSTALLATION .
The
11
LA
11
air
circuit
breaker
is
completely
adjusted,
tested,
and
inspected
before
shipment,
but
a
careful
check
should
be
made
to
be
certain
that
shipment
or
storage
has
not
resulted
in
damage
or
change
of
adjustment.
Circuit
breakers
should
be
installed
in a
clean,
dry,
well-ventilated
area
in
which
the
atmosphere
is
free
from
destructive
acid
or
alkali
fumes.
Stationary-type
breakers
should
be
mounted high
enough
to
prevent
injury
to
personnel
either
from
circuit
in-
terruption
or
from moving
parts
during
automatic
opening
of
the
breaker.
Al low
sufficient
space
to
permit
access
for
cleaning
and
inspection
and
adequate
clearance
to
insulating
barrier
above
the
breaker
to
prevent
damage
from
arcing
during
interruption.
Before
installing,
make
certain
that
the
breaker
contacts
are
in
the
open
position.
1.
After
the
breaker
is
installed
in
position,
close
.
it
manually
by
the
maintenance
closing
method
(see
MAINTENANCE
AND
ADJUSTMENTS,
page
8 )
to
check
proper
functioning
of
the
mechanism
and
contacts.
CAUTION!!
MAKE
SURE
CIRCUIT
IS
NOT
ENERGIZED.
During
the
closing
operation,
observe
that
the
contacts
move
freely
without
interference
or
rubbing
between
·
movable
arcing
contacts
and
parts
of
the
arc
chutes.
Then
refer
to
OPERATION,
page
3 for a
detailed
description
of
the
circuit
breaker
operating
char-
acteristics
before
putting
the
breaker
in
service.
Courtesy of NationalSwitchgear.com

2.
Trip
units
and
accessory
devices
should
receive
a
thorough
check
prior
to
pl
acing
the
r ' -
breaker
in
service
to
be
certain
that
adjustments
are
proper
and
parts
are
not
damaged.
4IJ
Refer
to
Static
Trip
Device
Instruction
Book 18X4827.
~
w
3.
Cubicle
-mounted
breakers
of
the
drawout
type
are
equipped
with
a
drawout
interlock
to
prevent
movement
of
a
closed
breaker
into
or
out
of
the
connected
position.
See
DRAW-
OUT
INTERLOCK,
page
5 for a
description
of
the
interlock.
Its
operation
should
be
checked
before
the
breaker
is
energized.
4.
Upon
completion
of
the
installation
inspection,
the
breaker
is
ready
to
be
energized
after
the
control
wiring,
if
any,
is
checked
and
the
insulation
tested.
STORAGE
When
breakers
are
not
to
be
put
into
immediate
use,
they
should
be
wrapped
or
covered
with
a
non-absorbent
material
to
provide
protection
from
plaster,
concrete
dust,
or
other
foreign
matter.
Breakers should
not
be
exposed
to
the
action
of
corrosive
gases
or
moisture.
In
areas
of
high
humidity
or
temperature
fluctuations,
space
heaters
or
the
equivalent
should
be
provided.
MAINTENANCE
Occasional
checking
and
cleaning
of
the
breaker
will
promote
long
and
trouble
-
free
service.
A
periodic
inspection
and
servicing
at
least
every
six
months should
be
included
in
the
breaker
maintenance
routine.
If
the
circuit
breaker
is
not
operated
during
extended
periods,
the
breaker
should
not
remain
in
either
the
closed
or
open
position
any
longer
than
six
months.
Maintenance
opening
and
closing
operations
should
be
made
to
ensure
freedom
of
movement
of
all
parts.
CAUTIONS
TO
BE
OBSERVED
IN
THE
INSTALLATION
AND
OPERATION
OF
11
LA
11
CIRCUIT
BREAKERS
1.
Read
Instruction
Book
before
installing
or
making
any
changes
or
adjustments
on
the
breaker.
2.
As
the
closing
springs
on
stored-energy
breakers
may
be
charged
in
either
the
breaker
open
or
closed
position,
extreme
care
should
be
taken
to
discharge
the
springs
before
working
on
the
breaker.
3.
4.
5.
6.
7.
When closing manually-operated breakers
out
of
this
unit,
the
racking mechani
sm
mu
st
be
re-
turned
to
the test position before closing springs can be charged.
When
closing
manually
-
operated
breakers,
always
grasp
closing
handle
firmly
until
it
is
returned
to
the
normal
vertical
position.
.
Check
current
ratings
against
single
line
diagram
to
assure
that
breakers
are
properly
located
in
switchgear
at
installation.
Check
the
alignment
of
the
secondary
disconnect
fingers
to
ensure
against
misalignment
due
to
possible
distortion
of
fingers
during
shipment
and
handling.
Once
the
breaker
is
energized,
it
should
not
be
touched,
except
for
operating,
since
most
of
the
component
parts
are
also
energized
.
2
Courtesy of NationalSwitchgear.com
I
OPERATION
D
ESCRI
PTI
ON
The
LA-600A
air
circuit
breaker
has
a
maximum
continuous
current
rating
of
600
amperes, and
an
inter-
ruption
rating
of
25,000
amperes
at
254,
508
volts
60
Hz,
or
22,000
amperes at
635
volts
60
Hz. when
.
used
with
the
short
time
delay
trip
deivce.
With
instantaneous
trip
device, the
interruption
rat
ing
is
42,000
amperes
at
254
volts,
30,000
amperes
at
508
volts and
22,000
amperes
at
635
volts.
The
LA-1600A
circuit
breaker
has
a continuous current rating
of
1600 amperes and an
interruption
rating
of
50,000
amperes
at
254
and
508
volts,
or
42,000
amperes at
635
volts when
used
with
the short
time
delay
trip
device. The
interruption
with
intantaneous
trip
device
is
65,000
amperes
at
254
volts,
50,000
amperes
at
508
volts and
42,000
amperes at
635
vo
lt
s.
All
currents are symmetrical amperes and voltages
are maximum.
The
breakers
are
also
available
with
integrally
mounted
current
limit fuses. The basic
breakers
are
the
same
with
or
without
the
fuses. The fuses mount on a
bracket
arrangement
that
is
bolted
to
the
side
rails
and upper studs on
the
back
of
the
breaker.
The
current
limit fuses
increase
the
interruption
rating to
that
of
the
fuses. Fused
breakers
are
identified
as LAF-600A,
and
LAF-1600A. Fused
breakers
are
also
equipped
with
an
anti-single
phase
device
to
open
the
breaker
if
one
or
more
current
limit fuses
open.
The
breakers
can
aiso
be
supplied for
stationary
mounting in which
the
racking
components
are
omitted,
and
brackets
are
provided for mounting
to
a
stationary
frame. ·
Both
the
LA-600A
and
LA-l600A
circuit
breakers
use
the
same closing mechanism
or
operator.
·
'-
~
:·
l..
The
closing
springs
are
larger
for
the
1600
ampere
breaker.
Three configurations
of
the
operator
W
are
available
for charging
the
closing springs.
These
are
manual
charging,
electrical
charging
and
combination
manual-electrical
charging.
Al
I
operators
are
identical
except
for
the
means
of
supplying
energy
to
the
closing springs.
A
double-toggle,
trip-free
mechanism is used;
that
is,
the
breaker
contacts
are
free
to
open
at
any
time,
if
required,
regardless
of
the
position
of
the
mechanism.
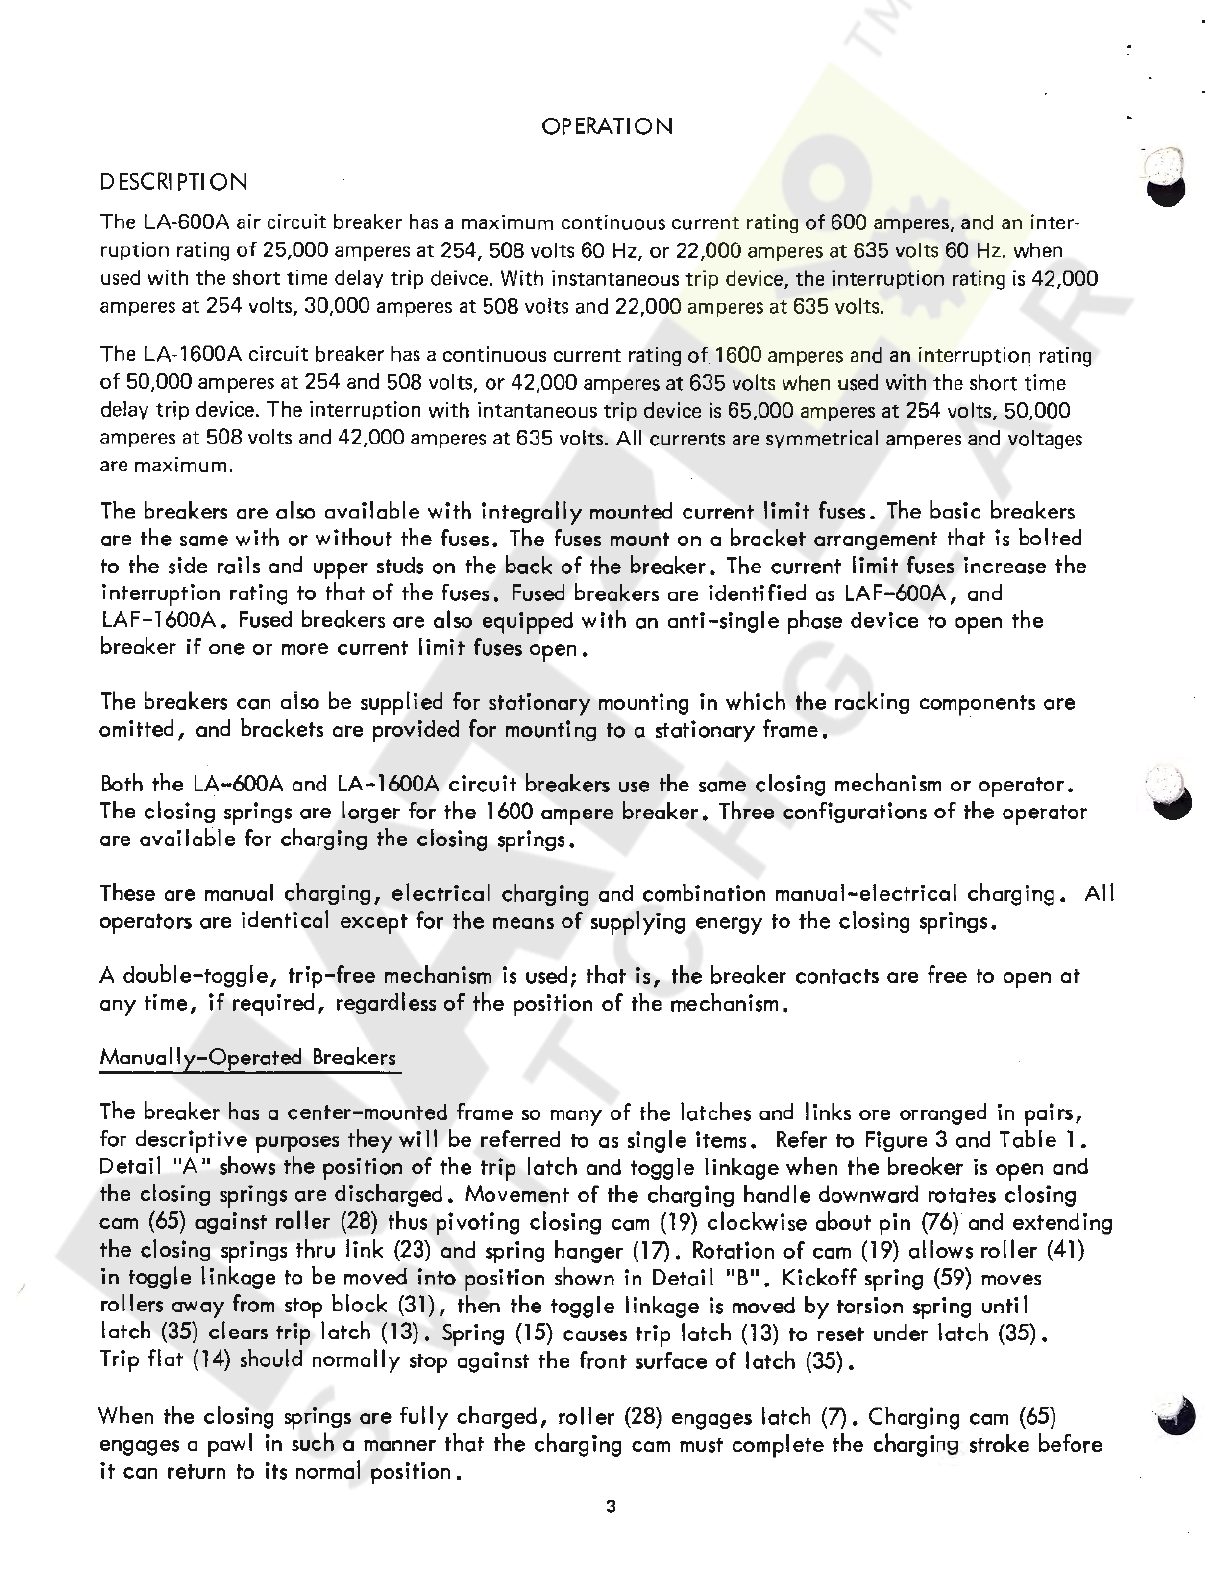
Manua
11
y-Operated
Breakers ·
The
breaker
has a
center-mounted
frame so many
of
the
latches
and links
are
arranged
in
pairs,
for
descriptive
purposes
they
wi
11
be
referred
to
as
single
items.
Refer to Figure 3
and
Table
l.
Detail
"A
11
shows
the
position
of
the
trip
latch
and
toggle
linkage
when
the
breaker
is
open
and
the
closing springs
are
discharged.
Movement
of
the
charging
handle
downward
rotates
closing
cam (65)
against
roller
(28) thus
pivoting
closing
cam (19)
clockwise
about
pin
(76)
and
extending
the
closing springs thru link (23)
and
spring
hanger
(17).
Rotation
of
cam (19)
allows
roller
(41)
in
toggle
linkage
to
be
moved
into
position shown in Detail
"B".
Kickoff spring (59) moves
rollers
away
from stop
block
(31),
then
the
toggle
linkage
is moved
by
torsion spring until
latch
(35)
clears
trip
latch
(13).
Spring (15)
causes
trip
latch
(13)
to
reset
under
latch
(35).
Trip
flat
(14) should normally stop
against
the
front
surface
of
latch
(35).
When
the
closing springs
are
fully
charged,
roller
(28)
engages
latch
(7).
Charging
cam
(65)
:._
~
engages
a pawl in such a manner
that
the
charging
cam must
complete
the
charging
stroke
before
it
can
return to its normal
position.
3
Courtesy of NationalSwitchgear.com

With
the
ch
argin
g
handle
in
its
normal upright
position,
the
breaker
ca
n
be
closed.
By
pressing
firmly
on
ho
od
(8)
latch
(7)
will
disengage
roller
(28)
and
closing springs
cause
closing cam (19)
to
rotate
against
the
tog
gle
rollers
(
41
) moving
the
toggle
into
its
upr
ight
pcsition,
shown in
de
tail
"C".
The closing
cycle
can
be
interrupted
at
any
point
by
operation
of
one
of
the
tripping
means,
which
cause
rotatio
n
of
trip
latch (13) to a
position
that
release
latch
(35)
allowing
togg
le
I
inkage
to
collapse to
the
position shown in
detai
I
"A".
Manual
opening
of
the
breaker
is
accom
plis
hed
by pressing
on
trip
bar
(48),
this
bar
engages
the
top
of
trip
fl
ap (14)
which
is
in
turn
arranged
to
disenga
ge
the
t
rip
latch.
TABLE
1 - OPERATING PROCEDURE -MANUALLY-OPERATED
BREAKE
RS
Oeeration
Procedure
Charging Springs Pull
charging
handle
down
all
the
way
(approximately
120°)
and
return
to
normal
vertical
position.
(
En
gagem
ent
of
pawl w
it
h
the
ratchet
teeth
pre-
vents
hand
le
reversal
until
the
downward
stroke
is comple
ted.
)
Closing
Push
down
spring-release
latch
hood (8)
after
handle
is returned to normal
ver
tical
position.
Tripping Push in manual
trip
rod
(48).
or
If shunt
trip
is
provided,
operate
remote
trip
control
switch (
CST
) (See
Figure 4).
Electrical
Iy
Operated
Breaker
The mechanism
of
the electrically operated breaker
is
the
same
as
the manually charged breaker except the
manual charging handle
is
replaced
by
a
motor
and
gea
r system. Refer
to
Figures 3 and 4 and Table 2.
With power available
to
the
control
circuit,
closing the
motor
control
switch
(Ml)
will
st
art
the
automatic charging cycle. The
motor
gear
box
pinion
rotates gear
(86)
counterclockwise,
cam
follower
(95)
engages
an
arm
of
wind
and close
ca
m
(85)
which rotates
the
cams
in
the
same
manner
as
for
the
manually charged breaker. When
the
wind and close
cam
(85)
reaches its charged position,
the
back
of
the
cam
engages
switch lever (91)
rotating
the
lever away
from
the
switch operator. Gear switch lever (
93)
will
still be holding the switch in
the
operate position, and
the
motor
will
continue
to
run
until
the
roll
pins on
the side
of
gear
(86)
lifts
lever
(93)
clear, releasing the
motor
cutoff
switch (MCO). When the MCO switch
opens the
motor
stops, and the closing coil
circuit
is
set up
throu
gh one side
of
the MCO switch.
The
breaker
can
now
be
closed
by
manually
releasing
hood (8)
or
by
energizing
the
closing
coil
(CC) through
the
external
close
control
switch
(CSC).
When
the
close
circuit
is
energized
the
"Y"
relay
is
energized
and
opens
the
"Y"
contact
in
the
motor
circuit,
thus
preventing
"p
umping"
or
repeated
attempts
to
charge
the
closing
sp
rings.
If
the
close
circuit
CSC
switch
is
opene
d,
the
m
otor
will
automatically
recharge
the
closing
springs,
if
pcwer
is
ava
ilabl
e for
the
motor
circuit.
The
close
coil
'
circuit
is
always
interrupted
by
the
motor
cut-off
switch
MCO.
Trip
free
operation
of
the
mechanism,
discharging
the
springs
on
a closed
breaker
is
prevented
by
completing
the
close
coil
circuit
thru
auxiliary
contacts
of
the
breaker.
4
Courtesy of NationalSwitchgear.com
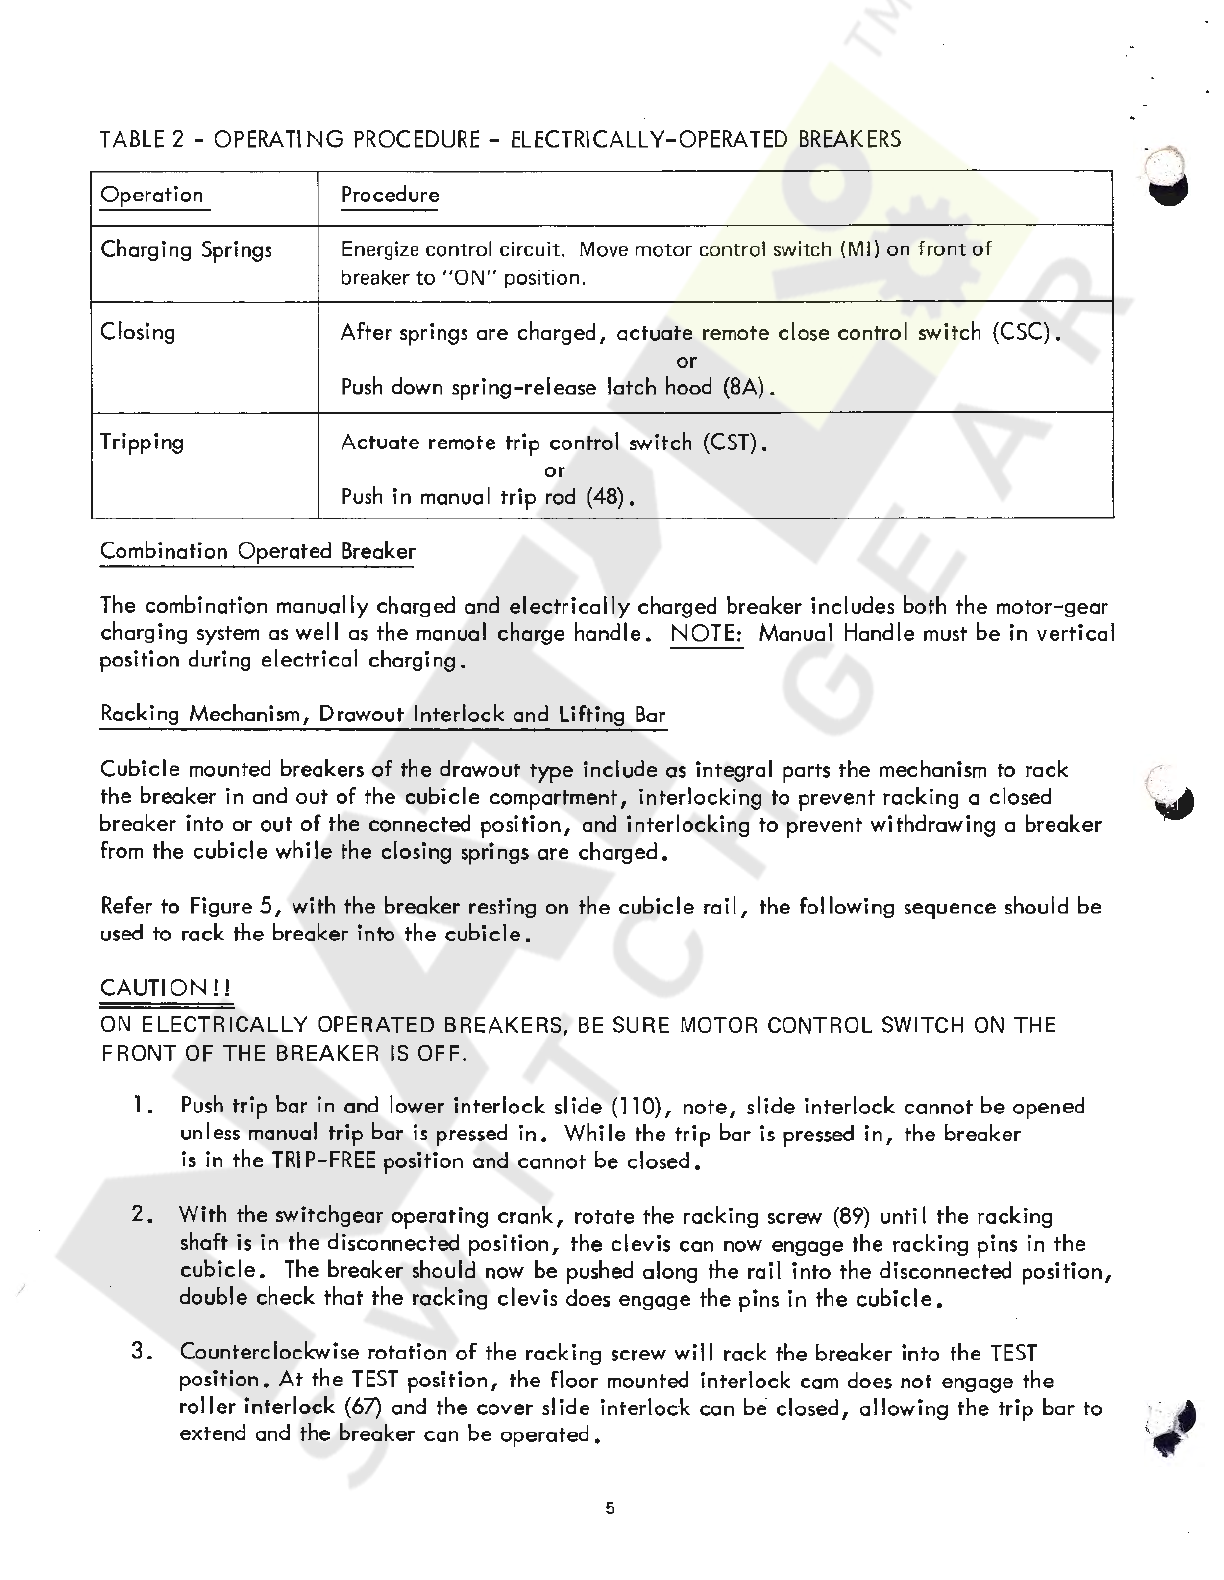
TAB
LE 2 - OPERATING PROCEDURE -ELECTRICALLY-OPERATED
BREAKERS
Operation
Procedure
Charging
Springs Energize con
tro
l circuit. Mo
ve
motor con
tro
l switch
(M
l} on front
of
breaker
to
"ON"
position.
Closing
After
springs
are
charged,
actuate
remote
close
control
switch
(
CSC).
or
Push down
spring-release
l
atch
hood
(8A).
Tripping
Actuate
remote
trip
control
switch
(CST).
or
Push
in
manual
trip
rod
(48).
Combination
Operated
Breaker
The
combination
manually
charged
and
electrically
charged
breaker
i
ncludes
both
the
motor-gear
charging
system
as
welI
as
the
manual
charge
handle.
NOTE:
Manual
Handle
must
be
in
vertical
position
during
electrical
charging.
Racking
Mechanism,
Drawout
Interlock
and
Lifting Bar
Cubicle
mounted
breakers
of
the
drawout
type
include
as
integral
parts
the
mechanism
to
rack
1·
· .
the
breaker
in
and
out
of
the
cubicle
compartment,
interlocking
to
prevent
racking
a
closed
~
breaker
into
or
out
of
the
connected
position,
and
interlocking
to
prevent
withdrawing
a
breaker
from
the
cubicle
while
the
closing
springs
are
charged.
Refer
to
Figure
5,
with
the
breaker
resting
on
the
cubicle
rail,
the
fol lowing
sequence
should
be
used
to
rack
the
breaker
into
the
cubicle.
CAUTION!!
ON
ELECTRICALLY
OPERATED
BREAKERS,
BE
SURE MOTOR
CONTROL
SWITCH ON
THE
FRONT
OF THE
BREAKER
IS OFF.
1.
Push
trip
bar
in and
lower
interlock
slide
(110),
note,
slide
interlock
cannot
be
opened
unless manual
trip
bar
is pressed in .
While
the
trip
bar
is pressed
in,
the
breaker
is in
the
TRIP-FREE
position
and
cannot
be
closed.
2.
With
the
switchgear
operating
crank,
rotate
the
racking
screw (89) untiI
the
racking
shaft
is
in
the
disconnected
position,
the
clevis
can
now
engage
the
racking
pins in
the
cubicle.
The
breaker
should now
be
pushed
along
the
rail
into
the
disconnected
position,
double
check
that
the
racking
clevis
does
engage
the
pins
in
the
cubicle.
3.
Counterclockwise
rotation
of
the
racking
screw
will
rack
the
breaker
into
the
TEST
position.
At
the
TEST
position,
the
floor
mounted
interlock
cam
does
not
engage
the
·
roller
i
nterlock
(67)
and
the
cover
slide
interlock
can
be
closed,
allowing
the
trip
bar
to
\:.:
.·
£1
·)
extend
and
the
breaker
can
be
operated
•
~
.•
-..;
5
Courtesy of NationalSwitchgear.com

Betwe~
(6he
TEST
position and
engag@che floor cam and the
even
i·
ie
cover slide is close
In
the am)NNECTED position,
cubicl:D
~This
prevents moving
4.
To
wit' saaw the breaker
from
1
the
ra<
·
1g
screw rotation is c
5.
Before' ch-empting to
operate
ti
with nleC;ence to the marking
stop
mse
(are provided
on
the
r
adjust'3urby setting the
angle
c
tightepn g
the
nuts against the
agains
-:ich
other.
CAUT
I
'\J
!!
TO
A\HE!D
DAMAGE
TO
THE
ING
01'\NK
IN
THE
COUNT
POSIT
N.
Spring
Discha1
Interlock
When racking:.Jtoe breaker out to t
he
c
discharge,
at
;prlbefore reachi
ng
the
c
interlock
(s
ee
rel,ures 3 and 4), this
ir
closing spring:
CAUTION!!
ON
MANUA!HE
1
CHARGED
BREAKEF
CHARGE
CAf.)C<AND
MUST
BE
CLEA
POSITION.
NOTE:
Manual
charg1isr:>0ndle
must
be
in vert
returned to themest position before cli
cubicle.
Note
also thah cie spring discharge
in
stored energy1e rthe springs is dissipat
trol switch
off
rar the
TEST
position, c
the
normaI
me
er.
CAUTION!!
W
ITH
COVER
BR;MOVED
AND
Cl
RCL
WI
LL
CLOSE
I
CAEN
THE
STORED
EN
SINCE
THE
SI
;EI
NTERLOCK
IS
N<
~
CONNECTED positm
t,
the roller
interlod
th17}
does
~aker
will be
tripped~
trough the interlock m•breanism,
t F
th
x:I
•
.e
roller interlock wil
CGain
clear
the floor c th;
of
the
:losed breaker into ore.
it
of the CONNECTEa <)Osition.
CONNECTED positihdr.
the
procedure is
th~heme
only
:kwise. :kir loc
b
reaker,
the position
at
·the
device
should
be1e
iecked
the
cubicle,
to
be
c~feiin
that it is fully conrin
ted.
Two
dng
screw to set the Jts lnected position, the:
acbre
he racking
clevis,
a~d
bwn in
detail
"A"
FiM
te
5,
and
JP washer
(84)
the
tw1in1uts
(95)
should
be
th'
stdocked
t e:
I
Ot
\CK
ING
MECHANIS/O DO NOT
ROTAT
E
T:
RJ
RACK-
CLOCKWISE DIRECT:RtN,
WH
EN
IN
THE
0ER4NECTED
10
;onnected position,
thhdosing
springs
wi
II
aHscmatically
.onne
ct
position. Theor rrel nut engages
the
Hsdng
:
rn
connects to the
m<
figal close hood which
~
ti.eases the
s.
THE
CLOSE HOOD
_L
)l
NTERLOCKED
TO
ns, MANUAL
~EFORE
RACKING
HA,
BREAKER
TO
THE
Dl~R
p)NNECT
11
position during racle
hg
and racking mechaficc.n must
be
:-ig
springs can be chae t:d, while breaker is rosipved
from
lock produces a
TRI
Pt
tKEE
operation in whic1terl I
of
the
in the mechanism. lof> preferable to turn tl--ednotor
con-
:e
the breaker
normal=
ilin that position,
then:lo~k
out in
inn
=
BREAKER
CONTACT RDPEN,
THE
CIRCUITJITEAKER
GY
SPR!
NGS
ARE
DIWf.HARGED
AUTOMATIER\LL
Y
IN
PLACE.
LID
)T
6
Courtesy of NationalSwitchgear.com

Lift Bar
See
Figure
5.
The Iifting
bar
connects
as
shown in Figure 5 for
the
standard b
rea
k
er
and
the
fused
breaker.
The
additional
lifting lugs
ore
provided
as
part
of
the
breaker
because
the
additional
overhang
of
the
fuses shifts
the
center
of
gravity,
and
lifting from
the
usual position
causes
tipping
of
the
device.
7
:
Courtesy of NationalSwitchgear.com
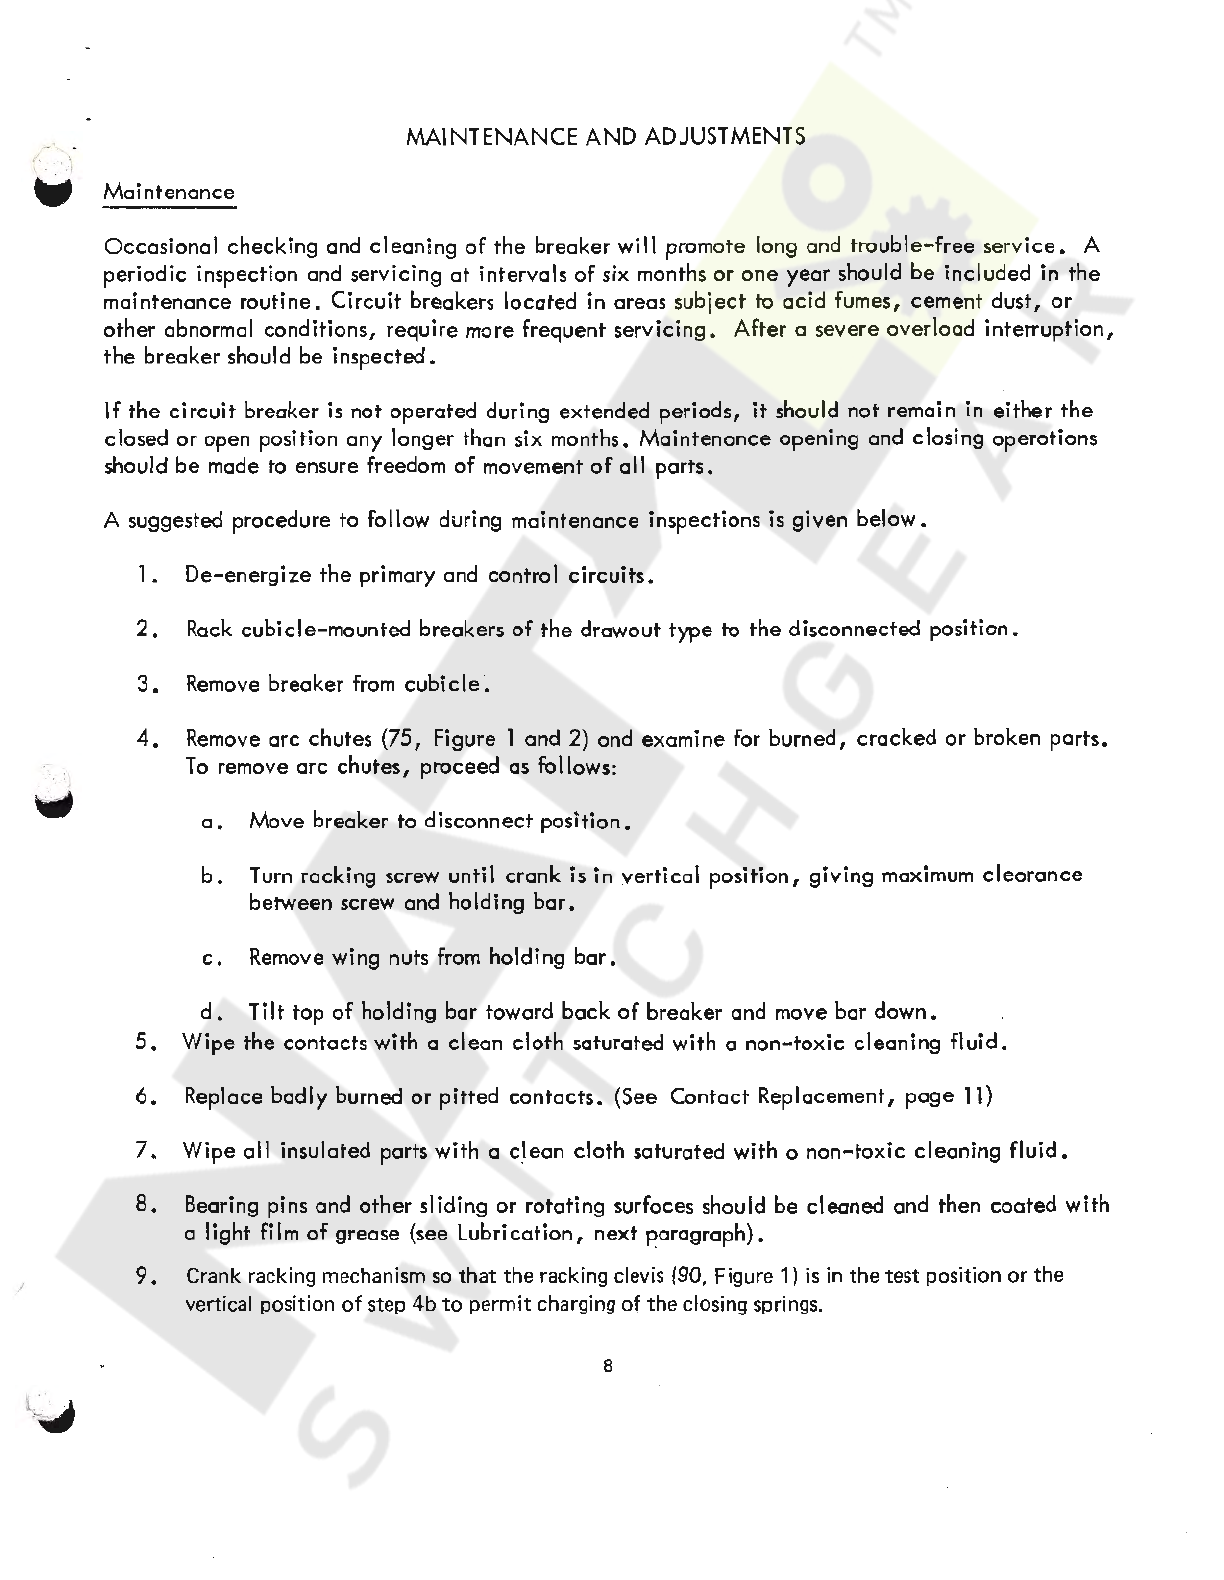
MAINTENANCE
AND
ADJUSTMENTS
W
Maintenance
Occasional
checking
and
cleaning
of
the
breaker
wil I promote long
and
trouble-free
service.
A
periodic
inspection
and
servicing
at
intervals
of
six months
or
one
year
should
be
included
in
the
maintenance
routine.
Circuit
breakers
located
in
areas
subject
to
acid
fumes,
cement
dust,
or
other
abnormal
conditions,
require
more
frequent
servicing.
After
a
severe
overload
interruption,
the
breaker
should
be
inspected.
If
the
circuit
breaker
is
not
operated
during
extended
periods,
it
should
not
remain in
either
the
closed
or
open
position
any
longer
than
six months.
Maintenance
opening
and
closing
operations
should
be
made to ensure freedom
of
movement
of
all
parts.
A suggested
procedure
to follow during
maintenance
inspections is
given
below.
1.
De-energize
the
primary
and
control
circuits.
2.
Rack
cubicle-mounted
breakers
of
the
drawout
type
to
the
disconnected
position.
3.
Remove
breaker
from
cubicle~
4.
Remove
arc
chutes
(7
5,
Figure 1
and
2)
and
examine
for
burned,
cracked
or
broken
parts.
To
remove
arc
chutes,
proceed
as follows:
a.
Move
breaker
to
disconnect
position.
b.
Turn
racking
screw
until
crank
is
in
yertical
position,
giving
maximum
clearance
between
screw and
holding
bar.
c.
Remove wing nuts from
holding
bar.
d.
Ti
It
top
of
holding
bar
toward
back
of
breaker
and
move
bar
down.
5.
Wipe
the
contacts
with
a
clean
cloth
saturated
with
a
non-toxic
cleaning
fluid.
6.
Replace
badly
burned
or
pitted
contacts.
(See
Contact
Replacement,
page
11)
7.
Wipe
al
I
insulated
parts
with
a
cJean
cloth
saturated
with
a
non-toxic
cleaning
fluid.
8.
Bearing pins
and
other
sliding
or
rotating
surfaces should
be
cleaned
and
then
coa
ted
with
a
Ii
ght
fi
Im
of
grease
(
see
Lubrication,
next
paragraph).
9.
Crank racking mechanism
so
that
the
racking clevis (90, Figure
1)
is
in
the
test
position
or
the
vertical position
of
step 4b
to
permit charging
of
the
closing springs.
8
Courtesy of NationalSwitchgear.com

I
'
10. Operate the breaker manually in maintenance closing position
(see
Maintenance Closing, below)
to
check latch and linkage movement.
11.
Check
breaker
adjustments (see Adjustments,
page
10).
NOTE:
After
inspection and before inserting breaker
in
the
cubicle
or
moving
the
breaker
to
test posi-
tion,
turn
racking screw (89)
until
racking clevis (90) reaches its normal disengaged position.
Lubrication
Lubrication should
be
a
part
of
the
servicing
procedure.
Needle
bearings
are
packed
with
grease
anp
should
require
no further
attention.
Old
grease
should
be
removed from
bearing
pins
and
other
non-current
·carrying
rotating
or
sliding
surfaces,
and
they
should
be
wiped
with
a
thin
film
of
petroleum-oil-base
precision-equipment
grease
such
as
BEACON
P-290.
Greasing
should
be
done
with
care
because
excess
grease
tends
to
collect
foreign
matter
which
in
time
may
make
operation
sluggish
an9
may
affect
the
dielectric
strength
of
insulating
members.
Faces
of
main
and
arcing
contacts
should
not
be
lubricated.
The rubbing surfaces
of
the
main
contact
fingers and
hinge
contact
fingers
are
lubricated
with
a
coating
of
A-C
contact
lubricant
15-171-370-002.
If
dust
has
accumulated
disassembly is
necessary
to
relubricate
these
points.
(See
Contact
Replacement,
page
11
.)
Maintenance
Closing
During
inspection
prior to installotion
and
for
routine
maintenance
inspections,
the
breaker
con-
·
-w
tacts
may
be
closed
slowly
to
check
clearances,
contact
adjustments,
and
movement
of
links
and
latches.
The manual closing
handle
is used for
maintenance
closing
the
breaker.
Electrically-operated
breakers
do
not
have
a manual closing
handle,
but
a manual
closing
handle-cam
assembly
is
available
as
a
maintenance
item.
Figure 6 shows
the
maintenance
closing
handle
being
inserted
in
an
electrically-operated
breaker
after
removal
of
the
front
cover
from
the
breaker.
When
the
hole
in
the
maintenance
closing
handle
assembly
is
aligned
with
the
holes
in
the
operating
mechanism
frame,
the
pin
which
is
attached
to
the
chain
is
in-
serted.
This
pin
holds
the
assembly
in
place
and
acts
as
a
pivot
point
for
the
cam.
After
insertion
of
the
maintenance
closing
handle
assembly
on
the
electrically-operated
breaker,
the
actual
maintenance
closing
operation
is
the
same for both
the
electrically-operated
breaker
and
the
manually-operated
breaker.
Refer
to
Table
3
and
Figure
6.
CAUTION!!
THE
PROCEDURE
IN
TABLE
3 SHOULD
BE
USED
FOR MAINTENANCE
CLOSING
ONLY.
MAINTAIN A
FIRM
GRIP
ON
THE
MANUAL
CHARGING
HANDLE DURING
THE
CLOSING
STROKE -
THE
BREAKER
MAY SUDDENLY
LATCH
FULLY
CLOSED AND APPLY UNEXPECTED
FORCE
TO
THE
CLOSING
HANDLE,
9
Courtesy of NationalSwitchgear.com

TABLE
3.
MAINTENANCE CLOSING
Operation
Procedure
Closing Contacts
1.
Pull charging
handle
DO
WN
ALL
THE
WAY (approximately 120°
).
2.
Place
blade
of
screwdriver
between
hood and spring
release
latch
and
hold
it
in this
position.
3.
Slowly return
handle
to
vertical
position.
Observe
contact
touch,
mechanical
operation,
etc.
4.
Remove screwdriver and pull charging handle to
the
fully charged
position.
Allow spring
release
latch
to hold closing springs. Move
charging
handle
to
the
vertical
position.
5 . Close
breaker
norma
lly
by
pressing
close
hood.
Opening
Contacts
Push
in manual
trip
rod.
NOTE:
Holding
the
spring
release
latch
down
prevents
the
stored-energy
springs from propping in
the
charged
position.
Thus, when
the
handle
is slowly returned to
the
normal
vertic
al
position,
the
energy
in
the
springs is slowly released
against
the
closing handle assembly cam
face.
Adjustments
During
maintenance
inspections,
the
following items should
be
checked
to
ensure
that
the
original
settings
are
maintained:
Trip·Latch Engagement
(R
efer
to
Figure
3.)
Toggle
latch
(35) should
engage
the
full width
of
trip
latch
(13) when
the
breaker
is closed
in
the
normal
manner.
To
adjust,
the
tension on spring (15)
can
be
increased
by bending spring
tab
on trip flap towards
the
front
of
the
breaker.
Too
much tension will
interfer
with
the
capability
of
the tripping
actuator
to
move
the
trip
flap,
so
over
bending should be
avoided.
Main
Contact
Make J!Jl- -
IYg
(Refer to Figure 7.) Compression
of
contact
fingers (9) should be between
.093"
an
.125".
This
is
the
difference
in
the
measurement from
the
breaker
base to
the
tip
of
the
finger
contact
surface
when
the
breaker
is open and
the
measurement in
the
same
place
when
the
breaker
is
closed.
This
is
checked
with a normal closing
operation
-
not
maintenance
closing.
Adjustment is provided
by
positioning screws (35)
after
loosening nuts (36). Counterclockwise rotation
of
screws (35)
in-
creases compression.
Care
should
be
taken
to
retighten
nuts (
36
)
after
adjustment.
If
it
is desired
to
check
contact
pressure, a
push-type
spring
scale
can
be
used to compress
contact
fingers
(9),
with
breaker
open.
Contact
pressure should
be
between
20-30
lbs.
10
Courtesy of NationalSwitchgear.com

Arcing
Contact
Make
(Refer to Figure 7
.)
With movable
arcing
contact
(27) in
any
one
phase touching
the
mating
stationary
contact
when
the
breaker is closed
by
the
maintenance
closing method (see Table
3),
the
phase
to phase variation should not
exceed
.062
11
• Adjustment may
be
made
by
positioning
screws
(3
5) as in
the
previous
paragraph,
but
it
is essential
that
the
main
contact
compression
be
maintained
within
the
tolerance
Iisted in the previous
paragraph.
Arcing
contact
pressure should
be
between
30 and 40 pounds when
checked
with a
pull-type
spring
scale
at
the
base
of
the
arc-
ing
contact
tip
insert with
the
breaker
contacts
closed.
Contact
Replacement
(Refer to Figure 7
.)
The
contact
structure consists
of
main
current
carrying
contacts
and
arcing
contacts
arranged so
that
initial
contact
make and final
contact
break
is
by
means
of
the
arcing
contacts.
The
actual
contact
surfaces
are
clad
with
an
alloy
facing which
greatly
reduces
mechanical
wear
and
arc
erosion.
When inspection
of
the
alloy
facing
indicates
that
the
contacts
should be
replaced,
it
should
be
noted
that
hinge
contact
fingers
(20,
21) main
contact
fingers
(9)
and
arcing
:
contacts
(27)
ore
spring
loaded.
Therefore,
care
must
be
exercised in removal and installation
of
any
of
the
con-
tacts.
Main
Contact
Fingers
_<),
·
~
..
t
With
the
breaker
contacts
open
and
the
stored-energy
springs
discharged,
main
contact
fingers
\J
(9) may
be
removed by loosening screws (18) enough to
relieve
the compression on springs
(10).
There
ore
two springs behind
each
finger and
it
is important
that
they
be
positioned properly upon
reinstal
lotion.
If
difficulty
is
experienced
in
correctly
positioning
these
springs,
the
upper and
lower primary disconnects (123, Figure
1)
may
be
removed from
each
phase and
the
breaker
in-
verted to rest on
the
ends
of
connectors (4) and (11).
After
the
contact
fingers
are
replaced,
connector
(4)
should
be
positioned in
the
center
of
the
slot in
the
molded base to assure
correct
alignment
of
the
primary
disconnect
fingers.
Stationary
Arcing
Contact
The
stationary
arcing
contact
is a
part
of
connector
(4) and may
be
replaced
by
proceeding
as
above.
In
this
case,
screws (18) must
be
removed • However, to provi
de
clearance
for removaI
of
connector
(4)
first insert a
3/16"
diameter
rod
at
least 2
11
long through
the
opening in support
(13).
It
~ay
be
necessary to compress
contact
(21) opposite
arcing
contact
(27) in
order
to insert
the
rod.
This will
--
hofd hinge
contact
fingers (21) in position
to
permit removal
of
pin (38) .
After
removaI
of
pin (38), main
contact
(28) and
arcing
contact
(27)
can
be
positioned
so
that
con-
nector
(5)
can
be
removed.
Hinge
Contact
Fingers
Hinge
contact
fingers
(20,21)
may
be
removed
as
follows: Remove top screw (17) from support
(13)
and
replace
it
with
a
1/4-20
screw
at
least
1-1/2"
long.
Remove lower screws and then
gradually
back
off
the
1-1/2"
screw to
relieve
the
loading from springs (16). The
hinge
contact
fingers
can
now
be
removed.
To
provide
easier
access
to
the
hinge
contact
fingers, pin (38)
may
be
removed
after
the
loading is
relieved
from springs
(16).
11
Courtesy of NationalSwitchgear.com

Moving Arcing and Main
Contact
~
Either moving arcing
contact
(27)
or
main
contact
(28) or both may
be
removed and
replaced
as
follows: Follow
the
steps outlined
in
the
above
paragraph including removal
of
pin (38)
or
if
hinge
contact
fingers
are
not to
be
replaced,
omit these steps and begin by
placing
a
3/16
11
diameter
rod
at
least
2
11
long through
the
opening in support (13). Remove pin (38)
if
not removed
previously.
The complete movable
contact
assembly may now
be
brought
to
a
bench.
It is suggested
that
a
1/ 2
11
thick
piece
of
wood
or
phenolic
be
placed
upright in a vise and
the
open slot in
clevis
(26)
placed
against
it
as
a
rest.
The location
of
spacers should
be
noted.
CAUTION!!
EXTREME
CARE
SHOULD
BE
TAKEN
TO HOLD
THE
ASSEMBLY
FIRMLY
TO
RETAIN
SPRING
GUDE
(32) AND SPRING (33,34) UPON
REMOVAL
OF
THE
SCREWS.
The moving
arcing
contact
or
the
main
contact
may now
be
easily
replaced.
The reverse
proce-
dure
is
fol
lowed for
re-instal
lotion.
Core should
be
taken
to
replace
spacers
correctly.
Check
alignment and adjustment
of
contacts
upon reassembly.
Tripping Actuator
When
the
static
trip
device
senses a
circuit
condition
that
requires
the
circuit
breaker
to
open,
it
produces
an
output
that
is fed to
the
tripping
actuator.
This
device
then causes
the
circuit
breaker
contacts
to open
and
isolate
the
circuit
.
Mounted on
the
circuit
breaker,
the
tripping
actuator
is held in a charged position
by
a
perma-
nent
magnet.
It contains a coil
that
is
energized
by
the
output
of
the
static
trip
device.
When
energized,
the
coil causes
the
magnetic flux to shift
to
a new
path,
releasing
the
stored
energy
of
a spring located inside
the
tripping
actuator.
The spring provides
the
energy to trip
the
breaker
moving
the
trip flap
clear
of
the
toggle
latch.
If
the
spring loaded armature does not
reset
during trip
operation
as
explained
above,
spacer
washers may
be
added
to
obtain
positive
reset
of
the
armature.
If adding spacers does
not
al
low
the
armature to
be
reset,
the
tripping
actuator
should
be
re-
placed
(if
br~ker
mechanism is not
at
fault
) .
NOTE:
Do
not
attempt
to disassemble
the
tripping
actuator
as this may d'estroy
the
magnetic field
set-up
by
the
permanent magnet and wi
11
render
the
actuator
latch
inoperative
untiI remagneti
zed.
When
replacing
a tripping
actuator,
the
coiI leads must
be
connected
to
the
terminal
block
of
the
static
trip
in
the
correct
polarity
relationship.
The
black
lead
of
coil must
be
connected
to
terminal 7 (negative) and
the
red lead
of
coil
connected
to terminaI 8 (positive)
of
the
static
trip
device.
12
Courtesy of NationalSwitchgear.com

When
the
tripping
actuator
has
been
replaced
the
circuit
breaker
should
be
given
a
FUNCTION
TEST
to
ensure
proper
operation
of
all
components. Refer to
Allis-Chalmers
Instruction
Book
<J
18X4827 for
the
procedures
of
the
FUNCTION TEST.
Motor
Cutoff
Switches
The
function
and adjustment
of
the
motor
cutoff
switches on electrically operated breakers
is
described
in
Figure 16.
13
Courtesy of NationalSwitchgear.com

I
FUSE
FUNCTIONS
Current
Limiting Fuse
(See
Figure 8-9.) The C.L.
Fuses
are special purpose fuses having NE
MA
Class
"J"
or
Class
"L"
character-
ist
ics
and have an interrupting r·ating
of
200,0
00
Amps
RMS Symmetrical.
When replacement
is
required due
to
the
C.
L. fuse
interrupting,
replace
only
with
a fuse
of
the same manu-
facturer and rating
as
supplied
with
the
circuit
breaker.
Fuses
of
different
manufacture
will
not
mount
on
the breaker terminals.
Open Fuse
Tripping
Device
(See
Figure 10.) The open fuse
trip
mechanism has three functions. The
first
function
is
to
trip
the
circuit
breaker mechanically when a
C.
L. fuse
has
interrupted.
The second
function
is to
indicate
which
phase
C.
L. fuse has
interrupted.
The
plunger
on
top
of
the
trigger
fuse (12)
indicates
visu
ally
whi
ch
phase
C.
L. fuse has
interrupted.
The
third
function is to
retain
the
breaker
in
the
trip-free
position until
the
trigger
fuse is
replaced.
Each
trigger
fuse is wired in
parallel
with
one
of
the
C.
L. fuses.
When
the
C.
L.
fuse
interrupts,
its
associated
trigger
fuse also
opens
and
releases
a
plunger
which
releases
a precompressed
spring
contained
in
the
trigger
fuse
hous~ng.
The
plunger
operates
arm (2)
which
moves
the
toggle,
releasing
the
spring
loaded
lever
(19)
which
engages
circuit
breaker
interlock
thru link
(20).
This trips
the
circuit
breaker
and
holds
the
circuit
breaker
in
the
mechanical
trip
free
position.
The
circuit
breaker
will remain
trip
free
(cannot
be
closed)
until
the
trigger
fuse has
been
re-
placed
and
the
associated
trip
mechanism
reset
tever
(17) has
been
manually
reset
(pulled
down).
To
remove
the
trigger
fuse remove
strap
(14),
remove
plastic
cover
(13),
then
the
trigger
fuse.
To
insert
the
trigger
fuse,
reverse
the
above
procedure.
CAUTION!!
THE
TRIGGER
FUSE
(12)
MUST
BE
INSERTED WITH
THE
PLUNGER
FACING
ARM (2) .
THE
GAP
DIMENSION
OF
0 -
.03
11
MAX.
MUST
BE
MAINTAINED FOR
EACH
FUSE
.
BE
SURE
TO
RE-
PLACE
BOTH
THE
TRIGGER
FUSE
AND IT'S CORRESPONDING
C.L.
FUSE
BEFORE
THE
BREAK
ER
IS
RES
ET.
NOTE:
•· • \
Do
not
remove Trigger Fuse
cover
when
breaker
is
in
connected
osition.
Line
voltage
ma
be
.J
avai
a
le
inside
t e Trigger Fuse assem
ly.
14
Courtesy of NationalSwitchgear.com

ACCESSORIES
Tripping Transformers
There o
re
a number
of
tripping transformer
ratings
ovoi
loble,
each
with
seven
ca
librated
pickup
settings (
Table
4).
T
he
tripping
transformers on
the
upper
connectors
of
the
circuit
breakers a
re
mounted
with
the
polarity
ma
rks
facing
the
breaker
panel.
The tripping transform
er
on
the
lower
co
nn
ector
is
mounted
with
the
pola
r
ity
mark
facing
away
from
the
breaker
panel . OPTIONAL DEVICES
Secondary Disconnect
Assem
. Option
The
electri
ca
l
atta
chments
are
wired to
the
terminals
of
a
secondary
disconnect
assembly (see
Figure 11)
which
is mounted
on
the
left
side
of
the
breaker.
Two
blocks
of
ten
terminals
each
can
be
mounted
on
the
breaker.
The
secondary
disconnect
assembly is
accessible
from
the
front
of
the
breake
r
and
aligns
with
a
stationary
unit
in
the
cu
bic
le.
The
stationary
contact
strips
should
be
lubricated
with
a
light
film
of
contact
grease
which
is furnished
with
the
switchgear.
Auxiliary Switch Option
The
au
xi
liary
sw
it
ch
(s
ee
Figu
re
12) is
of
the
rotary
type
and
functions by
direct
connect
to the
br
ea
ker mechanism. T
he
contacts
are
factory
set
for "a " (
open
when
b
reaker
is
open
)
and
11
b11
(
closed
when
breaker
is
open
)
position,
b
ut
each
rot
or
(
250
) may
be
adjusted
individually
in
steps of
30
deg
ree
s. This adj
us
tment
is made
by
remo
ving
cover
(257)
and
lifting
the
entire
rotor
assembly
out
of
case
(245)
after
di
sconnecting
ann
(
252
) from
the
Iinka
ge.
Cotter
pin (
256
) and
bearing
(251)
are
removed to
permit
remov
al
of
rotors (250) from
shaft
(249) .
To
change
rotors
(250) from
11
a
11
to
11
b
11
position,
the
rotor should
be
rota
ted
60°
in the
clockwise
direction
after
removal
and
re
p
laced
on
the
shaft
in this new
position.
Shunt
Trip Option
Each
electrically
-o
perated
breaker
is
equipped
with
a shunt trip
attachment
for tripping from a
remote
location.
{See Figure
13.)
Since
the
shunt
trip
coil
is designed for a momentary
duty
cycle,
an
11
a
11
auxiliary
contact
switch is used
to
interrupt
its
circuit
immediately
after
the
breaker
is
tri
p
ped.
Energization
of
the
coil
causes
the
armature
to
pick
up
and
rotate
the
trip
latch
to
trip
the
breaker.
A
co
mpression spring (148) r
eturns
the
armature
to
its
normal
position.
Undervoltage Trip Device Option
The
undervoltage
tri
p
device
(Figure.
14.
)
automaticall
y
trips
the
breaker
on
loss
of
v
oltage.
Either
instantaneous
or
time-
delay
operation
can
be
supplied.
Adjusting screw (
19
) should be
set
to pro
vide
an
air
gap
of
.25
11
between
the
sole
noid
pole
h
ead
and
ar
mature with the
device
d
e-energi
zed
as
shown in the front
vi
e
w.
A .
06
11
gap
should
be
m
ain
tain
ed
between
flap
ex-
tension and pulI li nk (
22
) when
the
device
is
energized
w
it
h the b
rea
k
er
closed. Pick
-u
p
and
drop-
out
adjusting
nut
(13) should
be
set
so
that
the
device
picks up
at
a
voltage
of
85
%
or
less
of
ra
ted
V?
I
ue
and
drops
out
be
twe
en
30%
and
60
%
of
t
he
ra
ted
va
I
ue.
NOTE:
Pick-up
an
d d
rop-out
are
not
individually
adjustable.
On
devices
equipped
with
time
delay
airpot
(2),
the
airpot
adjusting
screw
can
be
set
to
provide
a ra
nge
of
time
delay
between
0.5
and
4.5
seconds.
Tightening
the
screw
increases
time
delay.
15
'-)
i
Courtesy of NationalSwitchgear.com
Other manuals for LA-600A
1
This manual suits for next models
3
Table of contents
Other Siemens-Allis Circuit Breaker manuals


