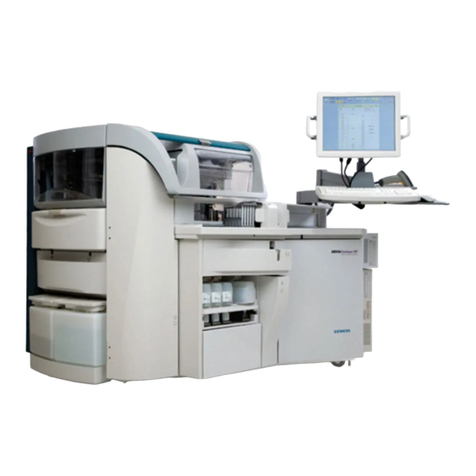
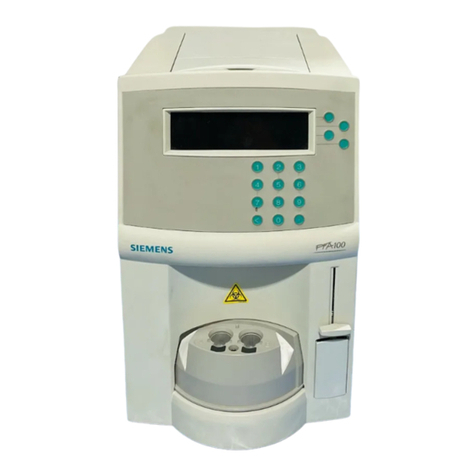
Siemens Healthineers ADVIA User manual

ADVIA® Autoslide System
Quick Reference Guide

2
Table of Contents
System Overview ....................................3
Starting each Shift ..................................6
Slide Options ........................................10
Weekly Maintenance .............................12
Monthly Maintenance ...........................15
As Needed Maintenance........................16
Troubleshooting....................................19
T02004.012 | Effective date: 12/06/2021
12-2021 | © Siemens Healthcare Diagnostics Inc., 2021

3
System Overview
System Overview
1. Slide Dispenser
2. Glass Particle Tray
3. Front Access Door
4. Rack Loader
5. Manual Inlet Door
6. Stain Overflow Tray
7. Rack Collection Area
8. Stainer Access Door

4
Theory of Operation

5
Software Overview
1. Status Line 1
Sample ID, Sample Type,
Selectivity, Pending Service
2. Status Line 2
Displays analyzer status
3. Menu Buttons
Select to display a dropdown of system functions
including the online Operator’s Guide
4. Tabs
Correspond to items on active Menu button
5. Main Display Area
Displays active screen
6. Icons
Autoslide Service Log, Analyzer Service Log,
Message Log, Help, Autoslide Status

6
Starting each Shift
Starting each Shift Tasks
1. Check the Stain Waste container;
empty if necessary.
2. Check Stain, Reagent, and Rinse using
the Autoslide Reagent Log.
3. Load slides and slide racks.
4. Check smearing tape; replace if
needed.
5. Perform the Daily Shutdown and
Startup if not configured to perform
automatically.

7
Reagent Installation
1. Select Logs > Reagent Log >
Autoslide Reagent Log
2. Select Reagent Installation
3. Manually enter Reagent Volume, Lot
Number and Expiration Date.
4. Load reagents on the instrument.
5. Select OK
6. When prompted to prime lines, select
Yes
7. Select OK

8
Replace the Smearing Tape
1. Select Operations > Autoslide Control > Special
Functions > Smearing Tape > Replace Tape
2. Open the Autoslide front access door.
3. Pull the black magnetic knob and open the tape holder
plate.
4. Remove the upper and lower bobbins from holders.
5. Clean the wedge by wiping with a soft cloth.
6. Place the new smearing tape bobbin on the upper holder
and the take-up bobbin on the lower hold.
7. Thread the smearing tape through spindle and Tape
Routing Guide Pins (2) as shown on diagram. Do not
twist or crimp tape. Verify Broken Tape Detector Lever
(1) is closed when loading new tape.
8. Close the tape holder plate.
9. On the Autoslide Control window, select Start to tighten
the tape.

9
Daily Shutdown / Startup Cycle
1. Select Operations > Autoslide Control
2. Select Shutdown > Start
3. Select Operations > Autoslide Control
4. Select Startup > Start
Note:
After Daily Shutdown, Daily Startup must be
performed before resuming Autoslide operation.

10
Slide Options
Manual Slide Staining
1. Verify the ADVIA 2120 / 2120i is not
processing samples.
2. Select Operations > Autoslide Control
3. On the Autoslide Control screen, select
Manual/Inlet Door > Start
4. Allow the door to open with the smear facing
right and frosted end up. Insert the slide in
the holder door.
5. Close the Manual/Inlet door.
6. The system will process the slide.
7. When cycle is complete, the Manual/Inlet
door will open for the additional slides.
8. If no additional slides need to be stained
close Manual/Inlet Door and return to routine
analyzer and Autoslide routine operation.

11
Slide Option Configuration
1. Select Customize > Autoslide Setup >
Slide Options > General Options
2. Enable Slide Requests enables system to
prepare slides
Enable Staining enables staining of all
slides produced by Autoslide
Slides on All Samples enables the system
to make slides on all samples
By Exception allows the operator to
customize criteria for slide preparation.
Selecting By Exception will open the
Exception Criteria for configuration.
3. Select Save to save Slide Options
configuration.

12
Weekly
Maintenance
Clean the Stain Overflow Tray
1. The Stain Overflow Tray is located under the
stainer module. Carefully pull out the tray
and remove from the Autoslide.
2. Clean the tray with a cloth or paper towel
dampened with a 10% bleach solution.
3. Allow the tray to air dry. When dry, place
the tray back in position under the stainer
module.

13
Empty Glass Particle Tray
1. The Glass Particle Tray is located beneath the
slide dispenser. Using both hands, carefully
pull the Glass Particle Tray forward and
remove tray from Autoslide.
WARNING: Use caution when handling
objects with sharp edges
2. Discard the glass particles in the tray as per
your laboratory policy.
3. Place the tray back in position on Autoslide
holder.

14
Weekly Shutdown - Startup
1. Select Procedures > Clean Autoslide >
Weekly Shutdown
2. Follow the on screen instructions. Remove
stain and buffer lines from reagent bottles
and place in empty containers. Use separate
containers for buffer and stain lines.
3. Select Next; the system will perform a 5
minute air prime.
4. When prompted, move buffer and stain lines
to containers containing methanol. Use a
separate container for buffer and stain lines.
5. When complete, Exit Weekly Shutdown and
select Weekly Startup.
6. Follow the on screen instructions. Place stain
and buffer lines in the empty containers and
select Next.
7. When prompted, place lines in the reagent
bottles. Select Next.
8. Select Exit when Weekly Startup complete.

15
Monthly
Maintenance
Clean Stainer Wells and Plate after 3,000 Slides
1. Analyzer Mode: Standby
Autoslide Mode: Off
2. Slide open the stainer tray door. Manually
rotate the stainer plate and gently slide each
well out of the stainer plate.
3. Place the stainer wells in a tray filled with
methanol ensuring wells are completely
submerged.
4. Clean stainer plate surface with clean soft
cloth or paper towel.
5. Allow wells to soak for ten minutes, remove
from methanol and dry
with paper towel.
6. Replace stainer wells to stainer plate. Verify
wells are properly seated in stainer plate.
7. Close the stainer tray door.
8. Return analyzer to Ready mode.
Power on the Autoslide.

16
As Needed
Maintenance
Replace the Smearing Tape
1. Select Operations > Autoslide Control > Special
Functions > Smearing Tape > Replace Tape
2. Open the Autoslide front access door.
3. Pull the black magnetic knob and open the tape holder
plate.
4. Remove the upper and lower bobbins from holders.
5. Clean the wedge by wiping with a soft cloth.
6. Place the new smearing tape bobbin on the upper holder
and the take-up bobbin on the lower hold.
7. Thread the smearing tape through spindle and Tape
Routing Guide Pins (2) as shown on diagram.
Do not twist or crimp tape. Verify Broken Tape Detector
Lever (1) is closed when loading new tape.
8. Close the tape holder plate.
9. On the Autoslide Control window, select
Start to tighten the tape.

17
Printer Ribbon Replacement
1. Analyzer Mode: Standby
Autoslide Mode: Off
2. Open the Autoslide lower front cover and remove
the slide rack loader.
3. Remove the printer ribbon by holding both sides
of the printer cartridge and press towards the
inside of the Autoslide. Pull the ribbon cartridge of
the holder.
4. Install a new ribbon in the holder. Verify the
notches on the ribbon cartridge are positioned
correctly in the holder.
5. Replace the slide rack loader. Close the lower front
door of the Autoslide.
6. Return the analyzer to Ready to Run and turn on
the Autoslide.
7. The Autoslide will automatically perform a
Mechanical Initialization. Allow the initialization to
complete before using system.

18
Decontaminate Water Container Every 6 Months
1. Move the rinse container to a suitable location for cleaning.
2. Empty the rinse container.
3. Fill the rinse container half full with deionized water.
4. Add 500 mL of bleach to the container.
5. Scrub the inside of the container with a bottle brush.
6. Rinse the container thoroughly with deionized water.
7. Fill with deionized water.
8. Attach to Autoslide.

19
Troubleshooting
Troubleshooting
Error Code Severity Possible Cause Corrective Action
ASL - Aspiration needle retract timeout Failure Aspiration needle failed to retract in time Perform Reset Smearer
Resolve Autosampler error
ASL - Critical Error - Stop Failure General Autoslide critical error Check and resolve errors on Message Log
Reset Smearer / Reset Autoslide
ASL - Dispenser error Failure Mechanical problem on slide dispenser Inspect Slide Dispenser for damaged slide
Reset Smearer
ASL - Emergency stop cycle Failure Autoslide lower front cover opened during processing Close lower front cover
Reset Smearer
ASL - Hardware error Failure A hardware error has occurred Check message log for specfic errors and troubleshoot
ASL - Impossible to rinse Failure Unable to rinse sample or drop deposit lines; Other
command is processing
Reset Smearer
ASL - Operation completed in error Failure Run Stopped - Autoslide command failed Check Message Log - Detail screen for specific cause
Resolve cause
Reset Autoslide
Note:
If the Autoslide is powered off, please wait 30
seconds before the power is switched back on.
This allows the ADVIA software to timeout
appropriately.

20
Troubleshooting
Error Code Severity Possible Cause Corrective Action
ASL - Printer error Failure Printer ribbon not advancing or jammed Inspect printer ribbon - clear jam or replace ribbon
Check printer area for glass particles
Reset Smearer
ASL - Rack Error - Stop Failure General rack problem, could be low on racks Replenish racks in dispenser
Check for jammed rack or full output rack collection area
Reset Smearer
ASL - Rack Handling error Failure Hardware failure in rack handler track Check for jammed racks or debris
Reset Smearer
ASL - Slide Carrier error Failure Slide did not make it to the carrier in time, or loaded
incorrectly
Clear slide and inspect area for glass particles or debris
Reset Smearer
ASL - Smearing module not primed Failure Smearing module is not primed Prime Smearer
Reset Smearer
Perform Daily Startup if necessary
ASL - Smearing module not ready Failure Smearing module problem Perform Reset Smearer
ASL - Smearing tape is loose Failure Smearing film empty, broken or incorrectly
threaded
Replace smearing film
Clean smearing wedge
Note:
If the Autoslide is powered off, please wait 30
seconds before the power is switched back on.
This allows the ADVIA software to timeout
appropriately.
Table of contents
Other Siemens Laboratory Equipment manuals
Siemens
Siemens GAS-Guard 8 Instruction Manual

Siemens
Siemens Maxum II User manual

Siemens
Siemens ADVIA Centaur Quick start guide

Siemens
Siemens Simatic MV220 User manual
Siemens
Siemens ADVIA LabCell User manual

Siemens
Siemens Hematek User manual
Siemens
Siemens ADVIA 2400 Manual
Siemens
Siemens PGC 302 Edition II User manual
Siemens
Siemens PFA-100 System User manual
Siemens
Siemens Maxum II User manual