manuals.online logo
Brands
  1. Home
  2. •
  3. Brands
  4. •
  5. Siemens
  6. •
  7. Switch
  8. •
  9. Siemens 5WG1 523-1AB03 User manual

Siemens 5WG1 523-1AB03 User manual

Other Siemens Switch manuals

Siemens SCALANCE XP-200 User manual

Siemens

Siemens SCALANCE XP-200 User manual

Siemens SIMATIC NET RUGGEDCOM RS900 User manual

Siemens

Siemens SIMATIC NET RUGGEDCOM RS900 User manual

Siemens SKB62 Series User manual

Siemens

Siemens SKB62 Series User manual

Siemens Pointek CLS200 User manual

Siemens

Siemens Pointek CLS200 User manual

Siemens BT300 LonWorks User manual

Siemens

Siemens BT300 LonWorks User manual

Siemens 3TK2850 User manual

Siemens

Siemens 3TK2850 User manual

Siemens SCALANCE X-300EEC Administrator guide

Siemens

Siemens SCALANCE X-300EEC Administrator guide

Siemens 3WN Series User manual

Siemens

Siemens 3WN Series User manual

Siemens RUGGEDCOM RSG920P User manual

Siemens

Siemens RUGGEDCOM RSG920P User manual

Siemens AC-21 User manual

Siemens

Siemens AC-21 User manual

Siemens SIMATIC USB-Prommer Operating instructions

Siemens

Siemens SIMATIC USB-Prommer Operating instructions

Siemens SCALANCE XF-200BA User manual

Siemens

Siemens SCALANCE XF-200BA User manual

Siemens l-T-E MD6 User manual

Siemens

Siemens l-T-E MD6 User manual

Siemens GTW100ZB User manual

Siemens

Siemens GTW100ZB User manual

Siemens SCALANCE XC-200 Setup guide

Siemens

Siemens SCALANCE XC-200 Setup guide

Siemens SCALANCE XC-100 User manual

Siemens

Siemens SCALANCE XC-100 User manual

Siemens 3LD7 User manual

Siemens

Siemens 3LD7 User manual

Siemens QVE1902.010 User manual

Siemens

Siemens QVE1902.010 User manual

Siemens GM-SG User manual

Siemens

Siemens GM-SG User manual

Siemens 3VA9988 - 0AB2 Series User manual

Siemens

Siemens 3VA9988 - 0AB2 Series User manual

Siemens Pointek CLS200 User manual

Siemens

Siemens Pointek CLS200 User manual

Siemens 3RV1.6/7 User manual

Siemens

Siemens 3RV1.6/7 User manual

Siemens SIRIUS 3SB12 Series User manual

Siemens

Siemens SIRIUS 3SB12 Series User manual

Siemens 3RV1991-1AA0 User manual

Siemens

Siemens 3RV1991-1AA0 User manual

Popular Switch manuals by other brands

SMC Networks SMC6224M Technical specifications

SMC Networks

SMC Networks SMC6224M Technical specifications

Aeotec ZWA003-S operating manual

Aeotec

Aeotec ZWA003-S operating manual

TRENDnet TK-209i Quick installation guide

TRENDnet

TRENDnet TK-209i Quick installation guide

Planet FGSW-2022VHP user manual

Planet

Planet FGSW-2022VHP user manual

Avocent AutoView 2000  AV2000BC AV2000BC Installer/user guide

Avocent

Avocent AutoView 2000 AV2000BC AV2000BC Installer/user guide

Moxa Technologies PT-7728 Series user manual

Moxa Technologies

Moxa Technologies PT-7728 Series user manual

Intos Electronic inLine 35392I operating instructions

Intos Electronic

Intos Electronic inLine 35392I operating instructions

Cisco Catalyst 3560-X-24T Technical specifications

Cisco

Cisco Catalyst 3560-X-24T Technical specifications

Asante IntraCore IC3648 Specifications

Asante

Asante IntraCore IC3648 Specifications

Edge-Core DCS520 quick start guide

Edge-Core

Edge-Core DCS520 quick start guide

RGBLE S00203 user manual

RGBLE

RGBLE S00203 user manual

Thrustmaster FLIGHT SIMULATOR X quick guide

Thrustmaster

Thrustmaster FLIGHT SIMULATOR X quick guide

Southwire SURGE GUARD 41390 RVC troubleshooting guide

Southwire

Southwire SURGE GUARD 41390 RVC troubleshooting guide

Buhler Nivotemp NT 61 Brief instructions

Buhler

Buhler Nivotemp NT 61 Brief instructions

Kramer VS-41HDCP user manual

Kramer

Kramer VS-41HDCP user manual

Techly IDATA AU-270 user manual

Techly

Techly IDATA AU-270 user manual

Belkin F1U109 user manual

Belkin

Belkin F1U109 user manual

Emerson Rosemount 2521 Series quick start guide

Emerson

Emerson Rosemount 2521 Series quick start guide

manuals.online logo
manuals.online logoBrands
  • About & Mission
  • Contact us
  • Privacy Policy
  • Terms and Conditions

Copyright 2025 Manuals.Online. All Rights Reserved.

instabus EIB
Technical product information
January 2008
Roller shutter switch N 523/03 5WG1 523-1AB03
4 x 230 V AC / 6 A
Siemens AG N 523/03, 4 pages Technical manual
Automation and Drives Group
Electrical Installation Technology © Siemens AG 2008 Update: http://www.siemens.de/gamma
P.O. Box 10 09 53, D-93009 Regensburg Subject to change without further notice
2.10.1.14/1
Product and functional description
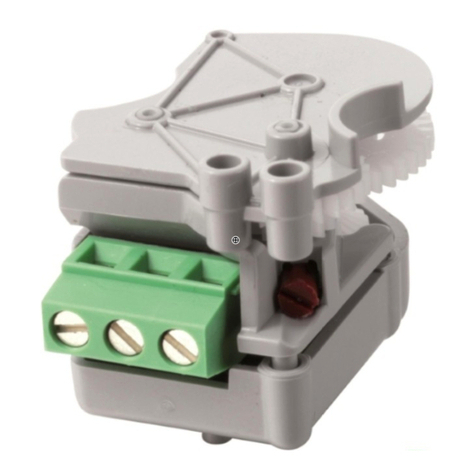
The roller shutter switch N 523/03 is a DIN rail mounted
device in N-system dimensions with a width of 4 module
units. Only one AC 230V drive (motor) with electro-
mechanical limit switches or with integrated electronics
for disconnection at the limit positions can be connected
to a channel of the 4-fold roller shutter switch N 523/03.
The parallel operation of several drives on one channel
requires the intermediate switching of a special relay.
Apart from moving the roller shutter into one of the two
limit positions, a started movement can also be stopped.
The power supply of the roller shutter switch electronics
is carried out via an integrated power supply unit, which
is fed via the mains connection L1 for channels A and B.
The mains connection of channels C and D is carried out
via the connection L2. This enables two channels to be
connected to different external conductors. If this is not
required, one of the terminals L1 must be linked to one
of the terminals L2 via a wiring jumper.
For direct operation (also in the event of
communications failure or if EIB communication has not
yet been put into operation), four pairs of push buttons
are available on the top of the device. For direct
operation, both AC
230 V and bus voltage must be applied at the actuator.
Moreover, the actuator must be switched to direct
operation via the appropriate push button with an LED.
In direct operation mode, an output remains switched on
as long as the associated push button is pressed. As the
direct operation is completely isolated from the bus
communication, any active safety alarm or protection
mode (for blocking the raising or lowering of the
sun/anti-glare protection) is not taken into account.
Application program
The roller shutter switch N 523/03 only works together
with the application program 25 A4 Roller shutter switch
980181.
Due to its two 1 bit command objects which are always
available per channel, the program enables the move-
ment of a roller shutter into the upper or lower limit
position and stopping the movement of the roller
shutter. The adjustable period for gradually raising the
roller shutter again once it has reached the lower limit
position only becomes into effect if the roller shutter has
been lowered from the upper limit position without any
interruptions.
When commissioning the roller shutter switch the
following objects can be added to all the channels :
-one object “Move-up blockade On/Off“
(required e.g. for cleaning)
-one object “Move-down blockade On/Off”
(required e.g. when the terrace door is open)
-two 1 bit objects for saving/restoring two roller
shutter positions
-one 8 bit status object (roller shutter position as a
percentage value).
In connection with a weather station, in the event of a
wind or rain alarm it is ensured via an alarm object that
the sun/anti-glare protection is for example raised
automatically and that the lowering of it via the EIB is
prevented when there is an alarm.
It can further be selected whether the parameterisation
is adopted for all the channels or whether each channel
should be configured individually.
Connection example
Roller shutter switch N 523/03
instabusEIB
roller shutter drives
roller
shutter
channel D
roller
shutter
channel C
roller
shutter
channel B
roller
shutter
channel A
K1
up
K2
down
K3
up
K4
down
K5
up
K6
down
K7
up
K8
down
L2
L1 N
power supply
Bus coupling unit
instabus EIB
Technical product information
January 2008
Roller shutter switch N 523/03 5WG1 523-1AB03
4 x 230 V AC / 6 A
Technical manual N 523/03, 4 pages Siemens AG
Automation and Drives Group
Update: http://www.siemens.de/gamma © Siemens AG 2008 Electrical Installation Technology
Subject to change without further notice P.O. Box 10 09 53, D-93009 Regensburg
2.10.1.14/2
Notes for installation
The device may be used for permanent interior
installations in dry locations within distribution boards or
small casings with DIN rail EN 60715-TH35-7,5.
VDANGER
•The device must be mounted and commissioned by an
authorised electrician.
•When connecting the device, it should be ensured that
the device can be isolated.
•The device must not be opened.
•When planning and installing electrical systems, the
appropriate guidelines, regulations and specifications
of the respective countries must be taken into account.
•In the case of motors with electronic limit switches, the
switching points must be adapted on site.
Technical data
Power supply
•Bus voltage: carried out via the bus line
•N 523 electronics: integrated power supply unit
230V AC, +10% / -15%, 50Hz
•Supply voltage for bus: 21V DC to 30V DC
Operating elements
•1 push button:
for toggling between normal mode / addressing mode
•1 push button:
for toggling between bus / direct operation
•4 x 2 push buttons:
for direct operation of the roller shutter drives,
independent of the EIB
Display elements
•1 red LED: for displaying
normal mode / addressing mode (off / on)
•1 yellow LED: for displaying
bus / direct operation (off / on)
Inputs/outputs
•Mains connection:
- 2 x 2-pole (N, L1) (L1 is also the power supply for
outputs A and B)
- 2-pole L2 (power supply for channels C and D)
•4 load outputs for 4 roller shutters:
- each 2-pole (UP, DOWN)
-rated voltage: AC 230 V, 50Hz
-rated current per relay contact: 6 A (resistive load)
-Switching cycles: >20,000 at cos ϕ= 1
Connections
•Mains and load circuits
plug-in terminals for mains connections and outputs
Insulation strip length 9... 10 mm
The following conductor cross-sections are permitted:
- 0.5... 2.5 mm² single-core
- 0.5... 2.5 mm² finely stranded with connector sleeve
- 1.5 mm² finely stranded, untreated (max. ampacity
6A).
•Bus line: Pressure contacts on data rail
and bus terminal
VDANGER
When looping through the L and N conductors, it should
be noted that the maximum terminal current of 10 A,
which is limited by the permitted printed conductor load,
may not be exceeded.
Mechanical data
•Housing: plastic
•Dimensions: DIN rail mounted device in N-system
dimensions, width: 4 modules (1 module = 18 mm)
•Weight: approx. 260 g
•Fire load: approx. 3600 KJ ± 10%
•Installation: snap-on fixing onto DIN rail
DIN EN 50022-35 x 7.5
Electrical safety
•Degree of pollution (in accordance with IEC 60664-1):2
•Protection type (in accordance with EN 60529): IP 20
•Bus: safety extra-low voltage SELV DC 24 V
•Device complies with
EN 50090-2-2 and EN 60669-2-1
EMC requirements
complies with EN 61000-6-1, EN 61000-6-3 and
EN 50090-2-2
Environmental conditions
•Ambient operating temperature: - 5 ... + 45 °C
•Storage temperature: - 25 ... + 70 °C
Markings
KNX / EIB
CE mark
In accordance with the EMC guideline (residential and
functional buildings) and the low voltage guideline
instabus EIB
Technical product information
January 2008
Roller shutter switch N 523/03 5WG1 523-1AB03
4 x 230 V AC / 6 A
Siemens AG N 523/03, 4 pages Technical manual
Automation and Drives Group
Electrical Installation Technology © Siemens AG 2008 Update: http://www.siemens.de/gamma
P.O. Box 10 09 53, D-93009 Regensburg Subject to change without further notice
2.10.1.14/3
Location and function of the display and
operating elements
Figure 1: Location of the display and operating elements
A1 Commissioning button
A2 Commissioning LED
A3 Bus terminal
A4 Buttons for direct operation UP/DOWN of a sun-
blind
A5 Terminals for sunblind UP/DOWN (Channel C + D)
A6 Terminals for sunblind UP/DOWN (Channel A + B)
A7 Terminals N
A8 Terminals L1
A9 Terminals L2
A10 LED direct operation
A11 Button for toggling between bus / direct operation
Mounting and wiring
General description
The DIN rail mounted device with N-system dimensions (4
module units) can be inserted in N-system distribution
boards, either surface- or flush-mounted, and wherever
EN 50022-35 x 7.5 DIN rails are available. The contact
with the bus line is carried out via the bus terminals or
via the contact system to the data rail.
Assembling the DIN rail mounted device (Figure 2)
-Place the device (B1) on the DIN rail (B2) and
-rotate the device downwards until the slide switch
audibly clicks into position.
Dismantling the DIN rail mounted device (Figure 2)
-Remove all the connected cables,
-press the slide switch (C3) down with a screwdriver
and
-remove the device (C1) from the DIN rail (C2) with a
swivel action.
B1 C1
C2
C3
B2
Figure 2: Assembling and dismantling the DIN rail
mounted device
Removing the bus terminal (Figure 3)
-The bus terminal is located on the top of the roller
shutter switch N 523/03 (D1)
-The bus terminal (D2) consists of two sections (D2.1,
D2.2), each with four terminal contacts. Care should
be taken not to damage the two test sockets (D2.3)
either by accidentally connecting them to the bus
conductor or with the screwdriver when attempting to
remove the bus terminal.
-Carefully insert the screwdriver in the wire entry slot
underneath the bus terminal (D2) and pull the bus
terminal forwards out of the roller shutter switch
N 523/03 (D1).
Note
When removing the bus terminal, there is a danger of
short circuits.
Plugging in the bus terminal (Figure 3)
-Place the bus terminal (D2) in the guide slot and
-press downwards until it reaches the stop.
Connecting the bus cable (Figure 3)
-The bus terminal (D2) is suitable for single-core
conductors with 0.6 ... 0.8 mm Ø.
-Strip approx. 5 mm of insulation from the conductor
(D2.4) and then plug in the terminal (D2) (red = +,
black = -).
Disconnecting the bus cable (Figure 3)
-Remove the bus terminal (D2) and the conductor
(D2.4) from the bus cable by rotating them simul-
taneously backwards and forwards.
A1
A2
A3
A4
A5
A6
A7
A8
A9
A10
A11
instabus EIB
Technical product information
January 2008
Roller shutter switch N 523/03 5WG1 523-1AB03
4 x 230 V AC / 6 A
Technical manual N 523/03, 4 pages Siemens AG
Automation and Drives Group
Update: http://www.siemens.de/gamma © Siemens AG 2008 Electrical Installation Technology
Subject to change without further notice P.O. Box 10 09 53, D-93009 Regensburg
2.10.1.14/4
C1
C2
C2
C2.4
C2 C2.4
5 mm
C2.1 C2.2
2
C2.3
C
Figure 3: Connecting and removing the cable
Connecting the mains voltage and roller shutter drives
-The connections are carried out with plug-in terminals.
-Strip approx. 9-10 mm of insulation from the
conductor and slide into the respective terminal.
-Outputs A and B are supplied via terminal L1 while
outputs C and D are supplied via terminal L2. This
enables two outputs to be connected to different
external conductors. If all the actuator outputs should
be connected to the same external conductor, a
terminal L1 must be linked to a terminal L2 via a wiring
jumper.
Cross-sections:
•The following conductor cross-sections are permitted:
-2 x 0.5... 2.5mm² single-core or 2 x 0.5... 1.5mm²
finely stranded with connector sleeve
•Each of the mains connections L1 and L2 must be
fused with a miniature circuit breaker of characteristic
B or C with a max. nominal current of 10 A.
Mounting the insulating cap
If the device should be mounted on a DIN rail without an
data rail, the contact system must be covered with the
supplied insulating cap.
Removing the locating clamp: (Figure 4)
-The locating clamp (D3) encloses the contact system
(D2) on the rear of the roller shutter switch (D1).
-Insert the screwdriver between the DIN rail mounted
device (D1) and the locating clamp (D3) and remove
the clamp.
Clipping on the insulation cap: (Figure 4)
Place the insulating cap (D4) on the contact system and
press so that it snaps in place.
Figure 4: Covering the contact system
Dimension drawing
Dimensions in mm
b
90
44
55
45
b = 4 module units
1 module unit = 18 mm
General notes
•Any faulty devices should be returned to the local
Siemens office.
•Should you have any additional queries, please contact
our Technical Support department:
℡+49 (0) 180 50 50-222
+49 (0) 180 50 50-223
[email protected]
D3 D1 D2 D2 D4 D1