Sigma PE 7.5 User manual

1
Via Artigianato 85 –25030 Torbole Casaglia (BRESCIA) –ITALY –Tel 030 265 04 79 –Fax 030 265 01 43
INSTRUCTION BOOK
PLANETARY MIXER PE 7.5
INSTRUCTION BOOK: The following instruction book contains the necessary instructions for the
transport, the fuctioning and the maintenance of the mixer and
must be read before each of these operations. The instruction
book should be read by the technicians who must have care of
the maintanance of the mixer and also by the operators who
must use the mixer itsself. This manual is part of the mixer and
the user must have care of it during all the life of the mixer.
The observance of all the rules contained in it allow the correct
use of the mixer, its security and also the security of the
operator.

2
INDEX:
1) SYMBOLS
2) MACHINE DESCRIPTION
3) IDENTIFICATION
4) OPERATIVE CONDITIONS
5) DIMENSIONS AND WEIGHT
6.1) TRANSPORT-PACKING-HANDLING
6.2) STOCKING
7) INSTALLATION
8) USE INSTRUCTIONS
9) HOW TO WORK WITH THE MACHINE : THE CONTROL PANEL
9.1) OPERATIVE RUNNING
9.2) END OF WORK
9.3) THE TOOLS AND THEIR USE.
9.4) SCRAPER
10) ORDINARY MAINTENANCE
11) POSSIBLE FAULTS AND REPAIRS
12) EXTRAORDINARY MAINTENANCE
13) SPARE PARTS
14) RAW MATERIAL
15) RISKS, PROHIBITIONS, OBLIGATIONS.
16) ELIMINATION
SYMBOLS: they are used to define the qualification of the person who has to carry out a
particular operation.
Symbol Description Characteristics
OPERATOR Person in good conditions of health who has
been informed about the use of the macchine
and has read and well understood this
instruction book.
ELECTRICIAN Person in good conditions of health who is
qualified for the profession of electrician and
has read and well understood this instruction
book.
MECHANIC Person in good conditions of health who is
qualified for the profession of mechanic and
has read and well understood this instruction
book.
SIGMA ASSISTANCE
Tel.
0039.030.265.04.88
Fax
0039.030.265.10.82
•Revision of the manual.
•Phone-assistance about the use.
•Phone-assistance about the starting or
the faults of the mixer.
•Spare parts requests.
•Repairs of the mixer.
•Revisions of the mixer.
A

3
5) DIMENSIONS AND WEIGHT Fig. 4: total net weight kg 38 + kg 12 packing
6) TRANSPORT-PACKING -HANDLING. Fig. 4B
The standard packing box onto pallet has the following external dimensions 650x400
h750.
Lifting rules with lift truck: •Make sure that the lift truck is
adequate to the load.
•Enlarge the lifting forks.
•Make sure that during the lifting
the forks come out from the pallet.
•During the movements always
keep the laod near the ground.
The mixer can be lifted also with a strong belt put
between the bowl and the head, after removing the
lower grid (removable).
Lifting rules with belt:
•Make sure that the lifting means is adequate
to the load.
•Make sure that the load is correctly fastened.
•Do the movements in a free area.
6.2) STOCKING: The machine should be installed in
a closed room sheltered from dust and atmospheric
agents, temperatures should be between –20
e+40°C and moistures should not be more than
90%. The room must be hygienically sure.

4
7) INSTALLATION
The machine must be placed on a solid working table or on a basement.
Next to the machine a lead must be installed wires section of 1,5 mm2at
least and tap with blocked plug.
Make sure that volt, Hz, kw comply with the ones indicated on the rating plate
of the machine.
ATTENTION: At the start of the power supply a differential must be fitted with leakage
current of 0,03A (Ampere).
8.0) OPERATING INSTRUCTIONS
The machine must have the bowl attached and the
protection grid closed otherwise the protections and
safety devices prevent the machine from working.
DO NOT REMOVE OR TAMPER PROTECTIOND AND SAFETY DEVICES, EITHER
ELECTRIC OR MECHANIC, THE MACHINE IS EQUIPPED WITH.
8.1)1. The bowl must be attached to the
mixer BEFORE attaching the tools.
Make sure that the bowl lift lever is in
the down position. Place the bowl onto
the mixer making sure that the holes
on each side are securely placed over
the pins. Rotate the bowl clockwise.
8.2) Complete the operation by blocking the
bowl with the handle.
Insert the bowl pins in the
lifting arch and rotate anti-
clockwise.
Block the bowl with
the handle

5
8.3) Rotate the bowl guard in the
open position, select the
appropriate tool and insert it
onto the tool shaft.. Insert the
tool clockwise so that the
notch on the agitator fits over
the pin on the tool shaft as
shown in the picture.
Rotate the tool anticlockwise for
unhooking it..
8.4) Use the bowl lift lever to lift
the bowl in working position
and close the protection grid.
Rotate the grid and
insert the appropriate
tool.
1)
rotate the grid to
close the mixer
2) use the lift lever to
lift the bowl.
3) The mixer is ready
to work.

6
9.0) HOW TO WORK WITH THE MACHINE : THE CONTROL PANEL
A) Main switch led.
By pushing the buttons with
the digits you make rotate
the tool at the selected
speed , speed 1 is the
lowest while speed 6 is the highest.
B) Couple of buttons, by pushing them
together you can increase the selected
speed till the maximum of the rpm.
C) Couple of buttons, by pushing them
together you can decrease the selected
speed till the minumum of the rpm.
D Couple of buttons, by pushing them,
together you stop the mixer.
E) Main switch.
F) Indicator. It shows the absorbed
current of the mixer .
G) Regulation feet.
H) Protection grid with safety
microswitch.
I) Bowl lifting lever.
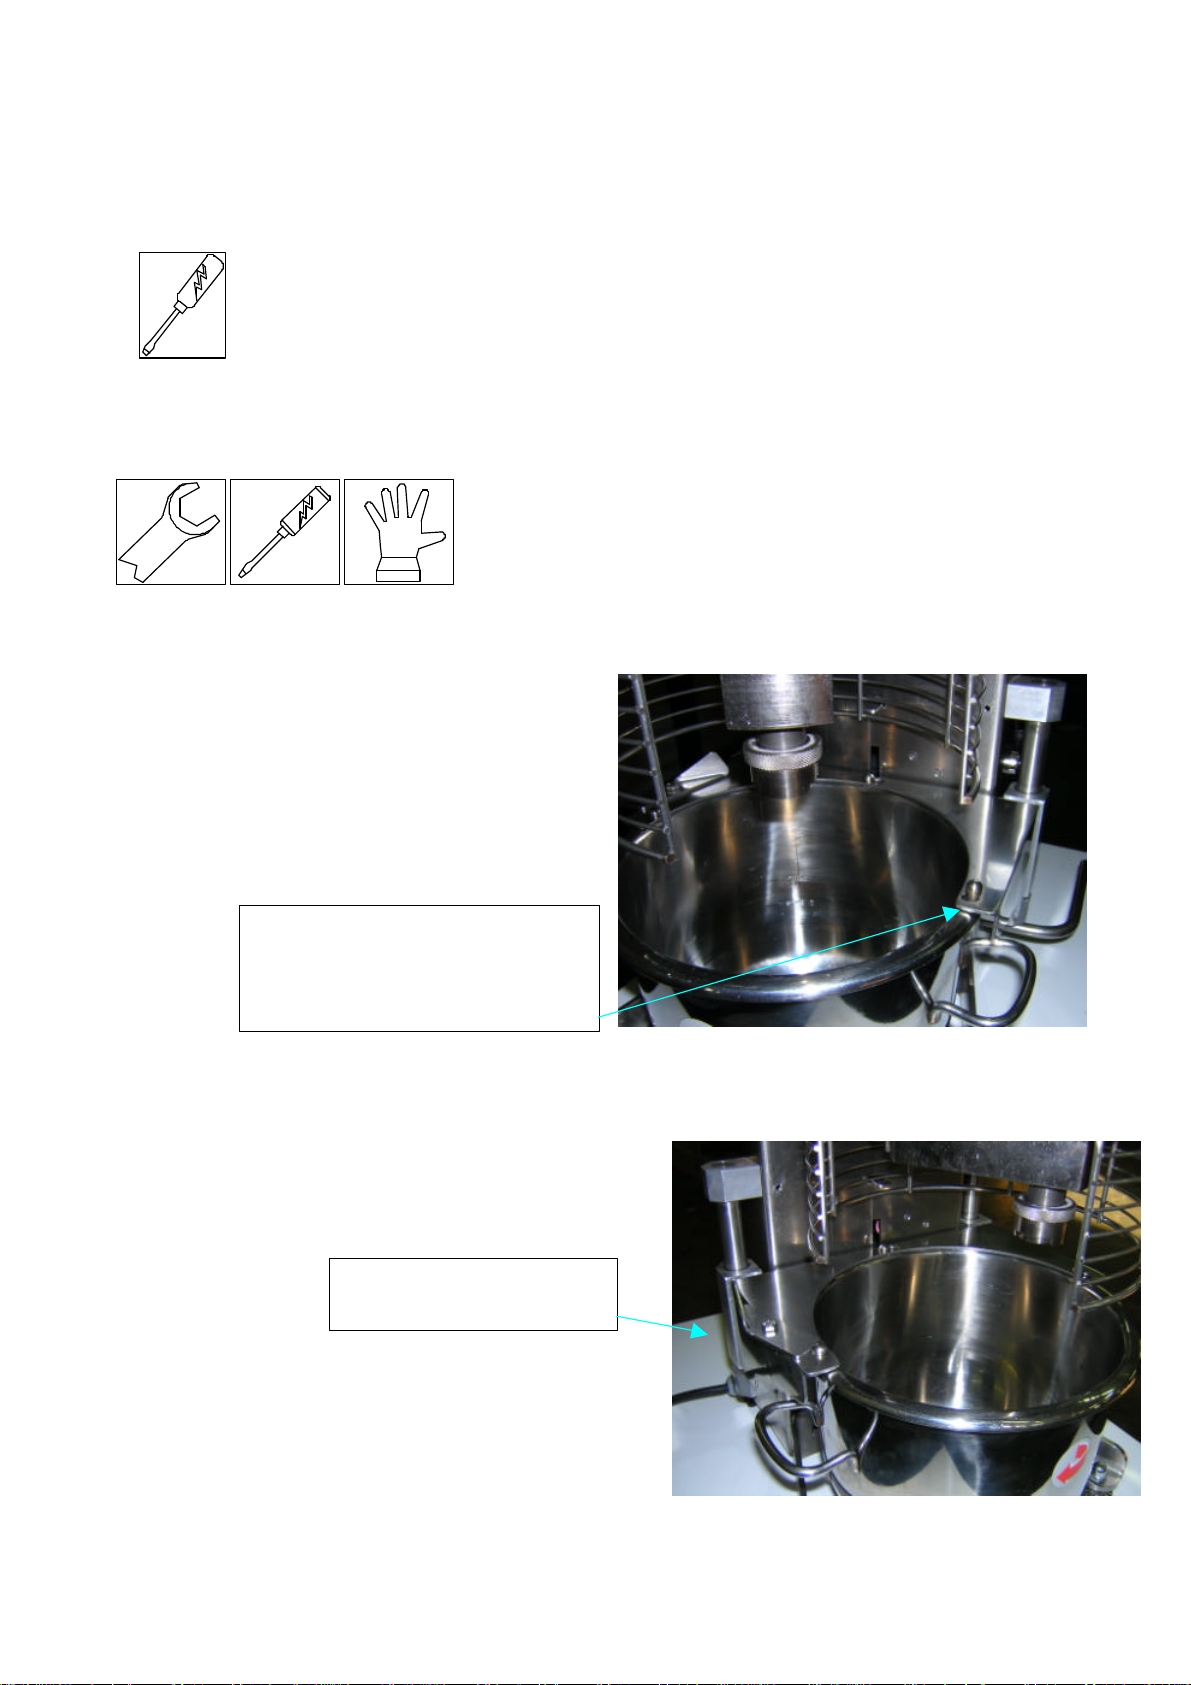
How to start the mixer:
•Press the main button in position I.
•Insert the tool.
•Insert the bowl.
•Lift the bowl
•Rotate the protection grid in the close position.
•Press one of the buttons with the digits to select the speed, the mixer will start to work.
•9.1) OPERATIVE RUNNING: Press the main switch F (see the exploded view from
position O to position I. Lamp A will light. Press button 1, (or another one of the
buttons if you already know the working speed) the tool will start to rotate at the
minimum speed, by pressing the buttons 2, 3 and the following till numberl 6 the
speed will increase till the highest one. By pressing together the couple of buttons
B, the speed gradually increases till the highest one. By pressing together the
couple of buttons C, the speed gradually decreases till the lowest one. By
watching the indicator F you can see the absorbed current of the mixer. Pay
attention not to exceed the power of absorbtion indicated in the rating plate.
9.2) END OF WORK: To remove the dough when the tool is still, rotate the grid; lower the
bowl with the lifting lever and rotate the tool anticlockwise to unlock it. Free the bowl from
the safety handles and take the bowl with the tool out.
Remind to switch the main switch off.
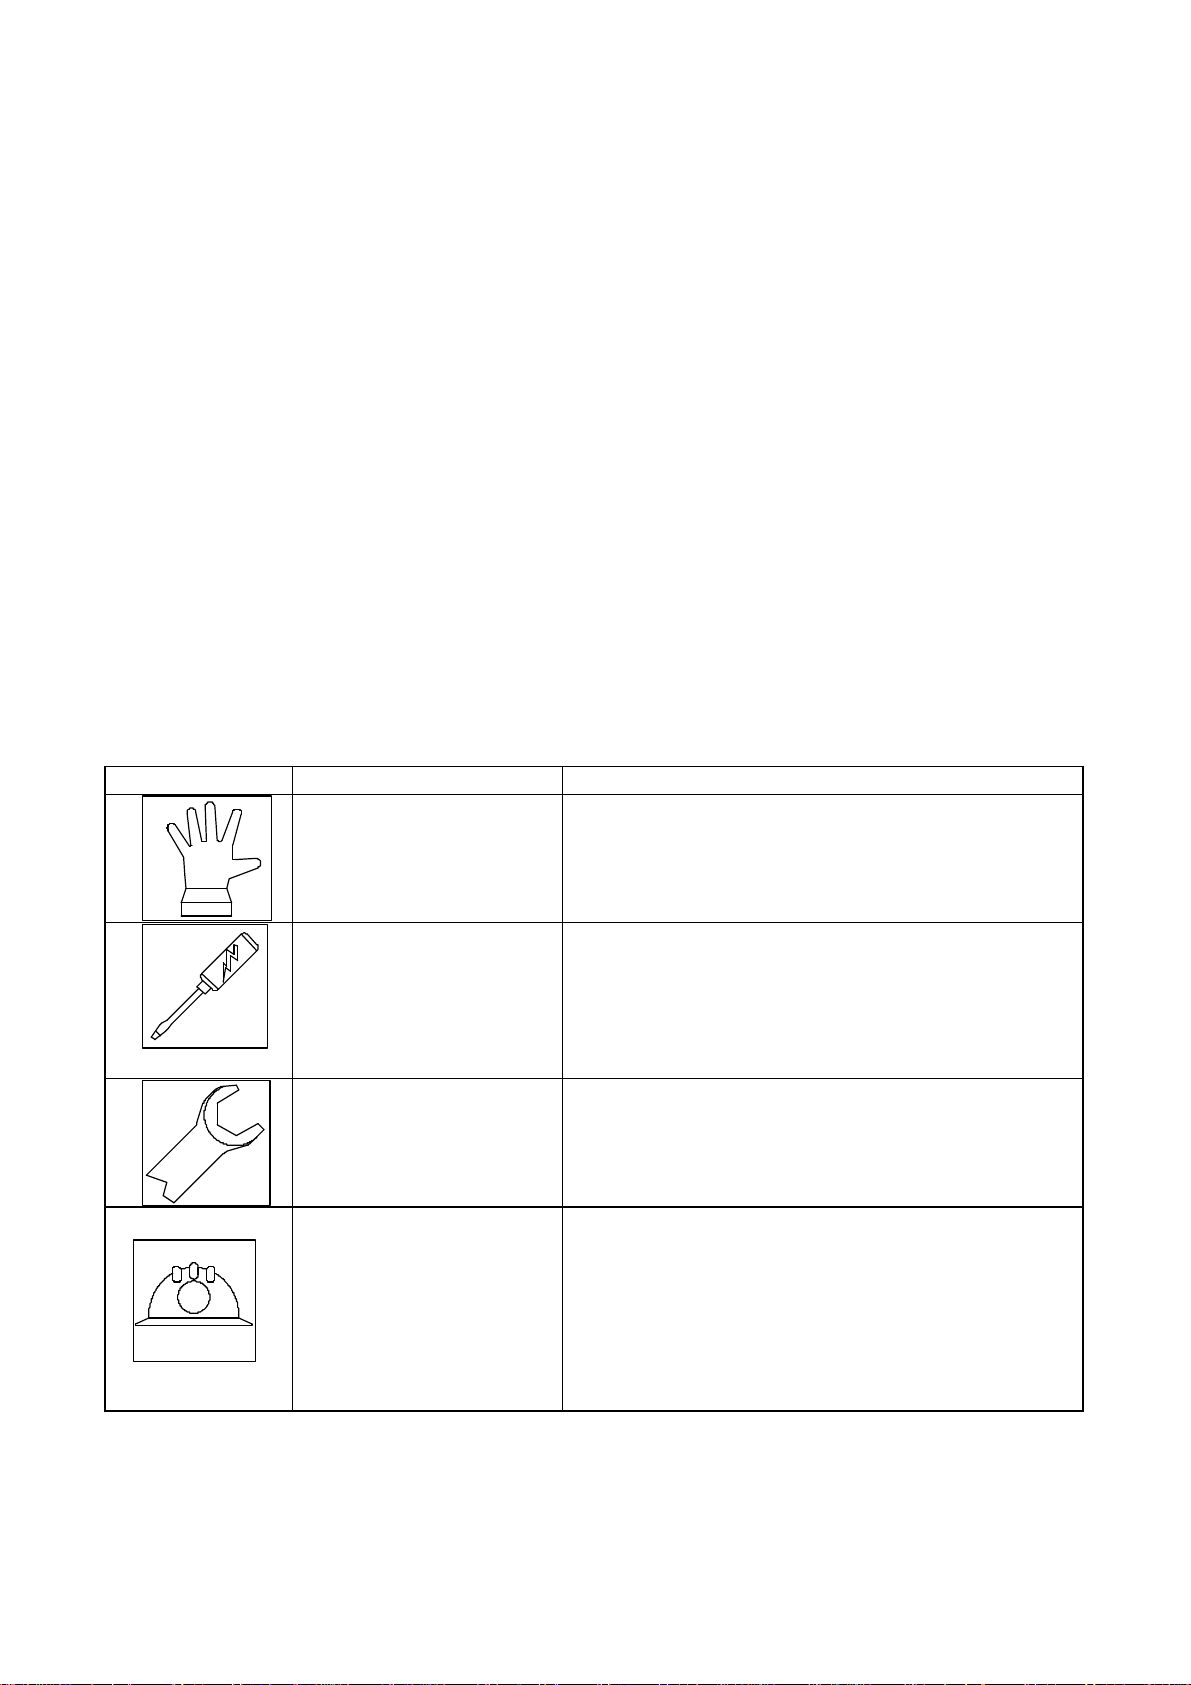
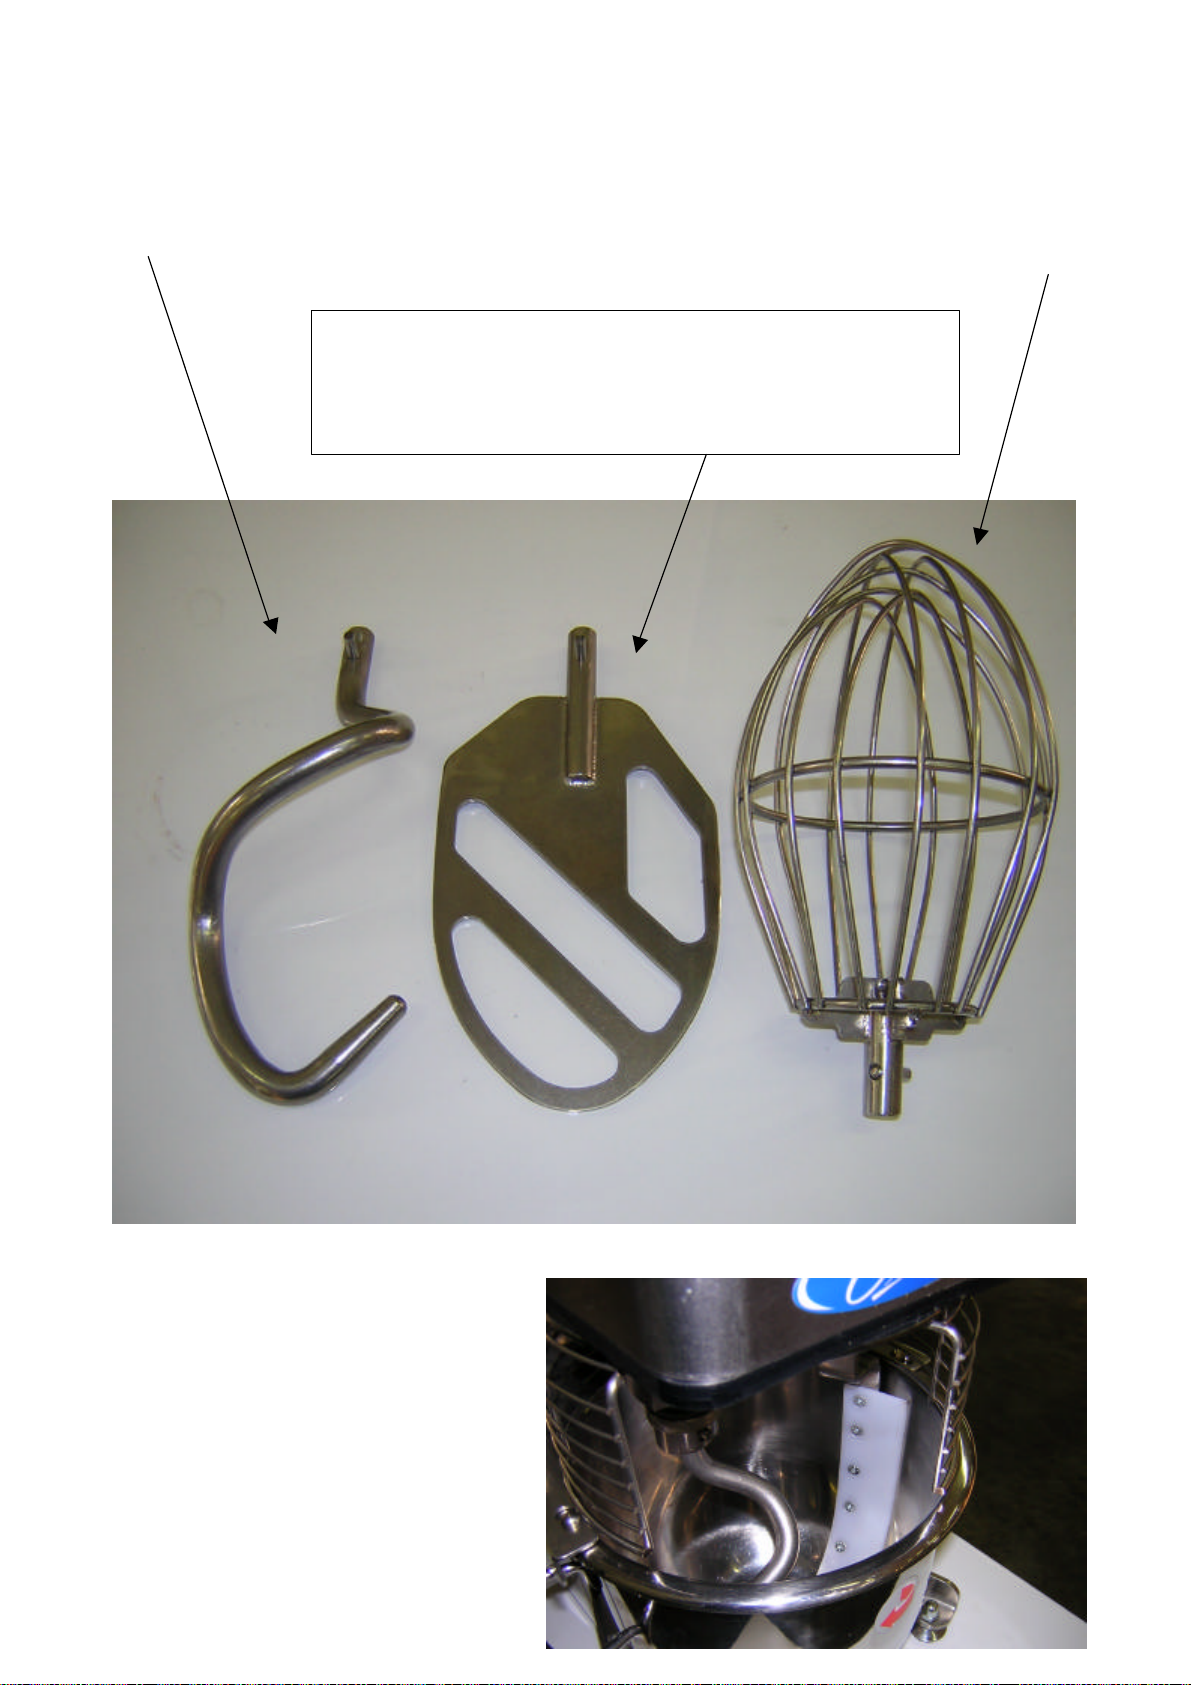
9.3) TOOLS AND THEIR USE.
I
G
H
0
I
+
_
S
T
O
P
1 2
43
65
A
B
C
D
E
F
Spiral: use it for hard dough,
•Pizza or bread dough
•Cake and croissant dough etc.
•Cream puff dough
•Meat, mashed potatoes etc
Tool rpm:minimum speed Position: 1÷2
Whisk::use it to mount the softest
ingredients
•Albumen
•Biscuits.
•Meringues
•Whipped cream.
DO NOT USE FOR HARD DOUGH
Tool rpm: from medioum to max
Position:
3
÷
4
÷
5
÷
6

7
9.4) SCRAPER:
It is possible to require this tool that
removes the dough from the edge,it is
useful for dough with margarine, butter
o sugar. You have to mount it onto the
planetary in the appropriate attach.
Blade: use it for dough of intermediate consistency
•Meat and mashed potatoes
Tool rpm: from minimum to medium speed Position:
1÷2÷3÷4

8
After having insert it block it with the appropriate screw.
9.5) HOW TO WORK WITH THE MIXER.
Many problems rise from an improper use of the machine by the end user. Tg
of the advised quantities will be prejudicial to the quality of the working process
and to the endurance of the mechanical parts of the machine. It will be useful to
take as an indication about the maximum quantities the following capacity chart:
APPLICATION INGREDIENTS
PE 7.5 PE 20
TOOL SPEED NR
dough 55% water Kg flour. 2.0 5Spiral 1-2
Croissant dough Kg flour. 1,8 4.5 Spiral 1-2
Cream puff dough Kg flour. 1,5 4Spiral 1-2
meat Kg. 3,5 10 Spiral/blade
1-2-3
Mashed potatoes Kg.potatoes
3,5 10 Blade/whisk 2-3-4
Albumen Number of
eggs 12 32 Whisk 4-5-6
Biscuits Number of
eggs 12 30 whisk 3-4-5
Meringues Kg sugar. 0,55 1,5 Whisk 4-5-6
Whipped cream Lt of cream1,5 4Whisk 4-5-6
10) SAFETY DEVICES: The mixer is equipped with a series of safety devices that
saveguards the operator’s safety. These devices should
neither be tampered nor excluded and are to be checked
before starting the machine.
•Shutdown general switch in the electrical board:
interrupts the input of the open electrical board allowing a safe mechanical
maintenance.

9
•Inverter power blocking: interrupts the input in case of too much motor load.
•Thermal probe: interrupts the input in case of motor overheating.
•Fixed protections: all the covers fixed with screws can be taken off just for the
maintenance by skilled staff.
•Mobile protections: the movement of the grid and of the bowl drives two
microswitches that prevent the movement of the mixer if:
o The bowl is not in the high position.
o The grid is not closed.
10.2) SAFETY SUGGESTIONS:
•The machine should be installed in an illuminated and airy room.
•The user should wear adequate clothes, nonslip shoes,very well closed sleeves, do
not wear dangling clothes (ties, napkins, open jackets ecc.) to prevent the risk of
entangling.
11) USE AND MAINTENANCE DISPOSALS
According to our experience the first and most efficacious form of maintenance is cleaning
the machine. For cleaning and removing the dough waste we advice the use of a plastic
spatula or of a moist cloth . The outer surfaces can be easily cleaned with spray or neutral
soap.
EARTHING: The efficacy of the grounding of the mixer should be checked.
Should it be faulty or not correct serious accidents and also death can happen.
ELECTRICAL BOARD: general disposals.
The opening of the electrical board is allowed just to authorized staff. The
mixer with not protected electrical parts should never be left unattended.
The working of the machine where electrical parts are not protected is allowed
just in presence of skilled staff and just for the short time necessary for the
eventual repairs under the responsability of the staff.
The electrical plan is shown in the enclosed nr 1.

10
12)ORDINARY MAINTENANCE
ANY CHECK OR MAINTENANCE OPERATION SHOULD BE
CARRIED OUT ONLY WHEN THE MIXER IS UNPLUGGED AND
POWER IS DICONNECTED. The machine does not need particular
maintenance operations. Check worn-out level of the belts after the
first three months
ATTENTION: The machine is not waterproof, therefore whatever cleaning process must
not involve a jet of water.
If the power supply cable becomes damaged it must be substituted with a H07RN/F cable
with a cross-sectional measurement of 3x1,5 mm2.
i
To tighten the belt
unscrew the motor’s
bolts and lever with a
screwdriver.Close the
motor’s bolts,replace
the cover and test the
machine
Problems with the
micro of the bowl:
remove the back
cover, check the
functioning, replace
the cover and test the
machine
.
Problems with the
micro of the grid:
remove the cover that
protects the gears,
check the functioning,
replace the cover and
test the machine.
When the tool’s pin is
broken remove the tool,
close it in a vice, remove
the pin with the
appropriate tool F 5-6
mm, insert a new pin and
attach the tool to the
shaft.

11
13.1) POSSIBLE FAULTS AND REPAIRS
FUNCTIONING
ANOMALIES
POSSIBLE CAUSES REPAIRS
When turning switch into position
1 the warning lamp does not light
1) The plug or the wires are not
correctly connected.
2) The warning lamp is burnt
3)
1) Check right connection.
2) Replace the light.
When pressing start button the
machine does not start.
1) The protection grid is open
2) The bowl is not in the correct
position .
3) The safety microswitches are
damaged.
1) Turn it completely close again
and block it.
2) Check the position.
3) Replace the microswitches.
The machine stops and does not
start again
1) The termic probe has intervened
2) The inverter protection has
intervened
1) Wait some minutes for the
cooling of the machine
Continuous noise.
1) Check roller bearings.
1) Replace the bearings.
The tool does not do its normal
revolution on the tool shaft.
1) Belt released.
2) Belt worn out.
3) Etrainment pin broken
1) Tighten the belt
2) Replace the belt.
3) Replace the pin.
13.2) Extraordinary maintenance:
In case of operations not mentioned in this instruction manual
please call SIGMA SrL. To replace motor, electronic panel,
important mechanical parts such as planetary or gears or if the
machine falls down, please get in touch with our assistance
service.
A

12
14) SPARE PARTS REQUEST:In case you need spare parts please contact SIGMA
S.R.L. assistance
1
2
3
4
56
7810
11
12
14
9
13
15
16
18
10
10
19 20
21
22
24
25
26
27
23
34
313029
28
17
33
35
36
32

13
Nr
Code QtY Description
102175004 1Vertical rod for PE 7.5
22500 1Motor operation
31100 1Motor G71 4 poles 0.37 kw 380/50/3 B14
401175048 1Motor pulley PE 7.5
512003960 1Belt multigrip 8J 813
603175045 1Upper cover
701175049 1Drive pulley PE 7.5
801175050 1Hub hole d=20
901175038 1Planetary shaft
10
13000315 3Bearings 6204 2RS 20-47-14
11
01175005 1Journal box for planetary PE 7.5
12
13000362 1Bearings 4204 2RS 20-47-14
13
02175001
02175002
02175003
1
1
1
Plate for head enclosure
Plate for head reinforce
Head plate PE 7.5
14
01175041 1Internal toothed crown PE 7.5
15
01175022 1Cover for gears’protection 7.5
16
01175040 1Covering for planetary PE 7.5
17
05175019
05175020
021750021
1
1
1
Removable grid for the bowl 7.5
Closed protection in polycarbonate
Cam for grid 7.5
18
01175039 1Planetary PE 7.5
19
01175035 1Tool shafti PE 7.5
20
01175037 1Planetary gear
21
22
01175036 1Blocking tools ring PE 7.5
23
02175008 1Blocking bowl sheet PE 7.5
24
02175007 1Bowl arm PE 7.5
25
04175018 1Bowl 7.5 litri
26
02175006 1Front basement
27
28
01175010 1Bowl contrast block
29
01175012 1Bowl movement block
30
31
01175011 1Bowl lifting block
32
02175046 1Back cover PE 7.5
33
02175025 1Bowl protection plate
34
01175030
01175033
01175034
1
1
1
Whisk PE 7.5
Blade PE 7.5
Spiral PE 7.5
35
01175055 1Planetary gears
36
01175042
01175043
01175044
1
1
1
Scraper rod PE 7.5
Scraper PE 7.5
Scraper pin

14
37
38
37
39
40
41
43
44
46
45
42
Nr
Code Qty
Description
37
01175053
4Bowl attach
38
01175057
2Drive bars for bowl PE 7.5
39
01175009
15005003
2
4Block for guiding bowl
Journal box KU 20-23-20
40
01175056
1Bowl presence rod
41
42
02175054
1Enclosure cover PE 7.5
43
02175023
1Sheet for micro grid PE 7.5
44
01175024
13003106
1
1Micro bearing screw PE 7.5
Bearing 626 2RS 6-9-19
45
25001301
25001302
1
1Micro crouzet 83161.1w3
Lever crouzet 161e raggio 13.6 fiorel
46
08091045
1Spring D=11 filo d=1 x 15 spire
15) PRINCIPAL COMPONENTS:
•Raw materials: Steel, NBR (rubber), Nylon, Bronze.
•Surfaces treatment: Polishing of the parts with alimentary polish.

15
16) RISKS, PROHIBITIONS, OBLIGAS.
17) ELIMINATION: The buyer is responsible if the machine goes out of order. The
disassembly of the mechanical and electrical parts should be done by the competent
staff.The machine should be eliminated locally following the local rules and regulations
Do not put out the
fire with water
Do not start the mixer before
having checked the protection
Do not clean the mixer while it
is running
380 V
The use of the whisk for too hard
dough can cause the breaking of
some parts that could also go out of
the grid.
Strong strikes can release the safety grid. The
machine stops immediately. DO NOT touch
anything without disconnecting the machine.
The weight of the bowl is 25 kg and should be lifted
only with the special grips.
Put the machine onto flat surfaces at a height
confortable for the operator.
Steadiness of the machine:if the machine
should be placed onto wet or greasy
surfaces or on unstable laces(ships,planes or
other), take off the feet and fix the machine
on the floor using the special holes.
Table of contents
Other Sigma Mixer manuals
Popular Mixer manuals by other brands

Cuisinart
Cuisinart Precision Master SM-50 Series user manual

Bravetti
Bravetti Platinum Pro EP559V2 owner's manual

Honeywell
Honeywell HON 985B Operating and maintenance instructions

Hans Grohe
Hans Grohe Ecomax Bath / Shower Instructions for use

Yamaha
Yamaha M406 owner's manual

Varimixer
Varimixer ERGO100 operating instructions