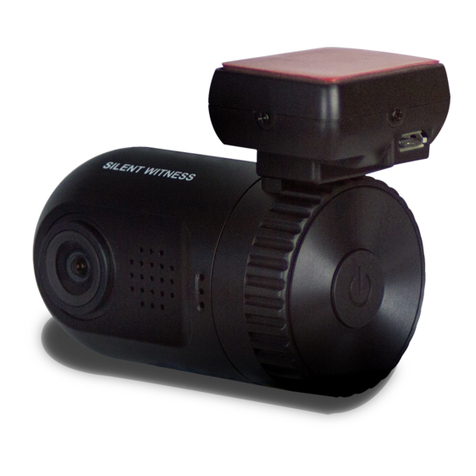
Silent Witness SW021 User manual

SW021
MANUAL v1

Product Structure:
1)TV-OUT 2)Holder Interface 3) Reset
4)Power Button 5)SD Card 6)Mode Button
7)Indicator Light 8)LCD 9)Menu Button
10)Down Button 11) Up Button 12)OK Confirmation Button
13)USB Interface 14)MIC 15)HDMI Interface
16 ) Speaker 17)FHD Lens 18)Infrared lamp
Button and Interface Instruction:
POWER Button: on/off
OK Button: Confirmation/record/enter WIFI
MODE Button:switchamong photograph, record, playback
▲Up Button: Up Button /Lock
▼Down Button: Down Button
MENU: menu/return
Reset: Reset slot

Button/Location Function Description
TV OUT AV Output 1. Connect the camera from the TV out socket to the Tv input
Holder Interface Install holder 1.Install the suction bracket to the camera, Slide and Click
Reset Reset 1.Reset the camera to factory settings
Power Power on/off 1.Power on:Short press to turn ON
2.Power off:Long press to turn OFF
SD Card Slot SD Card Slot 1;Insert the SD Card into this Slot
Mode Switches between photo/
record/playback settings 1:Switch between photo/ record/playback settings
Indication LED Power on/off indication
LED
1;When recording the LED will flash Green, when charging the
LED will be solid blue, Once the device is fully charged the LED
will go out.
LCD 2.0 inch TFT 1;Displays the video and menu
Menu Photo/record/ playback,
all function setting 1. To change video and camera settings
Up/Down In the menu mode,
choose up and down
1. In the menu mode :Up
2. In the menu mode :Down
OK Confirmation Video start/stop/photo
function
Menu confirmation
1:In video mode- Ashort press start recording, to stop recording
another short press
2:In the photo mode:short press to take a photo
3:In the menu mode: used for SET and CONFIRM
USB Output storage/charging 1 The usb can be used for charging the device and viewing files on
your computer
MIC audio record 1;Audio record
HDMI Interface High definition output 1.Connect the HD television by HDMI cable, To view Videos
Infrared Lamp 8pcs IR Used for improved vison in dark surroundings

Charge and Power on/off instruction:
1.Charging
This machine is built in rechargeable lithium battery, when using the machine first time, please charge, the
camera for 12 hours, this can be charged by the following ways:
1. Connect it to your computer via usb lead
2. Use the usb lead and a power adaptor to charge with an electrical socket
3. Car charger
Whilst charging a Blue LED will display, once the device is fully charged the LED will go out.
For best performance please leave the power connected whilst in the vehicle.
2. Operating Guide :
Auto power on/off:
When the camera is installed into the vehicle and the power lead if left connected to the vehicles cigarette
socket, the camera will automatically turn on and record when you start your vehicle and switch off and stop
recording when you turn your vehicle off .
3. Power On/Off Manual
3.1: A Short press the “POWER” Button, and then camera will turn on
3.2:After the start up, The system default in camera mode, press the ”OK” button to start recording, press the
“OK” button again to pause recording and save the document automatically.
4.Pause mode:
MENU
A Short press on the “MENU” Button will allow you to enter into the “Setting” when the cursor
appear on the top of screen
Press the “MODE” button to switch between the “record setting menu” and “system setting menu”;
use the “▼”"▲" button to choose the menu heading and press “OK” button to confirm. Use the
“▼”"▲" buttons and “OK” through the menu to set your device up. And press the “MENU” button to
return and exit. Now the camera will return to video mode.
PHOTO MODE
When the camera is in pause mode, Press The “Mode” button to enter “Photo mode” and use the
OK button to take a photo.
REPLAY
Press the “Mode” button again to enter the replay mode, use the “▼”"▲" to choose to replay
Events, Video or JPG (photos), make your choice and press OK.

When you have made your choice use the “▼”"▲" to move through the videos and photos and
press OK to view them.
Photo/Video/Playback basic operation instruction:
Video recording setting/system setting
1.A Short press on the “MENU” button to show “Video recording menu” homepage
Press“▼”"▲" button to choose the menu setting option, press the “OK” button to set as follows:
(1)Video size:1080P(30fps)/720P(30fps)/720P(60fps);
(2)Image quality:Very good/good/normal
(3)Seamless video:off/1 minute/3 minute /5 minute – this is the size of the video files made, if you choose
the “off” setting the camera will stop recording once the card is full, if you choose a “time” setting the
camera will automatically overwrite the old files first
(4)White balance:auto/sunlight/cloudy/ filament lamp/ fluorescent lamp / user-defined
(5)Motion detection:on/off – this setting is used only if the camera is being used as a security camera and
has been installed to a permanent power source.
(6)Date on/off date and time – this option will imprint the time and date into the video file
2.Short press the “MENU” button to show the “Video menu” homepage, when the cursor appears on
the top of screen, press the “MODE” button to switch to the “record setting menu” and “system setting
menu”;
press“▼”"▲" button to set the options in the menu, press the “OK” button to set as follows:
(1)Voice:on/off - this setting allows you to choose if you wish to record audio as well as video
(2)Infrared lamp:(night vision) on/off
(3)Auto power off/shutdown:on/off 1 minute/3 minute /5 minute – if you leave your device on without
power it will automatically turns off after your chosen time
(4)Screen protect: (screensaver) off 1 minute/3 minute /5 minute
(5)Date and time:year/month/date
(6)Language:multi-language
(7)TV:NTSC/PAL
(8)G-sensor: on/off low/middle/high
(9)Parking mode: off low/middle/high
(10)Frequency:50HZ/60HZ
(11)System:factory default/system information/card information
(12)Format:yes/no WARNING this will delete all video and photo data from your camera
3.photo /playback setting
Press the “MODE” button to enter “PHOTO” Mode then press the “MENU” button.
Please use the “▼”"▲" to choose and OK to confirm.
(1)Image size:10M/8M/6M/3M/2M/VGA
(2)White balance:auto/sunlight/cloudy/ filament lamp/ fluorescent lamp / user-defined
(3)Photograph mode:on/off - auto 2Sec - auto 10S - two at a time
(4)Continuous capture:on/off 10fps 20fps 30fps
(5)Date: on/off date and time (choose to have the data stamped into the photo)
“Video” Store standard video files

“Picture” Store pictures
press“▼”"▲" to choose the file type that you need to open:
(1)press the OK button to enter the file, press “▼”"▲"to choose the file that want to view/scan, press the
OK button to start playing. on the homepage of browsing files, short press the “MENU”button to enter
into “Playback mode menu”, long press “MENU” button for 3 seconds to enter into delete or lock
mode, press“▼”"▲" to delete or lock, press the “OK” button to set, after the file plays, press “MENU”
button to go back to “playback mode homepage” and press the “MENU” button again to exit.
Menu Setting Instruction
Functional Operation
Recording and Cycle recording
1.Turn the camera ON, press the “OK” button, the“.REC” a red recording signal in the top right corner of the
screen will start flash, this means it has started to record, while the camera is recording, if press “▲”button,
the lock signal will show on the top left corner of the screen, it means this file has been locked and stored
in the accident file. Also while recording if the “▼”button is pressed this will pause and continue recording.
2.Standard videos will be stored in the VIDEO file automatically, and when the card is full, the machine will
delete the first video in the file by itself and continue to recycle the recordings. (if the loop setting has been
switched to OFF, the camera will stop recording when the card is full)
3.Emergency video:In the event of an accident in your vehicle, if the G-Sensor has been activated the video
file will automatically be stored in the “accident” file automatically after 5 seconds, and then continue to
cycle recording.
4.When the camera is recording in the vehicle, the screen saver will turn the screen off, press the
button to turn on/off the backlight.
Computer connect mode
Connect the camera to the computer using the usb lead, the device will show on your computer as a removable
disk. Open the disk to view the video and photos
HDMI Output
Connect the camera via the HDMI socket to your tv’s hdmi socket, choose the files you wish to view and share
with others.
WIFI Mode
Ismart DV Operation
Android Users: Please visit the googleplay and search for ISmart DV
Apple Users: Please visit the app store and search for ISmart DV

Once the app has been downloaded and installed ,
1. Turn on your camera
2. Press and hold the OK button for 3 seconds , “waiting for wifi connection” will display
3. On your mobile device enter the wifi settings
4. Scan for new device
5. Choose the wifi camera
6. Enter the passcode 1234567890 and enter
The device is now paired with your camera, please open the app on your mobile device
With this app you are now able to view live streaming video, view videos and pictures and download them to
your device.

Product Specification:
Product
Feature HD Camera, HD Recording
G-sensor Built-in(to save accidents to a non over write folder)
LCD Size 2.0 LTPS TFT LCD
Lens 170 DegreeA+HD ultra wide angle
Language Multi-language
Video Format MOV.
Video
Resolution 1920x1080 30fps
Built in Camera 400W
Video Codec. H.264, Audio: AAC
Color Effect Standard
Loop
Recording Seamless recycling recording
Auto turn
on/off while
car power
on/off
Support turn on while car starts.And turn off while car shutdowns.
Motion
Detection Support
Year/Month/D
ay/Hour/Minut
e
Support
Photo Mode 10M/8M/6M/3M/2M/VGA
Photo Format JPEG
Memory Card TF (up to 32GB Max)
MIC Support
Built-in Sound Support
TV Output PAL/NTSC
WIFI By connect with mobile phone
Frequency 50HZ/60HZ
USB Function 1:Storage
2:Charging
Power
Interface 5V 1.5A 1+5-charge
Battery Built-in Battery, 370mAh/3.7V

FAQ:
For problems in normal operating situation ,please try these methods below:
Can’t take photo and recording
Check the SD card for space, make sure the sd is not locked.
Automatically stop when recording
Make sure the SD card is high speed, Please make sure the SD card is Class 4 or 6
Appear “files error” when replay photo or video
Check SD card storage, if the SD is full the SD will need to be formatted to clear space.
No photos appear HDTV
Please make sure the hdmi cables are securely in the camera and tv
Unclear video
Check the camera lens, clean with a soft dry cloth
Black image when recording sky or water scene
Check you EV setting in the mode menu.
Color is not correct in cloudy day and outdoor light
Please check the white balance setting in the menu and adjust to Automatic
Cross stripe interference in image
This is because the“power frequency” is set incorrect, please set it to 50Hz or 60Hz
For more information and help please visit
www.silentwitness.co.uk
Table of contents
Other Silent Witness Security Camera manuals

Silent Witness
Silent Witness SW010 User manual

Silent Witness
Silent Witness Night Hawk SWX45 User manual

Silent Witness
Silent Witness V25 ArmorDome User manual

Silent Witness
Silent Witness SW001 User manual

Silent Witness
Silent Witness MagnaView V28R User manual

Silent Witness
Silent Witness SW2200 User manual

Silent Witness
Silent Witness SWX80 User manual

Silent Witness
Silent Witness V60 Night Hawk User manual

Silent Witness
Silent Witness SWC40 Series User manual