Silent Witness V60 Night Hawk User manual
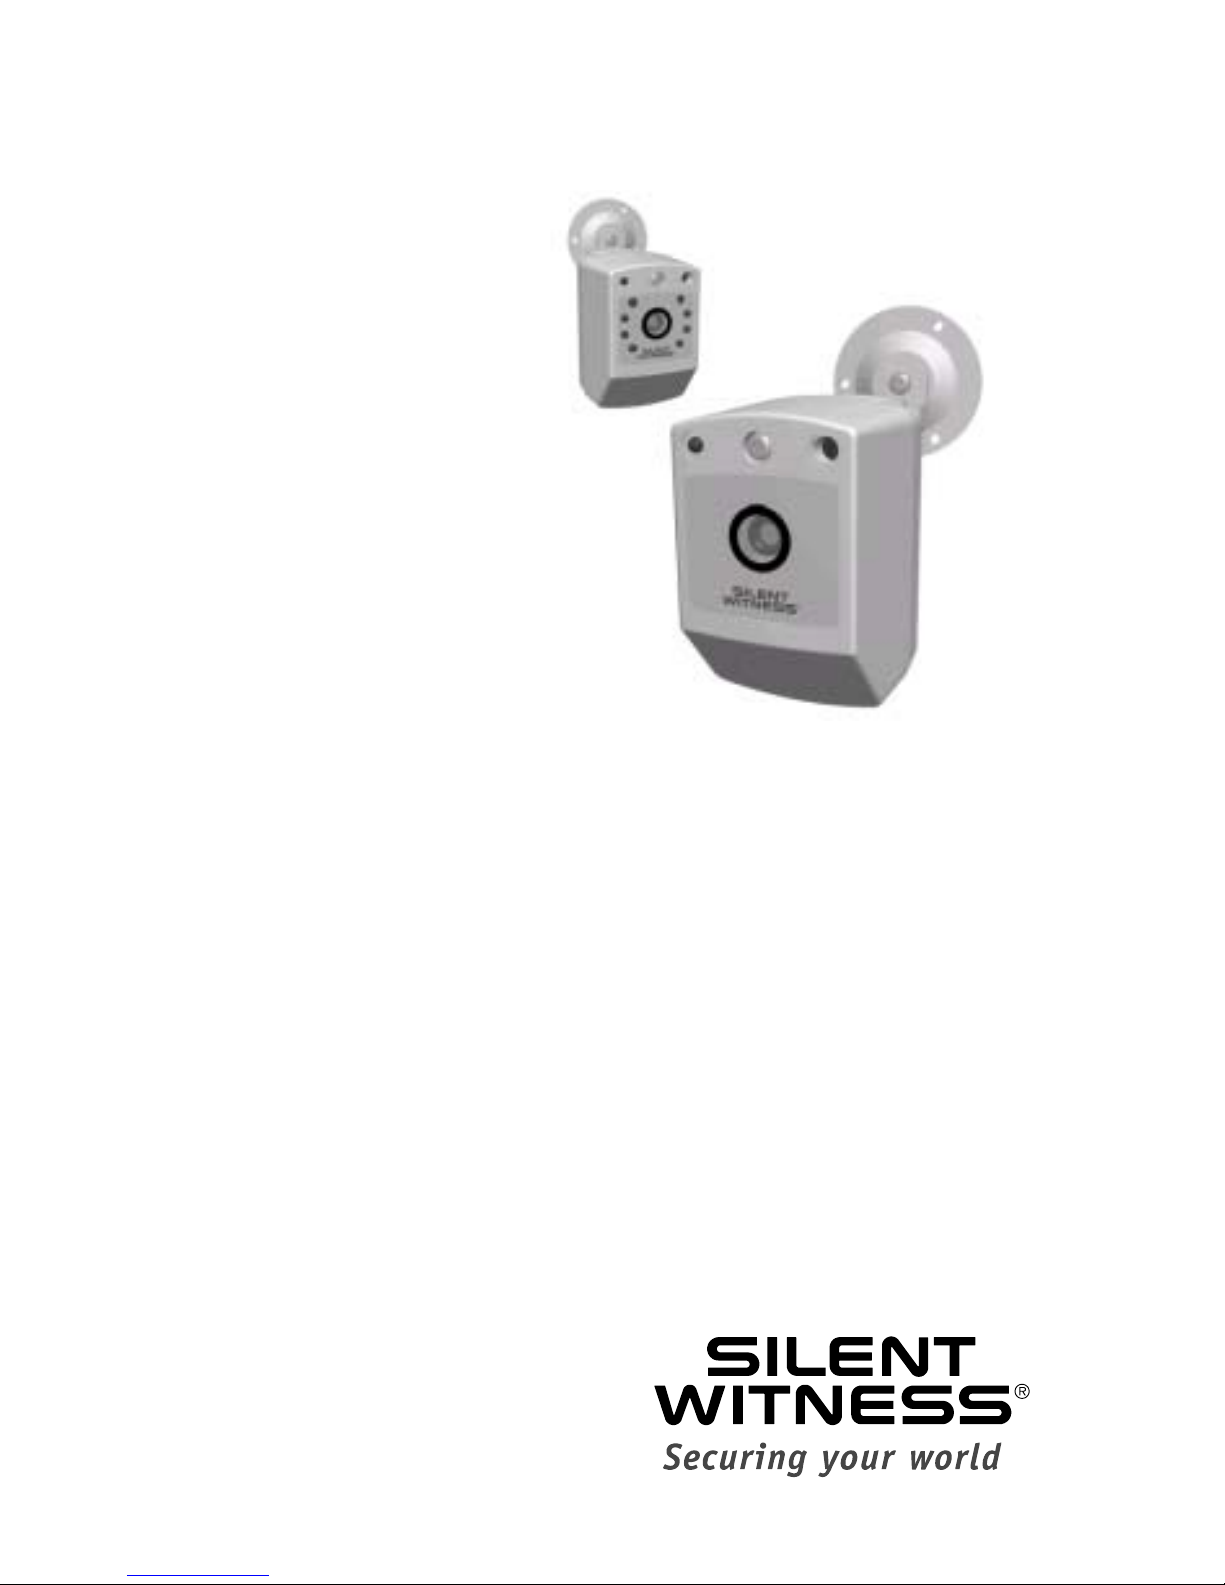
V60 Night Hawk®
CCTV Camera
Quick Setup Guide


Contents
Overview . . . . . . . . . . . . . . . . . . . . . . . . . . . . . . . . . . . . . . . . . . . . . . . . . . . 1
Before You Begin . . . . . . . . . . . . . . . . . . . . . . . . . . . . . . . . . . . . . . . . . . . . 1
Unpack Everything . . . . . . . . . . . . . . . . . . . . . . . . . . . . . . . . . . . . . . . . . . . . . 1
Equipment Required . . . . . . . . . . . . . . . . . . . . . . . . . . . . . . . . . . . . . . . . . . . . 1
Installation . . . . . . . . . . . . . . . . . . . . . . . . . . . . . . . . . . . . . . . . . . . . . . . . . . 2
Mounting the Camera . . . . . . . . . . . . . . . . . . . . . . . . . . . . . . . . . . . . . . . . . . 2
Wiring . . . . . . . . . . . . . . . . . . . . . . . . . . . . . . . . . . . . . . . . . . . . . . . . . . . . . . . 4
Aiming . . . . . . . . . . . . . . . . . . . . . . . . . . . . . . . . . . . . . . . . . . . . . . . . . . . . . . . 5
Adjusting the Mounting Bracket . . . . . . . . . . . . . . . . . . . . . . . . . . . . . . . . 5
External Polarizer (Optional) . . . . . . . . . . . . . . . . . . . . . . . . . . . . . . . . . . . . . 5
Routine Maintenance . . . . . . . . . . . . . . . . . . . . . . . . . . . . . . . . . . . . . . . . . 6
Service . . . . . . . . . . . . . . . . . . . . . . . . . . . . . . . . . . . . . . . . . . . . . . . . . . . . . 6
Specifications . . . . . . . . . . . . . . . . . . . . . . . . . . . . . . . . . . . . . . . . . . . . . . . 7
Cable Guidelines . . . . . . . . . . . . . . . . . . . . . . . . . . . . . . . . . . . . . . . . . . . . . 9
Regulatory Compliance . . . . . . . . . . . . . . . . . . . . . . . . . . . . . . . . . . . . . . 10
FCC Statement (U.S.A.) . . . . . . . . . . . . . . . . . . . . . . . . . . . . . . . . . . . . . . . . 10
Industry Canada Notice . . . . . . . . . . . . . . . . . . . . . . . . . . . . . . . . . . . . . . . . 10
Π. . . . . . . . . . . . . . . . . . . . . . . . . . . . . . . . . . . . . . . . . . . . . . . . . . . . . . . . . 10


1
Overview
The V60 Series CCTV Camera comes fully assembled from the factory. The die-cast
zinc enclosure and tamper-resistant screws make this camera ideal for use in the
most extreme environments.
Before You Begin
Unpack Everything
Check that the items received match those listed on the order form and packing
slip. The V60 packing box should include, in addition to this Quick Setup Guide:
If any parts are missing or damaged, please contact the dealer you purchased the
camera from, or call Silent Witness Customer Service (see “Service” on page 6).
Equipment Required
You will require the following tools to complete the installation:
• Phillips screwdriver.
• Mounting screws. Use mounting screws appropriate to your installation.
• One camera enclosure
• One V60 hardware kit
• One Product Warranty Card
Please read this guide carefully before you install
the V60 Series CCTV Camera.
Keep this guide for future reference.

Document 920.0092 Rev 2.02 March 11, 2004
2
Installation
Mounting the Camera
To mount the V60 camera:
1. Assemble the V60 mounting base following Figure 1.
Note The insulating shoulder washer and composite washers must
remain installed as shown to ensure that the camera is
electrically isolated from the mounting surface.
Install the L-bracket with the raised points toward the mounting
plate.
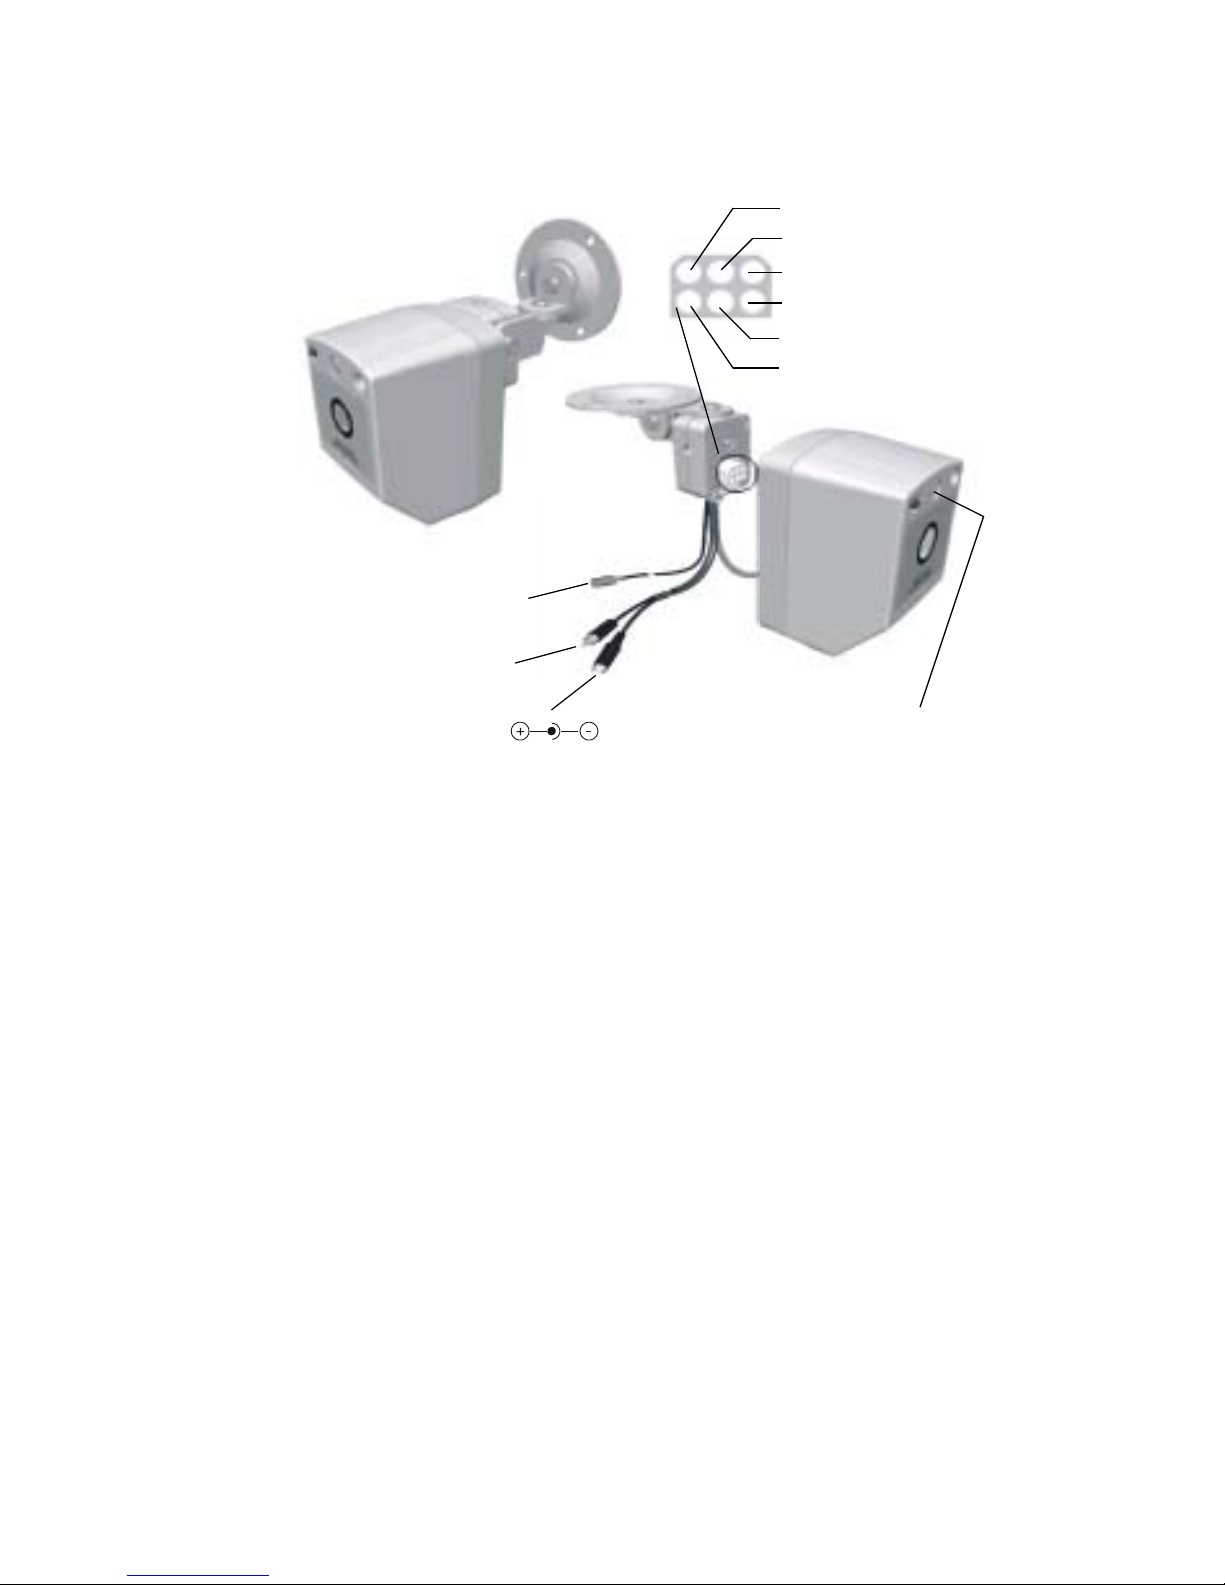
Figure 1 Mount Components
2. Mount the mounting plate to a flat surface on a wall or ceiling, using mounting
screws appropriate to your installation.
3. Attach the V60 enclosure and power connector to the swivel bracket (see
Figure 2).
Mounting plate
Shoulder
washer
L-bracket
Composite
washers
Swivel
bracket
Lock washer (x3)
1/4 in. 20 x 5/8 in. Security head screws (x3)
Note Raised points
toward mounting
plate
3
Figure 2 Mount Options
Note The optional wall, ceiling, or pedestal mounting bracket shown
in Figure 3 can be ordered for installations that do not require
any pan adjustment. This bracket is particularly useful in mobile
applications where vibration may be a significant factor.
Wall mount
Ceiling mount
Audio
Line
Video+
V+
Power Gnd
Video-
Video: female BNC
Audio: RCA plug
Power: 2.1 mm male jack
white stripe Do not remove retaining screw
from camera enclosure
Document 920.0092 Rev 2.02 March 11, 2004
4
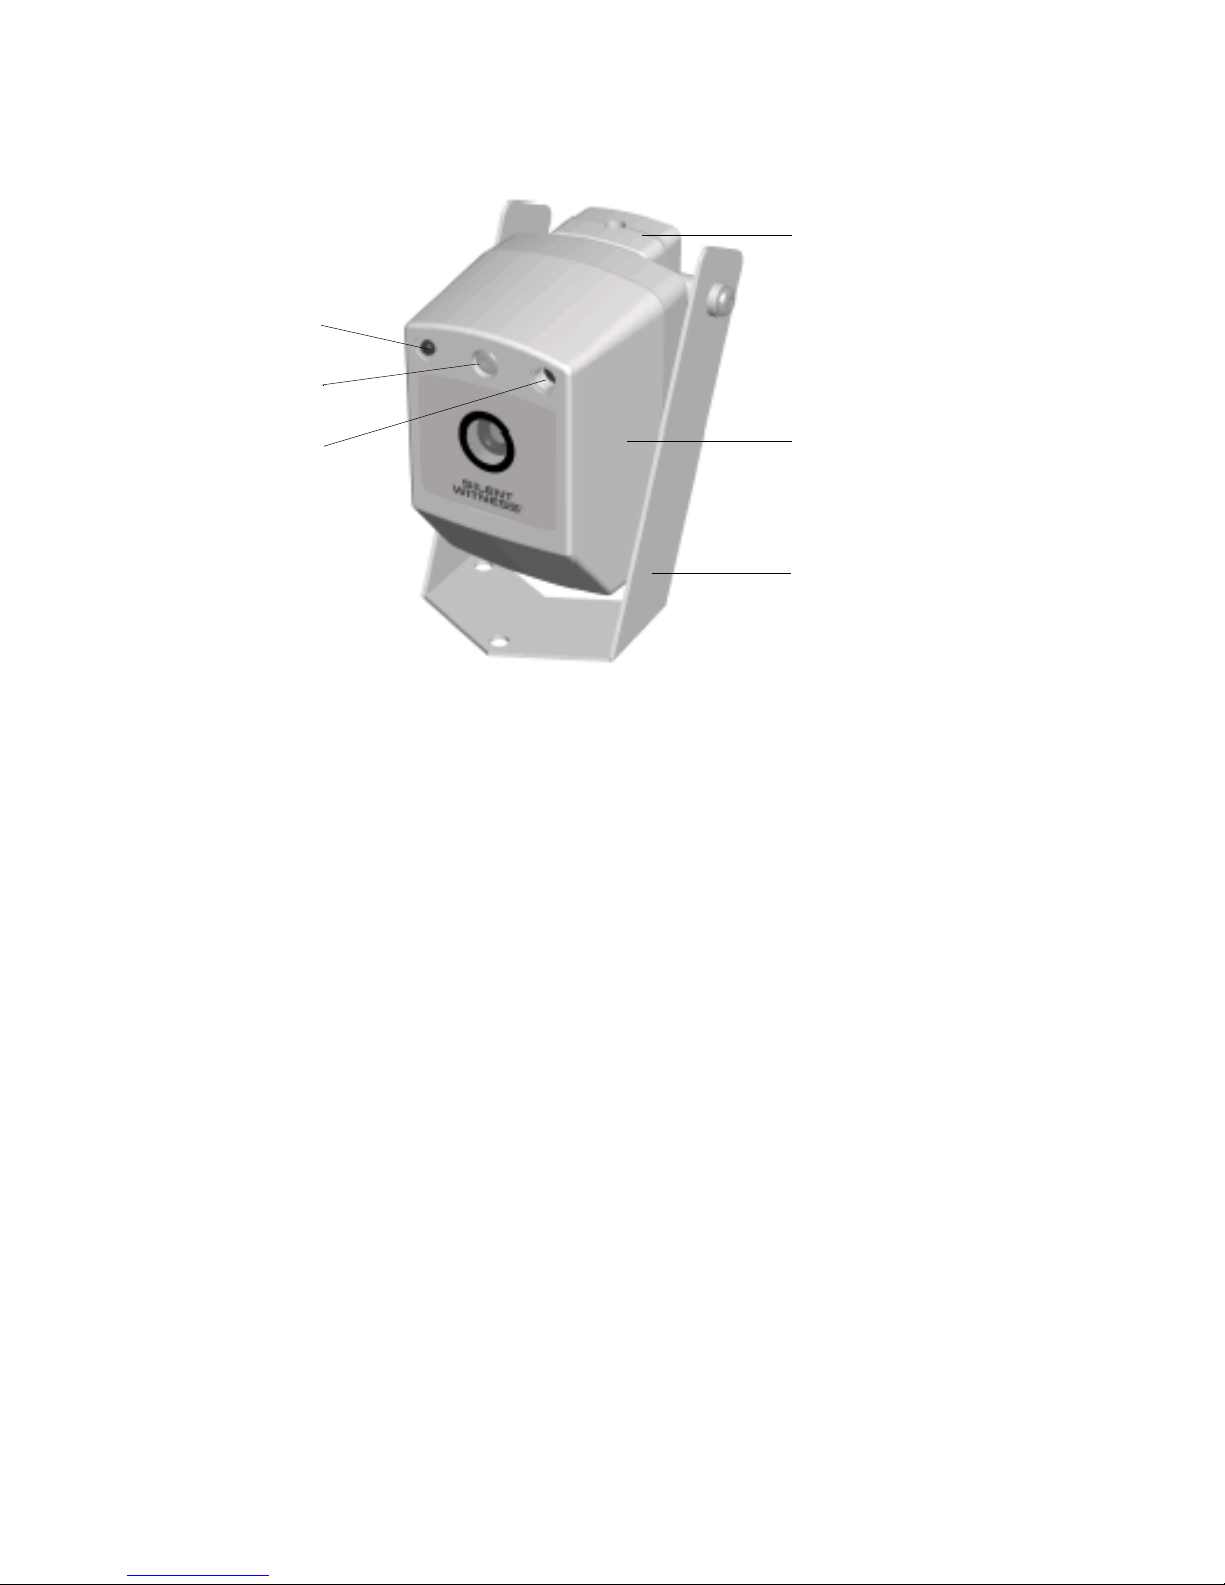
Figure 3 Optional Pedestal Mount
Wiring
Your V60 camera comes supplied with a power connector and wiring harness that
allows the camera enclosure to be quickly changed and secured with a single tamper
proof retaining screw.
See Cable Guidelines on page 9 for cable gauge and length recommendations.
1. Ensure there is enough slack in the wiring harness to adjust the V60 through its
full range of motion.
WARNING! The use of a CSA Certified/UL Listed Class 2
power supply is required to ensure
compliance with electrical safety standards.
2. Read the voltage and current requirements of your V60 camera on the product
label located on the back of the camera. Connect a suitable power supply to
the black, 2.1 mm male jack on the V60 wiring harness.
For DC powered cameras, the positive voltage must be connected to the
center pin of the jack or to the power wire with the white stripe.
Caution Severe over-voltage will damage your V60 and void your
warranty.
3. Connect the V60 video output signal (female BNC connector) to the video
output of a monitor or CCTV system.
Power connector
Camera enclosure
U-bracket (optional)
Flashing LED
(optional)
Enclosure
retaining screw
Microphone
(optional)

5
4. For V60 cameras with the microphone option installed, connect the audio
output signal (red RCA plug) to the audio input of a monitor or CCTV system.
Aiming
Adjusting the Mounting Bracket
The V60 mounting bracket adjustments are designed to lock in position.
Caution Always loosen the locking screws before adjusting the
mounting brackets to avoid damaging the locking
mechanisms.
To aim the mounting bracket:
1. Turn on the camera power and monitor the video signal.
2. Use the security hex key (supplied) to loosen the mounting bracket locking
screws.
3. Adjust the pan and tilt angle of the camera to the desired view.
4. Retighten the locking screws to secure the camera in position.
External Polarizer (Optional)
The optional V60 External Polarizer is a self-adhesive, polarized light filter that can
be mounted on the outside of the V60 camera window. This filter can improve
video image quality by reducing glare and increasing contrast.
Note Do not use the External Polarizer on V60 Night Hawk cameras.
To install the V60 External Polarizer:
1. Clean the V60 camera window with isopropyl alcohol and a clean, soft cloth.
2. Do not remove the adhesive backing from the polarizer at this time. Remove
the clear protective plastic from the front of the polarizer and set aside. Do
not discard. Handle the polarizer by its edges to avoid finger prints.
3. Position the polarizer on the outside of the V60 camera window, directly over
the viewing center of the camera. Rotate the polarizer to find the orientation
that provides the best video image. Use the flat edge of the polarizer as a
reference.
4. Replace the clear protective plastic on the front of the polarizer, and then
remove the adhesive backing. Do not touch the adhesive side of the polarizer.
Press the polarizer firmly onto the V60 camera window, in the position and
orientation that gives the best video image.
5. Remove the clear protective plastic from the polarizer.

Document 920.0092 Rev 2.02 March 11, 2004
6
Routine Maintenance
Use regular, non-abrasive liquid cleaners to remove most dirt and grime.
Caution Do not use harsh or abrasive cleaners which can scratch
the Lexan window in the enclosure and reduce visibility of
the camera.
Service
Subject to the terms and conditions listed on the Product Warranty Card, during
the warranty period Silent Witness will repair or replace, at its sole option, free of
charge, any defective products returned prepaid.
In the event you have a problem with any Silent Witness product, please call
Customer Service for assistance or to request a Return Authorization (RA)
number.
In the U.S.A. and Canada, call 1.800.893.9513
Or call +1.604.574.1523
Be sure to have the model number, serial number, and the nature of the problem
available for the technical service representative.
Prior authorization must be obtained for all returns, exchanges, or credits. Items
shipped to Silent Witness without a clearly identified Return
Authorization (RA) number may be refused.

7
Specifications
Note Specifications apply to all camera models, unless noted
otherwise.
Audio/Video Signal Specifications
Pickup device: 1/3 in. CCD
Electronic iris: 1/60 (1/50) to 1/100,000 sec.
Video output: 1 V p-p @ 75 Ω
Video signal:
Monochrome Standard EIA or CCIR
Color Standard NTSC or PAL
Signal to noise ratio: Better than 51 dB
Surge suppression: 1.5 kW transient
Light sensitivity: High RES Standard RES
Monochrome 0.3 lux @ f2.0 0.2 lux @ f2.0
Color 1.0 lux @ f2.0 0.8 lux @ f2.0
Desert Hawk (Monochrome) 0.3 lux @ f2.0 0.2 lux @ f2.0
Desert Hawk (Color) 1.0 lux @ f2.0 0.8 lux @ f2.0
Resolution TV lines: High RES Standard RES
Color 480 350
Monochrome 570 410
Desert Hawk ((Monochrome) 570 410
Desert Hawk (Color) 480 350
Power Requirements
Voltage and current or power:
Monochrome 11 to 16 VDC, 250 mA maxa
Color 11 to 16 VDC, 900 mA maxa
Optional power supply:
Monochrome PSI 4.1
Color PSI 1.2
Desert Hawk (Monochrome/
Color)
PSI 4.1

Document 920.0092 Rev 2.02 March 11, 2004
8
Operating Temperature
Monochrome -13°F to 122°F
(-25°C to 50°C)
Color -4°F to 122°F
(-20°C to 50°C)
Arctic Hawk (Monochrome) -50°F to 122°F
(-46°C to 50°C)
Arctic Hawk (Color) -50°F to 122°F
(-46°C to 50°C)
High RES Standard RES
Desert Hawk (Monochrome) -4°F to 140°F
(-20°C to 60°C)
-13°F to 140°F
(-25°C to 60°C)
Desert Hawk (Color) -4°F to 140°F
(-20°C to 60°C)
-4°F to 140°F
(-20°C to 60°C)
Size and Weight
Length x width x height (no brackets): 2.5 in. x 2.75 in. x 4.5 in.
(64 mm x 70 mm x 114 mm)
Weight: 2.6 lbs. (1179 g)
Ratings FCC Part 15B
Œ
a. Current consumption depends on camera model.

9
Cable Guidelines
Maximum Power Supply Cable Length (feet/meters)
Wire gauge
Total
load
Power
supply
24
AWG
22
AWG
18
AWG
16
AWG
Cameras with DC power supplies
150 mA 12 VDC 50/15 100/30 200/61 300/91
150 mA 15 VDC 300/91 500/152 1000/305 1000/305
250 mA 12 VDC n/r 50/15 100/30 200/61
250 mA 15 VDC 200/61 300/91 500/152 1000/305
300 mA 12 VDC n/r n/r n/r 100/30
300 mA 15 VDC 200/61 300/91 500/152 1000/305
950 mA 12 VDC n/r n/r n/r 50/15
950 mA 15 VDC 50/15 100/30 300/91 500/152
1150 mA 12 VDC n/r n/r n/r 50/15
1150 mA 15 VDC 50/15 100/30 200/61 400/122
Line-lock cameras with AC or DC power supplies
2.5 W 24 VAC 50/15 100/30 200/61 300/91
2.5 W 15 VDC 200/60 300/90 500/150 1000/305
4.5 W 24 VAC n/r 50/15 100/30 200/61
4.5 W 15 VDC 200/61 300/91 500/152 1000/305
n/r = not recommended
Maximum Video Cable Length (feet/meters)
Cable type RG-59 RG-6 RG-11
Wire gauge 23 AWG* 18 AWG* 16 AWG*
Maximum length (feet/meters) 750/229 1500/457 2000/610
* Copper clad steel core, 95% braided shield

Document 920.0092 Rev 2.02 March 11, 2004
10
Regulatory Compliance
FCC Statement (U.S.A.)
This device complies with Part 15 of the FCC Rules. Operation is subject to the
following two conditions: (1) This device may not cause harmful interference, and
(2) this device must accept any interference received including interference that may
cause undesired operation.
Industry Canada Notice
This digital apparatus meets all requirements of the Canadian Interference-
Causing Equipment Regulations.
Cet appareil numérique respecte toutes les exigences du Règlement sur la
matériel brouilleur du Canada.
Œ
The Πmark on the product indicates that the system has been tested to, and
conforms with, the provisions noted within the 89/336/EEC Electromagnetic
Compatibility Directive.


www.silentwitness.com
Toll free: 1.888.289.2288
International toll free: 00800.2020.8080
Silent Witness Enterprises Ltd.
Sales: 1.888.289.2288 6554 - 176th Street
Tech Service:1.800.893.9513 Surrey, B.C. V3S 4G5
Phone: 1.604.574.1526 Canada
Fax: 1.604.574.7736
Email: [email protected]
Document 920.0092 Rev 2.02 March 11, 2004
Specifications subject to change without notice.
Imperial conversions are approximate.
Night Hawk® and Silent Witness® are registered trademarks of Silent Witness Enterprises
Ltd. © 2004 Silent Witness Enterprises Ltd. All rights reserved. Printed in Canada.
Table of contents
Other Silent Witness Security Camera manuals

Silent Witness
Silent Witness SWC40 Series User manual

Silent Witness
Silent Witness SW001 User manual

Silent Witness
Silent Witness SW010 User manual

Silent Witness
Silent Witness SW021 User manual

Silent Witness
Silent Witness SW2200 User manual

Silent Witness
Silent Witness SWX80 User manual

Silent Witness
Silent Witness Night Hawk SWX45 User manual

Silent Witness
Silent Witness MagnaView V28R User manual

Silent Witness
Silent Witness V25 ArmorDome User manual


