Silversphere Companion One Quick start guide

Staff Check with
Select Disable
Operational Manual
This guide explains how to properly use
your Staff Check feature.
Staff Check allows your community even
greater security for those residents in need
of special attention and care by helping to
enforce scheduled times at which your staff
should be checking up on your residents.
Staff check is also useful when enforcing
security rounds in common areas. Though
this guide primarily covers handling
residents, the procedure for checking
common areas is the same.
A schedule, congured at the
time of installation, varies
based on the needs of each
community. For questions
regarding your community’s schedule, see
your Tel-Tron certied coworker within
your community. If you do not have a
certied coworker on staff, please contact
Tel-Tron technical support at (386-523-1079).
Section 1:
How it works (Schedule)
The purpose of Staff Check is to remind
your staff that a resident or area within a
community needs to be regularly checked
upon, enforcing mandatory rounds.
Although your schedule may be different,
for the purpose of this guide, we will be
using the following example schedule.
10PM — 11PM 1st Staff Check period
11PM — 12AM 2nd Staff Check period
12AM — 1AM 3rd Staff Check period
1AM — 2AM 4th Staff Check period
2AM — 3AM 5th Staff Check period
3AM — 4AM 6th Staff Check period
4AM — 5AM 7th Staff Check period
5AM — 6AM 8th Staff Check period
6AM — 7AM 9th Staff Check period
This example schedule means staff are
expected to check up on residents once
every hour between the hours of 10 PM
and 7 AM. (9 Staff Check periods.)
Starting at 10PM, your system begins
tracking the activity of your Staff Check
feature in each room with Staff Check
enabled. If a staff member presses the Staff
Check button within the room (indicating
that they have been to the room), the
system keeps a tally. At 11PM, the system
compares the list of rooms that have been
checked upon to the list that are expected
to be checked upon. If any were missed, a
“Reminder” alert appears on the console
for each missed room reminding your staff
to perform a check immediately. Then the
system resets the tally and begins keeping
track for the next hour. In the example, this
procedure continues on the hour, every
hour, until the end of the scheduled Staff
Check period—in this case 7AM.
Operational Manual— Staff Check w/ Select Disable
©2012 Tel-Tron Technologies Corporation - Doc.SCSD.0212
Page 1
Companion One

Section 1 (continued):
How it works
(“Select Disable”)
It’s not uncommon that rooms using
the Staff Check feature also have motion
sensors in them. Select Disable is a part
of the Staff Check feature that disables
clearable alarms, such as a motion sensor,
in a room when a staff member presses the
Staff Check button.
This prevents unnecessary alarms from
appearing on your consoles and pagers
whenever a staff member performs
routine checks.
With Select Disable turned on
(configured at installation), whenever
a staff member presses the Staff Check
button within a room, a message
appears on your desk console that reads
“Staff In Room” for that room. This
tells your staff that all clearable alarms
— usually motion sensors — have
been disabled for a brief period while
someone is in the room.
When finished, your staff member
simply presses the Staff Check button
again to re-enable alarms. If that
person forgets to press the button
to re-enable alarms, the system will
automatically re-enable them after
a pre-configured amount of time—
usually 5 to 10 minutes.
Section 2:
Performing
Staff Checks
1) During your rounds, go
to the resident’s room and
press the check mark on the
Silversphere wireless device.
Operational Manual— Staff Check w/ Select Disable
©2014 Silversphere - Doc.SCSD.0214
Page 2
Companion One
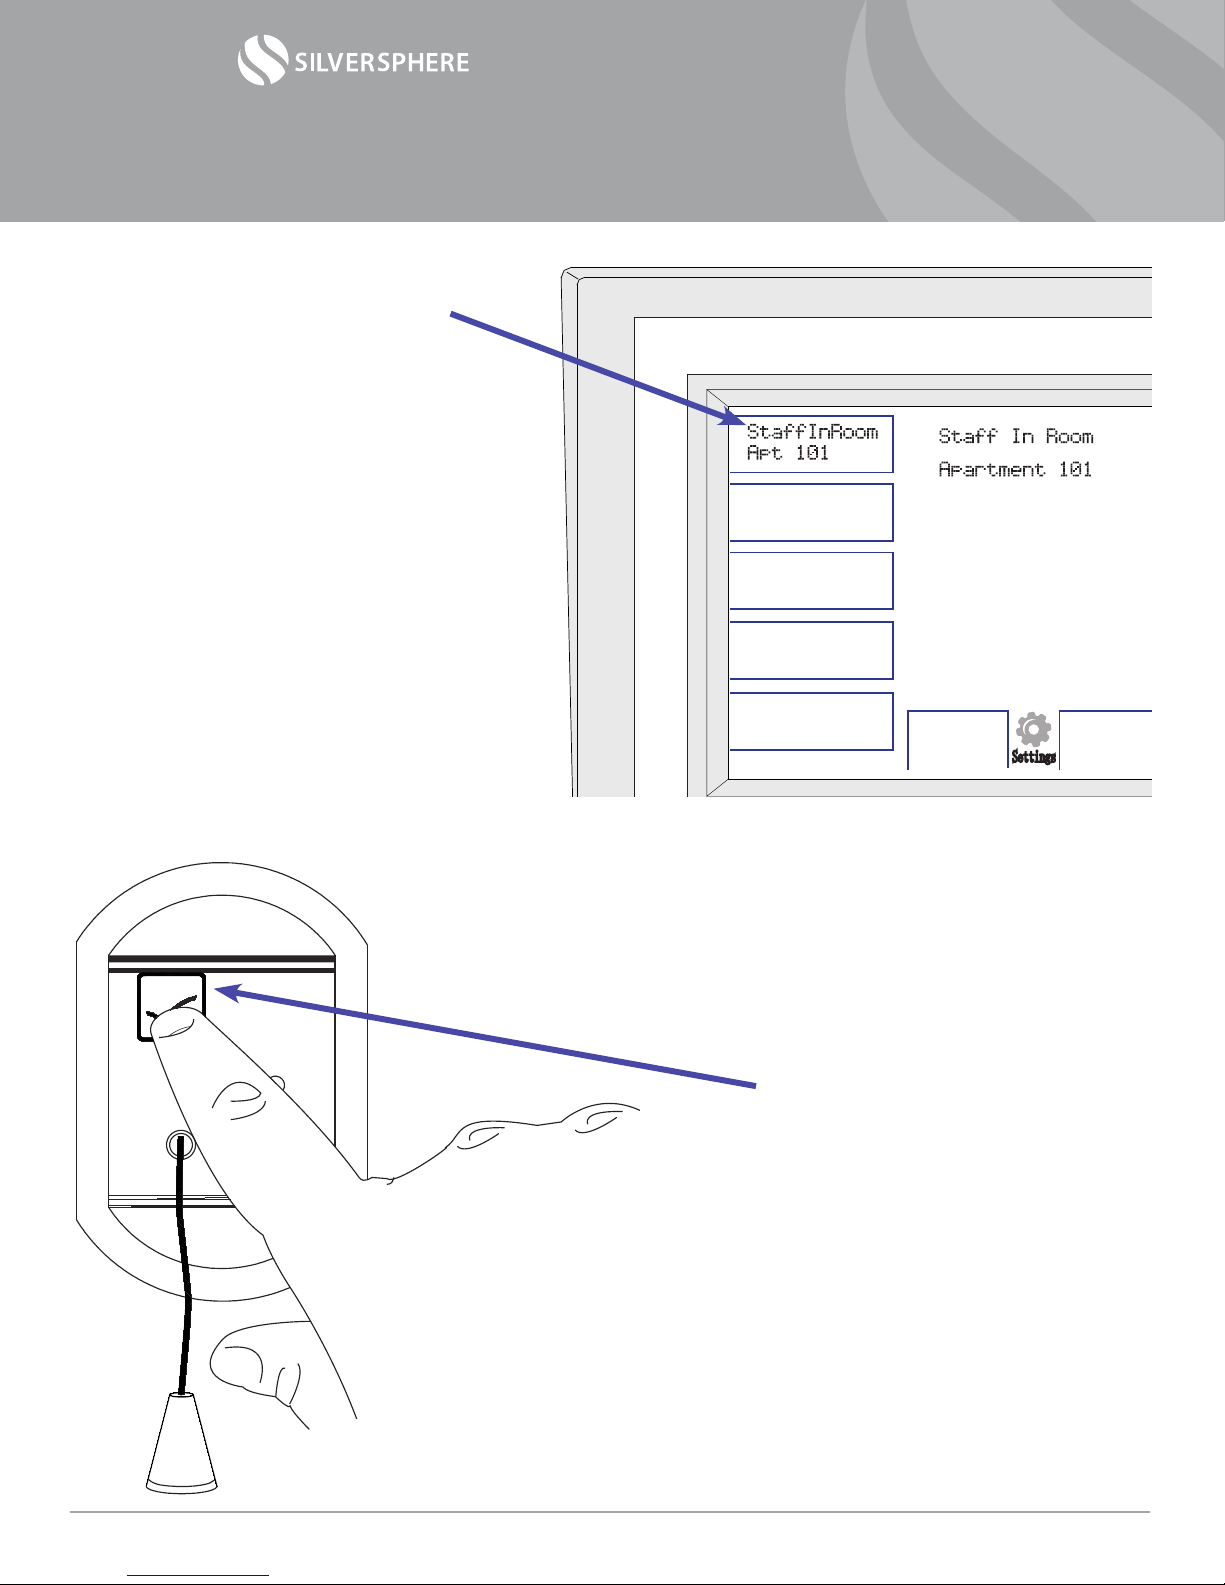
2) Your console will display the
message “Staff In Room” and
the room number you are
checking on.
This tells other staff members
that you are checking on the
resident in that room.
This also disables clearable
alarms from this room while
you are working in there.
3) Now that the alarms are on
hold, go about performing
whatever your expected duties
would be when checking in on
your residents.
4) When you are nished, press
the check mark button again
on your way out the door. This
will re-enable your alarms.
Note: If you forget to press
the button on the way out,
don’t worry. Your system is
programmed to re-enable
alarms automatically after
a predetermined amount of
time—usually between 5 and
10 minutes.
Settings
Operational Manual— Staff Check w/ Select Disable
©2014 Silversphere - Doc.SCSD.0214
Page 3
Companion One

Section 3:
Reminders and Missed
Staff Checks
If a room is missed during mandatory
rounds, you will see the alert “Reminder”
coupled with a room number appear
automatically on your console. This may also
create an audible alarm.
1) Silence the alarm by gently pressing
on the yellow alarm box, then pressing
“Silence Alarm” in the center
2) Go to the resident’s room and perform
the exact same steps as outlined in
Section 2: Performing Staff Checks.*
Settings
Each community has its own specic Staff Check schedule. For your own reference, write in your
community’s Staff Check schedule below.
1st Staff Check period: between ______ and ______ ( Example: between 10 PM and 11 PM )
2nd Staff Check period: between ______ and ______
3rd Staff Check period: between ______ and ______
4th Staff Check period: between ______ and ______
5th Staff Check period: between ______ and ______
6th Staff Check period: between ______ and ______
7th Staff Check period: between ______ and ______
8th Staff Check period: between ______ and ______
9th Staff Check period: between ______ and ______
10th Staff Check period: between ______ and ______
11th Staff Check period: between ______ and ______
12th Staff Check period: between ______ and ______
* “Reminder” alerts are cleared manually from
the console.
Operational Manual— Staff Check w/ Select Disable
©2014 Silversphere - Doc.SCSD.0214
Page 4
Companion One
Popular Office Equipment manuals by other brands

hushoffice
hushoffice hushtwin HUS-BX-019 Maintenance and safety manual

silen
silen Space 2 Assembly manual

Middle Atlantic Products
Middle Atlantic Products LD Series instruction sheet

SHFL
SHFL DECK MATE BLACKJACK Service manual

VITRA
VITRA Stefan Hürlemann Dancing Wall Assembly instructions

BISLEY
BISLEY Glide V2 Assembly instructions


