Simfer SM 5658 User manual

USER MANUAL
BEDIENUNGSANLEITUG
H10-20-300-206
GB
DE
DECORATIVE HOOD

G
B
2
Dear Customer,
Thank you for choosing this product. We aim to allow you to optimally and
efficiently use this environment-friendly product produced in our modern
facilities under precise conditions with respect to sense of qualityin total.
We advise you to read this user manual thoroughly before using the hood
and keep it permanently so that the features of the hood you have purchased
will stay the same as the first day for a long time and serve inan optimum
efficient way.
This product has been produced in modern environment-friendly
facilities without harmfully affecting the nature.
Complies with WEEE Regulations. No PCB Included.
Note: This Operating Manual is prepared for multiple models. Your
appliance may not feature some functions specified in the manual.
These functions are marked by the sign *.
WARNING: READ THE INSTRUCTIONS BEFORE TESTING OR
USING THIS DEVICE.

3
Ingredients
Safety instructions............................................................................4
General View ...................................................................................7
Accessories .......................................................................................8
Installation........................................................................................9
Control Panel ..................................................................................14
Dismounting, maintenance and cleaning.......................................18
Reduction of the environmental impact ........................................20
Transporting of the device .............................................................20
Service and spare parts ..................................................................21
Troubleshooting .............................................................................21
Packing Information .......................................................................22
Compliance with WEEE regulations and waste disposal................22

4
GB
SAFETY INSTRUCTIONS
1. It is recommended that the product be installedby
authorized persons. Installation by unauthorized persons
could lead to poor operation performance,damage to the
product, and accidents. The product willnot be covered by
the warranty.
2. Avoid connecting a chimney or air duct used to
exhaust smoke from appliances that use gas froman
electric cooker hood or other fuels (stove, boiler,
thermosiphon, etc.). This warning does not apply to uses
without flue.
3. Comply with the regulations of the authorities on the
discharge of outlet air. (not applicable for devices that
discharge air back into the room).
4. When the cooker hood is placed on a gas burning
device, the distance between the hob and the hood
should
be at least 65 cm. If a larger distance is specified
in the
installation instructions of the gas burning hobs,this value
should be taken into account.
5. While the hood is running, ensure fresh air can enter
the environment; especially when used at the same time
with gas baking ovens and solid and gas- fired appliances.
6. For your safety, use ”Max 6.A” fuses in the hood
installation.
7. Do not leave boiling oil on the stove. Pots that contain
boiling oil may catch fire by itself.

5
8. Do not operate the hood without using cookwares.
High heat may cause some parts of your product to deform
and cause fire.
9. The packages pose a danger to children. Never allow
children to play with packaging materials. Keep packaging
materials out of reach of children.
10.
Clean the oil trap aluminium filters regularly. Filters
pose
risk of fire due to accumulated grease deposits onthem.
11. Do not operate your product without filter, and donot
remove the filters when the product is in operation.Do not
use non-fire-resistant filtering materials insteadof the filter.
12. Flammable foods must not be cooked under the
appliance.
13. In case of any fire, de-energize the device. Coverthe
flames with a damp cloth or towel. Never use waterto put
out the flames.
14. Failure to comply with deadlines and periodic
instructions may result in a fire hazard.
15. This device should not be used by children,persons
with physical, sensory or mental abilities,persons lacking
experience or technical knowledge.Do not allow the
persons and children under custodyto use the product,
play with the product, to perform maintenance and
cleaning on the product.

6
GB
16. Kitchen hoods are designed for domestic use. They
should not be used for other purposes. May causevarious
accidents if used, the device is out of warranty
17. The electrical connection of the product must be
done to a grounded outlet.
18. Theelectricalconnectionshouldonlybemadeoncethe
installation of the appliance has been completed.
19. Before the installation, maintenance and cleaningof
the product, de-energize the device. (Unplug the device or
turn off the fuse).
20. It is forbidden to install the power cord near
equipment or materials that may come into contact with
heat and cause distortion. This may cause fire.
21. Avoid touching the lamps in your product when they
are operating for a long period of time. Since theywould be
hot, they could burn your hand.
22. Failure to install screws or fixing installationsin
accordance with these instructions may result in electrical
hazards.
23. Your device is manufactured in accordance with 220-
240 V 50 Hz AC AC power supply and requiresa fuse of
16 Amp. Should your electrical system differ from these
specified values, contact a licensed electrician or your
authorized service center.

7
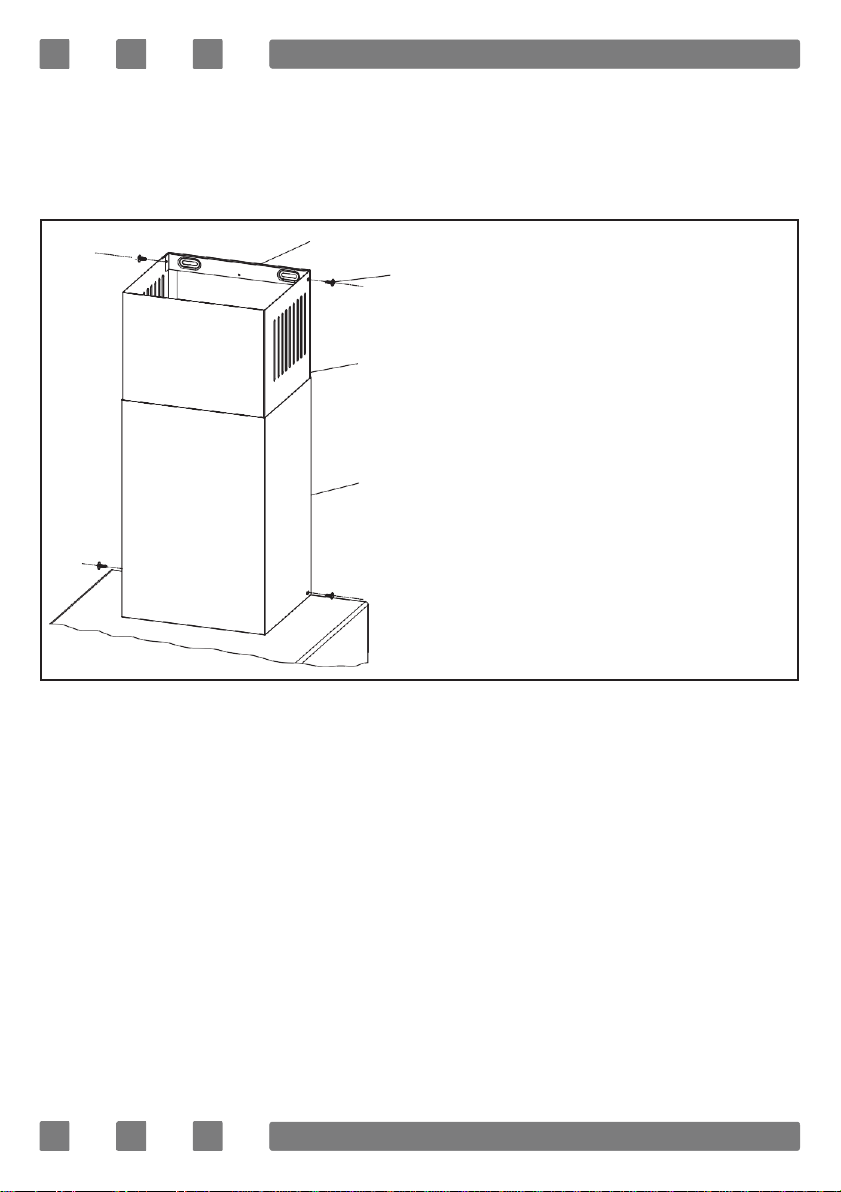
GENERAL VIEW
1
2
3
4
1
3
2
4
1
2
3
4
1
2
3
4
1. Flue 2. Body 3. Control Panel 4. Lightning
Note: Product images are representative. Product may vary in size and
model.

8
GB
ACCESSORRIES
Product body
Inner connection sheet
Ø10 Dowel - x 4
Ø5 x 50 - x 4
Ø3,9 x 30 - x 2
Ø6 Dowel - x 2
Flap - x 2
Ø3.5 x 9.5 Screw - x 4
150/120 mm Adapter - x 1
Printed documents
*
*
Mounting suspension plate - x 2 (option)
Suspension plate connection
bolt x 2 (option)

9
INSTALLATION
Mounting Distances
Distance between the cooker and the cooker hood must be considered prior
to assembly. The distance between the cooker and the cooker hoodshould be
at least 65 cm.
Electric Cooker Gas Cooker
Min. 65 cm Min. 65 cm
Figure 1

10
GB
Body Mounting
Attach the mounting template to the wall at the distance (65 cm) shownin
Figure 1. Drill through points A and C with Ø8 mm drill bit. At the B points,drill
the chimney mounting plate with a Ø6 mm drill bit, consideringthe distance to
the ceiling and the maximum length of the flue.
Attach Ø8 mm dowel (5) to points A and C. Attach Ø6 mm (8) anchors tothe
B points. Tighten the Ø5 x 50 mm screw (6) to the A points so that thedistance
between it and the wall is 5 mm. Attach the product body to thescrews at point
A and tighten the screws completely. Open the product cover and remove the
filters. Complete the body assembly by mounting Ø5 x 50 mm screws to the C
points (6).
Note: The suspension plate mounting shown in detail is optional. It
varies based on model.
Optional
Installatio
n
9
10
4
7
8
3
2
B
B
6
5
1
A
A
C
C

11
Carbon Filter Assembly
Open the product cover and take out the aluminum filter. (see figure 3) Turn
the
carbon filter in the direction of the arrow by pressing the sides. (see Fig. 4)
Figure 2 Figure 3 Figure 4
Flap Assembly
Attach flap tabs to points A as shown in Figure 5. Complete the assembly
process so that the nails remain on the upper surface as shown in Figure 6.
Adapter Mounting
Motor outlet diameter is 150 mm. If a connection with a 120 mm spiralhose
be required, the plastic adapter must be mounted on the body as shown in the
figure.
Carbon
filter
Flap
plastic
A
A
Figure 5
Figure 6
Figure 7
150 / 120mm
adapte
rBody
Figure 8
12
GB
Flue Installation
Fix the outer flue to the body from point A with Ø3.5 x 9.5 mm screw. Insert
the inner flue into the outer flue and fix it at the B points with Ø3.5x 9.5 mm
screws.
1
B
2
B
3
1. Chimney connection sheet x 1
2. Ø3.5 x 9.5 Screw - x 4
4
3. Inner Flue
4. Outer Flue
A
A
Figure 9

13
Air Outlet Connection
Air discharge can be done by flue connection (air discharge to the external
environment) or by filtering the air back to the environment (carbon filter).
Flue Connected Use
The absorbed air is delivered to a flue or outdoor environment
with the help of a pipe attached to the blowermotor outlet of
the hood in use with flue connection.
For flue-connected use, Ø150 mm or Ø120 mm spiral pipe and clamp must
be provided from an authorized service or service recommended point.
Note: It is recommended to make a pipe connection of Ø150 mm.
Flueless use
During flueless use, the air sucked by the activated carbon
filter mounted on the blower motor side parts or hood body
is filtered and returned to the environment.
WARNING: These parts are not included in the
productcontent and must be purchased.
WARNING:Incaseofinstallationconnectedtoachimney,
it is necessary to note all relevant warnings in the safety
and environmental instructions.
WARNING: Since carbon filters are optional parts, they
must be purchased from the service at an additional fee.
Never wash the carbon filter.

14
GB
CONTROL PANEL
Mechanic Appliance Control Panel*
Moto
r
off
Motor
1st speed
Motor
2nd speed
Motor
3rd speed
Light
On / Off
Touch Control Panel (Type 3)
Light 1st speed 2nd speed 3rd speed
Lamp: Turns the device lamp on and off. Key lighting is activated when
the lamp is on.
1st Speed: The engine of the device runs at speed level 1. Key lighteningis
activated on while the engine is running. Pressing this key for a long time
activates the timer function and the key lightening flashes. The device is
operated for 15 minutes at first speed level, the motor stops atthe end of this
period.
2nd Speed: The engine of the device runs at speed level 2. The key illumination
ofthespeedkeyslightsup whenthe engineis running.Pressingthis key for a long
time activates the timer function. The lighting of the 1stand 2nd speed keys
flashes. The device is operated for 15 minutes at thesecond speed level, the
motor stops at the end of this period.
3rd Speed: The engine of the device runs at speed level 3. The key illumination
of the speed keys lights up when the engine is running. Pressing this key for a
long time activates the timer function and the
lightening of the speed keys
flashes. The device is operated for 15 minutes
at the third speed level, the motor
stops at the end of this period.

15
Automatic power-off: Should the appliance be left on, the appliance motorand
itslightingareswitchedoffaftera maximumof 5 hours and the lightinglamp after
a maximum of 10 hours to ensure safety and energy saving.

16
GB
Touch Control Panel (Type 1)
ON / OFF Speed (+) Digital screen Speed (-) Light
ON / OFF: Starts the motor. The engine initially runs at speed level 1. Speed
(+): Increases the speed of the motor. Maximum 3rd speed level.Speed (-):
decreases the speed of the motor. Minimum 1st speed level.
Lamp: Turns the light on and off. When the lamp is on, the point symbol
appears on the screen.
Timer: It activates when the lamp key is held down for 3 seconds. The device
starts to flash at the current speed level. The device switches off after 15
minutes.
Air Cleaning: Activates when the air purge key is pressed with the remote
control. The screen symbols start to rotate while the engine is running. The
system then shuts down automatically. The cycle is valid for 24 hoursonly.
Filter Warning: A 'C ’ warning appears on the screen at the end of the 100-
hour engine run time. Press and hold the speed minus (-) key for 5 seconds
whiletheproductisclosed.The'E' symbolappearsonthedisplay.This will delete
the alert and reset the time. The filter fullness warning appears for 2 seconds
when the ON/OFF key is pressed. This warning will not be shown in revolution
changes.
Automatic Power-off: For safety purposes, the circuit board is programmedto
turn off the engine for a maximum of 5 hours and the lighting for a maximum
of 10 hours. The engine shutdown feature is disabled when the air purge
function is activated.

17
Touch Control Panel (Type 5)
ON / OFF Light 1st led Speed (+/-) 2nd led 3rd led 4th led 5th led
ON / OFF: Starts the motor. The engine initially runs at speed level 1.
Lamp:
Turns the light on and off. 1
st
led is activated when the lamp is on.
Transfer (+/-): Increases speed when the engine is running. In case of
pressure on the motor at the last speed, the motor returns to the first
speed.
Timer: It is activated when the engine ON / OFF button is pressed for 3
seconds. The device is activated for 15 minutes at the current speed. Atthe end
of this period, the product is deactivated. The motor led that is active during
operation flashes.
Air Cleaning: Function is activated when the air purge key is pressed with the
remote control. The engine runs for 10 minutes at the first speedlevel and
remains on stand by for 50 minutes. This cycle continues for 24 hours. When
this function is working, only the ON / OFF button led starts blinking. The
system later shuts down automatically. The cycle is valid for 24 hours only.
Automatic Power-off: For safety purposes, the circuit board is programmedto
turn off the engine for a maximum of 5 hours and the lighting for a maximum
of 10 hours. The engine shutdown feature is disabled when the air purge
function is activated.
Speed Leds:
2nd Led: It is activated when the engine is running at the speed level 1.3rd Led:
It is activated when the engine is running at the speed level 2.4th Led: It is
activated when the engine is running at the speed level 3.5th Led: It is
activated when the engine is running at the speed level 4.

18
GB
DISMOUNTING, MAINTENANCE AND CLEANING
You can dismount the unit for maintenance purposes and for disposal.
Follow the steps below to do this:
1. disconnect the unit from the power supply by pulling out the plug or turning
off the the power socket, e.g. by removing the fuse.
2. if available, loosen the screws of the shaft and dismantle it.
3. pull out the mains plug if necessary
4. remove the recirculation accessories (hose, clamps, air recirculation
diverter, etc.)
5. remove the hood from the wall. It is recommended that this process is done
by two people.
1. Pay attention to clean the appliance, especially immediately after cooking
fried foods.
2. It is sufficient to use a soft cloth soaked in liquid detergent to clean
the exterior of the unit.
3. Never use abrasive or scratching products for cleaning.
4. In order to preserve the surface quality of the unit, avoid using cleaning
agents containing methylated spirits, bleach and abrasive powder when
cleaning. On stainless surfaces; use special cleaning spray used for damp,soapy
cloths or preferably stainless surfaces.
WARNING: Prior to each maintenance and cleaning, the
unitmustbeunpluggedorthefusetowhichitisconnected
must be disconnected.
WARNING: Without periodic cleaning, there is a risk of
fire and loss of yield.

19
Aluminum Filter Cleaning
The filter helps to keep the oil particles in the air. It is recommended to clean
your filter within 1 month for normal use. Wash and rinse the filters in the
dishwasher or in water with liquid detergent and replace after drying.
WARNING: When washed in aluminum filters,
discolorationcan be observed. This is normal, you don't
need to changeyour filters.
WARNING: If thealuminum filteris notcleaned periodically,
the oil accumulated on it creates a risk of fire.

20
GB
Aluminum Filter Removal
Pull the aluminum filter towards you by pressing
it down as shown in figure 10. Reverse the
process to install the filter.
Note: Avoid bending the aluminum filter to
prevent damage.
REDUCTION OF THE ENVIRONMENTAL IMPACT
•During cooking, make sure that there is sufficient air supply so that
the cooker hood can work efficiently and with low operating noise.
•Adjust the operating level to the amount of steam produced during
cooking. As the working level is lower, less energy is consumed.
•Switch off the cooker hood and the lighting when you no longer need them.
•Clean the filter at regular intervals and replace it if necessary to increase
the effectiveness of the ventilation system and avoid fire hazards.
TRANSPORT THE DEVICE
Save the original packaging of the device. Transport the device in its
original packaging, follow the transport markings on the packaging.
If the Original Package of the Device Is Not Available;
Avoid putting weight on the device.
Protect the outer surface from impacts.
Carry the device by packing it in such a way that it is not damaged.
Figure 10
Table of contents
Languages:
Other Simfer Ventilation Hood manuals


Popular Ventilation Hood manuals by other brands


ELICA
ELICA Atlantis EAT-E36ASX Use, care and installation guide

Thor Kitchen
Thor Kitchen HRH3006-BS Installation guide and user's manual
 Pte Ltd. CH-AG30-A Use and care guide")
Casa (S) Pte Ltd.
Casa (S) Pte Ltd. CH-AG30-A Use and care guide

Pelgrim
Pelgrim PSK1086 manual

Zigmund & Shtain
Zigmund & Shtain K 333.41 S Use and installation manual

Morgan
Morgan MDH-922OC user manual


