manuals.online logo
Brands
  1. Home
  2. •
  3. Brands
  4. •
  5. Simrad
  6. •
  7. Accessories
  8. •
  9. Simrad PI TWIN SPREAD - QUICK REFERENCE GUIDE REV B User manual

Simrad PI TWIN SPREAD - QUICK REFERENCE GUIDE REV B User manual

A
B
CD
(CD11207A)
Quick reference guide
PI Twin Spread sensor
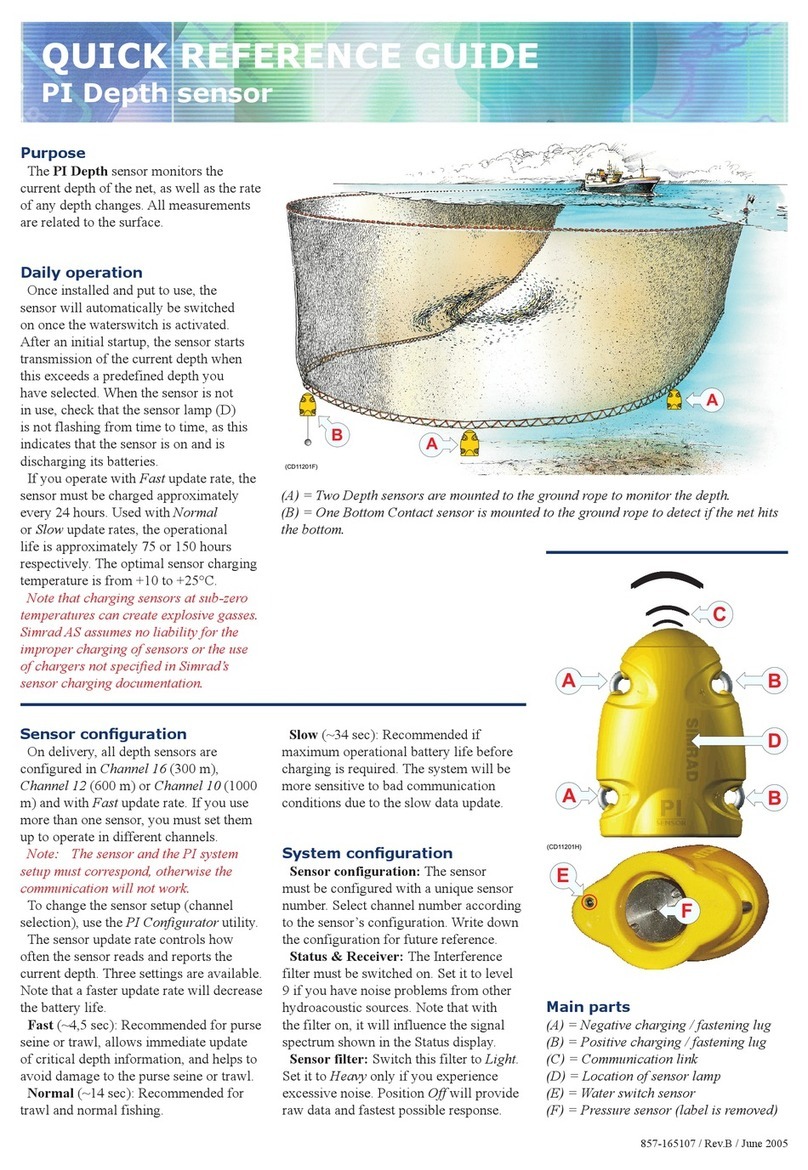
Purpose
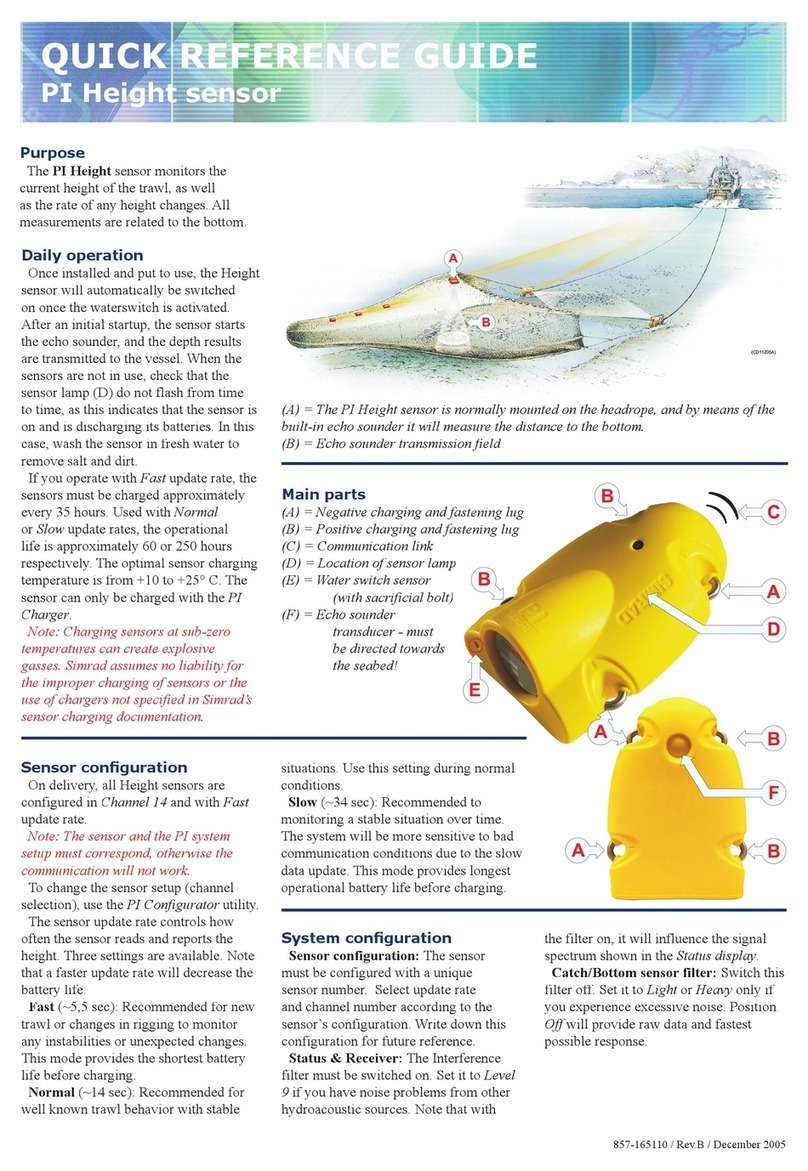
The PI Twin Spread is used with two
Remote sensors to measure the physical
distance between the trawl doors during
twin trawl operations.
(A) = The PI Twin Spread sensor
communicates with the PI system
on the vessel.
(B) = The PI Twin Spread sensor
is mounted on the port trawl
door.
(C) = One PI Remote sensor is
mounted on the center clump.
(D) = One PI Remote sensor is
mounted on the starboard trawl
door.
Daily operation
Once installed and put to use, the
Twin Spread sensor will automatically
be switched on once the waterswitch is
activated. After an initial startup, the sensor
starts interrogating the Remote sensors
to measure the two distances. The results
are transmitted to the vessel. When the
sensors are not in use, check that the sensor
lamps (D) do not flash from time to time,
as this indicates that the sensor is on and is
discharging its batteries. In this case, wash
the sensor in fresh water to remove salt and
dirt.
If you operate with Fast update rate, the
sensors must be charged approximately
every 24 hours. Used with Normal or
Slow update rates, the operational life is
approximately 48 or 70 hours respectively.
For the Remote sensors, the batteries will
last approximately 50, 100 and 150 hours
respectively. The optimal sensor charging
temperature is from +10 to +25° C.
Note that the two rubber inserts provided
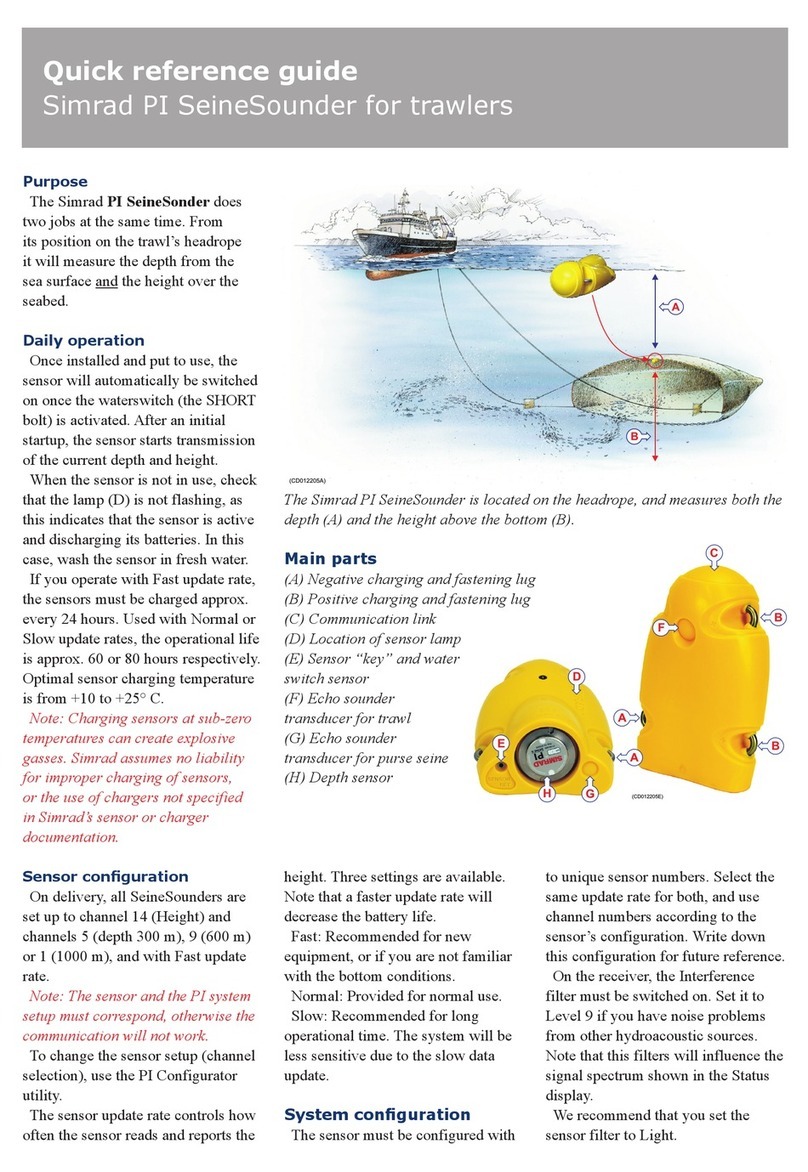
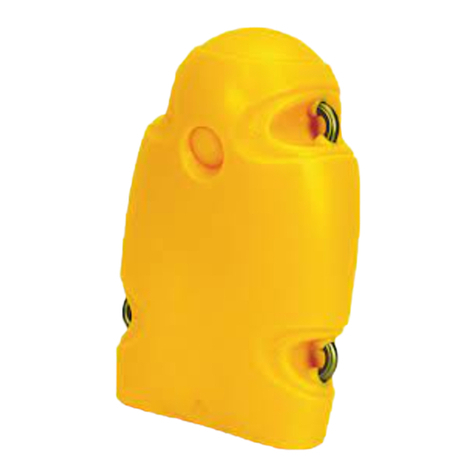
Main parts
(A) = Negative charging and fastening lug
(B) = Positive charging and fastening lug
(C) = Communication link to the vessel
(D) = Location of sensor lamp (rear side of
PI Spread)
(E) = Water switch sensor
(F) = Transverse communication links to
the two Remote sensors
at the bottom of each sensor adapter must
not be replaced with any other types or
designs. It is essential that these inserts
provide a secure cradle for the sensors,
but they must also allow for free water
circulation to allow the sensor’s water
switch to engage. Also, the design of the
inserts allows sand and mud to flow out
when the trawl doors are pulled up from
the water.
Note: Charging sensors at sub-zero
temperatures can create explosive gasses.
Simrad AS assumes no liability for the
improper charging of sensors or the use of
chargers not specified in Simrad’s sensor
charging documentation.
Sensor configuration
You can operate two sets of Twin Spread
sensors, these sets are identified as Twin
Spread 1 and Twin Spread 2.
• Twin Spread 1 uses two Remote
sensors: Remote 1 and Remote 3.
• Twin Spread 2 uses two Remote
sensors: Remote 2 and Remote 4.
On delivery, all Twin Spread sensors are
configured as Twin Spread 1 in Channels
2 and 7, with Fast update rate, and for
use with Remote sensors 1 and 3. The
four Remote sensors can be ordered pre-
programmed from Simrad, but if you wish
to use a Twin Spread 2 set-up you must re-
configure a Twin Spread 1 sensor using the
PI Configurator utility.
))
A
C
B
F
(CD11207B)
B
A
DD
E
D
Note: The Twin Spread sensor and the
PI system setup must also correspond,
otherwise the communication will not work.
The sensor update rate controls how often
the sensor reads and reports the door spread.
Three settings are available. Note that a
faster update rate will decrease the battery
life.
Fast (~5,5 sec): Recommended for new
trawl or gear or changes in rigging to
monitor any instabilities or unexpected
changes. This mode provides the shortest
battery life before charging.
Normal (~14 sec): Recommended for
well known trawl, gear and door behavior
with stable situations. Use
this setting during normal
conditions.
System configuration
Sensor configuration: The sensor must
be configured with a unique sensor number.
Select channel number and update rate
according to the sensor’s configuration.
Write down the configuration for future
reference.
Status & Receiver: The Interference
filter must be switched on. Set it to level
9 if you have noise problems from other
hydroacoustic sources. Note that with
the filter on, it will influence the signal
spectrum shown in the Status display.
Sensor filter: Switch this filter to Light.
Set it to Heavy only if you experience
excessive noise. Position Off will provide
raw data and fastest possible response.
Numerical
presentation
On the PI display, the
distances between the
trawl doors are displayed
in the numeric display.
Two rectangles are
used, one for each distance. If
the distance is increasing or
decreasing, this is shown with
two arrows and the variation in
meters per minute.
When the readings are stable, the digits
are shown in black colour. When the values
are predicted, the digits are grey, and if the
contact is lost, the characters **.* are shown
in grey. The characters ±±.± indicate that
the Twin Spread sensor has lost contact with
the Remote sensor(s), while characters ???
means that the Remote sensors are out of
range.
(A) = Twin Spread sensor set up as sensor
no.1.
(B) = The distancea are measured in meters.
(C) = Current distance between the port
door and the center clump.
Mounting
The Spread and Remote sensors must
be mounted in special adapters on each
trawl door and on the centre clump. These
adapters must be installed aforehand.
Detailed information on how to install the
adapters are provided with the installation
kit.
Installation principle
The PI Twin Spread sensor is mounted
on the port door. One PI Remote sensor is
mounted on the center clump, while the
other Remote sensor is mounted on the
starboard door. It is essential that there is
a clear line of sight between the transverse
communication “eyes” (one on each sensor),
and between the top of the PI Twin Spread
sensor and the hydrophone on the vessel.
1
0.5
S1 [m]
S3 [m]
34.5
68.9
A B CEE D


F
G
H
(CD11101T)
(D) = The distance is increasing by 1 meters
per minute.
(E) = Arrows pointing “out” means that the
distance is increasing. Arrows pointing “in”
means that it is decreasing.
(F) = Graphic alarm
(G) = Indicator, lit for every sensor
interrogation.
(H) = Interference symbol.
The bottom numeric display shows the
distance from the port door to the starboard
door, and indicates that the distance
decreases with 0.5 m per minute.
B
D
C
F
E
A
(CD11207C)
(A) = Port trawl
(B) = Starboard trawl
(C) = Port door
with the PI Twin
Spread sensor
mounted in an
adapter. One acoustic
communication
link is directed
forward towards the
vessel, while two are
directed towards the
two Remote sensors.
(D) = Center clump
with one Remote sensor
(E) = Starboard door
with the other Remote
sensor
(F) = Forward
857-165224 / Rev.B / October 2005
Slow (~34 sec): Recommended to
monitoring a stable situation over time,
focus on door not falling over, broken sweep
lines etc. during the tow. The PI system will
be more sensitive to bad communication
conditions due to slow data update. This
mode provides longest operational battery
life before charging.

This manual suits for next models

1

Other Simrad Accessories manuals

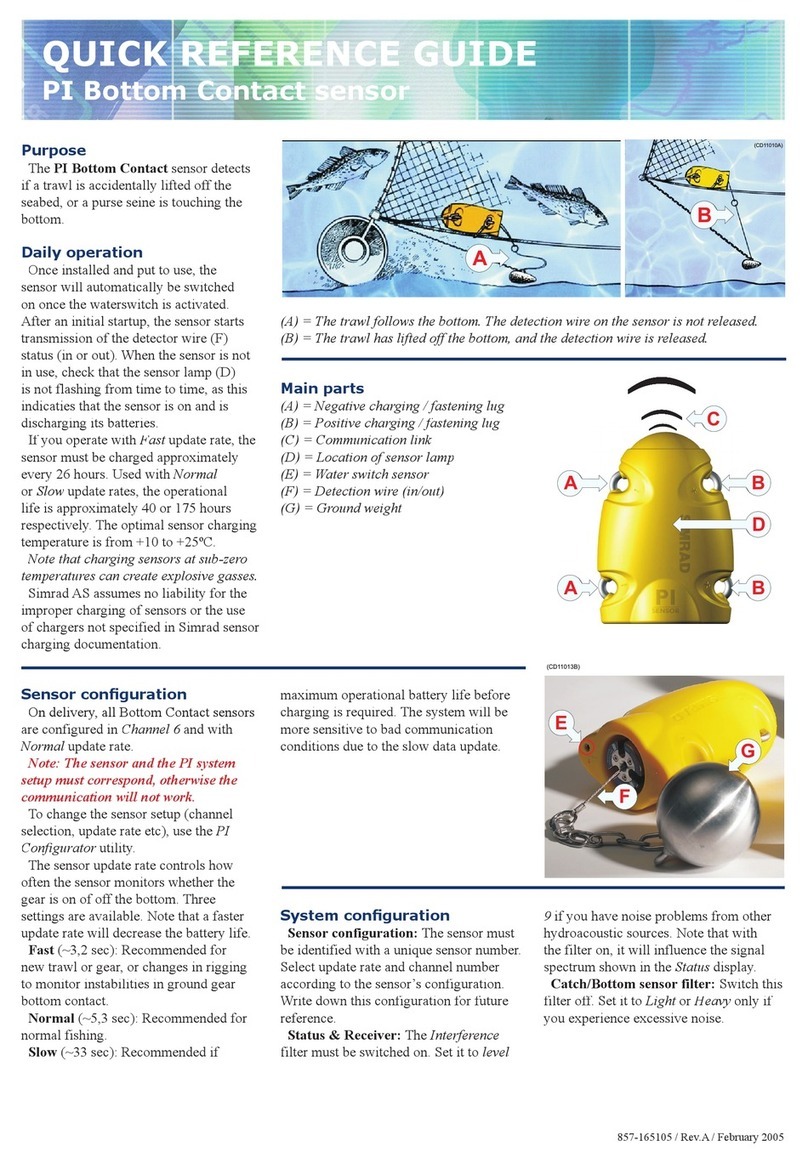
Simrad PI DEPTH User manual

Simrad

Simrad PI DEPTH User manual

Simrad PI SEINESOUNDER - REV D User manual

Simrad

Simrad PI SEINESOUNDER - REV D User manual

Simrad MOUNTING RING COMBI-W-38-200 - SCHEMA REV A User manual

Simrad

Simrad MOUNTING RING COMBI-W-38-200 - SCHEMA REV A User manual

Simrad PI SeineSounder User manual

Simrad

Simrad PI SeineSounder User manual

Simrad HS50 User manual

Simrad

Simrad HS50 User manual

Simrad PI DEPTH - MANUAL 2 User manual

Simrad

Simrad PI DEPTH - MANUAL 2 User manual

Simrad PI HEIGHT - DATASHEET REV A User manual

Simrad

Simrad PI HEIGHT - DATASHEET REV A User manual

Simrad PI DEPTH -  GUIDE 2 User manual

Simrad

Simrad PI DEPTH - GUIDE 2 User manual

Simrad PI REMOTE - QUICK REFERENCE GUIDE REV B User manual

Simrad

Simrad PI REMOTE - QUICK REFERENCE GUIDE REV B User manual

Simrad PI BOTTOM CONTACT - QUICK REFERENCE GUIDE REV... User manual

Simrad

Simrad PI BOTTOM CONTACT - QUICK REFERENCE GUIDE REV... User manual

Simrad PI32 User manual

Simrad

Simrad PI32 User manual

Simrad PI32 User manual

Simrad

Simrad PI32 User manual

Simrad PI GEOMETRY - QUICK REFERENCE GUIDE REV B User manual

Simrad

Simrad PI GEOMETRY - QUICK REFERENCE GUIDE REV B User manual

Simrad PI DEPTH User manual

Simrad

Simrad PI DEPTH User manual

Simrad PI SeineSounder User manual

Simrad

Simrad PI SeineSounder User manual

Simrad PI TEMPERATURE - QUICK REFERENCE GUIDE REV B User manual

Simrad

Simrad PI TEMPERATURE - QUICK REFERENCE GUIDE REV B User manual

Simrad PI CATCH - QUICK REFERENCE GUIDE REV A User manual

Simrad

Simrad PI CATCH - QUICK REFERENCE GUIDE REV A User manual

Simrad PX MultiSensor User manual

Simrad

Simrad PX MultiSensor User manual

Simrad PI GEOMETRY User manual

Simrad

Simrad PI GEOMETRY User manual

Simrad PI RIP - QUICK REFERENCE GUIDE REV B User manual

Simrad

Simrad PI RIP - QUICK REFERENCE GUIDE REV B User manual

Simrad PI GEOMETRY - QUICK REFERENCE GUIDE REV B User manual

Simrad

Simrad PI GEOMETRY - QUICK REFERENCE GUIDE REV B User manual

Simrad PI50 -  REV A User manual

Simrad

Simrad PI50 - REV A User manual

Simrad PI CATCH - DATASHEET REV A User manual

Simrad

Simrad PI CATCH - DATASHEET REV A User manual

Simrad PI BOTTOM CONTACT - DATASHEET REV A User manual

Simrad

Simrad PI BOTTOM CONTACT - DATASHEET REV A User manual

Popular Accessories manuals by other brands

Nonstop UV Station quick start guide

Nonstop

Nonstop UV Station quick start guide

Intermatic AG4803C installation instructions

Intermatic

Intermatic AG4803C installation instructions

Asgard POWER BANK LEGEND 8000 MAH quick start guide

Asgard

Asgard POWER BANK LEGEND 8000 MAH quick start guide

BEA MAGIC SWITCH MS21H quick start guide

BEA

BEA MAGIC SWITCH MS21H quick start guide

aci DRN3.1 Installation and operation instructions

aci

aci DRN3.1 Installation and operation instructions

Shure UA888 user guide

Shure

Shure UA888 user guide

Gamko E1/22MU user manual

Gamko

Gamko E1/22MU user manual

eufy Security T8213 quick start guide

eufy Security

eufy Security T8213 quick start guide

Optea RFX B user manual

Optea

Optea RFX B user manual

Elsner KNX LW Series Technical specifications and installation instructions

Elsner

Elsner KNX LW Series Technical specifications and installation instructions

Badger Meter SDI Series user manual

Badger Meter

Badger Meter SDI Series user manual

Radial Engineering EDU-DI Build instructions

Radial Engineering

Radial Engineering EDU-DI Build instructions

MOTU Audio Express user guide

MOTU

MOTU Audio Express user guide

AKCP Thermal Map manual

AKCP

AKCP Thermal Map manual

Pfannenberg DTS 3641 quick guide

Pfannenberg

Pfannenberg DTS 3641 quick guide

ibis Single InteliSocket IS-301 quick start guide

ibis

ibis Single InteliSocket IS-301 quick start guide

Heatcraft Refrigeration Products Unit Coolers H-IM-UC Installating and operation manual

Heatcraft Refrigeration Products

Heatcraft Refrigeration Products Unit Coolers H-IM-UC Installating and operation manual

PHOENIX MANUFACTURING Aerocool Pro Series owner's guide

PHOENIX MANUFACTURING

PHOENIX MANUFACTURING Aerocool Pro Series owner's guide

manuals.online logo
manuals.online logoBrands
  • About & Mission
  • Contact us
  • Privacy Policy
  • Terms and Conditions

Copyright 2025 Manuals.Online. All Rights Reserved.