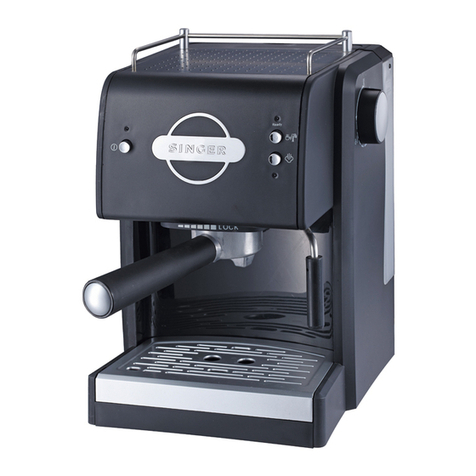
Singer ES-850B User manual

ES-850B
Espresso-cappuccino machine
Καφετιέρα espresso-cappuccino
Кафемашина за еспресо икапучино
GB
INSTRUCTION MANUAL
GR
ΒΙΒΛΙΟ ΟΔΗΓΙΩΝ
BG
ИНСТРУКЦИИ ЗА ЕКСПЛОАТАЦИЯ

2
ENGLISH
IMPORTANT SAFEGUARDS
• Please read these instructions carefully before use the appliance
and save it for future reference.
1. This appliance can be used by children aged from 8
years and above if they have been given supervision or
instruction concerning use of the appliance in a safe way
and if they understand the hazards involved. Children
shall not play with the appliance. Cleaning and user
maintenance shall not be made by children unless they
are older than 8 and supervised. Keep the appliance and
its cord out of reach of children aged less than 8 years.
2. The appliance can be used by persons with reduced
physical, sensory or mental capabilities or lack of
experience and knowledge if they have been given
supervision or instruction concerning use of the appliance
in a safe way and understand the hazards involved.
3. The appliance is not intended for use by persons
(including children) with reduced physical, sensory or
mental capabilities, or lack of experience and knowledge,
unless they have been given supervision or instruction
concerning use of the appliance by a person responsible
for their safety. Children should be supervised to ensure
that they do not play with the appliance.
4. Do not immerse the supply cord, plug, or appliance itself
in water or any other liquids.
5. Never let the machine operate while unattended.
6. The supply cord should be regularly examined for signs
of damage. If the supply cord is damaged, it must be
replaced by the manufacturer, its service agent or similarly
qualified persons in order to avoid a hazard.
7. Do not operate the appliance with a damaged cord or plug,

3
ENGLISH
or after the appliance malfunctions, or has been damaged
in any manner, return appliance to the nearest authorized
service agent for examination, repair or adjustment.
8. This appliance is intended for household use and similar
applications such as:
– staff kitchen areas in shops, offices and other working
environments;
– farm houses;
– by clients in hotels, motels and other residential type
environments;
– bed and breakfast type environments.
9. Only use the machine for its intended household purposes
in accordance with these instructions.
10. Make sure your mains voltage corresponds to that
specified on the appliance before plugging in. The
appliance must be connected to an earthed mains safety
socket.
11. Do not use the appliance with a damaged socket-outlet.
12. Never use the appliance outdoors and always place it in a
dry environment.
13. Unplug
- Before filling with water.
- Before cleaning.
- After use.
14. Never use the appliance near hot surfaces.
15. Make sure the cord never comes into contact with the hot
parts of the appliance.
16. Never move the appliance by pulling the cord. Do not wind
the cord around the appliance or twist it.
17. Stand the appliance on a stable, flat surface.
18. Only use fresh and cold water. Do not use water contained
in bathtubs, washbasins or other reservoirs.

4
ENGLISH
19. Never put too fine ground coffee or use torn pods in the
appliance, as this causes it to become blocked.
20. Never remove the filter holder whilst coffee is brewing
or the coffee and steam button is pressed down, steam
could shoot out and burn you.
21. Don’t get burnt by:
- Hot parts, including the steam/hot water nozzle, cup
warming tray, filter holder and boiler outlet.
- Steam or hot water coming out of the steam/hot water
nozzle or boiler outlet.
22. Never fill the water tank above the MAX level marked.
Never use the machine when water overflow.
23. Never use without water, the pump will burn out. If you
have a programmable appliance, make sure to fill it with
water before programming it.
24. Always set any control to “off” before unplugging from
the socket-outlet.
25. Make sure the ambient temperature is at least 10°C,
otherwise the appliance does not function properly.
26. Do not use the machine at altitudes higher than 2200
metres above sea level.
27. Never use without the drip tray and cup stand.
28. Never use accessories which are not recommended by
the producer. They could constitute a danger to the user
and risk to damage the appliance.
29. Do not forget that the temperature of the coffee prepared
is high. Handle with care your jug to avoid any risk of
scald.
30. Make sure cool down before cleaning or storing the
appliance.

5
ENGLISH
SERVICE & REPAIR
1. For service or repair under warranty, please contact the authorized service
company that is mentioned on the guarantee card and accompanies the
product.
2. Do not operate any product with a damaged cord or plug. If the supply
cord is damaged, return the appliance to a SINGER service center for
examination, repair or adjustment. Do not attempt to dismantle any part of
the appliance. This should only be done at an authorized SINGER service
center.
3. The partial or total non-respect of the safety instructions in the present
instruction manual will automatically release Singer of any type of
responsibility in case of malfunction of the machine or injuries to persons
or animals.
4. In case of manipulation, repairing or any modification of the machine
made by unqualified persons or in case of improper use, the guarantee
will be automatically cancelled.

6
ENGLISH
KNOW YOUR COFFEE MAKER
A. ON/OFF Power switch
B. Coffee/Steam selector
C. Pump control switch
D. Steam control knob
E. Water tank cover
F. Water tank transparent
G. Top cover
H. Steam wand
I. Froth device
J. Main body
K. Removable shelf/Cups stand
L. Steel mesh
M. Metal funnel
N. Drip tray
O. Metal funnel handle
P. Measuring spoon and tamper
Q. Filter for 2 cups dose
R. Filter for 1 cup dose
P
QR

7
ENGLISH
BEFORE THE FIRST USE
To ensure the first cup of coffee tastes excellent, you should rinse the coffee
maker with warm water as follows:
1. Pour water into water tank, the water level should not exceed the “MAX”
mark in the water tank. Then place the water tank cover.
Note: the appliance is supplied with a detachable tank for easy cleaning,
you can fill the tank with water firstly, and then put the tank into the
appliance.
2. Set steel mesh into metal funnel (no coffee in steel mesh).
3. Place a jug on removable shelf. Make sure the steam control knob is on
the OFF position.
Note: the appliance is not equipped with jug, please use your own jug or
coffee cup.
4. Connect to power source. Press the power button “ ” one time, the red
indicator is light up.
5. Press the pump control switch to the “ ” position, the pump will pump
water. When there is water flowing out close the pump by pressing the
pump control switch to “ ”, press the coffee/steam selector to the
“” position and wait for a moment. The appliance begins to be pre-
heated until the inner lamp of pump control switch is illuminated, it shows
the pre-heating is finished. Press the pump control switch to “ ” position
again, and water will flow out.
6. After water does not drop out any more, you can pour the water in container
out then clean them thoroughly. Now you can start coffee brewing.
Note: There may be noise when pumping the water for the first time, it is
normal, the appliance is releasing the air inside. After about 20s, the noise
will disappear.
PRE-HEATING
To make a cup of good hot Espresso coffee, we recommend you preheating
the appliance before making coffee, including the funnel, filter and cup, so that
the coffee flavour cannot be influenced by the cold parts.
1. Remove the detachable tank and open the tank cover to fill it with desired
water. Τhe water level should not exceed the “MAX” mark in the tank.
Then place the tank into the appliance properly.
2. Select the two cup mesh, set steel mesh into metal funnel. Make sure that

8
ENGLISH
the handle of the funnel aligns with groove in the appliance, then insert
the funnel into the appliance from the “Insert” position. You can fix them
into coffee maker firmly through turn it anticlockwise until it is at the “Lock”
position.
3. Place an espresso cup on removable shelf.
4. Then connect the appliance to power supply. Make sure the steam control
knob is on the OFF position.
5. Press the power button “ ” one time, the red indicator is illuminated,
press the coffee/steam selector on the “ ” position. Press the pump
control button on the “ ” position, when there is water flowing out, close
the pump immediately. The purpose of the step is to pump the water of the
tank into the housing.
6. When the lamp in pump control switch is illuminated, you should press the
pump control switch on the “ ” position again, there will be hot water
flowing out. When the lamp it is extinguished, close the pump. The pre-
heating is finished.
MAKE ESPRESSO
1. Remove the funnel by turning it in clockwise. Add ground coffee to steel
mesh with measuring spoon, a spoon ground coffee powder can make
about a cup of top-grade coffee, then press the ground coffee powder
tightly with the tamper.
2. Set steel mesh into metal funnel. Make sure that the handle of the
funnel aligns with groove in the appliance, then insert the funnel into the
appliance from the “Insert” position. You can fix them into coffee maker
firmly through turn it anticlockwise until it is at the “Lock” position.
3. Pour hot water in the cup. Then place the hot cup on removable shelf.
4. At the time, the lamp in pump control switch shall be illuminated, if it is
extinguished, wait for a moment. Once the lamp in it is illuminated, you
should press the pump control switch on the “ ” position, wait for a
moment, there will be coffee flowing out.
Note: During operation, if the indicator is extinguished, you must close
the pump and stop to make espresso coffee. After a few seconds, if the
lamp is illuminated again, you can make espresso coffee continued by
pressing pump control switch to “ ” position, the lamp is cycle on and

9
ENGLISH
off to maintain the water temperature is hot enough.
WARNING: Do not leave the coffee maker unattended during making the
coffee, as you need operate manually sometimes!
5. After finishing making the coffee, you can take the metal funnel out
through turn clockwise, then pour the coffee residue out with the steel
mesh pressed by press bar.
6. Let them cool down completely, then rinse under running water.
MAKE CAPPUCCINO/FROTHED MILK
1. Prepare espresso first with big container enough according to the part
“MAKE ESPRESSO COFFEE”, make sure that the steam control knob is
at the “o” position.
2. Press the coffee/steam selector to the “ ” position, the lamp in the
pump control switch will be illuminated, wait for until the indicator in the
coffee/steam selector is illuminated.
Note: During operation, the indicator in the coffee/steam selector will
cycle on and off to maintain to desired temperature.
3. Fill a jug with about 100 ml of milk for each cappuccino to be prepared.
You are recommended to use whole milk at refrigerator temperature (not
hot!).
Note: In choosing the size of jug, it is recommended the diameter is not
less than 70±5mm, and bear in mind that the milk increases in volume by
2 times, make sure the height of jug is enough.
4. Turn the steam control knob slowly anti-clockwise, steam will come out
from the frothing device.
Note: Never turn the steam control button rapidly, as the steam will
accumulate rapidly in short time which may increase the potential of the
risk of explosion.
5. Place the froth device into the milk about 2cm deep and turn the steam
control knob in an anticlockwise direction, the milk will begin to increase
in volume and appear frothy. Froth milk in the way moving vessel round
from up to down.
6. When the desired temperature is reached, you can turn the steam control
knob to “o” position.
Note: Clean steam outlet with wet sponge immediately after steam stops
generating, but be careful not to get injured by the hot steam.

10
ENGLISH
7
. Pour the
f
rothed milk into the espresso prepared. Now the cappuccino
is ready. I
f
desired, add su
g
ar and sprinkle the
f
roth with a little cocoa
pow
d
er or cinnamon
.
8
. Pre
ss
the Power
s
witch to the
“
” position to cut the power source o
ff
.
A
ll in
d
icators will
b
e extin
g
uis
h
e
d.
No
te
:
we recommend
y
ou allow the co
ff
ee maker to cool down at least
f
or
5 min before makin
g
coffee a
g
ain. Otherwise burnt odour may occurred
in
y
our Espresso co
ff
ee
.
M
AKE
S
TEAM
T
h
e steam wan
d
can
b
e use
d
to make
h
ot
b
evera
g
es like
d
rinkin
g
c
h
ocolate,
w
a
te
r
o
r
te
a
.
Me
t
hod
:
1
. Open the top cover, remove the detachable tank and fill it with desired
w
ater
,
the water level should not exceed the
“
MAX” mark in the tank. Then
place t
h
e tank into t
h
e appliance properl
y.
2. Replace the top cover, then connect the appliance to power supply.
3
. Pre
ss
the Power
s
witch to the
“
” position, it’s lamp is illuminated.
4. Make
s
ure the co
ff
ee/
s
team
s
elector on the
“
” position, turn t
h
e pump
c
ontrol
s
witch to the
“
” position. T
h
e pump will pump water, w
h
en t
h
ere
is water flowing out, close the pump immediately, press the coffee/steam
s
elector to the
“
” position and wait
f
or a moment. The appliance be
g
ins
to heat until the lamp in co
ff
ee/steam selector is illuminated, it shows the
heatin
g
is
fi
nished.
5. Remove the
f
rothin
g
device
f
rom the steam wand
.
6
. Dip t
h
e steam wan
d
into t
h
e liqui
d
to
b
e
h
eate
d
. Turn t
h
e steam control
k
no
b
anti-clockwise slowly to start makin
g
steam
.
7
. W
h
en t
h
e
d
esire
d
temperature is reac
h
e
d
,
y
ou can turn t
h
e steam control
k
nob to
“
o” position
.
8
. Pre
ss
the Power
s
witch to the
“
” position to cut o
ff
the power source
.
A
UT
O
MATI
C
P
O
WER
O
FF FUN
C
TI
ON
I
f
there is no an
y
operation a
f
ter 29 minutes, the unit will power o
ff
automaticall
y.

11
ENGLISH
CLEANING AND MAINTENANCE
• Always unplug the machine and make sure that it has cooled down before
you clean it.
• Don’t wash parts in the dishwasher.
• Clean housing of coffee maker with moisture-proof sponge often and
clean water tank, drip tray and removable shelf regularly then dry them.
Note: Do not clean with alcohol, or solvent cleanser. Never immerse the
housing in water for cleaning. Never immerse the cord, plug, or appliance
itself in water or other liquids.
Water tank/Metal Funnel
Wash the water tank and the metal funnel with water and dish-soap, rinse well
and let dry.
Stainless steel mesh (coffee filter)
1. Wash and dry well after every use.
2. After approximately every 100 uses dismantle and clean more thoroughly
as follows:
Remove the metal filter from the filter holder. Clean the filter in hot
water using a brush, make sure the holes in the filter are not blocked, if
necessary clean with a pin. Dry the parts then reassemble, make sure the
parts are correctly assembled.
Froth device/Hot water nozzle
• Prior to cleaning allow some hot water to flow out of the nozzle then
unplug and allow to cool before proceeding.
• Pull out the rubber tube downwards, then wash thoroughly. Check that the
hole in the nozzle is not blocked, if necessary unblock them with a pin.
• Revolve the rubber tube onto the nozzle.
Cup stand, drip tray
• Empty the drip tray regularly, wash and then dry it.

12
ENGLISH
CLEANING MINERAL DEPOSITS
1. To make sure your coffee maker is operating efficiently, internal piping
should be cleanly. To enjoy the peak flavor of coffee, you should clean
away the mineral deposits left every 2-3 months.
2. Fill the tank with water and descaler to the MAX level (the scale of water
and descaler is 4:1, the detail refers to the instruction of descaler. Please
use “household descaler” for cleaning espresso coffee makers.
3. According to the program of pre-heating, put the metal funnel (no coffee
powder in it) and jug in place. Brewing water per “PRE-HEATING”.
4. Press the Power switch one time, its red lamp will be illuminated. Then
you should press the pump control switch, make sure the coffee/steam
selector is to the “ ” position, when there is water flowing out and close
the pump. Wait for a moment, the coffee maker begins to be heated.
5. When the lamp in pump control switch is illuminated, it shows the heating
is finished. Pressing the pump control switch to “ ” position and make
two cups coffee. Then close the pump and wait for 5s.
6. Press the coffee/steam selector to the “ ” position, the indicator in the
pump control switch will be extinguished, waiting until the indicator in the
coffee/steam selector is illuminated. Make steam for 2min by turning the
steam control knob, then turn the steam control knob to “o” position to
stop making steam. Press the Power switch to stop the unit immediately,
make the descalers deposit in the unit at least 15 minutes.
7. Restart the unit and repeat the steps 4-6 at least 3 times.
8. Then press the coffee/steam selector to “ ” position, the lamp in pump
control switch will be illuminated, then press the pump control switch to
“” position to brew until no descaler is left.
9. Then brewing coffee (no coffee powder) with tap water in the MAX level,
repeat the steps of 4-6 for 3 times (it is unnecessary to wait for 15 minutes
in step of 6), then brew until no water is left in the tank.
10. Repeat the step 9 at least 3 times to make sure the piping is clean.

13
ENGLISH
TROUBLE SHOOTING
Symptom Cause Corrections
Water leaks from the
bottom of coffee maker.
There is much water in
the drip tray.
Please clean the drip
tray.
The coffee maker is
malfunction.
Please contact with the
authorized service facil-
ity for repairing.
Water leaks out of outer
side of filter.
There is some coffee
powder on filter edge. Get rid of them.
Acid (vinegar) taste ex-
ists in Espresso coffee.
No clean correctly
after cleaning mineral
deposits.
Clean coffee maker per
the content in “before
the first use” for several
times.
The coffee powder is
stored in a hot, wet
place for a long time.
The coffee powder
turns bad.
Please use fresh coffee
powder, or store unused
coffee powder in a cool,
dry place. After opening
a package of coffee pow-
der, reseal it tightly and
store it in a refrigerator to
maintain its freshness.
The coffee maker can-
not work any more.
The power outlet is not
plugged well.
Plug the power cord into
a wall outlet correctly, if
the appliance still does
not work, please contact
with the authorized ser-
vice facility for repairing.
The steam cannot froth.
The steam ready indi-
cator is not illuminated.
Only after the steam
ready indicator is illumi-
nated, the steam can be
used to froth.
The container is too big
or the shape is not fit.
Use high and narrow
cup.
You have used
skimmed milk
Use whole milk or half-
skimmed milk

14
ENGLISH
Do not take apart the appliance by yourself if the cause of failure is not found,
you had better contact certified SINGER service center.
Disposal of old Electrical & Electronic Equipment (Applicable in
the European Union and other European countries with separate
collection systems).
This symbol on the product or on its packaging indicates that this
product shall not be treated as household waste. Instead it shall
be handed over to the applicable collection point for the recycling
of electrical and electronic equipment. By ensuring this product is disposed
of correctly, you will help prevent potential negative consequences for
the environment and human health, which could otherwise be caused by
inappropriate waste handling of this product. The recycling of materials will
help to conserve natural resources. For more detailed information about
recycling of this product, please contact your local city office, your household
waste disposal service or the shop where you purchased the product.

15
ΕΛΛΗΝΙΚΑ
ΣΗΜΑΝΤΙΚΕΣ ΟΔΗΓΙΕΣ ΑΣΦΑΛΕΙΑΣ
Παρακαλούμε διαβάστε τις παρακάτω οδηγίες χρήσεως με
προσοχή πριν την χρήση της συσκευής και φυλάξτε τες για
μελλοντική χρήση και αναφορά.
1. Αυτή ησυσκευή μπορεί να χρησιμοποιηθεί από παιδιά
ηλικίας από 8 ετών και πάνω εφόσον υπάρχει εποπτεία ή
έχουν δοθεί οδηγίες σχετικά με την χρήση της συσκευ-
ής με ασφαλή τρόπο και κατανοούν τους κινδύνους που
ενέχονται. Τα παιδιά πρέπει να επιβλέπονται για να εξα-
σφαλιστεί ότι δεν παίζουν με τη συσκευή. Οκαθαρισμός
και ησυντήρηση της συσκευής δεν πρέπει να γίνεται
από παιδιά εκτός και αν είναι μεγαλύτερα από 8 ετών και
υπάρχει επίβλεψη ενηλίκου. Κρατήστε τη συσκευή και το
καλώδιο μακριά από παιδιά ηλικίας κάτω των 8 ετών.
2. Αυτή ησυσκευή μπορεί να χρησιμοποιηθεί από άτομα με
μειωμένες σωματικές, αισθητηριακές ή/και πνευματικές
δυνατότητες ήέλλειψη εμπειρίας και γνώσεων εφόσον
υπάρχει εποπτεία ήέχουν δοθεί οδηγίες σχετικά με την
χρήση της συσκευής με ασφαλή τρόπο και κατανοούν
τους κινδύνους που ενέχονται.
3. Αυτή ησυσκευή δεν προορίζεται για χρήση από άτομα
(συμπεριλαμβανομένων και των παιδιών) με μειωμένες
φυσικές και νοητικές και ικανότητες ήέλλειψη εμπειρίας
και γνώσης, εκτός αν υπάρχει επιτήρηση ήέχουν δοθεί
οδηγίες για τη χρήση της συσκευής από ένα άτομο υπεύ-
θυνο για την ασφάλεια τους. Τα παιδιά πρέπει να επιτη-
ρούνται για να βεβαιωθεί ότι δεν παίζουν με τη συσκευή.
4. Ποτέ μη βυθίζετε το καλώδιο ρεύματος, το φις ήτη συ-
σκευή σε νερό ήοποιοδήποτε άλλο υγρό.
5. Μην αφήνετε τη συσκευή να λειτουργεί εάν δεν υπάρχει
επιτήρηση.

16
ΕΛΛΗΝΙΚΑ
6. Το καλώδιο ρεύματος θα πρέπει να εξετάζεται συχνά για
σημάδια φθοράς. Εάν το καλώδιο ήκάποιο άλλο εξάρτη-
μα παρουσιάζουν βλάβη, θα πρέπει να σταματήσετε αμέ-
σως τη χρήση της συσκευής και να επικοινωνήσετε με
κάποιο Εξουσιοδοτημένο κατάστημα SINGER SERVICE
για την επισκευή και την αποφυγή τραυματισμού.
7. Μην λειτουργείτε τη συσκευή με φθαρμένο καλώδιο ή
φις, ήεάν ησυσκευή έχει παρουσιάσει βλάβη, ήαν έχει
υποστεί ζημιά με οποιονδήποτε τρόπο, επιστρέψτε τη
συσκευή στο κοντινότερο Εξουσιοδοτημένο κατάστημα
SINGER SERVICE για έλεγχο, επισκευή ήρύθμιση.
8. Αυτή ησυσκευή προορίζεται για οικιακή χρήση και παρό-
μοιες εφαρμογές όπως:
- κουζίνες προσωπικού σε καταστήματα, γραφεία και άλλα
εργασιακά περιβάλλοντα;
- αγροκτήματα;
- από πελάτες σε ξενοδοχεία, μοτέλ και άλλους τύπους
οικιστικών χώρων;
- Ενοικιαζόμενα δωμάτια
9. Να χρησιμοποιείτε τη συσκευή μόνο για οικιακή χρήση
και πάντα σύμφωνα με τις οδηγίες που περιγράφονται σε
αυτό το εγχειρίδιο χρήσης.
10. Ησυσκευή θα πρέπει να συνδέεται μόνο σε γειωμένη
πρίζα. Ελέγξτε αν ητάση που αναφέρεται στη βάση της
συσκευής ανταποκρίνεται στην τοπική τάση πριν τη συν-
δέσετε.
11. Μην χρησιμοποιείτε τη συσκευή με φθαρμένο καλώδιο,
φις ήπρίζα.
12. Μην χρησιμοποιείτε τη συσκευή σε εξωτερικούς χώρους
και πάντα να τοποθετείτε τη συσκευή σε στεγνό περιβάλ-
λον.

17
ΕΛΛΗΝΙΚΑ
13. Αποσυνδέστε τη συσκευή από το ρεύμα:
-Πριν γεμίσετε με νερό.
-Πριν τον καθαρισμό.
-Μετά τη χρήση.
14. Μην αφήνετε τη συσκευή να ακουμπάει σε θερμές επιφά-
νειες ήνα έρχεται σε επαφή με πηγές θερμότητας.
15. Μην αφήνετε το καλώδιο τροφοδοσίας της να ακουμπάει
σε θερμές επιφάνειες ήνα έρθουν σε επαφή με πηγές
θερμότητας.
16. Μην αποσυνδέετε τη συσκευή τραβώντας το καλώδιο.
Μην τυλίγετε το καλώδιο γύρω από τη συσκευή και μην
το περιστρέφετε.
17. Βεβαιωθείτε ότι έχετε τοποθετήσει τη συσκευή πάνω σε
επίπεδη και σταθερή επιφάνεια.
18. Χρησιμοποιείτε μόνο φρέσκο και κρύο νερό. Μην χρησι-
μοποιείτε νερό από μπανιέρες, νεροχύτες ήάλλα δοχεία
νερού.
19. Μην βάζετε στη συσκευή πάρα πολύ λεπτοκομμένο καφέ,
γιατί αυτό μπορεί να μπλοκάρει τη συσκευή.
20. Ποτέ μην αφαιρείτε το φίλτρο του καφέ κατά τη διάρκεια
παρασκευής του καφέ ήόταν οδιακόπτης του καφέ και
του ατμού είναι σε λειτουργία διότι μπορεί να πεταχτεί
καυτός ατμός και να σας τραυματίσει.
21. Προσοχή μην καείτε από:
- Θερμαινόμενα μέρη της συσκευής, συμπεριλαμβανο-
μένου του ρύγχους ατμού/ζεστού νερού, βάση προθέρ-
μανσης φλιτζανιών, φίλτρο καφέ και το εξωτερικό μέ-
ρος του μπόιλερ.
- Από τον ατμό ήτο ζεστό νερό που βγαίνει από το ρύγ-
χος ατμού/ζεστού νερού ήαπό το εξωτερικό μέρος του
μπόιλερ.

18
ΕΛΛΗΝΙΚΑ
22. Ποτέ μην γεμίζετε το δοχείο νερού παραπάνω από την
ένδειξη Max. Μην χρησιμοποιήσετε τη συσκευή σε περί-
πτωση υπερχείλισης.
23. Μη θέτετε σε λειτουργία τη συσκευή εάν το δοχείο νε-
ρού είναι άδειο διότι θα καεί ηαντλία της συσκευής. Εάν
διαθέτετε μοντέλο με προγραμματισμό βεβαιωθείτε ότι
έχετε γεμίσει το δοχείο νερού πριν προγραμματίσετε τη
συσκευή.
24. Πάντα να θέτετε όλους τους διακόπτες στη θέση “Off”
πριν αφαιρέσετε το βύσμα από την παροχή ρεύματος.
25. Βεβαιωθείτε ότι ηθερμοκρασία του χώρου είναι τουλά-
χιστον 10°C, διαφορετικά ησυσκευή δεν θα λειτουργεί
σωστά.
26. Μην χρησιμοποιείτε της συσκευή σε μέρη με υψόμετρό
πάνω από 2200 μέτρα από την επιφάνεια της θάλασσας.
27. Ποτέ μην χρησιμοποιείτε τη συσκευή χωρίς το δοχείο
συλλογής υγρών και το προστατευτικό της βάσης προ-
θέρμανσης φλιτζανιών.
28. Ποτέ μην χρησιμοποιείτε εξαρτήματα τα οποία δεν προ-
τείνονται από τον κατασκευαστή. Μπορούν να αποτελέ-
σουν κίνδυνο για τον χρήστη και υπάρχει κίνδυνος να
βλάψουν τη συσκευή.
29. Μην ξεχνάτε ότι ηθερμοκρασία του καφέ είναι υψηλή.
Χειριστείτε την κούπα με τον καφέ με προσοχή για να
αποφύγετε τραυματισμό ήέγκαυμα.
30. Αφήστε τη συσκευή να κρυώσει πλήρως πριν τον καθαρι-
σμό και την αποθήκευση της.

19
ΕΛΛΗΝΙΚΑ
ΣΥΝΤΗΡΗΣΗ & ΕΠΙΣΚΕΥΗ
1. Για συντήρηση ήεπισκευή εντός εγγύησης, παρακαλούμε επικοι-
νωνήστε με τα στοιχεία της εταιρίας service που αναφέρονται στο
φύλλο εγγύησης που συνοδεύει το προϊόν.
2. Μην λειτουργείτε τη συσκευή με φθαρμένο καλώδιο ήπρίζα, εάν το
προϊόν δυσλειτουργεί ήέχει πέσει ήέχει υποστεί βλάβη με οποιον-
δήποτε τρόπο. Θα πρέπει να απευθυνθείτε σε ένα Εξουσιοδοτημένο
Κατάστημα Σέρβις της SINGER ήνα επικοινωνήσετε με το Κέντρο
Εξυπηρέτησης Πελατών της SINGER. Μην επιχειρήσετε να αποσυ-
ναρμολογήσετε οποιοδήποτε εξάρτημα της συσκευής. Αυτό μπο-
ρεί να γίνει μόνο από ένα Εξουσιοδοτημένο Κατάστημα Σέρβις της
SINGER.
3. Ημη τήρηση αυτών των κανονισμών και υποδείξεων που περιγρά-
φονται στο παρόν εγχειρίδιο απαλλάσσει τη Singer από κάθε ευθύνη
σε περίπτωση κακής λειτουργίας ήπρόκλησης βλάβης σε άτομα,
ζώα, κλπ.
4. Ηκακή χρήση ήπαρέμβαση από το χρήστη που δεν επιτρέπονται,
ακυρώνουν αυτομάτως την εγγύηση του προϊόντος.

20
ΕΛΛΗΝΙΚΑ
ΤΑ ΜΕΡΗ ΤΗΣ ΣΥΣΚΕΥΗΣ
A. ON/OFF πλήκτρο λειτουργίας
B. Πλήκτρο Καφέ/Ατμού
C. Διακόπτης ελέγχου αντλίας
D. Ρυθμιστής ροής ατμού
E. Καπάκι δοχείου νερού
F. Δοχείο νερού διαφανές
G. Εξωτερικό (πάνω) κάλυμμα
H. Ακροφύσιο ατμού/ζεστού νερού
I. Σύστημα παρασκευής αφρόγαλου
J. Σώμα της συσκευής
K. Αφαιρούμενος δίσκος/δίσκος στήριξης φλυτζανιών
L. Φίλτρο
M. Θήκη Φίλτρου
N. Δίσκος συλλογής υγρών
O. Λαβή φίλτρου
P. Κουταλάκι μεζούρα
Q. Φίλτρο για 2 φλυτζάνια (βαθύ)
R. Φίλτρο για 1 φλυτζάνι (ρηχό)
P
QR
Table of contents
Languages:
Other Singer Coffee Maker manuals

Singer
Singer SFC-1810D User manual

Singer
Singer ES-851B User manual

Singer
Singer CM-1000 PBL User manual

Singer
Singer Meraki User manual

Singer
Singer MERAKI CHARISMA User manual

Singer
Singer Meraki User manual

Singer
Singer SFC828 User manual

Singer
Singer ES110 User manual

Singer
Singer SFC-1812 User manual

Singer
Singer SCM2125ST User manual