SINO SDS2-3MS User manual

DIGITAL READOUTS
SDS2-3MS
Operation Manual

Dear Users:
When using the manual:
●Chapters and sections are listed in the table of contents( see P5
readout and other series, including.
the readout used for multi-functional 2 axis milling
machine
Safety Precautions:
Caution:
■Do not dampen or splash coolant directly onto the unit to avoid electric shock
or fire.
Warning:
■Do not open the enclosure optionally to avoid electric shock, there is no
element repairable by the user inside. Turn to appointed technician for repair.
■If the unit is not used for along time, the chargeable lithium batteries for data
retention inside the digital display meter will be damaged. Please contact
Notice :Please read the following safety instructions and
precautions for safety operation of the new digital readout device.
Thank you for purchasing the products of the digital readout device
of Guangzhou SINO DRO Co.,Ltd.It is a precision measurement
products and mainly for various types of manual machine tools machining
or testing equipment to provide a Detection and localization function
Guangzhou SINO DRO Co.,Ltd. agent or professional technicians
SDS2-3MS
ahead).
●This manual includes some instructions for panel keys of SDS2-3MS digital
It is recommended that:
●Instructions for panel keys of the SDS2-3MS digital readout that is
applicable to this manual are listed in P1~4 of the above Section 1.
●Read through follow safety precautions and Section 2( see P46~51),
which are very important to the safe operation of your digital readout.

for battery replacement when using it again.
Notes:
●Disconnect power plug promptly if the digital display meter emits smog or
optical electronic ruler. Once the connecting wires between the two parts are
broken or damaged of surface during use, error in detection data might be
caused, to which the user should pay special attention.
●Do not repair or refit the digital display by yourself, otherwise a fault or
do not replace it with rulers of other brands, because products of different
companies have their respective characteristics, indicators and wiring. Never
make wiring without the guide of professional technicians, otherwise the
digital display meter might get into fault.
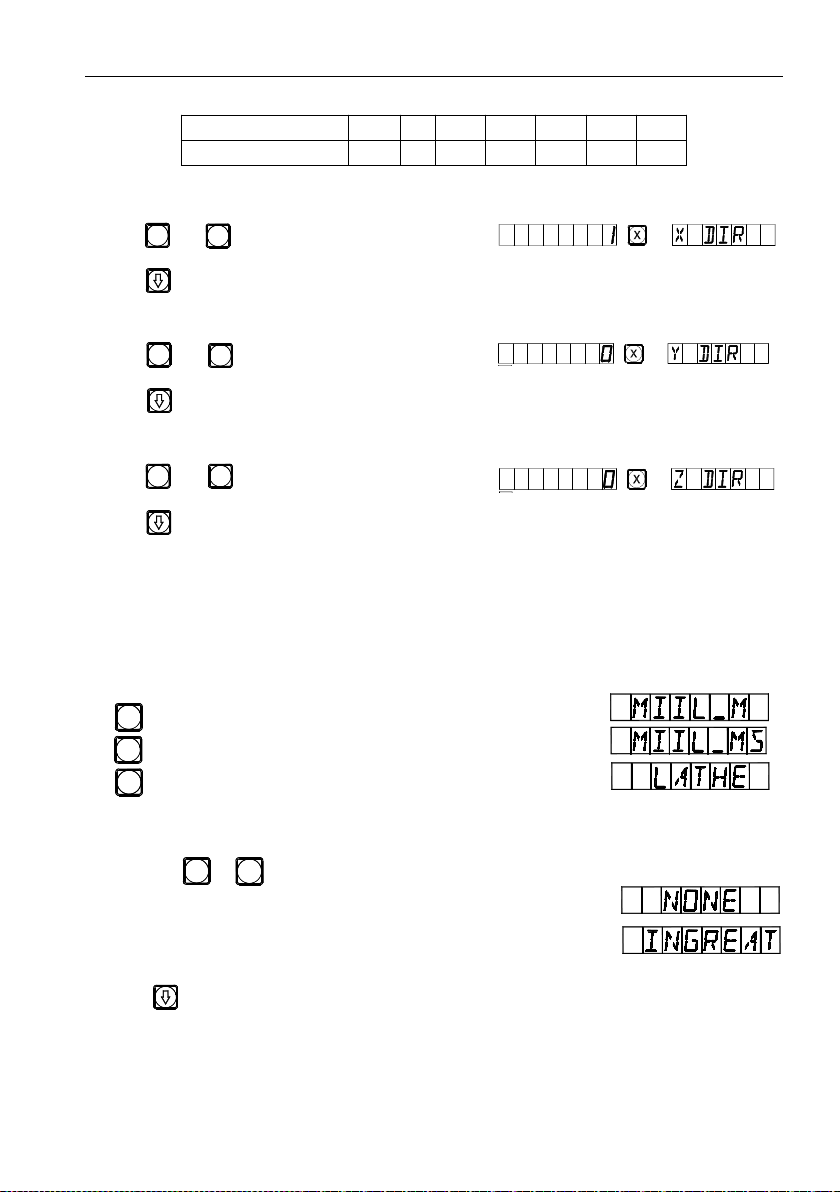
●
●
●
Forgive product upgrades without further notice.
The displacement sensor complies with 2006/95/EC directive for
low-voltage electric apparatus and 2004/108/EC directive for EMC.
Our company has passed the authorization and the audit of ISO9001 Quality
System, ISO14001 Environmental System, OHSAS18001 Occupational
Health and Safety System.
peculiar smells, when an electric shock or fire may be caused when
continuing to use it. Please contact Guangzhou SINO DRO Co.,Ltd.or
dealer and never attempt to repair it by yourself.
●The digital display meter constitutes a precision detection device with an
damage might be caused. In the case of abnormality, please contact
Guangzhou SINO DRO Co.,Ltd. or dealer.
●Once the optical electronic ruler used in the digital display meter is damaged,
.
Notice: The Interpretation of this manual belongs to Guangzhou SINO DRO Co.,
Ltd .

Illustration of Panel and Keyboard
1

Illustration of Panel and Keyboard
2
√—
Caption of the Keyboard of SDS2-3MS
Returning the displayed
Value to zero(X/Y/Z Axis)
Keys for Axis Selection
Entry keys for digits
Operation key(in calculation
function key)
Calculation key(in calculation
function key)
Input (calculation result)
canceling key(in Calculation
function key)
Key for “Inverting”
Trigonometric Functions
(in Calculation function key)
Square root calculating key
(in Calculation function key)
Entry keys for decimal point
Entry key plus or minus symbol
Key for entering data
±

Illustration of Panel and Keyboard
3
Function key for getting one half
Key for the conversion the meter
System/ British system display
Function key for Sleep
Function key for 200 zero
Position
R angular ARC function key
(ARC Function key)
Function key for circle equally
Dividing (PCD Function key)
Function key for drilling holes
along an oblique line
Angular surface processing
function key; In calculation
function as sine trigonometric
function key
In calculation function as cosine
trigonometric function key
Tool compensation function key
In calculation function as
tangent trigonometric function
key
12
R

Illustration of Panel and Keyboard
4
Key for the conversion of
relative/absolute display
Key for the selection of
upper/lower term or plane
procession

Catalog
5
Catalog
1. A Basic Functions …………………………………………………………. 1
2. B Smooth R ……………………………………………………………….. 14
(Be the same with: MIIL_MS 、MIIL_M)
3. C Hole Drilling Along An Oblique Line ………………………………… 22
(Be the same with: MIIL_MS)
4. D The Function For 200 Point Subsidiary Zero Position ……………... 25
(Be the same with: MIIL_MS、MIIL_M、LATHE)
5. E PCD Circle Equally Dividing Holes …………………………………... 33
(Be the same with: MIIL_MS、MIIL_M)
6. F Angular Surface Processing ……………………………………………36
(Be the same with: MIIL_MS)
7. G The Function-Calculator Function ………………………………….. 40
(Be the same with: MIIL_MS)
8. H Tool Diameter Compensation ………………………………………… 42
(Be the same with: MIIL_MS)
9. I The Progressive Progressing of rectangular Inner chamber ………. 44
(Be the same with: MIIL_MS)
10. Additional sheet……………………………………………………….. 46

A. Basic Function
1
SEL
SEL
SEL
Model
Number of axes
Display resolution
Special mark for
milling machine
A. Basic Functions
1. Start, Self check
1) Selecting the power voltage,
switching the power on
2) Self check of the digital readout
3) Self check finished,
enter working mode
Note: Two axial readout only has X-axis and Y-axis, three axial readout has
X-axis, Y-axis and Z-axis. The lathe machine readout display “LATHE”; the
multifunctional milling machine readout display “MILL_MS”; the universal
milling machine readout display “MILL_M”
2. Setting of System
After power on, and the digital displayer displays the digits, it is available to
enter into the setting of system by keying in 3 seconds.
1) Setting axis X resolution.
Selecting a different resolution by keying a corresponding number
Please refer to fig. 1 for the relations between number key and resolution.
Key , next step
2) Setting axis Y resolution.
Selecting a different resolution by keying a corresponding number
Please refer to fig. 1
Key , next step
3) Setting axis Z resolution.
Selecting a different resolution by keying a corresponding number
Please refer to fig. 1
Key , next step
SEL
SEL
SEL
SEL
SEL
SEL
Message screen displays
"ALE" or "INC" or "ZER"

A. Basic Function
2
SEL
SEL
SEL
Fig. 1: Relations between Number key and Resolution
Number key
0
1
2
5
7
8
9
Resolution(μm)
10
1
2
5
0.1
0.2
0.5
4) Setting counting direction of axis X linear encoder.
Key and to convert the count direction.
Key , next step
5) Setting counting direction of axis Y linear encoder.
Key and to convert the count direction.
Key , next step
6) Setting counting direction of axis Z linear encoder.
Key and to convert the count direction.
Key , next step
Note: “0” and “1” do not represent the positive and negative direction of
machine tool, they are only used for converting the counting direction.
7) Choose machine tool type
Digital Readout SDS2-3MS
universal milling machine digital readout
multifunctional milling machine digital readout
lathe machine digital readout
8) Choose whether integrated display Y-axis with Z-axis
Press or to realize the conversion
“NONE” means no integration
“INGREAT” means integration and the integrated
value displays in Y-axis LED.
Press , next step
Note: only 3 axis lathe machine has this function.
9) Choose Segmented compensation function and linear compensation function
2
0
1
0
1
0
1
1
0
1
3

A. Basic Function
3
Press choose linear compensation function “LINEAR”;
Press choose Segmented error compensation “SEGMENT”;
Press , next step
10) Choose linear axis display and angle axis display, setting methods are:
1Press to choose linear axis display function“RAS_X”
Press , next step, enter into Y axis display.
2Press to choose angle axis display function“ENC_X”
Press , input number of encoder lines
Press for confirmation
Press , next step, enter into Y axis display.
Select and set Y axis and Z axis display with the same method
Notes: angle display is available for minutes and seconds display as well
as decimal display, press to convert the display type under the general
mode, angle display take priority if choose inch mode under angle display.
The angle display values are calculated cyclically from 0-360 degree.
11) Setting the display brightness
Message screen displays”LIGHT”, setting a different brightness according to a
different digit key
Digit key
0
1
2
3
4
5
6
7
brightness
1 level
2 level
3 level
4 level
5 level
6 level
7 level
8 level
Key ,next step
12) Self test.
Key twice, the Self-test program started
then key to quit. Key is also available to quit.
3. Returning the displayed Value to zero
1) It is possible to return to zero at any
point, take the example of X axis
Display.
0
1
0
+
ALE
SEL

A. Basic Function
4
20
13
5
ABC
2) Key
3) Key to clear the value, and key again to return the value
4. Presetting data
1) As shown in the figure, after the processing
of Hole A finished, the position of the
working piece has been adjusted, Hole B
is to be processed.
2) Align the Tool with Hole A.
3) Select the key for axis, key .
4) Key , Enter the value(If the entered value
is wrong, key and enter the correct one
again)
5) Key , (If any mistake is found now, repeat
steps 3~5).
6) Move the machine table to the position
of 13, and the processing at Point B can
start.
5. Absolute/relative/user coordinate display
mode.
Key , the absolute/relative display mode
will convert one the other, following are operations.
1) Let the Tool point to Point M
reset under the absolute mode.
Press or
2) Move the machine tool to Position A.
3) Move the machine tool to Position B.
50
30
10
10
10
20
10
M
A
B
E
D
C
SEL
SEL
SEL
SEL
SEL
SEL
SEL
5
SEL
SEL
SEL
SEL

A. Basic Function
5
4) Press
5) Move the machine tool to Position C
6) Move the machine tool to position D
7) Return to absolute mode and press
8) Move the machine tool to position E
Note: The resetting in the absolute and the relative display mode must be
done separately. In absolute display mode, “ALE” is displayed on
Message Screen. It is in relative display mode when “INC” is display
Message Screen.
Keying , can also realize the conversion between the two display mode,
and it is also possible to enter the display mode of 200 sets of user coordinates, as
shown in the following circulating schematic diagram.
Key and enter the display mode of 200 sets of user coordinates directly.
Enter the number
Key digit keys, such as Entered the display mode
of No. 50 set of relative
coordinates.
SEL
SEL
SEL
SEL
SEL
SEL
SEL
SEL
SEL
SEL
5
0

A. Basic Function
6
6. Key display
As shown in the figure, the enter between
two points is to be found。
1) Let the tool touch the one edges of
the working piece and Return the X-axis displayed Value to zero, then move the
tool along the direction of arrow and let it come to touch the other edges of the
working piece, then do the next step can determine the center position.
2) Press axis key
3) Press
4) Move the machine tool to bring the axis
displayed value into zero, and the center position is reached.
(in the same method can determine the center positions of Y-axis and Z-axis).
Note: Lathe machine without this function.
7.“R/D” (Radius/Diameter) Switch Display.
X axis datum on the center line.
1) Cutting tool in place A.
2) Press
3) Move the cutting tool to place B.
4) Press
Notes: only lathe machine has this function,Y/Z axis is not able to display so.
1
2
1
2
SEL
SEL
SEL
144
6
SEL
SEL
SEL
SEL
B
A
φ20
φ10
1
2
1
2
SEL
SEL
SEL
SEL
SEL
SEL

A. Basic Function
7
8. Axis summing / separate summinging display
In the function of Y, Z axis summing display and separate
display, press to switch the display mode.
1) Switch summing display into separate display
2) Press
3) Press again to return to summing display
Note: only in the lathe machine digital display mode it has the function, the
parameter option “whether the Y\Z axis in summing display” must be set in
summing mode, the Z axis only displays the digital value, and can’t be preset
value or cleared.
9. "M/I" (The mm System/inch System)
Conversion Display.
Press , the size displayed in the
mm System/inch system will convert
one to the other.
1) The original display is in the mm
system, and the display in inch is
desired.
2) Press to convert inch display
3) Press or to choose the bits of decimal
(between 4 bits or 5 bits))
Press for confirmation
4) Move the working table to Hole B
5) Enter processing mode of Hole B
6) Press to convert directly to mm System
AB
1"
2.4"
SEL
SEL
SEL
SEL
SEL
SEL

A. Basic Function
8
10. Segmented error compensation
Notes: only in Metric system can do Segmented error compensation .
After Segmented error compensation, the display can be converted freely
between Metric system and Imperial system.
There are two methods for Segmented error compensation of the digital
readout
1. To carry out error compensation taking the start point as the mechanical
origin. (Figure 1)
2. To carry out error compensation taking the 1st absolute zero of the raster
ruler as the mechanical origin. (Figure 2)
L: The distance of effective range of raster ruler
L1: Length of the compensation segment
L2: Effective distance of the compensation segment
1. The parameter set-up method is as follows: (the operation methods of Y-axis
and Z-axis are the same as X-axis)
1) Move the raster ruler to the smallest end of
the coordinate, and enter into “ALE” right-angle coordinate system.
2) Press enter into the function of segment compensation of X axis, and
input related parameters.
3) Set the segment compensation
1. FIND_ZE
(Find only the reference point, it needs to find the reference point after the set
of segment compensation)
SEL
SEL
SEL
SEL
SEL
SEL

A. Basic Function
9
Press , convert
2. SET_SEG
(segment error compensation)
Press , next step
Remarks: both of the two modes enter into the finding of the mechanical
origin, only the segmented compensation can enter into the compensation
interface after find the reference point
4)Find the mechanical origin
5)There are two methods for setting the compensation origin,
after the machine origin interface is confirmed.
1. Press to choose the current position as origin, and directly enter into
the set of step 5 compensation,
2. Press to confirm the absolute zero of the linear scale is the
mechanical origin, move the linear scale in positive direction
and find the the absolute zero and enter into the compensation interface.
Move towards the positive direction of X axis of the
machine tool and search for the 1st absolute zero of the raster ruler as the
mechanical origin. After find the origin, then auto enter the next step for data input.
This time the X-axis displays the raster ruler real value, and Y-axis displays the
empty compensation, the input value is displayed on the Y-axis.
5) Input the compensation setup of the 1st segment
At this time, firstly move the X-axis raster ruler
towards the positive direction.
When the raster ruler is moved close to the compensation value
Press
(When press Y-axis will displays the X-axis’s value, and that means the
compensation value has been setup. If the value input is wrong, don’t move the
1
0
Y
X

A. Basic Function
10
raster ruler, and press , then press , this time the digit-display LED of Y-axis
will be in input state, and input the right value again.
Press , enter into the next set-up point
Remarks: In this function, the display of X
axis is the coordinate value, while Y axis
displays the standard value or the
measurement value by laser.
6) Input the compensation setup of the 2nd segment
Press
Press enter into the next set-up point
7) Input the compensation setup of the 3rd segment
Press
Press enter into the next set-up point
8) Input the compensation setup of the 4th segment
Press
Press enter into the next set-up point
9) Input the compensation setup of the 5th segment
Press
Press enter into the next set-up point
10) Input the compensation setup of the 6th segment
Press
After the setup is finished, press to exit.
2. The cancellation method of Segmented compensation value
The Segmented compensation value is only aimed at the digital readout, raster
0
2
3
0
4
0
5
0
6
0
Y
X
Y
X
Y
X
Y
X
Y
X
coordinate value
The standard value or the
measurement value by laser

A. Basic Function
11
ruler and machine tool set up together. If the raster ruler or digital readout whose
Segmented compensation value is set up in a machine tool is moved to another
machine tool, the Segmented compensation value needs to be reset. When the
Segmented compensation function is not needed, the Segmented compensation
value is to be canceled. The cancellation method is:
Enter into the set of Segmented compensation, and press to quit to cancel
the former set compensation value when entering into the compensation value
input page.
3. Methods of finding mechanical origin
If there is power off when the raster ruler is moving, or the rater ruler is
moved before the power is on, after re-start, the mechanical origin needs to be
found again. Because of the movement in power off or before power on, the
coordinate origin of the machine tool can not match the value in the digit display
meter. If the mechanical origin is not found, the misplaced relationship is brought
into the later user coordinate system. As when calculating the user coordinate, the
Segmented compensation value is found according to the wrong mechanical
coordinate, thus there will be big error of the displayed coordinate.
The method of finding mechanical origin is as follows:
1. Move the raster ruler to the position which is initially set up as the
mechanical origin, and then enter into the select page of Segmented compensation.
Choose FIND_ZE and press to the interface for choosing compensation method,
press , the interior of digit display meter handles automatically. At this time,
finish finding the mechanical origin and quit the absolute coordinate system
automatically.
2. Firstly move the raster ruler to the smallest value, and enter into the
Segmented compensation page, choose FIND_ZE, press to enter into the
interface for choosing compensation method, press
Enter X axis to find the status of absolute zero. Move the raster ruler towards
the positive direction. When the absolute zero is found, it is the mechanical origin.
Automatically back to absolute coordinate system after above finished.
Advise: find the mechanical origin before start work after power on to
assure the coordinate origin of the machine tool can match the value in the
digital readout.

A. Basic Function
12
11. Linear Error Compensation
The linear error compensation function is used to make the linear correction
of the system error of the grating metering system.
Correction factor S =(L-L')/(L/1000) mm/m
L---the actually metered length (mm)
L'---the displayed value on digital display meter (mm)
S---the actually factor (mm/m), "+" symbol means the actual length is larger, and
"-" symbol means the actual length is smaller.
Compensation range: -1.500 mm/m~+1.500 mm/m
Example: The Actual metered length of the machine tool machine table is 1000
mm, and the display value on the digital display meter is 999.98 mm.
S=(1000-999.98)/(1000/1000)=0.02 mm/m
1) Select the axis
2) Press
modificatory coefficient used
last time
3) Press the new correction factor in:
4) Press
Note: The linear error compensation can only be carried in absolute display
mode (the message screen displays ALE) and metric system;
12. Power Interruption Memory
During the processing of a working piece, there may occur power interruptions or
needed temporary turnoffs, the digital display box will automatically store the
working state (such as the working mode in every axis, displayed data and the
linear error compensation factor) just before every interruption event in its
memory. Every time when the machine is turn on again, the digital display box
will recover to its working state just before the interruption event after self
checking, and the valve just before the interruption (turn off) event will recover,
and the processing will continue.
0
0
2
Table of contents
Other SINO Cash Counter manuals