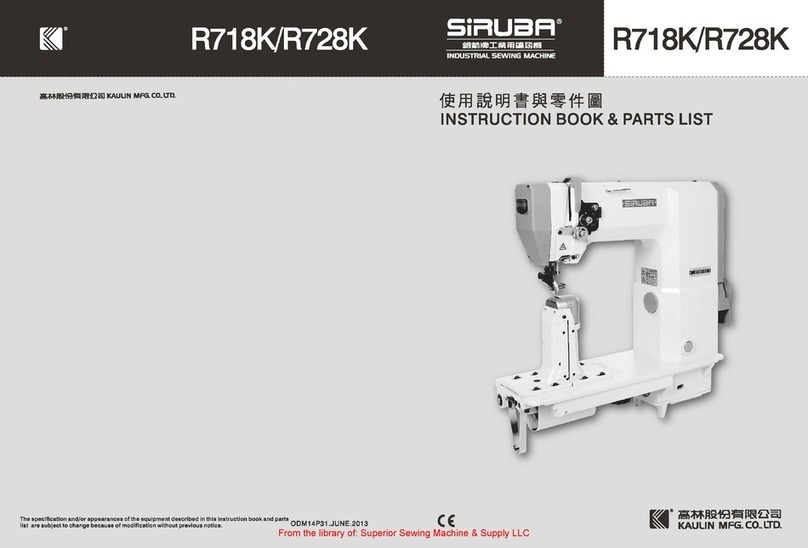
Siruba PK522 Datasheet

PK522
1fffl~~a~JW~1~11
INSTRUCTION AND PARTS LIST
·Sir=tUaFt·
CE
CE
I
f/41
®
R~Jii1f.)~P~D6J
~
KAULIN MFG.CO
..
LTD.
From the library of: Superior Sewing Machine & Supply LLC

~1~
IMPORTANT SAFETY INSTRUCTIONS
-------
Putting sewing systems into operation is prohibited until it has been ascertained that the sewing systems in which these
sewing machines will be built into, have conformed with the safety regulations in yourcountry.
Technical service for those sewing systems is also prohibited.
1.
Observe the basic safety measures, including, but not limited to the following ones, whenever you use the machine.
2. Read all the instructions, including, butnot limited to this Instruction Manual before you use the machine. In addition,
keep this Instruction Manual so that you may read it at anytime when necessary.
3. Use the machine after it has been ascertained that it conforms with safety rules/standards valid in yourcountry.
4. All safety devices must be in position when the machine
is
ready for work
or
in operation. The operation without the
specified safety devices is not allowed.
5. This machine shall be operated by appropriately-trained operators.
6.
Foryour personal protection, we recommend that you wear safety glasses.
7.
For the following, turn offthe powerswitch
or
disconnect the power plug
of
the machine from the receptacle.
7-1
For threading needle(s), looper, spreaderetc. and replacing bobbin.
7-2 For replacing part(s)
of
needle, presser foot, throat plate, looper, spreader, feed dog, needle guard, folder, cloth
guide etc.
7-3 For repair work.
7-4 When leaving the working place orwhen the working place is unattended.
7-5 When using clutch motors without applying brake, it has to be waited until the motorstopped totally.
8. Ifyou should allow oil, grease, etc. use with the machine and devices to come in contact with youreyes or skin
or
swallow any
of
such liquid by mistake, immediately wash the contacted areas and consult a medical doctor.
9.
Tampering with the live parts and devices, regardless
of
whether the machine is powered, is prohibited.
10. Repair, remodeling and adjustment works mustonly be done
by
appropriately trained technicians
or
specially skilled
presonnel. Only spare parts designated by JUKI can be used for repairs.
11
. General maintenance and inspection works have to be done by appropriately trained personnel.
12. Repairand maintenance works
of
electrical components shall be conducted
by
qualified electric technicians or under
the audit and guidance
of
specially skilled personnel.
Whenever you find a failure
of
any
of
electrical components, immediately stop the machine.
13. Before making repair and maintenanceworks on the machine equipped with pneumatic parts such as an air cylinder,
the aircompressor has to be detached from the machine and the compressed airsupply has to
be
cut off.
Existing residual air pressure afterdisconnecting the
air
compressor from the machine has to be expelled.
Exceptions tothis are only adjustments and performance checks done
by
appropriately trained technicians or specially
skilled personnel.
14. Periodically clean the machine throughout the period
of
use.
15
. Grounding the machine is always necessary for the normal operation
of
the machine. The machine has to be operated
in an environment that is free from strong noise sources such
as
high-frequency welder.
16. An appropriate power plug has to be attached to the machine
by
electric technicians. Power plug has to be connected
to a grounded receptacle.
17. The machine is only allowed to be used
for
the purpose intended. Other used are not allowed.
18. Remodel
or
modify the machine in accordance with
the
safety rules/standards while taking all the effective safety
measures. JUKI assumes no responsibility
for
damage caused by remodeling
or
modification
of
the machine.
19. Warning hints are marked with the two shown symbols.
~
Danger
of
injuryto operator
or
service staff
& Items requiring special attention
From the library of: Superior Sewing Machine & Supply LLC
~2~
----------------
-----~~-~-------------------
J1t*l,W~
1±~1¥1~*
c
~~;l:~rJT
)
mn~~~I¥J~~~JUE:rm~~lr:f~m
o
IQ]ffi¥.
~~qni!Efu!Q]
l~~~Ko
1.
Ut!fflJtt~*'1mt!F-J,
~,~iH~9''§fl55lDT~
§
i¥J~;<fs::~~m'ntli
o
2.
Ut!fflJtt*itWmt~IW,
~wOO~:$:-ut!ffliD~JY:Hf:ttrgi¥JJ'iJT~m:3f>Jtf4o
[QJIF-J:IJ!#~JI:tf£1!fflmtsJl!f~®f*~,
J;J~~g~
llift!F-J~OO
o
3.
Jtt~~mt!J!Wi!t~i¥J~IUJ~~~JUE
-
~Ut!ffl
o
4.
Ut!m
Jtt$i~~o$i~~if.Jf'Fcp
•
?JT~i¥J~~~llflff!~~~um!Ei¥Jtiiiiilto
ril[~~m!Ei¥J~~~~~i¥J$i~:mt~
.LI::~.FI
L
5.
Jl:t$1*'1~1J!El3~~~:tgWI!I¥J~f'F
A~*~f'F
o
6.
~ffl$1*'1tt't~,
~~-t~
~
llJJ~IJN~
o
7.
R~TJU'I~i5t!F-J,
JJ!.li.ElPIUJ}!i!~rmtOOIUl,
:!3xJ~T~!t~ml!iJl
o
7-1
~~,
!t~t,
0/iME~~~~fDJ!tt:!iiJE;WIF-J:
o
7-2
J!ttl!ttlt~t,
&Jlilll
,
~tt&,
~~t,
0/iME~,
~:ffi%,
~~Hb\
~~,
1Ti~IPJH-~~
o
7-3
f~:f.!IF-J:o
7- 4
If'F:I:~J'iJT~A
7gi(;I@00If'F:t:~pJl~
o
7-5
fN!ffliUir~~~.
~w~f~~~3t~~.LI::zfrtW~1'J
o
8.
$i~~J;J2?dlf;f~~il-ut!ffla"J:mt?!E,
~ftlij~~~MlmtfiJN~g\(;rti~U&:/li__t~,
gl(;~~~~,
JJ!.li.E!Pm'i5'G~IUlfiB
151#:1;:~~¥~~
0
9.
~.LI::ffl.:f.fl!1~nooT$i~ttltOOruJ;®mi¥J~149.X:~il
o
10.
~lm~U'1~1¥Jf~:E.!,
c5<:~
~
~~IJ!El3~5rMJ
F~W
ll*'i¥.71XV!trA~gi(;~**~1'J
o
11. -
~i¥J~~f!f:!tff!El35't~Wli*'I¥JAffii*~1'J
o
12.
l[IUJ*itW:mti¥J~~
/JITfi
i¥Jf~:f.!,
~f~JJ!El3~~mi¥J~~tz-filtrA~gi(;-*I¥J'Nii'iifDt~~T~1'J
o
13.
1~:£.!,
f*Jll[~~AA,
~ftii~~*'*~~i¥J~f41F-J:,
JJ!WIT~~JE~~m~rmtfrtW~1'J
o
5lD~71W
~*'*~~IF-J:,
JJ!tli~}!i!m*'*~~
o
f.§.,
)t~;f13~Wll*'i¥.71XV!trA~9.X:~*~1'J~IUl~~9.X:lii~iJ.J1'F~~Y'i-
o
14.
$i~~i¥J~fflWJF"',IJ!/EM~1'Jm':tW
o
15.
~TJE';t~~il$$,
JJ!~~tili~
o
[QJIF-J:IJ!:tt:::f
5't
~~~~~5~~1f~Wi¥Jfl:tlTf'Fffl
o
16.
~!tfi!IJlff!fflJl~~~3F~~D~i¥JA*~~
o
~~fiR~~'~Ji~~¥
U
~tiliml.¥.L
o
11.
$i~JJ~1~!Em~tJY'i-::r:~g~m
o
18.
~$i~~a"Jc5<:~,
~J!JJ!r-Jii-3i.'~mm.
:Ft:SRJ{)(~~i¥J3i.'~m:Mli
o
:93:$1-,
~~~IUlc5<:~fD~J!.
*i}R.lfl!
/f~Jf
o
19.
:$:1Jt!fflmli!J3~
__t
)Rf§J;)"f2f!mff'5'1-J~
o
~
~t~1~1t1'PA.~
,
*11~A~I¥Jfe:~
o
ffi
~~_t~~~JJU1JotJJ±~I¥JJJ~
o
From the library of: Superior Sewing Machine & Supply LLC
~3~
&
FOR SAFE OPERATION
1.
To
avoid immediate rotation
of
the machine afterturning the power on, checkto be sure that the cloth feed
cam on the machine head is in the stop-motion position.
2.
To
avoid possible personal injury, never operate the machine with safety devices such as beltcoverand
eye protecting cover removed.
3.
To
avoid possible personal injury
due
to involvement, keep your fingers, head and clothes away from the
handwheel, V beltand motor while the machine is in operation. In addition, place nothing nearthe
aforementioned parts.
4.
To
avoid possible personal injury, never place your fingers nearthe needle when turning the power on
or
while the machine is in operation.
5.
To
avoid possible personal injury, never place your fingers inside the thread take-up cover while the
machine
is
in operation.
6.
The hook rotates at a high speed while
the
machine is in operation.
To
avoid possible injury
to
hands, keep
your hands away from the hookwhile the machine is in operation. In addition, be sure to turn the power off
when replacing a bobbin.
7.
To
avoid possible personal injury, exercise care not to allowyourfingers to get caught in the machine when
tilting the machine
or
returning it to the home position.
8.
To
avoid possible accidents due to abrupt start
of
the machine, turn the power
off
when tilting the machine
head and removing the belt cover and the V belt.
9.
To
prevent possible accidents because
of
electricshock,
do
notoperate the machine with the power earth
removed.
10. Be sure to tum offthe power switch in prior to the connection/disconnection
of
the power plug.
11
. In time
of
thunderand lightning, stop your work and disconnectthe power plug for safety's sake.
12. Ifthe machine is suddenly moved from a cold place to a warm place,
dew
condensation may be observed.
In this case, turn on the powerto the machine after you have confirmed that there is no danger
of
water
drops in the machine.
fi\.
CAUTION:
[D
The safety.devices, "eye guard cove
r"
, "finger guard", etc
.,
may be omitted in the figures
of
this manual
for easy explanation. Never use the machine with these safety devices removed.
1.
2.
3.
4.
5.
6.
7.
8.
IT~
tl
~
i¥J
II'll~
.
U~i:i!"itJ
.
~
T!dli~
$
$:1¥1~
~.
rr~mm:
~M~
lll-JE:
litltm.W~MI¥J
~
:ffl
c:J~~~tEJt~{.iLJll
0
~T
ilJ5ll::A.~$$:1¥J~
~,
~1'~tE
JfiJT
&:w~~,
!JN!fi!JilJ5~~
~3C~~ti
8'-J~m1TiiM!U.
o
~
TllJ5
.11::
~~
/\!¥JA.~
$
$:1¥1~~,
~iRfflw
~~&:tm~~.iJ
I¥J
,~~
o
~
Tlt15
ll::A.!t
$$:,
ITf#l~iW-OOIUl~
,
~W1'
~
re-¥tlii
/\
¥
U:fm£-ti¥Jiif
tlli:o
~71t1Jll::A.!t$
$:,
*ii~U$icf:l,
~1''B!re
-¥
t
liif$
¥
Um~tHi-.!llcf:l
o
UUt$cp.
ME~1R~ti!!ME"
o
~
71lJ5
.rt
=Tf11-¥t!ii,
ilt$
9='
1'JB!re
-¥
tliiJ'Dt¥U!tE~~Iiftlli:
o
£~~
f!i¥,
~-~~
IUJ~~~
o
~
7m
ll::A.!f$itt.
J'Dt¥U~~W'
D
ttli(Mi*1J.~Iij:,
IDit.:t@:1'~~¥
U
-¥t!ii
o
~7
1lJ5ll::
A.!t$$:.1Dt~m~~~~JfiJ&:~~~
,
v~&:ffil~.~~~~~#lit~~ll::~~~~
o
9.
~7
1t1Jll::A~$$:,
~/f'~~~T
~
~J~~~~~~
~
o
10.
~7m
ll::HfOH
VJl
~
1
4
,
1iW11~1imlij:~
-JE:
Im
~fl!~OO
im
o
11.
~TIIfjll::!JiiJllt~~
1
4,
IT
"iif!i¥
,
~f'f
ll::~
~
.
#t!T'II~~o
12.
~
71lJ5
ll::HI
.Jfr~~~
f
4.
~
*~
i¥11tl!
:1J
f$
¥
UIIIf0
1¥Jt
i!!
:1J~
.
®-~1:.~1'1.
~
f~*~
%~~1:i~~
rr
00
1ltilJ,o
From the library of: Superior Sewing Machine & Supply LLC
~4~
CONTENTS
IMPORTANTSAFETY INSTRUCTIONS ····························································································· 6
CAUTIONS BEFORE OPERATIONS ································································································· 6
1. INSTALLING THE MOTOR ········································································································· 8
2. INSTALLING THE THREAD STAND ····························································································· 8
3. REMOVING THE BELT COVER ·································································································· 9
4. RAISING THE MACHINE HEAD ·
..............
·
..........
·····....·..··...........
............
·....·......·....
..
..........
·....· 9
5. INSTALLING THE MACHINE HEAD
.............................................................................................
10
6. ATTACHING THE IDLER PULLEY
.................
..
..........
.........
..
.......................................................
.10
7. MOTOR PULLEYS AND BELTS ···.
........................
.....
.........
.....
..
.. .
.......
.........
.·
..........
····
...............
11
8. ATTACHING THE CHAIN ···········································································································
13
9. LUBRICATION
......
·
..........
··············......·······........·
............
···
..
·····
........
·
..........
···......···..··
......
···· 13
10. OPERATING THE SEWING MACHINE
........
..
........................
.'
......................................................
14
11
. MATERIALS AND NEEDLES TO BE USED
.................
..
...........
................
......
....................
...........
15
1
2.
ATTACHING THE NEEDLE ...
...............................................
..
.
..
........
..................
.. .
....................
15
13. THREADING THE MACHINE .
................
...........
.............
..............
..
...............
..
..
.....
..
..
..
.........
...... 16
14. REMOVING AND INSTALLING THE BOBBIN CASE ....·......·....
..
......
......
·
..............
..
..·
............
·
........
·16
15
. WINDINGA BOBBIN
.....
...............
..........
.........
..
.......
....
........
......
.............
....................
.....
........
17
16. THREADING THE BOBBIN CASE ·······
······
···
·········································
·
·······
········
······
·······
·········
17
17. THREAD TENSION
..........
·····..···
..........
·..··
........
·
..............
········
...................
··.·
..
..·······......···
......
17
18.ADJUSTING THE THREAD TAKE-UP SPRING ····
···········
··········
··
··
······ ··· ···························
·····
······
··· 18
1
9.
ADJUSTING THE LENGTH AND WIDTH OF BAR-TACKING ····· ·······
··
················
··
·· ·······
··
··
··
·············· 18
20. ADJUSTING THE FEED TIMING ································································································· 19
21. NEEDLE-TO-SHUTTLE RELATION ······························································································20
22.ADJUSTING THE THREAD TENSION RELEASE TIMING ································································ 21
23.ADJUSTING THE DISK FLOATING TIMING(For S-type only) ·····························································
21
24. ADJUSTING THE THREAD TRIMMER ··························································································22
2
5.
ADJUSTING THE LATERAL POSITION
OF
THE WORK CLAMP FO
OT
..................
........
·......
..........
·..·22
26.ADJUSTING THE LIFT
OF
THE WORK CLAMP FOOT
......
..·
..........
·..
............
..·
..........................
·.... 23
27. ADJUSTING THE SAFETY PLATE
...............................................................
..
........
.........
............
23
28. SPECIFICATIONS ··················································································································· 24
29. TROUBLESAND CORRECTIVE MEASURES ·······················
·'
·······················································26
30. HOW TO SUPPLY GREASE TO THE REDUCER ···
··
·····
··
··
··
·
··
·····
··
··
··
··
··
·
··
·····
··
·········
··
·····
··
··
··
·····
··
···28
From the library of: Superior Sewing Machine & Supply LLC

~5~
!:;t;!
.D.;:+;noi$i"TiS
.....
.......................
...
........
....
.
..
..
...
..........
...
....
...... ......
.....
.....
..
.
...
........
..
.
...
... ··
··
·····
·-·
····
·
····
6
>'-
.::I::.I.L}~
,~"YY
.. ····-·
--
-
··
-· .......
.....
............
~$$*1~~1¥)1'.1~$~
--
-
--
·········
··
··
·
··
···
··
·
····
··
··
··········
···
·
··
·······. -··
··
·
···
··
··
·········
·····
··-
··
··
-·
·····
·····
·
--··
·
-·
·
··
·
··
·-··
·······
··
··
··
·
··
····-
·····
·-···
..···· ··
-
--
·--·
·· 6
1
EE~fth!:;t;!lt;l:tvt:
. . . .
....
...
...
.....
...
...
.....
...
..
..
.
..
.
....
..
....
..
..
......
..
..
...
...
..
-....
.....
......
...
..
......
...
.....
.....
8
.
,'rt;J~rl'.I><.~/J{:A
" ....
....
...
....
...
....
..
.....
.........
...
...
.....
....
....
.
2.
~~~fil¥)3(~
··-·------···
. . . .. " ..
...
. .
..
.
..
...
.
..
.
.....
..
........
.. .
..
.
..
.....
"
..
..
..
.. . .
.....
.
....
.
..
....
...
.. .. ..
. 8
3.
_&:1ffi'
j
~.lJI¥J1Jffm1Jtt
······· ·····
··
··
..
.
...
..
.
.......
...
...
.
...
.
..
...
..
.....
..
. --
--
..
..
..
.
..
....
.......
....
...
...
..
.
..
....
...
.
...
..
..
...
..
...
..
.
..
..
..
.
..
.
........
..
.
.....
. 9
4.
*ii~~I¥Jti:!Jm1Ji!
.
..
..
.
....
..... .. ..
..
.. ..
...
.
..
..
....
..
..
..
.
....
..
...
......
....
..
...
....
.
..
.......
.·
•·
....
..
.
..
..
.
..
.
....
..·-· ..
...
......
.
..
..
....
..
....
..
...
. 9
5.
*ii~~l¥1~-"
........
..
....
..
.
..
..
..
...
........
....
...
...
..
..
...........
..
--· . .
..
.
..
. .
..
....
..
..
.
..
.
......
....
.
..
....
..
...
..
.
..
.
--
..
.
..
... "
..
. - 10
6
.,
">/:i!~nh±.~
. . . .
..
......
....
........
.......
..
....
..
.
..
..
..
...........
..
........
..
.
...
........
....
10
.
~'l'ffliP:J!>(_~
................
..
.
..
....
..
...
..
...
....
..
.
....
...
..
.
..
...........
....
..
...
..
.
....
...
......
..
..
.. . . -
--
7.
~~_&:tffi'fijijfD&:tffi'
.
....
..
.....
..
..
....
....
....
...
--
..
....
..
. ·
....
-
..
.
....
.
..
..
..
...
------
-
..
--
..
--
..
....
...
..
....
.
--
....
..
...
·
--
--
·
..
..
--
-----
-
11
8.
£lf'*I¥Jfii! ··
···
··
··
·····
··
··
·
··
···
···
·····
··
·
··
·
··
······
··
·
······
··
··
·
··
·
··
··
·
··-··
··-··-
··
···
····
··
···
···
··
-
-·
--···
····
····
·
··
·
··
·
··
········
··
·
·····
······
··
·
··· ...
.....
.
..
.
..
..
.
....
.
..
13
9.
1JD7ffi
-
------
--
--
............
..
· · · · ·· · ......
..
...
....
..
.
..
....
..
....
..
....
.
....
·· · · ·
...
..
..
..
--
··
··
··
··
··· ·
..
.
..
-
----
--
·
--
-
......
..
..
..
....
..
..
..
.
....
....
.
..
13
10.
m~~l¥1~"
--
---------
---
--
--
-
-----
---
--
·-··
···-
----·--
·-
--
-·
·--
--
·--·-·--·--·
--
·--·
--
---
-·
--
·
----
-
--·--
·
--
·
-------
·
--·-
-
--
·
--
·---
--·----
·
--
·-
---
-
--
·
--
·-
-·----
-
--·
--·----
·
--·-
----·----
·
----
14
11.
~~HD:ffi*-41¥J~:t¥1Ji!
.........
..
...
..
..
.
----
·····
··
·--
·--
·-
.........
..
...
.
..
...
..
.
..
.
...
..
..
.
..
.
..
..
....
·
..
.·.
.. ..
.....
..
.
..
....
.
....
..
.
..
· · ·.
...
...
.......
..
.
..
.....
---
15
12.
~HI¥J3C~1Ji!
-
···
·--
-
---
--
--
--
-·--·--
......
.
..
.
...
.
....
..
..
..
..
....
..
....
.
..
.....
..
..
...
.
..
..
.....
.
..
..
..
..
.....
.
..
...
.........
...
....
...
..
.
..
....
.
..
..
.
..
..........
..
...
..
..
.....
..
..
....
....
15
13.
_t~l¥]~~/Ji~
....
..
.....
.
...
.....
..
.....
..
......
..
.
..
.
..
....
..
....
.......
...
...............
..
......
..
........
..
...........
..
.
...
..
............
..
...........
..
..............
..
16
14.
f~~I¥JJ&rmiA.
............
....
..
.
....
.
..
...
..
.
..
.
..
......
..
...
.. ..
..
-
--
-·-
--
-
--
-
--
-
--
---
----
-
-- --
·······
·-
.
..
...
..
..
......
..
..
.
..
.
...
.
....
..
.
..
............
..
...
..
..
.
..
.
..
...... 16
15.
~~I¥J~~t1Ji!
.....
.
...
..
..
...
..
.
..
.
..
.
..
...
..
....
..
.
...
. .
......
..
........
...
.
..
...
..
...
....
..
........
..
..
....
.
..
.
...
..
..
..
.........
....
..
...
.
...
.
.....
....
...... 17
16.
~t~I¥JMA.1Jt!
-----·--
-
----
---
·--·
--
--·
--·
·
--
-
--
---
·-
..
····
·
---
--
·-
-·-
---
·----
--
----
-
--
----
--
----
·
··
·
··
·-
..
··
··
·
--
------
··
--
-·--
---
--
--
---------
·
-----
·-
--
--
--
·
--
·-
-·
------
--
-----
--
-
-----
--
17
17.
~~jJ
..
....
. .
..
..
.
...
.
....
...
.
..
.
..
.....
..
..........
..
..
...
..
.....
.
..
..
..
.....
...
.
..
..
...
......
..
.....
..
..
..
.
...
.
...
.....
..
...
..
.
..
..
..
..
...
..
..
.
....
...
..
..
..
.....
.
..
..
..
........
..
..
.
··-
· 17
18.
fj~~5-'~1¥J~fr]
.
..
...
..
......
.
..
..
..
..
...
..
..
..
....
...
.
...
....... ..
.....
..
.
....
..
..
.
..
...
..
.
..
....
..
..
.
..
.
...
..
....
..
.
...
..
..
.
..
..
.
....
...
..
....
..
...
..
...
....
..
...
..
..
.....
18
19.
*iiWR
-ti¥J~W
.....
.
.....
....
.....
.......
...
...
...
...
...
..
...
...........
..
...
..
..
...
..
.....
..
.......
---
·-
---
----
----
-·
----
----
··
··
·
··
···
----·
···
·
-·
··
--·
···
---·
····
-
--·-----
18
20.
~;(p~~I¥J~~p
.........
..
.
..
.....
.
..
....
...
..
..
.
..
...
.
..
.
..
........
...
.....
.....
..
.....
..
....
..
..
...
..
..
.....
..
...
....
.
..
....
..
.....
..
.
..
....
.
....
...
..
...
.
..
.
..
..
...
..
..
..
..
....... 19
21.
~~HD~~I¥J!Ul*
-
---
--
--
..
..
.
..
.
....
.
..
...
.
..
..
....
..
.....
........
..
......
..
..
.
....
.
..
.
..
.. ·
..
..
.....
..
..............
....
....
......
.
..
.
....
.
..
.
..
.
..
..
..
....
---
· .
..
..
..
..
-
--
-20
22.
~¥$~~~8'-J~fr).
.
....
..
....
.....
..
..
..
..
..
.
..
..
...
..
....
..
....
.
...
...... "
---
.
..
.............
21
23.
~1J~¥$~~~1¥J~frl
(
s~)
....
....
..
.
..
........
..
..
...
.
..
--
.. ..
.
..
....
...
..
..
.
....
.
..
..
..
.
..
------
· .
...
-
...
...
---
21
24.
t7J~7JI¥J~fr)
.....
..
......
.
....
.
.......
·-
-
---
---
--
--
-
----
-
---·
······-
---
----
----
........
.
..
...
..
..
.
...
....
......
....
.
....
.....
..
....
.
.......
...
.....
.
..
.
..
....
....
....
.
.........
....
..
....
.
.....
22
25.
;f!J~Jl(J!J1Jicp,[,vf:Vjlfi¥J~fr'J
..
..
.
....
.
..
...
.......
....
...
....
.
........
..
.
..
..
.....
.
..
..
..
.. ·..
......
..
....
..·
.........
.
....
..
.
....
.
...
··..
..
..
. ·
.........
....
....
.....
22
26.
:ffl~Jmllr.u~I¥J~W
...
......
.
.....
..
...
...
..
------
......
.
..
..
. .
..
..
..
..
·-
--
--------
------
-
------
-.
.......
.
........
..
..
.. ..
....
..
....
.
...
..
..
.-
---
-- --
..
...........
.
.....
.
.....
...
23
27.
3C:3kt'Rl¥J~W
--
- --
--
··
.....
....
..
...
..
·
..
.
..
.
....
...
..
. .
....
..
.
..
...
.
..
..
..
.
..
.
...
..
..
. ·
---
.
....
.
..
..
...
--
.....
..
...
...
..
....
. ·
..
.
....
..
..
...
..
...
..
...........
·
.......
....
23
28.
mm
........
.
......
..
............
......
_
___ ___
_
_____
_
---
-
.......
..
.
....
..
....
......
..
.......
..
...
..
...
..
......
....
.
..
.
..
...
...
..
....
.
..
....
....
.
..
......
..
..
...........
....
...
.....
..
...
......
...
....
..
-25
29.
*iiM~I¥Ji!&~,
J*lt9fDf.t~--
.
..
.
---
.
....
..
.
....
.
..
-
.....
....
.
.........
....
.. .
..
..
...
...
.
.....
..
.
..
.....
...
..
......
..
--27
··
··
·
····
•···················
···
················
···
····
·
···--·
···········
··
·
···
··
·
···
· ...........
...
..
,..
..
................... .. 28
From the library of: Superior Sewing Machine & Supply LLC
~6~
WARNING:
~
To
protect against possible personal injury due to abrupt start
of
the machine, be sure to start the following work
afterturning the poweroffand ascertaining that the motor is at rest.
&
~==-
~
a
I.
,~,
f£71tfi.It~?&1Atlbii~A~$~
.
~~~~-~
.
U.~itii.~.It·lhJ§fliiiU7
.
IMPORTANT SAFETY INSTRUCTIONSI
~~511:$~
1.
Do
not place yourfingers
near
the work clamp foot while the
machine is in
ope
ration.
3. N
eve
r bring
your
fingers
or
hair close to,
or
place anything
on the handwheel, V-belt, bobbin winderwheel
or
motor
during operation.
It
may
lead to serious personal injuries.
3.
ou
q~
rp
~1'~
~
=F
t
~,
im
~
,
:t{IJIUtm
.&:t,!filfifft,
v
~.&:f/fl'
,
RJGji
,
ili1'
~fEJf<!es~fU.oo
o
~~
~
:=::i
.:1)
I
~
·
-
\
_
-rr:-
-
~,,
~
;:
-~
-
~
I o
f ;\
,,
\'
1 0 :
r7
!
'-J
~
li
~
·
f/
t
+-
:
::
: l
..i
\ !
r:
i
\ t li .
2. Make
su
re
to
tum
offthe power switch before removing the
belt cover.
4.
If
your machine is provided with a belt cover, finger guard,
and eye guard, never operate your machine with any of
them removed.
4.
3C~~.&:mfifftj}~,
ilm~,
~~&
lijljf*
~~~IJ\¥
.
~
1'~tt~rt~~~~
r
~"b
~
o
CAUTIONS BEFORE OPERATIONS
/li.Uis.Jitf.J51·$~
X
1. Do not hold the belt cover when
carrying the sewing machine.
1.
m-
~
~
IJ\¥,
m1'~
m-
.&:
m
j'
}
~
o
2.
The
sewi
ng
machine should run in the
arrowed direction. N
ever
allow the
ma
ch
ine
to run in the reverse direction.
2.
m,w
~
~fi
iJJn
JJt
,
~.&:m~~
il!
IJ
~m&:~£
t:n
tcJ
<
;r
~)
o
@t-1
1'
~
~W.~~Jiji
o
3. Remove the rubber plug.
If
the felt
placed inside
ha
s dried, lubricate the
machine referring to the description
given in "9. Lubrication".
3.
MJ
r
~
~m
~,
t~o:!if!
•
oo~tt
~~~
7
~
~
~
~
~
~~ "
1Joi1tl"
~
JJt§~
fi
1J
D
i1tl
o
From the library of: Superior Sewing Machine & Supply LLC
~7~
0
))y)
}
I
0/
""'
/ o
""'
/
/
4. Before starting a
ma
chine which hasbeen newly set
up
or
has not been used fora long period
of
time, apply a few drops
of
the
lubricating oil to main shaft components through
hole8
, one drop to the racing surface 8
of
the shuttle race, and infiltrate amount
of
the lubricating oil to the machine bed oil felte
4.
:tJJ:?i:
~ffl*ii
,f@J.~~,
~~m
~~r.n
&:ij~ms":Jli,W
tt~
.
~rm
i!!l
~illl5
B
e
JJo2-3~,
rmme~'ftm,
oo
e1Jo1~iffi
,
rmftiffi
tt
eiffir~if'JJ
o
5. Be sure to fix eye protecting covere with screw8 on machine frame before putting the
machine into service.
From the library of: Superior Sewing Machine & Supply LLC

~8~
WARNING:
The machine has to be installed
by
a serviceman
or
maintenance personnel
in
accordance with the
Instruction Manual. Set-up
of
the machine has to
be started after turning OFF the power to the
machi
ne
.
:lt~*l*'-1*~·
alilftlif!A~:§X$
fJJAiiH!UaltiB.f.IJIH~itUr
.
je~
il*'lfl~
,
··N·i!~il~i
.
1. INSTALLING THE MOTOR
/,~lfa91t~J55!
!A
&
WARNING:
To
protect against possible
per
sonal injury due to abrupt start
of
the machine, be sure to start the following work
afterturning the poweroffand ascertaining that the motor
is
at
rest.
':£.:1%
I.
~~~
m
71tfjll:~?&@lhi!.SXA.~t$~
,
illlltt•i!
.
u.~ltfiiWfJ.ll:MihFcPJitUr
.
1.Attach motor base• to table8 using bolte, vibration-
proof rubber pad0 , washer 0 , spring washer0 ,and
nutO.
2. Using bolt
Ci)
,
washerO
, spring washer
Q)
, and nut0
install motor 8
to
motor
base8
1.
ffl~it~3C~~~
·
-
~it~~
·
'
zp~
):f
et
,
~!'fl~~
wo,
:i'\
fi'!~a
o
re
.~ifl*
8
~~
~u1l
~
'G
.
.t.o
2.
ffl
/\fi'l~~
·
,
zp:
~J:f
6il
,
si\!JY£~J:f
Q)
,
/\%1!ltl«-at
0
re
~jf
f)
3/:~~
IJ~
it~
8
.l:.
o
2. INSTALLING THE THREAD STAND I
*l~~il:a9it~
/C;
c;:/ .:
~
'
i
~
..
._.,e
~
.......
~
...
~
9
""'
. i
i
w
r:
''
I;
J
Assemble the thread stand, and set it in the hole in the
table.
Tighten nut8 to fix the thread stand.
If
ceiling wiring is made, pass the power co
rd
through
spool rest rod8 .
re~~~t!3C~~UtlBfL
...t
a
t•~IID;E~e
e
.
ISJ}Efi~~~~~o
llJ
.t:J~a~r
~~~,
ID!fre~?mi~iitf~$1@ff
8
1iJ~j§
o
From the library of: Superior Sewing Machine & Supply LLC
~9~
3. REMOVING THE BELT COVER I
&:~9~.!1~9tfi~nn5!
~
&
WARNING:
To
protect against possible personal injury due to abrupt start
of
the machine, be sure to start the following
work
afterturning the power
off
and ascertaining that the motor is at rest.
'!.:1%.
' B
I.
#1:.1' m
71tfj11:~?&~11Ji§JiXAjt*~
·
~~~~~-~
.
fii~J~itfil'l~li:MibFcMiiMi
o
-
--
0
To
remove the belt cover, loosen screwe and tilt the belt
cover
away
from you until itcomes off then lift it.
* lntall the belt cover
by
reversing the above proceduce.
m~~~~a~.~~~~~~~
-.
~~~~a~~n
fb{itl¥}
~
J:filJillo
*
*'~~~a~
.
tft:Wtlfff
P
~:f§&IY-JJ
I
I\'V¥j!ff
o
4. RAISING THE MACHINE HEAD I
*1*1Jml~9~~JJ)!
WARNING:
~
To
protect against possible personal injury due to abrupt start
of
the machine, be sure to start the following
work
afterturning the power offand ascertaining that the motor is at rest.
&
'!.:1%.
' B
I.
'1:.1'
~
71tfj
ll:~?&f§t1Ji§JiXAjt
!JI~
.
~~~~~-~.
~~
.
~itfil'l~
ll:ftltiFcMiiUro
1. Remove the belt cover. With the machine head set in its installing position
on the
ma
chine table, raise the machine head in direction 0 while pushing
down (in direction
)0
bed lockere.
2. Releasing the bed locker, further raise the machine head in
direction0
until
it locks.
*To
lowerthe machine head, push up the bed locker
to
release the lock.
1.
~T
~~)'}a,
:tE~Wm~:f'~:ttmBIY-JitJ\fm
T
,
~T<~~
O)
tft:m
B
~~~
·
.~~wm~~
~
0
n~tiliill
o
2.
¥~0011
B
~~~
.
rJt~~
0
n~~itttJ:tiliill
~W.11iR~U~~
f
.t
ffi&Jl:.
o
*
~W11~@~~~
.
filiill~B~~~
.
M~~~
.
fb
T
~W.m
o
From the library of: Superior Sewing Machine & Supply LLC
~10~
5. INSTALLING THE MACHINE HEAD I
Mi9J#IMH~a9~~n5!
At
&
WARNING:
Turn OFF the power before starting
the
work so as
to
prevent accidents caused
by
abruptstart
of
the sewing
machine.
Be sure to raise the machine head with both hands. Move your hands
off
the machine head after ascertaining
that the bed locker has been locked.
'~XI:.
~71!till:a9~~-M!:
.
~~~~~-~~~~~7"M~IUUJft::t'lb~lliitU1'
.
I.
~~~
ltffl."fffliiliiM
.
~7·~---~Z~lli~~--¥
.
1. Install bed mounting
basee
to machine
tableO
using bolts
8,
flat washers 8 ande,and nuts
CD
(each 3 pes.).
2.
Fix point0 before raising the machine head.
Then fix two points
6.
1.
mr:%3~~
·
,
zp:~
Jt
•
e ,
r:P3~a
•
~
3
1'1,
:tE
5'JX~
ge
'JX~JIJ.ttt
i:J
CD
..t
o
2.
9tiEI~
O
ffB,
?&tt
t
~illime1L
!e!J:E
a
g
B
~
2@l
tti!1J
o
~i§flmt~
,
~~IJ.I~flmtift~
ftO(l{J-=F
.
~1'.te-=FW1.iU~fl
H~m~ii~i1'zll1
.
6. ATTACHING THE IDLER PULLEY I
i'ft-a{]~~
At
&
WARNING:
To
protect against possible personal injury due to abrupt start
of
the machine, be sure to start the following work
afterturning the power
off
and ascertaining that the motor is at rest.
'~XI:.
'
E3
I.
~~~
ii
71t':i
.Lt~~811Ji.§liX.A.a-
$~
,
a.lll~·~
·
~J!~ltfiiW~
lf::.fllhFc:JiiitMi'
.
Fix idler pulleye to mounting plate8
by
setscrewe.
(Caution) Adjust the clearance at 0 to justallow the V beltto
pass itthrough.
1E
'
IW~
8
ffl
!el~~&%
e
~Jm5E¥
U
'!X~:t&
8
..t
o
(
~~)
0
$~rd'l~)ji:JJ!fiEgJV~&:1ff3m~
o
From the library of: Superior Sewing Machine & Supply LLC
~11~
7. MOTOR PULLEYS AND BELTS I
.~itltfif.~Jttl
1. M-type V belts are used for this model
of
sew
ing machine.
2. This sewing machine users
two
V belts, one for high-speed sewing, and the other for low-speed sewing.
3. The table below shows the relation between the motorpulleys, V belts, and sewing speeds.
Frequency Sewing speed Motor pulley part No. Engraved mark High-speed Vbelt (mm) Low-speed V belt(mm)
2300rpm *
13531
108 50-2300 MTJVM005000(1270)
50Hz 2000rpm * 13531207 5
0-2000
MTJVM004900(1245) MTJVM004600(
11
68)
tR
OOrp
m 13531306
50-1
800 MTJVM004800(121
9)
2300rpm *13531405
60-23
00 MTJVM004900(1245)
60Hz 2000rpm *13531504 60-2000 MTJVM004800(
121
9)
MTJVM004600(1168)
1800rpm 13531603 60
-1
ROO
MTJVM004800(1219)
Note: The motor pulleys marked with asterisks are applicable
on
ly
to
cotton thread. Please orderthe motor pulleys for threads otherthan cotton
thread.
1.
i
~J§M
m!t'I9V
]f;
&:t,:'!¥
"
2.
:<t>:
fitm-t~~
m
r.~J~fflffif~~mz
f
l5\'iviD&:~
0
3.
.'
W
b~&:t,¥r~ffi&:t,'f!
,
ji~M~Et91m*~
D
T*
J5!f
5fo
fi$
""'
.~il&:li•(l(rW~
~J~P~7F
jij;!VW~&:t.f
Cmm)
iftifVW
~&:tili
(mm)
2300rpm *13531108 5
0-2300
MTJVM005000(
12
70)
50Hz 2000rpm * 13531207 50-2000 MTJVM004900(1245) MTJVM004600(11
68)
1800rpm 13531306 50- l
ROO
MTJVM004R00(1219)
2300rpm *13531405 60-2300 MTJVM004900(1245)
60Hz 2000rpm * 13531504 60-2000 MTJVM004800(1219) MTJVM004600(1168)
1800rpm 13531603 60- 1800 MTJVM004800(1219)
WARNING:
~
To
protect against possible personal injury due to abruptstart
of
the machine, be sure to start the following work
& afterturning the poweroffand ascertaining that the motor is
at
rest.
'£.:1%
I.
,~,
1§
71ifj
J.l:~~51bl!.61Aa-$~
.
awlll~•:s
.
~~itfi'IW~
J.I:.111Fc~~~7
.
*Installing the motorpulley
Set
m
otor
pull
ey
e o
nt
o
motor
shaft 0 so that
one
of
two
setscrewse
me
ets
th
e flat part
of
the
motor
shaft.
Then
tighten setscrews e.
*
.~ii&:~-(I(J~~
felJ!i;llSlli¥¥
Me
~~
:
liMili:i!J.!i,~ft!l
.
H
*
tlll
e
t¥J lfi
!!!$~Dz
f
!E
f!m
}E~t.;**
•
tp
i¥]1
f
!E
f.t~
0
:Jelf!m)i:~**
·
~
~
0
From the library of: Superior Sewing Machine & Supply LLC
~12~
*
J.t~a~nm~
*Attaching
the
belts
1. Set high-speed V belt8
on
the large diameters
of
high-speed pulley 8 and the
motor
pulley.
2.
Set
low-speed
V belt e on
the
small diameters
oflow
- speed
pu
lley e and the
motor
pulley
thro
u
ght
pr
ess
ur
e
de
cr
eas
ing pulley e and idler pulley• .
3.
Move
the
motor
pulley back or forth to provide a 2 to
3mm
clearance b
etween
high-
speed v belt eand
bobbin
winder
whee!O.
4.
Lomen setsc
rew
t9,
and
move
the
motor
to
the right
or
left to make adjustm
en
t so that
the
high-speed
V belt comes evenly
in
contact
with
the b
ob
bin
winder
whee
l wh
en
the bobbin winder
is
used (refer to "15. winding a bobbin").
5. Loosen setscrew0 ,and
mov
e
motor
base
Q)
up
or
d
own
by
adjusting
nut
0
to
perform
ad
ju
s
tment
so that the high
-s
peed V
belt
slacks abo
ut
IO
mm
whe
n
yo
u push
th
e
belt
at
middle
f)
.
6. Loosen set
sc
rewfB
, a
nd
move idler pulley
4!)
in
th
e arrowed direction to perform
adjust
ment
so
that
the
low-
speed Vbelt slacks about 1
Omm
when
you
push the belt
midd
le(f).
(At this time, set the idler pulley so that
it
is aligned
wit
h
eng
raved marker
dot
ell
on
the
installing plate.)
1.
:te:li'§i3i
vjB
&:trff
e
tt¥
1J
jlf{ji!&:tr'fffffil
&
fo~
:li&:m~
B"J*iil
~
~_t
o
2.
1
[g1~
3ivff~&:trff~)®~
~
&:1fr~
e
w·~~
e
~
ti~
IJi
~3m&:m~
e
w.
~
:li&W/~L¥Y
J
\iil~*fti_t
o
3.
Mitt
.t$!1UJF.!;;~&:w~
,
te:l~3m&:
we
f!J~~M
e
Z
rJJI¥1r
a
,l\:
~r.u3m
~
2-3
rnm
c
4.
ID~~fl~J:E~~m~~~mli¥J~~
<
~m
11
s.
®~
I¥J
~~:n
~ J ) ,
~t11!f!IJ:E~**-
e,
tr:
k:i.f$JJJ&:
w~
.
tef.li
3i
v
jB&:tr'ff
f!J
~~~~~~~~*~
o
s.
t
;~l!f!JJ:EM:**-
0,
lr:ti.f$ii.J
.~jt,
ffi~
~
~~W~ffl:
®
~f-J-Wijj~,
!tl'fmi'§i§!fvff~&:t,lffB"J~~
O
ti3!ey
if.'J
T:!fE.
l
Otnm
o
6.
l*~l!f!I
J:E
t'
**-
4!1,
r
alfriml
nrta.t$i!Jifi~
4ll
~n
~lf.
m
¥-
~1~11Ev*
~
&:1ffili¥Jcp1\:
e
rm~¥-rf
*
tomm
o
From the library of: Superior Sewing Machine & Supply LLC
~13~
8. ATTACHING THE CHAIN
/il1tla9tt~5!
~
&
WARNING:
To
protect against possible personal injury due to abruptstart
of
the machine, be sure to start the following work
after turning the power offand ascertaining that the motor is
at
rest.
't==
~
B
/.
IU#'
li71tf:il.l:[email protected]!l«AA$~,
91m~ii:~,
il~.~;til.ff
l.l:ft!JJFc:pJ;tt~J'
.
HookS-shaped hook
f)
into the hole in the tip
of
starting
lever
8,
and attach
chainG
to the S-shaped hook.
9. LUBRICATION
/1JD5m
~
&
WARNING:
To
protectagainst possible personal injury due to abrupt start
of
the machine, be sure to start the following work
afterturning the power
off
and ascertaining that the motor
is
at rest.
't==
~
B
/.
IU#'
m
7!$t:il.I:~~@IJJ~l«AA*~·
~lm~il:~.
iil:~.~;tiiW'f*
l.I:MI1.JJ!i:pjil~1'.
1.
Lubricate the machine once a
day
from lubrication hole
8.
The machine can also
be
lubricated by removing rubber
pluge.
2. Use Juki New Defrix Oil
No.2
orspindle oil
No.2
as the
lubrication oil.
*
When
using
the
thread
guide
of silicone oil lubricating unit.
(optionally available)
Supply silicone oil through silicone oil lubricating hole
f)
when
using thread guide e
of
silicone oil lubricating unit.
Atthis time, check that the thread which has passed through
thread guide e has the silicone oil on it.
1.
iWr1JD<1EfL8~-WIW&8,
4JJ7.j~~j:t!11JD<1EFX
o
2.
ll1H~fl3JUKI
No.2~;1EJJX;z~~W~nB
o
*iRffltt1M~~~,~~I!i¥
C
~~~
)
~Jft1~\Ht~~~-l*OI!i¥,
mi?£~~1JD<1EtL81JDA.1ilt~:£<1E
(
{iinl:J)
"
Jltl!i¥,
®~~~~~~o
J:t!1~~-U~:W{ii<1E
o
From the library of: Superior Sewing Machine & Supply LLC
~14~
10. OPERATING THE SEWING MACHINE
/*IMJ~a~H.Iifit
Ope
rate
the
sew
ing machine in the foll
ow
ing
pro
cedure:
1.
Tum
on
the p
ower
switch.
2. Depr
ess
the starting pedal a littl
e,
and the
work
clamp f
oot
w
ill
come down.
When
you
want
to make the
work
clamp foot
go
up, release the pedal.
3. Furt
her
depre
ss
the pedal, and
th
e sewing machine starts bar- racking. I
mme
diat
ely
after the
s
ewing
ma
chine starts
bar-ra
cking, release the pedal.
4.
When
the mac
hin
e has completed the specified ba
r-t
acki
ng
cycle,
the
wo
rk
clamp f
oot
will
automatically
go
up, and the n
eed
le
an
d bobbin
thr
eads are
trimm
ed before
the
machine stops.
(Cautions) 1. Be sure to release the pedal as soon
as
the machine starts bar-tacking,
or
else the machinewill notstop
at
the prodetermined point.
2. Ifyou fail
to
depress the pedal sufficiently, the machine may stop
at
the first
stitch. In this case, depress the pedal gain sufficiently.
3.
If
the machine will not start even when you depress itstrong enough, turn
offthe powerswitch, and remove the belt cover. Then turn changeover
pulley e (Knurled part) in
the
arrowed direction
of
low-speed pulley• .
4. This sewing machine may run rather unsmoothly on a cold morning because
it
use
s grease for the lubrication of several parts. In such a case, allowthe
machine to idle for 5
or
6 times before starting the work.
*To operate the sewing machi
ne
manually;
WARNING:
Carry outthe following steps
of
procedure after the power switch
has
been turned OFF.
Turn
off
the
powe
r switch, remove
the
upper
end
spri
ng8
, give lo
w-speed
pulley e
two
turns
in
the
arrowed direction and
the
work
clamp
foot will
come
down
.
Th
en
depress
the
starting pedal, and the machine c
an
be
run
manually.
~
ttrf
~Ua-:J
A
!ft~~~
o
t.
fTIJf.lil!
lw.
OOIUJ
o
2.
ffiWJ
.i!*MI!l1Jr.lifBL
~RW -v~
o
l"l*MmmiD
..tf
Hii'f,
~j~RfiD~OOr./i
t&,
mne~Jllt~
..tft-o
3.
l"}ll,f{
~~*•
~~~!WJtiE!M\M:I.J
o
~~liJ
1
~~jlj'ffi~IJI!m~t&
o
4.
UD11'7fn~
IY-JJhf'F
1~.
D§Jha-:J..tft,
WUT..t~~~f'tli.:.IIJJ
f'F
o
n.t•)
1.
Mimi~IDFc
,
~~---~iftfi((.]~
,
MSJWit~-MM~a~W:af.Jtt
.
F.fiJ.1lt*'JWialhFcilrL.I!IWIIJflfi
.
2.
MMJUfiR~:;;n~.~ma~
.
~PJ~a;1&tFcll~.lJ:
.
il~a.mnrlMfi
.
3.
.fflt.JU~MSJW~~~ID~
,
-·~·i1-llll
,
tfl""Flt.~U!.
reftflltf;liflfii
e <
li~Dffl!l't-Jml~
)
M¥41a:iiltfl'*•l't-Jfi
mt1JIRJ
.
4.
**1*1.ltll't-J-&~U:I$J1!1I17~illli
,
ll51M
.
tiWJtll't-J"Ih*WI
.
f;!ldtM~·s-6li!J5~il~ft'Ftl
.
From the library of: Superior Sewing Machine & Supply LLC
~15~
11. MATERIALS AND NEEDLES
TO
BE USED I
lttt~01ti*~A{J31ti1J5!
Material Needle Needle plate needle hole guide Class
or
work
Extra lig
ht
-weig
ht
material #
11
(
DP
X
5)
D2426282COO Knit goods, tri
cot
we
ar
Sy
nth
etic fiber material
#14
(
DP
x 5,
SUPER
needl
e)
B2426280000 (sta
nd
ard) Men's suit
s,
Ladies' wear
Medium- weight material
#16
(
DP
XS)
B2426280000 (standard) Men's suits, Ladies' wear
Heavy-weight material
#18
(
DP
x
5)
B2426280000 (standard)
Working
wear, overcoats
;{fjf*
Mitt
tt1UirtiJB
-~.i.
t3!~*'1-
#11
(
DP
X
5)
D
24
26
282COO
jt~.fc
'
rlfif..}t{~
ft
~
#14
(DPxs
.~-tl~
t
)
B2426280000
(~$)
~!l!'i,~!l!'i
tf:!JJ*
~
#16
(
DP
X5)
B2426280000
(~$
)
~!l!'i,~~
JJ;j<;~
# 18 (
DP
X
5)
B2
426280000
(~$)
IfFij~
,
::k:t<:~
12. ATTACHING THE NEEDLE I
*l~tA93t~1J5!
WARNING:
~
To
protect against possible personal injury due to abrupt start
of
the machine, be sure to start the following work
afterturning the power
off
and ascertaining that the
mo
tor is at rest.
&
~==
i.
JG!~
~7~J.I:.~~@Ibii!UAJt·~
·
flllll~t»
.
~J~;tMi1W'{:$J.I:.MIJJFc~)l~t
.
3C~~~
t
rey,
~~~IBJ5E~&\1
e
,
tel.fil
i
te~
*tiJiiErtoOOM
.
tel
-ilit~~~1
f
H
tff
f
L
miA.
,
?!.:
13tt;~[ji!)YE~
**-
•
o
()
:£;1 )
1.
~D·M~~DOII~m~
.
a.reMttWn11H1~!M.
.
2.
11::MUi~itlln~
.
IW~Jf.lil::li'JJf.liH*&.it
.
Loosening
se
ts
c
rew
e.
in
se
rt needle e
full
y into
th
e needle
bar hole
with
the long groove
of
th
e needle
fa
cing towards
yo
u, then tighten set
sc
rew 8 .
(Cautions)
1.
If
the bar-tacking stitches
asOshown
ab-
ove are produced, install the needle so
that it slightly faces to the left.
2.
Use a SUPER needle for synthetic fiber
when sewing with synthetic fiber thread
or material.
From the library of: Superior Sewing Machine & Supply LLC
~16~
13. THREADING THE MACHINE I
J:Jl~9~*in5~
#\
&
WARNING:
To
protect against possible personal injury due to abrupt start
of
the machine, be sure to start the fo
ll
owing work
afterturning the poweroffand ascertaining that the motor
is
at
rest.
'!~
' B
/,
IU,\
li71lfill:~~P.Rihl§.s.tA..••~.
~1111$11~
.
u.~ii~W~ll:•lhJ6M-i1Ui
.
Thread
the
mach
in
e
in
the
or
der
a.~
s
hown
above. Leave
thread
of
approx. 4cm
on
the needle.
(Cautions) 1. Ifthe machine is equipped with a
silicon oil lubricating unit, pass the
thread through guide e
of
the si
li
con
oil lubricating unit. (Thesilicon oil
lubricating unit is optionally available.)
<
a•
l
2. For a thick thread, pass the thread
through only one
of
the two holes in
needle barthread
guide•
.
1. 1£fflj!)
dlley
,
~~~,.......
.
(ill
••
f4)
2.
UH~
,
!I.R~&tffd.ftea~-111L
.
14. REMOVING AND INSTALLING THE BOBBIN CASE I
~tia9Im-rM.A
#\
&
WARNING:
To
protectagainst possible personal injury due to abrupt start
of
the machine, be sure to start the following work
afterturning the power
off
and ascertaining that the motor is at rest.
'!~
' B
/.
IU#\
ji71l1Jll:~~@lhi§I£Aa-•~
.
illlltf.'lliF-
,
U
.
~;iii.~ll:f!llbJ6JiitM'T
.
1.
Open
cylind
er
arm cap
8.
2. Raise and
hold
the latch lever
of
bobb
in
cas
e (i} to take
it
out.
Th
e
bobb
in in the
bo
bbin
ca.se
does not
fail
as
far
as
latch lever e is raised and held.
3. To load
the
bobb
in
case into the s
hut
tle,
fit
it
on
to the shaft
of
the
shuttle and snap
in
the
latch lever
of
the
bobbin
case.
t .
HOO
Wiftt~~
eo
2.~~
~
-
~~~
-
~ili~~
o
¥
$~~~~~~*~~
0
3.
tiA
I!if
,
JE\
ME
ttttai~Umi
f~~_t
.
~1tdU
J
M~~
o
From the library of: Superior Sewing Machine & Supply LLC
~17~
15. WINDING A BOBBIN I
~Wa9W=Mn5~
1.
Attach
bobbin
8
to
bobbin
winder
spindle@.
2.
Thread
the
winder
in
the
order
as
illustrated
and
wind
the
thread
onto
the
bobbin
four
or
five turns.
3.
Push
bobbin
wmder
trip
latch
0 towards
the
bobbin
(in the arrowed
direction),
and
the
winder
starts to
wind
the
bobbin.
The
winder
will
automatically stop
as
soon
as
it
has
wound
a
predeter-mined
amount
(80%
of
the
capacity
of
the
bobbin)
of
thread
round
the
bobbin.
4.
To
adjust
the
amount
of
thread
wound
round
the
bobbin,
loosen
nut
8
and
sc
rew
in
adjusting screw 0
to
decrease
the
thread
amount.
5.
If
the
thread
is
not
wound
evenly
round
the
bobbin,
loosen
screw (i) and
move
bobbin
winder
base 8 in
the
arrowed
direction
to
make
adjustment.
(Caution) Ensure to use the genuine JUKI bobbin case and bobbin.
1.
mniE~tifl3~/~~fm8
o
2.
~D!IIJ'iJT~~{J'~~,
fJ]f.j]IJI}jrPJ~4-5~g
o
3.
rPJJilE~fJtiJ
(
jf.f~}jrPJ)
iti:~JilE~JEmlll•'
gt~MJ~@~.
~~5i-5E
it
(
JilE~~>'H!f!B"JSO%
)
~
§JID~
.il:
a
4.
f~wmg:~:~.
~~m~;_f~frl~ae.
~~~g::lif~W~M•.
~
g!l:1f!Po
5.
~g1lllf.¥,
~t$~fBl5E~iltii
o,
rd'ffi1J
l
1JtnrP1lJ;tJJmg~!1-'Hl!Z•rt1'11'*
ffr
L
16. THREADING THE BOBBIN CASE
IME-Mra9fi.A.n5~
1.
Hold
bobbin
8 in
hand
so that
it
spins counterclockwise
and
set it
in
bobbin
case
f).
2. Pass
the
thread
throgh
slot 0
in
the
bobbin
case. Pull
the
thread
to
pass
it
under
the
tension spring
out
to
thread
exit$.
At
this time,
confirm
that
the
bobbin
spins in
the
arrow
ed direction
when
the
thread is pulled.
3. Pass
the
thread
through
hole
0,
and
allow the thread
to
trail
about
2.5cm
from
the
hole.
1.
'¥:$:1llE~8,
il!UMJ~ti:1:J~~®1JrP1,
taf.A.1&~8
a
0 2.
Ng~~1&~~goe,
lli:~Mj.
ggtQJtJ.i~~~JJiJ!'I!~TB"J~goer:pru:tl:l*
o
3.
:!EM~~fi'jg~B"J~goo.
regt~gotv:tl:\2.5
Cill
o
17. THREAD TENSION I
*l~JJ
*Adjusting the needle thread tension
As
thread
tension controller
No.
1 8 is
turned
clockwise,
the
length
of
the
thread remaining
on
the
needle after
thread
trimming
will decrease,
and
vice
versa,
Minimize
the
length
of
the
thread remaining
on
the
needle
as
far
as
the
thread does
not
slip
off
the
needle.
As
thread
tension controller
No.
2
f)
is
turned
clockwise,
the
needle
thread
tension increases,
and
versa.
* Adjusting the bobbin thread tension
Turning
thread
tension adjusting screw 8 clockwise will increase
the
bobbin
thread tension,
and
vice versa.
*
J:*l~1.Ja9GM
Jtu;t:J"-tJJm-~n~til£m
e.
wgftd¥l~U~t!m®~g~~.
rtutr:•ib
~~
o
*~~~~~g,~~~~
o
~;t:J"-th~=~~JJ~JilEm
•.
...t~~tJ!f~ffi,
~tr:•~~
o
*f4ll~1.JMG!ff
re~~JJ~i\tiie!Elti"-,
@;g'*JJ
~~ffi,
rtutr:*'~~~
o
From the library of: Superior Sewing Machine & Supply LLC
~18~
18. ADJUSTING THE THREAD
TAKE-UP
SPRING I
Wi~ii~iiJiff
The
no
rm
al stroke
of
thread
take-up
spring 8
is
6
to
8
mm
, and
th
e tensi
on
at the starting
point
is 0.3 to
O.S
N .
*Adjusting
the stroke
Loos
en
screw8 ,and cum tension
contro
ll
er
asse
mbly
e clockwise
to
increase
the s
tro
ke
or
co
unt
ercloc
kwi
se to decrease it.
*Adjusting
the
tension
l
mert
the
bl
a
de
of
a flat
-bi
t scr
ew
dri
ve
r
int
o
the
groove
in
the tens
ion
post8 ,
and
turn
it
clockwise to
in
crease the tension or counterclockwise to decr
eas
e
it.
(Caution) Decrease
the
tension
of
the thread
take-up
spring
for
a
synthetic fiber thread.
~~~~
~~~
f$!1VJ:!im
&-smm
,
mltm~U~~I¥J%i~!!i;o
.3
-o.sN
o
*~11J:R99DIIafJ
~~
~
~~~
s
.
~~
-
~~~
n~~m
·.
~~
~~*·~
~~
~
-~
/j \
0
*M99~ali
fl:lllm**JJ
c-)
i\j~~JJ~!Hf
e
i¥J
fi!!i
rp,
~ti~$i!IJ~~tn
.
r5Jti:.iib~
~~
0
<
5!~
l
11::MUI~
.
Rle!#~f!ijUVH~~~-rJi
.
19. ADJUSTING THE LENGTH AND WIDTH OF
BAR-
TACKING I
MMJR'i"a~DiJiff
WARNING:
~
To
protect against possible personal injury due to abrupt start
of
the machine, be sure to start the following work
after turning the powero
ff
and ascertaining thatthe motoris
at
rest.
&
'!..:a.
' a
I.
,~,
a
71$/;.IJ:~t&~~~.A.Alt•~
.
aa
f*tl~
.
u.Y~•~
J.J:
M11J
Fc:jiji1Hr
.
--
*
1:JDI!l:Li:Ji99
Dll!ii
*Adjusting
the
bartacklng lenght
Push and open bed
cover
(A
)e
in
the arro
wed
direction,
and
loosen
nut
8 .
Mov
e feed across regulator e towards you to
in
crease the
ba
-
r
ta
c
king
length or away from you to decre
as
e it.
Af
ter adjustment, ti
g-
ht
en
nut
8 and close bed cover
(A)
e .
*Adjusting
the
bartacking
width
Push and
ope
n b
ed
cover
(B
) 0
in
the arrowed
dir
ection, and l
oosen
nut
@.
M
ov
e feed regulat
or
0 to t
he
le
ft
to increase the hartacking
widt
h
or
to the
ri
g
ht
to
de
crease
it
.
Mt
er adjustment, ti
ght
en
nut
0
and
dose
bed co
ve
r
(B)
0 .
¥J3if.f
fiit1J
i
tlJ
~OO~!H'i-.i'.
<A ) • ,
J$~tlt:l%!li!«EJ
8
,
r
~
J
ooM~fh~
3
2U~
~uH
e
tJ
o
l!ll
*ii*~~iil:
,
~~oo~
m~
u
~~
o
~
f1l'i
~
.
~~tl3.%M~~11AA:EJ
8 ,
fmMt:m
it5'
i-
~
(
A)
8 0
*
1lli!IWJia~D.IM
WjifJ
mtn
rtiJ~ImtM
f5'i-
~
( B ) 0 ,
~~Jf~t'«ffJ
O
,
rtiJ:ti~ii!J~~
~
frl
ffe
;IJO!QJ~
Ji
~~:J[,
rPJ~~~~
IJ
~~o
~M~
.
~~
~
:l%~fil
!f!.'-ffl:
4D
,
IUJM~
:lf
5'}.'¥
(B )e a
From the library of: Superior Sewing Machine & Supply LLC
~19~
20. ADJUSTING THE FEED TIMING I
~{f]I6J~89~fri
WARNING:
~
To
protect against possible personal injury due to abrupt start
of
the machine, be sure to start the following work
after turning the power offand ascertaining that the motor is
at
rest.
&
~.:a:
' E3l
I.
~~~
ii7Jtfjl.l:.~~.§ltl~l«A~$~.
~~~~.::11!.
tii~.~lttiiWf.f;l.I:.Mibffiilii1MT
.
1.
Rai
se the
machine
head. (See "4. Raising
the
ma
c
hine
head")
2.
Loosening
hexagon
nut
f)
and
socket
s
crew
8,
tum
feed c
am0
to
perform
adjustment so that
the
material feed is completed at
the
moment
the
point
of
needle e has
lowered
to
a
height
of
7
to
1
Omm
above
the
surface of
throat
plate8 .
Turning
the feed
cam
clockwise will delay
the
compl
etion
of
the
material feed,
and
vice versa.
3.
After
adjustment, securely
tighten
soc
ket
screw e
and
hexagon
nut@).
-fi
Better thread
temion
is
obtained
as
the
above-mentioned
height
is
adjusted to
about
7mm.
ti
If
starting stitches
formed
are loose
when
using a synthetic fiber
thread, adjust
the
above-mentioned
height
to
about
lOmm
in
order
to
prev
e
nt
such trouble.
4.
Stop-motion
regulating c
am
Ci)
is
turned
together
with
feed ca-
m0
.
Therefore,
loo
s
en
setscrew 0
and
turn
the
stop-motion
regulating c
am
to
make
adjustment so
that
stop-motion
regula-
ting
cam roller 8 enters stop
motion
from
the
low-speed
revo-
lution
when
stop-motion
hook
0 tills
onto
stop-motion
cam
sc
rew
No.
1 0 at
the
final stitch.
1.
fa~~~:ij{
o
(
?£.~.~~2]{
"4.
~W~i¥JfaJm/J$"
)
2.
tiUtei'i~W!Iififf~¥U~~.&8J:.007-10mmi'i~
f
irtl~.
~~
7\ft!~-ffJ:e:fD/\ftlfl~:&e,
"iJJ~1nr.J~ct~1'Jmlfi'i,
iil~;ffi~
.Ito
rtuk=l*'~;ffii¥
.It~~,
[l't]tr:*fJ'!U~!fl
o
3.
~~1H~7\fi'HL~~e
~7\ftJ~Bt•lit1!1*"
o
*~~t&Iuliff~¥U~UH1li007mmllftj}f~W:
ll::i¥.J~iS,
~~
%!:*~0
*~ffl1t~~~.
~o*g:t£~~~1¥1~,
re~~iWi11MW5J~
¥1J()I~tf.&J:.OO
1
Omm,
~~%!:*~
o
4.
*'ih~;ffit_l.j~·,
7t/1Mtf~ifj1Jt_l.j~·iliiPJBi¥ibf'F,
PfitJ~
~~IIDJE~*-*',
*'iJJJtlij!f:I~%U8~,
~JtMiiJfDJ!A.Jt
•uif~-!11!«*-*•,
~frJJtlllm
ill
uu~•
t
:tf.a;~•JiJ*
/\
71
1¥1
i¥JIPJ
~Bi¥FdL
From the library of: Superior Sewing Machine & Supply LLC
Table of contents
Other Siruba Sewing Machine manuals

Siruba
Siruba DL7300 User manual

Siruba
Siruba HSP-68100 User manual

Siruba
Siruba VC008A User manual

Siruba
Siruba 700K User manual

Siruba
Siruba 700KS-LFD6-K1 User manual

Siruba
Siruba VC008B User manual

Siruba
Siruba ASP-PTA100 User manual

Siruba
Siruba Sew Reach F007KD User manual

Siruba
Siruba LZ457A Datasheet

Siruba
Siruba DT8200 Series User manual

Siruba
Siruba DL3880 Series User manual

Siruba
Siruba L381 User manual

Siruba
Siruba ASP-JBL300 User manual

Siruba
Siruba R718K User manual

Siruba
Siruba HSM-2517 User manual

Siruba
Siruba NC008 User manual

Siruba
Siruba C007KP User manual

Siruba
Siruba DL7200 User manual

Siruba
Siruba Siruba HSO-747 User manual

Siruba
Siruba C007KD User manual