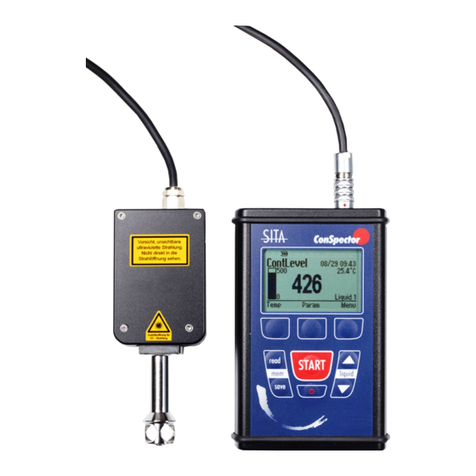
Sita ConSpector User manual

SITA Messtechnik GmbH
- Operating Instructions -


SITA Messtechnik GmbH – Operating Instructions SITA ConSpector
1
Contents
1Intended use .......................................................................................... 2
2Fluorescence measurement for monitoring bath contamination....................... 4
2.1 Measurement procedures.................................................................................... 4
2.2 Examples of Applications..................................................................................... 5
3Quick-start ............................................................................................ 8
3.1 Sampling ........................................................................................................... 8
3.2 Perform measurement......................................................................................... 8
3.3 Checking the device (short description) ................................................................ 9
3.4 Cleaning (short description)................................................................................. 9
4Getting to know the device..................................................................... 11
4.1 Design............................................................................................................. 11
4.2 Immersion probe .............................................................................................. 12
4.3 Power supply.................................................................................................... 13
4.4 Display ............................................................................................................ 13
4.5 Keyboard......................................................................................................... 15
4.6 Setting device options ....................................................................................... 15
5Putting the SITA ConSpector into Operation .............................................. 17
6Profiles and Profile settings ..................................................................... 20
6.1 Measurement of fluorescence intensity in RFU..................................................... 20
6.2 User-defined output – ContLevel ........................................................................ 22
6.3 User-defined output – e. g. Concentration .......................................................... 23
7Saving and readout of measuring data..................................................... 24
8Maintenance and Troubleshooting........................................................... 25
8.1 Device inspection ............................................................................................. 26
8.2 Cleaning the Immersion Probe........................................................................... 31
8.3 Adjustment of the Sensor................................................................................... 32
8.4 Replacing the battery ........................................................................................ 33
9Technical data ..................................................................................... 34
10 FAQ / Frequently asked questions ........................................................... 35
11 Transport, Disposal............................................................................... 37
12 Windows software SITA-ProcessLog.......................................................... 38
13 Appendix............................................................................................. 41
14 Admin Code ........................................................................................ 42

SITA Messtechnik GmbH - Operating Instructions SITA ConSpector
2
1Intended use
Please read these instructions completely before use and follow the safety instructions. No warranty
or liability will be accepted by SITA Messtechnik GmbH for any damage caused by improper han-
dling of the device or its components. Pay special attention to the following information:
Check the intactness of the device and the accessories and the compliance with the scope of
delivery and the packing list immediately after receipt.
Keep these operating instructions handy for all users.
Use the device for no other purposes than that specified in these operating instructions. Any other
use may cause hazards or damage. No liability for such damage will be accepted by the manu-
facturer. The user will bear the risk exclusively.
Attention: The radiation emission is in a non-hazardous range (EN 62471, free
group). Nevertheless, do not expose yourself directly to the invisible ultraviolet ra-
diation emerging from the immersion sensor of the sensor head. Avoid looking di-
rectly into the ray outlet opening.
Do not open the device (exception: battery replacement, see section 8.4), otherwise all warranty
claims will be voided. Any repair of open devices usually involves higher testing and repair costs.
Read the operating instructions and additional instructions, if any, prior to installation, start-up and
maintenance
Avoid any mechanical damage, especially to the display and the light conductor but also electrical
lines.
Avoid strong light irradiation or rapid light changes during a measurement.
Only the immersion sensor should come into contact with the liquids. Make sure the sensor housing
and the basic device do not come into contact with acids/alkaline solutions as well as organic
solvents. In case of doubt, test the chemical resistance of the SITA ConSpector according to the
material specifications (see section 4.2).
Do not use the device in a corrosive environment.
Avoid any extreme stress, such as high temperature or high air humidity. Allow the cold device to
adapt to room temperature before you switch it on.
To operate the device, always use USB-conforming interfaces or the original power pack supplied.
Should problems occur, contact the manufacturer of the device or your dealer.

SITA Messtechnik GmbH – Operating Instructions SITA ConSpector
3
Manufacturer:
SITA Messtechnik GmbH
Gostritzer Straße 63
01217 Dresden
Germany
Phone: +49 (0)351 871 8041
Fax: +49 (0)351 871 8464
http://www.sita-process.com
e-mail: info@sita-process.com
OI Version: Rev6 (07/2022)
Valid from device firmware version 2.02
Changes in the sense of the technical advancement reserved.

SITA Messtechnik GmbH - Operating Instructions SITA ConSpector
4
2Fluorescence measurement for monitoring bath contamina-
tion
This manual describes the SITA ConSpector measuring device. The handy and easy-to-use device
is used for fluorescence measurement in liquids, e.g. for monitoring bath contamination in cleaning
and rinsing baths. For this purpose, the device detects residues of fluorescent impurities in the
liquid on the basis of fluorescence measurement. The measurement result is output as relative
fluorescence intensity in RFU. The unit RFU stands for Relative Fluorescence Unit and refers to the
fluorescence standards of SITA Messtechnik GmbH. The higher the measured value in RFU, the
higher the concentration of fluorescent substances.
2.1 Measurement procedures
Short description
The fluorescence of the bath contamination (e.g. drops of oil)
is excited by a UV light source. A photodiode in the sensor head
of the SITA ConSpector measures the intensity of the radiation
emitted by the fluorescence at a defined wave length in the blue
light spectrum. The strength of the fluorescence depends on the
contamination level per volume.
The SITA ConSpector works on the confocal measuring
principle. The excitation light and the light emitted by the
fluorescence follow the same parallel ray path. The
measurement of the contamination level can be easily realised
by immersing the remote immersion probe into the bath sample.
Detailed Description
Measuring principle
The fluorescence of organic contaminants (oils, greases, cooling lubricants, release agents, etc.)
is excited by a UV light source. A photodiode in the sensor head of the SITA ConSpector measures
the intensity of the radiation emitted by the fluorescence at a specified wavelength in the range of
blue light. The intensity is measured in the unit RFU (Relative Fluorescence Unit) and is related to
the SITA fluorescence standards. The lower the measured value in RFU, the lower the exposure of
the bath sample to fluorescent substances.
The fluorescence measured in the process liquid is a cumulative parameter of all fluorescent matter.
If the process bath has different types of contamination, the measured fluorescence cannot be used
to determine the kind of contamination or the individual concentration of the same. Non-fluores-
cent contamination introduced into the process bath are not detected.
Besides the continuous inspection of the bath contamination the device can also be used to meas-
ure the oil concentrations in solvent baths.

SITA Messtechnik GmbH – Operating Instructions SITA ConSpector
5
Fluorescence of contamination
In production aids, fluorescence is largely due to the aromatic ring systems contained in additives
but primarily also in the mineral oil itself, as well as the unsaturated structures of the oils and fats.
Carboxylic acids and their esters as well as aliphatic ketones fluoresce, too. The fluorescence
measurement detects slightest traces of fluorescent substances.
Exceptions are substances that do not fluoresce when excited with UV light. Those include some
silicon oils, saturated organic compounds as well as short unsaturated hydrocarbons, metals and
their oxides. Processing aids such as oils, greases, cooling lubricants and release agents are tech-
nical liquids that also contain numerous additives, which can likewise contribute to fluorescence.
By adding fluorescent pigments or dyes as fluorescent markers, a non-fluorescent substance can
also be detected.
Photobleaching
Photobleaching is a dynamic process in which the contamination is photochemically destroyed by
UV excitation, thereby diminishing its ability to fluoresce. The strength of the photo-bleaching effect
depends on the substance. The SITA ConSpector was designed in such a way that the sampling
time of a measuring point keeps the photo-bleaching effect as low as possible. When measuring
in a sample mixed with the magnetic stirrer, the medium is also permanently exchanged and a
photo-bleaching effect will generally not be visible.
Defining limits for bath contamination
The displayed measurement value in RFU increases with increasing bath contamination (see appli-
cation examples). Based on reference samples or empirically by the effect on the part quality, a
limit value (alarm) of the contamination level can be defined. If this limit value is exceeded, the
device issues a warning and the plant operator can immediately initiate the necessary measures.
2.2 Examples of Applications
The quick and simple monitoring of the contamination level of the process baths is used as the
basis for process optimisation and achieving high process reliability. The SITA ConSpector captures
process-related changes and allows them to be compensated for through process management
measures. An example of this is the appropriately metered addition of cleaning components and
the removal of the contamination introduced with the immersed parts through bath maintenance.
Overdosing practiced for safety reasons and the premature new bath formulation can be avoided
by monitoring the contamination level.
The following examples illustrate the connection between the fluorescence intensity in RFU output
by the SITA ConSpector and the concentration of the contamination in the bath.

SITA Messtechnik GmbH - Operating Instructions SITA ConSpector
6
Example 1
In this example, the process
bath is contaminated through
the introduction of oil. The in-
creasing contamination of the
bath by the oil causes the
value of the measured fluo-
rescence to increase. The fig-
ure beside shows the develop-
ment of the fluorescence in-
tensity, measured by the SITA
ConSpector, in connection
with the oil concentration in
the process bath.
The value of the measured
fluorescence intensity depends not only on the amount but also on the type of contamination. Since
the requirements for the cleaned components can also vary greatly, the limit value for the degree
of contamination of the bath must be determined individually depending on the process.
A limit value (alarm) for the degree of contamination can be defined on the basis of reference
samples or empirically through the effect on the part quality. If this limit value is exceeded, the
device issues a warning and the plant operator can immediately initiate the necessary measures.
Example 2
The following figure shows the
change of the contamination
level in relationship to the time
for an aqueous cleaning bath
with high introduction of con-
tamination and a short bath
life time of two weeks. After the
new bath preparation, the flu-
orescence intensity increased
continuously due to the impu-
rities removed from the metal
parts. Partial discarding took
place at the weekend. After an-
other five days, the contamina-
tion level rose to the previously defined limit. Subsequently, the bath was discarded and a new
approach was made.
Oil concentration in %
Fluorescence intensity in RFU
Fluorescence intensity in RFU

SITA Messtechnik GmbH – Operating Instructions SITA ConSpector
7
Example 3
In order to preserve components after solvent cleaning, corrosion protection oils are used. The
corrosion protection of the components is influenced by the concentration of the corrosion protec-
tion oil in the solvent. Since the concentration decreases due to the process, it must be monitored
and re-dosed. The first figure shows the correlation between measured fluorescence intensity and
the concentration of the corrosion protection oil in the solvent. The second figure shows measured
bath samples before and after dosing.
46
4261
6824
8404 9397 10030
0
2000
4000
6000
8000
10000
12000
14000
012345
Fluorescece intensity in RFU
Concentration Anticorit MPC 5000 in %
in Dowclene 1601
18,3
1920,1
2449,7
1718,6
0
500
1000
1500
2000
2500
3000
3500
Dowclene 1601 Badprobe 19.03. vor
Nachdosieren
Badprobe 19.03.
nachdosiert
Badprobe 20.03 vor
Nachdosieren
Fluorescence intensity in RFU
Dowclene 1601 +
0,25 vol.-%
MPC 5000
Dowclene 1601 +
0,75 vol.-%
MPC 5000
Dowclene 1601
Bath sample
before redosing
Bath sample
after redosing
Bath sample
before redosing
on the next day

SITA Messtechnik GmbH - Operating Instructions SITA ConSpector
8
3Quick-start
The quick-start chapter contains the most important information for operation, conduct-
ing a measurement and inspection of the device in abbreviated form. The single sections
of the quick-start chapter provide cross references to later chapters with more detailed
information on the respective topic.
3.1 Sampling
Take samples at a well-mixed and representative sampling location. Always carry out
measurements at the same sample temperature. Allow samples to cool down to room
temperature before starting the measurement.
3.2 Perform measurement
1. Switch on the SITA ConSpector (press -key for 2 s).
2. Choose the desired measuring profile. The active
measuring profile appears at the lower right edge of
the display. Use the arrow selection keys Liquid to
change the profile.
3. Place the stainless steel beaker filled with approx. 80 ml of the sample liquid (ap-
prox. 1 cm below the rim of the beaker) on the support surface of the magnetic
stirrer. Place a magnetic stick in the beaker and turn the rotary knob to mid posi-
tion.
4. To immerse the immersion probe into the sample liquid, lower the device holder
by using the star knob screw (see set-up in picture above). Immerse the immersion
probe approximately half way into the bath sample. The limiter should rest against
one side of the beaker.
5. Use the lid to cover the bath sample.
immersion
probe
limiter
immersion
depth
active profile
lid closed
12 o'clock position
measurement in
stainless beaker

SITA Messtechnik GmbH – Operating Instructions SITA ConSpector
9
6. Observe the correct sample temperature (temperature indication on the display)
While measuring, mix the sample thoroughly using the magnetic stirrer.
7. To start the measurement press the START key.
8. Write down the measured value.
Please note:
The device comes with an internal data logger. In the default settings
all measuring values are automatically saved within the used profile. To export
measured values use the software SITA-ProcessLog. The measured values can be
displayed on the device by pressing the read key.
9. Rinse off the immersion probe with water (e.g. using a spray bottle). Continue
measuring with the next sample.
3.3 Checking the device (short description)
Check the device regularly to identify contamination on the
immersion probe (light conductor and limiter). Use the stand
and place the immersion probe in the clean and empty stain-
less steel cup; cover it with the respective lid (blank measure-
ment set-up). To start the device check select Menu>Check-
ing.
3.4 Cleaning (short description)
In most cases it is sufficient to rinse the outside of the
immersion probe after the measurements. When
measuring aqueous samples, water is suitable for
rinsing. When measuring solvent samples, rinse and
clean with the clean solvent.
If both aqueous samples and non-polar solvents are
measured, rinse or clean with an alcohol (e.g.
isopropanol) before switching from one to the other. The
intermediate step with a polar alcohol such as
isopropanol is needed because non-polar solvents and water are not mixable. The
alcohol removes the residues from the immersion probe and makes it wettable for the
following sample liquid.
blank measurement setup

SITA Messtechnik GmbH - Operating Instructions SITA ConSpector
10
You can pre-clean the immersion probe with a mild cleaning solution. To do so, please
prepare the measuring arrangement with screwed-on limiter and using the cleaning so-
lution instead of a sample.
Use demineralized water to rinse off cleaning agents and other residues after cleaning
using water. Check the result (see ‘Checking the device’) and repeat the cleaning process
if necessary.
Please clean the stainless steel beaker after use.
For a detailed cleaning, e.g. after a failed test/empty
measurement, you can also carefully unscrew the lim-
iter of the immersion probe. Then clean the end of the
glass rod. Cotton swabs soaked in alcohol or water are
suitable for this purpose. Avoid damaging the glass
rod.
For more information on cleaning, see the operating instructions in chapter 8.2.

SITA Messtechnik GmbH – Operating Instructions SITA ConSpector
11
4Getting to know the device
4.1 Design
BASIC UNIT
USB:
USB: Universal interface (USB-B) for power supply/battery
charging (see section 4.3) and for connection to the PC
Connecting line:
connects the basic unit with the sensor head
Display:
LCD graphic display with background lighting (see also
section 4.4)
Keyboard:
Robust membrane keyboard for direct access to device
functions (see also section )
Housing:
Sturdy aluminium housing
Service interface:
Log printer (optional)
Socket
To connect the connecting line with the basic
unit, make sure the socket and the plug are
properly aligned. An improper alignment or
force effects may damage the contacts.
(see section 5)
USB
Service

SITA Messtechnik GmbH - Operating Instructions SITA ConSpector
12
SENSOR HEAD
Connecting line:
connects the sensor head with the basic unit
Magnetic plate:
secures the sensor on the counterpart of the stand
Immersion probe:
The immersion probe is immersed approximately to the
middle of the probe into the liquid to measure the con-
tamination level. (see also section 4.2)
Limiter:
This is a part of the immersion probe. Limits the effective
space of the UV radiation thereby creating a defined liquid
space.
4.2 Immersion probe
The immersion probe on the sensor head of the SITA ConSpector is equipped with a light conductor
on the inside through which the excitation radiation is emitted into the liquid. The fluorescence
radiation excited in the defined liquid space at the end of the immersion probe is conducted via
the light conductor into the sensor head and from there to the photodiode.
The immersion probe and thus also the light conductor are chemically resistant against the effect
of organic, acid and alkaline solutions. The immersion probe consists of stainless steel (1.4301),
quartz glass and Viton. Avoid prolonged contact of the immersion probe hydrofluoric acid and hot
phosphoric acid, strong alkaline solutions (pH 12) and phosphates.
Avoid mechanical loads or mechanical damages of the light conductor.
Remove the limiter only to clean the immersion probe since it protects the
visible part of the light conductor against mechanical damages.
To connect the connecting line with the basic
unit, make sure the socket and the plug are
properly aligned (see section 5).
Make sure to regularly clean the immersion
probe, the limiter and especially the visible
part of the light conductor from contamina-
tion (see section 8.1
). Do not look directly into
the ray outlet opening while measuring is in
progress.

SITA Messtechnik GmbH – Operating Instructions SITA ConSpector
13
A temperature sensor is integrated in the immersion probe to measure the temperature of the
sample.
4.3 Power supply
In mobile operation power is supplied by an integrated lithium ion battery. The integrated charging
circuit of the device charges the battery gently within a maximum of 7 hours. So express battery
servicing is not needed and you can operate the device with the power pack supplied or an USB
interface if possible. When the battery is empty (as shown on the battery charge display or device
cannot be switched on) connect the device with the power pack supplied or a USB port.
For initial use charge the battery completely using the power pack. If the battery capacity decreases
noticeably after about 1,000 charging cycles, it can be replaced (see section 8.4).
It is possible to disable the battery charge function (see section
4.6) and thus conserve the battery if you permanently use the
power pack or the PC interface to operate the SITA ConSpector.
If the charging function is disabled, a warning symbol will ap-
pear on the display (see section 4.4).
Stored measured values and set device parameters will be maintained even if the battery is empty
or when there is no power supply.
4.4 Display
The SITA ConSpector has a display on which the necessary information is output according to the
various operating states (FluoLevel, Cont(amination)Level or User-defined profile). The most im-
portant output contents are shown below as an introduction:
Toolbar:
Battery charge level (3 bars = fully charged)
PC or power supply connection
Signal tones On/Off
Warning "Charge battery off"
Operating mode
(here: FluoLevel)
Measured value
Measured value
(graphically)
Toolbar
Date and time
Temperature
Profile name and warnings
Software key assignment

SITA Messtechnik GmbH - Operating Instructions SITA ConSpector
14
For better orientation, the current operating mode is displayed (FluoLevel: Determining the fluo-
rescence intensity, ContLevel: Determining the degree of contamination of a liquid, Concentration:
user-defined concentration characteristic curve). The recorded measured values always refer to the
respectively selected liquid profile ('Liquid x').
The software keys have different assignments. Depending on the operating state assignments may
be, for example, navigation arrows or OK, Exit or ESC. The relevant assignments are explained
in the following sections as needed.
The freely selectable alarm limit AlarmbarMin corresponds to the bar minimum and the freely
selectable alarm limit AlarmbarMax to the bar maximum (here 6000). If the alarm limits are ex-
ceeded or not reached, the current measured value and the bar graph flash.
You can also freely select the warning limits. These are indicated by a horizontal line in the bar
graph (here at 2000). The lower or upper warning limit must always be above or below the re-
spective alarm limit.
In case of warnings such as "ambient light fluctuation",
"overrange" or "check required", the measured value
flashes. In the software, the warning is additionally saved
as a comment on the measured value.
Alarm limit
Warning limit

SITA Messtechnik GmbH – Operating Instructions SITA ConSpector
15
4.5 Keyboard
ON/OFF key. Switch device on and off
(press for 2 s)
Start or continue determining contami-
nation level
Select liquid profile up
Select liquid profile down
Read out stored measured data
Store measured data
Software keys with changing assign-
ments (Symbols in display)
4.6 Setting device options
Pressing the software key Menu in the main screen takes
you to the unit menu, which allows the basic unit settings in
addition to the profile settings.
The selection of a menu item or the selection of numerical
values is done with the software keys and .
The selection is confirmed in each case with the OK key.
liquid
save
read
mem

SITA Messtechnik GmbH - Operating Instructions SITA ConSpector
16
Menu tree:
Menu Profiles Edit Changes the parameter for the selected surface profile
New
Creates a new surface profile (
FluoLevel
or
Cleanliness
)
Delete profile Deletes the selected surface profile
Clear mem Deletes all or the last data record
Exit Exits the menu level
Profiles
Device Display Changes the display contrast, brightness or language (Ger-
man/English/French)
Time Setting date and time of internal clock
Battery Enables or disables battery charging function
Beeper Enables or disables the signal tone
User level Selects the user level
Operator
or
Admin
Exit Exits the menu level
Device
Info Shows information of the basic device and the sensor head
Checking Checks the correct function of the sensor (see Paragraph 8.1)
Adjustment Carries out an adjustment of the SITA ConSpector (see Paragraph
8.3)
Exit Exits the
Menu
In each list view displayed by the unit, you can use the save key to jump alternately
to the beginning and end of the list.
Pressing the I/O key briefly takes you back one menu level. Pressing the
START key takes you to the main view.
Profiles can be created and edited in the Profiles menu. The parameters of the selected or newly
created profile can be called up and edited under the menu item Edit or from the main screen via
the software key Param. The structure and adjustable parameters can be found in chapter 6, ar-
ranged according to profile types.
User level
In the User Level menu you can choose between Operator and Admin. In the Operator user level
no settings/changes can be made in the parameter menu of the surface profiles to avoid manipu-
lations and operating errors. In the delivery state the Admin user level is enabled (device is un-
locked). An information sheet (Page 42) attached to the operating instructions describes how to
access the Admin user level. Take this information sheet if you prefer an exclusively administrated
operation of the device, and keep together with the sales receipts, for example.
The Service user level is a mode that can only be accessed by the manufacturer for maintenance
and servicing purposes.
The menu for changing the parameters of the currently selected liquid profile can also be accessed
directly from the main screen via the software key Param.
The parameters of the relevant surface profile can be edited/changed in
the Admin user level only. If the device is on the Operator user level, you
can only view the parameters of the relevant surface profile.

SITA Messtechnik GmbH – Operating Instructions SITA ConSpector
17
5Putting the SITA ConSpector into Operation
Contents equipment case:
1 Document compartment with operating instructions and calibra-
tion certificate
2
Quick-start guide
10
USB-cable under stand base
3
Stand rod
11
Magnetic stirrer bars
4
Calibration Standandards
12
Magnetic stirrer
5
Sensor
13
Lid
6 Magnetic holder 14 Stainless steel beaker 100ml
7 Device holder 15 USB stick with PC software
8
Basic unit
16
Cotton sticks
9
Stand base
17
Power supply unit
4
5
3
16
9
8
7
13
14
17
6
12
11
2
1
10
15

SITA Messtechnik GmbH - Operating Instructions SITA ConSpector
18
Connecting the sensor head to the basic unit:
Take the basic unit 6out of the case and connect it to the sensor head using the connecting line.
Pay attention to a proper alignment of the guide groove of the female connector and the guide
cam of the male connector. The connector must be easily pluggable.
Any improper alignment of the male connector and the female connector and excessive forces may
damage the contacts.
To loosen the connector, pull back the fluted outer sleeve only. It is not possible to loosen the
connector without unlocking by only pulling at the fluted outer sleeve. Please also refrain from
pulling at the cable, it may cause damage.
Set up the instrument stand:
It is recommended to use the supplied stand for the measurement.
The stand is set up as shown:
14
13
5
6
lid closed
12 o'clock position
measurement in
stainless beaker
Other manuals for ConSpector
1
Table of contents
Other Sita Laboratory Equipment manuals
