SJE Rhombus Ultra Nator User guide

This Ultra Nator™control and alarm system provides a pre-wired contol panel for an indoor duplex pump application. The Ultra Nator™
employs two receptacles to accept two 120 VAC pump plugs.
In normal operation pumps will alternate based on the pump switch level. If an alarm condition occurs (top float activates), the alarm
light and horn turn on. The pump in use will turn off and the other pump will turn on. Pumping will continue until the pump switch
deactivates (bottom float).
ULTRA NATOR™System Installation Instructions
ULTRA NATOR™FEATURES
SJE-RHOMBUS®warrants to the original consumer that this product
shall be free of manufacturing defects for three years after the date of
consumerpurchase. Duringthattimeperiodandsubjecttotheconditions
set forth below, SJE-RHOMBUS®will repair or replace, for the original
consumer, anycomponent which proves tobe defective due todefective
materials or workmanship of SJE-RHOMBUS®.
THIS WARRANTY DOES NOT APPLY: (A) to damage due to lightning
or conditions beyond the control of SJE-RHOMBUS®; (B) to defects or
malfunctionsresulting from failure toproperlyinstall, operate or maintain
the unit in accordance with printed instructions provided; (C) to failures
resultingfrom abuse, misuse, accident,or negligence; (D) tounits which
are not installed in accordance with applicable local codes, ordinances,
or accepted trade practices, and (E) to units repaired and/or modified
without prior authorization from SJE-RHOMBUS®.
Some states do not allow limitations on how long an implied warranty
lasts, so the above limitation may not apply to you. Some states do not
allowthe exclusion or limitationof incidental orconsequential damages,
sothe above limitationor exclusion maynot apply to you. This warranty
givesyou specific legal rights,and you mayalso have other rightswhich
vary from state to state.
TO OBTAIN WARRANTY SERVICE: The consumer shall assume all
responsibility and expense for removal, reinstallation, and freight. Any
item to be repaired or replaced under this warranty must be returned to
SJE-RHOMBUS®, or such place as designated by SJE-RHOMBUS®.
ANY IMPLIED WARRANTIES OF MERCHANTABILITY OR FITNESS
ARE LIMITED TO THE DURATION OF THIS WRITTEN WARRANTY.
SJE-RHOMBUS®SHALL NOT, IN ANY MANNER, BE LIABLE FOR
ANY INCIDENTAL OR CONSEQUENTIAL DAMAGES AS A RESULT
OF A BREACH OF THIS WRITTEN WARRANTY OR ANY IMPLIED
WARRANTY.
NEMA 1 rated for indoor use.
Alternating pump action equalizes pump wear.
Factory-installed 10ft power cord.
Factory-installed pump activation and alarm activation switches for easy installations. (Various switch configurations available).
Green power on indicator.
Green pump run indicators (pump 1 & pump 2).
Audible and visual high water alarm.
Normal/silence alarm switch mounted externally for easy operation.
Entire system is UL and cUL Listed to meet and/or exceed industry safety standards.
Three-year limited warranty.
SJE-RHOMBUS®THREE-YEAR LIMITED WARRANTY
PREVENTATIVE MAINTENANCE
• Periodically inspect the product. Check that the cable has not become worn or that the housing has not been damaged so as to impair the protection of the
product. Replace the product immediately if any damage is found or suspected.
• Periodically check to see that the floats are free to move and operate the pump and alarm.
• Use only SJE-Rhombus®replacement parts.

NEMA1enclosuresareforindooruseonly,primarilytoprovide
adegreeofprotectionagainstcontactwithenclosedequipment.
The Ultra Nator™is designed to operate with two floats.
These floats operate pump stop/start and high level alarm
functions.
1. Determine mounting location for the Ultra Nator™.
2. Plug the pump plugs into the receptacles as shown in
Figure A.
3. Plug in power cord.
4. Check the installation by manually tipping the pump
float and then the alarm float.
5. Test the unit periodically to insure proper operation.
Note: After any alarm condition is cleared, the Normal/
Silence switch must be manually placed
in "Normal" position.
INSTALLING THE ULTRA NATOR™
For detailed specifications on this product, or for the complete line of SJE-Rhombus®
panel, alarm, and switch products, visit our web-site at www.sjerhombus.com.
ELECTRICAL SHOCK HAZARD
Disconnect power before installing or servicing this
product. A qualified service person must install and
service this product according to applicable electrical
and plumbing codes.
EXPLOSION OR FIRE HAZARD
Do not use this product with flammable liquids.
Do not install in hazardous locations as defined by
National Electrical Code, ANSI/NFPA 70.
Failure to follow these precautions could result in serious injury or death. Replace product immediately if switch cable becomes damaged
or severed. Keep these instructions with warranty after installation. This product must be installed in accordance with National Electric Code,
ANSI/NFPA 70 so as to prevent moisture from entering or accumulating within boxes, conduit bodies, fittings, float housing, or cable.
Figure C
WARNING: Tethering switches below minimum
tether length can affect switch operation and will
reduce the fatigue life of the cable.
!
Figure A
tether
length
pumping
range
1. Determine the required cord tether length according to
chart below and as shown in Figure B.
2. Place the cord into the clamp as shown as shown in
Figure C.
3. Locate clamp at desired activation level and secure the
clamp to the discharge pipe as shown in Figure C.
Note: Do not install cord under hose clamp.
4. Tighten the hose clamp using screwdriver. Over
tightening may result in damage to the plastic clamp.
Make sure the float cable is not allowed to touch the
excess hose clamp band during operation.
5. Check installation. Allow system to cycle to insure proper
operation.
Note: All hose clamp components are made of 18-8 stainless
steel material. See your SJE-Rhombus®supplier for
replacements.
MOUNTING THE SJE MICROMASTER®
3.5 6 9 12 15 18 22
8 11 15 21 28 31 36
min.
(inches)
(inches)
Figure B
Duetoweightofcable,pumpingrangeabovehorizontalisNOT
equaltopumpingrangebelowhorizontal.Usevaluespublished
as a guide. Pumping ranges are based on testing in non-
turbulentconditions.Rangemayvaryduetowatertemperature
and cord shape. Note: As the tether length increases, so does
the variance of the pumping range.

INSTALLING THE VERTICALMASTER®II
Warning: Do not install switch in direct flow of incoming
liquid.
1. Determine desired activation level and pumping range
as shown in Figure D. Pumping range can be adjusted
by moving the float stop up or down the rod.
2. Insert hose clamp through slots in mounting bracket as
shown in Figure E.
3. Position hose clamp around discharge pipe with bracket
gripping tabs against pipe as shown in Figure E and F.
Cable should remain outside of hose clamp.
4. Tighten the hose clamp securely.
5. Secure pump cable and switch cable to discharge pipe
as shown in Figure D with wire ties (not supplied).
6. Check the installation. Verify that the float is free to
move and activate the switch. Allow system to cycle to
ensure proper operation.
Note: All hose clamp components are made of 18-8
stainless steel material. See your SJE-Rhombus®
supplier for replacements.
Figure D
Figure E
MOUNTING THE VERTICAL REED SWITCH
Warning: Do not install switch in direct line of incoming
liquid.
1. Determine desired activation level and pumping range
as shown in Figure F. Pumping range can be adjusted
by moving the float stop up or down the rod.
1. Place the clamp into the VRS switch housing as shown
in Figure G.
2. Locate clamp at desired activation level and secure the
clamp to the discharge pipe as shown in Figure F & G.
Note: Do not install cord under hose clamp.
3. Tighten the hose clamp using screwdriver. Over
tightening may result in damage to the switch housing.
4. Check installation. Allow system to cycle to insure
proper operation.
Note: All hose clamp components are made of 18-8
stainless steel material. See your SJE-Rhombus®
supplier for replacements.
Figure G
alarm
activation
level
VRS switch
activation
level
pumping
range
secure
cables
to
discharge
pipe
high water
alarm
Figure F
activation
level
pumping
range
secure
cables
to
discharge
pipe
high water
alarm

22650 County Highway 6
P.O. Box 1708
Detroit Lakes, Minnesota 56502 USA
1-888-DIAL-SJE (1-888-342-5753)
Phone: 218-847-1317
Fax: 218-847-4617
E-mail: [email protected]
Instl. Instr. PN 1030450B
©SJE-Rhombus 11/10
NOTES: ________________________________________________________________________________
_______________________________________________________________________________________
_______________________________________________________________________________________
_______________________________________________________________________________________
_______________________________________________________________________________________
_______________________________________________________________________________________
_______________________________________________________________________________________
_______________________________________________________________________________________
_______________________________________________________________________________________
_______________________________________________________________________________________
_______________________________________________________________________________________
_______________________________________________________________________________________
_______________________________________________________________________________________
_______________________________________________________________________________________
_______________________________________________________________________________________
_______________________________________________________________________________________
_______________________________________________________________________________________
_______________________________________________________________________________________
_______________________________________________________________________________________
_______________________________________________________________________________________
_______________________________________________________________________________________
_______________________________________________________________________________________
_______________________________________________________________________________________
_______________________________________________________________________________________
Other SJE Rhombus Controllers manuals
Popular Controllers manuals by other brands
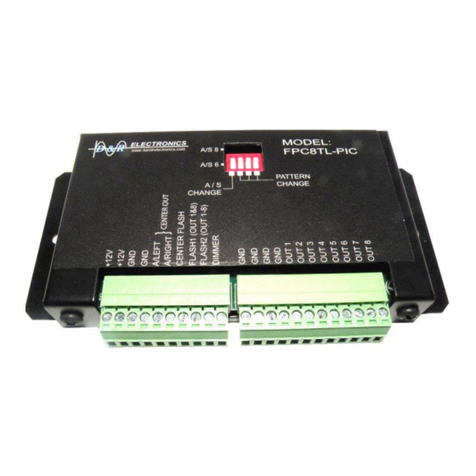
D&R ELECTRONICS
D&R ELECTRONICS FPC8TL-PIC Installation & operation manual

Doms
Doms PSS 5000 installation guide
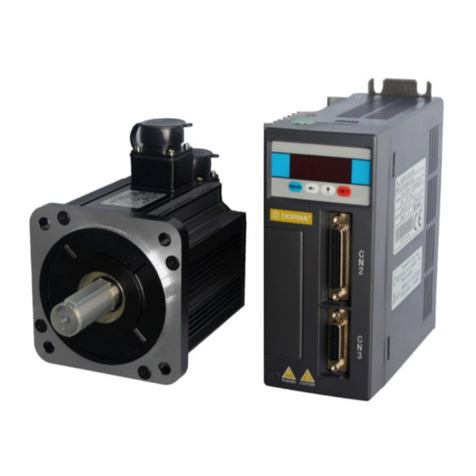
Dorna
Dorna EPS-EB Series user manual

Sentera Controls
Sentera Controls EVSS1 Series Mounting and operating instructions
Eelectron
Eelectron BO24F01KNX user manual
Samsung
Samsung MWR-WG00JN user manual
