PRO GUIDE // DROP
Compatibility test 1110 Installing the reserve chute
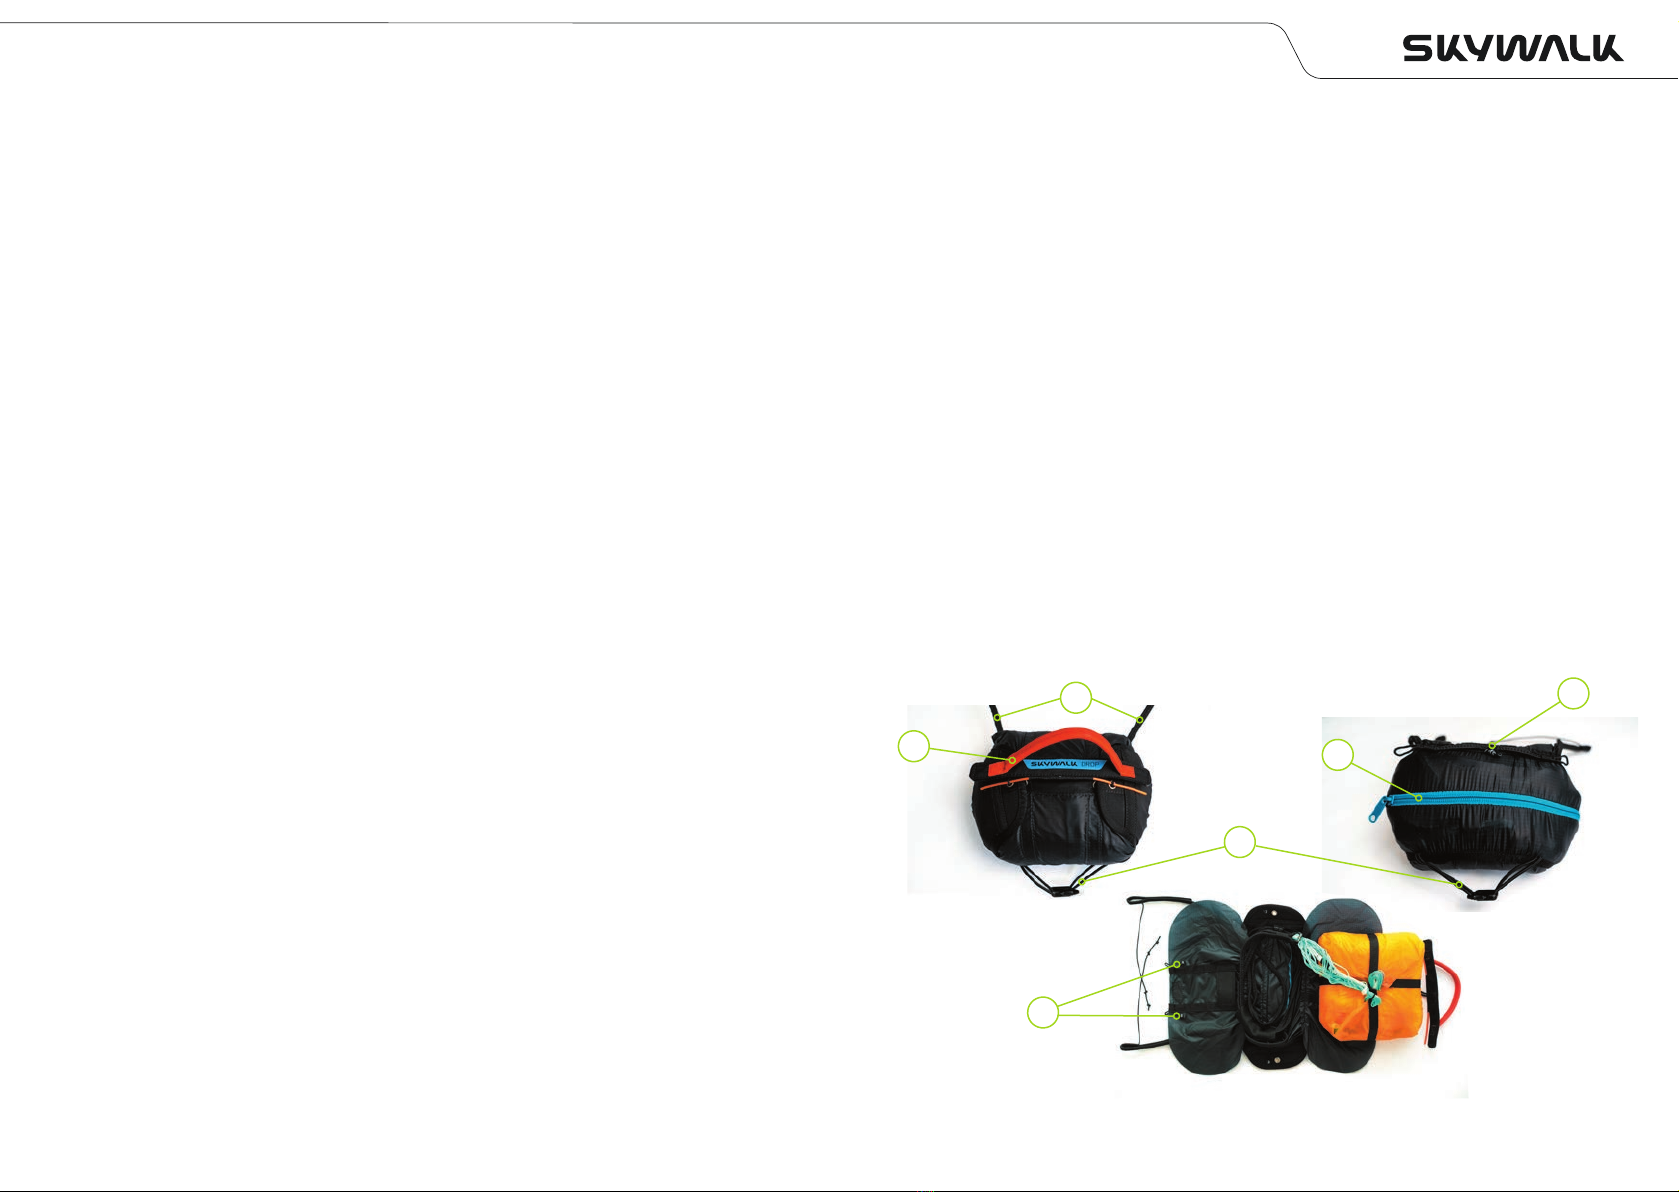
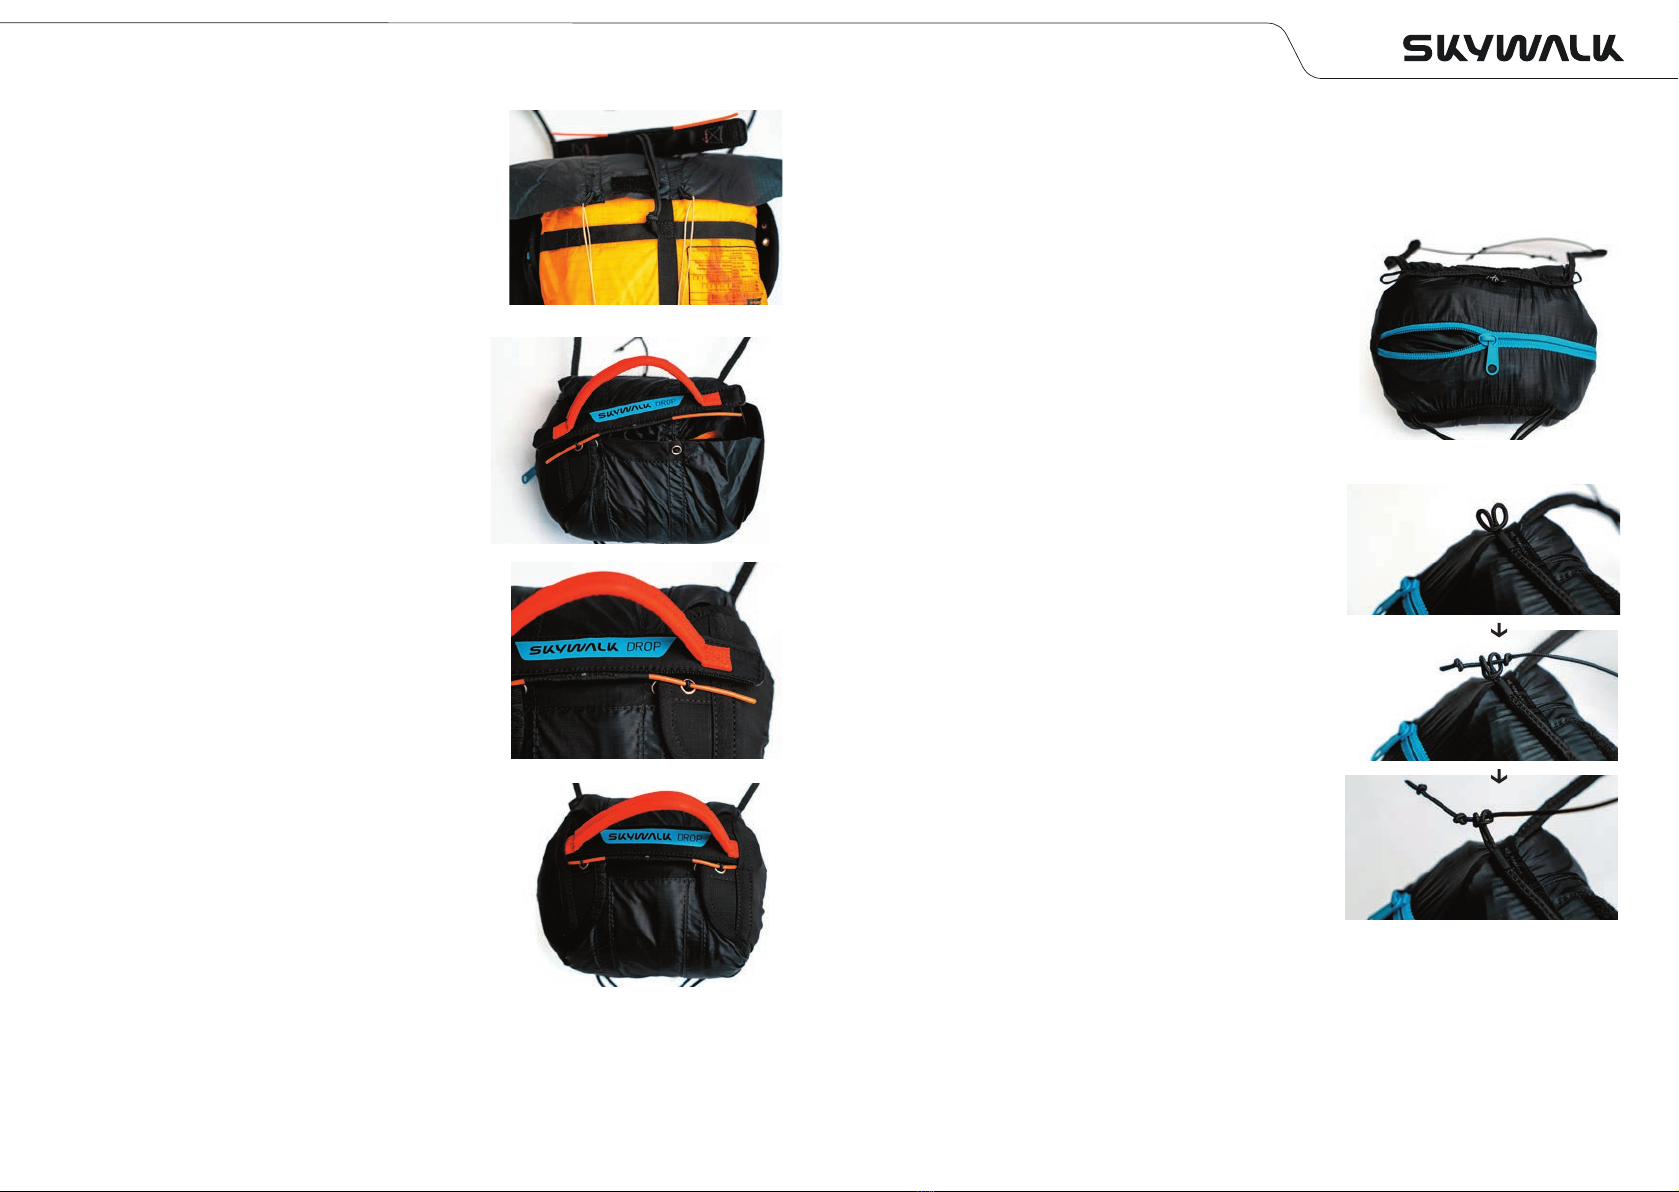
MOUNTING THE FRONT CONTAINER
The DROP front container has 3 attachment points, so that it can be universally mounted
on standard harnesses.
Before you connect the V-line to the harness, you should make sure that the fixation
lines are connected to the bowline knot on the front container, otherwise the weight of
the rescue can pull the V-line out of the container and you may have to repack the front
container. To connect the V-line to the harness, both ends of the V-line must be hooked
into the main carabiners.
This way the connection of the V-line and the fixation of the front container is done with
one movement. It is important here that the opening of the carabiners point against the
direction of flight, otherwise a rescue release can lead to peak loads and asymmetries in
the connection.
DUE TO THEIR DESIGN, SOME MANUFACTURERS ADVISE AGAINST REVERS-
ING THEIR CARABINERS, AS WITH SOME CARABINERS INVERTED INSTALLA-
TION CAN POSSIBLY INJURE WEBBING. THIS SHOULD BE CLARIFIED BEFORE
INSTALLING THE DROP.
For the third fixation point, the horizontal mounting clip should be passed around the leg
loops or around the get-up system of the harness, so
that the front container cannot tip upwards in the
event of a
deployment.
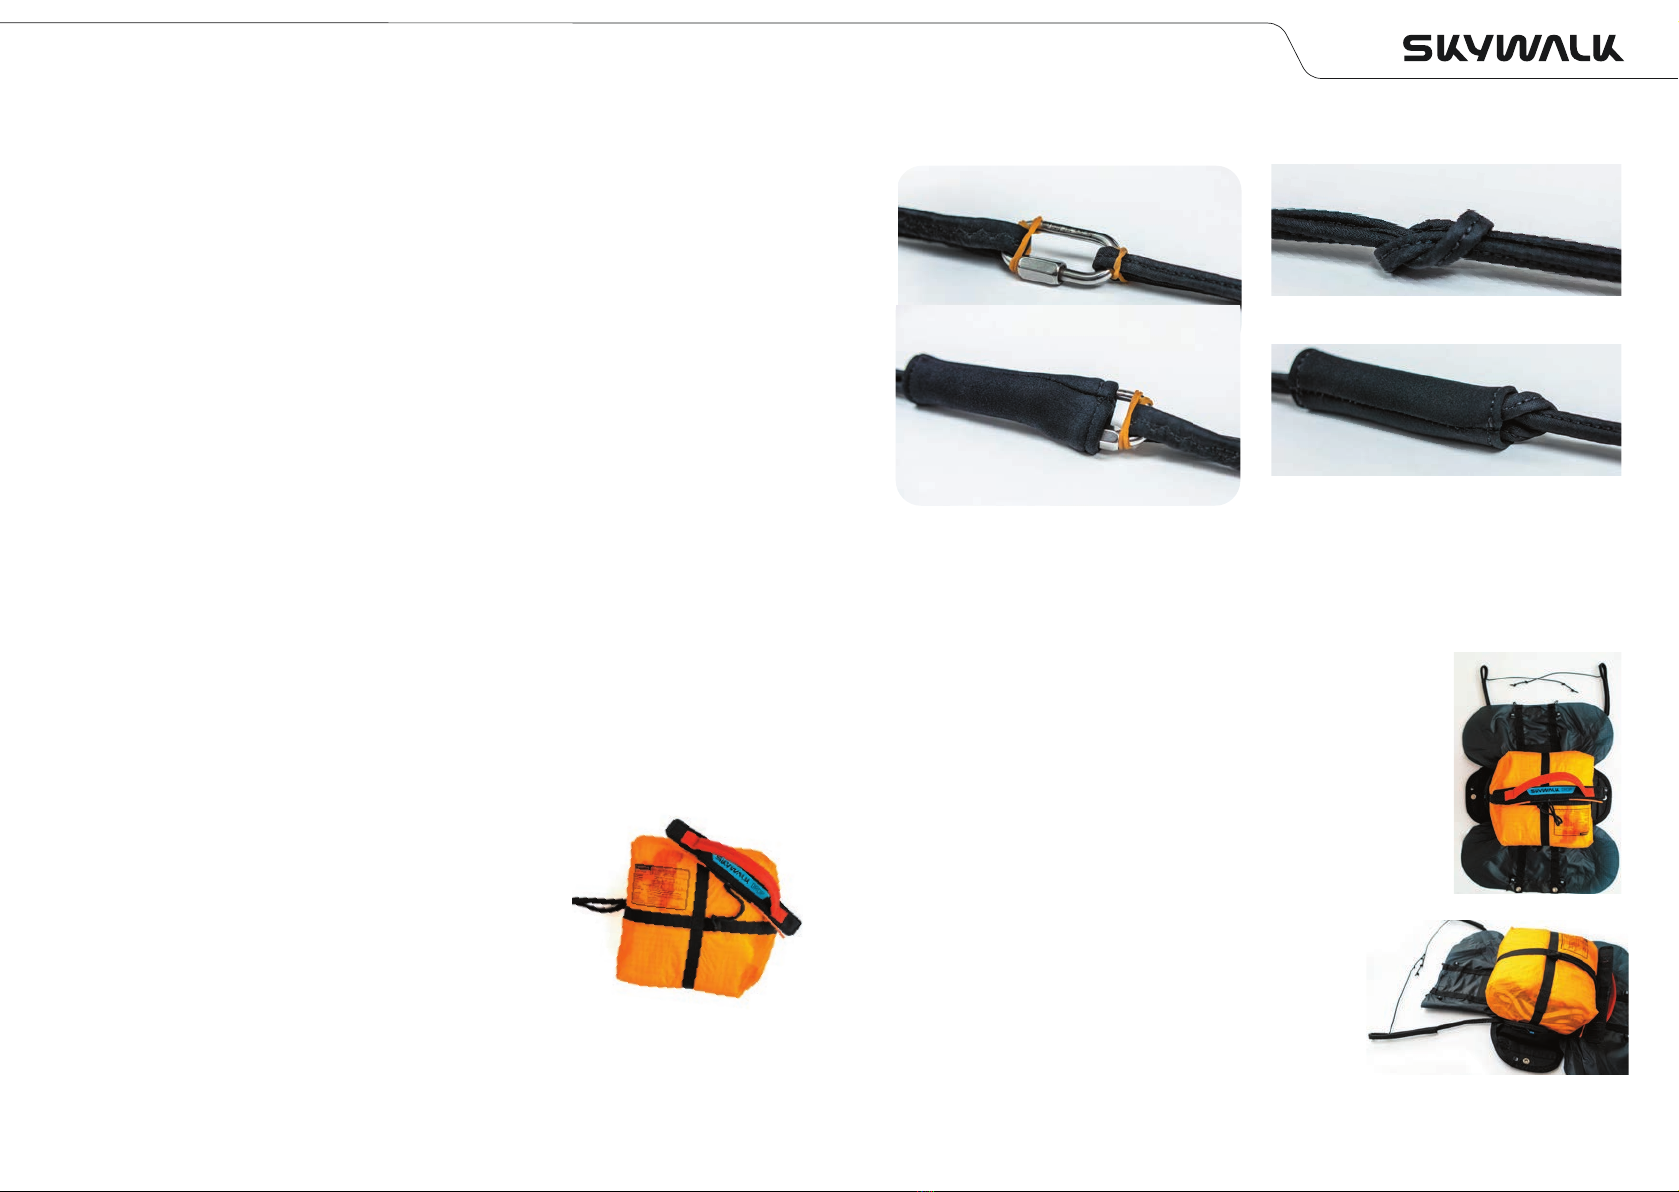
When initially adjusting the container to your harness,
the lengths of the fixation lines must be matched to
the suspension width of your harness. This can be
regulated by the knots on the fixation lines.
It is important to ensure that the fixation lines are
neither loose in flight nor should they take up the
main tension of the harness. The two knots cover the
suspension widths of most lightweight harnesses on
the market. However, if this does not suit you, the in-
ner knot can either be opened to widen the fixation,
or moved by loosening it first and then tightening it
in the correct place.
You should check the optimum setting in the harness
simulator before the first flight.
6 COMPATIBILITY TEST
The correct installation of the reserve chute should now be verified with a test deployment.
To do this, put on the harness, close the safety buckles and hang the main carabiners in
a harness simulator. Then pull out the reserve chute by the handle. For this test, it is not
enough to deploy the reserve chute without sitting in the harness. It must be possible for
you to reach and pull the handle with no problem from the flying position, in accordance
with the instructions of this manual.
The deployment force must not be below 2 daN and must not exceed 7daN. In case of
uncertainties you should consult a specialist or contact your competent skywalk dealer.
The reserve chute must be deployed with the correct throwing technique, with a con-
tinuous and steady pull in a forward movement away from the harness. Otherwise,
deployment may be difficult.
A reserve chute deployment can be made more difficult by the following
factors:
> The reserve chute is too large or too bulky for the front container.
> The reserve chute is not packed in the shape of the front container.
> The reserve chute is not thrown with the appropriate throwing technique.
> The reserve chute has too much volume after repacking.
> Because arm length is crucial for a successful reserve chute deployment, smaller
persons with short arms may not be able to deploy the reserve chute. In emergency
situations, high G-loading can occur, which can make deployment even more difficult
BEFORE EACH FLIGHT, CHECK TO SEE IF THE RESCUE HANDLE IS IN THE RIGHT
POSITION AND WHETHER THE SPLINTS OF THE HANDLE ARE SITTING COR-
RECTLY. REACHING FOR THE RELEASE HANDLE TO TEST ITS POSITION EVERY
FLIGHT CAN HELP YOU MEMORIZE THE POSITION SUBCONSCIOUSLY.
Best caseOk Ok
Worst Case
Worst Case
Deployment