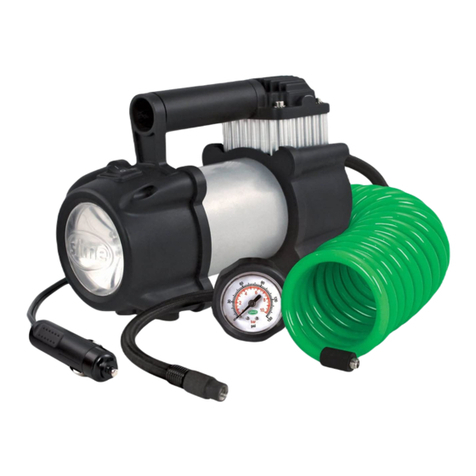
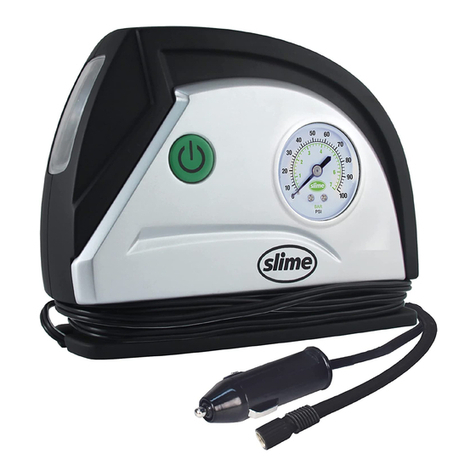
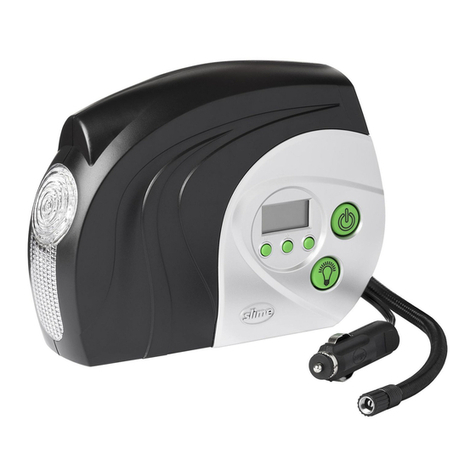
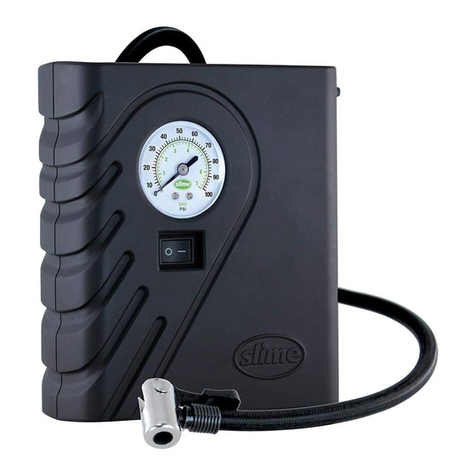
Slime PRO POWER User manual

CONVENIENT
FOLDING HANDLE
PART# 40048 | REV062723ART
TIRE INFLATOR
ATTENTION! READ ALL INSTRUCTIONS CAREFULLY
FAILURE TO FOLLOW WARNING INSTRUCTIONS CAN RESULT IN FIRE,
PERSONAL INJURY OR PROPERTY DAMAGE.
22 FOOT
EXTENSION
AIR HOSE
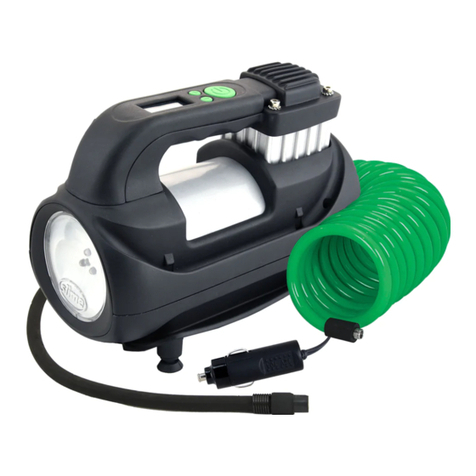
• Connects to built-in air
hose for extra reach
ON/OFF
BUTTON
QUICK CONNECT
AIR HOSE
POWER SOURCE
• Direct connect to baery
INFLATOR
• Dual piston motor
• Powerful direct-drive motor
• Thermal break safety feature
• Air-cooled motor
BRIGHT LED
REMOVABLE
MAGNETIC LIGHT
• For nighime emergencies
RUGGED
CARRY CASE
AIR ADAPTORS
PRO POWER
™
HIGH PRESSURE LIQUID-
FILLED GAUGE
• 0-150 PSI / 0-10 BAR
• Gauge can be used independently or
aached to hose for in-line use
SUPER-DUTY
PP
5

Ensure that the vehicle is outside, or in an open, well-ventilated area and NOT INSIDE A
CONFINED AREA, SUCH AS A GARAGE as bodily injury or asphyxiation resulting in death
could occur. Always operate the inator in a well-ventilated area free of combustible
materials, gasoline, or solvent vapors. Always set parking/emergency brake and ensure
vehicle is in Park (or neutral if equipped with manual transmission).
CAUTION: HOT • DO NOT HOLD IN HAND WHILE OPERATING
NOTICE: ENGINE SHOULD BE RUNNING WHILE USING THIS INFLATOR
It is recommended that you operate your inator with your vehicle’s engine running to
achieve the optimal inator performance. Never start the vehicle while the inator is
connected to the baery.
• Do not aempt to disassemble inator.
• No user serviceable parts inside.
• Keep inator out of reach of children.
• Place inator on a hard, clean surface.
• Ensure air hose chuck touches the core of the valve stem for proper ination.
• DO NOT use inator continuously for more than 10 minutes. Allow unit to cool approximately 25 minutes
between uses. Do not leave inator unaended.
• ALWAYS use a pressure gauge to check tire pressure. DO NOT over-inate.
• So inatables (i.e. ras, balls, etc.) may not have recommended pressure markings. Be careful not to
inate items beyond their capacity.
• While operating, never block the inator input or output.
• Make sure connections and terminals are free of corrosion, debris, etc.
• To reduce risk of electrical shock or electrocution, do not disassemble the tire inator.
• Do not use this product in an area where it can fall into liquids or bodies of water.
• The tire inator is not intended to be hard-wired to your vehicle’s 12V DC system.
• The 12V direct connect clips should be stored in secure manner when not in use; do not leave 12V direct
connect clips connected to baery while vehicle is in motion.
• For use with 12-volt DC baeries.
VEHICLE EXHAUST WITHOUT PROPER VENTILATION IS
EXTREMELY DANGEROUS. ALWAYS ALLOW FOR PROPER
VENTILATION.
TECH SPECS
TIRE INFLATION TIME
CFM (LPM)
IN-LINE DIAL GAUGE
COIL AIR HOSE LENGTH
POWER CORD LENGTH
POWER SOURCE
TOTAL REACH
* (0-35 PSI, Standard Tire: P195/65 R15)
1.5 min*
2.5 CFM (70.8 LPM) @ 0 PSI
PSI 0-150, BAR 0-10
22 . (6.7 m)
8 . (2.4 m)
Direct connect to baery
33 . (10 m)

USING THE COIL HOSE AND ADAPTERS
1. To unlock the quick connect, pull handle down.
2. Place end of coil hose or adapter into connector and pull up on handle to lock in coil hose
or adapter.
INFLATE TIRES
1. Attach quick connect air hose onto tire's valve stem and pull lever up to lock.
2. Attach battery clips to battery, positive side first.
3. Press on switch to turn on inflator. Inflate tire to manufacturer's recommended air pressure.*
When proper pressure is reached, press off switch to turn off inflator. Remove power cord
and air hose connector.
*NOTE: Correct tire pressure can be found in vehicle owner's manual or on driver's side door
jamb.
NOTE: Engine should be running while using this inflator. See Warning Section for
further details.

REMOVING THE LIGHT
1. Using the finger-grip depressions found on the top and bottom surfaces of the removable
light, grab the light and pull firmly straight out to remove it from the inflator.
2. When finished, push the light firmly back into place until it clicks, confirming the light is
seated in the inflator.
REPLACING THE LIGHT BATTERIES
The removable light uses (2) AAA batteries which can be replaced when depleted.
1. Using the finger-grip depressions found on the top and bottom surfaces of the removable
light, grab the light and pull firmly straight out to remove it from the inflator.
2. Remove the light back panel cover by pulling it away from the main light housing, exposing
the interior components and batteries. There is a finger clearance area on the light housing
to aid in this step. Be careful not to move or remove any components other than the
batteries.
3. Remove depleted batteries and replace with new.
4. Carefully reinstall the back panel cover while holding the batteries in place until the cover
snaps into place.
5. When finished, push the light firmly back into place on the inflator until it clicks, confirming
the light is properly seated within the inflator housing.

MOUNTING THE INFLATOR
Proceed with inflator vehicle mounting at your own risk! Some vehicle modifications may
be necessary and are done at your own risk. Vehicle modifications may void your warranty.
Manufacturer is not liable for any warranty issues, vehicle damage or inflator damage caused
from inflator vehicle mounting.
SELECTING A SUITABLE MOUNTING LOCATION:
The selection of suitable mounting location for tire inflator will prolong unit life. Please
consider the following when choosing location:
• Choose a location close to the vehicle battery so 12V direct connectors supplied will easily
reach battery.
• Mounting location will ideally be flat, allowing the tire inflator to be mounted in the upright
position.
• Mounting location should be as cool as possible, away from heat sources.
• Do not mount tire inflator anywhere in which the unit is likely to come into contact with
water.
TOOLS NEEDED:
• Safety glasses • (2) 10mm box end wrenches or sockets
• Power drill • (4) M6 bolts, (4) nuts and washers (included)
• ¼" drill bit • Mounting template (included)
MOUNTING INSTRUCTIONS:
1. Select suitable mounting location (see tips above) within reachable distance of battery to
allow connection of 12V connectors when inflator is to be used.
2. Using the supplied mounting template, carefully mark mounting location on vehicle and
prepare to drill holes for mounting. If you did not receive a mounting template with your
inflator, print out the template included in these instructions. Before drilling, ensure that
there is nothing on the other side of the vehicle panel that may be damaged during this
process, and that the area is accessible to allow the hardware to be properly tightened.
3. Drill the holes for mounting using a ¼” drill bit. Make sure to exercise caution and use
safety glasses and gloves.
4. Mount tire inflator to vehicle using supplied hardware. (Hardware size and length may
need to be adjusted depending on placement or application, make sure to use appropriate
hardware. Additional washers may be needed.) Place the fender washer on the bolt and
push the bolt through the rubber insulator on the base of the inflator, and then through
the corresponding mounting hole, and thread on nut. Repeat for all four holes, and finger
tighten until all four mounting locations are snug. Fully tighten nuts with wrench or socket
to ensure tire inflator will not vibrate free. The use of a thread-locker is recommended.

Inflator does not turn on:
1.Thermal fuse may have tripped. Allow unit to cool for 25 minutes and retry.
2.Ensure connection is secure.
3.Make sure connections and terminals are free of corrosion, debris, etc.
Inflator runs but does not inflate:
1.Be sure the air hose connector is secured tightly onto the valve stem.
2.Check tire for leaks. Check hose for breaks and leaks at fittings.
Inflator runs slowly:
1.The inflator may have overheated from excessive use. Shut it off and allow it to cool for 25
minutes.
2.The voltage may be too low. Check the condition of your vehicle's battery.
NOTE: If tire is totally deflated, it is possible that the tire could separate from the rim allowing
air to leak out when trying to inflate. In the event this occurs, it may be necessary to jack up the
tire prior to inflation.
Dispose of this product at an e-waste recycling collection point or facility.
Do not place in the trash or standard recycling receptacle.
TROUBLESHOOTING
FOR WARRANTY INFORMATION GO TO: WWW.SLIME.COM / WARRANTY
QUESTIONS OR COMMENTS:
Call (888)457-5463 or visit www.slime.com
ITW Global Tire Repair • 125 Venture Drive, Suite 210, San Luis Obispo, CA 93401 USA
Slime®is a trademark of Illinois Tool Works, Inc., registered in the U.S. and other countries.

¡ATENCIÓN! LEA TODAS LAS INSTRUCCIONES CON ATENCIÓN
SI NO SIGUE LAS INSTRUCCIONES DE ADVERTENCIA, PUEDE CAUSAR INCENDIO,
LESIONES A PERSONAS O DAÑOS MATERIALES.
BOTÓN DE
ENCENDIDO/
APAGADO
LUZ MAGNÉTICA
EXTRAÍBLE DE LED
BRILLIANTE
• Para emergencias nocturnas
ADAPTORES
DE AIRE
MANÓMETRO DE ALTA
PRESIÓN LLENO DE LÍQUIDO
• 0-150 PSI / 0-10 BAR
• El manómetro se puede usar de forma
independiente o conectado a la
manguera para uso en línea
MANAGUERA
DE AIRE DE
EXTENSIÓN
DE 22 PIES
• Se conecta a la
manguera de aire
incorporada para
mayor alcance
INFLADOR
• Motor de doble pistón
• Potente motor de transmisión directa
• Función de seguridad de interrupción térmica
• Motor enfriado por aire
MANGUERA DE
AIRE DE CONEXIÓN
RÁPIDA
AGARRADERA PLEGABLE
CONVENIENTE
MALETÍN DE
TRANSPORTE
RESISTENTE
FUENTE DE ENERGÍA
• Conexión directa a la batería
TIRE INFLATOR
PRO POWER
™
SUPER-DUTY
PP
5

ESPECIFICACIONES TÉCNICAS
TIEMPO DE INFLADO DE LLANTAS
PCM (LPM)
MEDIDOR DE RELOJ EN LÍNEA
LONGITUD DE MANGUERA DE AIRE DE ROLLO
LONGITUD DEL CABLE DE CORRIENTE
FUENTE DE ENERGÍA
ALCANCE TOTAL
1.5 min*
2.5 CFM (70.8 LPM) @ 0 PSI
PSI 0-150, BAR 0-10
22 . (6.7 m)
8 . (2.4 m)
Conexión directa a la batería
33 . (10 m)
EL ESCAPE DEL VEHÍCULO SIN LA VENTILACIÓN
ADECUADA ES EXTREMADAMENTE PELIGROSO.
PERMITA SIEMPRE UNA VENTILACIÓN ADECUADA.
* (0-35 PSI, Tamaño de Llanta estandar: P195/65 R15)
Asegúrese de que el vehículo esté al aire libre o en un área abierta y bien ventilada y NO DENTRO DE
UN ÁREA CERRADA, COMO UN GARAJE, ya que podrían producirse lesiones o asxia con resultado de
muerte. Siempre opere el inador en un área bien ventilada libre de materiales combustibles, gasolina o
vapores de solventes. Siempre coloque el freno de mano/emergencia y asegúrese de que el vehículo esté
en Punto Muerto (o neutral si está equipado con transmisión manual).
PRECAUCIÓN: CALIENTE • NO SOSTENER EN LA MANO DURANTE LA OPERACIÓN
AVISO: EL MOTOR DEBE ESTAR FUNCIONANDO MIENTRAS UTILIZA ESTE INFLADOR
Se recomienda que opere su inflador con el motor de su vehículo en marcha para lograr un
rendimiento óptimo. Nunca arranque el vehiculo mientras el inflador está conectado a la bateria.
• No intente desarmar el infador.
• No hay piezas reparables por el usuario en el interior.
• Mantenga el inador fuera del alcance de los niños.
• Coloque el inador sobre una supercie dura y limpia.
• Asegúrese que la nariz de la manguera de aire toque el núcleo del vástago de la válvula para inarlo
correctamente.
• NO use el inador continuamente por más de 10 minutos. Deje que la unidad se enfríe durante
aproximadamente 25 minutos entre usos. No deje el inador desatendido.
• Utilice SIEMPRE un manómetro para comprobar la presión de las llantas. NO ine demasiado.
• Es posible que los inables blandos (es decir, balsas, pelotas, etc.) no tengan las marcas de presión
recomendadas. Tenga cuidado de no inar los artículos más allá de su capacidad.
• Durante el funcionamiento, nunca bloquee la entrada o salida del inador.
• Asegúrese de que las conexiones y las termiales estén libres de corrosión, residuos, etc.
• Para reducir el riesgo de descarga eléctrica o electrocución, no desarmar el inador de llantas.
• No use este producto en un área donde pueda caer en líquidos o cuerpos de agua.
• El inador de llantas no está diseñado para ser conectado al sistema de 12V DC de su vehículo.
• Los clips de conexión directa de 12V de ben almacenarse de forma segura cuando no se utilicen; no deje
clips de conexión directa de 12V conectados a la batería mientras el vehiculo está en movimiento.
• Para usar con baterías de 12 voltios CD.
USO DE LA MANGUERA ENROLLADA Y DE LOS
ADAPTADORES
1. Para quitar el seguro de la conexión rápida, jalar la manija hacia abajo.
2. Coloque el extremo de la manguera enrollada o el adaptador en el conector y jale la manija
hacia arriba para asegurar la manguera enrollada o el adaptador.
INFLE LAS LLANTAS
1. Coloque la manguera de aire de conexión rapida en el vástago de la llanta y tire de la
palanca hacia arriba para asegurar.
2. Conecte los clips de la batería a la batería, el lado positivo primero.
3. Presione el interruptor para encender el inflador. Infle la llanta a la presión recomendada
por el fabricante.* Cuando alcance la presión adecuada, presione el interruptor para
apagar el inflador. Retire el cable de poder y el conector de la manguera de aire.
*NOTA: La presión de la llanta adecuada se encuentra en el manual del propietario del
vehículo o en el panel de la puerta del lado del conductor.
NOTA: El motor debe estar funcionando mientras usa este inflador. Consulte la
sección de advertencias para obtener más detalles.

MONTAJE DEL INFLADOR
¡Continúe con el montaje del inflador en el vehículo bajo su propio riesgo! Algunas
modificaciones del vehículo pueden ser necesarias y se realizan bajo su propio riesgo. Las
modificaciones del vehículo pueden anular la garantía. El fabricante no es responsable de
ningún problema de garantía, daños al vehículo o daños al inflador causados por el montaje
del inflador en el vehículo.
Selección de una ubicación de montaje adecuada:
La selección de una ubicación de montaje adecuada para el inflador prolongarála vida útil de
la unidad. Tenga en cuenta lo siguiente al elegir la ubicación:
• Elija una unbicación cerca de la batería del vehículo para que los connectores directos de
12 V provistos lleguen fácilmente a la batería.
REMOVIENDO LA LUZ
1. Apoyandote en las superficies de arriba y de abajo de la luz removible, tome la luz y jale con
firmeza hacia afuera para sacarla del inflador.
2. Cuando haya termindado, vuelva a colocar la luz firmemente en su lugar hasta que haga
clic, confirmando que la luz está asentada en el inflador.
REEMPLAZO DE LAS BATERÍAS DE LA LUZ
La luz extraíble usa (2) baterías AAA que se pueden reemplazar cuando se agotan.
1. Usando las marcas de agarre para los dedos que se encuentran en las superficies superior
e inferior de la luz extraíble, tome la luz y tire con firmeza hacia afuera para sacarla del
inflador.
2. Con un destornillador Phillips pequeño, quite los dos tornillos negros ubicados en el panel
posterior de la luz.
3. Con un destornillador pequeño de cabeza plana, levante con cuidado la tapa trasera para
sacarla de la carcasa, dejando al descubierto los componentes internos y las baterías.
Tenga cuidado de no mover o quitar ningún componente que no sean las baterías.
4. Retire las baterías agotadas y reemplácelas con nuevas.
5. Vuelva a instalar con cuidado el panel posterior mientras mantiene las baterías en su lugar.
Una vez en su lugar, vuelva a instalar los dos tornillos negros. No apriete demasiado.
6. Cuando haya terminado, vuelva a colocar la luz firmemente en su lugar hasta que haga clic,
lo que confirma que la luz está asentada en el inflador.

• Idealmente, la ubicación de montaje será plana, lo que permitirá montar el inflador de
neumáticos en posición vertical.
• La ubicación de montaje debe ser lo más fresca posible, lejos de fuentes de calor.
• No instale el inflador de llantas en ningún lugar donde la unidad pueda entrar en contacto
con el agua.
HERRAMIENTAS NECESARIAS:
• Lentes de seguridad • (2) llaves o dados de caja de 10mm
• Taladro eléctrico • (4) pernos M6, (4) tuercas y arandelas (incluidas)
• Broca de ¼" • Plantilla de montaje (incluida)
INSTRUCCIONES DE MONTAJE:
1. Seleccione una ubicación de montaje adecuada (consulte los consejos anteriores) a una
distancia accesible de la batería para permitir la conexión de conectores de 12 V cuando
se vaya a utilizar el inflador.
2. Con la plantilla de montaje suministrada, marque con cuidado la ubicación de montaje en
el vehículo y prepárese para perforar los orificios para el montaje. Si no recibió una plantilla
de montaje con su inflador, imprima la placa que se incluye en estas instrucciones. Antes
de taladrar, asegúrese de que no haya nada en el otro lado del panel del vehículo que
pueda dañarse durante este proceso, y que esa área sea accesible para permitir que el
hardware se apriete correctamente.
3. Taladre los orificios para el montaje con una broca de ¼". Asegúrese de tener cuidad y use
gafas y guantes de seguridad.
4. Monte el inflador de llantas en el vehículo utilizando los accesorios suministrados. (Es
posible que sea necesario ajustar el tamaño y la longitud de los accesorios según la
ubicación o la aplicación, asegúrese de usar los accesorios adecuados. Es posible que
se necesiten arandelas adicionales). Coloque la arandela del guardafango en el perno y
empújelo a través del aislador de goma en la base del inflador, y luego a través del orificio
de montaje correspondiente, y enrosque la tuerca. Repita para los cuatro orificios y apriete
con los dedos hasta que las cuatro ubicaciones de montaje estén ajustadas. Apriete
completamente las tuercas con una llave o un ratchet para asegurarse de que el inflador
de llantas no vibre libremente.Se recomienda el uso de un fijador de roscas.
MONTAJE DEL INFLADOR
(continuado)

El inflador no enciende:
1.Es posible que se haya disparado el fusible térmico. Deje que la unidad se enfríe durante 25
minutos y vuelva a intentario.
2. Asegúrese de que la conexión sea segura.
3. Asegúrese de que las conexiones y las terminales estén libres de corrosión, residuos, etc.
El inflador funciona pero no infla:
1.Asegúrese de que el conector de la manguera de aire esté bien sojeto al vástago de la
válvula.
2.Verifique que la llanta no tenga fugas. Revise que la manguera no tenga grietas ni fugas en las
conexiones.
El inflador funciona lentamente:
1.El inflador puede estar sobrecalentado debido a uso excesivo. Apáguelo y espere 25 minutos
para que se enfríe.
2.El voltaje puede ser demasiado bajo. Revise la condición de la batería de su vehículo.
NOTA: Si la llanta está totalmente desinflada, es posible que esté separada del aro y éste
permite que el aire se escape cuando trata de inflarla. Si ocurre esta situación, puede ser
necesario levantar la llanta con un gato para inflarla.
Deshágase de este producto en un punto de recogida de reciclaje de residuos electrónicos o
instalación. No coloque en la basura o recipiente de reciclaje estándar.
SOLUCIÓN DE PROBLEMAS
PARA INFORMACIÓN DE GARANTÍA: WWW.SLIME.COM/WARRANTY
PREGUNTAS O COMENTARIOS: Llamar al +1-888-457-5463 o visitar www.slime.com
ITW Global Tire Repair • 125 Venture Drive, Suite 210, San Luis Obispo, CA 93401 USA
Slime® es una marca registrada de Illinois Tool Works, Inc., registrada en Estados Unidos y en
otros países.
Other manuals for PRO POWER
1
This manual suits for next models
1
Table of contents
Languages:
Other Slime Power Tools manuals

Slime
Slime ELITE HEAVY DUTY TIRE INFLATOR User manual

Slime
Slime 40020 User manual

Slime
Slime 40059 User manual

Slime
Slime Power Sport 40001 User manual

Slime
Slime 40048 User manual

Slime
Slime 40051 User manual

Slime
Slime 40050 User manual

Slime
Slime Expert Heavy-Duty Tire Inflator User manual

Slime
Slime GARAGE INFLATION STATION User manual

Slime
Slime 50139 User manual