Read this short manual carefully and keep it
accessible for further reference!
1. GENERAL SAFETY MESSAGES
Life-threatening danger due to
electric shock, danger of fire and danger from falling
objects may exist if the following is not respected!
This luminaire must be installed in accordance
with the National Electric Code, Canadian
Electrical Code, State, Provincial, and local
regulations by a licensed electrician.
Do not cover the product - provide free air circulation!
Do not hang or fasten anything on the product.
Do not modify the product.
Keep children away from the product. This product is
not intended to be used by children.
The luminaire may only be operated with a complete
and intact lamp protection cover.
Operate the product only when its integrity is
intact:
In case of a malfunction you shall NOT touch the
product or operate it further. Disconnect the product
from the power supply with an electrical breaker and
switch before doing any installing or performing
maintenance.
A malfunction exists when:
visible damages appear.
the product does not work properly (e.g. flickering).
smoke, steam or crackling sounds appear.
smell of burning is recognizable.
an overheating is recognizable (e.g. by discoloration
of adjacent surfaces).
Operate the product only after maintenance and
examination by a licensed electrician!
2. USE AS DIRECTED
This product serves exclusively lighting purposes and
may:
only be used with a voltage of 120VAC.
only be operated when firmly mounted.
not be exposed to strong mechanical loads or to
strong contamination.
only be installed and operated after a condition
inspection.
3. OPERATION
Replacing the light source:
Disconnect the product from the 120V power supply
using the electrical breaker and switch and let lamp
cool.
Remove the top portion of the fixture by removing four
hex head screws. Unscrew the polycarbonate lamp
capsule/shield to remove the lamp.
Check and clean the gasket after each opening of the
fixture. The bearing surface of the gasket must be free
of dirt. These measures ensure that the IP class is
maintained.
Note the proper fit for the gasket.
Replace the lamp and reattach the top portion of the
fixture using the two hex head screws.
4. MAINTENANCE AND CARE
Standard Finish: The Rusty series fixtures are
extremely weather proof. A special steel alloy forms
a special barrier layer of iron oxide (rust) which
protects the material core against flaking rust.
Individual deviations in from and surface are
intended and each unit is unique.
NOTICE: The following environmental influences may
have effects on the surface of the product:
acid rain and sour soil, thawing salt
high salt content in the air, fertilizer (e.g. in flowerbeds)
Cleaning agents or other chemical substances
Protect the product by adequate means to avoid
unwanted changes of the surface.
Cleaning: Cleaning of the polycarbonate lamp capsule
can be performed using a soft moistened lint-free cloth.
5. ADDITIONAL IMPORTANT NOTES
Storage: The product carton must be stored in a dry and
clean environment to protect the product carton.
Warranty: In case of a warranty contact your dealer.
6. INSTALLATION
Should only be performed by a licensed
electrician.
Disconnect the product from the 120V power with a
breaker and switch before doing any work.
Use only the fixture parts, which are supplied with
the product or are described as accessories!
Inspect the product for loose parts inside the
housing. When there are loose parts inside the
housing the product shall not be installed or
operated.
Use the supplied fastening material only when it is
suited for the application and installation
background.
If the supplied fastening materials are not suitable
for the application, the installer must supply suitable
fastening materials.
Unpacking
Consignment: Fastening materials.
Please note: Due to the rusty surface adjacent areas
may be stained. Product will soil clothing.
Carefully take the product out of the packaging
removing any transport safeguards.
Remove all fastening materials or accessories
before disposing of the product carton.
Installation place
The product is solely suited for installation on the
floor, ground, or concrete pad.
Make sure that the product is firmly mounted on a
stable and flat surface/background.
Installation steps:
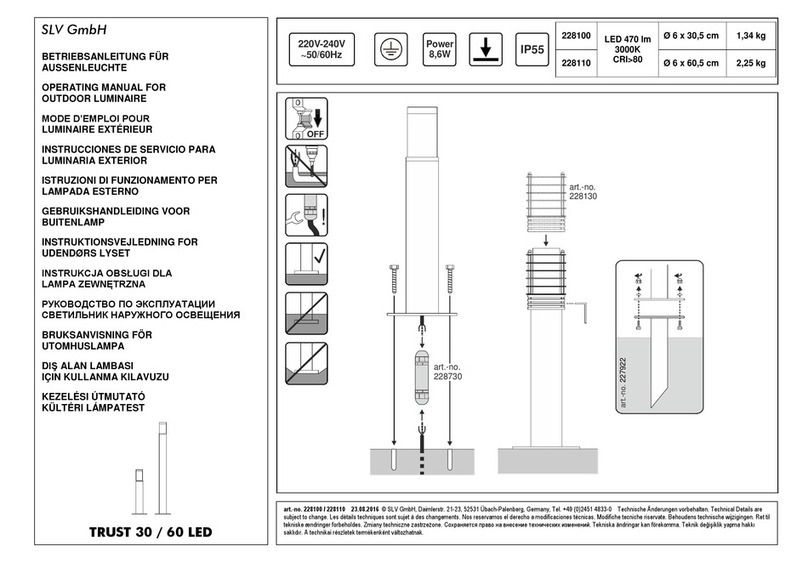
Install the product as shown on the figure.
Conduit should be brought up into the hollow base of
the fixture to keep wiring connections contained
within the fixture body.
Fixture can be secured to a deck with fastening
materials.
Fixture can be mounted on concrete when suitable
bolts or anchors are used.
Fixture can be secured in soil using an optional
Earth Spike (article # 231230U). Dig hole, insert
spike, backfill.
