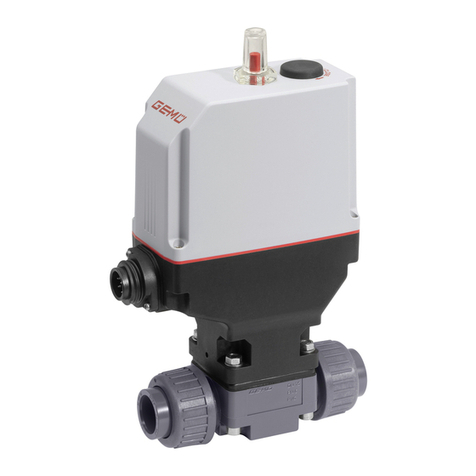
SmartCow Cerberus NX User manual

Cerberus NX
Guide
Creating safer and smarter cities

•Host Ubuntu version is Linux 18.04.4 LTS.
•The NVIDIA SDK Manager version is 1.2.0.6733 or up.
BSP version is JetPack_4.4_Linux_JETSON_XAVIER_NX (L4T 32.4.3)
•The SOP take Cerberus NX as an example
The SOP Patch is “R32_4_3_Cerberus_NX_Camera_IMX290_Dual_1.tar.gz”
BSP folder path : ~/nvidia/nvidia_sdk / JetPack_4.4_Linux_JETSON_XAVIER_NX
(home/nvidia/nvidia_sdk/JetPack_4.4_Linux_JETSON_XAVIER_NX)
•The SOP will also explain how to install Jetson SDK Components
SOP
Description

•Xavier NX production module and Cerberus NX carrier board (Include
Power Adapter and cable)
•x86 PC (Include Linux 16.04 or Linux 18.04 system) and monitor
•USB Cable (Micro-B To Type-A)
Requirement for
Patch file
Installation Device

Click top left corner “Search your computer”
Click “Install”
After download, click “SDK Manager deb” to execute the file
Please use Host computer to download NVIDIA SDK Manager from Jetson download Center.
https://developer.nvidia.com/embedded/downloads
***DO NOT open Jetson system in advance***
Use NVIDIA SDK Manager to Download BSP

Use NVIDIA SDK Manager to Download BSP
Open “SDK Manager”
Click “SDKManager”
Type in “SDK”

Use NVIDIA SDK Manager to Download BSP
After Login, if you don’t want to install “Host Components”,
please cancel the selection of “Host Machine”.
Enter Account and Password and Click “LOGIN”
If you don’t have an Account and Password,
please visit Nvidia website and register.

Use NVIDIA SDK Manager to Download BSP
Confirm the Module and BSP version. Then click “CONTINUE TO STEP 02”
Choose Product Version (BSP Version). Please select “JetPack 4.4”
Choose the Module. Select “Jetson Xavier NX”
Please select the Module based on your flashing need.
Please select the Product Version based on your flashing need.

Use NVIDIA SDK Manager to Download BSP
Click “I accept the terms and conditions of the license agreements”.
And click “CONTINUE TO STEP 03”.
“Jetson OS” and “Jetson SDK Components” will be selected automatically.
If you don’t want to install the later one,
cancel the selection of “Jetson SDK Components”.

Use NVIDIA SDK Manager to Download BSP
After finishing the download of “Jetson OS Image”.
It will start to download “Jetson OS Image”.
Enter Password.
Be aware that choosing different modules will look slightly different.

Use NVIDIA SDK Manager to Download BSP
Please select the “Manual Setup. Finish the selection.
***DO NOT click “Flash” and “Skip” or close “SDK Manger”***
Please open the folder from the path “Home/nvidia/nvidia_sdk” to install Patch file

Patch file installation
After downloading “Jetson OS Image (BSP)”, enter “Home/nvidia/nvidia_sdk”.
You will see “JetPack_4.4_Linux_JETSON_XAVIER_NX ” folder.
Attention! This SOP take JetPack_4.4_Linux_JETSON_XAVIER_NX as an example.
The folder will vary with the downloaded JetPack version and the selection of Modules.
To check whether “Jetson OS Image (BSP)” is downloaded
completely, please enter the following path to see if there
are files in the folder.
~/nvidia/nvidia_sdk / JetPack_4.4_Linux_JETSON_XAVIER_NX
(home/nvidia/nvidia_sdk/JetPack_4.4_Linux_JETSON_XAVIER_NX)

Patch file installation
Click right button of mouse and click “Open in Terminal”
Copy the Patch file to “Home/nvidia/nvidia_sdk”.

Patch file installation
Please enter Unzip Command.
E.g. The Patch file name as an example in this SOP:
R32_4_3_Cerberus_NX_Camera_IMX290_Dual_1.tar.gz
Unzip Command:
tar -zxvf R32_4_3_Cerberus_NX_Camera_IMX290_Dual_1.tar.gz

Patch file installation
When the process is done, it’ll shown as right.
After the commands, system will request you to enter the username and
password of Ubuntu.
cd to R32_4_3_Cerberus_NX_Camera_IMX290_Dual_1 and
Enter Patch file Installation Command: ./setup.sh

Confirm if Patch file Installation is done
Enter kernel folder. Check the image and dtb time have been modified.
If yes, it means the Patch file installation is successful.
E.g. Executing setup patch at 02:10
The following folder path is an example in this SOP.
Attention! The folder path varies with different Jetson OS
Image.
~/nvidia/nvidia_sdk /JetPack_4.4_Linux_JETSON_XAVIER_NX/Linux_for_Tegra/kernel
(home/nvidia/nvidia_sdk/JetPack_4.4_Linux_JETSON_XAVIER_NX
/Linux_for_Tegra/kernel)
If the file time is still the same, please repeat step 4 to 8 from Patch file Installation.

Jetson OS flash (BSP)
Go to Host PC. Open SDK Manager.
Set system to recovery mode (Described in next slide)
Before flashing BSP, please connect USB Cable (Micro-B To Type-
A) to Micro-B connector of Jetson system and USB port of x86
PC

Set System to Recovery Mode
Step1. Power down the device. If connected, remove the AC
adapter from the device. The device must be powered OFF, and
not in a suspend or sleep state.
Step2. Connect the Micro-B plug on the USB cable to the
Recovery (USB Micro-B) Port on the device and the other end to
an available USB port on the host PC.
Step3. Connect the power adapter to the device.
Step4. With the system powered on:
•Press and hold the RECOVERY FORCE button.
•While depressing the RECOVERY FORCE button, press and
release the RESET button.
•Wait 2 seconds and release the RECOVERY FORCE button

Jetson OS flash (BSP)
Click “Flash”*
*When Jetson system is not open or not in recovery mode,
click “Flash” will be show: could not detect Nvidia Jetson
Device.

Jetson OS flash (BSP)
After clicking “Flash”, it’ll start to flash.

Jetson SDK Components Installation
Enter the Username and Password
When the flash is done, it’ll pop up the window
Jetson platform will auto reboot after BSP flashing.
Follow System configuration wizard on Sentinel and setup
username and password.
