manuals.online logo
Brands
  1. Home
  2. •
  3. Brands
  4. •
  5. ZURN
  6. •
  7. Control Unit
  8. •
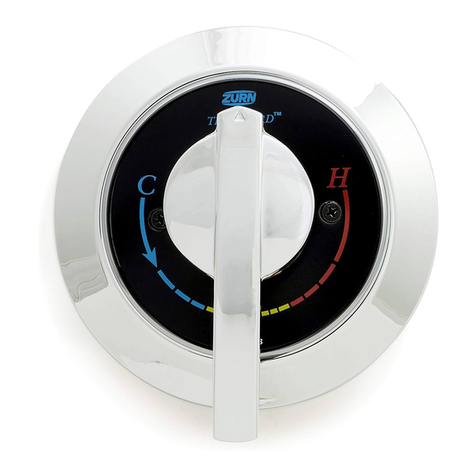
  9. ZURN TEMP-GARD III Z7300-SS-MT-HW-H9 User manual

ZURN TEMP-GARD III Z7300-SS-MT-HW-H9 User manual

ZURN INDUSTRIES, LLC 5900 Elwin Buchanan Drive, Sanford, NC U.S.A. 27330, Ph. 1-800-997-3876, Fax 919-775-3541
In Canada: ZURN INDUSTRIES LIMITED 7900 Goreway Drive, Unit 10, Brampton, Ontario L6T 5W6, Ph. 905-405-8272, Fax 905-405-1292
Rev. H Date: 10/29/2018 C.N. No. SAN008373 Prod. | Dwg. No. CF1024
PAGE 1 OF 4
Operation Installation Maintenance Instructions Replacement Kits
Pressure Balancing Shower/
Tub & Shower Valve
Z7300 Series
TEMP-GARD III
INSTALLATION OF TEMP-GARD III SHOWER VALVE (Refer to page 4 for part no.)
®
WARNING: Caution should be taken
when heating valve for sweat connec-
tions to avoid damaging internal rubber
and plastic components in valve.
1. Install rough piping and valve body as shown.
Do not use PEX or CPVC CTS piping from
valve to tub spout, as the reduced ID re-
sults in too much back pressure for valve
to function properly. When facing valve, HOT
“H” is on left and COLD “C” is on right. Tub
port “T” should face down and shower port “S”
should face upward. The ears on the valve at
the 5 o’clock and 11 o’clock positions may be
used to attach the valve to framing of wall if
necessary.
2.Alwaysinstallvalvewithmudguard(23)sothattheindicatedsurfaceonmudguardisushwithnishedwall.
The hole in the wall should be 4” in diameter.
3.Ifvalveistobeusedforashoweronly,wrapthreadsontubplug(24)withteontapeandinstallplugintotub
port on shower valve.
4.Whenthenalouterwallisnishedremovemudguardandopenbothsupplystopsonvalvebyturningcounter
clockwise.
5. Loosen and remove escutcheon (19) from valve. Carefully remove cartridge (10) from valve by holding car
tridge as close to the valve body (1) as possible and wiggling back and forth until cartridge comes out of the
valve.Placethumbandngerongraypartofcartridgetoremoveit,asshowninFigure4.
6.Withthecartridgesremovedfromallvalvesinthesystem,turnonwatersupplyandushthesystemofany
debris.Ifthewatercomingoutofthevalvewhileushingisgoingbehindnishedwall,ahosebibushing
out kit (RK7300-20HB) may be used to allow the water to be directed to a drain by attaching a garden hose
to valve.
7.Ifhotandcoldsupplyinletsarereversedsimplyremovecartridgeandreinstallwithcartridgeipped
180o. The handle adaptor (12) will need to be readjusted. To adjust handle adaptor remove and turn
180o. Handle should always turn through cold, then hot. Reinstall cartridge and tighten escutcheon
to150inlbs.Thesystemwillneedtobeushedagainbeforeinstallingshowerheads.
FOR OPTIMUM VALVE
PERFORMANCE, BALANCE SUPPLY
PRESSURES TO LESS THAN 5 PSI
PRESSURE DIFFERENTIAL BETWEEN
HOT AND COLD WATER SUPPLIES.
FIGURE 1
WARNING: Cancer and Reproducve Harm - www.P65Warnings.ca.gov
ADVERTENCIA: Cáncer y daño reproducvo - www.P65Warnings.ca.gov
AVERTISSEMENT: Cancer et eets néfastes sur la reproducon - www.P65Warnings.ca.gov
ZURN INDUSTRIES, LLC 5900 Elwin Buchanan Drive, Sanford, NC U.S.A. 27330, Ph. 1-800-997-3876, Fax 919-775-3541
In Canada: ZURN INDUSTRIES LIMITED 7900 Goreway Drive, Unit 10, Brampton, Ontario L6T 5W6, Ph. 905-405-8272, Fax 905-405-1292
Rev. H Date: 10/29/2018 C.N. No. SAN008373 Prod. | Dwg. No. CF1024
PAGE 2 OF 4
8. To adjust temperature limit stop (11), turn valve to desired hottest temperature, remove temperature
limit stop (11) turn clockwise and reinstall so that the white protrusion on cartridge is touching the
red protrusion on the temperature limit stop.
9.Afterallushingisdoneinstallshowerheadsandchecksystemforleaks.
10. Assemble external trim to valve.
•Hand tighten escutcheon nut (20) on valve.
•Remove tape from gasket (15) and adhere gasket (centered on the top half of the back of cover
plate (16)) so that 1/4 of the width of the gasket is sticking out beyond the back of the cover plate, see
Figure 2.
•Place cover plate over escutcheon (19) and fasten with screws (18).
•Install handle onto cartridge with handle pointed down. Tighten set screw.
FIGURE 3FIGURE 2
Cover Gasket:
Position gasket in back side of cover with the adhesive
against the cover and the open end at bottom as shown.
TEMPERATURE
LIMIT STOP
Adjusting Temperature Limit Stop:
Lift and turn temperature limit stop clockwise to reduce
maximum temperature.
The ZURN TEMP-GARD III Pressure Balancing Shower Valve is equipped with an adjustable temperature limit stop. The temperature
limit stop device is to be used to limit the valve handle from being turned to undesired hot water discharge temperatures. To adjust the
temperaturelimitstop,seestep8oftheinstallationandreferencegure3.
IMPORTANT: Failure to adjust the temperature limit stop properly increases the chances for serious injury.
WARNING: This shower system may not protect the user from scalding when there is a failure of other
temperature controlling devices elsewhere in the plumbing system.
Notes:
When there is a shutoff valve installed after the control valve, there shall be stop and check valves on the inlets. This is to
eliminatehotandcoldcross-connectionintheeventthevalvehandleislefton.Specifysufx“-SC”forASSEapprovedchecks.
Ifvalveisgoingtobeinstalledin“ThinWallApplication”suchasaberglassorpanelwall,itisrecommended
thatanoptionalwallange(RK7300-WF)beused.Thiswallangeisusedtosandwichthewallbetweenthe
valve body and cover plate.
The main handle of the Temp-Gard III valve is for temperature control only. To turn valve on, the handle is
turned counterclockwise through the cold position, to the warm and then to the hot position. The range of
motion on the handle is 140o.
OPERATION:
ZURN INDUSTRIES, LLC 5900 Elwin Buchanan Drive, Sanford, NC U.S.A. 27330, Ph. 1-800-997-3876, Fax 919-775-3541
In Canada: ZURN INDUSTRIES LIMITED 7900 Goreway Drive, Unit 10, Brampton, Ontario L6T 5W6, Ph. 905-405-8272, Fax 905-405-1292
Rev. H Date: 10/29/2018 C.N. No. SAN008373 Prod. | Dwg. No. CF1024
PAGE 3 OF 4
FIGURE 4
HOLD HERE TO
REMOVE CARTRIDGE
Properperformanceisdependentuponlicensed,qualiedpersonnelperformingregular,periodictestingaccordingto
ZURNspecicationsandprevailinggovernmental&industrystandardsandcodesanduponfollowingtheseinstallation
instructions. Failure to do so releases ZURN of any liability that it might otherwise have with respect to that device. Such
failure could also result in an improperly functioning device.
TROUBLE SHOOTING:
PROBLEM CAUSE SOLUTION
 Valvewillnotowwater. Hotandcoldwaternotturnedon. Besurebothsupliesareturnedon
Service Stops not open. and service stops are open. Valve will
not operate unless both HOT and
COLD water inlets have pressure.
Water volume from valve is Pressure balancing piston housed in Remove and service cartridge as
inconsistent during operation. cartridge (10) assembly is blocked described in steps 1 through 6
from free movement by foreign of the MAINTENANCE and SERVICE
matter. section.
 Valvedeliversaninsufcientquantity 
of Hot or Cold water.
 Temperaturesuctuatewithoutmoving
temperature handle.
Valve does not deliver Valve designed to deliver mixed Increase system hot water
desired hot water temperature. hot and cold water in all handle temperature.
positions.
 Temperatureoutofvalvereduces Supplysystemisrunningoutofhot Reducemaximumowrateoutofvalve
gradually during use. water. or shower head. This will allow longer
period of use before reduction of hot
water supply.
Valve makes loud noise. Piston in cartridge is moving back
and forth because of a large pressure
differential between the HOT and
COLD water lines.
Alter the water system such that the
pressure differential at all shower
valves is no more than 5 psi.
MAINTENANCE and SERVICE:
1. Remove handle (21) and cover plate (16).
2. Usingaatheadscrewdriver,turnbothservicestops(7)clockwiseuntil
they bottom out. This allows the valve to be serviced without turning off
the main water supply. If service stops need to be repaired or replaced,
the main water supply must be turned off and the service stop retainer
(9) must be removed by turning counterclockwise.
3. Remove escutcheon nut (20) and escutcheon (19).
4. Removecartridge(10)byplacingthumbandforengerwhereshown
ingure4andcarefullywigglingcartridge.Caution: If cartridge is not
removed in manner described damage may occur to cartridge.
5. To determine if the piston in cartridge is functioning properly, shake
cartridge side to side. The piston should make a clicking sound.
6. If no sound is heard when shaking, place cartridge in vinegar for at least
8 hours to remove scale and debris. If still no sound is heard replace
cartridge with RK7300-CART-3P cartridge replacement kit.
ZURN INDUSTRIES, LLC 5900 Elwin Buchanan Drive, Sanford, NC U.S.A. 27330, Ph. 1-800-997-3876, Fax 919-775-3541
In Canada: ZURN INDUSTRIES LIMITED 7900 Goreway Drive, Unit 10, Brampton, Ontario L6T 5W6, Ph. 905-405-8272, Fax 905-405-1292
Rev. H Date: 10/29/2018 C.N. No. SAN008373 Prod. | Dwg. No. CF1024
PAGE 4 OF 4
PARTS:
1. Valve Body
2. Service Stop Washer
3. Service Stop Plunger
4. Spring
5. Stem O-Ring
6. Service Stop Roll Pin
7. Service Stop Stem
8. Retainer O-Ring
9. Service Stop Retainer
10. Pressure Balancing Cartridge
11. Temperature Limit Stop
12. Handle Adaptor
13. Set Screw
14. Wall Flange
15. Gasket (7000-90).
16. Cover Plate w/Etched Lettering
17. Temperature Indicator
18. Cover Plate Screw, 3”
19. Escutcheon (7300-81MT)
20. Escutcheon Nut (7300-9MT)
21. Handle
22. Set Screw
23. Mud Guard (7300-17)
24. Tub Plug (7300-7B)
25. Hose Bib
26. Escutcheon Extension
27. Set Screw
28. Stem Extension
29. Cover Plate Screw, 4”
RK7300-CART-3P
CARTRIDGE KIT
ITEM NO.
10. Pressure Balancing Cartridge
11. Temperature Limit Stop
12. Handle Adaptor
13 Set Screw
RK7300-50A
SERVICE/CHECK STOP KIT
(2) PER.
ITEM NO.
2. Service Stop Washer
3. Service Stop Plunger
4. Spring
5. Stem O-Ring
6. Service Stop Roll Pin
7. Service Stop Stem
8. Retainer O-Ring
9. Service Stop Retainer
RK7300-WF
WALL FLANGE KIT (OPTIONAL)
ITEM NO.
14. Wall Flange
RK7300-LH
LEVER HANDLE KIT
ITEM NO.
21. Handle
22. Set Screw
RK7300-11AE-001
COVER SCREWS KIT
(2) PER
ITEM NO.
18. Cover Plate Screw, 3”
RK7300-EXT
EXTENSION KIT (OPTIONAL)
ITEM NO.
26. Escutcheon Extension
27. Set Screw
28. Stem Extension
29. Cover Plate Screws, 4”
RK7300-20HB
FLUSHING OUT KIT (OPTIONAL)
ITEM NO.
25. Hose Bib
RK7300-8MT-002
COVER PLATE KIT
ITEM NO.
16. Cover Plate w/Etched Lettering
17. Temperature Indicator
PARTS BREAKDOWN
REPLACEMENT KITS:

This manual suits for next models

6

Other ZURN Control Unit manuals

ZURN ZER6000AV-CPM User manual

ZURN

ZURN ZER6000AV-CPM User manual

ZURN 350 User manual

ZURN

ZURN 350 User manual

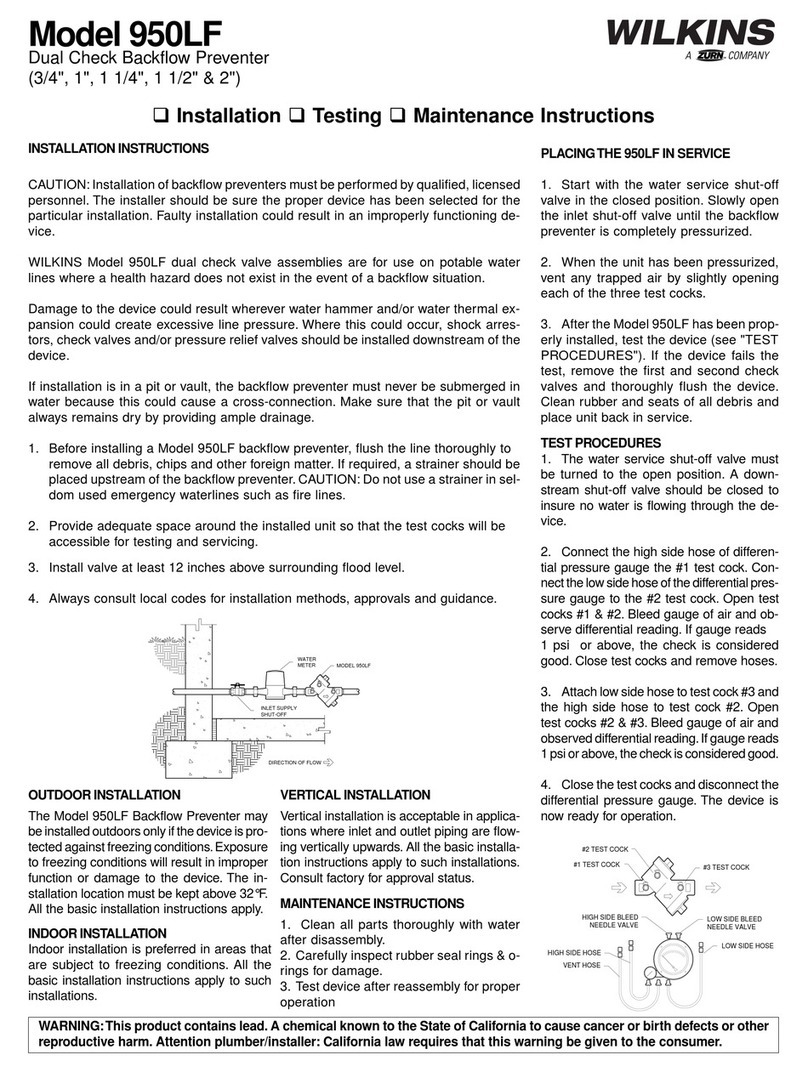
ZURN WILKINS 950LF User manual

ZURN

ZURN WILKINS 950LF User manual

ZURN WILKINS 450 User manual

ZURN

ZURN WILKINS 450 User manual

ZURN AQUA-GARD ZW1070/15 Maintenance and service guide

ZURN

ZURN AQUA-GARD ZW1070/15 Maintenance and service guide

ZURN Aquaflush Z6001 User manual

ZURN

ZURN Aquaflush Z6001 User manual

ZURN TEMP-GARD Z7100 User manual

ZURN

ZURN TEMP-GARD Z7100 User manual

ZURN WILKINS BR4EC User manual

ZURN

ZURN WILKINS BR4EC User manual

ZURN Metroflush Z6200 series User manual

ZURN

ZURN Metroflush Z6200 series User manual

ZURN AquaSense ZTR Series User manual

ZURN

ZURN AquaSense ZTR Series User manual

ZURN WILKINS ZW109FP Owner's manual

ZURN

ZURN WILKINS ZW109FP Owner's manual

ZURN QHCMKIT5 User manual

ZURN

ZURN QHCMKIT5 User manual

ZURN AquaVantage ZH Series User manual

ZURN

ZURN AquaVantage ZH Series User manual

ZURN 350AST Series User manual

ZURN

ZURN 350AST Series User manual

ZURN WILKANS PV-PRD User manual

ZURN

ZURN WILKANS PV-PRD User manual

ZURN Wilkins ZW109BP Owner's manual

ZURN

ZURN Wilkins ZW109BP Owner's manual

ZURN ZW215FP Installation manual

ZURN

ZURN ZW215FP Installation manual

ZURN AquaSense ZER-SM Series User manual
ZURN

ZURN AquaSense ZER-SM Series User manual
ZURN LEAD-FREE ZW209 Manual

ZURN

ZURN LEAD-FREE ZW209 Manual

ZURN AquaSense ZER-W2 Series User manual
ZURN

ZURN AquaSense ZER-W2 Series User manual

ZURN AquaSense ZER-SM Series User manual

ZURN

ZURN AquaSense ZER-SM Series User manual

Popular Control Unit manuals by other brands

Control Techniques UD77 DeviceNet user guide

Control Techniques

Control Techniques UD77 DeviceNet user guide

DSE 53 Series operating manual

DSE

DSE 53 Series operating manual

Panasonic GP-KH232CUE operating instructions

Panasonic

Panasonic GP-KH232CUE operating instructions

WABCO 461 307 Test instruction

WABCO

WABCO 461 307 Test instruction

Train-Tech Scenic Sounds manual

Train-Tech

Train-Tech Scenic Sounds manual

VXI Technology Multifunction Plus VT1419A user manual

VXI Technology

VXI Technology Multifunction Plus VT1419A user manual

LICHUAN MC556 Instruction book

LICHUAN

LICHUAN MC556 Instruction book

Verizon FiOS-JenMod1 user guide

Verizon

Verizon FiOS-JenMod1 user guide

PCB Piezotronics 352C16 Installation and operating manual

PCB Piezotronics

PCB Piezotronics 352C16 Installation and operating manual

Digi XBee ZigBee S2C user guide

Digi

Digi XBee ZigBee S2C user guide

Aaeon ETX-945GSE manual

Aaeon

Aaeon ETX-945GSE manual

Handicare VR2 user manual

Handicare

Handicare VR2 user manual

Georg Fischer Signet 9900 instruction sheet

Georg Fischer

Georg Fischer Signet 9900 instruction sheet

Emerson Yarway Color-Port 4511N Installation, operation and maintenance instructions

Emerson

Emerson Yarway Color-Port 4511N Installation, operation and maintenance instructions

Dustcontrol 14124x Original instructions

Dustcontrol

Dustcontrol 14124x Original instructions

Emerson SM-I/O 24V Protected user guide

Emerson

Emerson SM-I/O 24V Protected user guide

MOULDPRO TCU-200L User guideline

MOULDPRO

MOULDPRO TCU-200L User guideline

Apollo 40-300 Series (1/2") Installation, operation & maintenance manual

Apollo

Apollo 40-300 Series (1/2") Installation, operation & maintenance manual

manuals.online logo
manuals.online logoBrands
  • About & Mission
  • Contact us
  • Privacy Policy
  • Terms and Conditions

Copyright 2025 Manuals.Online. All Rights Reserved.