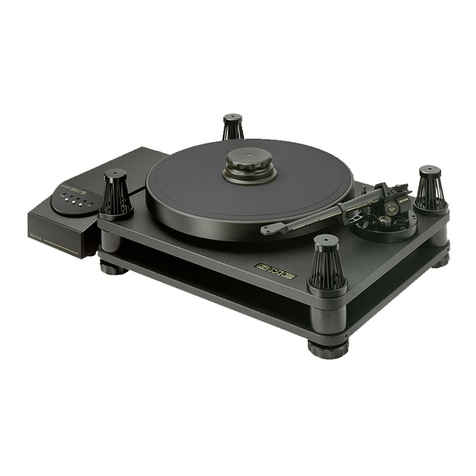
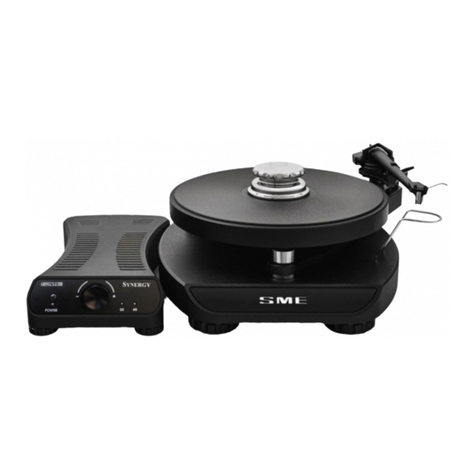
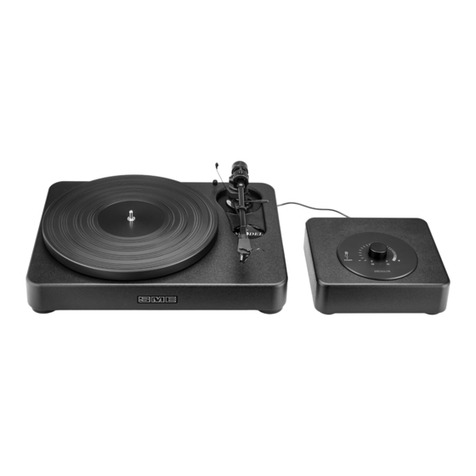
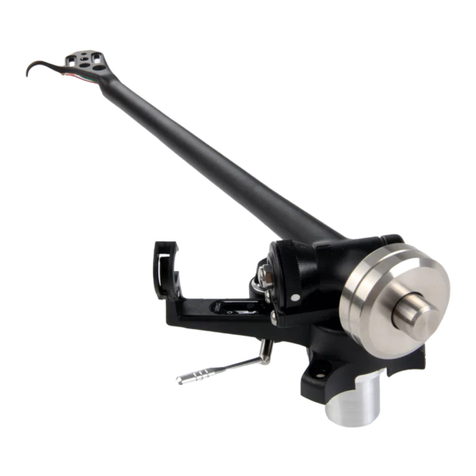
SME 10 User manual

PRECISION TURNTABLE
Instructions

Precision Turntable
Instructions
This is not an ordinary turntable. These instructions cover unpacking, adjustment and
installation procedures and you owe it to yourself to read them carefully before proceeding
further.
2

1. Introduction
The SME Model 10 Precision Turntable is built to exacting engineering standards providing
reliability and freedom from critical adjustments. Build integrity, sophisticated electronics and
vibration free moving parts allow the full capabilities of any sound system to be fully
explored.
3

2. Contents
Page
3 Introduction
5 Dimensions and specification
6 Packing list
7 Parts identification - Model 10 - Turntable
8 Parts identification - Model 10 - Pick-up Arm
9 Unpacking
9/10 Setting up
10 Fitting the Model 10 Precision Pick-up Arm
10/11 Fitting the Cartridge
11/12 Fitting the Headshell
12 Balancing the Arm
12 Vertical Tracking Adjustment (VTF)
12/13 Arm Height Adjustment (VTA)
13 Horizontal Tracking Angle Adjustment (HTA)
14 Positioning the Armrest
14 Locking the Base
14 Anti-Skate Control
14/15 Operation (turntable)
15 Operation (pick-up arm)
15/16 Maintenance
16 Transit Precautions
17 Guarantee
18 Appendix
4

3. Dimensions (turntable)
Width 370.0mm (14.57”)
Depth 350.0mm (13.80”)
Height 161.0mm (6.3”) - Record clamp fitted
Platter Diameter 304.0mm (11.97”)
Spindle to Arm 215.35mm (8.48”)
Net Weight 16.0Kg (35lb)
Shipping weight 18.25Kg (40lb)
4. Specification (turntable)
Motor commutation and speed selection are supervised by an 8-bit micro-controller and
regenerative braking reduces run-on to a minimum.
The special SME motor sets new standards of speed stability and quiet running. Its
rotation is compared 120 times per revolution each speed having its own crystal
reference ensuring rotation is exactly 33 1/3 or 45 rpm.
Speeds 33 1/3 & 45 rpm
5. Dimensions (tone-arm)
Distance from pivot to stylus 233.15mm (9.18”)
Distance from pivot to turntable centre 215.35mm (8.48”)
Cartridge fixing centres 12.70mm (0.50”)
Offset Angle 23.6o
Linear offset 93.47mm (3.68”)
Overhang 17.8mm (0.70”)
6. Specification (tone-arm)
Effective mass 9.5g
Cartridge balance range 6-17g
Vertical tracking force 0-3g
Maximum tracking error 0.012O/mm
Null point inner/outer 66.04/120.9mm (2.60”/4.76”)
5

7. Packing List - Model 10 turntable
Qty Description Part No.
1 Base and sub-chassis assembly 1200
1 Platter 1201
1 Operating Instructions 1271
1 Record Clamp 1239A
1 Dust Cover 1244
1 Stylus guard 1245
1 Power supply unit - 100V 115V 230V 1266
1 Power Cord - UK EUR USA 1098-9
1 Drive Belt 1100
1 Syringe of Lubricating Oil 1287
1 Record Spindle Washer 1148
4 Socket Cap Screws M3 x 12 5893/12
8. Packing List - Model 10/A turntable
Items in addition to the above
Qty Description Part No.
1 Precision Pick-Up Arm 1300
1 Detachable Headshell 1252
1 Alignment Protractor 1257
2 Plain Washer M4 1286
1-set Alloy Cartridge Fixing Screws (Bright) 2300
1 3-part Polystyrene Pack 3964
1 1,2M Audio Lead 3900A
1 Finger Lift and Two Washers 4906/7
1 VTA Screw 5860
1 Hexagon Wrench 2,5mm A/F 5896
1 Ball-Ended Hexagon Wrench 3,0 A/F 5905/300
1 Spanner 5,0/5,5 A/F 5923
1 Hexagon Wrench 2,0mm A/F 5924
1 Hexagon Wrench 0,89mm A/F 5926
2 Socket Cap Screws M4 x 18 5974/18
1 Hexagon Wrench 3,0mm A/F 5990
6
Model 10 Turntable Serial No: ....................
Model 10 Pick-up Arm Serial No: ....................
Contents checked by: ....................
Date: ....../....../......

9. Parts Identification - Model 10 Precision Turntable
7
Low Voltage
Input Cable
Motor Lubrication
Point
Motor Pulley
Sub-Chassis
(Arm Mounting)
Stylus guard
Driven Pulle
y
Drive Belt
Turntable S
p
indle Record Spindle
Washer Platter
Socket Cap
Screw M3 x 12
Insert Stylus guard
into holes in base
Base
Supporting Feet
(Rotate to level
turntable)
Suspension
Isolator
Transit Screw
(Remove)
Bearing
adjuster
Drive Motor

10. Parts Identification - Model 10 Pick-up Arm
8
Balance Weight
Clamp Bolt
Balance Wei
g
ht
Anti-Skate
Control
Base Clamp
Bolts
Arm Base
Sub-Chassis
Narrow Slot
M4 x 18 Socket Cap
Screw and Washer
Balance Weight
Leadscrew
Yokehead
VTA
Screw
Control Lever
(in raised position)
Armrest
Headshell
Headshell
Clam
p
-Bolt
205mm Rad

11. Unpacking
1. Unpack and check all items against the packing list on page 6. In the very unlikely event
that anything is missing your dealer and SME Limited should be notified at once.
2. The design of the turntable allows it to be used on any substantial table or similar piece
of furniture in the absence of a dedicated equipment stand.
3. Rest the base and sub-chassis assembly on the soft seat of an armchair or settee so that it
stands vertically with the SME emblem pointing upwards and the underside of the base
towards you, it can be helpful to have a colleague hold it in this position. Remove the
transit screw from the underside of the base as shown on page 7.
4. Restore the unit to its normal position and keep the screw safely for possible re-use.
12. Setting Up
Note:
The spindle bearing has been fully lubricated at the factory, the addition of more oil at
this stage is unnecessary. See Section 25 ‘Maintenance’ for details of lubrication.
1. Unpack the drive belt and place it over the driven pulley. Press it down as far as the
flange, ensuring that it is free from twists, then stretch it over the motor pulley.
2. Examine the face of the driven pulley and the underside of the platter to ensure that both
mating surfaces are clean, place the platter squarely over the turntable spindle lowering it
gently until it rests on the driven pulley. Rotate the platter slowly by hand to position the
belt on the pulleys.
WARNING: The unique Isodamp extensional damping material with which the platter is
faced has been diamond turned and scrolled for intimate contact with the record. Avoid
handling or anything that might mar the surface, as like the record itself, it could be
easily damaged.
3. Insert the stylus guard into the holes provided in the base, as shown on page 7. Push
down to ensure full engagement.
4. If desired the turntable can be levelled by rotating the appropriate supporting foot. If the
base is lifted slightly at the same time the foot will turn more readily. Check the
adjustment with a precision spirit level placed on the platter.
5. Any SME nine-inch precision pick-up arm can be used with the Model 10 turntable, the
SME Model 10 precision pick-up arm is particularly recommended for its high quality at
moderate cost.
6. Unpack the power supply unit, the mains voltage setting is indicated on the back panel.
Before fitting the power cord check carefully that this matches your mains voltage.
7. The power cord has a standard moulded mains plug. In the event that it must be replaced
the original plug should be cut off and disposed of responsibly.
9

WARNING! To meet international safety standards the power supply unit is earthed through
the yellow/green wire of the power cord and particular care must be taken to ensure that this is
connected so as to maintain effective earthing should the original mains plug be changed.
Connect the low voltage output cable from the power supply unit by inserting the mini-DIN
plug into the socket at the rear of the base. Take care to see that it is pushed fully home. An
on-off switch is situated on the back of the power supply unit.
13. Fitting the Model 10 Precision Pick-up Arm
1. Unpack and check all items against the packing list on page 6. In the unlikely event that
something is missing notify your dealer and SME Limited immediately.
2. The heads of the base clamp bolts are presented to the rear of the tone-arm for ease of
access. Using the 3mm A/F ball-ended wrench, see that both are lightly locked and then
released by three-quarters of a turn only. This will enable the pillar to be moved
vertically in the base. The clamp bolts must not be re-locked until installation and
adjustments have been completed. The movement is internally spring loaded so settings
will not be lost in the meantime.
3. Remove the four socket cap screws M3 x 12 from the Model 10 sub-chassis (Arm
Mounting). These have been provided in case you should wish to use another model
from the wide range of SME precision pick-up arms.
4. Position the arm on the sub-chassis, engage the small location pins protruding from the
underside of the arm base into the narrow slot in the sub-chassis. Fit a washer to each of
the M4 x 18 socket cap screws and insert them from under the sub-chassis through the
slots on either side and screwing them up into the tapped holes in the arm base. Position
the turntable so that the sub-chassis overhangs the edge of the table allowing the cap
screws to be tightened with the ball-ended hexagon wrench 3mm A/F and then released
by three-quarters to one turn to allow for arm adjustment.
5. Plug in the audio lead. The socket at the bottom of the arm pillar rotates through 315
degrees allowing a wide choice of position.
The ground lead serving the arm should be connected to the ground terminal of the
pre-amp and those from the phono plugs to the ground terminal on the piece of
equipment to which the plugs are connected, ie. transformer, head-amp of pre-amp.
The system has been designed for a high signal to noise ratio and if this is not achieved,
multiple ground paths or the over proximity of mains equipment will be likely causes.
WARNING: To prevent bridging the compliance of the turntable’s suspension, the audio lead
and the low voltage cable from the power supply must be routed clear of the turntable base and
the surface on which the turntable is mounted. Failure to do this can result in acoustic feeback.
14. Fitting the Cartridge
1. Before fitting the cartridge see that its stylus guard is in position as a precaution against
accidental damage.
10

LCOFC cartridge leads have 1mm diameter receptacles for the headshell and standard
1,25mm for the cartridge. The latter may require adjustment with pliers or a screwdriver
blade for a snug fit on non-standard terminals.
Connections to the cartridge must never be made by direct
soldering. The colour coding is as follows:
Red - right channel Green - right
channel ground
White - left channel Blue - Left channel ground
2. The LCOFC cartridge leads, Part No. 4899, can be replaced
and may be obtained from your dealer or
3. Four lengths of alloy screw, nuts and washers are provided for cartridge fixing:
6,5mm (1/4”) 11mm (7/16”) 16mm (5/8”) 19mm (3/4”)Select a
pair, using the shorter if more than one length is suitable. For the purist, use without the
finger lift is preferred but it is unlikely that the difference will be audible. When used,
the two stainless steel washers should first be placed in the counter-bores in the
headshell.
4. Examine the top of the cartridge. It is important that it presents a good flat face to the
underside of the headshell. Before final tightening check that the cartridge is lying
parallel to the reference edge of the headshell.
5. Tighten the cartridge fixing screws securely using a screwdriver which must be a good
fit in the screw-slots to avoid damage. If necessary hold the nut with the 5,0/5,5 A/F
spanner to prevent rotation.
The screws are non-magnetic. Damage can be caused if a screw is snatched by magnetic
attraction whilst being offered up to the cartridge. For the same reason do not lay tools
down nearby.
15. Fitting the Headshell
1. Using the 2mm A/F hexagon wrench release the headshell clamp-bolt and remove it. The
nut should remain in its housing in the underside of the headshell as it is retained there
with adhesive.
2. Offer up the headshell to the tone-arm identifying the half-round key-way near the front.
3. As the headshell is pushed onto the tone-arm resistance will be felt as the spring loaded
contact pins in the tone-arm are compressed.
4. Align the bolt-hole in the headshell clamp-boss with the key-way in the tone-arm and
insert the clamp-bolt until it touches the nut. Tighten lightly using the 2mm A/F hexagon
wrench.
Removing the headshell
Using the same wrench release the clamp-bolt and unscrew it. To remove the bolt push
the headshell onto the tone-arm using just enough pressure to overcome the spring
loaded contact pins in the tone-arm plug. The clamp-bolt should now be loose enough to
11
Red
Green
Blue
White

lift out using the long leg of the wrench and applying slight side pressure so that it does
not slip out of the socket. The nut remains in its housing in the underside of the
headshell where it is retained with adhesive.
16. Balancing the Arm (Longitudinal)
1. If a detachable stylus guard is fitted to the cartridge it should be removed, thereafter
handling the arm with suitable caution.
The balance-weight is unlocked by releasing its central screw using the 3mm A/F
ball-ended wrench. A half turn anticlockwise is sufficient and for this purpose should not
be exceeded.
2. Check that the anti-skate control is set at zero. Position the arm so that it is clear of the
armrest and the cartridge is clear of the turntable. Move the control lever into the
lowered position. Balance the arm by rotating the leadscrew, using the 3mm A/F
ball-ended wrench. This moves the balance-weight backwards or forwards as required.
Adjust until the arm with the cartridge fitted is either level or slightly low at the front end
when the balance-weight is re-locked.
17. Vertical Tracking Force (VTF) Adjustment
1. For safety the lever of the lowering control should now be moved into the raised
position. The front face of the handle of the 3mm ball-ended wrench carries arrows and
letters A-B-C-D at quarter turn intervals.
To apply VTF, unlock the balance-weight one quarter turn only. Note the position of one
of the letters, after engaging the wrench with the leadscrew, and rotate in the direction of
the arrows. One full turn applies 0,5g or 0,125g for each letter. For example to apply
1,5g VTF, three complete turns of the wrench will be required.
When reducing VTF by opposite rotation of the wrench, move the balance-weight
slightly further than required so that final adjustment is made in the forward direction
thereby taking up any backlash in the thread. Re-lock the balance-weight. Whilst the
foregoing procedure is sufficiently accurate for all normal purposes, VTF can be further
checked with a stylus force gauge if one is available.
18. Arm Height (VTA) Adjustment
1. Insert the VTA screw into the screwed bush at the further side of the arm between the lift
lower dashpot and the yoke assembly. Screw in clockwise and continue to rotate until
resistance is felt. Further rotation will increase the height of the tone-arm relative to the
base. To lower the tone-arm turn the VTA screw anticlockwise. Finger pressure on the
yokehead will then move the arm downwards until it stops on the screw, at which point
further movement in either direction can be made as needed.
2. Use an old but unwarped record for the following procedures in case of accidental
damage.
Place the arm about halfway across the record and move the control lever forward into
12

the playing position. Adjust the arm height until there is approximately 3mm (1/8”)
clearance between the underside of the tone-arm and the surface of the record at its
circumference.
3. In standard operation the mounting surface of the cartridge, underside of the headshell
and the centreline of the tone-arm should all be approximately parallel with the surface
of the record. The alignment protractor has been printed to act also as a height guide in
conjunction with the lines on the side of the tone-arm. Measure the distance from the
surface of the record to the upper of the two lines at the front of the tone-arm using the
left-hand scale.
4. Reposition the protractor about 6mm (1/4”) from the edge of the record. Using the right
hand scale repeat the measurement and compare it with the first one. Adjust the VTA
screw until similar reading are obtained indicating that the arm is level with the surface
of the record.
Other dispositions can of course be accommodated and if the readings are noted can be
quickly implemented for special needs. Do not remove the VTA screw at this point.
19. Horizontal Tracking Angle (HTA) Adjustment
1. With the record still on the turntable, place the alignment protractor onto the record
spindle. Move the arm base as far forward as it will go on the turntable sub-chassis.
Check that the anti-skate control is at zero and the VTF is set for suit the cartridge in use.
The stylus position on the protractor is marked with a small cross. Move the arm out of
the armrest and place it so that the cartridge stylus enters the indent formed at the
intersection of the cross-lines, taking utmost care not to touch or knock the tone-arm
once it is engaged.
2. Carefully move the arm base backwards a little at a time until, when directly viewed
from above, the outline of the tone-arm coincides with the arm profile lines printed on
the protractor.
3. Most cartridges have a stylus - fixing-hole centre distance of 9,5mm (3/8”). Correctly
adjusted with these, the outlines of the tone-arm and protractor will coincide when
viewed directly above the centre-line of the tone-arm. With others, according to the
position of the stylus, it will be necessary to view slightly to the left or right of the centre
line; the only requirement for correct HTA being that the outlines appear to coincide
along their length. Replace the arm in the armrest, without disturbing settings, and
remove the protractor.
13

20. Positioning the Armrest
1. Keeping the tone-arm in the armrest and avoiding any pressure that might disturb the
HTA setting, swing both tone-arm and armrest radially until the left-hand front edge of
the headshell is at a radius of 205mm (8 1/16”) from the centre of the record spindle. The
measurement is not critical within+/- 3mm (1/8”) but the accuracy of the anti-skate
control will be affected is this is exceeded.
21. Locking the Base
1. The two M4 x 18 socket cap screws securing the tone-arm base to the sub-chassis can
now be tightened, followed by the base clamp bolts at the rear. Excessive force is
unnecessary and should be avoided. At this point the VTA screw may be removed until it
is required again.
22. Anti-Skate Control
1. The dial is calibrated and should be set to correspond with the VTF in use. Rotate the
dial until the chosen setting coincides with the index point.
Requirements are dependent on a number of variables and the recommended setting will
be found a good compromise. The situation lends itself to experimentation. Listen for
any discrepancy between channels. If the left channel mistracks, reduce the setting and if
the right channel mistracks increase it.
23. Operation (turntable)
1. Complete the arm and cartridge set-up procedures as detailed above Sections 11 - 20.
2. Place the record spindle washer on the spindle followed by the record and clamp. The
latter should be screwed down clockwise enough to deflect the record flat into firm
contact with the platter. With a fingertip tap the record in three places equally over its
surface and with a little practice it will soon become evident whether or not the record is
touching the platter. If not, some further tightening may be necessary but this is not
always the answer however and sometimes releasing the clamp a little may do more to
effect the desired improvement.
3. The turntable is now ready for
use. At this point packing and all
other items no longer required
should be stored in the packing
case so as to be available if
needed in the future.
4. Plug in the power supply and
switch on at its rear. The LED
marked ‘power’ will light up.
Select the speed by pressing the
14
Power Supply - Control Unit

button 33 or 45, the LED appropriate will light up. Press the button marked stop/start and
the turntable platter will rotate and the ‘stop/start’ LED light up. The ‘lock’ LED
indicates correct speed rotation.
5. Depress the stop/start button again to stop rotation also before changing the speed
selected. The stop/start and lock LEDs will go out.
6. The Model 10 is not equipped with a lid as this could cause acoustic feedback. A soft
cover is provided to protect the turntable and arm from dust when not in use. The back
should be fitted first and the cover then brought forward so that the front can be guided
safely past the cartridge and stylus. When removing the cover start at the back and lift it
upwards then forwards away from the front of the tone arm, the stylus guard affords
additional protection whilst doing this.
24. Operation (pick-up arm)
1. With the control lever in the raised position move the tone-arm out of the armrest and
position the arm so that the stylus is over the selected record groove.
2. To lower the stylus onto the record move the control lever forward until it is just past top
dead centre. This will set the lowering control in motion, at which point it will take over
the movement of the lever, giving a smooth controlled descent.
Note: For the correct descent time the control must be operated exactly as above. The
speed will be increased considerably if the lever is pushed down instead of being allowed
to fall of its own accord.
3. To raise the stylus from the record move the control lever back to its original position.
When the arm is not in use it should always be returned to the armrest for safety.
25. Maintenance (turntable)
1. There are no critical adjustments or need for ‘tweak’ and only very little maintenance.
Clean the drive belt occasionally by drawing it through a piece of soft linen moistened
with lighter fuel. The same material may be used to clean the periphery of the motor and
driven pulleys.
2. Having sintered bronze bearings the motor requires minimal lubrication. One drop of oil
only in one year is sufficient and must not be exceeded.
Remove the platter and drive belt. Apply one drop of 1287 lubricating oil from the
syringe at the point indicated on top of the motor. Choose a time when the turntable will
not be used for some hours so that the oil can find its way down to the lower bearing.
After this time check that there is no oil on the motor pulley and replace the drive belt
and platter.
3. Along with the motor the record spindle is a vitally important part of a good turntable
and for good performance must rotate with extremely small radial clearance. Sometimes
extremes of temperature can make this impracticable so the massive spindle of the Model
10 has a taper top-bearing which can be adjusted but only if it becomes absolutely
15

necessary. Check from time to time by removing platter and drive belt and spinning the
driven pulley. If it is stiff to turn and stops very quickly the bearing is too tight, if it
continues to spin for a very long time the bearing is too loose, somewhere between these
two conditions is correct.
Adjustment is carried out as follows:
Invert the base and sub-chassis assembly keeping the spindle clear of the table with some
judiciously placed books. At the centre of the base will be seen the bottom bearing cap
which is on a fine screw thread. Before leaving the factory this was scribed with a radial
line so that its adjustment can be positively identified, and we stress here that when
re-adjusting rotation should never be more than the thickness of this line at one time
before reassessment. To effect movement the cap is turned by passing a small
screwdriver blade through the cross hole in it in the manner of a tommy-bar. Use both
hands for maximum control moving it slowly with gentle firmness. The golden rule is ‘a
very little at a time’ as the bearing could be severely damaged by over-tightening and
failure to observe these instructions would not be covered by warranty. Clockwise
rotation tightens the bearing anti-clockwise rotation releases it. Do not alter the factory
adjustment unless there is real evidence of need.
4. Spindle lubrication is also recommended after 1000 hours use or two years. With the
turntable inverted as for bearing adjustment take out the small screw near the centre of
the bearing cap and insert just one drop of oil, from the syringe of lubricating oil. Do not
exceed this. Replace the screw and tighten.
5. For cleaning the platter should be removed from the turntable whilst its surface is
sponged with a soft cloth using warm water and washing-up liquid, followed by warm
water only and then a dry towel.
6. Replace the drive belt after 1000 hours use or two years. A replacement (Part No. 1100)
is available from SME Limited.
7. There are no user-serviceable parts inside the power supply unit. A 500 milli-amp fuse is
located below the mains socket, its replacement should only be undertaken by qualified
service personnel.
26. TRANSIT PRECAUTIONS
1. The Model 10 can be safely transported,
SUBJECT ABSOLUTELY TO THE FOLLOWING PRECAUTIONS:
Short journeys by car: remove the platter, disengage the drive belt from the motor pulley,
and replace the transit screw (see page 7). The turntable itself is best placed on the floor
of the car in front of the passenger seat. The platter and other items can be stowed
elsewhere provided they are carefully protected. For all other transportation purposes the
original packing case and materials must be used.
16

27. GUARANTEE
Your SME Model 10 precision turntable and pick-up arm is guaranteed against faulty
material and workmanship. The nominal period of the guarantee is twelve months but is
liberally interpreted at our discretion subject to the following conditions being observed:
1. Any matter arising must in the first instance be raised with SME Limited at the address
appearing below.
2. In no circumstances return the turntable or any part thereof to SME Limited unless we
have requested you to do so. Responsibility will not be accepted for any items or costs
arising if this point is disregarded.
3. Items returned to our Service Department must be:
a. Sent strictly in accordance with the packing and routing directions which we will
provide.
b. Insurance should be effected by the owner. SME Limited are unable to accept
liability for any items until they reach the factory safely.
4. Defective parts will be replaced free of charge. The cost of labour may be charged at the
discretion of SME Limited. Return transport and insurance costs will be charged.
5. The guarantee expressly excludes:
a. Damage by any cause whatever.
b. Contingent and third party liability.
c. Personal injury.
6. No alteration or variation of the guarantee will be recognised by SME Limited.
7. The guarantee is not transferable.
SME Limited · Steyning · Sussex · BN44 3GY ·England
Tel: +44 (0)1903 814321 · Fax: +44 (0)1903 814269
e-mail: [email protected]
17

28. APPENDIX
We hope these instructions have made the installation of your Model 10 precision
turntable and pick-up arm straightforward. Care for it as befits its fine construction. Do
not invert it except where directed for service. Do not apply oil other than that supplied
by SME Limited for the purpose. Do not attempt to take it to pieces or interfere with any
of the screws except as directed in the instructions. To do so will invalidate the warranty
and may occasion costly repairs. Keep your turntable clean by dusting it regularly with
due regard for the safety of the cartridge and stylus. Always use the soft dust cover when
not in use. Finger marks may be removed from the black enamel/chrome finish with a
linen handkerchief moistened with lighter fuel. Do not use any other kind of spirit or
solvent cleaner.
In the unlikely event of a problem concerning operation or service, always contact us in
the first instance at the address on page 17, stating the exact nature of the problem, the
name and address of the dealer who supplied the unit and its serial number which will be
found on the label at the rear of the of the turntable base.
18
1271 Instruction Book Issue 3
Other manuals for 10
1
Table of contents
Other SME Turntable manuals

