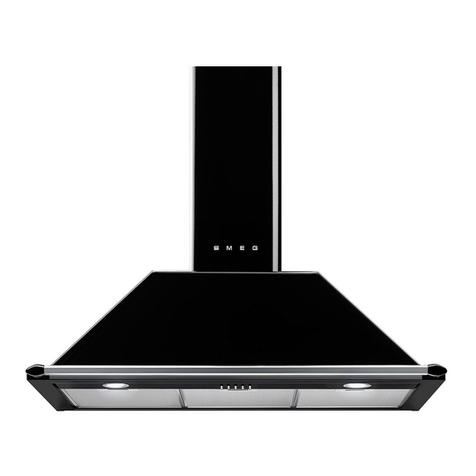
Smeg Dolce&Gabbana Divina Cucina User manual

MANUALE D’USO
INSTRUCTION MANUAL

MANUALE D’USO
CAPPA D’ASPIRAZIONE
INSTRUCTION MANUAL
EXTRACTOR HOOD
MANUEL D’UTILISATION
HOTTE ASPIRANTE
GEBRAUCHSANWEISUNG
ABZUGSHAUBE
GEBRUIKSAANWIJZING
AFZUIGKAP
MANUAL DE USO
CAMPANA DE ASPIRACIÓN
MANUAL DE UTILIZAÇÃO
EXAUSTOR
РУКОВОДСТВО ПО ЭКСПЛУАТАЦИИ
КУХОННАЯ ВЫТЯЖКА
BRUGERMANUAL
KÖKSFLÄKT
KÄYTTÖOPAS
LIESITUULETIN
BRUKSANVISNING
EMHÆTTE
INSTRUKCJA UŻYTKOWNIKA
OKAP KUCHENNY
ITENFRDENLESPTNO PL
BRUKSANVISNING
AVTREKKSHETTE
RUFI DA SV

Dear Customer,
Thank you for having chosen Divina Cucina, domestic appliances from the ‘Sicily is my
love’ collection by Smeg – Dolce&Gabbana.
By choosing this product, you have selected an appliance
that combines the quality and technology of Smeg products and the creativity and design of
Dolce&Gabbana.
The decorations are applied to the product through a combination of patented industrial
and manual process
so any irregularities in the processing should be considered as unique and distinctive
characteristics of the product.

21
Contents
ENEN
1Instructions 22
1.1 General safety instructions 22
1.2 Appliance purpose 24
1.3 Manufacturer’s liability 24
1.4 This user manual 24
1.5 Identification plate 24
1.6 Disposal 25
1.7 How to read the user manual 26
2 Description 26
2.1 General Description 26
2.2 Control panel 26
3Use 27
3.1 Instructions 27
3.2 Fan speed selector switch. 27
3.3 Timed intensive function 27
4 Cleaning and maintenance 28
4.1 Instructions 28
5Installation 31
5.1 Positioning 31
5.2 Air connection systems 32
5.3 Electrical connection 34
We advise you to read this manual carefully, which contains all the instructions for
maintaining the appliance’s aesthetic and functional qualities.
For further information on the product: www.smeg.com

22
Instructions
1 Instructions
1.1 General safety instructions
Risk of personal injury
• Before performing any work on
the appliance, switch off the
power supply.
• Never attempt to extinguish a
flame or fire with water.
• Do not cook or fry in a way that
creates strong flames that may be
drawn by the hood while it is in
operation and cause a fire.
• Do not flambé foods under the
hood; Fire hazard.
• This appliance may only be used
by children aged 8 years and
over, and by people of reduced
physical, sensory or mental
capacity, or lacking in experience
in the use of electrical appliances,
provided that they are supervised
or have been given instructions on
the safe use of the appliance and
of the hazards associated with it.
• Children must not play with the
appliance.
• Keep children under the age of
eight at a safe distance unless they
are constantly supervised.
• Keep children under the age of 8
away from the appliance when it
is in use.
• Never leave the appliance
unattended during cooking
operations where fats or oils could
be released, as these could then
heat up and catch fire. Be very
careful.
• Do not insert pointed metal objects
(cutlery or utensils) into the slots in
the appliance.
• Switch off the appliance
immediately after use.
• DO NOT USE OR STORE
FLAMMABLE MATERIALS NEAR
THE APPLIANCE.
•DONOTUSEAEROSOLSIN
THE VICINITY OF THIS
APPLIANCE WHILST IT IS IN
USE.
• DO NOT MODIFY THIS
APPLIANCE.
• Installation and servicing should
be carried out by qualified
personnel in accordance with
current standards.
• Do not try to repair the appliance
yourself or without the assistance
of a qualified technician.
• Do not pull the cable to unplug the
appliance.

23
Instructions
ENEN
• This appliance is fitted with a Class
1M white LED light according to
standard EN 60825-1: 1994 +
A1:2002 + A2:2001; maximum
optical power emitted@439nm:
7μW. Do not look at the light
directly using optical instruments
(binoculars, magnifying glass
etc.).
Risk of damaging the appliance
• Do not use abrasive or corrosive
detergents (e.g. scouring
powders, stain removers and
metallic sponges) on glass parts.
Use wooden or plastic utensils.
• Do not use rough or abrasive
materials or sharp metal scrapers.
• Do not use cleaning products
containing chlorine, ammonia or
bleach on parts made of steel or
that have metallic surface finishes
(e.g. anodizing, nickel- or
chromium-plating).
• Do not use steam jets to clean the
appliance.
• Do not spray any spray products
near the appliance.
• Do not obstruct ventilation
openings and heat dispersal slots.
• Do not use the handle to lift or
move the appliance.
Installation and maintenance
• Before performing any work on
the appliance, switch off the
power supply.
•THIS APPLIANCE MUST NOT BE
INSTALLED IN BOATS OR
CARAVANS.
• Position the appliance with the aid
of a second person.
• Installation and servicing should
be carried out by qualified
personnel in accordance with
current standards.
• Have the electrical connection
performed by authorised technical
personnel.
• The appliance must be connected
to earth in compliance with
electrical system safety standards.
• The minimum distance between
the lower surface of the hood and
the hob must be 750 mm for gas
appliances and 650 mm for
electric appliances.
• The air that is extracted must not
be conveyed into a duct that is
used for extracting fumes from
appliances powered by gas or
other fuels.
• Connect the air outlet from the hood
to fume extraction ducts that have an
adequate internal diameter, not less
than 120 mm.

24
Instructions
• There must be adequate aeration in
the room when the hood and gas
appliances are operating at the
same time.
• Comply with the legal requirements
regarding the discharge of extracted
air when the hood is in operation.
• If the power cable becomes
damaged, contact technical support
immediately to arrange for it to be
replaced in order to avoid possible
hazards.
• Always use any necessary/required
personal protective equipment (PPE)
before performing any work on the
appliance (installation,
maintenance, positioning or
movement).
For this appliance
• Maintain the filters carefully and
regularly according to the
schedule recommended by the
manufacturer.
• Do not install / use the appliance
outdoors.
1.2 Appliance purpose
• This appliance has been designed
to be used as an EXTRACTOR
hood (extraction of air to the
outside) or as a FILTER hood (air is
recirculated indoors) for
household use. Every other use is
considered improper.
• The appliance is not designed to
operate with external timers or with
remote-control systems.
1.3 Manufacturer’s liability
The manufacturer declines all liability
for damage to persons or property
caused by:
• Use of the appliance other than
that specified
• Failure to comply with the
instructions in the user manual
• Tampering with any part of the
appliance
• The use of non-original spare
parts.
1.4 This user manual
This user manual is an integral part of
the appliance and must therefore be
kept in its entirety and within the
user’s reach for the whole working
life of the appliance.
Read this user manual carefully
before using the appliance.
1.5 Identification plate
The identification plate bears the
technical data, serial number and
brand name of the appliance. Do not
remove the identification plate for
any reason.

25
Instructions
ENEN
1.6 Disposal
This appliance conforms to the
WEEE European directive (2012/
19/EU) and must be disposed of
separately from other waste at the end of its
service life.
The appliance does not contain substances
in quantities sufficient to be considered
hazardous to health and the environment, in
accordance with current European
directives.
To dispose of the appliance:
• Cut the power cable and remove it.
• Deliver the appliance to the appropriate
recycling centre for electrical and
electronic equipment waste, or return it to
the retailer when purchasing an
equivalent product, on a one for one
basis.
Our appliances are packaged in non-
polluting and recyclable materials.
• Deliver the packing materials to the
appropriate recycling centre.
Power voltage
Danger of electrocution
• Disconnect the mains power supply.
• Unplug the appliance.
Plastic packaging
Danger of suffocation
• Do not leave the packaging or any part
of it unattended.
• Do not let children play with the plastic
bags.

26
Instructions
Description
1.7 How to read the user manual
This user manual uses the following reading
conventions:
2 Description
2.1 General Description
1 Control panel
2 Oven light
3 Metal filter
2.2 Control panel
1 Light on/off switch.
2 Fan speed control switch.
Instructions
General information on this user
manual, on safety and final
disposal.
Description
Description of the appliance and its
accessories.
Use
Information on the use of the
appliance and its accessories,
cooking advice.
Cleaning and maintenance
Information for proper cleaning and
maintenance of the appliance.
Installation
Information for the qualified
technician: Installation, operation
and inspection.
Safety instructions
Information
Advice

27
Use
ENEN
3 Use
3.1 Instructions
Light on/off switch
Turn the knob to position (1) to switch the
light on or to position (0) to switch it off.
3.2 Fan speed selector switch
Turn the knob to:
3.3 Timed intensive function
During this function, the hood operates at its
maximum flow rate for a limited time.
From position 3, turn the knob to the
symbol and release it.
The intensive speed can be switched off by
turning the knob anti-clockwise again.
When the intensive speed time has
elapsed, it returns to speed three by default.
Improper use
Risk of fire.
• Do not use the hood without the metal
filters installed.
• Do not cook or fry in a way that creates
strong flames that may be drawn by the
hood while it is in operation and cause a
fire.
• Do not spray any spray products near
the appliance.
• Do not use or leave flammable materials
near the appliance.
0Turn off the fan
1-2-3 Regulate the extraction speed.
Activate the timed intensive
function.
For an optimal and efficient use of
the product, it is recommended to
start the hood a few minutes
before you start cooking and to
keep it on for at least 15 min after
you have finished cooking or until
steam and odours have
completely disappeared.

28
Cleaning and maintenance
4 Cleaning and maintenance
4.1 Instructions
How to maintain the surface finish of
your exclusive
SMEG – DOLCE&GABBANA appliance
Use only a soft, dry cloth to dust the
surfaces of the appliance. For residues that
are more difficult to remove, or to clean the
original surface finish more thoroughly,
wipe the surface with a soft cloth moistened
with water and then allow it to dry.
For more persistent stains, such as grease/
oil and any residues of liquid foods (fruit
juice, coffee, tomato etc.), remove them
immediately with a soft cloth and water. If
this does not remove the stains, moisten a
soft dry cloth with a glass cleaner.
Delicately rub the surface to be treated
covering an area that is larger than that of
the stain. Do not spray the detergent directly
on the stain.
Do not use abrasive, corrosive or acidic
detergents, scouring powders, stain
removers, creams or specific products for
cleaning steel, ovens or dishes. Do not use
rough or abrasive cloths and sponges or
scouring pads. The use of abrasive
products could irreparably damage the
surface of the product.
Power voltage
Danger of electrocution
• Switch off the appliance and disconnect
it from the power supply before carrying
out cleaning and/or maintenance.
• Do not pull the cable to unplug the
appliance.
Improper use
Risk of damage to surfaces
• Do not use steam jets to clean the
appliance.
• Do not use cleaning products containing
chlorine, ammonia or bleach on parts
made of steel or that have metallic
surface finishes (e.g. anodizing, nickel-
or chromium-plating).
• Do not use rough or abrasive materials
or sharp metal scrapers.

29
Cleaning and maintenance
ENEN
Cleaning the metal filters
Particular attention should be paid to the
metal grease filter panels.
The accumulation of grease inside the filter
panels as well as affecting the performance
of the extractor, can also be a fire hazard.
In order to minimise the risk of fire, the filters
should be cleaned regularly, at least once
a month or more often in the case of a
particularly intensive use of the appliance.
Remove one filter at a time as shown in the
following figures:
Wash the filters thoroughly by hand using a
mild detergent or in a dishwasher. Replace
the filters, making sure that the handle is
facing the outside of the hood.
Replacing the optional carbon filters
(filter version only)
The carbon filters can retain odours until the
carbon becomes saturated. They cannot be
washed and cannot be regenerated. It is
therefore recommended to replace them at
least every six months or more frequently if
the hood is used intensively.
1. To access the active carbon filters,
remove the metal filters as described
above.
2. Rotate them by 90° as for the two filters
and remove them from their seat.
Power voltage
Danger of electrocution
• Switch off the appliance and disconnect
it from the power supply before carrying
out cleaning and/or maintenance.
Power voltage
Danger of electrocution
• Switch off the appliance and disconnect
it from the power supply before carrying
out cleaning and/or maintenance.

30
Cleaning and maintenance
Replacing the lamps
LED lights guarantee a high number of hours
of operation. If it needs to be replaced due
to wear or if it is faulty, the entire unit has to
be replaced. In this case, please contact
Technical Support.
This appliance is fitted with a Class 1M
white LED light according to standard EN
60825-1: 1994 + A1:2002 + A2:2001;
maximum optical power emitted@439nm:
7μW. Do not look at the light directly using
optical instruments (binoculars, magnifying
glass etc.).
If the lighting system is damaged it
should only be repaired by the
Technical Support Service.

31
Installation
ENEN
5 Installation
5.1 Positioning
The minimum distance between the lower
surface of the hood and the appliance
installed below it (distance A) must be as
follows:
In order to secure the hood, follow the
instructions below:
1. The hood should be centred with respect
to the surface of the hob/cooker surface
that is installed below it.
2. The hood is supplied with two supports /
hooks (A) to fasten to the wall using wall
plugs. The mounting holes L1 are on the
back of the appliance.
3. Remove the grease filters, position the
hood on the wall and mark the position
of the holes for fastening the mounting
system.
4. After removing the hood from the wall,
drill 2 holes at the points that were
marked.
5. Fix the mounting system to the wall by
tightening the expansion plug.
6. Mark the holes L2 on the wall to secure
the plugs in the holes.
7. Drill 2 holes at the points that were
marked and insert the wall plugs.
8. Attach the hood to the mounting system
and level it using the adjustment screws.
9. Securely fasten the hood by fully
tightening the two expansion screws in
the holes L2.
Heavy appliance
Crushing hazard
• Position the appliance with the aid of a
second person.
for gas appliances 750 mm
for electrical appliances 650 mm

32
Installation
5.2 Air connection systems
Extraction version
Connect the fume extraction duct (inside
diameter Ø 150 mm) to the motor outlet.
Filter version
Leave the motor inlet free. Install the active
carbon filters (optional).
Assembling the flue
1. Position the upper part of the plate at the
maximum height of the flue.
2. Fix the plate using wall plugs that are
suitable for type of wall.
The diameter of the extraction duct
must not be less than Ø 120 mm.
For Germany:
When the kitchen hood and other
appliances powered by energy
other than electricity are working
simultaneously, the negative
pressure in the room must not
exceed 4 Pa (4 x 10⁻⁵ bar).
If the hood is not supplied with an
active carbon filter, you should
purchase one separately before
using the hood.
Make sure that you align the
centre of the plate with the centre
of the appliance.

33
Installation
ENEN
3. Cut the magnetic strips after having
measured the distance between the
hood and the start of the plate.
4. Apply the magnetic strips that have just
been cut to the upper part of the
extendible flue.
5. Insert the internal flue into its base.
6. Position the assembled flue against the
plate that is fastened to the wall.

34
Installation
5.3 Electrical connection
General information
Check the grid characteristics against the
data indicated on the plate.
The identification plate bearing the
technical data, serial number and brand
name is visibly positioned on the appliance.
Do not remove this plate for any reason.
The appliance operates at 220-240 V~.
Use a three-core cable (3 x 1.5 mm2
internal conductors).
Perform the ground connection using a wire
that is 20 mm longer than the other wires.
Power voltage
Danger of electrocution
• Have the electrical connection
performed by authorised technical
personnel.
• The appliance must be connected to
earth in compliance with electrical
system safety standards.
• Disconnect the mains power supply.

Il costruttore si riserva di apportare senza preavviso tutte le modifiche che riterrà utili al miglioramento dei propri
prodotti. Le illustrazioni e le descrizioni contenute in questo manuale non sono quindi impegnative ed hanno solo
valore indicativo.
The manufacturer reserves the right to make any changes deemed useful for improvement of its products without prior
notice. The illustrations and descriptions contained in this manual are therefore not binding and are merely indicative.
Le fabricant se réserve la faculté d’apporter, sans préavis, toutes les modifications qu’il jugera utiles pour
l’amélioration de ses produits. Les illustrations et les descriptions figurant dans ce manuel ne sont pas contraignantes et
n’ont qu’une valeur indicative.
Der Hersteller behält sich vor, ohne vorherige Benachrichtigung alle Änderungen vorzunehmen, die er zur
Verbesserung seiner Produkte für nützlich erachtet. Die in diesem Handbuch enthaltenen Illustrationen und
Beschreibungen sind daher unverbindlich und dienen nur zur Veranschaulichung.
De fabrikant behoudt zich het recht voor zonder waarschuwing alle wijzigingen aan te brengen die hij nodig acht om
zijn producten te verbeteren. De afbeeldingen en de beschrijvingen die aanwezig zijn in deze handleiding zijn niet
bindend, en hebben enkel een aanduidende waarde.
El fabricante se reserva el derecho a aportar sin aviso previo todas las modificaciones que considere útiles para la
mejora de sus propios productos. Las ilustraciones y las descripciones contenidas en este manual no comprometen,
por tanto, al fabricante y tienen un valor meramente indicativo.
O fabricante reserva-se o direito de efetuar, sem aviso prévio, qualquer modificação que vise o melhoramento dos
respetivos produtos. As ilustrações e descrições contidas neste manual, não são, por isso, vinculativas e possuem
apenas valor indicativo.
Производитель оставляет за собой право вносить без предупреждения все изменения, которые посчитает
полезными для улучшения собственной продукции. Рисунки и описания, содержащиеся в данном Руководстве
по эксплуатации, не имеют обязательств и имеют ознакомительный характер.
Producent zastrzega sobie prawo do nanoszenia, bez uprzedniego powiadomienia, wszelkich zmian, które uzna za
przydatne w celu ulepszania swoich produktów. Rysunki i opisy zawarte w niniejszej instrukcji nie są zobowiązujące i
mają charakter poglądowy.
Tillverkaren förbehåller sig rätten att genomföra alla de ändringar som anses nödvändiga för att förbättra de egna
produkterna utan att meddela detta i förväg. De illustrationer och beskrivningar som finns i denna bruksanvisning är
vägledande och därmed inte bindande.
Producenten forbeholder sig retten til at foretage eventuelle ændringer, der anses for at være en forbedring af det
oprindelige produkt, uden forudgående varsel. Illustrationer og beskrivelser i denne betjeningsvejledning er derfor ikke
bindende og kun vejledende.
Valmistaja pidättää itsellään oikeuden tehdä ohjeisiin mielestään tarpeellisia muutoksia ilman ennakkoilmoitusta. Tässä
oppaassa olevat kuvat ja piirrokset eivät näin ollen ole sitovia, vaan ne annetaan vain viitteellisessä mielessä.
Produsenten forbeholder seg rett til endringer på sine produkter grunnet tekniske fremskritt, uten forutgående varsel.
Illustrasjonene og beskrivelsene i denne bruksanvisningen er derfor ikke bindende og skal kun betraktes som
retningsgivende.

914779020/A
This manual suits for next models
1
Table of contents
Other Smeg Ventilation Hood manuals

Smeg
Smeg KDD90VX User manual

Smeg
Smeg KSMI960X1 Technical manual

Smeg
Smeg SHR900X User manual

Smeg
Smeg KI52E User manual

Smeg
Smeg KSEG90X2 User manual

Smeg
Smeg KUBUS FKU 368 TC W User manual

Smeg
Smeg HOTTE KCV60SE2 User manual

Smeg
Smeg KTE60EX Technical manual

Smeg
Smeg KDIAM90AX User manual

Smeg
Smeg KSEG90X Instructions for use
Popular Ventilation Hood manuals by other brands

Bertazzoni
Bertazzoni KT90MAS1NEB installation manual

Becken
Becken BCHTS2340 instruction manual

Pando
Pando INOXPAN S.L User and installation manual

Blaupunkt
Blaupunkt 5DW66750AU instruction manual

Foster
Foster MILANO GRAND CHEF 2460 900 installation instructions

Zephyr
Zephyr Siena ZSI-E36AS Use, care and installation guide