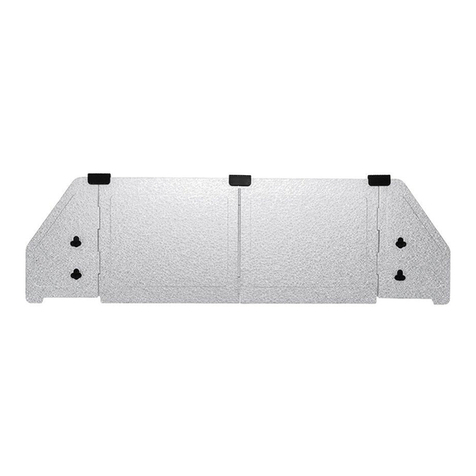
Mesh tray half unit
deep type
Bracket
Panel
Mesh tray half unit
shallow type
CK-303 unit frame (sold separately)
When two mesh trays
are attached
CK-300 clamp (sold separately)
The illustration shows the case of the
mesh tray shallow type. Push the mesh tray down
until there is no gap
between it and the bracket.
Enlarged view
Protrusion of bracket Attach the bracket so that
the hole isfacing outward.
Enlarged view
Groove of 300 mm shaft
Snow Peak USA, Inc.
404 NW 23rd Avenue, Portland, Oregon 97210, USA
Tel. +1 (503) 461-0781 / Instagram. @snowpeakusa
Email. info@snowpeak.com / www.snowpeak.com
●Keep an eye on small children if they are nearby. If children play with this product, it may result in unexpected accidents.
●When using this product in combination with the TTA series products, be sure to use the CK-300 clamps (sold separately) and the CK-303 unit frame (sold
separately) to attach this product to the table. If you use other means to attach this product, it may tip over, resulting in personal injury or product damage.
Mesh Tray Half Unit Deep Type / Mesh Tray Half Unit Shallow Type
CK-226 / CK-251
Contents (Name of the Parts) Specifications
Safety Precautions: Before use, please read thoroughly to ensure safety and avoid accidents.
CAUTION: Misuse could result in injury to the user and/or damage to property.
Instruction Manual:
Ver 1.00
Maintenance and disposal
Warranty
Repair
Product No.
Product name
Material(s)
Size
Weight
CK-226
Mesh Tray Half Unit Deep Type
Stainless steel, Polypropylene
356 mm(L)×120 mm(W)×139 mm(H)
/ 14"(L)×4.7"(W)×5.5"(H)
650 g / 1.4 lbs
CK-251
Mesh Tray Half Unit Shallow Type
Stainless steel, Polypropylene
356 mm(L)×120 mm(W)×48 mm(H)
/ 14"(L)×4.7"(W)×1.9"(H)
450 g / 1 lb
DANGER: Misuse could easily result in a serious accident or death.
WARNING: Misuse could result in serious injury or death.
Main body x 1, Bracket x 2
CAUTION
Be careful not to cut your hand on the edge of the threaded portion.
Instructions for Use
Thank you for purchasing this Snow Peak product. This is a mesh tray that can be combined with both the Table Top Architect (TTA) series and the Iron Grill Table
(IGT) series. If you want to use this product in combination with the TTA series products, the separately sold CK-300 clamps and CK-303 unit frame are required to
attach it to the table. This will create three-dimensional storage on the table.
In order to ensure your safety when using this product, please read the Instruction Manual carefully before use. Please be sure to keep this document for future
reference. If you have any difficulties understanding certain parts of the instruction manual or if you find any product defects, stop using the product immediately and
contact the dealer you purchased the product from or Snow Peak Customer Service.
●Before using the product, check each part for abnormalities. If you find any abnormalities, stop using the product immediately and contact the retailer where you
purchased the product or Snow Peak Customer Service for inspection or repairs.
●Do not install this product near heat sources such as a burner, oil stove, or grill. Doing so may cause the product to become hot, which may cause a burns, fire, or
product damage.
●When assembling or putting away the product, be careful not to cut your
hand on the edge of the threaded portion.
●After assembly, check for wobbling, and loose, screws and clamp bolts. Also,
regularly check the screws and bolts for looseness during use. If this product
is used while it is wobbly or screws and bolts are loose, parts may fall off or
objects may fall, which may result in personal injury or product damage.
●
Do not use this product if it cannot be assembled as described in the
Instruction Manual due to deformation or rust. If this product is used for a long
period of time, it may become deformed or rust, which may prevent screws
from turning smoothly or cause the product to become unstable when
assembled. If you continue to use this product in such a state, it may fall apart
or parts may come off, which may result in personal injury or product damage.
●Please note that this product will become hot if used in a place exposed to
direct sunlight for a long period of time, particularly under scorching sun.
●When using this product outdoors, use it in a place where it will not be
exposed to rain, such as under a tarp. If you leave this product wet with
rainwater for a long period of time, the screws and joints may rust, which may
lead to discoloration and sticking.
●Do not assemble or disassemble this product when it is wet or with wet
hands. Otherwise, an injury may result.
●The product should be assembled by a person who is capable of
understanding the Instruction Manual, has a sufficiently strong grip, and who
has the ability to assemble it correctly.
●Do not assemble or remove the mesh trays while items are placed on them. If
you drop the trays by mistake, it may cause an injury or damage the stored
items (seasonings, etc.), resulting in the surroundings being stained.
●Make sure that the protrusion of the bracket is not worn out before using.
When the bracket is used many times, the protrusion will wear out. If you use
a bracket with a worn protrusion, the mesh trays will not be firmly attached
and the trays may fall, resulting in personal injury or product damage.
●Be careful not to lose the bracket. Otherwise, the product may not be able to
be assembled. If you use other objects in place of the bracket, the mesh trays
will not be firmly attached and the trays may fall, resulting in personal injury
or product damage
●When using the product in combination with the TTA series products, keep in
mind that the maximum loading weight (3 kg / 6.6 lbs).
●Do not adjust the mounting position or move the product while it is still
assembled. If you loosen the clamp while the product is being assembled, the
product may fall off, which may result in personal injury or product damage.
●Do not remove this product from the table for transportation while they remain
combined with the CK-300 clamps and CK-303 unit frame. Otherwise, it may
cause a distortion.
●Use this product on a flat and stable surface. If it is used on an angled or
unstable surface, the product may fall, resulting in personal injury or product
damage. Also, read the instruction manual for the table, and use this product
correctly.
●After assembling this product, check that it will not easily come off the table.
●This product is not intended for permanent use. Clean up immediately after
use and store in a well-ventilated place out of the reach of children.
●When attaching to the IGT frame, do not attach next to the combustor. It may
result in fire or product damage.
●If professional repairs are required, please contact the retailer where you purchased the product or Snow Peak Customer Service.
●When you request repairs, please make sure that the product is dry and clean.
●Please attach a memo or a tag indicating the necessary repairs and write details of how and when the damage occurred.
●Transportation and repair costs are determined as follows.
1. When warranty applies: The transportation cost (both ways) and repair cost
will be covered by Snow Peak.
2. When warranty does not apply: The transportation cost (both ways) and
repair cost will be covered by the customer.
Snow Peak has taken all possible measures to ensure every product is durable and functions correctly. If you find any product defects, please contact the retailer
where you purchased the product or Snow Peak Customer Service. If there are apparent defects due to the product's manufacturing, the defective product will be
repaired or exchanged free of charge. In other cases, Snow Peak will repair the product for an appropriate fee. The decision to repair or replace the product will be
at our discretion. Snow Peak will not repair the product for any damage that occurred due to the following:
1. Material deterioration caused by age
2.
Damage caused by modifications or rough handling
3. Damage caused by inappropriate use not
mentioned in the instruction manual
4. Damage caused by unexpected accidents
5. Any damage other than defects in the
manufacturing process
6. Damage caused by dust or rust
7. Damage and defects caused by dismantling the
product
8. Damage and defects caused by dropping,
jolting or other shocks
9. Deterioration or failure of parts due to friction
10.
Damage caused by the use of the product in
combination with another manufacturer's products
●When disposing of this product, follow the rules of the local government of your area.
●When using the product after not using it for a long period of time, inspect it and make sure that there are no abnormalities in each part. If you find any abnormalities,
stop using the product immediately and contact the retailer where you purchased the product or Snow Peak Customer Service for inspection or repairs.
●After use, follow the procedure described below to appropriately clean and store the product. Not cleaning dirt or moisture off the product may cause rust to form.
・After use, disassemble the product and clean it using a dry cloth.
・If the product is wet, disassemble it, wipe it, and dry it well.
・If salt, seasonings, or other substances are adhered to the product, wipe them off thoroughly using a tightly wrung cloth and allow it to dry thoroughly.
・If you use this product in a location exposed to sea breezes such as a beach, disassemble it, wipe it thoroughly using a tightly wrung cloth, and dry it well.
How to attach it on the TTA unit frame
①Attach the CK-303 unit frame to the table.
Check that it does not wobble, and turn the joints on
the U-shaped metal piece at the top counterclock-
wise to remove the metal piece.
* Be sure to check the instructions for use in the
CK-303 unit frame instruction manual.
How to attach to the IGT
Attach the product to the iron grill table as
illustrated.
Maximum loading weight
Mesh tray deep type: 2 kg (4.4 lbs)
Mesh tray shallow type: 1 kg (2.2 lbs)
②Attach the brackets supplied with the mesh tray to the 300 mm shafts on the
left and right.
Align the protrusion of the bracket with the groove of the 300 mm shaft as illustrated,
and close and attach the bracket so that the hole of the CK-303 unit frame is facing
outward. Attach the bracket to the opposite 300 mm shaft in the same way. At this
time, ensure that the height of the left and right brackets are the same.
③Pass the 300 mm shafts through the holes in the panels of the mesh tray and
attach the tray to the bracket. Push until there is no gap between the bracket
and the panel.
④
Attach the upper U-shaped metal piece that has been removed. Tighten the
joints on the U-shaped metal piece clockwise into the screw hole of the 300 mm
shaft until there is no slack.
Finally, be sure to check each joint part for looseness.
⑤To remove it, carry out the attachment procedure in reverse.
CAUTION
When using this product in combination with the TTA series products, use them in
the configuration shown on the left. If you rearrange the configuration or combine
them with products manufactured by other companies, for example, if you add a
shaft to the CK-303 unit frame to make it longer, the product will become unstable
and may tip over resulting in personal injury or product damage.
*
You can change the positions and the number of mesh trays attached to the unit frame,
or change the combination of deep and shallow types. However, use with a maximum
loading weight of 3 kg (6.6 lbs). They can also be attached below the table by attaching
the unit frame under the clamp. The loading weight in that case is also 3 kg (6.6 lbs).
CAUTION
When attaching on a table in combination with CK-300 clamp and
CK-303 unit frame, attach the mesh trays only either above or
below the clamp. If you attach them above and below the table as
shown in the illustration, it will become unstable and tip over,
causing injury or damage.
Snow Peak Customer Service
(9:00-17:00)
+1(503)461-0781
If you have any questions or concerns,
please contact your retailer or Snow
Peak customer service.
