manuals.online logo
Brands
  1. Home
  2. •
  3. Brands
  4. •
  5. Snow Peak
  6. •
  7. Camping Equipment
  8. •
  9. Snow Peak TP-710IR User manual

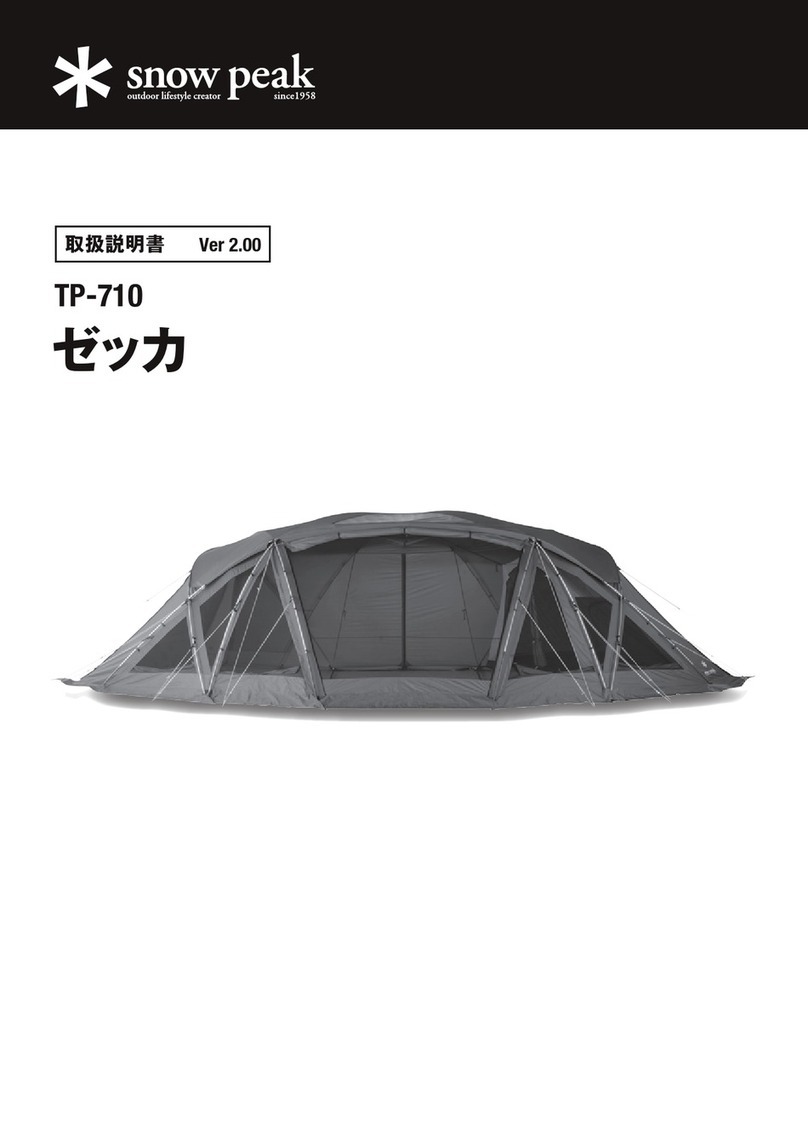
Snow Peak TP-710IR User manual

■ サイズ
290cm(9.5')
(リビング 側 )
235cm(7.7')
205cm(6.7')
205cm(6.7')
170cm(5.6')
ゼッカ内に3人分の寝室を作り出すインナールーム、グランドシート、渡り廊下のセットです。
ゼッカの左右どちらでも付けることができます。前後のドアとサイドのメッシュ窓が優れた通気性を確保します。
※本製品はTP-710ゼッカ専用です。他のシェルターとの併用または単品ではご使用いただけません。
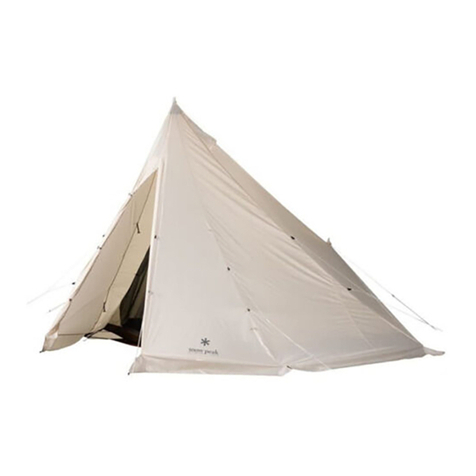
This set consists of an inner room, ground sheet, and walkway that creates a bedroom
for 3 people in Zekka. It can be attached to either the left or right side of ZeKKa.
Front and back doors and side mesh windows ensure excellent ventilation.
*This product is specifically designed for TP-710 Zekka. It cannot be used with other shelters or alone.
ゼッカ  イン ナ ー ル ー ム
Zekka Inner Room
TP-710IR
袋
MADEINCHINA
イン ナ ー ル ー ム
グ ラ ンド シ ート
渡り廊 下
収 納ケース
フック付きテープ
フック
ペグダウン
ループ
ドアパネル
フック
フック 付 き
テープ
スペック
各部の名称
●セット内容:インナールーム、グランドシート(渡り廊下付き)、収納ケース
●材質:インナールーム(ウォール)/68Dポリエステルタフタ、インナールーム(ボトム)/210Dポリエステルオックス・PUコーティ
ング耐水圧1,800mmミニマム、グランドシート/210Dポリエステルオックス、PUコーティング耐水圧1,800mmミニマム
●収納ケースサイズ:32x13×52(h)cm
●重量:4Kg
このたびはスノーピーク製 品をお買い上げいただき誠にありがとうございます。この製 品はゼッカ専 用のインナールームで
す。安全にご使用いただくためにも必ずこの取扱説明書をよく読んでからご使用ください。また、読み終わった後も大切に保
管してください。製品には万全を期しておりますが、フィールドでご使用する前に安全な場所で組立、取扱い方法及び付属
品の確認をしてください。説明内容で理解できない点及び製品に不具合が確認された際には、直ちに使用を中止しご購入
いただきました販売店様もしくは弊社ユーザーサービスまでお問い合わせください。
安全上の注意事項 ご使用の前によく読んで予測される事故を回避し安全にご使用ください。
危険 明らかに生命に関わる重大な事故が予測される行為を示します。
警告 取扱いを誤った場合、使用者が死亡または重症を負う可能性があることを示します。
注意 ケガや本体破損、物品破損として拡大被害の原因となる行為を示します。
●日差しによりインナールーム表面は低温やけどに発展するほどの高温になります。十分ご注意ください。
●たき火や花火などのそばで組み立てたり、使用しないでください。火の粉を被り、生地に穴を開けてしまう場合があります。
●インナールームの設営・撤収の際は、風に飛ばされないようインナールームをしっかりと支えて作業してください。
● ペ グ や 張り 綱 でしっ かりと 固 定し て 使 用し てください 。
●インナールーム素材は長時間日光にさらされた場合、退色や生地劣化などの強度低下を起こしますので、常設用とし
て 使 用し な い でください 。
●気象状況には常に細心の注意を払い、風の強いときや悪天候が予想されるときは速やかにキャンプを中止
して安全な場所へ避難してください。
●高温に加熱されたものや発熱性のあるものを持ち込まないでください。天候によりインナールーム内は高温
になり、熱中症などの危険があります。お子様の昼寝の際など、最新の注意を払ってください。
●風の吹き抜けるような場所や、雪崩、がけ崩れ、急な出水などの恐れのない地盤のしっかりとした、水はけの
良い平坦な場所を選んで設営してください。
●このインナールームの素材は難燃性ではありません。インナールームの中や近くでは燃焼式のランタン
やコンロ、ヒーターなどの熱源や、マッチ、ローソク、ライター、タバコなどの裸火や炎は絶対に使用しない
でください。限られた空間での火気の使用は火災の恐れがあり大変危険です。
●インナールームの中で燃料を保管したり、燃料を補給するなど、引火性のあるものを持ち込まないでください。
取扱説明書(本書)
1
取扱説明書:Ver 1.00
インナールームの取付け
2
グランドシート、インナールームはゼッカ本体の左右両側のどちらにでも取り付けることができます。本書では右側に取りつけ
る方法で説明します。
グランドシートを広 げ 、P Uコーティング 面( てかりのある面 )が 上 になるようにし 、織ネームタグが 室 内 側 にくるように 広
げ てください 。
1
インナールームを広げロゴが印字され
る 箇 所 を 前 にし て 広 げ てください 。
2
ロゴ
室内側
本 体( フ ラ イ )の
Oリング に フックを
掛 け てください
グランドシート各コーナーにあるゴムループを伸ばし、対応するペグに引掛けてください。(4カ所)
3
インナールーム上部奥側に付くフック3ヶ所を本体
( フ ラ イ )の O リ ン グ に 全 て 引 掛 け て く だ さ い 。
4
インナールーム室内側上部のS字フック3ヶ所
を図のように指定のOリングにそれぞれ引掛け
てください 。引掛けたらテープの長さを調整して
テ ン シ ョ ン を か け て く だ さ い 。 
5
インナールーム各ボトムコーナーに付くフック・ゴムループを本体(フライ)のOリング、ペグに引掛けてください。
6
最後に出入り囗下部にあるペグダウンテープをペグダウンします。このペグダウンをする事で、ドア開閉の際の
ボトム浮き上がりを軽減し、開閉しやすくなります。(この箇所に使用するペグは別途購入してください。)
7
イン ナ ー ボト ム
インナールームボトム入口コーナーに付
く 、フ ッ ク 付 テ ー プ を 本 体( フ ラ イ )の テ ン
トフレ ー ム Oリング に 引 掛 け てください 。
インナールームボトム入
口 コ ー ナ ー に 付 く 、フ ッ ク
付 テ ー プ を 本 体( フ ラ イ )
の テ ント フ レ ー ム O リン グ
に 引 掛 け てください 。
テ ント フ レ ー ム
クロスフレー ム
室内側
テ ント フ レ ー ム
Oリング
フック 付
テープ
ペグダウン
ル ー プ( グ レ ー 色 )
後 部 2 ケ 所 に 付くペグ
ダ ウ ン テ ー プ は 、本 体
( フ ラ イ )を 留 め る ペ グ
に 引 掛 け てください 。
ペグダウン
テープ
テ ント
フレーム
Oリング
テ ント フ レ ー ム
フック 付
テープ
ペグダウンル ープ
(グレ ー 色 )
グランドシート室内側、中央の
O リ ン グ に 、渡 り 廊 下 の ト グ ル
を 引 掛 け てください 。
織 ネームタグが 室
内 側 にくるように 広
げ てください 。
グランドシート室内側、背面側
のOリングに、渡り廊下のトグ
ル を 引 掛 け てください 。
イン ナ ー ボト ム
室内側
3
●濡れたまま保管すると、カビや悪臭、生地の色移り、生地の劣化などのトラブルの原因になりますので、使用後は風通し
の良い日陰で十分に乾燥し、柔らかいブラシなどで泥汚れを落としてから保管してください。
●高温多湿を避け、直射日光の当たらない風通しのよい場所に保管してください。
●ファスナーに泥や砂、ホコリなどが付着したまま使用すると摩耗し破損の原因になりますので、ブラシなどを使い常に清潔
にしてください。また、スライダーの動きを滑らかにするために、少量のシリコン系樹脂剤を定期的に塗布してください。塗
布し過ぎると生地に油ジミができますのでご注意ください。
●小さな生地の破損は市販のリペアテープで補修できます。補修の際はリペアテープの説明書をよくお読みください。
●ご使用により広範囲にわたり素材が劣化し、耐久度合を超えたものは修理できない場合があります。
●次回の使用に備え、張り綱などの付属品も含め、十分に保守、点検をしてください。
メンテナンス
渡り廊下を付ける場合
渡り廊下を広げ、PUコーティング面(てかりのある面)が上になるようにし、
織ネームタグが室内側にくるように広げてください。
8
グランドシート室内側、中央のOリングに、渡り廊下のトグルを引掛けてください。
9
グランドシート室内側、背面側のOリングに、渡り廊下のトグルを引掛けてください。
10
反対側に取りついているグランドシートにも同様に取り付けてください。
11 9
8
10
Thank you for purchasing this Snow Peak Product. This product is an Inner Room specifically designed for Zekka.
In order to ensure your safety when using this product, please read these instructions carefully before use. Please
be sure to keep this document for future reference. Although this product is expected to be complete and safe,
please check all accessory items and practice assembling and handling it in a safe location prior to use in the field.
If you find anything in the instruction manual that is difficult to understand, or if you find a defect with the product, stop
using it immediately and contact the dealers where you purchased the product or Snow Peak Customer Service.
4
Instruction Manual : Ver 1.00
Inner room
Ground sheet
Walkway
Storage case
Tapewithhook
Hook
Peg down
loop
Door panel
Hook
Tape
with hook
Specifications
Part names
●Contents: Inner room, ground sheet (with walkway), storage case
●Materials: Inner room (walls)/68D polyester taffeta; Inner room (bottom)/210D polyester oxford, PU coating,
waterproof rating 1,800 mm minimum; Ground sheet/210D polyester oxford, PU coating, waterproof rating
1,800 mm minimum
●Storage case size: 32x13×52(h)cm(12.6"×5.1"×20.5")
●Weight: 4kg(8.8lbs)
Before Use: Please read thoroughly to ensure safety and avoid accidents.
DANGER / Misuse could easily result in a serious accident or death.
WARNING / Misuse could result in serious injury or death to the user.
CAUTION / Misuse could result in injury to the user and/or damage to property.
●Sunlight can cause the surface of the inner room to heat up, potentially causing low-temperature burns.
●Do not assemble or use close to a bonfire, fireworks, etc. Flying sparks can create holes in the fabric.
●Firmly hold the inner room when assembling and disassembling.
●Firmly secure the pegs and tensioners.
●When the inner room material is exposed to sunlight for long periods, color degradation or strength deterio-
ration may occur. Do not leave the product assembled permanently.
●Pay close attention to the weather. If extreme weather is in the forecast, pack up camp and
evacuate to a safe place.
●Do not bring heated items into the tent when they are at high temperatures. The temperature inside
the inner room will be high during warm weather, and there is a risk of heatstroke. Pay close
attention to the temperature, particularly when children are asleep inside the shelter.
●Choose a flat, well-drained area with firm ground to pitch the tent. Choose a place with no chance
of avalanches, landslides, wind gusts, or sudden flooding.
●The material of this inner room is not flameproof. Do not use combustion-based heat sources such
as lanterns, stoves, or heaters, or open flames such as matches, candles, lighters, or cigarettes
near or inside the inner room. The use of such heat or light sources inside a small enclosed space
is hazardous and may result in fire.
●Do not keep fuel, or flammable items for replenishing the fuel inside the inner room.
Instruction Manual
(This Manual)
5
Attaching the inner room
The ground sheet and inner room can be attached to either the left or right side of the Zekka shelter.
In this manual, we describe attachment on the right side.
Spread the ground sheet so that the PU coated surface (shiny surface) is facing up and the woven name tag
is on the indoor side.
1
Spread the inner room so that the
part where the logo is printed is in
front.
2
Logo
Indoor side
Attach the hook to the O-ring of the shelter (fly).
Stretch the rubber loops at each corner of the ground sheet and attach them to the corresponding pegs.(4
locations)
3
Attach all three hooks at the back of the top of the
inner room to the O-rings of the shelter (fly).
4
Attach each of the three S-hooks at the top of
the inner room to the specified O-rings as
shown in the figure. After attaching, adjust the
length of the tape and apply tension.
5
Attach the hooks and rubber loops at the bottom corners of the inner room to the O-rings and pegs of the
shelter (fly).
6
Finally, peg down the peg down tape at the bottom of the entrance. This peg down reduces the bottom lift
when opening and closing the door, making it easier to open and close. (Separately purchase the pegs
that are used here.)
7
Inner bottom
Attach the tapes with hooks at the
bottom entrance corners of the
inner room to the tent frame O-rings
of the shelter (fly).
Attach the tapes with
hooks at the bottom
entrance corners of
the inner room to the
tent frame O-rings of
the shelter (fly).
Tent frame
Cross frame
Indoor side
Tent frame
O-ring
Tape with
hook
Peg down
loop (gray)
Attach the two peg
down tapes at the
back to the pegs that
fasten the shelter (fly).
Peg down tape
Tent frame
Tape with
hook
Peg down
loop (gray)
Tent frame
O-ring
6
Attach the toggles on the
walkway to the O-rings on
the indoor side and center of
the ground sheet.
Spread the walkway so that
the PU coated surface
(shiny surface) is facing up
and the woven name tag is
on the indoor side.
Attach the toggles on the
walkway to the O-rings on
the indoor side and back
side of the ground sheet.
Inner bottom
Indoor side
●Before storage, the product should be cleaned and dried sufficiently. If the product is stored when wet, the
build-up of mold, bad odors, color migration, and material deterioration will occur. Dry the product sufficiently
in a breezy and shaded area and clean the surface with a soft brush before storing.
●Please store in a well-ventilated area away from direct sunlight, high temperatures, and humidity.
●Using the zipper when it is covered with mud, sand or dust may cause wear or damage. Clean the zipper with
a brush before use. Apply small amounts of silicone lubricant to the zipper regularly to ensure smooth
movement. Applying an excessive amount of lubricant will stain the fabric.
●Small areas of fabric damage can be fixed with repair tape.
Please read the repair tape manual carefully before applying.
●Depending on the conditions during use, the tent material may deteriorate over a wide area, losing its durabili-
ty and becoming irreparable.
●In preparation for the next use, regularly check and maintain the product, including accessories such as
tension ropes.
Maintenance
To attach the walkway
Spread the walkway so that the PU coated surface (shiny surface) is facing up and the woven name tag is on
the indoor side.
8
Attach the toggles on the walkway to the O-rings on the indoor side and center of the ground sheet.
9
Attach the toggles on the walkway to the O-rings on the indoor side and back side of the ground sheet.
10
Attach to the ground sheet at the other side in the same manner.
11 9
8
10
お買い求めいただきました製品は万全を期していますが、万一不備な点がございましたら、お買い求めいただいた販売店様もしく
は弊社または各製品に記載された連絡先にご相談ください。製造上の欠陥が原因の場合は無償で修理または交換させていた
だきます。その他の場合は適切な価格で修理させていただきます。修理、交換の判断は弊社の裁量によるものとさせていただき
ます。また、以下の場合は修理できない場合もありますので予めご了承ください。
1.素材の経年劣化による損害など商品の寿命 / 2.改造および粗雑な取扱いによる故障 / 3.取扱説明書で禁止されている
取扱いによる故障/4.不測の事故による商品の故障/5.その他製造上の欠陥以外による製品の故障/6.ゴミやさびによる
故障/7.分解したことによる不具合の発生または破損/8.落下やその他の衝撃による部品の変形や破損による不具合/9.
摩擦によるパーツの変化及びそれによる故障/10.他社製品との組み合わせによる故障
品質保証について
●本格的な修理が必要な場合は、お買い求めになった販売店様または弊社ユーザーサービスまでお問い合わせください。
●修理を依頼される場合は、必ず十分に乾燥させ、汚れをきれいに落としてください。
●修理品には修理箇所がはっきりと解るように、必ずメモまたは荷札を付けてください。また破損時の状況をできるだけ詳し
く書 い たメモを 添 えてください 。
●修理品の運賃並びに修理費については以下のように規定させていただきます。
 1.保証対象の場合:往復運賃並びに修理費は弊社にて負担いたします。
 2.保証対象以外の場合:往復運賃並びに修理費は、お客様のご負担とさせていただきます。
修理について
The specifications of Snow Peak products are based on field testing and quality control to ensure the correct
function and longevity of every product. If apparent defects in the manufacturing of the product are found, the
defective product will be repaired or exchanged free of charge. Damages, as follows, are not covered under
warranty.
1. Material deterioration caused by age. / 2. Damage caused by modifications or rough handling. / 3. Damage
caused by improper use not following the instruction manual. / 4. Damage caused by unexpected accidents. /
5. Damage not caused by defects in the manufacturing process. / 6. Damage caused by dust or rust. / 7.
Damage or defects caused when dismantling the product. / 8. Damage and defects caused by dropping or other
shocks to the product. / 9. Deterioration or failure of parts due to friction. / 10. Damage caused by the use of the
product in combination with other maker’s products.
Warranty
●For repairs, please contact the retailer where you purchased the product or Snow Peak user service.
●When you ask for repair, please make sure that the product is dry and clean.
●Please attach a memo or some kind of tag indicating the needed repair, and please write details of when and
how the damage occurred.
●Shipping cost and repair fee for the repair as follows.
1. Within warranty: Return shipping cost and repair fee will be covered by Snow Peak
2. Outside warranty: Return shipping cost and repair fee will be covered by the user.
Repair
株式会社スノーピーク
〒955-0147新潟県三条市中野原456
Tel.0256-46-5858/Fax.0256-46-5860
www.snowpeak.co.jp
スノーピークユーザーサービス
(9:00〜17:00)
0120-010-660
Email:[email protected]
不明な点やお気付きの点がございましたら、
販売店様または弊社ユーザーサービスまで
お問い合わせください。
Snow Peak, Inc.
456, Nakanohara, Sanjo-Shi, Niigata 955-0147 Japan
Tel. +81 256-46-5858 / Fax. +81 256-46-5860
www.snowpeak.co.jp
Snow Peak USA, Inc.
404 NW 23rd Avenue, Portland, Oregon 97210, USA
Tel. +1-503-697-3330 / Instagram. @snowpeakusa
Email. [email protected] / www.snowpeak.com

Other Snow Peak Camping Equipment manuals

Snow Peak BD-080 User manual

Snow Peak

Snow Peak BD-080 User manual

Snow Peak CS-330 User manual

Snow Peak

Snow Peak CS-330 User manual

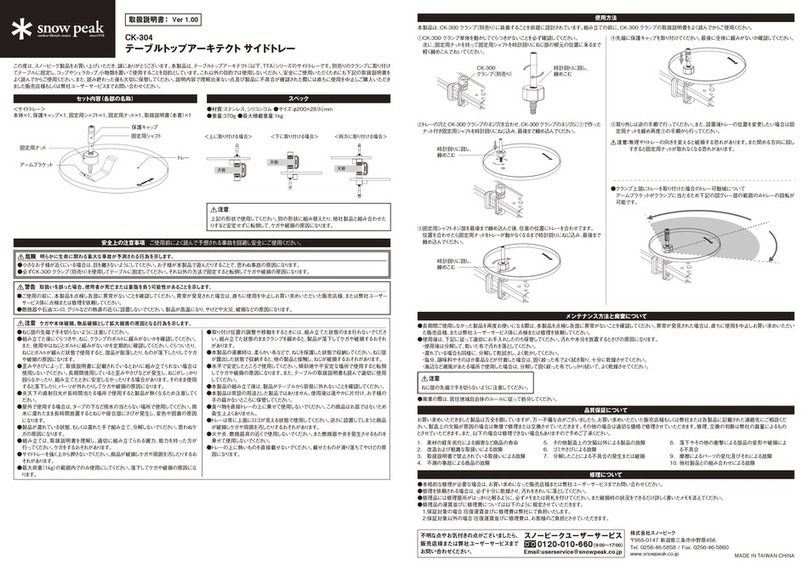
Snow Peak Zekka TP-710 User manual

Snow Peak

Snow Peak Zekka TP-710 User manual

Snow Peak CK-304 User manual

Snow Peak

Snow Peak CK-304 User manual

Snow Peak CK-226 User manual

Snow Peak

Snow Peak CK-226 User manual

Snow Peak UG-524 User manual

Snow Peak

Snow Peak UG-524 User manual

Snow Peak CS-068R User manual

Snow Peak

Snow Peak CS-068R User manual

Snow Peak BD-030R User manual

Snow Peak

Snow Peak BD-030R User manual

Snow Peak Kampai TW-070R User manual

Snow Peak

Snow Peak Kampai TW-070R User manual

Snow Peak TM-782 User manual

Snow Peak

Snow Peak TM-782 User manual

Snow Peak FES-029 User manual

Snow Peak

Snow Peak FES-029 User manual

Snow Peak CK-301 User manual

Snow Peak

Snow Peak CK-301 User manual

Snow Peak TW-340 User manual

Snow Peak

Snow Peak TW-340 User manual

Snow Peak FES-220 User manual

Snow Peak

Snow Peak FES-220 User manual

Snow Peak Zekka TM-710 User manual

Snow Peak

Snow Peak Zekka TM-710 User manual

Snow Peak FES-432 User manual

Snow Peak

Snow Peak FES-432 User manual

Snow Peak GS-1000 User manual

Snow Peak

Snow Peak GS-1000 User manual

Snow Peak Field Cooker Pro.1 Set User manual

Snow Peak

Snow Peak Field Cooker Pro.1 Set User manual

Snow Peak FP-150R User manual

Snow Peak

Snow Peak FP-150R User manual

Snow Peak TP-511 User manual

Snow Peak

Snow Peak TP-511 User manual

Snow Peak TW-115 User manual

Snow Peak

Snow Peak TW-115 User manual

Snow Peak Pack & Carry Fireplace XL User manual

Snow Peak

Snow Peak Pack & Carry Fireplace XL User manual

Snow Peak FES-217 User manual

Snow Peak

Snow Peak FES-217 User manual

Popular Camping Equipment manuals by other brands

ShelterLogic 62693 Instruction

ShelterLogic

ShelterLogic 62693 Instruction

portal 30382 instruction manual

portal

portal 30382 instruction manual

Kayoba 944-077 User instructions

Kayoba

Kayoba 944-077 User instructions

Inmedias Camping Barrel 330 manual

Inmedias

Inmedias Camping Barrel 330 manual

Teton Grill Sports manual

Teton Grill

Teton Grill Sports manual

Campingaz CAMPING KITCHEN 2 Instructions for use

Campingaz

Campingaz CAMPING KITCHEN 2 Instructions for use

Winnebago Reyo owner's manual

Winnebago

Winnebago Reyo owner's manual

ROBENS 690247 instruction manual

ROBENS

ROBENS 690247 instruction manual

Crivit 310839 quick start guide

Crivit

Crivit 310839 quick start guide

Osprey SISKIN Series owner's manual

Osprey

Osprey SISKIN Series owner's manual

MDC ROBSON XTT owner's manual

MDC

MDC ROBSON XTT owner's manual

Zempire MICROCELL PUMP instructions

Zempire

Zempire MICROCELL PUMP instructions

Crivit 311984 Instructions for use

Crivit

Crivit 311984 Instructions for use

Aussie Outback Trekker manual

Aussie

Aussie Outback Trekker manual

AUSTRACK CAMPERS PLENTY X user manual

AUSTRACK CAMPERS

AUSTRACK CAMPERS PLENTY X user manual

Enders Olymp instruction manual

Enders

Enders Olymp instruction manual

TENTCO T21 instructions

TENTCO

TENTCO T21 instructions

Coachmen RV Viking owner's manual

Coachmen RV

Coachmen RV Viking owner's manual

manuals.online logo
manuals.online logoBrands
  • About & Mission
  • Contact us
  • Privacy Policy
  • Terms and Conditions

Copyright 2025 Manuals.Online. All Rights Reserved.