manuals.online logo
Brands
  1. Home
  2. •
  3. Brands
  4. •
  5. Snow Peak
  6. •
  7. Tent
  8. •
  9. Snow Peak SD-651 User manual

Snow Peak SD-651 User manual

SD-651SD-651-IV/Manual/date2023.5.16
65周年記念
トレイルトリッパーPro.1/アイボリー
SD-651 / SD-651-IV
取扱説明書 Ver 1.00
65周年記念トレイルトリッパーPro.1
65周年記念トレイルトリッパーPro.1アイボリー
Snow Peak, Inc.
456, Nakanohara, Sanjo-Shi, Niigata 955-0147 Japan
Tel. +81 256-46-5858 / Fax. +81 256-46-5860
www.snowpeak.co.jp
Snow Peak USA, Inc.
404 NW 23rd Avenue, Portland, Oregon 97210, USA
Tel. +1 (503) 461-0781 / Instagram. @snowpeakusa
Email. [email protected] / www.snowpeak.com
MADEINCHINA
300cm
130cm
210cm
230cm
125cm
(inside dimensions 110 cm)
Specifications
●Material: Fly Sheet: 75D Polyester Ripstop, PU
Coating 1,800mm,Teflon Water Repellent, UV Cut
Processing, Inner Tent: 68D Polyester Ripstop,
Bottom: 300D Polyester Ox, PU Coating 10,000mm,
Ground sheet: 210D Polyester Ox, PU Coating
1,800mm, Poles: Duralumin A7001(Φ10.2mm)
●Carry Bag size: 59×17×21(h)cm(23.5×7×8.5")
●Weight: 4.9kg(10.8lbs)
●Capacity: 1 person
ThisisalowresolutionPDFforconfirmation.
PleaseprinttheAIfile.
確認用の低解像度PDFです、
A I データが 入 稿 用データとなります 。
SD-651/Manual/date2023.5.16
2
□セット内容は一般的な条件下での設営を基本としたものです。頑丈で長めのペグや、ロープなどを用意されると、
柔軟な対応が可能となります。ペグやロープ、自在などは消耗品ですので、常に予備を携行することをお勧めし
ま す 。 
※本体クロスフレームは、組立を補助する為、一部に曲げ加工を行っております。
取説冊子×1
リペ ア パ イプ
    ×1
ジ ュラ ル ミン ペ グ
(17cm×16)
自在 付ロープ
(2m×4)
フ ラ イシ ート
ペグケース×1
本体クロスフレーム(×1 )
サイドフレームA (×1 )
サイドフレームB (×2 )
メッシュギア ハンモック×1
シ ー ム グリッ プ 剤
      ×1
セット 内 容 ※ご使用の前に、付属品が全て揃っているかを確認してください。
フレーム構成
安全上の注意事項 ご使用の前によく読んで予測される事故を回避し安全にご使用ください。
明らかに生命にかかわる重大な事故が予測される行為を示します。
危険
●このテントの素材は難燃性ではありません。テント内では燃焼式のランタンやコンロ、ヒーターなどの
熱源や、マッチ、ローソク、ライター、タバコなどの裸火や炎は絶対に使用しないでください。限られた
空間での火気の使用は火災や酸欠、一酸化中毒などの恐れがあり大変危険です。
●テント内で燃料を保管したり、燃料を補給するなど、引火性のあるものを持ち込まないでください。
●ご使用の前に、本製品を点検し各部に異常がないことを確認してください。異常が発見された場合は、直ち
に使用を中止しお買い求めいただいた販売店様、または弊社ユーザーサービス係に点検または修理を依頼
してください 。
●気象状況には常に細心の注意を払い、風の強い時や悪天候が予想されるときは速やかに撤収し
て安全な場所へ避難してください。
●高温に加熱されたものや発熱性のあるものを持ち込まないでください。火災や熱中症などの危険があります。
●天候によりテント内は高温になり、熱中症などの危険があります。お子様の昼寝の際など、細心の注意を
払 ってください 。
●風の吹き抜けるような場所や、雪崩、がけ崩れ、急な洪水や氾濫などの恐れのない地盤のしっかりとした、水
はけの良い平坦な場所を選んで設営してください。
取扱いを誤った場合、使用者が死亡または重傷を負う可能性があることを示します。
警告
●本製品は常設用ではありません。テントの素材は長時間日光にさらされた場合、退色や生地劣化などの強
度低下を起こしますので、常設用として使用しないでください。
●日差しによりテントの表面は低温やけどに発展するほどの高温になります。十分にご注意ください。
●焚火や花火などのそばで組み立てたり、使用しないでください。設営・撤収の際には、周囲に火気がないこと
を確認してください。火の粉を被り、生地に穴を開けてしまう場 合があります。
●樹液が付着するときれいに除去することができません。樹液が垂れそうな木の下を避けて設営してください。
シンナーやベンジン等の有機溶剤により無理に除去しようとすると生地やコーティングを痛めてしまいますの
で お や めください 。
●テントの設営・撤収の際は、風に飛ばされないよう生地とフレームをしっかりと支えて作業してください。フレーム
先端のハネ返り等で思わぬ事故に繋がる恐れがありますので、必ず周囲の安全を確認して作業してください。
● ペ グとロ ー プ でしっ かりとテントを 固 定し てください 。
●薄い生地を使用していますので、生地を引っ張りすぎると破損する恐れがあります。ご注意ください。
●足もとのロープやペグ等にはご注意ください。足を引っ掛けて転倒し、思わぬ事故の原因となります。
●テント天井部には小物を吊すループが付いています。1kg/1ケ所を超えない範囲でご使用ください。
●急な積雪によりフライシートの裾が覆われたり、低温下で氷結したときなど、極端に通気性が悪く酸欠になり
ます。こまめに 除 雪したり入り口を開けるなどして常 に換 気をしてください 。
ケガや本体破損、物品破損として拡大損害の原因となる行為を示します。
注意
1
この度は、スノーピーク製 品をお買い上げいただき、誠にありがとうございます。本 製品は、キャンプ用のテントで
す。安全にご使用いただくためにも下記の取扱説明書をよく読んでからご使用ください。また、読み終わった後も
大切に保管してください。説明内容で理解出来ない点及び製品に不具合が確認された際には直ちに使用を中
止しご購入いただきました販売店様もしくは弊社ユーザーサービスまでお問い合わせください。
ビルディングテープ
フレームケース×1
グ ラ ンド シ ート
キャリー バッグ
イン ナ ー テ ント
本 体クロスフレーム
サ イド フ レ ー ム A
サ イド フ レ ー ム B
交点ハブが赤色
1節目が黄色
先端部が緑色先端部が緑色
ThisisalowresolutionPDFforconfirmation.
PleaseprinttheAIfile.
確認用の低解像度PDFです、
A I データが 入 稿 用 データとなります 。
SD-651/Manual/date2023.5.16
2
□セット内容は一般的な条件下での設営を基本としたものです。頑丈で長めのペグや、ロープなどを用意されると、
柔軟な対応が可能となります。ペグやロープ、自在などは消耗品ですので、常に予備を携行することをお勧めし
ま す 。 
※本体クロスフレームは、組立を補助する為、一部に曲げ加工を行っております。
取説冊子×1
リペ ア パ イプ
    ×1
ジ ュラ ル ミン ペ グ
(17cm×16)
自在 付ロープ
(2m×4)
フ ラ イシ ート
ペグケース×1
本体クロスフレーム(×1 )
サイドフレームA (×1 )
サイドフレームB (×2 )
メッシュギア ハンモック×1
シ ー ム グリッ プ 剤
      ×1
セット 内 容 ※ご使用の前に、付属品が全て揃っているかを確認してください。
フレーム構成
安全上の注意事項 ご使用の前によく読んで予測される事故を回避し安全にご使用ください。
明らかに生命にかかわる重大な事故が予測される行為を示します。
危険
●このテントの素材は難燃性ではありません。テント内では燃焼式のランタンやコンロ、ヒーターなどの
熱源や、マッチ、ローソク、ライター、タバコなどの裸火や炎は絶対に使用しないでください。限られた
空間での火気の使用は火災や酸欠、一酸化中毒などの恐れがあり大変危険です。
●テント内で燃料を保管したり、燃料を補給するなど、引火性のあるものを持ち込まないでください。
●ご使用の前に、本製品を点検し各部に異常がないことを確認してください。異常が発見された場合は、直ち
に使用を中止しお買い求めいただいた販売店様、または弊社ユーザーサービス係に点検または修理を依頼
してください 。
●気象状況には常に細心の注意を払い、風の強い時や悪天候が予想されるときは速やかに撤収し
て安全な場所へ避難してください。
●高温に加熱されたものや発熱性のあるものを持ち込まないでください。火災や熱中症などの危険があります。
●天候によりテント内は高温になり、熱中症などの危険があります。お子様の昼寝の際など、細心の注意を
払 ってください 。
●風の吹き抜けるような場所や、雪崩、がけ崩れ、急な洪水や氾濫などの恐れのない地盤のしっかりとした、水
はけの良い平坦な場所を選んで設営してください。
取扱いを誤った場合、使用者が死亡または重傷を負う可能性があることを示します。
警告
●本製品は常設用ではありません。テントの素材は長時間日光にさらされた場合、退色や生地劣化などの強
度低下を起こしますので、常設用として使用しないでください。
●日差しによりテントの表面は低温やけどに発展するほどの高温になります。十分にご注意ください。
●焚火や花火などのそばで組み立てたり、使用しないでください。設営・撤収の際には、周囲に火気がないこと
を確認してください。火の粉を被り、生地に穴を開けてしまう場 合があります。
●樹液が付着するときれいに除去することができません。樹液が垂れそうな木の下を避けて設営してください。
シンナーやベンジン等の有機溶剤により無理に除去しようとすると生地やコーティングを痛めてしまいますの
で お や めください 。
●テントの設営・撤収の際は、風に飛ばされないよう生地とフレームをしっかりと支えて作業してください。フレーム
先端のハネ返り等で思わぬ事故に繋がる恐れがありますので、必ず周囲の安全を確認して作業してください。
● ペ グとロ ー プ でしっ かりとテントを 固 定 してください 。
●薄い生地を使用していますので、生地を引っ張りすぎると破損する恐れがあります。ご注意ください。
●足もとのロープやペグ等にはご注意ください。足を引っ掛けて転倒し、思わぬ事故の原因となります。
●テント天井部には小物を吊すループが付いています。1kg/1ケ所を超えない範囲でご使用ください。
●急な積雪によりフライシートの裾が覆われたり、低温下で氷結したときなど、極端に通気性が悪く酸欠になり
ます。こまめに 除 雪したり入り口を開けるなどして常 に換 気をしてください 。
ケガや本体破損、物品破損として拡大損害の原因となる行為を示します。
注意
1
この度は、スノーピーク製 品をお買い上げいただき、誠にありがとうございます。本 製品は、キャンプ用のテントで
す。安全にご使用いただくためにも下記の取扱説明書をよく読んでからご使用ください。また、読み終わった後も
大切に保管してください。説明内容で理解出来ない点及び製品に不具合が確認された際には直ちに使用を中
止しご購入いただきました販売店様もしくは弊社ユーザーサービスまでお問い合わせください。
ビルディングテープ
フレームケース×1
グ ラ ンド シ ート
キャリー バッグ
イン ナ ー テ ント
本 体クロスフレーム
サ イド フ レ ー ム A
サ イド フ レ ー ム B
交点ハブが赤色
1節目が黄色
先端部が緑色先端部が緑色
ThisisalowresolutionPDFforconfirmation.
PleaseprinttheAIfile.
確認用の低解像度PDFです、
A I データが 入 稿 用 データとなります 。
SD-651/Manual/date2023.5.16
3
4
自在付ロープのフライシートへの取り付け、ペグダウンの位置
ロープ
約 45°
約 90°
ペグ
ペ グダ ウン は テントからできるだ け 遠くに 行 ってく
ださい。設営したとき、ロープの角度が地面に対
して約45°となるのが理想的なペグダウンの位
置 で す 。ま た 、ペ グ を 打 ち 込 む 角 度 は ロ ー プ に 対
して9 0 °になるようにペグダウンしてください。
ドーム
フ ラ イシ ート
湿気を含んだ空気
水滴
(結露)
●結露について
 空気中に含まれている水分が急激に冷やされて霧状になったものが結露
として現れます。特に狭いテント等の空間では、通常の室内よりも水蒸気
の濃度が高くなり結露の発生する確率が高くなります。原因としては、人体
構成要素の約60%を占める水分が、呼吸や汗などにより放出され、水蒸
気 と な り テ ント 内 に 結 露 が 発 生 し ま す 。テ ント 内 で は 、特 に フ ラ イシ ート・ボト
ム部分などの防水性能が高い部分に結露が発生しやすくなります。結露
は優れた透湿防水素材でも使用状況により完全に防ぐことは不可能です。
ご使用中は結露軽減のために適時換気を行なってください。
各部の名称
ペグループ
ビルディングテープ
グ ラ ンド シ ート
ボト ム
サ イド フ レ ー ム
イン ナ ー テ ント
本 体クロスフレーム
交 点 ハブ
[フレーム/インナー本体]
使用前の準備
1.シームグリップ剤による目止め
※本品にシームグリップ剤は付属していません。ご使用の際は、市販のシームグリップ剤をお買い求めください。縫製部
分にはシームテープによる防水処理が施してありますが 、フライシートの ベンチレータ− 部 やファスナー部 分 、ボトムシー
トの一部は、製造の都合上または構造上シームテープが施せない部分があります。通常の雨などは十分対応できます
が、長時間の大雨や横なぐりの雨、地面に雨水が溜まっているような状態では、縫い目から雨水が侵入することがありま
すので必要に応じて縫い目にシームグリップ剤(目止め液)を塗布してください。シームグリップ剤は縫い目にそって表裏
の両面からうすく塗布し、よく乾燥させてください。シームグリップ剤は時間とともに硬化してきます。剥離したときは塗布し
なおしてください。また、当社ではシーリング作業サービスは行なっておりません。テントをより完璧な状態で使用するため
にご協 力をお願 いいたします。
ボト ム の コ ー ナ ー 部 す
べ て に シ ー ム グリップ
剤 を 塗 布し てくださ
い。(4カ所)
ベ ン チレ ーション
部の外と内側に
シ ー ム グリップ 剤 を
塗 布し てください 。
フ ラ イ シ ート 内 側 、ベ ル ク ロ
テープの縫い付け部の表
と 裏 側 に シ ー ム グリップ 剤 を
塗 布 し て く だ さ い 。( 8カ所)
設営の手順
※設営は必ず2人で行なってください。
ビルディングテープを広げます。〔 図A 〕
この時、前室/後室の境目に、サイドビルディングテープをフッキングします。各コーナーのぺグループ部分に
縫 い 付けられているOリングが 上 向きになるようにセッティングしてください 。〔 図 B 〕
グレーテープ側が前室、黒テープ側がテント本体側になります。
※主に前室側がメインの出入口となります。あらかじめ風雨などの予測をし、前室の方向を決めておくことが必
要です。基本的に前室は風下に向けます。風上に向けると、風雨が侵入するばかりかドアを開けた際に突
然風が入り、本体を破損する場合があります。
※テント側が長方形、前室側が台形になることを意識してください。ここで形が崩れると綺麗に張れません。
1
後室側前室側
グレーテープ
黄 色テープ
黒テープ
図A
サイド
ビルディングテープ
上向き
図B
Oリング
(前室) (後室)
2m
2m
2m 2m
O リング
ロープ
返し部 分
自在
ペグ
ロープの自在が付いている返し部分がOリング側に
来 るように 取 り 付 け てください 。
シングルロープ の 取り付け
[ フ ラ イシ ート ]
ベンチレーター
ゴムループ
フ ロ ントド ア パ ネ ル
サ イドド ア
ThisisalowresolutionPDFforconfirmation.
PleaseprinttheAIfile.
確認用の低解像度PDFです、
A I データが 入 稿 用 データとなります 。
SD-651/Manual/date2023.5.16
3
4
自在付ロープのフライシートへの取り付け、ペグダウンの位置
ロープ
約 45°
約 90°
ペグ
ペ グダ ウン は テントからできるだ け 遠くに 行 ってく
ださい。設営したとき、ロープの角度が地面に対
して約45°となるのが理想的なペグダウンの位
置 で す 。ま た 、ペ グ を 打 ち 込 む 角 度 は ロ ー プ に 対
して9 0 °になるようにペグダウンしてください。
ドーム
フ ラ イシ ート
湿気を含んだ空気
水滴
(結露)
●結露について
 空気中に含まれている水分が急激に冷やされて霧状になったものが結露
として現れます。特に狭いテント等の空間では、通常の室内よりも水蒸気
の濃度が高くなり結露の発生する確率が高くなります。原因としては、人体
構成要素の約60%を占める水分が、呼吸や汗などにより放出され、水蒸
気 と な り テ ント 内 に 結 露 が 発 生 し ま す 。テ ント 内 で は 、特 に フ ラ イシ ート・ボト
ム部分などの防水性能が高い部分に結露が発生しやすくなります。結露
は優れた透湿防水素材でも使用状況により完全に防ぐことは不可能です。
ご使用中は結露軽減のために適時換気を行なってください。
各部の名称
ペグループ
ビルディングテープ
グ ラ ンド シ ート
ボト ム
サ イド フ レ ー ム
イン ナ ー テ ント
本 体クロスフレーム
交 点 ハブ
[フレーム/インナー本体]
使用前の準備
1.シームグリップ剤による目止め
※本品にシームグリップ剤は付属していません。ご使用の際は、市販のシームグリップ剤をお買い求めください。縫製部
分にはシームテープによる防水処理が施してありますが 、フライシートの ベンチレータ− 部 やファスナー部 分 、ボトムシー
トの一部は、製造の都合上または構造上シームテープが施せない部分があります。通常の雨などは十分対応できます
が、長時間の大雨や横なぐりの雨、地面に雨水が溜まっているような状態では、縫い目から雨水が侵入することがありま
すので必要に応じて縫い目にシームグリップ剤(目止め液)を塗布してください。シームグリップ剤は縫い目にそって表裏
の両面からうすく塗布し、よく乾燥させてください。シームグリップ剤は時間とともに硬化してきます。剥離したときは塗布し
なおしてください。また、当社ではシーリング作業サービスは行なっておりません。テントをより完璧な状態で使用するため
にご協 力をお願 いいたします。
ボト ム の コ ー ナ ー 部 す
べ て に シ ー ム グリップ
剤 を 塗 布し てくださ
い。(4カ所)
ベ ン チレ ーション
部の外と内側に
シ ー ム グリップ 剤 を
塗 布し てください 。
フ ラ イ シ ート 内 側 、ベ ル ク ロ
テープの縫い付け部の表
と 裏 側 に シ ー ム グリップ 剤 を
塗 布 し て く だ さ い 。( 8カ所)
設営の手順
※設営は必ず2人で行なってください。
ビルディングテープを広げます。〔 図A 〕
この時、前室/後室の境目に、サイドビルディングテープをフッキングします。各コーナーのぺグループ部分に
縫 い 付けられているOリングが 上 向きになるようにセッティングしてください 。〔 図 B 〕
グレーテープ側が前室、黒テープ側がテント本体側になります。
※主に前室側がメインの出入口となります。あらかじめ風雨などの予測をし、前室の方向を決めておくことが必
要です。基本的に前室は風下に向けます。風上に向けると、風雨が侵入するばかりかドアを開けた際に突
然風が入り、本体を破損する場合があります。
※テント側が長方形、前室側が台形になることを意識してください。ここで形が崩れると綺麗に張れません。
1
後室側前室側
グレーテープ
黄 色テープ
黒テープ
図A
サイド
ビルディングテープ
上向き
図B
Oリング
(前室) (後室)
2m
2m
2m 2m
O リング
ロープ
返し部 分
自在
ペグ
ロープの自在が付いている返し部分がOリング側に
来 るように 取 り 付 け てください 。
シングルロープ の 取り付け
[ フ ラ イシ ート ]
ベンチレーター
ゴムループ
フ ロ ントド ア パ ネ ル
サ イドド ア
ThisisalowresolutionPDFforconfirmation.
PleaseprinttheAIfile.
確認用の低解像度PDFです、
A I データが 入 稿 用 データとなります 。
SD-651/Manual/date2023.5.16
5
6
黄色テープのある後室側の長方形の枠にグランドシートを取り付けます。〔図I〕
グランドシートをP Uコーティング 面( てかりの ある面 )が 上 になるように 敷 いてください 。
グランドシートのフックをビルディングテープの5箇所のOリングに取り付けます。
前室グランドシートは、フライシートを被せた後に、三角形部のトグルをフライシートの3箇所のループに接続しま
す。〔図J〕
6
ビル ディングテープ に 弛 みが 生じないように 、ペグダウンループ に ペグを通し 、打ち 込 みます 。〔 図 C 〕
※形状に歪みがないか確認してください。フレームを差し込んだ後にペグダウン位置を調整するとフレームが
外れて跳ね返ることが有り危険です。
2
図C
本体クロスフレームをビルディングテープ四隅のグロメットに差込みます。黄色のテープに黄色のフレームエン
ドを差し込みます。〔図D〕
4
本 体クロスフレーム
グ ロ メ ット
黄色フレームエンド
グ ロ メ ット
黄 色テープ
前室側 後室側
図D
サイドフレームを取り付 けます 。〔 図 E 〕〈 b 〜 c の 作 業 は 片 方 ずつ 行 います 。〉
a)サイドフレームAの両端をクロスフレーム中間にある交点ハブに差し込みます。〔図F〕
b)サイドフレームBを交点ハブに取り付けたサイドフレームAに連結します。〔図G〕
c)サイドフレームBの端部を、前室/後室の中間にあるビルディングテープエンドのグロメットに差し込みます。
〔図H〕
5
サ イド フ レ ー ム A サ イド フ レ ー ム B
クロス
フレーム
ハブ
クロスフレーム
サイド
フレームA
サ イド フ レ ー ム B
前室側 後室側
交 点 ハブ
サ イド フ レ ー ム A
クロスフレーム
図F
注 )サ イド フ レ ー ム A に サ イド フ レ ー ム B が し っ か り 差 し 込 ま れ た
ことをご確認ください。完全に差し込まれていない状態で
設 営 するとフレーム の 破 損 に つながります 。正しく差し 込
まれた場合、緑色に着色されたフレーム先端部が隠れま
す。緑色の先端部が見えていないか確認してください。
図G 図H
後室側
前室側
図E
図G
図H
図H
図G
サ イド フ レ ー ム B
グ ロ メ ット
黒テープ
サ イド フ レ ー ム B
サ イド
フレーム A
クロスフレーム
本体クロスフレーム、サイドフレームA、Bを伸ばし、接続部分をしっかり連結します。
※フレームの連結部分にすき間ができないように、しっかりと差し込んでください。
3
本 体クロスフレーム サ イド フ レ ー ム A
サ イド フ レ ー ム B
図J図I PUコーティングが上面
フ ラ イシ ート 内 側 の
ループ 3カ所 に
トグル 留 め
後室側
前室側 前 室 グ ラ ンド シ ート
前室側
後室側
PUコーティングが上面
黄 色テープ 付
フック
黄 色テープ 付
フック
フックフック
フック
トグル グ ラ ンド シ ート
ThisisalowresolutionPDFforconfirmation.
PleaseprinttheAIfile.
確認用の低解像度PDFです、
A I データが 入 稿 用 データとなります 。
SD-651/Manual/date2023.5.16
5
6
黄色テープのある後室側の長方形の枠にグランドシートを取り付けます。〔図I〕
グランドシートをP Uコーティング 面( てかりの ある面 )が 上 になるように 敷 いてください 。
グランドシートのフックをビルディングテープの5箇所のOリングに取り付けます。
前室グランドシートは、フライシートを被せた後に、三角形部のトグルをフライシートの3箇所のループに接続しま
す。〔図J〕
6
ビル ディングテープ に 弛 みが 生じないように 、ペグダウンループ に ペグを通し 、打ち 込 みます 。〔 図 C 〕
※形状に歪みがないか確認してください。フレームを差し込んだ後にペグダウン位置を調整するとフレームが
外れて跳ね返ることが有り危険です。
2
図C
本体クロスフレームをビルディングテープ四隅のグロメットに差込みます。黄色のテープに黄色のフレームエン
ドを差し込みます。〔図D〕
4
本 体クロスフレーム
グ ロ メ ット
黄色フレームエンド
グ ロ メ ット
黄 色テープ
前室側 後室側
図D
サイドフレームを取り付 けます 。〔 図 E 〕〈 b 〜 c の 作 業 は 片 方 ずつ 行 います 。〉
a)サイドフレームAの両端をクロスフレーム中間にある交点ハブに差し込みます。〔図F〕
b)サイドフレームBを交点ハブに取り付けたサイドフレームAに連結します。〔図G〕
c)サイドフレームBの端部を、前室/後室の中間にあるビルディングテープエンドのグロメットに差し込みます。
〔図H〕
5
サ イド フ レ ー ム A サ イド フ レ ー ム B
クロス
フレーム
ハブ
クロスフレーム
サイド
フレームA
サ イド フ レ ー ム B
前室側 後室側
交 点 ハブ
サ イド フ レ ー ム A
クロスフレーム
図F
注 )サ イド フ レ ー ム A に サ イド フ レ ー ム B が し っ か り 差 し 込 ま れ た
ことをご確認ください。完全に差し込まれていない状態で
設 営 するとフレーム の 破 損 に つながります 。正しく差し 込
まれた場合、緑色に着色されたフレーム先端部が隠れま
す。緑色の先端部が見えていないか確認してください。
図G 図H
後室側
前室側
図E
図G
図H
図H
図G
サ イド フ レ ー ム B
グ ロ メ ット
黒テープ
サ イド フ レ ー ム B
サ イド
フレーム A
クロスフレーム
本体クロスフレーム、サイドフレームA、Bを伸ばし、接続部分をしっかり連結します。
※フレームの連結部分にすき間ができないように、しっかりと差し込んでください。
3
本 体クロスフレーム サ イド フ レ ー ム A
サ イド フ レ ー ム B
図J図I PUコーティングが上面
フ ラ イシ ート 内 側 の
ループ 3カ所 に
トグル 留 め
後室側
前室側 前 室 グ ラ ンド シ ート
前室側
後室側
PUコーティングが上面
黄 色テープ 付
フック
黄 色テープ 付
フック
フックフック
フック
トグル グ ラ ンド シ ート
ThisisalowresolutionPDFforconfirmation.
PleaseprinttheAIfile.
確認用の低解像度PDFです、
A I データが 入 稿 用 データとなります 。
SD-651/Manual/date2023.5.16
図O
イン ナ ー テ ント
    コ ー ナ ーフック
ビ ル デ ィン グ
テ ープ 付 O リング
図N
前室側
後室側 黄 色テープ 付
フック
フック
インナーテントを吊り下げます。〔図N〕
a)インナーテントの前後を確認し、ビルディングテープ内部に広げます。
※インナーテントは前後に出入口がありますが、黄色テープがあるパネルが、後室側になります。
b)インナーテントボトム四隅にあるコーナーフックを、ビルディングテープ付Oリングに引っ掛けます。〔図O〕
c)インナーテントに縫い付けられているフックを本 体フレーム、サイドフレームそれぞれに掛けていきます。〔 図N 〕
9
張り綱 の自在を引き、テンションをかけます。
※ 引きすぎにご注 意ください 。引きすぎますとフライシートに負 担がかかり破 損する恐れがあります。
11
7
8
図P
10
各 張り綱を伸ばし、ぺグを打ち込みます。〔 図P 〕
P3の「自在付ロープのフライシートへの取り付け、ペグダウンの位置」の図のように各自在付ロープをフライシ
ートに 取り付 けて 引き、ペグで 固 定してからテンションをかけてください 。
※ロープは引き過ぎますとフライシートに負 担がかかり破 損する恐れがあります。引き過ぎにご注 意ください 。
付属品に関して
メッシュギアハンモック〔図Q〕
本体クロスフレーム中心部分にメッシュギアハンモック四隅のフックを掛けます。
※四隅のゴム紐を強く引いたり、メッシュ部分に過度の重さを掛けますと破損の原因になりますのでご注意ください。
図Q
後室側前室側
サ イド フ レ ー ム
メッシ ュ
ギ ア ハ ン モック
本 体クロスフレーム
フライシート裾の6個のフックをぺグダウンループに付いているOリング6箇所に引っ掛けます。〔図L〕
※ビル ディングテープをつないでいるリングに引っ掛けるとフライにテンションが 掛 かりづらくなるのでご 注 意く
ださい 。
前室・後室・サイドドア下部のゴムループを引きぺグを通し、打ち込みます。〔図M〕
※特にジッパー下部分のゴムループは必ずぺグダウンしてください。ジッパーが開きにくくなったり、フラップ部
にスライダーが噛みやすくなります。
※ 引きすぎにご注 意ください 。引きすぎますと、ファスナーに負 担がかかり破 損する恐れがあります。
8
前室 後室
図 K
前室・後室の方向を確認しフライシートを被せます。
フライシートの内側についている、ずれ防止のベルクロテープをフレームに巻き付けて固定します。〔図K〕
7
※下記7)→8)→9)の設営手順は、9)→7)→8)の手順でも可能です。収納時も同様にインナーテント、フラ
イシートどちらからの収納も可能です。
フ ッ キ ン グ コ ード
フロントドアパネルを張り出す場合は、付属のフッキングコードをオ
ートバイなどに引っ掛けて立ち上げるか、別売のライトタープポール
125×2本セット(TP-161)をご使用ください。
注)降雨時のドアパネルは、水が溜まりやすくなりますので、ポール
を斜めに倒し勾 配をつけるなどして、水 の 逃げ 道をつくり溜まらない
ようにします 。
※付属のフッキングコードをオートバイなどに引っ掛ける場合、引っ
掛けた対象が倒れないよう、天候や周囲の環境にはご注意くださ
い。予期せぬ事象によりテントが破損したり、引っ掛けた対象が破
損しても弊社は一切の責任を負いかねます。あらかじめご了承くだ
さい 。
12
ライトタープポール125
後室前室
サ イドド ア
図L 図M
ThisisalowresolutionPDFforconfirmation.
PleaseprinttheAIfile.
確認用の低解像度PDFです、
A I データが 入 稿 用 データとなります 。
SD-651/Manual/date2023.5.16
図O
イン ナ ー テ ント
    コ ー ナ ーフック
ビ ル デ ィン グ
テ ープ 付 O リング
図N
前室側
後室側 黄 色テープ 付
フック
フック
インナーテントを吊り下げます。〔図N〕
a)インナーテントの前後を確認し、ビルディングテープ内部に広げます。
※インナーテントは前後に出入口がありますが、黄色テープがあるパネルが、後室側になります。
b)インナーテントボトム四隅にあるコーナーフックを、ビルディングテープ付Oリングに引っ掛けます。〔図O〕
c)インナーテントに縫い付けられているフックを本 体フレーム、サイドフレームそれぞれに掛けていきます。〔 図N 〕
9
張り綱 の自在を引き、テンションをかけます。
※ 引きすぎにご注 意ください 。引きすぎますとフライシートに負 担がかかり破 損する恐れがあります。
11
7
8
図P
10
各 張り綱を伸ばし、ぺグを打ち込みます。〔 図P 〕
P3の「自在付ロープのフライシートへの取り付け、ペグダウンの位置」の図のように各自在付ロープをフライシ
ートに 取り付 けて 引き、ペグで 固 定してからテンションをかけてください 。
※ロープは引き過ぎますとフライシートに負 担がかかり破 損する恐れがあります。引き過ぎにご注 意ください 。
付属品に関して
メッシュギアハンモック〔図Q〕
本体クロスフレーム中心部分にメッシュギアハンモック四隅のフックを掛けます。
※四隅のゴム紐を強く引いたり、メッシュ部分に過度の重さを掛けますと破損の原因になりますのでご注意ください。
図Q
後室側前室側
サ イド フ レ ー ム
メッシ ュ
ギ ア ハ ン モック
本 体クロスフレーム
フライシート裾の6個のフックをぺグダウンループに付いているOリング6箇所に引っ掛けます。〔図L〕
※ビル ディングテープをつないでいるリングに引っ掛けるとフライにテンションが 掛 かりづらくなるのでご 注 意く
ださい 。
前室・後室・サイドドア下部のゴムループを引きぺグを通し、打ち込みます。〔図M〕
※特にジッパー下部分のゴムループは必ずぺグダウンしてください。ジッパーが開きにくくなったり、フラップ部
にスライダーが噛みやすくなります。
※ 引きすぎにご注 意ください 。引きすぎますと、ファスナーに負 担がかかり破 損する恐れがあります。
8
前室 後室
図 K
前室・後室の方向を確認しフライシートを被せます。
フライシートの内側についている、ずれ防止のベルクロテープをフレームに巻き付けて固定します。〔図K〕
7
※下記7)→8)→9)の設営手順は、9)→7)→8)の手順でも可能です。収納時も同様にインナーテント、フラ
イシートどちらからの収納も可能です。
フ ッ キ ン グ コ ード
フロントドアパネルを張り出す場合は、付属のフッキングコードをオ
ートバイなどに引っ掛けて立ち上げるか、別売のライトタープポール
125×2本セット(TP-161)をご使用ください。
注)降雨時のドアパネルは、水が溜まりやすくなりますので、ポール
を斜めに倒し勾 配をつけるなどして、水 の 逃げ 道をつくり溜まらない
ようにします 。
※付属のフッキングコードをオートバイなどに引っ掛ける場合、引っ
掛けた対象が倒れないよう、天候や周囲の環境にはご注意くださ
い。予期せぬ事象によりテントが破損したり、引っ掛けた対象が破
損しても弊社は一切の責任を負いかねます。あらかじめご了承くだ
さい 。
12
ライトタープポール125
後室前室
サ イドド ア
図L 図M
ThisisalowresolutionPDFforconfirmation.
PleaseprinttheAIfile.
確認用の低解像度PDFです、
A I データが 入 稿 用 データとなります 。
SD-651/Manual/date2023.5.16
●本格的な修理が必要な場合は、お買い求めになった販売店様または弊社ユーザーサービスまでお問い合わせく
ださい 。
●修理を依頼される場合は、必ず十分に乾燥させ、汚れをきれいに落としてください。
●修理品には修理箇所がはっきりと解るように、必ずメモまたは荷札を付けてください。また破損時の状況をできる
だけ 詳しく書 い たメモを 添 え てください 。
●修理品の運賃並びに修理費については以下のように規定させていただきます。
1.保証対象の場合:往復運賃並びに修理費は弊社にて負担いたします。
2.保証対象以外の場合:往復運賃並びに修理費は、お客様のご負担とさせていただきます。
修理について
お買い求めいただきました製品は万全を期していますが、万一不備な点がございましたら、お買い求めいただいた販
売店様もしくは弊社または各製品に記載された連絡先にご相談ください。製造上の欠陥が原因の場合は無償で修
理または交換させていただきます。その他の場合は適切な価格で修理させていただきます。修理、交換の判断は弊社
の裁量によるものとさせていただきます。また、以下の場合は修理できない場合もありますので予めご了承ください。
品質保証について
 1.素材の経年劣化による損害など商品の寿命
 2.改造および粗雑な取扱いによる故障
 3.取扱説明書で禁止されている取扱いによる故障
 4.不測の事故による商品の故障
 5.その他製造上の欠陥以外による製品の故障
 6.ゴミやさびによる故障
 7.分解したことによる不具合の発生または破損
 8.落下やその他の衝撃による部品の変形や破損による不具合
 9.摩擦によるパーツの変化及びそれによる故障
 10.他社製品との組み合わせによる故障
10
9
●十分に乾燥してから収納してください。
●強風時は、風が収まるのを待ってから撤収してください。
●インナールームを取り付けた場合や、別のテント/タープ等を併用していた場合は、必ずインナールームや併用して
いた製 品を本 体から取りはずしてから撤 収をはじめてください 。
●テントの中に何も入っていないこと、すべてのパネルや窓部のファスナーが閉まっていることを確認してから撤収を
はじ め てください 。
●メインポールは必ず毎 回中 央 付 近から折りたたんでください。端から折りたたむとフレーム内 部のショックコードの
伸びや切れ、フレームの曲がりや折れの原因になります。
● ペグはす べて 抜 き、汚 れを 落として ペグ ケースに 頭を下 に 向けて 収 納してください 。フレームはす べてフレーム ケー
スに収納してください。むき出しの状態で収納すると、本体生地やキャリーバッグ等を傷付けることがあります。
※フレームをグロメットからはず す 際 は 、必 ず 手 でフレームをつ かんでください 。フレームが 跳 ね 上 がり大 変 危 険 です 。
撤収・収納時の注意事項
●本製品のフライシートの生地には撥水加工を施していますが、生地の特性上、撥水性能(撥水の仕方や耐久
性)に若干の差が見られる場合があります。また、ご使用を重ねますと撥水性能が低下する場合があります。
性能が低下した場合は市販の撥水スプレー等を、それらの説明書をよくお読みの上ご使用ください。
●ボトムにはPUコーティングを施してありますが、地面の水溜りなどへ長時間接触していると雨水が浸み込む場
合があります。地面の水溜りなどへ長時間接触していると雨水が浸み込む場合があります。
●農薬などでPUコーティングが破壊され耐水圧が異常低下してしまう場合があります。この症状と判断された場
合、製品の保証が出来なくなりますのでご注意ください。
●撥水剤の影響によりロゴマークが剥離する場合があります。
撥水・防水性能について
●テントの素材は長時間日光にさらされた場合、退色や生地劣化などの強度低下を起こしますので、常設用として
使 用し な い でください 。
●紫外線の影響と思われる素材の劣化により、耐久度合いを超えたものは弊社でも修理できない場合があります。
紫外線の影響について
●長期間ご使用しなかった製品を再度お使いになる際は、本製品を点検し各部に異常がないことを確認してくださ
い。異常が発見された場合は、直ちに使用を中止しお買い求めいただいた販売店様、または弊社ユーザーサービ
ス係に点検または修理を依頼してください。
●本製品はポリエステル生地を組み合わせて使用しています。生地の特性を考慮し、できる限り色移りし難い加工
と配色パターンを採用していますが、保管状態などにより、色移りが発生する場合があります。ご了承ください。ま
た、濡れたままの保管は避けてください。
●濡れたまま保管すると、カビや悪臭、生地の色移り、生地の劣化などのトラブルの原因になりますので、使用後は
風通しの良い日陰で十分に乾燥し、柔らかいブラシなどで泥汚れを落としてから保管してください。
●フレームは表面の汚れを落とし、十分に乾燥させてから保管してください。濡れたまま保管すると腐食したり、強度
が低下します。ジョイント部分は常に清潔にし、少量のシリコン系潤滑剤を薄く塗布してください。塗布し過ぎると生
地に油ジミができますのでご注意ください。また、フレーム内部のショックコードは不必要に引っ張らないでください。
●フレームを収納する際は、中央を意識しながら折り畳んでください。(図A)
●高温多湿を避け、直射日光の当たらない風通しのよい場所に保管してください。
●ファスナーに泥や砂、ホコリなどが付着したまま使用すると摩耗し破損の原因になりますので、ブラシなどを使い
常に清潔にしてください。また、スライダーの動きを滑らかにするために、少量のシリコン系樹脂剤を定期的に塗
布してください。塗布し過ぎると生地に油ジミができますのでご注意ください。
●小さな生地の破損は市販のリペアテープで補修できます。補修の際はリペアテープの説明書をよくお読みください。
●ご使用により広範囲にわたり素材が劣化し、耐久度合を超えたものは修理できない場合があります。
●シームテープはPUコーティングが痛まない程度の温度設定で圧着されていますが、使用を重ねるにしたがい剥
離してしまう場合があります。剥離が確認された場合は、アイロンを低温に設定し、剥離箇所のみを再度圧着して
ください。熱を掛け過ぎた場合生地が変色したり劣化が促進されますのでご注意ください。シームテープは無理や
り剥離させないでください。PUコーティングが一緒に剥離された場合、修理できなくなる可能性があります。
メンテナンス・保管
(図B)(図A)
●樹液が付着してしまうときれいに除去することはできません。樹液が垂れそうな木の下を避けて設営してください。
溶剤などにより無理に除去すると生地やコーティングを傷めます。
●次回の使用に備え、ロープやペグなどの付属品も含め、上記の通り十分に保守、点検をしてください。
●使用する際にフレームが折れてしまった場合は、応急処置として速やかに付属のリペアパイプをあて、ビニール
テープで固定するか、撤収をしてください。(図B)
ThisisalowresolutionPDFforconfirmation.
PleaseprinttheAIfile.
確認用の低解像度PDFです、
A I データが 入 稿 用 データとなります 。
SD-651/Manual/date2023.5.16
●本格的な修理が必要な場合は、お買い求めになった販売店様または弊社ユーザーサービスまでお問い合わせく
ださい 。
●修理を依頼される場合は、必ず十分に乾燥させ、汚れをきれいに落としてください。
●修理品には修理箇所がはっきりと解るように、必ずメモまたは荷札を付けてください。また破損時の状況をできる
だけ 詳しく書 い たメモを 添 え てください 。
●修理品の運賃並びに修理費については以下のように規定させていただきます。
1.保証対象の場合:往復運賃並びに修理費は弊社にて負担いたします。
2.保証対象以外の場合:往復運賃並びに修理費は、お客様のご負担とさせていただきます。
修理について
お買い求めいただきました製品は万全を期していますが、万一不備な点がございましたら、お買い求めいただいた販
売店様もしくは弊社または各製品に記載された連絡先にご相談ください。製造上の欠陥が原因の場合は無償で修
理または交換させていただきます。その他の場合は適切な価格で修理させていただきます。修理、交換の判断は弊社
の裁量によるものとさせていただきます。また、以下の場合は修理できない場合もありますので予めご了承ください。
品質保証について
 1.素材の経年劣化による損害など商品の寿命
 2.改造および粗雑な取扱いによる故障
 3.取扱説明書で禁止されている取扱いによる故障
 4.不測の事故による商品の故障
 5.その他製造上の欠陥以外による製品の故障
 6.ゴミやさびによる故障
 7.分解したことによる不具合の発生または破損
 8.落下やその他の衝撃による部品の変形や破損による不具合
 9.摩擦によるパーツの変化及びそれによる故障
 10.他社製品との組み合わせによる故障
10
9
●十分に乾燥してから収納してください。
●強風時は、風が収まるのを待ってから撤収してください。
●インナールームを取り付けた場合や、別のテント/タープ等を併用していた場合は、必ずインナールームや併用して
いた製 品を本 体から取りはずしてから撤 収をはじめてください 。
●テントの中に何も入っていないこと、すべてのパネルや窓部のファスナーが閉まっていることを確認してから撤収を
はじ め てください 。
●メインポールは必ず毎 回中 央 付 近から折りたたんでください。端から折りたたむとフレーム内 部のショックコードの
伸びや切れ、フレームの曲がりや折れの原因になります。
● ペグはす べて 抜 き、汚 れを 落として ペグ ケースに 頭を下 に 向けて 収 納してください 。フレームはす べてフレーム ケー
スに収納してください。むき出しの状態で収納すると、本体生地やキャリーバッグ等を傷付けることがあります。
※フレームをグロメットからはず す 際 は 、必 ず 手 でフレームをつ かんでください 。フレームが 跳 ね 上 がり大 変 危 険 です 。
撤収・収納時の注意事項
●本製品のフライシートの生地には撥水加工を施していますが、生地の特性上、撥水性能(撥水の仕方や耐久
性)に若干の差が見られる場合があります。また、ご使用を重ねますと撥水性能が低下する場合があります。
性能が低下した場合は市販の撥水スプレー等を、それらの説明書をよくお読みの上ご使用ください。
●ボトムにはPUコーティングを施してありますが、地面の水溜りなどへ長時間接触していると雨水が浸み込む場
合があります。地面の水溜りなどへ長時間接触していると雨水が浸み込む場合があります。
●農薬などでPUコーティングが破壊され耐水圧が異常低下してしまう場合があります。この症状と判断された場
合、製品の保証が出来なくなりますのでご注意ください。
●撥水剤の影響によりロゴマークが剥離する場合があります。
撥水・防水性能について
●テントの素材は長時間日光にさらされた場合、退色や生地劣化などの強度低下を起こしますので、常設用として
使 用し な い でください 。
●紫外線の影響と思われる素材の劣化により、耐久度合いを超えたものは弊社でも修理できない場合があります。
紫外線の影響について
●長期間ご使用しなかった製品を再度お使いになる際は、本製品を点検し各部に異常がないことを確認してくださ
い。異常が発見された場合は、直ちに使用を中止しお買い求めいただいた販売店様、または弊社ユーザーサービ
ス係に点検または修理を依頼してください。
●本製品はポリエステル生地を組み合わせて使用しています。生地の特性を考慮し、できる限り色移りし難い加工
と配色パターンを採用していますが、保管状態などにより、色移りが発生する場合があります。ご了承ください。ま
た、濡れたままの保管は避けてください。
●濡れたまま保管すると、カビや悪臭、生地の色移り、生地の劣化などのトラブルの原因になりますので、使用後は
風通しの良い日陰で十分に乾燥し、柔らかいブラシなどで泥汚れを落としてから保管してください。
●フレームは表面の汚れを落とし、十分に乾燥させてから保管してください。濡れたまま保管すると腐食したり、強度
が低下します。ジョイント部分は常に清潔にし、少量のシリコン系潤滑剤を薄く塗布してください。塗布し過ぎると生
地に油ジミができますのでご注意ください。また、フレーム内部のショックコードは不必要に引っ張らないでください。
●フレームを収納する際は、中央を意識しながら折り畳んでください。(図A)
●高温多湿を避け、直射日光の当たらない風通しのよい場所に保管してください。
●ファスナーに泥や砂、ホコリなどが付着したまま使用すると摩耗し破損の原因になりますので、ブラシなどを使い
常に清潔にしてください。また、スライダーの動きを滑らかにするために、少量のシリコン系樹脂剤を定期的に塗
布してください。塗布し過ぎると生地に油ジミができますのでご注意ください。
●小さな生地の破損は市販のリペアテープで補修できます。補修の際はリペアテープの説明書をよくお読みください。
●ご使用により広範囲にわたり素材が劣化し、耐久度合を超えたものは修理できない場合があります。
●シームテープはPUコーティングが痛まない程度の温度設定で圧着されていますが、使用を重ねるにしたがい剥
離してしまう場合があります。剥離が確認された場合は、アイロンを低温に設定し、剥離箇所のみを再度圧着して
ください。熱を掛け過ぎた場合生地が変色したり劣化が促進されますのでご注意ください。シームテープは無理や
り剥離させないでください。PUコーティングが一緒に剥離された場合、修理できなくなる可能性があります。
メンテナンス・保管
(図B)(図A)
●樹液が付着してしまうときれいに除去することはできません。樹液が垂れそうな木の下を避けて設営してください。
溶剤などにより無理に除去すると生地やコーティングを傷めます。
●次回の使用に備え、ロープやペグなどの付属品も含め、上記の通り十分に保守、点検をしてください。
●使用する際にフレームが折れてしまった場合は、応急処置として速やかに付属のリペアパイプをあて、ビニール
テープで固定するか、撤収をしてください。(図B)
ThisisalowresolutionPDFforconfirmation.
PleaseprinttheAIfile.
確認用の低解像度PDFです、
A I データが 入 稿 用 データとなります 。
SD-651/Manual/date2023.5.16
MADEINCHINA
スノーピークユーザーサービス
不明な点やお気付きの点がございましたら、販売店様
または弊社ユーザーサービスまでお問い合わせください。
0120-010-660
(9:00〜17:00)
Email:[email protected]
株式会社スノーピーク
〒955-0147新潟県三条市中野原456
Tel.0256-46-5858/Fax.0256-46-5860
www.snowpeak.co.jp
スペック
○材質:フライシート/75Dポリエステルリップストップ・
PUコーティング耐水圧1,800mmミニマム・テフロン撥
水加工・UVカット加工、インナーウォール/68Dポリエ
ステルリップストップ、ボトム/300Dポリエステルオッ
クス・PUコーティング耐水圧10,000mmミニマム、グラ
ンドシート/210Dポリエステルオックス・PUコーティン
グ耐水圧1,800mmミニマム、フレーム/ジュラルミン
A7001(Φ10.2mm)
○収納サイズ:キャリーバッグサイズ/59×17×21(h)cm
○重量:4.9kg
○対応人数1名
300cm
130cm
230cm
210cm
(室内高110cm)
125cm
11
12
65th Anniversary
Trail Tripper 1 Pro. in Gray / Ivory
SD-651 / SD-651-IV
Instruction Manual : Ver 1.00
65th Anniversary Trail Tripper 1 Pro. in Gray
65th Anniversary Trail Tripper 1 Pro. in Ivory
ThisisalowresolutionPDFforconfirmation.
PleaseprinttheAIfile.
確認用の低解像度PDFです、
A I データが 入 稿 用 データとなります 。
SD-651/Manual/date2023.5.16
MADEINCHINA
スノーピークユーザーサービス
不明な点やお気付きの点がございましたら、販売店様
または弊社ユーザーサービスまでお問い合わせください。
0120-010-660
(9:00〜17:00)
Email:[email protected]
株式会社スノーピーク
〒955-0147新潟県三条市中野原456
Tel.0256-46-5858/Fax.0256-46-5860
www.snowpeak.co.jp
スペック
○材質:フライシート/75Dポリエステルリップストップ・
PUコーティング耐水圧1,800mmミニマム・テフロン撥
水加工・UVカット加工、インナーウォール/68Dポリエ
ステルリップストップ、ボトム/300Dポリエステルオッ
クス・PUコーティング耐水圧10,000mmミニマム、グラ
ンドシート/210Dポリエステルオックス・PUコーティン
グ耐水圧1,800mmミニマム、フレーム/ジュラルミン
A7001(Φ10.2mm)
○収納サイズ:キャリーバッグサイズ/59×17×21(h)cm
○重量:4.9kg
○対応人数1名
300cm
130cm
230cm
210cm
(室内高110cm)
125cm
11
12
65th Anniversary
Trail Tripper 1 Pro. in Gray / Ivory
SD-651 / SD-651-IV
Instruction Manual : Ver 1.00
65th Anniversary Trail Tripper 1 Pro. in Gray
65th Anniversary Trail Tripper 1 Pro. in Ivory
ThisisalowresolutionPDFforconfirmation.
PleaseprinttheAIfile.
確認用の低解像度PDFです、
A I データが 入 稿 用 データとなります 。
SD-651/Manual/date2023.5.16
13
14
Thank you for purchasing a Snow Peak product. This product is a tent for camping. For safety, read the
following instruction manual before use. Please keep it safe for future reference. Finally, if you find
anything that you do not understand in the description or any problems with the product, please stop use
immediately and contact the retailer or Snow Peak Customer Service.
Set Contents *Checkthatallaccessoriesaresupplied,priortouse.
Frames
Fly Sheet Inner Tent Ground sheet Building Tape
Cross Frame × 1
Side Frame A × 1
Side Frame B × 2
Mesh Gear Hammock
× 1
Duralumin Pegs
(17cm × 16)
Seam Grip Agent
× 1
Repair Pipe
× 1
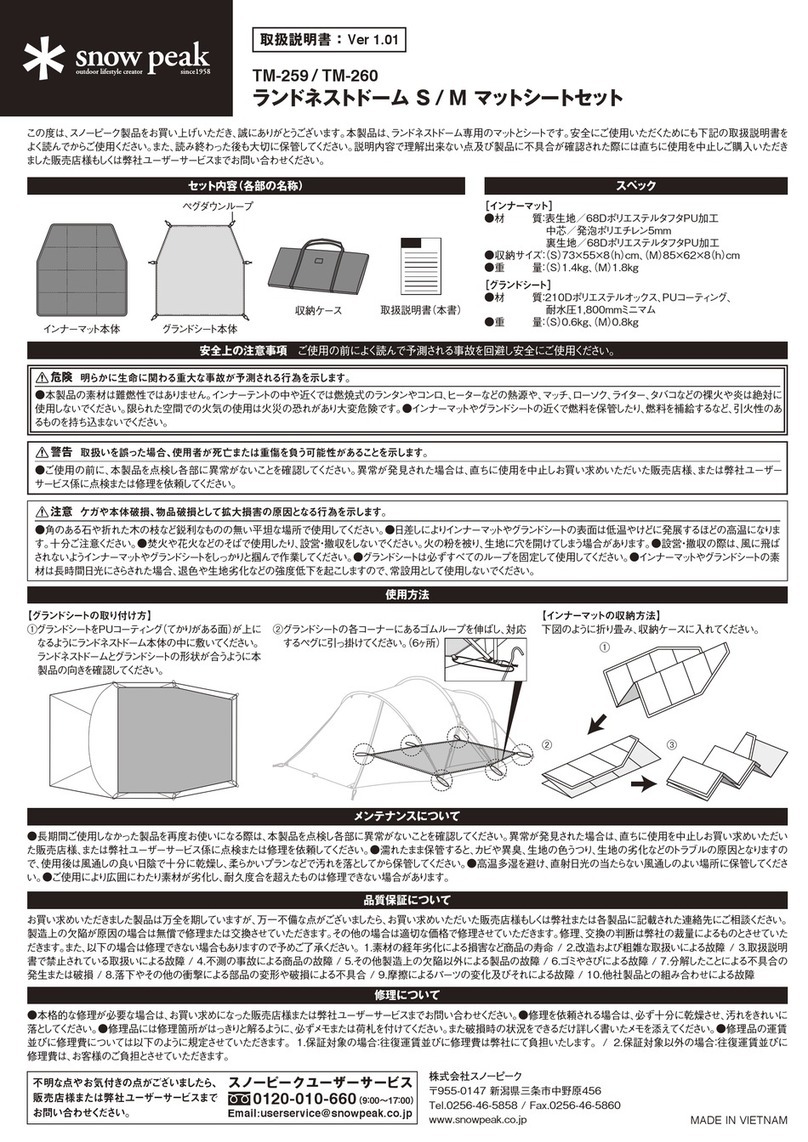
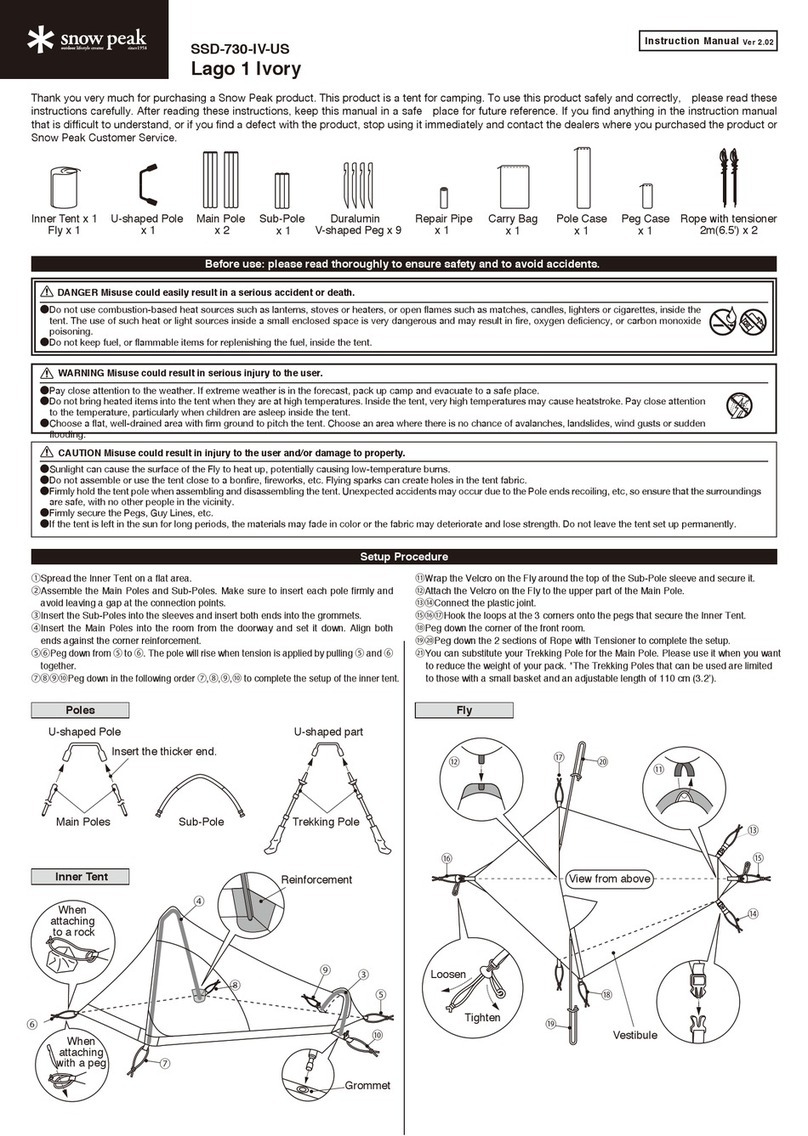
Storage Case Frame Case × 1 Peg Case × 1 Instruction manual × 1
Flexible Rope
(2m×4)
□Contents are based on setup in average conditions. If you bring a sturdy, long peg or a spare rope, you
can be flexible for various conditions. Always carry a spare as the peg, rope, and rope stoppers are
consumable items that wear out over time.
* The cross frame is partially bent to aid in assembly.
Safety Precautions Before use please read thoroughly to ensure safety and to avoid accidents.
Misuse could easily result in a serious accident or death.DANGER
●The tent’s material is not flame-proof. Therefore, do not use combustion-based heat sources
such as lanterns, stoves, heaters, or open flames such as matches, candles, lighters, or
cigarettes inside the tent. The use of such heat or light sources inside a small enclosed space
is dangerous and may result in fire, oxygen deficiency, or carbon monoxide poisoning.
●Do not keep fuel or flammable items for replenishing the fuel inside the tent.
●Beforeusingtheproduct,checkeachpartforabnormalities.Ifthereareabnormalities,takethe
producttothedealerorSnowPeakCustomerServiceforinspectionorrepair.
●Pay close attention to the weather. If extreme weather is in the forecast, pack up camp and
evacuate to a safe place.
●Do not bring heated items into the tent when they are at high temperatures. Very high tempera-
tures inside of the tent may cause fire or heatstroke.
●Hot weather will cause high temperatures in the tent, leading to a higher risk of heatstroke. Pay
close attention to temperatures, particularly when children are asleep inside the tent.
●Choose a flat, well-drained area with firm ground to pitch the tent. The area should have no
chance of avalanches, landslides, wind gusts, or sudden flooding.
●This product is not intended to be in permanent use, as it may fade or deteriorate if exposed to sunlight
over a long period of time.
●Sunlight can cause the surface of the fly to heat up, potentially causing low-temperature burns.
●Flying sparks can create holes in the tent fabric. Do not assemble or use the tent close to a bonfire,
fireworks, or areas where a fire is present. When setting up and disassembling, make sure there is no
fire around.
●Sap cannot be removed easily once it dries. Please avoid setting up under trees where sap is likely to
drip. Please do not use organic solvents such as thinner or benzene to remove the sap, as they will
damage the fabric and its coating.
●Firmly hold the tent pole when assembling and disassembling the tent. Pole ends recoiling may lead to
unexpected accidents, so ensure that the surroundings are safe with no bystanders in the vicinity.
●Secure the tent firmly with pegs and ropes.
●It is made of thin fabric, so it may break if you pull the fabric too much. Please be careful.
●Watch your feet when utilizing the rope and peg. It may offset your balance and cause an unexpected
accident.
●There are loops attached to the ceiling of the tent. These can be used for hanging small articles.Do not
hang anything exceeding 1 kg from a loop.
●If snow accumulates suddenly, the bottom end of the fly sheet could become covered or frozen in low
temperature, which can severely worsen ventilation and result in oxygen deficiency.Keep the inside
ventilated by removing snow or opening the entrance every now and then.
Misuse could result in serious injury or death.WARNING
Misuse could result in injury to the user and/or damage to property.CAUTION
Cross Frame Crossover hubs are red
First section is yellow
Side Frame A
End is green End is green
Side Frame B
ThisisalowresolutionPDFforconfirmation.
PleaseprinttheAIfile.
確認用の低解像度PDFです、
A I データが 入 稿 用 データとなります 。
SD-651/Manual/date2023.5.16
13
14
Thank you for purchasing a Snow Peak product. This product is a tent for camping. For safety, read the
following instruction manual before use. Please keep it safe for future reference. Finally, if you find
anything that you do not understand in the description or any problems with the product, please stop use
immediately and contact the retailer or Snow Peak Customer Service.
Set Contents *Checkthatallaccessoriesaresupplied,priortouse.
Frames
Fly Sheet Inner Tent Ground sheet Building Tape
Cross Frame × 1
Side Frame A × 1
Side Frame B × 2
Mesh Gear Hammock
× 1
Duralumin Pegs
(17cm × 16)
Seam Grip Agent
× 1
Repair Pipe
× 1
Storage Case Frame Case × 1 Peg Case × 1 Instruction manual × 1
Flexible Rope
(2m×4)
□Contents are based on setup in average conditions. If you bring a sturdy, long peg or a spare rope, you
can be flexible for various conditions. Always carry a spare as the peg, rope, and rope stoppers are
consumable items that wear out over time.
* The cross frame is partially bent to aid in assembly.
Safety Precautions Before use please read thoroughly to ensure safety and to avoid accidents.
Misuse could easily result in a serious accident or death.DANGER
●The tent’s material is not flame-proof. Therefore, do not use combustion-based heat sources
such as lanterns, stoves, heaters, or open flames such as matches, candles, lighters, or
cigarettes inside the tent. The use of such heat or light sources inside a small enclosed space
is dangerous and may result in fire, oxygen deficiency, or carbon monoxide poisoning.
●Do not keep fuel or flammable items for replenishing the fuel inside the tent.
●Beforeusingtheproduct,checkeachpartforabnormalities.Ifthereareabnormalities,takethe
producttothedealerorSnowPeakCustomerServiceforinspectionorrepair.
●Pay close attention to the weather. If extreme weather is in the forecast, pack up camp and
evacuate to a safe place.
●Do not bring heated items into the tent when they are at high temperatures. Very high tempera-
tures inside of the tent may cause fire or heatstroke.
●Hot weather will cause high temperatures in the tent, leading to a higher risk of heatstroke. Pay
close attention to temperatures, particularly when children are asleep inside the tent.
●Choose a flat, well-drained area with firm ground to pitch the tent. The area should have no
chance of avalanches, landslides, wind gusts, or sudden flooding.
●This product is not intended to be in permanent use, as it may fade or deteriorate if exposed to sunlight
over a long period of time.
●Sunlight can cause the surface of the fly to heat up, potentially causing low-temperature burns.
●Flying sparks can create holes in the tent fabric. Do not assemble or use the tent close to a bonfire,
fireworks, or areas where a fire is present. When setting up and disassembling, make sure there is no
fire around.
●Sap cannot be removed easily once it dries. Please avoid setting up under trees where sap is likely to
drip. Please do not use organic solvents such as thinner or benzene to remove the sap, as they will
damage the fabric and its coating.
●Firmly hold the tent pole when assembling and disassembling the tent. Pole ends recoiling may lead to
unexpected accidents, so ensure that the surroundings are safe with no bystanders in the vicinity.
●Secure the tent firmly with pegs and ropes.
●It is made of thin fabric, so it may break if you pull the fabric too much. Please be careful.
●Watch your feet when utilizing the rope and peg. It may offset your balance and cause an unexpected
accident.
●There are loops attached to the ceiling of the tent. These can be used for hanging small articles.Do not
hang anything exceeding 1 kg from a loop.
●If snow accumulates suddenly, the bottom end of the fly sheet could become covered or frozen in low
temperature, which can severely worsen ventilation and result in oxygen deficiency.Keep the inside
ventilated by removing snow or opening the entrance every now and then.
Misuse could result in serious injury or death.WARNING
Misuse could result in injury to the user and/or damage to property.CAUTION
Cross Frame Crossover hubs are red
First section is yellow
Side Frame A
End is green End is green
Side Frame B
ThisisalowresolutionPDFforconfirmation.
PleaseprinttheAIfile.
確認用の低解像度PDFです、
A I データが 入 稿 用 データとなります 。
SD-651/Manual/date2023.5.16
15
16
Name of the Parts
[Fly]
Loop
Approximately
45 °
Approximately 90 °
Peg
Ground
Peg down as far away from the tent as possible.
When set up, the angle of the rope should be
about 45 ° to the ground, which is the ideal
peg-down position. Also, please pull down the
peg so that the angle to drive the peg is 90 ° to
the rope.
How to attach Rope with Rope Tensioner on the Fly and Peg-down position
2m 2m
2m
2m
Ring
Loop
Rope Tensioner
Peg
Attach the rope so that the loopwith the
rope tensioner comes to the o-ring side.
How to attach a single rope
1. Sealing with Seam Sealer
*Seam sealer is not included in this product. When using, please purchase seam sealant from local outdoor gear retailer.
A waterproofing treatment with seam taping has been applied to the stitching of the tent. However, the ventilator and
fasteners on the Fly and a part of the bottom sheet cannot be treated with the seam tape due to their inherent design. Though
capable during periods of normal rain, long spells of heavy or driving rain, or prolonged contact with water pools on the
ground, may result in the penetration of water along the stitching. In such cases, the application of a seam sealer is
recommended. Apply the seam sealer lightly on both sides along the stitching and dry completely. The seam sealer will cure
with time. As the seam sealer wears off, re-apply as necessary. We do not provide a sealing service. However, to maintain
the tent in its best condition, application of seam sealer by the user is highly recommended.
Apply the Seam
Sealer to all corner
parts of the Bottom.
(4 locations)
Apply the Seam
Sealer to the outside
and inside of the
ventilation area.
Please apply the Seam
Sealer on both surfaces of
the Velcro Tape,on the
backside of Fly. (8 locations)
Preparations Before Use
1
Set-up Procedure
[Frame / inner tent]
Ventilator
Front Door Panel
Side Door
Rubber Loop
Inner Tent
Crossover Hub
Bottom
Side Frame
Building Tape
Peg Loop
Ground sheet
Cross Frame
(Back Room)(Vestibule)
●Condensation
A collection of water droplets suspended in the air turn into mist and form condensation in rapidly falling
temperatures.The concentration of water vapor is higher in smaller spaces (such as the inside of a tent) than
in an ordinary room and frequently results in more condensation.Water accounts for 60 percent of the human
body and is released through breathing and perspiration. This also causes the amount of water vapor in the
tent to increase, resulting in more condensation.Inside a tent, condensation can commonly be found on
materials that are highly waterproof, such as the fly sheet or the bottom.It is impossible to avoid condensation
completely, even with the use of high-quality permeable waterproof materials.To reduce condensation, it is
recommended to constantly ventilate the tent.
Moist Air
Water Droplets
(Condensation)
Fly Sheet
Dome
* Make sure that two or more people take part in the setup.
Spread out the building tape. [Figure A]
Hook the side building tape on the border between the vestibule and back room. Ensure that the O-rings sewn to the
peg loop area at each corner are facing upward. [Figure B]
The gray tape side will be on the vestibule side, and the black tape side will be on the tent side.
* The vestibule side is the main entrance. Check the weather forecast for wind and rain when determining the
direction of the vestibule. In general, the vestibule should be facing downwind. If the vestibule is facing upwind, not
only will it allow entry of wind and rain, but also create a risk of sudden wind coming in when the door is opened,
which may result in damage to the main unit.
* Note that the tent side will be rectangular, while the vestibule side will form a trapezoid. The shape must be
maintained at this point during setup to ensure that the tent is setup properly.
Figure A
Vestibule
Side
Gray Tape
Yellow Tape
Back Room
Side
Side Building
Tape
Black Tape
Figure B
Upward
O-ring
ThisisalowresolutionPDFforconfirmation.
PleaseprinttheAIfile.
確認用の低解像度PDFです、
A I データが 入 稿 用 データとなります 。
SD-651/Manual/date2023.5.16
15
16
Name of the Parts
[Fly]
Loop
Approximately
45 °
Approximately 90 °
Peg
Ground
Peg down as far away from the tent as possible.
When set up, the angle of the rope should be
about 45 ° to the ground, which is the ideal
peg-down position. Also, please pull down the
peg so that the angle to drive the peg is 90 ° to
the rope.
How to attach Rope with Rope Tensioner on the Fly and Peg-down position
2m 2m
2m
2m
Ring
Loop
Rope Tensioner
Peg
Attach the rope so that the loopwith the
rope tensioner comes to the o-ring side.
How to attach a single rope
1. Sealing with Seam Sealer
*Seam sealer is not included in this product. When using, please purchase seam sealant from local outdoor gear retailer.
A waterproofing treatment with seam taping has been applied to the stitching of the tent. However, the ventilator and
fasteners on the Fly and a part of the bottom sheet cannot be treated with the seam tape due to their inherent design. Though
capable during periods of normal rain, long spells of heavy or driving rain, or prolonged contact with water pools on the
ground, may result in the penetration of water along the stitching. In such cases, the application of a seam sealer is
recommended. Apply the seam sealer lightly on both sides along the stitching and dry completely. The seam sealer will cure
with time. As the seam sealer wears off, re-apply as necessary. We do not provide a sealing service. However, to maintain
the tent in its best condition, application of seam sealer by the user is highly recommended.
Apply the Seam
Sealer to all corner
parts of the Bottom.
(4 locations)
Apply the Seam
Sealer to the outside
and inside of the
ventilation area.
Please apply the Seam
Sealer on both surfaces of
the Velcro Tape,on the
backside of Fly. (8 locations)
Preparations Before Use
1
Set-up Procedure
[Frame / inner tent]
Ventilator
Front Door Panel
Side Door
Rubber Loop
Inner Tent
Crossover Hub
Bottom
Side Frame
Building Tape
Peg Loop
Ground sheet
Cross Frame
(Back Room)(Vestibule)
●Condensation
A collection of water droplets suspended in the air turn into mist and form condensation in rapidly falling
temperatures.The concentration of water vapor is higher in smaller spaces (such as the inside of a tent) than
in an ordinary room and frequently results in more condensation.Water accounts for 60 percent of the human
body and is released through breathing and perspiration. This also causes the amount of water vapor in the
tent to increase, resulting in more condensation.Inside a tent, condensation can commonly be found on
materials that are highly waterproof, such as the fly sheet or the bottom.It is impossible to avoid condensation
completely, even with the use of high-quality permeable waterproof materials.To reduce condensation, it is
recommended to constantly ventilate the tent.
Moist Air
Water Droplets
(Condensation)
Fly Sheet
Dome
* Make sure that two or more people take part in the setup.
Spread out the building tape. [Figure A]
Hook the side building tape on the border between the vestibule and back room. Ensure that the O-rings sewn to the
peg loop area at each corner are facing upward. [Figure B]
The gray tape side will be on the vestibule side, and the black tape side will be on the tent side.
* The vestibule side is the main entrance. Check the weather forecast for wind and rain when determining the
direction of the vestibule. In general, the vestibule should be facing downwind. If the vestibule is facing upwind, not
only will it allow entry of wind and rain, but also create a risk of sudden wind coming in when the door is opened,
which may result in damage to the main unit.
* Note that the tent side will be rectangular, while the vestibule side will form a trapezoid. The shape must be
maintained at this point during setup to ensure that the tent is setup properly.
Figure A
Vestibule
Side
Gray Tape
Yellow Tape
Back Room
Side
Side Building
Tape
Black Tape
Figure B
Upward
O-ring
ThisisalowresolutionPDFforconfirmation.
PleaseprinttheAIfile.
確認用の低解像度PDFです、
A I データが 入 稿 用 データとなります 。
SD-651/Manual/date2023.5.16
17
18
2
3
4
5
6
Pass the peg through the pegging loop and drive it into the ground, ensuring that there is no slack in the
building tape. [Figure C]
* Check that the shape is correct. Adjusting the peg location after insertion into the frame is dangerous, as the
frame could become detached and recoil.
Extend the cross frame and side frame A and B, and then firmly join the connecting parts.
* Firmly insert the frames so that no gap is present in the connecting parts of the frames.
Insert the cross frame into the grommets on the four corners of the building tape. Insert the yellow ends of the
frame into the yellow tape. [Figure D]
Figure C
Cross Frame Side Frame A
Side Frame B
Figure D
Cross Frame
Vestibule
Side
Grommet
Back Room
Side
Yellow Frame End
Grommet
Yellow Tape
Attach the side frames. [Figure E] (Carry out steps b to c one side at a time.)
a) Insert both ends of side frame A into the crossover hubs in the center of the cross frame. [Figure F]
b) After attaching side frame A to the crossover hubs, connect each side frame B to side frame A. [Figure G]
c) Insert the end of each side frame B into the grommets on the building tape in between the vestibule and back
room. [Figure H]
Attach the ground sheet to the rectangular area on the back room side (indicated with yellow tape). [Figure I]
Attach the ground sheet with the PU coating side (shiny side) facing upward.
Attach the hooks on the ground sheet to the five O-rings on the building tape.
For the vestibule ground sheet, connect the toggles in the triangular area to the three loops on the fly sheet,
after attaching the fly sheet. [Figure J]
Side Frame A Side Frame B
Figure E Side Frame B Cross Frame
Figure H
Vestibule
Side
Cross Frame
Hub
Back Room
Side
Side Frame A
Figure G
Back Room Side
Figure F
Cross Frame
Figure G
Figure H
Vestibule Side
Side Frame A
Crossover Hub
Figure G
Side Frame B
Side Frame A
Cross Frame
Note: Confirm that each side frame B is firmly inserted into
side frame A. Setting the tent up without firmly inserting
them may cause frame damage. The green frame end
will be completely hidden if the frame is inserted
correctly. Confirm that the green end is not visible.
Figure H
Side Frame B
Grommet
Black Tape
Figure I
Hook with
Yellow Tape
Hook
Toggle
Hook with
Yellow Tape
Hook
Ground Sheet
PU Coating Upward
Hook
Vestibule Side
Back Room Side Figure J PU Coating Upward
Back Room
Side
Vestibule Ground Sheet
Vestibule Side
Connect toggles
to three loops on
inside of fly sheet
ThisisalowresolutionPDFforconfirmation.
PleaseprinttheAIfile.
確認用の低解像度PDFです、
A I データが 入 稿 用 データとなります 。
SD-651/Manual/date2023.5.16
17
18
2
3
4
5
6
Pass the peg through the pegging loop and drive it into the ground, ensuring that there is no slack in the
building tape. [Figure C]
* Check that the shape is correct. Adjusting the peg location after insertion into the frame is dangerous, as the
frame could become detached and recoil.
Extend the cross frame and side frame A and B, and then firmly join the connecting parts.
* Firmly insert the frames so that no gap is present in the connecting parts of the frames.
Insert the cross frame into the grommets on the four corners of the building tape. Insert the yellow ends of the
frame into the yellow tape. [Figure D]
Figure C
Cross Frame Side Frame A
Side Frame B
Figure D
Cross Frame
Vestibule
Side
Grommet
Back Room
Side
Yellow Frame End
Grommet
Yellow Tape
Attach the side frames. [Figure E] (Carry out steps b to c one side at a time.)
a) Insert both ends of side frame A into the crossover hubs in the center of the cross frame. [Figure F]
b) After attaching side frame A to the crossover hubs, connect each side frame B to side frame A. [Figure G]
c) Insert the end of each side frame B into the grommets on the building tape in between the vestibule and back
room. [Figure H]
Attach the ground sheet to the rectangular area on the back room side (indicated with yellow tape). [Figure I]
Attach the ground sheet with the PU coating side (shiny side) facing upward.
Attach the hooks on the ground sheet to the five O-rings on the building tape.
For the vestibule ground sheet, connect the toggles in the triangular area to the three loops on the fly sheet,
after attaching the fly sheet. [Figure J]
Side Frame A Side Frame B
Figure E Side Frame B Cross Frame
Figure H
Vestibule
Side
Cross Frame
Hub
Back Room
Side
Side Frame A
Figure G
Back Room Side
Figure F
Cross Frame
Figure G
Figure H
Vestibule Side
Side Frame A
Crossover Hub
Figure G
Side Frame B
Side Frame A
Cross Frame
Note: Confirm that each side frame B is firmly inserted into
side frame A. Setting the tent up without firmly inserting
them may cause frame damage. The green frame end
will be completely hidden if the frame is inserted
correctly. Confirm that the green end is not visible.
Figure H
Side Frame B
Grommet
Black Tape
Figure I
Hook with
Yellow Tape
Hook
Toggle
Hook with
Yellow Tape
Hook
Ground Sheet
PU Coating Upward
Hook
Vestibule Side
Back Room Side Figure J PU Coating Upward
Back Room
Side
Vestibule Ground Sheet
Vestibule Side
Connect toggles
to three loops on
inside of fly sheet
ThisisalowresolutionPDFforconfirmation.
PleaseprinttheAIfile.
確認用の低解像度PDFです、
A I データが 入 稿 用 データとなります 。
SD-651/Manual/date2023.5.16
19
20
9
11
10
8
12
* Steps 7, 8, and 9 can also be done in the following order: 9, 7, then 8. When storing, either the inner tent or
fly sheet can be stored first.
Confirm the direction of the vestibule and back room, and then attach the fly sheet.
Wrap the slip-prevention Velcro tape attached to the inside of the fly sheet to the frame to secure it in place.
[Figure K]
Attach the six hooks on the bottom end of the fly sheet to the six O-rings attached to the pegging loops. [Figure L]
* Note that attaching the hooks to the rings connected to the building tape will make it difficult to apply tension
to the fly sheet.
Pull the rubber loops on the bottom of the vestibule, back room, and side door, pass the pegs through them,
and then drive the pegs into the ground. [Figure M]
* Ensure that the rubber loop on the bottom of the zipper is pegged down. Otherwise, it could become difficult
to unzip the zipper, or the zipper could get caught on the flap.
* Be careful not to pull too much. Pulling too much could apply excessive force to the zipper, damaging it.
Suspend the inner tent. [Figure N]
a) Confirm the front and rear sides of the inner tent, and then spread it within the building tape.
* Although there is an entrance at both the front and rear of the inner tent, the panel with yellow tape is the back
room side.
b) Attach the corner hooks on the bottom corners of the inner tent to the O-rings on the building tape. [Figure O]
c) Attach the hooks sewn into the inner tent to the frame and side frames. [Figure N]
Figure K
Vestibule Back Room
Figure L Figure M
Vestibule Back Room
Side Door
7
Figure N Back Room Side
Hook with
Yellow Tape
Vestibule Side Hook
Figure O
O-ring on Building Tape
Inner Tent Corner Hook
Extend the guy lines and then peg them down. [Figure P]
As shown in "How to attach Rope with Rope Tensioner on the Fly and Peg-down position" on page 15, attach
each rope with a rope tensioner to the fly sheet. Then, pull each rope, peg it down, and then adjust the tension.
* Pulling a rope too much could apply excessive force to the zipper, damaging it. Be careful not to pull too
much.
Figure P
Pull the tensioner on the guy lines to apply tension.
* Be careful not to pull too much. Pulling too much could apply excessive force to the fly sheet, damaging it.
To push out the front door panel, attach the supplied hooking cords
to a motorcycle or other solid object, or use the separately sold
Light Tarp Pole 125 (Set of 2) (TP-161).
Note: Water can easily gather around the door panel during rainfall.
Create a slope by laying a pole down at an angle or otherwise
create some means for water to drain away from the tent.
* When attaching the supplied hooking cords to a motorcycle or
other solid object, remain aware of the weather and surrounding
environment, so that the object does not tip over. Snow Peak is
not responsible for any damage to the tent or any attached
objects. Please note this beforehand.
Hooking Cord
Light Tarp Pole 125
Accessories
Mesh gear hammock [Figure Q]
Attach the hooks on the four corners of the mesh gear hammock to the center of the cross frame.
* Note that pulling the rubber strings on the four corners too strongly or applying excessive weight to the mesh section
may cause damage.
Figure Q Side Frame Cross Frame
Mesh Gear Hammock
Vestibule Side Back Room Side
ThisisalowresolutionPDFforconfirmation.
PleaseprinttheAIfile.
確認用の低解像度PDFです、
A I データが 入 稿 用 データとなります 。
This manual suits for next models

1

Other Snow Peak Tent manuals

Snow Peak Takibi Tarp Hexa Set M User manual

Snow Peak

Snow Peak Takibi Tarp Hexa Set M User manual

Snow Peak Entry Pack TT User manual

Snow Peak

Snow Peak Entry Pack TT User manual

Snow Peak Land Nest Dome User manual

Snow Peak

Snow Peak Land Nest Dome User manual

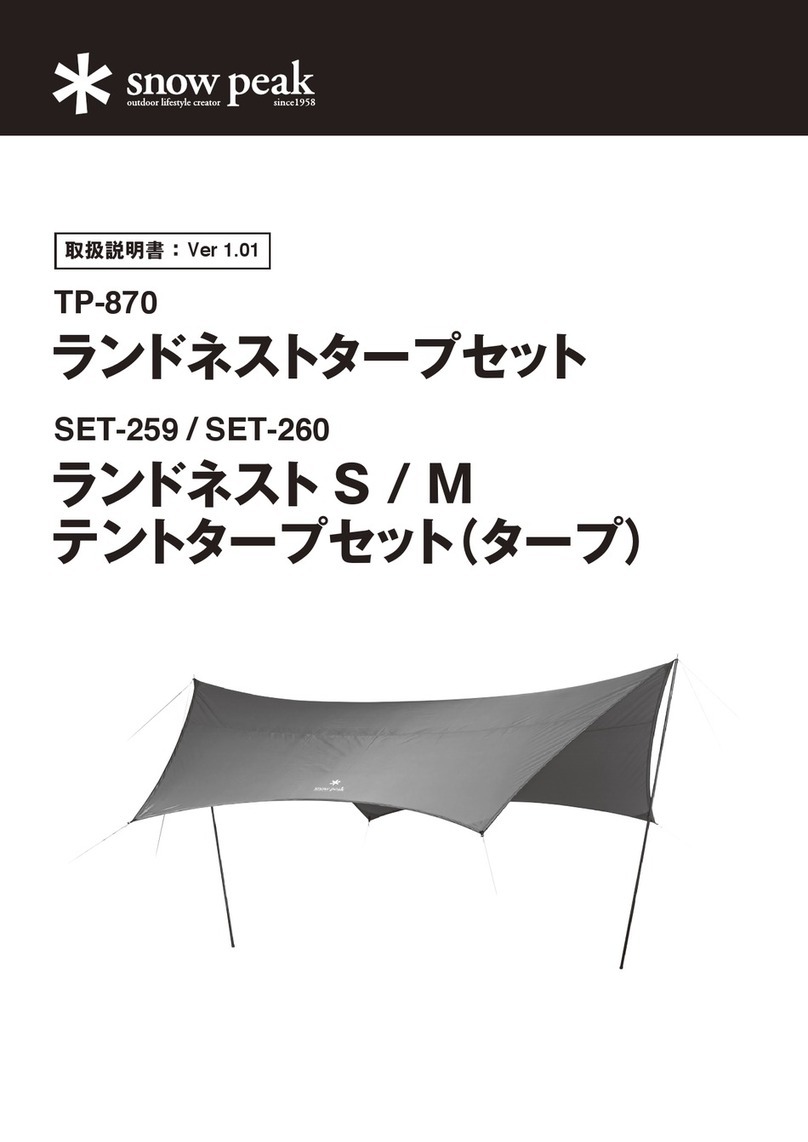
Snow Peak TP-870 User manual

Snow Peak

Snow Peak TP-870 User manual

Snow Peak Amenity Dome M User manual

Snow Peak

Snow Peak Amenity Dome M User manual

Snow Peak TM-259 User manual

Snow Peak

Snow Peak TM-259 User manual

Snow Peak FES-195 User manual

Snow Peak

Snow Peak FES-195 User manual

Snow Peak Amenity Dome L User manual

Snow Peak

Snow Peak Amenity Dome L User manual

Snow Peak FES-091 User manual

Snow Peak

Snow Peak FES-091 User manual

Snow Peak Lago 1 Ivory User manual

Snow Peak

Snow Peak Lago 1 Ivory User manual

Snow Peak Living Lodge M User manual

Snow Peak

Snow Peak Living Lodge M User manual

Snow Peak SDE-260IR User manual

Snow Peak

Snow Peak SDE-260IR User manual

Snow Peak SSD-630-1 User manual

Snow Peak

Snow Peak SSD-630-1 User manual

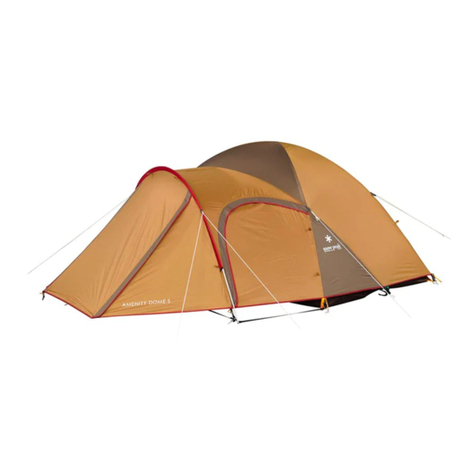
Snow Peak Amenity Dome S User manual

Snow Peak

Snow Peak Amenity Dome S User manual

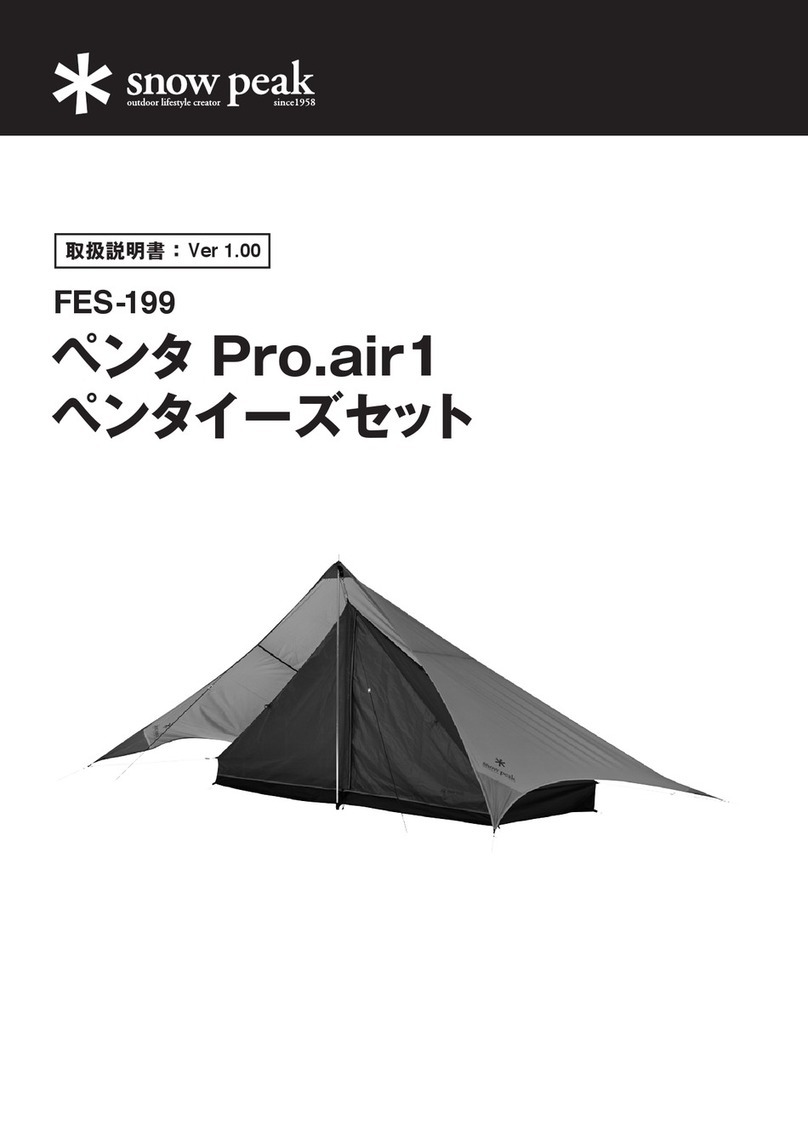
Snow Peak Penta Pro.air 1 User manual

Snow Peak

Snow Peak Penta Pro.air 1 User manual

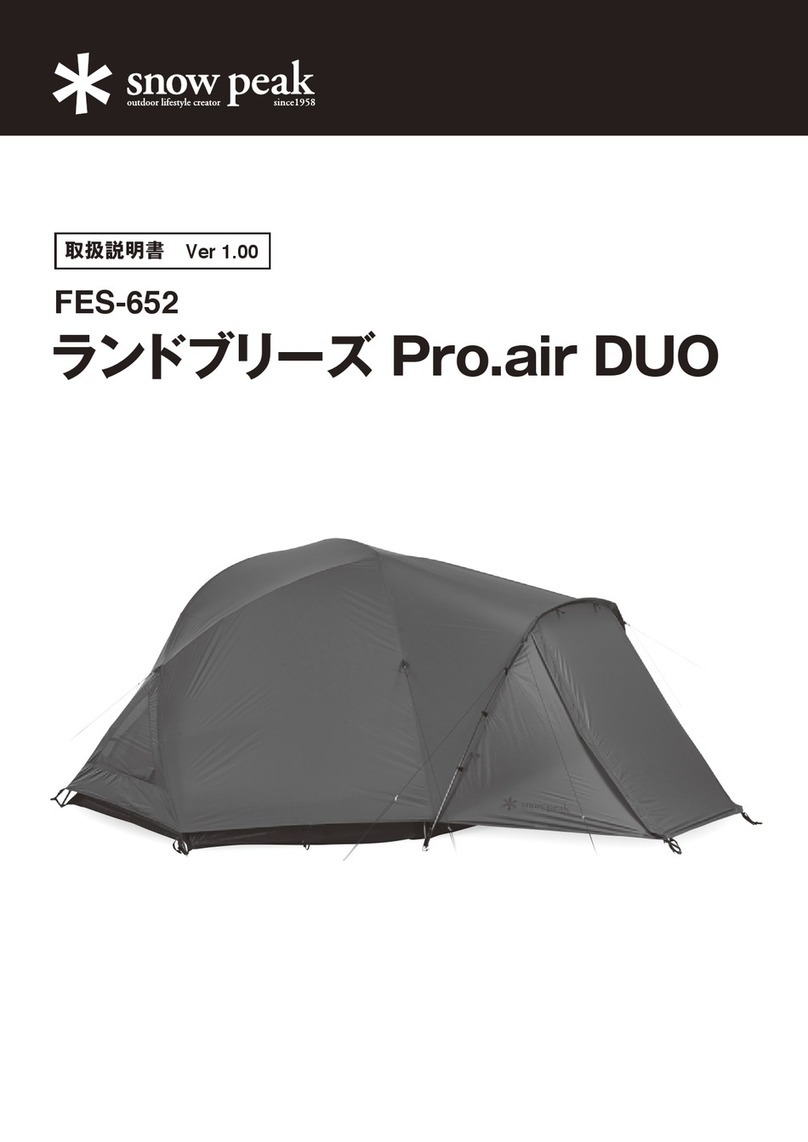
Snow Peak Land Breeze Pro Air Duo User manual

Snow Peak

Snow Peak Land Breeze Pro Air Duo User manual

Snow Peak Amenity Dome Small in Ivory User manual

Snow Peak

Snow Peak Amenity Dome Small in Ivory User manual

Snow Peak Toya 2 User manual

Snow Peak

Snow Peak Toya 2 User manual

Snow Peak Vault User manual

Snow Peak

Snow Peak Vault User manual

Snow Peak Alpha Breeze User manual

Snow Peak

Snow Peak Alpha Breeze User manual

Snow Peak LV-071-1-IV User manual

Snow Peak

Snow Peak LV-071-1-IV User manual

Snow Peak Land Nest Dome Small User manual

Snow Peak

Snow Peak Land Nest Dome Small User manual

Popular Tent manuals by other brands

Snugpak JOURNEY SOLO Assembly instructions

Snugpak

Snugpak JOURNEY SOLO Assembly instructions

Pacific Yurts 20' Yurt Setup manual

Pacific Yurts

Pacific Yurts 20' Yurt Setup manual

SMRT TENT SUMMIT SUITE owner's manual

SMRT TENT

SMRT TENT SUMMIT SUITE owner's manual

Nemo KUNAI 2P manual

Nemo

Nemo KUNAI 2P manual

PULEX PERGOLA SHUTTER HARDWARE installation manual

PULEX

PULEX PERGOLA SHUTTER HARDWARE installation manual

Magellan Outdoors MG LAKEWOOD LODGE instruction manual

Magellan Outdoors

Magellan Outdoors MG LAKEWOOD LODGE instruction manual

Coleman 9271H133 instructions

Coleman

Coleman 9271H133 instructions

Coleman CUYAHOGA 9234-181 instructions

Coleman

Coleman CUYAHOGA 9234-181 instructions

Palram Juniper 3x3 manual

Palram

Palram Juniper 3x3 manual

Zempire Neo Series Pitching instructions

Zempire

Zempire Neo Series Pitching instructions

Extreme marquees CREST instructions

Extreme marquees

Extreme marquees CREST instructions

DARCHE ECLIPSE 270 EC27-W1 instructions

DARCHE

DARCHE ECLIPSE 270 EC27-W1 instructions

Carefree of Colorado ONE-Touch instructions

Carefree of Colorado

Carefree of Colorado ONE-Touch instructions

Clarke CIG81015 Assembly instructions

Clarke

Clarke CIG81015 Assembly instructions

Palram MILANO 3000 Setup manual

Palram

Palram MILANO 3000 Setup manual

ClearSpan 104137 manual

ClearSpan

ClearSpan 104137 manual

Creative Structures Hexadome L manual

Creative Structures

Creative Structures Hexadome L manual

Vango BRAVO Pitching instructions

Vango

Vango BRAVO Pitching instructions

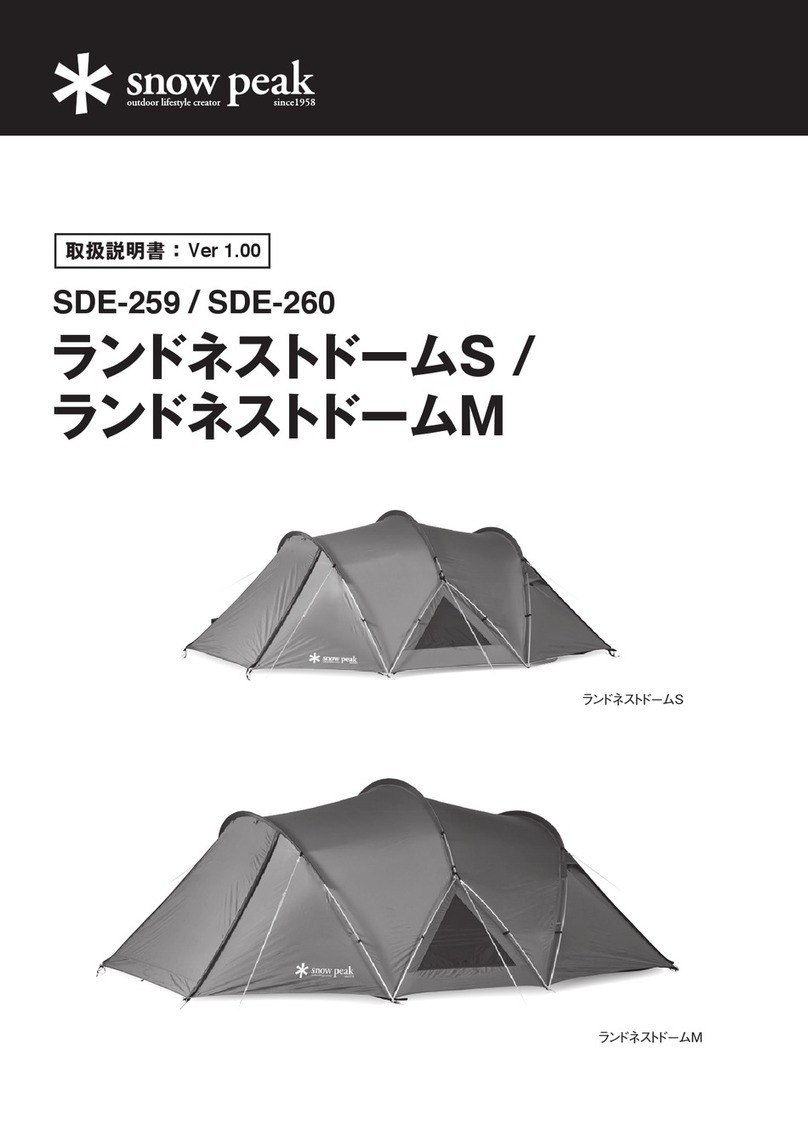
manuals.online logo
manuals.online logoBrands
  • About & Mission
  • Contact us
  • Privacy Policy
  • Terms and Conditions

Copyright 2025 Manuals.Online. All Rights Reserved.