manuals.online logo
Brands
  1. Home
  2. •
  3. Brands
  4. •
  5. Snow Peak
  6. •
  7. Tent
  8. •
  9. Snow Peak FES-091 User manual

Snow Peak FES-091 User manual

취급설명서 Ver 1.00
 Pro.
RED FRAME EDITION
FES091
1
Ⓑ
펙케이스×1
스토퍼로프
(7m×2,3.5m×6,2.5m×4,1.5m×2)
A프레임×2
C프레임×2
센터프레임×1
릿지폴×1
업라이트폴×2
프레임 수납케이스×1본체 수납케이스×1
두랄루민펙×
(21cm×31)
심그립제×1
□세트 내용은 일반적인 조건하에서 설영을 기본으로 한 것입니다. 견고하고 긴 펙과 예비 로프 등을 준비하면 유연한
대응이 가능해집니다. 펙과 로프 등은 소모품이기 때문에 항상 여분을 휴대하는 것이 좋습니다.
■아래 장소는 제품 구조상 심처리가 불가능하므로 물이 침입할 가능성이 있습니다. 아래 장소 및 침수가 확인된 곳의 외측 절취선에
심그립제를 도포하여 봉제선에서 물이 침입하는 것을 막아주세요
 1. 루프나 토글을 봉제한 미싱선 Ⓐ
 2. 지퍼 레일을 봉제한 외부 미싱선 Ⓑ
도어패널 윗부분
토글 6곳
(반대쪽도 동일합니다)
토글×6
미싱선 Ⓐ
본체×1
컴프레션벨트×2
이너텐트×1
취급설명서×1

이번에 스노우피크 제품을 구입해 주셔서 대단히 감사합니다. 본 제품은, 캠핑용 쉘터입니다. 안전하게 사용하기
위해서도 아래의 사용설명서를 잘 읽고 사용해 주십시오. 또, 다 읽은 후에도 소중히 보관해 주세요. 설명 내용에서
이해가 가지 않는 점 및 제품에 하자가 확인되었을 때에는 즉시 사용을 중지하고 구입하신 판매점 혹은 당사 유저
서비스로 문의해 주십시오.
※사용 전에 부속품이 모두 갖추어져 있는지 확인해 주세요.
2
         .
명백히 생명과 관련된 중대한 사고가 예측되는 행위를 나타냅니다.

● 이 쉘터의 소재는 난연성이 아닙니다. 쉘터내에서는 연소식 랜턴이나 스토브, 히터 등의 열원이나 성냥,
촛불, 라이터, 담배 등의 불이나 불꽃은 절대 사용하지 마십시오. 한정된 공간에서의 화기 사용은 화재나
산소 결핍, 일산화 중독 등의 우려가 있어 매우 위험합니다.
● 쉘터에서 연료를 보관하거나 연료를 보급하는 등, 인화성이 있는 물건을 반입하지 마십시오.
● 사용 전에, 본 제품을 점검하여 각부에 이상이 없는지 확인해 주십시오. 이상이 발견되었을 경우, 즉시
사용을 중지하고 구입하신 판매점 또는 당사 유저서비스에 점검 또는 수리를 의뢰해 주십시오.
● 기상상황에는 항상 세심한 주의를 기울이고 바람이 강할 때나 악천후가 예상될 때는 신속히 철수하고
안전한 곳으로 대피하세요.
● 고온으로 가열된 것이나 발열성이 있는 물건을 반입하지 마십시오.화재 및 열사병 등의 위험이 있습니
● 날씨에 의해 쉘터 안이 더워지면 열사병 등의 위험이 있습니다. 어린이의 낮잠 시에는 세심한 주의를
기울여 주십시오.
● 바람이 통할 것 같은 장소나, 눈사태, 산사태, 갑작스러운 홍수나 범람 등의 우려가 없는 지반이 튼튼하고,
배수가 잘 되는 평탄한 장소를 선택해 설치하십시오.
● 갑작스러운 적설로 인해 도어패널의 머드스커트가 눈으로 덮이거나 천장부에 높게 쌓이면 위험합니다.
자주 제설하거나 입구를 여는 등 환기에 주의를 기울여 주시기 바랍니다.
취급을 잘못할 경우 사용자가 사망또는 중상을 입을 수 있음을 나타냅니다.

● 본 제품은 상설(장박)용이 아닙니다. 원단의 소재는 장시간 햇빛에 노출될 경우 탈색 및 원단 열화 등의 강도
저하를 일으키므로 상설(장박)용으로 사용하지 마십시오.
● 햇살에 의해 원단 표면은 저온화상으로 발전할 정도의 고온이 됩니다. 충분히 주의하세요.
● 모닥불이나 불꽃 등이 있는 장소의 옆에서 설영하거나, 사용하지 마십시오. 설영·철수 시에는 주위에 화기가
없는지 확인하십시오. 불티를 입어 원단에 구멍이 뚫리는 경우가 있습니다.
● 쉘터의 설영 및 철수시에는, 바람에 날아가지 않도록본체를 단단히 고정 후 작업하십시오. 프레임의 해체는
사고로 이어질수 있으므로 취급시 반드시 주변의 안전을 확인하고 작업하세요. 작업은 반드시 2인 이상이
진행해야합니다.
● 펙과 로프로 단단히 보호대를 고정하십시오.
● 원단을 너무당기면 파손될 우려가 있습니다. 주의하세요.
● 발밑의 빌딩 테이프, 로프나 펙 등에 주의하십시오. 다리를 걸어 넘어져 뜻하지 않은 사고의 원인이 됩니다.
● 로프를 올바르게 결속함으로써바람이나 비를 견딜수 있는 강도를 얻을 수 있습니다. 사용 시에는 취급설명서
(본서)에 따라 반드시 모든로프를 결속하여 주십시오.
● 이너룸안에는 소품을 매다는 루프가 붙어 있습니다. 반드시 1kg을 넘지 않는 범위에서 사용하십시오.
부상이나 본체 파손, 물품 파손으로서 확대 손해의 원인이 되는 행위를 나타냅니다.

3
릿지폴
A프레임
분리한 상태로
릿지폴을 세트함
분리한 상태로
릿지폴을 세트함
■각 부분의 명칭
①본체를 설영하고자 하는 장소에
펼칩니다. 이 때 2개인 출입구용
도어패널의 방향을 고려해주세요.
주)빌딩테이프 3개가 모두 버클에
연결 되어 있는지 확인해주세요.
빠져있는 경우는 설영전에 모두
연결해주세요.
②처음에는 남색의 표식이 있는 A프레임 릿지폴을 정중앙의 남색 슬리브에 넣습니다. 그리고 A프레임 조인트 부분에 붙어있는 2
개의 남색씰이 바깥쪽을 향하도록릿지폴을 끼웁니다. 릿지폴의 끝부분이 A프레임 조인트 부분의 끝부분까지 다 들어간 것을
확인하고 센터링을 안쪽까지 끼워 겁니다. (그림A) 이 시점에서는 센터링의 테이프는 텐션을 걸지 않고 느슨하게 해둡니다.
다음은 반대측의 A프레임에도 릿지폴을 끼웁니다.
주)A프레임을 릿지폴에 세트할 때는 A프레임을 모두 연결된 상태에서 끼우지말고, 좌우측 프레임마디를 분리하여 릿지폴을
연결해주세요. (그림B) 세트하고나서 세우면 접합부분의 금속스트레스를 줄여 편하게 설영이 가능합니다.
【경고】사용 전에 본 제품을 점검하고 각부에 이상이 없는지 확인해 주세요. 이상이 발견되었을 경우, 즉시 사용을 중지하고 구입하신
판매점 또는 당사 유저서비스에 점검 또는 수리를 의뢰해 주십시오.

보다 안전하게 설영하기 위해 반드시 2인 이상으로 설영해주세요.
릿지폴
A프레임
A프레임
C프레임
C프레임
벤틸레이션
메쉬창
센터프레임
사이드도어패널
사이드월
도어패널
업라이트폴
랜드록 본체
도어패널
(출입구)
도어패널
(출입구)
본체 바닥부분에 연결되어 있는
빌딩테이프 3개
릿지폴 릿지폴
A프레임
슬리브(남색)
슬리브
(남색)
남색
스티커
릿지폴 끝부분(남색)
본체
A프레임 조인트부분
A프레임
센터링센터링
(그림A)
(그림B)
4
C프레임
(끝부분에 검정색씰이 붙어 있습니다.)
③본체의 바닥부분에 있는 곤색 끈이 연결되어 있는 링핀을 가지고 A프레임 에 끼웁니다.(4곳) 양쪽의 센터링의 테이프 텐션을
조절합니다. 이때 A프레임 상부의 플라스틱후크를 미리 체결해 둡니다.
주)링핀을 A프레임 끝부분에 넣을 때는 프레임 끝부분이 움직이 않도록들고 손가락이 끼이지 않도록주의하면서 끼웁니다.
프레임을 들어 올리면 반대쪽에 부하가 걸려 A프레임릿지폴의 끝부분이 꺾일 수
있습니다.
링핀을 끼울 때는 화살표 방향으로 크게 들어올려버리면 반대쪽의 A프레임 조인트 부분의
A프레임 릿지폴에 무리한 하중이 걸릴 위험이 있으므로 반대쪽 상황을 잘 보면서 끼워주세요.
④검은 표식의 C프레임을 조금씩 연결하여 검은 테이프가 붙어 있는 슬리브에 밀어넣습니다. 다음은 ③과 동일하게 링핀
(검은 끈)을 끼웁니다. 한쪽의 C프레임을 세운후 다른한쪽도 동일하게 세웁니다.
주)C프레임도 조금씩 마디를 체결하면서 슬리브에 넣습니다. C프레임은 A프레임의 바깥쪽을 지납니다.
⑤양쪽 끝이 빨간색인 센터프레임을 마디를 조금씩 연결하면서 본체 센터에 있는 빨간색테이프가 있는 센터 슬리브에 밀어
넣습니다. 다음은 ③과 동일하게 링핀(빨강 끈)을 양끝의 프레임 끝부분에 끼웁니다.
슬리브에 프레임을 통과시킬때는
사이드도어 패널을 열어서 본체
쪽에서 작업을 하면 편합니다.
조금씩 마디를 체결할 때는
끝까지 연결되었는지 확인
하고 슬리브에 밀어 넣어주세요.
링
A프레임의
끝부분(남색)
본체
링핀
펙다운루프
(남색)
A프레임 윗부분의
후크만먼저 걸기
하중이 걸려 꺽임
C프레임
검정색테이프
슬리브
검정색테이프가
달린 슬리브
조금씩 마디를 연결할 때는
프레임이 끝까지 끼워졌는지
확인하고 슬리브에 넣어주세요.
센터
프레임
센터 프레임의
끝부분(스티커 없음)
빨간색 테이프
슬리브
슬리브
(빨간색테이프 포함)
사이드도어패널
링핀
펙다운루프(빨간색)
링
5
⑥A프레임/C프레임/센터프레임에 각각 위에서 아래로 순서대로 플라스틱후크를 겁니다. 크로스 프레임 부분은 벨크로 테이프를 O
링에 연결해 고정합니다.
주) 바람으로 본체가 날아가거나, 프레임이
부러지지 않도록본체 및 로프는 펙다운을
충분하게 합니다.
※크로스 프레임 /센터프레임 부분에 로프는
본체에 붙어 있는 O링테이프를 크로스
프레임/센터프레임 부분에 한바퀴돌려 로프에
텐션을 겁니다.
⑦바닥링핀에 붙어 있는 펙다운용 루프 및 테이프에 듀랄루민 펙을 통과시켜, 모두 실내쪽으로 펙다운합니다. 또, 부속품인
로프도 펙다운합니다. 출입구용 도어패널을 세울 경우는 별매인 업라이트 폴(TP-080)을 사용하여 두갈래 로프로
세워주세요. 주름이 남지않도록로프의 방향을 조정해주세요.
주)비가 내릴때 도어패널은 물이 고이기 쉬으므로 폴을 사선으로 눕혀 물길을 만들거나 폴을 짧게 사용하여
전면 중앙을 커다란V자에 로프를 내려 물길을 만들어 물이 고이지 않도록합니다.
※크로스
프레임 부분
플라스틱
후크
프레임
C프레임
A프레임
O링
두갈래7m로프
업라이트폴 3.5m로프
3.5m로프
2.5m
로프
1.5m
로프
2.5m
로프
C프레임
A프레임
O링
당기는 로프
V자 물길을 만들어주세요.
6
⑧필요에 따라 마지막에 빌딩 테이프의 버클을 분리하여
테이프를 포켓에 수납해주세요.(설영후에 빌딩 테이프를
분리할 경우는 반드시 실내쪽에 펙다운을 하여 텐션을
실내쪽에서 걸어주세요.)
①이너텐트의 전후를 확인하여 랜드록의 실내에
펼칩니다. (이너텐트는 바닥에 로고 프린터가
있는쪽이 실내쪽입니다.)
※이너텐트는 랜드록 본체의 사이드도어가 없는 쪽 실내에 겁니다.
(사이드도어측에는 이너텐트 설치용 O링이 없음)
■이너텐트 설영
Y자형빌딩 테이프
센터 빌딩 테이프
Y자형빌딩 테이프 빌딩 테이프 포켓
이너텐트 설치위치사이드도어
로고프린트
실내쪽
7
이너룸
센터
프레임
O링
⑤마지막으로 출입문 하부에 있는 펙다운테이프를 펙다운해
주십시오. 이 펙다운을 하면 문을 열고 닫을 때 바닥들뜸을
줄이고 개폐가 쉬워집니다.
④이너 텐트 상부에 있는 후크 및 토글을 본체(플라이)의 O링에 모두 걸어 주십시오.(11개부분)
③하단에 있는 모든후크를 건 후, 후크 부착테이프의 길이를 조정하여 이너룸을 붙여주세요.
②이너텐트 각 바닥코너에 붙어 있는 후크·고무루프를 본체(플라이)의 O링, 펙을 겁니다.
뒤쪽 2곳에 펙다운테이프는
본체 (플라이) 를 묶은 펙에
겁니다.
바닥입구 코너에 있는
후크 빨간색테이프를
본체(플라이)의
센터프레임 O링에 겁니다.
바닥양사이드에 있는 후크 남색 테이프를
본체(플라이)의 A프레임O링에 겁니다.
A프레임
끝부분(남색)
실내쪽
A프레임
O링
센터프레임
(양끝 빨간색)
후크
남색 테이프
후크
빨간색테이프
펙다운
루프(남색)
펙다운
테이프
펙다운루프
(빨간색)
본체(플라이) O링에
토글을 걸어주세요
본체(플라이) O링에
후크를 걸어주세요
8
■세이프티 링의 활용
본 제품에는 강풍시에 측면에서의 바람에 안정성을 가질수 있도록세이프티링이 예비되어 있습니다.
센터 프레임 안쪽에서 가지고 있는 로프로 하기와같이 셋팅합니다.
어디까지나 보조대책입니다. 모든 악천후에 견딜수 있는 것은 아니며, 일시적인 강풍시나 즉시
철수가 곤란한 경우에만 사용해주세요. 세이프티 링에 과한 하중이 가해지면 파손되므로
유의해주세요.
다른한쪽의 로프
끝부분을 센터
프레임을 삽입되어
있는 O링을
연결합니다.
마지막에 로프 전체에
텐션이 걸리도록스토퍼를
조정합니다. 이 때 강하게
당기면 본체의 봉제부분이
파손될수 있으므로 무리한
텐션을 걸지마세요.
①본체(플라이)쪽
센터프레임 안쪽 상부에 있는 세이프티링에 스토퍼
로프(5m~6m)를 연결합니다.
빨간색테이프
스토퍼 로프
세이프티링
본체 봉제 부분
조정
본체(플라이)
묶기
로프
센터
프레임
③
②

9
■ 
 (수납할 때는 반드시 이너 텐트를 본체에서 분리한 후에 본체를 철수해 주십시오.)
①센터 슬리브를 중심을 반을 접습니다.
②직사각형이 되도록양옆을 안쪽으로 접습니다.
프레임
수납케이스
본체
수납케이스
본체(플라이)
이너텐트
10
③직사각형으로 된 본체(프라이)를 본체 수납 케이스 크기에
들어가는 폭으로 접으세요.
⑥케이스 폭이 된 본체(플라이)를 바닥면 쪽으로 공기를
빼면서 말아갑니다. 이너텐트는 ④에서 열어둔
지퍼(패스너)쪽으로 공기를 빼면서 말아갑니다.
⑦본체(플라이)와이너텐트를 함께 묶어 부속품인 컴프레션
벨트로 체결합니다. ⑧프레임은 프레임 수납케이스에 넣고, 본체(플라이)와
이너텐트, 펙은 본체 수납케이스에 각각 수납합니다.
④이너룸도어패널 하단의 지퍼는 내부의 공기를 빼기 쉽게
하기 위해 비워두시기 바랍니다.
⑤본체 (프라이)와마찬가지로 본체 수납 케이스 사이즈에
들어가도록접어주십시오.
11
공기중에 포함되어 있는 수분이 급격히 차가워져 이슬처럼맺치는 것을 결로라고 합니다. 특히 좁은 텐트 등의 공간에서는
통상 실내보다도 수증기의 농도가 높아져, 결로의 발생 확율이 더 높아집니다. 원인으로서는 인체 구성요소의 60%를
점유하는 수분이 호흡이나 땀등으로 방출되어 수증기가 되어 텐트 내부에 결로가 발생합니다. 텐트 안에서는 특히
플라이시트, 바닥부분 등의 방수성능이 높은 부분에 결로가 발생하기 쉽고, 결로는 뛰어난 투습소재라도 사용 상황에 따라
발생하는 등 완전한 해소는 불가능합니다. 사용중에는 결로를 줄이기 위해 적절한 환기를 해주십시오.
결로에 대해
● 본체가 충분히 건조된 후 수납해 주십시오.
● 설영 후 빌딩 테이프를 분리한 경우는, 철수 전에 빌딩 테이프의 Y자형과 I자형버클을 세팅합니다. 다음번 설영
시에 펙다운의 위치가 결정되기 쉬워집니다.
 ※ Y, I자형부분의 펙다운을 본체 외부에서 했을 경우 본체가 넓어져, 철수 시에 재세팅하기 어려워지므로
실내측에서 펙다운되는 것을 권장합니다.
● 프레임을 핀에서 분리할 때는 프레임이 튀어 나올수 있어 위험합니다. 프레임이 일직선이 될 때까지 손을 떼지 말아
주세요.
● 슬리브에서 프레임을 꺼낼 때는, 반드시 밀어서 꺼내십시오.
 ※ 프레임을 당겨꺼내면, 슬리브 안에서 연결부가 분리될 수 있어 원단을 손상시킬수 있습니다.
● 강풍시에는 바람이 잠잠해지기를 기다렸다가 철수하시기 바랍니다.
● 이너룸을 설치했을 경우나, 다른텐트/타프 등을 함께 사용하고 있었을 경우는, 반드시 이너룸이나 함께 사용하고
있던제품을 본체에서 분리한 후 철수하기 시작해 주십시오.
● 쉘터 안에 아무것도 들어 있지 않은지와, 모든패널과 창문의 지퍼가 닫혀 있는지 확인하고 나서 철수를 시작해
주세요.
● 철수 전에 모든빌딩 테이프가 연결되어 있는지 확인하십시오. 다음번 설영 시에 펙다운하기 쉬워집니다.
● 프레임은 반드시 매번 중앙부근에서 접으세요. 끝에서 접으면 프레임 내부의 쇼트 코드가 늘어나거나 끊어짐,
프레임의 구부러짐이나 부러짐의 원인이 됩니다.
● 펙은 모두 뺀후에는 뭍어있는 흙등의 오염을 제거하고 펙 케이스에 머리를 아래로 향하게 수납하십시오. 프레임은
모두 프레임 케이스에 수납하세요. 노출상태로 수납하면, 본체 원단이나 수납 케이스 등에 흠집이 날 수 있습니다.
철수 및 수납 시 주의사항
발수・방수성능에 대해
●본 제품은 원단에 고성능 발수 가공을 하고 있어 원단 특성상 발수성능(발수의 사양이나 내구성)은 다소의 차이가
있습니다. 사용을 해가는 빈도와환경에 따라 발수성능은 저하하므로 성능이 저하된 경우는 시판하는 하는 발수
스프레이 등으로 해당 상품의 사용설명서를 잘 읽고 사용해주십시오.
●방수성이 높은 원단을 사용하고 있으나, 지면의 물웅덩이 등에 장시간 접촉하고 있으면 빗물이 흡수됩니다.
●농약 등으로 PU코팅이 파손되어 내수압이 이상 저하가 발생할 수 있습니다. 이 증상으로 판단하는 경우, 제품의
보증이 불가능하므로 주의해주세요.
●발수제의 영향으로 로그마크가 벗겨질 수 있습니다.
● 본체의 원단에는 UV차단 가공을 했습니다.
 ※UV차단 가공은, 자외선이 인체에 미치는 영향이나, 소재 노화를 방지하는 것이 아닙니다.
● 원단의 소재는 장시간 햇빛에 노출된 경우, 탈색이나 원단 열화 등의 강도 저하를 일으키므로, 상설용으로 사용하지
마십시오.
● 자외선의 영향이라고 생각되는 소재의 열화에 의해, 내구 정도를 넘은 것은 당사에서도 수리할 수 없는 경우가
있습니다.
자외선 영향에 대해
12
● 장기간 사용하지 않으셨던 제품을 다시 사용하실때는, 제품 및 내용물을 잘 점검하십시오. 궁금한 점이 있으시면
당사 유저서비스로 연락주십시오.
● 본 제품은 폴리에스테르 원단을 조합하여 사용하고 있습니다. 원단 특성을 고려하여 최대한 이염이 잘 되지 않는
가공과 배색패턴을 사용하였으나 보관 상태등에 따라 이염이 발생할 수 있습니다. 양해를 부탁드립니다. 또, 젖은
상태로 보관은 피해 주세요.
● 젖은 채로 보관하면 곰팡이, 악취, 원단 이염, 원단 열화 등의 문제의 원인이 되므로 사용 후에는 통풍이 잘되는
그늘에서 충분히 건조하시고, 부드러운 솔등으로 진흙 얼룩을 제거하신 후 보관하십시오.
● 프레임을 체결한 상태에서 제품을 뒤집거나 하지 마십시요. 프레임 파손이나 원단 손상의 원인이 됩니다.
● 프레임은 표면의 오염을 제거하고, 충분히 건조시킨후 보관하십시오. 젖은 채로 보관하면 부식되며강도가
저하됩니다. 조인트 부분은 항상 청결하게 하고 소량의 실리콘계 윤활제를 얇게 도포하여 주십시오. 너무많이
도포하면 원단에 기름때가 생기기 때문에 주의해 주세요. 또한 폴 내부의 쇼트코드는 불필요하게 잡아당기지 말아
주세요.
● 프레임을 수납할 때는, 중앙에서 부터 접으세요. (그림A)
● 고온다습한 곳을 피하고 직사광선이 닿지 않는 통풍이 잘 되는
장소에 보관하십시오.
● 지퍼에 진흙이나 모래, 먼지등이 부착된 채로 사용하면 마모되어 파손의 원인이 되므로, 브러쉬 등을 사용하여 항상
청결하게 해주십시오 .또한 슬라이더의 움직임을 부드럽게 하기 위해 소량의 실리콘계 수지제를 정기적으로 도포해
주십시오. 너무도포하면 원단에 기름때가 생기기 때문에 주의해 주세요.
● 작은 원단의 파손은 시판되는 리페어 테이프로 고칠수 있습니다. 보수할 때는 리페어 테이프의 설명서를 잘 읽어
보시기 바랍니다.
● 사용으로 인해 광범위한 소재가 열화되며, 내구 정도를 넘은 것은 수리가 불가능한 경우가 있습니다.
● 심 테이프는 PU 코팅이 손상되지 않을 정도의 온도 설정으로 압착되어 있으나, 사용을 거듭함에 따라 박리되는
경우가 있습니다. 박리가 확인되었을 경우 다림질을 저온으로 설정하여 박리 부위만을 다시 압착하여 주십시오.열을
너무많이 가할 경우 원단의 변색 및 열화가 촉진되오니 주의하시기 바랍니다.심 테이프는 억지로 떼어내지
마십시오. PU 코팅이 함께 벗겨지면 수리하지 못할 수 있습니다.
● 수액이 묻어 버리면 깨끗하게 제거되지 않습니다.수액이 떨어질것 같은 나무밑을 피해 설영하세요. 용액등에 의해
무리하게 제거하면 원단이나 코팅을 손상시킵니다.
● 사용할 때 프레임이 부러져 버린 경우는, 응급처치로 신속하게 부목을 대고, 비닐테이프 등으로 고정시키거나,
철수하십시오.
● 다음캠프에 대비해, 상기대로 충분히 보수,점검을 해주십시오.
 
그림A
13
FES-091 Pro. RED FRAME EDITION
385cm 240cm
625cm
405cm 205cm
190cm
●세트내용 :본체, 이너룸, A프레임 (×2), C프레임 (×2), 센터
프레임, 릿지폴, 업라이트폴, 두랄루민 펙 (21cm × 31), 스토퍼
로프 (두갈래용 7m×2, 3.5m×6, 2.5m×4, 1.5m×2), 심그립제,
프레임 케이스, 본체 케이스, 컴프레션 벨트 (×2)
●재질:루프 부분 /210D폴리 에스테르 립스탑차광 피그먼트 PU
코팅 내수압3,000mm 미니멈·UV 컷가공 ·테플론발수 가공, 벽
부분 /210D폴리 에스테르 립스탑PU 코팅 내수압1,800mm
미니멈·UV 컷가공 테프론발수 가공, 머드 스커트 /210D폴리
에스테르 옥스 ·PU 코팅, 이너 월/68D폴리 에스테르 태피터,
바닥/210D폴리 에스테르 옥스 ·PU 코팅 내수압1,800mm
미니멈프레임 /A6061 (ø19mm +ø22mm)
●수납케이스 사이즈:본체케이스 /77×35×37cm, 프레임케이스
/73×20×23cm
●중량/28.5kg (본체, 부속품포함)
●대응인원 /6명

()  
서울특별시 양천구 목2동 507-17(공항대로 602)
TEL) 1661-1958FAX) 02-6203-1959
www.snowpeak.co.kr
MADE INCHINA
문의 사항이나 의문점이 있으시면 판매점
또는 본사 유저서비스에 문의하십시오.
 
0262031266
(09:00~18:00)
14
Instruction Manual Ver 1.00
Land Lock Pro.
Red Frame Edition
FES-091
15
Ⓑ
Peg Case x 1
Rope with Rope Tensioner
(Forked 7m (23') x 2,
3.5m(11’5”) x 6,
2.5m(8'3”) x 4,
1.5m(4’9’) x 2
A pole x 2
C pole x 2
Center Pole x 1
Ridge pole x 1
Upright Pole x 2
Pole Carry Bag x 1Carry Bag x 1
Duralumin Peg
(21cm x 31) 8.3”
x 31
Seam Grip
Agent x 1
□Contents are based on setup in general conditions. If you prepare a sturdy and long peg or a spare
rope, you can be flexible for various conditions. Always carry a spare as the peg, rope, and rope
stoppers are consumable items that wear out over time.
■Due to the product’s structure, seam processing is not possible in the following places, which
may give way for water penetration. Apply a seam sealer on the outer stitching where you find a
risk of water penetration to prevent water from entering through the seams.
1. Sewing holes for loops and toggles Ⓐ
2. Outside sewing holes for zipper rails Ⓑ
Door panel top
There are six toggles.
(Same for the other side.)
Toggle x 6
Stitching Ⓐ
Main body x 1
Compression Belt x 2
Inner Room x 1
Instruction
Manual x 1
Contents
Thank you very much for purchasing a Snow Peak product. This product is a shelter/tent hybrid
designed for camping. To use this product safely and correctly, read these instructions carefully. Keep
this manual in a safe place for future reference. If you find anything in the instruction manual difficult to
understand, or find the product to be defective, stop using it immediately. Contact the dealers where the
product was purchased or reach out to Snow Peak’s Customer Service for repairs and replacements.
Please check that all accessory items are included before attempting to assemble the product.
16
Before use: please read thoroughly to ensure safety and avoid accidents.
Misuse may result in a serious accident or death.DANGER
Misuse could result in a potentially hazardous situation that can result in serious injury or death to the user.
WARNING
Misuse could result in injury to the user and/or damage to property.
CAUTION
●The shelter’s material is not flame-proof. Therefore, do not use combustion-based heat
sources such as lanterns, stoves, heaters, or open flames such as matches, candles,
lighters, or cigarettes inside the tent. The use of such heat or light sources inside a
small enclosed space is dangerous and may result in fire, oxygen deficiency, or carbon
monoxide poisoning.
●Do not keep fuel or flammable items for replenishing the fuel inside the shelter.
●Before using the product, check each part for abnormalities. If there are abnormalities, take
the product to your reseller or Snow Peak’s Customer Service Team for inspection and
repair.
●Pay close attention to the weather. If extreme weather is in the forecast, pack up camp and
evacuate to a safe place.
●Do not bring heated items into the tent when they are at high temperatures. Very high
temperatures inside of the tent may cause fire or heatstroke.
●Hot weather will cause high temperatures in the shelter, leading to a higher risk of heatstroke.
Pay close attention to temperatures, particularly when children are asleep inside the tent.
●Choose a flat, well-drained area with firm ground to pitch the tent. The area should have no
chance of avalanches, landslides, wind gusts, or sudden flooding.
●It is dangerous if the mud skirt of the door panel is covered with snow or if it is piled high on
the ceiling due to the sudden snow. Please ensure ventilation by removing snow frequently
and opening the entrance.
●This product is not intended to be in permanent use, as it may fade or deteriorate if exposed to
sunlight over a long period of time.
●Sunlight can cause the surface of the fly to heat up, potentially causing low-temperature burns.
●Flying sparks can create holes in the tent fabric. Do not assemble or use the tent close to a bonfire,
fireworks, or areas where a fire is present. When setting up and disassembling, make sure there is no
fire around.
●Firmly hold the tent pole when assembling and disassembling the tent. Pole ends recoiling may lead
to unexpected accidents, so ensure that the surroundings are safe with no bystanders in the vicinity.
Be sure to work with two or more people.
●Secure the shelter firmly with pegs and ropes.
●It is made of thin fabric, so it may break if you pull the fabric too much. Please be careful.
●Watch your feet when utilizing the building tape, rope and peg. It may offset your balance and cause
an unexpected accident.
●By correctly stretching the rope, you can obtain strength that can withstand wind and rain.
When using, please make sure to use all ropes according to the instruction manual.
●The inner room has a loop to hang small items. Please only use with items less than 1 kg.
17
Ridge pole
A pole
Set A pole on the Ridge pole
in a disassembled state
Set A pole on the Ridge pole
in a disassembled state
■Part Names
①Spread the main body on a flat
area. Consider the orientation of
the two doorway panels.
Note: Make sure all three building
tapes are buckled. If it is
disconnected, make sure to
connect them before setup.
②First, put the dark blue tip of the ridge pole into the sleeve of the dark blue tape in the center. Next, insert the
ridge pole so that the two dark blue stickers on the A ridge joint part outward. Confirm that the edge of the ridge
pole is firmly inserted into the end of the A pole joint part, and then insert the center ring as if pushing it all the
way in and hook it. (Figure A) At this point, please loosen the tape of the center ring without applying tension.
Next, insert the ridge pole into the A pole on the opposite side.
Note: When setting the A pole on the ridge pole, do not set it after connecting all the A poles, and set it on the ridge
pole while leaving the left and right upper ones apart. (Figure B) By setting it and then starting to raise the A pole,
you can reduce the stress on the joint and set it up easily.
WARNING: Before using the product, check each part for abnormalities. If there are abnormalities, take
the product to a dealer or Snow Peak Customer Service for inspection or repair.
Setup procedure
Make sure that two or more people take part in the setup.
Ridge pole
A pole
A pole
C pole
C pole
Ventilation
Mesh window
Center Pole
Side door panel
Sidewall
Door panel
Upright pole
Land Lock main body
Door panel
(Entrance / Exit)
Door panel
(Entrance / Exit)
Three building tapes attached to the hem of the main body
Ridge pole Ridge pole
A pole
Sleeve (dark blue)
Sleeve
(dark blue)
Dark blue
seal
Ridge pole tip (Dark Blue)
Main body
A: Pole joint section
A pole
Center ring
Center ring
(Figure A)
(Figure B)
18
C pole with black sticker
③Hold the ring pin with the dark blue peg down loop on the hem of the body and insert it into the A pole. (4 places)
Adjust the tension of the tape by pulling the belt with center rings on both sides. At this time, please hook the
plastic hook in the upper part of the A pole beforehand.
Note: When inserting the ring pin into the A pole end, hold the pole ends firmly
so that it does not move, and insert carefully so that your finger does not get
caught. If you lift the pole, a load will be
applied to the opposite side, and there is
a risk of bending the end of the ridge pole.
If you lift the ring pin largely in the direction of the arrow when inserting it, there
is a risk that the load will be applied to the ridge pole of the A pole joint on the
opposite side, and the ring pin will be bent. Therefore, please check the situation
on the opposite side before inserting it.
④Connect the C pole with the black sticker on the tip node little by little and pass it through the sleeve with the
black tape. Next, in the same way as ③, insert a ring pin with a black peg down loop to the tip of the C pole.
After setting up one C pole, please set up the other C pole as well.
Note: Please pass C pole through sleeve little by little. The C pole should pass through the outside of the A pole.
⑤Connect the center pole, which is red on both ends, little by little, and pass it through the center sleeve with the
red tape in the center of Land Lock. Next, insert the ring pin with the red peg down loop in the same way as ③
into the pole end with the red seal on both ends.
When you pass the pole
through the sleeve, it is
convenient to open the side
door panel and get closer to
the main body.
When you connect poles little by
little, please ensure that the pole
sections are firmly connected before
passing them through the sleeve.
Ring
Tip of A pole
(dark blue)
Main body
Ring pin
Peg down loop
(dark blue)
Hang the hook only
on the upper A pole
It bends under load.
C pole
Black tape
Sleeve
Sleeve with
black tape
When you connect poles little by
little, please make sure each
section of the pole is firmly
connected before passing them
through the sleeve.
Center pole
Tip of the center pole
without seal
Red tape
Sleeve
Sleeve with red tape
Side door panel
Ring pin
Peg down loop (red)
Ring
19
⑥Please hook the plastic hooks from top to bottom to the A pole / C pole / center pole. Fix the crossing part of
poles with tape with Velcro through the o-ring.
* For the tension rope of the crossing
part of poles /Center pole part, turn
the O-ring tape sewn on the body
around the crossing part of poles
/center pole part for one turn and
apply tension to the tension rope.
Note: To maintain the pole’s stability
amidst windier weather conditions,
peg down the main body and the
extension ropes firmly.
⑦Place the Duralumin peg through the loop attached to the ring pin on the hem and peg down all the loops inside
the room. Peg down the rope firmly. Use the provided upright pole and a forked-end rope to lift the entrance/exit
door panel. Adjust the direction of the rope so that no wrinkles remain.
Note: When it rains, the door panel tends to fill with water, so either tilt the pole and make a gradient or use a short
pole and pull down the center of the front with a large V-shaped rope so that water can escape.
* Crossing part pole
Plastic hook
Pole
C pole
A pole
O-ring
Forked-end rope 7m(22’9”)
Upright pole 3.5m(11’5”) rope
3.5m(11’5”) rope
2.5m(8’3”) rope
1.5m(4’9’)
rope
2.5m(8’3”) rope
C pole
A pole
O-ring
Rope
Make a water escape route
in the shape of a V.

This manual suits for next models

1

Other Snow Peak Tent manuals

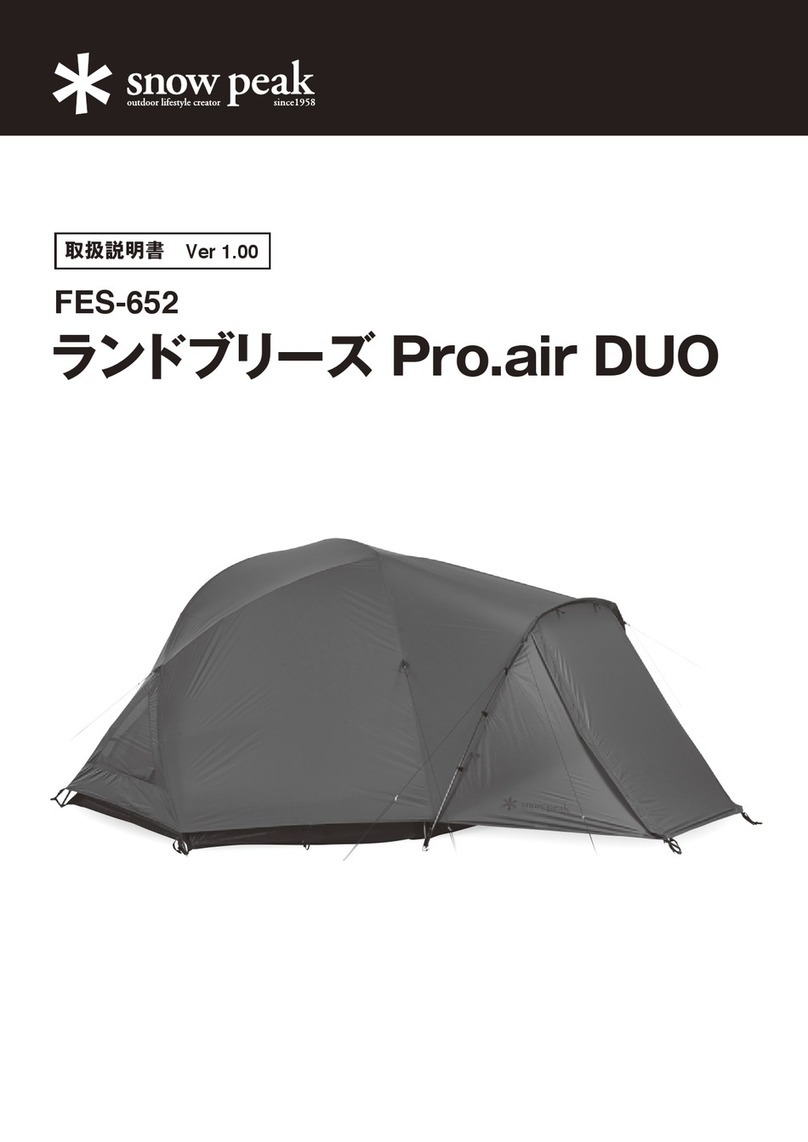
Snow Peak Vault User manual

Snow Peak

Snow Peak Vault User manual

Snow Peak Living Lodge M User manual

Snow Peak

Snow Peak Living Lodge M User manual

Snow Peak Amenity Dome L User manual

Snow Peak

Snow Peak Amenity Dome L User manual

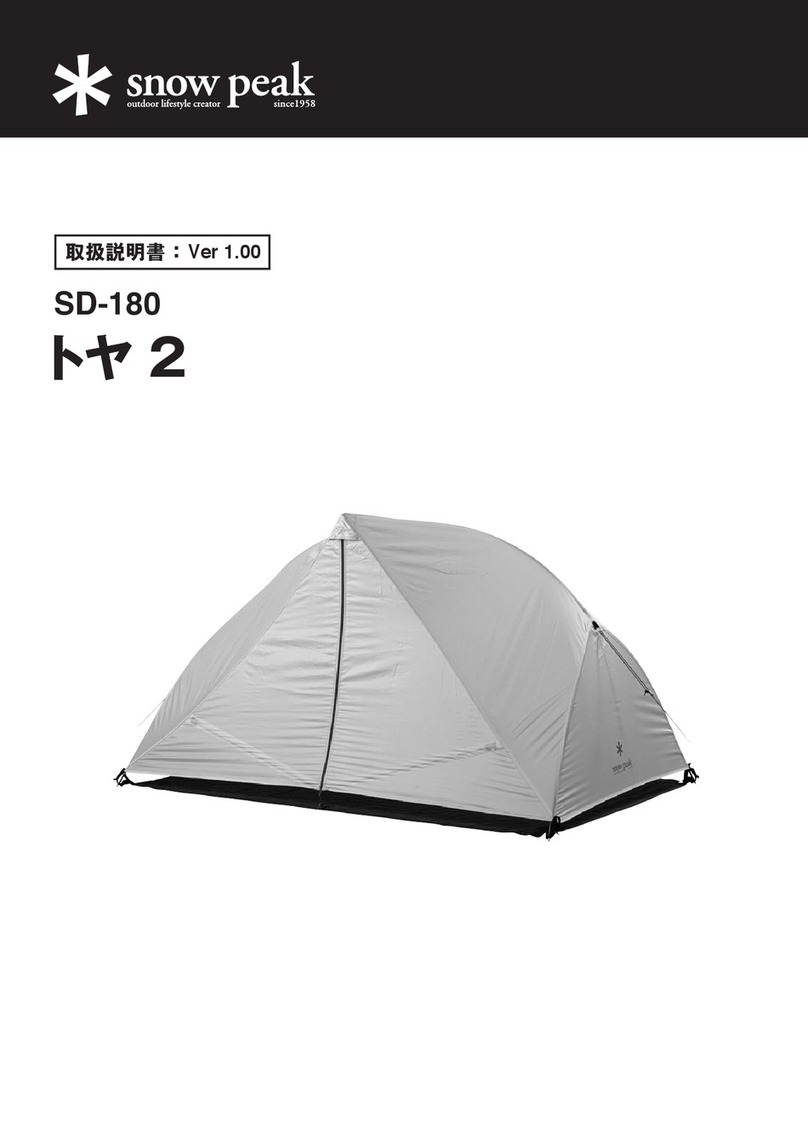
Snow Peak Toya 2 User manual

Snow Peak

Snow Peak Toya 2 User manual

Snow Peak Land Breeze Pro Air Duo User manual
Snow Peak

Snow Peak Land Breeze Pro Air Duo User manual

Snow Peak SD-651 User manual

Snow Peak

Snow Peak SD-651 User manual

Snow Peak Lago 1 Ivory User manual

Snow Peak

Snow Peak Lago 1 Ivory User manual

Snow Peak Takibi Tarp Hexa Set M User manual

Snow Peak

Snow Peak Takibi Tarp Hexa Set M User manual

Snow Peak SSD-630-1 User manual

Snow Peak

Snow Peak SSD-630-1 User manual

Snow Peak Amenity Dome M User manual

Snow Peak

Snow Peak Amenity Dome M User manual

Snow Peak SDE-260IR User manual

Snow Peak

Snow Peak SDE-260IR User manual

Snow Peak Penta Pro.air 1 User manual

Snow Peak

Snow Peak Penta Pro.air 1 User manual

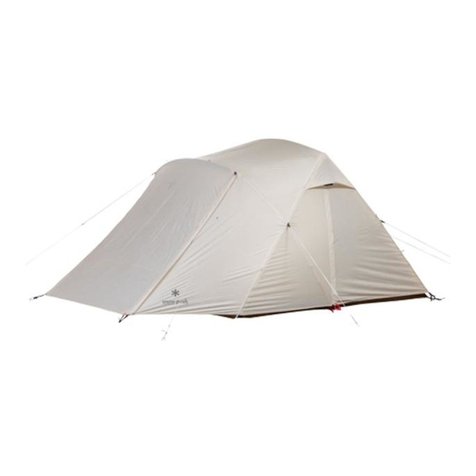
Snow Peak Land Nest Dome Small User manual

Snow Peak

Snow Peak Land Nest Dome Small User manual

Snow Peak Alpha Breeze User manual

Snow Peak

Snow Peak Alpha Breeze User manual
Snow Peak Amenity Dome S User manual

Snow Peak

Snow Peak Amenity Dome S User manual

Snow Peak Entry Pack TT User manual

Snow Peak

Snow Peak Entry Pack TT User manual

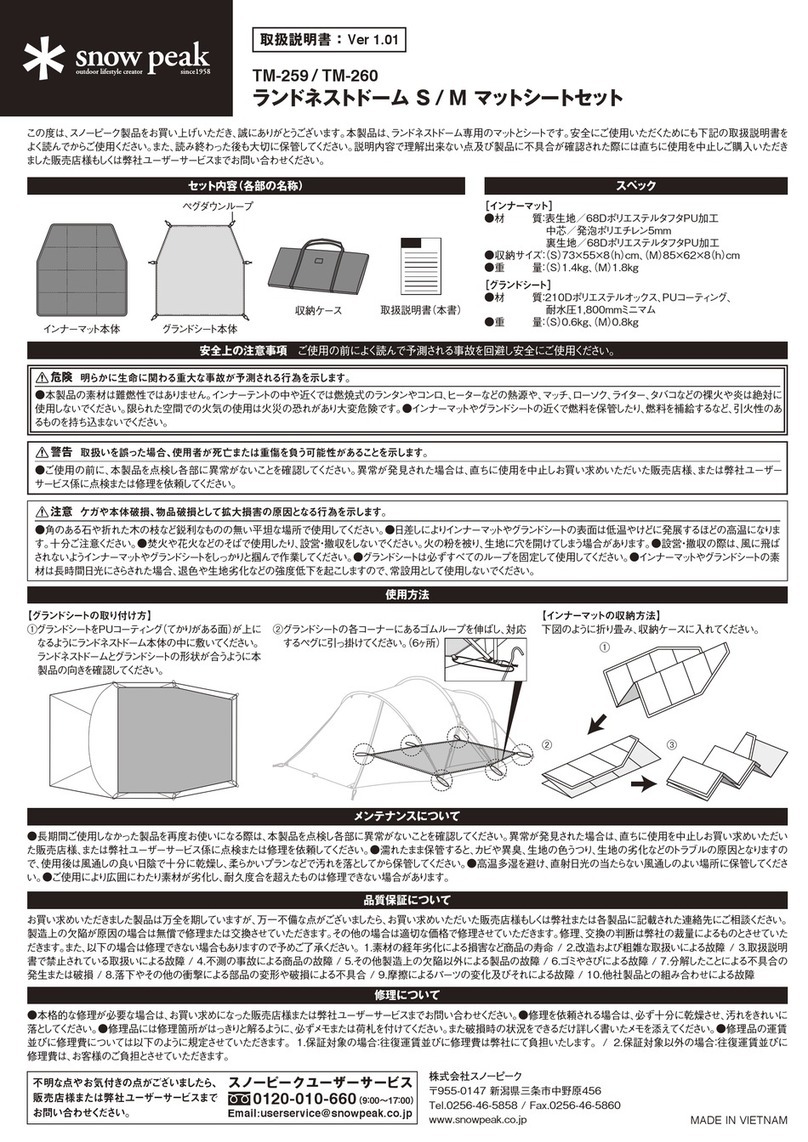
Snow Peak TM-259 User manual

Snow Peak

Snow Peak TM-259 User manual

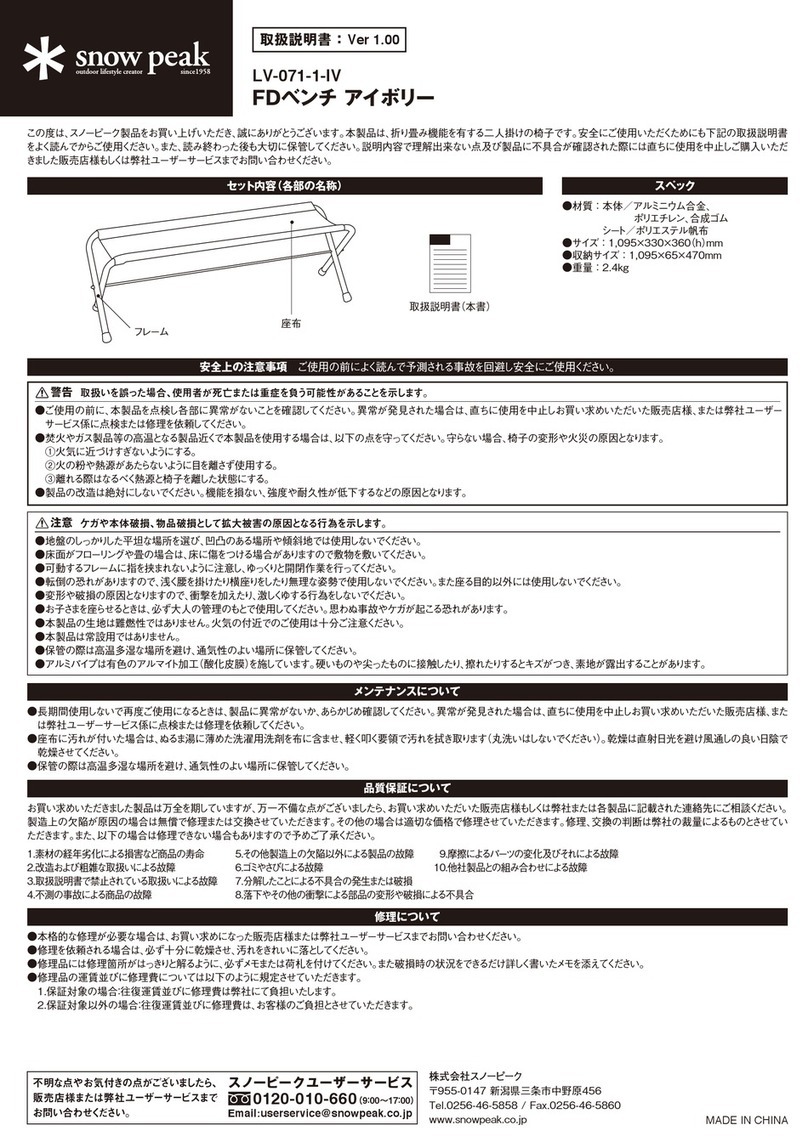
Snow Peak LV-071-1-IV User manual

Snow Peak

Snow Peak LV-071-1-IV User manual
Snow Peak Amenity Dome Small in Ivory User manual

Snow Peak

Snow Peak Amenity Dome Small in Ivory User manual

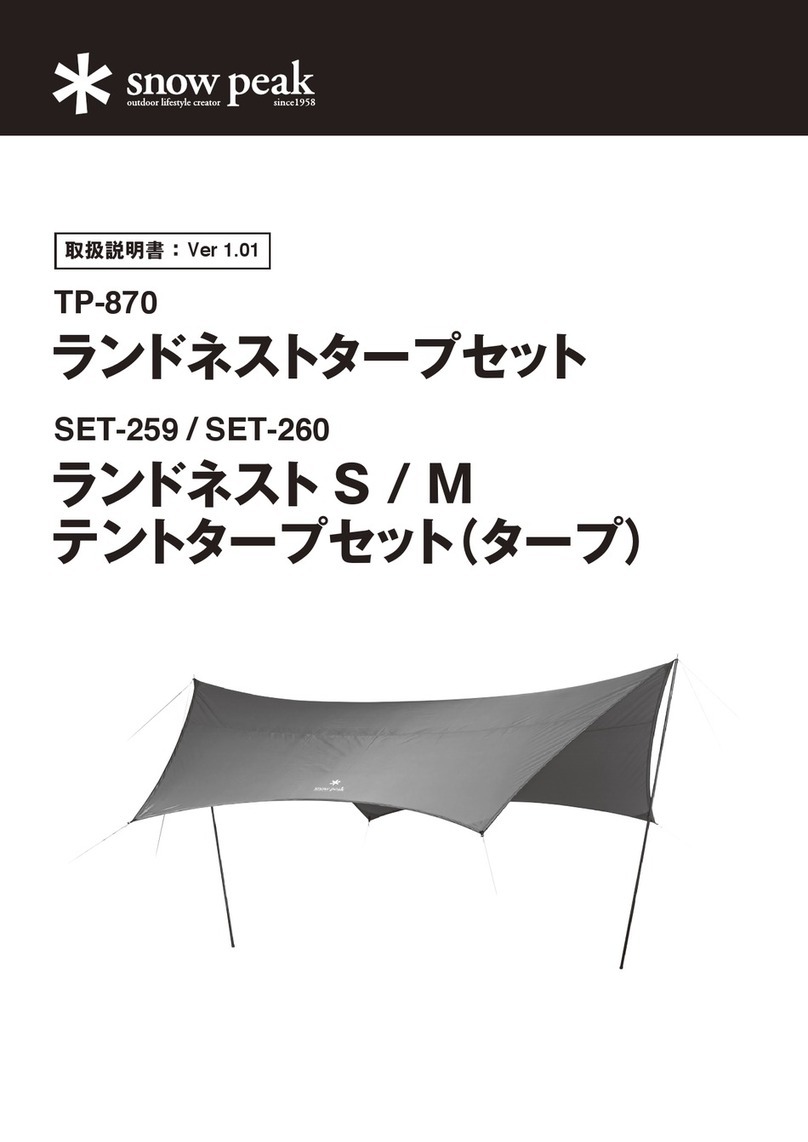
Snow Peak TP-870 User manual

Snow Peak

Snow Peak TP-870 User manual

Snow Peak Land Nest Dome User manual

Snow Peak

Snow Peak Land Nest Dome User manual

Snow Peak FES-195 User manual

Snow Peak

Snow Peak FES-195 User manual
Popular Tent manuals by other brands

Kampa Brighton 2 Installation and operating manual

Kampa

Kampa Brighton 2 Installation and operating manual

VEVOR 0010 user manual

VEVOR

VEVOR 0010 user manual

BIRK OUTDOOR CT010993 manual

BIRK OUTDOOR

BIRK OUTDOOR CT010993 manual

skandika outdoor Oulu 4 Setup Instruction

skandika outdoor

skandika outdoor Oulu 4 Setup Instruction

Carefree PIONEER LITE installation manual

Carefree

Carefree PIONEER LITE installation manual

Wild Country Cabin 108 Assembly instructions

Wild Country

Wild Country Cabin 108 Assembly instructions

Torpedo7 Large 6 Tent instructions

Torpedo7

Torpedo7 Large 6 Tent instructions

Ohenry Productions 20x30 quick start guide

Ohenry Productions

Ohenry Productions 20x30 quick start guide

telluria GARAGE 3654 Assembly instructions

telluria

telluria GARAGE 3654 Assembly instructions

skandika outdoor CAMPER Setup Instruction

skandika outdoor

skandika outdoor CAMPER Setup Instruction

Crua Outdoors X-Tent Instruction guide

Crua Outdoors

Crua Outdoors X-Tent Instruction guide

XL displays Star Tent Assembly instructions

XL displays

XL displays Star Tent Assembly instructions

KING CANOPY Enclosed Universal BJ2PC manual

KING CANOPY

KING CANOPY Enclosed Universal BJ2PC manual

Mocka Minka House Assembly instructions

Mocka

Mocka Minka House Assembly instructions

Overland Vehicle Systems LD Tact quick start guide

Overland Vehicle Systems

Overland Vehicle Systems LD Tact quick start guide

Nemo HORNET ELITE Series Instructions for setup

Nemo

Nemo HORNET ELITE Series Instructions for setup

Clam Quick-Set Escape Series owner's manual

Clam

Clam Quick-Set Escape Series owner's manual

Coleman ELITE WEATHERMASTER 2000005748 user manual

Coleman

Coleman ELITE WEATHERMASTER 2000005748 user manual

manuals.online logo
manuals.online logoBrands
  • About & Mission
  • Contact us
  • Privacy Policy
  • Terms and Conditions

Copyright 2025 Manuals.Online. All Rights Reserved.