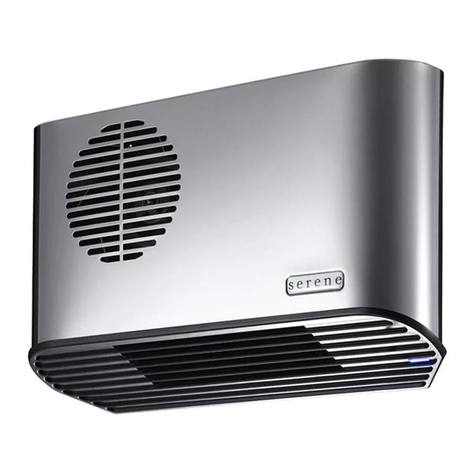
Soler & Palau CB-2005 User manual

1
CB-2005
CB-2005 TS
Calefactor de baño
Bathroom fan heater
Radiateur soufflant
Termoventilatore da bagno
Aquecedor de casa de banho
Thermoventilator voor de badkamer
Manual de instalación. Instrucciones de uso
Installation manual. Instructions for use
Manuel d'installation. Conseils d'utilisation
Manuale di installazione e istruzioni per l'uso
Manual de instalação. Instruções de utilização
Installatiehandleiding. Gebruiksaanwijzingen

2

3

4
GENERAL
- Le agradecemos la confianza que nos ha depositado mediante la compra de
este aparato. Usted ha adquirido un producto de calidad que ha sido totalmente
fabricado según reglas técnicas de seguridad reconocidas y conformes a las nor-
mas CE.
- Sirvase leer atentamente estas instrucciones antes de la puesta en funciona-
miento y guárdelas para futuras referencias.
- Rogamos compruebe el perfecto estado y funcionamiento del aparato al desem-
balarlo ya que cualquier defecto de origen que presente está amparado por la
garantía S&P.
ADVERTENCIAS DE SEGURIDAD
- Este producto no lo deben utilizar personas (niños incluidos) con capacidades
físicas, sensoriales o mentales reducidas, o con experiencia y conocimientos ina-
decuados, si no están bajo la supervisión de una persona responsable de su
seguridad o si dicha persona no les ha instruido adecuadamente. Los niños
deben ser vigilados para asegurarse de que no jueguen con el producto.
- Este calefactor es una fuente de calefacción auxiliar y se debe utilizar exclusiva-
mente con este fin.
- Asegúrese de que la alimentación de red se corresponde con los datos de la
placa: 230V CA, 50Hz.
- Nunca se vaya de casa dejando en funcionamiento el calefactor. En ese caso,
asegúrese siempre de que el temporizador (si está presente) esté en posición OFF
(0) y de que el termostato esté al mínimo (*).
- Durante el funcionamiento, coloque el calefactor en una posición segura, es
decir:
- A al menos 1m de objetos inflamables o muebles;
- Dejando libre la parrilla de salida del aire: no debe haber ningún objeto en el
radio de 1m de la parrilla de salida;
- Nunca colocado justo debajo de una toma de corriente.
- No deje que los animales o los niños jueguen con el calefactor o lo toquen.
¡Atención! Durante el funcionamiento, la parrilla de salida del aire se puede calen-
tar mucho (más de 80ºC = 175ºF);
- IMPORTANTE: para evitar sobrecalentamientos, no cubra nunca el produc-
to. Nunca apoye ningún objeto o manta sobre el aparato mientras está funcionan-
do. Esto está escrito claramente en el aparato o ilustrado por el símbolo
ESPAÑOL

5
- Nunca utilice el calefactor en habitaciones saturadas de gases explosivos, de
vapores generados por solventes y pinturas o, en todo caso, de vapores, gases
inflamables.
- Si el cable está dañado y lo debe sustituir, no realice esta operación usted solo;
lleve el calefactor a nuestros Talleres de Reparación o por personal similar cuali-
ficado, ya que es necesaria la intervención de personal especializado con el fin de
evitar cualquier riesgo de averías.
- No utilice este calefactorr cerca de duchas, bañeras o lavabos.
- La conexión fija solamente podrá efectuarse en redes de cables que estén equi-
padas con un dispositivo de separación omnipolar con una apertura de contac-
tos de 3 mm como mínimo en todos los polos.
- El calefactor se debe colocar de tal manera que la toma de alimentación esté
siempre al alcance.
- No instale el producto en paredes de material sintético.
CONEXIÓN ELÉCTRICA
- Utilice el calefactor solo instalado en la pared y en posición vertical;
- El calefactor está realizado con doble aislamiento eléctrico (clase II) y, por tanto,
no requiere conexión a tierra.
- El calefactor tiene un grado de protección del agua de IPX4. Por lo tanto, se
puede utilizar en cuartos de baño o en lugares húmedos, pero NO SE PUEDE INS-
TALAR DENTRO DEL PERÍMETRO DE LA BAÑERA O DE LA DUCHA. Por lo tanto,
no lo instale en las zonas indicadas como VOLUMEN 1 en la figura 1.
- Los mandos de regulación no deben ser accesibles en ningún caso por parte de
personas que estén dentro de la bañera o de la ducha.
- Los dispositivos de conexión de la red de alimentación deben permitir la desco-
nexión completa en las condiciones de la categoría de sobretensiones III.
- La instalación se debe realizar adecuadamente y conforme a la normativa vigen-
te en su país.
INSTALACIÓN
- En caso de la versión del producto dotada de soporte porta toallas, ANTES DE
INSTALAR EL PRODUCTO EN LA PARED:
- Introduzca el soporte para toallas en los orificios específicos que están por
debajo del producto (figura 2).
- Fije los 4 tornillos (cortos) que se encuentran en la bolsa (figura 3).
- La distancia mínima desde el suelo que aparece en la figura 4 (30cm) se debe
modificar y aumentar a 60cm.
- El aparato se debe instalar en la pared, respetando las distancias mínimas res-
pecto al techo, al suelo y a las paredes laterales indicadas en la figura 4.
- Realice en la pared 3 orificios de 6mm de diámetro, con una distancia entre ellos
según lo indicado en la figura 5.
- Introduzca los tres tacos que incluye el producto.

6
- Introduzca los 2 tornillos incluidos en la misma bolsa en la parte superior, con
cuidado de dejar 8mm entre la cabeza del tornillo y la pared.
- Ajuste el producto a los 2 tornillos que ha fijado sujetándolo siempre firmemen-
te con las manos. ¡ATENCIÓN! Antes de soltar el producto compruebe que esté
bien sujeto a los 2 tornillos.
- Por último, sujete el producto con el tercer tornillo en la parte inferior (figura 6).
USO DEL CALEFACTOR
Su producto cuenta con los mandos indicados en la figura 7.
Modelo con termostato
- Empezando por la posición de anticongelamiento, marcada por el símbolo “ ”,
gire el mando del termostato en sentido horario hasta que no oiga un “clic”: de
esta manera, el producto empieza a funcionar a 1800W de potencia y el señala-
dor luminoso se ilumina.
- El termostato mantiene la temperatura ambiente deseada encendiendo y apa-
gando automáticamente el calefactor. Cuanto más se gira el mando en sentido
horario, con un número más alto en posición, más alta será la temperatura ofre-
cida. La posición máxima del termostato se corresponde con unos 35ºC; la míni-
ma (*), con unos 5ºC.
Uso del termostato
- En una habitación en la que la temperatura supera los 35ºC, es normal que el
termostato, aunque esté situado al máximo, no encienda el calefactor.
- Viceversa, en una habitación con una temperatura demasiado baja (menos de
5°C) es normal que el termostato mantenga continuamente encendido el apara-
to, aunque esté al mínimo.
- Para regular lo mejor posible el termostato, recomendamos este procedimiento:
- Coloque el termostato al máximo y haga funcionar el aparato hasta que alcan-
ce una temperatura confortable;
- Después, gire el mando del termostato en sentido antihorario hasta oír un
“clic” y el aparato se apagará;
- Después vuelva a girar ligeramente (solo un poco) el mando del termostato en
sentido horario;
- En esta posición, el termostato mantendrá la temperatura ambiente que ha
elegido.
Modelo con termostato y temporizador de 60’
- El calefactor incluye dos mandos: uno para el temporizador de 60’ y otro para
el termostato.
- El producto permite configurar 2 modos diferentes de funcionamiento:
•Calentamiento del ambiente con mantenimiento de la temperatura:
Empezando por la posición de anticongelamiento, marcada por el símbolo

7
“ ”, gire el mando del termostato en sentido horario hasta que no oiga un
“clic”: de esta manera, el producto empieza a funcionar a 1000W de potencia
y el señalador luminoso se ilumina.
El termostato mantiene la temperatura ambiente deseada encendiendo y apa-
gando automáticamente el calefactor. Cuanto más se gira el mando en senti-
do horario, con un número más alto en posición, más alta será la temperatura
ofrecida. La posición máxima del termostato se corresponde con unos 35ºC;
la mínima (*), con unos 5ºC.
Para regular el termostato, ver el capítulo USO DEL TERMOSTATO del aparta-
do anterior.
• Calentamiento rápido del ambiente:
Regule el termostato de ambiente según la temperatura deseada y después
gire el mando del temporizador seleccionando el tiempo de funcionamiento
deseado. El producto funciona a 1800W de potencia para el tiempo configu-
rado, produciendo un calentamiento rápido de la habitación, y después, a una
potencia de 1000W, asegurará el mantenimiento de la temperatura ambiente
regulada por el termostato.
- Cuando el producto funciona a 1800W, bajo el control del temporizador, el ter-
mostato no controla la temperatura del ambiente. En estas condiciones, no utili-
ce el calefactor en ambientes de pequeñas dimensiones si en estos se encuen-
tran personas (niños incluidos) que no puedan irse de la habitación solos y que
no estén bajo constante supervisió de una persona responsable de su seguridad.
PROTECCIÓN ANTIHELADAS
- El CB-2005 incorpora un dispositivo antiheladas que hace que el aparato se
ponga en funcionamiento cuando la temperatura ambiente desciende de +5ºC.
Para accionar este dispositivo basta con conectar el aparato a la red y colocar el
mando termostatoen posición *. Si la temperatura ambiente desciende de +5ºC
automáticamente sepondrá en funcionamiento manteniendo la temperatura
ambiental de +5ºC. Este dispositivo es especialmente beneficioso en lugares
donde se alcanzan bajas temperaturas y es facil que se hiele el agua de las tube-
rias, etc.
FILTRO
- Su producto incluye un filtro para proteger los elementos calefactores del polvo
y de la suciedad.
- El filtro se puede introducir tanto por la izquierda como por la derecha y se
puede quitar (figura 8).
- Para un buen funcionamiento del producto, le recomendamos que limpie el fil-
tro una vez cada 6 meses ACORDÁNDOSE DE VOLVERLO A MONTAR EN EL
PRODUCTO.

8
BARRA PORTA TOALLAS
- La barra porta toallas le permite calentar hasta 2 toallas a la vez.
- Las toallas se deben colocar correctamente en el soporte, tal y como indica la
figura 9, y NO como indica la figura 10, para evitar sobrecalentamientos y funcio-
namientos incorrectos.
SEGURIDAD EN CASO DE FUNCIONAMIENTO ANORMAL
- En caso de sobrecalentamiento, el sistema de protección del aparato desactiva
automáticamente los elementos calefactores y el motor, interrumpiendo, así, el
funcionamiento del calefactor. En este caso, el producto no funciona pero la lám-
para luminosa está encendida.
- En este caso:
- Apague el calefactor y déjelo enfriar durante unos 15/20 minutos.
- Compruebe que el filtro anti-polvo no esté completamente obstruido y, si es
así, límpielo y vuélvalo a montar.
- Quite otras causas eventuales de sobrecalentamiento (por ej., obstáculos fren-
te a la parrilla de entrada y/o de salida del aire, acumulación anómala de sucie-
dad, etc.);
- Vuelva a encender el calefactor y compruebe si funciona correctamente.
- Para cualquier intervención de mantenimiento en el producto, es necesario
dirigirse a personal especializado y cualificado.
MANTENIMIENTO
- Los calefactores S&P no necesitan un especial mantenimiento. Antes de proce-
der a su limpieza no olvide desconectar el aparato de la red. Limpie la carcasa
con un paño suave impregnado con un detergente no abrasivo.
ASISTENCIA TÉCNICA
- La extensa Red de Servicios Oficiales S&P garantiza una adecuada asistencia
técnica.
- En caso de observar alguna anomalía en el aparato, rogamos se ponga en con-
tacto con cualquiera de los servicios mencionados, donde será debidamente
atendido.
- Cualquier manipulación efectuada por personas ajenas a los Servicios Oficiales
S&P, nos obligaría a cancelar su garantía.

9
ENGLISH
GENERAL
- The CB range of bathroom heaters have been manufactured to the rigorous
standards of production quality laid down by the International Quality Standards.
- All components have been checked and tested at the end of the manufacturing
process.
- Before any installation or connection we would advise that the following
instructions are carefully read and then kept in an accessible area for future
reference.
- All appliances are supplied in perfect condition and operation. However if
found to be defective the unit should be returned to the supplier in accordance
with ther terms of the S&P guaranttee.
FOR YOUR SAFETY
- This appliance is not intended for use by persons (including children) with redu-
ced physical, sensory or mental capabilities, or lack of experience and knowled-
ge, unless thy have been given supervision or instruction concerning use of the
appliance by a person responsible for their safety.
- Children must be under watch to avoid that they could play with the product.
- This fan heater is an extra-heating in the house. It must be used according to
this concept.
- Make sure that your supply rating corresponds to what specified on the rating
plate i.e. 230 V AC, 50 Hz.
- Don't leave your home while the appliance is in function: ensure in this case that
the timer (if present) is in OFF (0) position and the thermostat is in minimum posi-
tion timer ( *).
- During function, place the heater in a safe position :
- Far (1 mt. ) from inflammable objects or furnitures;
- Leaving the air outlet space free : 1 mt. of free space in front of the heater;
- Not located immediately below a socket-outlet.
- Do not leave animals or children touch or play with the appliance. Pay attention!
- The air outlet grille gets hot during operation (more than 80°C i.e. 175°F).
- WARNING: In order to avoid overheating, do not cover the heater. Do not
hang anything on the heater and do not cover it while it’s working. This is clearly
written on the cover of the product or shown by the symbol.

10
- Do not use the heater in rooms with explosive gas or while using inflammable
solvents or varnish or glues.
- If the cordset is damaged and you have to change it, do not do the job yoursel-
ves! Take the product to an after sales authorised repair centre or to a person with
similar skill and knowledge, in order to avoid any risk of danger.
- Do not use this heater close to showers, baths, swimming pools.
- The appliance must be positioned so that the plug is always accessible.
- The heater shall not be placed just under a wall socket.
- Do not mount the product on walls made from synthetic material.
ELECTRICAL CONNECTION
- Only use the heater if it has been mounted on the wall in a vertical position;
- This heater is fitted with a double electrical insulation circuit (class II) and there-
fore does not require an earth connection.
- This heater is water resistant to IPX4. It can therefore be used in bathrooms or
other areas subject to humidity AS LONG AS IT IS NOT INSTALLED WITHIN THE
PERIMETER OF BATH TUBS OR SHOWERS. This means that it cannot be insta-
lled in the areas marked as VOLUME 1 in figure 1.
- It must never be possible for people in the bath tub or shower to reach the
adjustment knob.
- The disconnection devices of the supply rating must enalble the complete dis-
connection in case of the category of overvoltage III.
- This heater must be correctly installed in compliance with the legislation in force
in the country of installation.
INSTALLATION
- For the version fitted with a towel rail, BEFORE MOUNTING THE FAN HEATER
ON THE WALL:
- Fit the towel rail into the holes underneath the product, figure 2.
- Insert and tighten the 4 (short) screws contained in the bag, figure 3.
- The mimimum distance from the floor reported in figure 4 (30cm) changes to
60cm.
- Mount the heater on the wall making sure to observe the minimum distances
from the ceiling, floor and other walls, as shown in figure 4.
- Drill three 6 mm diameter holes in the wall, as shown in figure 5.
- Insert the three wall plugs supplied with the product.
- Insert the 2 upper screws, contained in the same bag, taking care to leave a dis-
tance of 8 mm between the head of the screws and the wall.
- Gripping the heater firmly, hook it onto the two screws; CAUTION! Before rele-
asing the heater make sure it is attached to the 2 screws.
- Then secure the product with the lower screw, figure 6.

11
USING THE FAN HEATER
The heater is fitted with the controls shown in figure 7.
Model with thermostat
- Starting from the anti-freeze position “ ”, turn the thermostat knob clockwise
until you hear a “click”: the fan heater starts working at 1800W and the indicator
LED lights up.
- The thermostat maintains the required ambient temperature by automatically tur-
ning the heater on and off. The more the knob is turned clockwise to a higher
number, the higher the ambient temperature will be. The highest position of the
thermostat corresponds to approximately 35°C, the bottom one (*) to about 5°C.
Using the thermostat
- In a room with a temperature in excess of 35°C, the thermostat does not turn on
the fan heater even if it is at maximum.
- Vice-versa, in a room with a very low temperature (below 5°C), the thermostat
keeps the heater constantly on, even if it is at minimum.
- To optimise use of the thermostat, proceed as follows:
- Turn the thermostat knob to maximum and wait until a comfortable temperature
is reached;
- Then turn the thermostat knob anti-clockwise until you hear a “ click” and the
heater turns off;
- Turn the thermostat knob clockwise just a little;
- In this position, the thermostat will maintain the selected ambient temperature.
Model with thermostat and 60’ timer
- This model of fan heater is fitted with two knobs, one for the 60’ timer and the
other for the thermostat.
- 2 different operating modes are available:
•Maintenance of ambient temperature:
Starting from the anti-freeze position “ ”, turn the thermostat knob clock-
wise until you hear a “click”: the fan heater starts working at 1000W and the
indicator LED lights up.
The thermostat maintains the required ambient temperature by automatically
turning the heater on and off. The more the knob is turned clockwise to a hig-
her number, the higher the ambient temperature will be. The highest position
of the thermostat corresponds to approximately 35°C, the bottom one (*) to
about 5°C.
To adjust the thermostat, see the USING THE THERMOSTAT section above.

12
• Rapid heating:
Adjust the ambient thermostat to the required temperature and then turn
the timer knob to select the required operating time. The product rapidly heats
the room 1800W for the set time and then reduces power to 1000W to main-
tain the ambient temperature selected with the thermostat.
- When the heater is working under timer control at 1800W the thermostat doesn't
control the room temperature. In this condition, do not use the heater in small rooms
when they are occupied by persons not capable of leaving the room on their own,
unless constant supervision is provided by a person responsible for their safety.
AUTOMATIC ANTI-FROST
- The CB-2005 wall mounted heater incorporates as standard an Anti-Frost
Protection Device which switches the unit ON automatically when the temperature
is less than +50C. To activate this device when the heater is in use and turn the
Thermostat to position (*). Therefore when the temperature drops below +50C the
appliance will automatically switch ON keeping the room at this constant tempera-
ture. This device is very useful where low temperatures are common and where
pipeline water is easily frosted.
FILTER
- This product is fitted with a filter to protect the heating elements from dust and
dirt.
- The filter is removable and can be fitted both from the left and from the right,
figure 8.
- To keep the heater in perfect condition, clean the filter once every six months
REMEMBERING TO PUT IT BACK AGAIN AFTERWARDS.
TOWEL RAIL
- The towel rail can warm up to 2 towels at a time.
- Position the towels correctly on the rail, as shown in figure 9 and NOT as shown
in figure 10, to prevent overheating and malfunctions.
WHAT TO DO IN CASE OF MALFUNCTIONS
- In the event of overheating, the safety device on the appliance automatically
disabled the heating elements and motor. As a result, the heater stops working,
even though the indicator LED stays on.
- In this case:
- Turn off the fan heater and allow it to cool down for about 15/20 minutes.
- Make sure the dust filter is not totally obstructed and clean if necessary.
- Remember to put it back again afterwards.

13
- Eliminate any other possible reasons for overheating (e.g.: obstructions in front
of the air inlet/outlet grilles, build-ups of dirt).
- Turn on the fan heater again and check it works correctly.
- If the product needs servicing, call in a qualified specialised technician.
MAINTENANCE
- IMPORTANT: BEFORE CONDUCTING ANY MAINTENANCE OR CLEANING
ENSURE THAT THE APPLIANCE IS DISCONNECTED FROM THE MAINS
ELECTRICAL SUPPLY.
- The S&P CB range of Heaters Do Not Require any special maintenance.
To ensure long and trouble free operation we do however recommend that the
intake and exhaust air vents are periodically checked to ensure there is no
build up of dust and debris. TIP: With the appliance switched OFF, use a
vacuum cleaner to remove any dust or debris from inside the air vents.
- To clean the appliance simply wipe with a damp (not wet) cloth. Do Not Use
any abrasives or solvents.
TECHNICAL ASSISTANCE SERVICE
- All CB Wall Mounted Heaters are offered with a comprehensive guarantee and
Technical Assistance Service. If the appliance is found to be defective within
the period of guarantee then first please contact the Technical Assistance
Service, then only if neccessary return to an authorised S&P supplier.
- IMPORTANT: Any repairs or work carried out on the appliance by person(s)
not authorised by S&P will invalidate the guaranttee.
Soler & Palau reserves the right to alter specifications without prior notice.

14
FRANÇAIS
GÉNÉRAL
- Lire attentivement ces instructions avant d’utiliser l’appareil et les conserver en
vue de futures consultations.
- Les radiateurs soufflants CB-2005 et CB-2005T ont été fabriqués en respectant
de rigoureuses normes de fabrication et de contrôle qualité. Tous les composants
ont été vérifiés; tous les appareils ont été testés en fin de montage.
- Vérifier, dès l’avoir sorti de son emballage, le parfait état de l’appareil ainsi que
son fonctionnement, étant donné que tout éventuel défaut d’origine est couvert
par la garantie S&P.
POUR VOTRE SÉCURITÉ
- L’utilisation de cet appareil n’est pas adressée aux personnes (y compris les
enfants) qui ont des capacités physiques, sensorielles ou intellectuelles reduites,
qui manquent d’expérience ou de connaissance, à l’exception d’une supervision
ou d’une explication de l’emploi de l’appareil faite par une personne responsable
pour leur sécurité.
- Les enfants doivent être surveillés pour être surs qu’ils ne juent pas avec le pro-
duit.
- Cet appareilr est une source de chaleur auxiliaire qui ne doit servir que dans ce
but.
- Assurez-vous que l’alimentation du secteur soit conforme à la plaque signaleti-
que : 230 V CA, 50 Hz.
- Ne sortez jamais de chez vous sans éteindre l’appareil ; assurez-vous que le
timer (s’il est présent) soit en position Eteint (0) et que le thermostat soit sur le
minimum (*).
- Pendant le fonctionnement, installez l’appareil dans un endroit sûr, c’est-à-dire :
- À 1 mètre au moins des objets inflammables ou des meubles ;
- En laissant libres la grille de sortie de l’air ; en ne plaçant aucun objet dans un
rayon d’un mètre de la grille de sortie;
- En ne le plaçant jamais juste au-dessous d’une prise de courant.
- Ne laissez jamais les enfants et les animaux jouer ou toucher l’appareil.
Attention ! Pendant le fonctionnement, la grille de sortie de l’air peut atteindre
une température très élevée (plus de 80°C = 175°F) ;
- IMPORTANT : pour éviter tout risque de surchauffe ne couvrez jamais l’ap-
pareil. Ne posez jamais ni objet, ni couverture, sur l’appareil lorsqu’il est en mar-
che. Cette interdiction est écrite clairement sur l’appareil et illustrée par ce
symbole.

15
- N’utilisez pas l’appareil dans des pièces saturées de gaz explosifs, de vapeurs
générées par des solvants ou des vernis ou de vapeurs/gaz inflammables.
- Ne remplacez pas vous-même le câble s’il est abîmé ; apportez l’appareil à un
service après-vente autorisé où du personnel spécialisé effectuera l’intervention
afin d’éviter tout risque de dégât.
- N’utilisez pas cet appareil pres d’une douche, d’une baignoire, d’un lavabo.
- Placez l’appareil de façon à ce que la prise d’alimentation soit toujours accessi-
ble.
- Ne pas installer le produit sur des murs en matière synthétique.
RACCORDEMENT ÉLECTRIQUE
- Utilisez le radiateur soufflant seulement avec installation murale et en position
verticale ;
- Le radiateur soufflant est fabriqué en double isolement électrique (classe II) et
ainsi ne requiert pas la connexion de terre.
- Le radiateur soufflant a un degré IPX4 de protection à l’eau. Ainsi il peut être uti-
lisé dans les salles de bain ou dans les endroits humides mais IL NE PEUT PAS
ETRE INSTALLE A L’INTERIEUR DU PERIMETRE DE LA BAIGNOIRE OU DE LA
DOUCHE. Donc il ne faut pas l’installer dans les zones indiquées comme VOLU-
ME 1 dans la figure 1.
- Les poignées de réglage ne doivent absolument pas être accessibles pour les
personnes qui sont à l’intérieur de la baignoire ou de la douche.
- Les dispositives de déconnexion de l’alimentation du secteur doivent permettre
la complète déconnexion dans les conditions de la catégorie de surtensions III.
- L’installation doit être effectuée conformément aux règles de l’art et en confor-
mité avec la normative en vigueur dans votre pays.
INSTALLATION DU PRODUIT
- Si la version du produit est munie du support pour serviettes, AVANT D’INSTA-
LLER LE PRODUIT AU MUR :
- Insérez le support serviettes dans les trous appropriés sous le produit, figure 2
- Fixez les 4 vis ( courtes) fournies dans le sachet approprié, figure 3.
- La distance minimale du plancher, comme demontré par la figure 4 (30 cm), doit
être modifiée et portée à 60 cm.
- L’appareil doit être installé au mur, en respectant les distances minimales du pla-
fond, du plancher et des murs latéraux indiqués dans la figure 4.
- Faire 3 trous de diamètre 6 mm. dans le mur à une distance l’un de l’autre
comme indiqué dans la figure 5.
- Insérez les trois chevilles fournies avec le produit.
- Insérez les 2 vis en haut fournies dans le même sachet, en laissant 8 mm. entre
la tête de la vis et le mur.
- Accrocher le produit aux 2 vis que vous avez fixées en le tenant toujours solide-

16
ment entre les mains; ATTENTION ! Avant de laisser le produit vérifiez qu’il est
bien accroché aux 2 vis.
- Fixer enfin le produit avec la troisième vis en bas , figure 6.
UTILISATION DU RADIATEUR SOUFFLANT
Votre produit est muni des commandes indiquées dans la figure 7.
Modèle avec thermostat
- En partant de la position antigel, marquée avec le symbole “ ”, tournez la
poignée du thermostat dans le sens des aiguilles de la montre jusqu’à entendre
un “clic”: le produit commence alors à fonctionner à 1800W de puissance et le
témoin lumineux s’allume.
- Le thermostat maintient la température ambiante requise en allumant et éteig-
nant automatiquement le radiateur soufflant. Le plus la poignée est tournée dans
le sens des aiguilles de la montre, dans la position avec le chiffre le plus haut, le
plus la température garantie sera élevée. La position maximale du thermostat
correspond à environ 35°C, la minimale (*) à environ 5°C.
Utilisation du thermostat
- Dans une pièce où la température dépasse les 35°C il est normal que le ther-
mostat, même si positionné au maximum, n’allume pas le radiateur soufflant.
- Vice-versa, dans une pièce avec une température trop basse (sous les 5°C) il est
normal que le thermostat maintient l’appareil constamment allumé, même si posi-
tionné au minimum.
- Pour régler au mieux le thermostat nous conseillons cette procédure :
- Positionner le thermostat au maximum et faire fonctionner l’appareil jusqu’à
atteindre une température confortable;
- Ensuite tourner la poignée du thermostat dans le sens inverse des aiguilles de
la montre jusqu’à entendre un “ clic” et l’appareil s’éteindra;
- Ensuite tourner encore légèrement (seulement en peu) la poignée du thermos-
tat dans le sens des aiguilles de la montre;
- Dans cette position le thermostat maintient la température ambiante que vous
avez choisie.
Modèle avec thermostat et timer 60’
- Le radiateur soufflant est muni de deux poignées, une pour le timer 60’ et une
pour le thermostat.
- Le produit vous permet de régler 2 différents modes de fonctionnement:
•Réchauffement de l’environnement avec maintient de la température :
En partant de la position antigel, marquée avec le symbole “ ”, tournez la
poignée du thermostat dans le sens des aiguilles de la montre jusqu’à enten-

17
dre un “clic”: le produit commence alors à fonctionner à 1000W de puissan-
ce et le témoin lumineux s’allume.
Le thermostat maintient la température ambiante requise en allumant et éteig-
nant automatiquement le radiateur soufflant. Le plus la poignée est tournée
dans le sens des aiguilles de la montre, dans la position avec le chiffre le plus
haut, plus la température garantie sera élevée. La position maximale du ther-
mostat correspond à environ 35°C, la minimale (*) à environ 5°C.
Pour le réglage du thermostat, voir chapitre UTILISATION DU THERMOSTAT
au paragraphe précédent.
• Réchauffement rapide de l’environnement:
Ayant réglé le thermostat ambiant selon la température ambiante requise,
tournez ensuite la poignée du timer en sélectionnant le temps de fonctionne-
ment requis. Le produit fonctionne à 2000W de puissance pour le temps réglé,
en produisant un réchauffement rapide de la pièce et ensuite garantira à une
puissance de 1000W le maintient de la température ambiante réglée par le
thermostat.
- Quand le radiateur soufflant fonctionne sous le contrôle du timer à 1800W, le
thermostat ne contrôle pas la température de la pièce.
A cette condition, n’utilisez pas le radiateur soufflant dans une petite pièce quand
elle est occupée par des personnes qui ne sont pas capable d’en sortir leur
mêmes, à l’exception d’une supervision constante faite par une personne qui soit
responsable pour leur sécurité.
DISPOSITIF “HORS GEL”
- Les radiateurs soufflants CB-2005 incorporent un dispositif “hors gel” mettant
en marche automatiquement le radiateur quand la température ambiante des-
cend en deçà de +5ºC et pour la maintenir à ce niveau.
- Ce dispositif est particulièrement intéressant pour les lieux où le gel pourrait
causer des problèmes pour les conduites d’eau.
- Une fois raccordé au réseau, pour mettre en action ce dispositif il suffit de pla-
cer le thermostat en position (*).
FILTRE
Votre produit est muni d’un filtre pour protéger les éléments chauffants contre la
poussière et la saleté.
- Le filtre peut être enlevé et inséré du côté droit ou gauche , figure 8.
- Pour un fonctionnement correct du produit nous conseillons de nettoyer le filtre
une fois tous les 6 mois EN SE RAPPELANT DE LE MONTER ENSUITE SUR LE
PRODUIT.

18
BARRE PORTE SERVIETTES
- La barre porte-serviette vous permet de chauffer jusqu’à 2 serviettes chaque
fois.
- Les serviettes doivent être positionnées correctement sur le support, comme
indiqué dans la figure 9 et NON PAS comme indiqué dans la figure 10, pour évi-
ter des surchauffes et des mauvais fonctionnements.
SÉCURITÉ EN CAS DE FONCTIONNEMENT ANORMAL
- En cas de surchauffe le système de protection de l’appareil désactive automati-
quement les éléments chauffants et le moteur, en faisant interrompre ainsi le fonc-
tionnement du radiateur soufflant . Dans ce cas le produit ne fonctionne pas mais
la lampe lumineuse est allumée.
- Dans ce cas:
- Eteindre le radiateur soufflant et le laisser refroidir pour environ 15/20 minutes.
- Contrôler que le filtre anti-poussière n’est pas complètement obstrué et, s’il en
est ainsi, nettoyez-le et remontez-le.
- Enlevez d’éventuelles autres causes de surchauffe (par ex. obstacles devant la
grille d’entrée et/ou sortie de l’air, accumulation anormale de saleté etc);
- Allumez à nouveau le radiateur soufflant et vérifiez-en le fonctionnement correct.
- Pour toute intervention d’entretien sur le produit il faut s’adresser au personnel
spécialisé et qualifié.
ENTRETIEN
- Avant d'effectuer quelque opération d'entretien et/ou de nettoyage, assurezvous
que l'appareil sois débranché.
- Ces appareils ne requièrent aucun entretien spécial. Il suffit de passer un chiffon
humide avec un détergent doux sur l'extérieur.
N'utilisez pas de dissolvant ni de produit abrasif pour son nettoyage.
IMPORTANT
- Nous vous conseillons de ne pas démonter l'appareil, puisque tout type de
manipulation annulerait automatiquement la garantie S&P.
- Si vous observez un comportement anormal de l'appareil ou de la structure,
débranchez immédiatement l'appareil de la prise de courant, et emportez-le ou
contactez le centre de réparations qualifié le plus proche, fin d'éviter tout risque
d'accident.
LE FABRICANT N'EST PAS RESPONSABLE DES DOMMAGES CAUSÉS PAR LE
NON ACCOMPLISSEMENT DE CES AVERTISSEMENTS.

19
ITALIANO
GENERALITÀ
- Vi ringraziamo per la fiducia depositata in noi con l'acquisto di questo dispositi-
vo. Avete acquistato un prodotto di qualità ha totalmente fabbricato in base alle
norme tecniche di sicurezza riconosciute e conformi alle regole della CE.
- Leggere attentamente il contenuto del presente manuale di istruzioni dal
momento che contiene indicazioni importanti per la vostra sicurezza nell'uso e
nella manutenzione di questo prodotto.
Conservatelo per una possibile consultazione in un secondo momento.
- Vi preghiamo di verificare il perfetto stato del dispositivo una volta tolto dall'im-
ballaggio, dal momento che qualsiasi difetto d'origine che possa presentare è
coperto dalla garanzia S&P.
PER LA VOSTRA SICUREZZA
- Questo prodotto non deve essere utilizzato da persone (bambini inclusi) con
capacità fisiche, sensoriali o mentali ridotte, o con inadeguata esperienza e
conoscenze, che non siano sotto la supervisione di una persona responsabile per
la loro sicurezza o che non siano da essa stati adeguatamente istruiti. I bambini
devono essere sorvegliati per assicurarsi che non giochino con il prodotto.
- Questo termoventilatore è una fonte di riscaldamento ausiliario e deve essere
utilizzato esclusivamente per questo scopo.
- Assicuratevi che l’alimentazione di rete corrisponda ai dati di targa: 230V AC,
50Hz.
- Non abbandonate mai la vostra abitazione lasciando il termoventilatore in fun-
zionamento; in tali casi assicuratevi sempre che il timer (se presente) sia in posi-
zione OFF (0) e che il termostato sia in posizione minima (*).
- Durante il funzionamento collocate il termoventilatore in una posizione sicura
ovvero:
- Ad almeno 1m da oggetti infiammabili o mobili;
- Lasciando libera la griglia di uscita dell’aria: nessun oggetto deve essere pre-
sente nel raggio di 1m dalla griglia di uscita;
- Mai posizionato immediatamente sotto ad una presa di corrente.
- Non lasciate che animali o bambini giochino o tocchino il termoventilatore.
Attenzione! Durante il funzionamento la griglia di uscita dell’aria può diventare
molto calda ( oltre 80°C = 175°F);
- IMPORTANTE: per evitare surriscaldamenti non ricoprite mai il prodotto.
Non appoggiate mai alcun oggetto o coperta sull’apparecchio mentre è in funzio-
ne. Questo è chiaramente scritto sull’apparecchio o illustrato dal simbolo

20
- Non utilizzate il termoventilatore in stanze sature di gas esplosivi, di vapori gene-
rati da solventi e vernici o comunque di vapori/gas infiammabili.
- Se il cavo è danneggiato e dovete sostituirlo non eseguite questa operazione da
soli, riportate il termoventilatore ad un centro di riparazioni autorizzato perché è
richiesto l’intervento di personale specializzato al fine di evitare qualunque rischio
di danneggiamento.
- Non utilizzate questo termoventilatore nelle vicinanze di docce, vasche da bagno
o lavandini.
- Il termoventilatore deve essere posizionato in modo tale che la presa di alimen-
tazione sia sempre raggiungibile.
- Non installate il prodotto su pareti di materiale sintetico.
POSIZIONAMENTO SICURO
- Utilizzate il termoventilatore solo installato a muro ed in posizione verticale ;
- Il termoventilatore è costruito in doppio isolamento elettrico (classe II) e, pertan-
to, non richiede il collegamento di terra.
- Il termoventilatore ha un grado IPX4 di protezione all’acqua. Puo’ pertanto esse-
re utilizzato nei bagni o nei luoghi umidi ma NON PUO’ ESSERE INSTALLATO
ALL’INTERNO DEL PERIMETRO DELLA VASCA DA BAGNO O DELLA DOCCIA.
Non installarlo pertanto nelle zone indicate come VOLUME 1 in figura 1.
- Le manopole di regolazione non devono in nessun caso essere accessibili da
parte di persone che siano all’interno della vasca da bagno o della doccia.
- I dispositivi di disconnessione dalla rete di alimentazione devono consentire la
disconnessione completa nelle condizioni della categoria di sovratensioni III.
- L’installazione deve essere eseguita a regola d’arte e conforme alla normativa
vigente nel vostro paese.
INSTALLAZIONE DEL PRODOTTO
- Nel caso della versione del prodotto dotata di supporto porta salviette, PRIMA
DI INSTALLARE IL PRODOTTO A PARETE :
- Inserite il supporto salviette negli appositi fori sotto il prodotto, figura 2.
- Fissate le 4 viti (corte) fornite nell’apposito sacchetto , figura 3.
- La distanza minima dal pavimento riportata in figura 4 (30cm) deve essero
modificata e innalzata a 60cm.
- L’apparecchio deve essere installato a muro, rispettando le distanze minime dal
soffitto, dal pavimento e dalle pareti laterali indicate in figura 4.
- Praticate nel muro 3 fori di diametro 6 mm. a distanza l’uno dall’altro come indi-
cato in figura 5.
- Inserite i tre tasselli forniti con il prodotto.
- Inserite le 2 viti in alto , fornite nello stesso sacchetto, avendo cura di lasciare 8
mm. tra la testa della vite ed il muro.
This manual suits for next models
1
Table of contents
Languages:
Other Soler & Palau Heater manuals

Soler & Palau
Soler & Palau TLS-501 User manual

Soler & Palau
Soler & Palau COR-1000 NW 9 User manual

Soler & Palau
Soler & Palau COR-6-1000 N User manual

Soler & Palau
Soler & Palau SAHARA Series Installation instructions manual

Soler & Palau
Soler & Palau HE3 - 2000 User manual

Soler & Palau
Soler & Palau TL-29 User manual

Soler & Palau
Soler & Palau EMIBLUE-A User manual