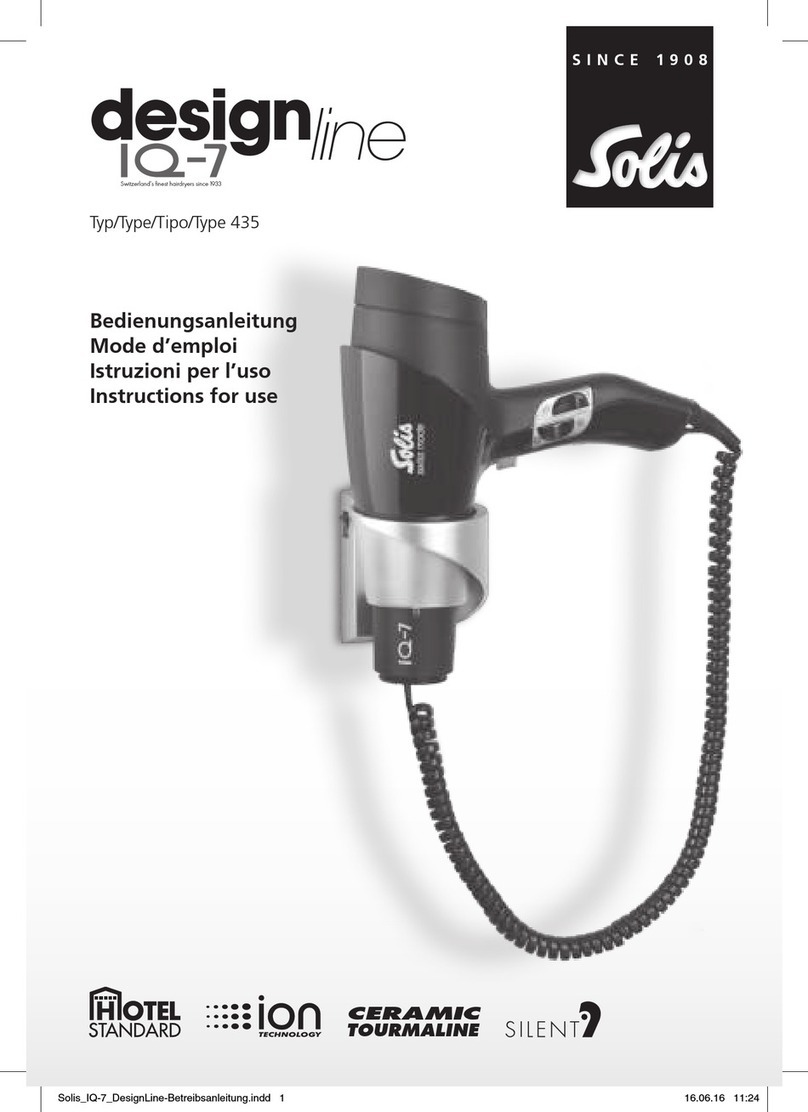
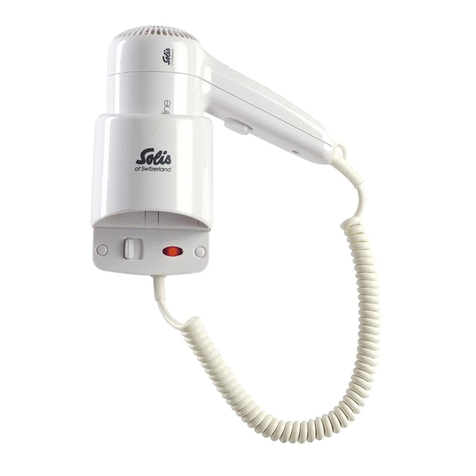
SOLIS IQ-7 User manual

Typ/Type/Tipo/Type 435
Bedienungsanleitung
Mode d’emploi
Istruzioni per l’uso
Instructions for use
line
design
Switzerland’s finest hairdryers since 1933
TECHNOLOGY
CERAMIC
TOURMALINE
GARANTIESCHEIN
BON DE GARANTIE
GUARANTEE CARD
Für alle Reparaturen oder Garantiefälle ist das Gerät direkt einzusenden an:
En cas de réparation et de garantie veuillez envoyer l’appareil directement à:
For all repairs and warranty cases please send the appliance directly to:
Nur mit Verkaufsdatum und Unterschrift der Verkaufsfirma gültig.
Seulement valable avec signature et date de la vente.
Valid only if provided with date of sale and signature of seller.
Solis_DesignLine_Betreibsanleitung.indd 1-2 06.10.09 11:01

Inhaltsverzeichnis
Bildlegende .......................................................................................................... Seite 3
Gerätekennwerte ................................................................................................. Seite 4
Sicherheitshinweise .............................................................................................. Seite 4-5
Inbetriebnahme und Anwendung ........................................................................ Seite 5-6
Reinigung und Pflege ........................................................................................... Seite 6
Entsorgung .......................................................................................................... Seite 6
Montage der Wandhalterung und elektrischer Anschluss ..................................... Seite 7-11
Table des matières
Légende d‘image ................................................................................................. Page 3
Caractéristique ..................................................................................................... Page 12
Consignes de sécurité importantes ....................................................................... Page 12-13
Première mise en service et utilisation................................................................... Page 13-14
Nettoyage et Entretien ......................................................................................... Page 14
Élimination ........................................................................................................... Page 14
Montage du support mural et raccordement électrique ........................................ Page 15-19
Sommario
Didascalia ............................................................................................................ Pagina 3
Dati tecnici .......................................................................................................... Pagina 20
Informazioni di sicurezza ..................................................................................... Pagina 20-21
Messa in funzione ed uso .................................................................................... Pagina 21-22
Pulizia e cura ....................................................................................................... Pagina 22
Smaltimento ....................................................................................................... Pagina 22
Montaggio del supporto a parete e allacciamento elettrico .................................. Pagina 23-27
Table of contents
Picture legend ..................................................................................................... Page 3
Appliance specifications ....................................................................................... Page 28
Important safety instructions ................................................................................ Page 28-29
Initial use and operation ....................................................................................... Page 29-30
Cleaning and care ................................................................................................ Page 30
Disposal ............................................................................................................... Page 30
Assembly of the wall mounting and electrical connection ..................................... Page 31-34
2 3
D
Ihren DesignLine IQ-7 kennenlernen
Familiarisez-vous avec votre DesignLine IQ-7
Imparare a conoscere il vostro DesignLine IQ-7
Familiarization with your DesignLine IQ-7
A
Abnehmbares
Luftansauggitter
B
Drucktaste
C Wippenschalter
D Aufhängeöse
E Wandhalterung
A
Grille d‘entrée
d‘air amovible
B
Bouton-poussoir
C Interrupteurs
D Anneau d‘accrochage
E Support mural
A
Detachable air
inlet grid
B
Button
C Switches
D Suspension loop
E Wall mounting
1 2 3 4
D
A
Griglia asportabile
di aspirazione aria
B
Comando a pulsante
C Interruttori
D Gancio
E Supporto a parete
B
A
C
Click
E
Solis_DesignLine_Betreibsanleitung.indd 2-3 06.10.09 11:01

5
Gerätekennwerte
Modell: 435
Spannung: 220-240 VAC ~ / 50 - 60 Hz
Leistung: 1400-1700 Watt
Schutzklasse: II
Funkentstörung: Dieses Gerät ist ent-
sprechend den Funkentstörungsrichtlinien
funkentstört.
EMV: Dieses Gerät ist entsprechend den
EMV (Elektromagnetische Verträglichkeit) –
Richtlinien entstört.
Zu Ihrer Sicherheit!
Die Bedienungsanleitung vermittelt
Ihnen wichtige Sicherheitshinweise
und Informationen, die zum ein-
wandfreien Betrieb des Gerätes
erforderlich sind!
Die Anleitung vollständig lesen, auf-
bewahren und ggf. an Nachbesitzer
weitergeben!
Alle Sicherheitshinweise dienen
stets auch Ihrer persönlichen Sicher-
heit!
Sicherheitshinweise
beim Anschluss des Gerätes
•
Dieses Gerät entspricht den anerkannten
Regeln der Technik und den einschlägigen
Sicherheitsbestimmungen für Elektro-
geräte!
•
Um Schäden und Gefahren durch nicht
ordnungsgemässen Gebrauch zu ver-
meiden, ist die Bedienungsanleitung zu
beachten und sorgfältig aufzubewahren!
•
Bei Weitergabe des Gerätes an andere
Personen ist auch die Bedienungsanlei-
tung mit zu übergeben!
•
Bei Beschädigung des Netzkabels darf
dieses nur durch eine vom Hersteller
benannte Reparaturwerkstatt ersetzt wer-
den, um eine Gefährdung zu vermeiden!
Bitte wenden Sie sich an den Hersteller
oder seinen Kundendienst!
•
Die Netzspannung muss mit der
Spannungs angabe (V) auf dem Gerät
übereinstimmen!
•
Das Gerät nur an Wechselstrom, an eine
Schutzkontaktsteckdose anschliessen.
Netz kabel dabei nicht über scharfe Kanten
ziehen, einklemmen oder herunterhängen
lassen. Netzkabel vor Hitze und Feuchtig-
keit schützen!
•
Vor jeder Inbetriebnahme das Gerät auf
einwandfreien Zustand kontrollieren, es
darf nicht in Betrieb genommen werden,
wenn:
– die Zuleitung beschädigt ist
– das Gerät sichtbare Schäden aufweist
•
Netzkabel nie um das Gerät wickeln!
•
Netzstecker nur bei ausgeschaltetem
Gerät in die Steckdose einstecken.
Sicherheitshinweise
bei der Bedienung des Gerätes
• Verwenden Sie das Gerät bestimmungs-
gemäss!
• Personen mit motorischen Störungen
sollten nie ohne Begleitperson das Gerät
in Betrieb nehmen, um eine Gefährdung
zu vermeiden!
• Kinder erkennen nicht die Gefahren,
die beim Umgang mit Elektrogeräten
ent stehen können, deshalb Kinder
niemals unbeaufsichtigt mit Elektro-
geräten ar beiten lassen!
• Verpackungsmaterialien, wie z.B. Folien-
beutel gehören nicht in Kinderhände!
• Der Netzstecker ist zu ziehen:
– bei Störungen während des Betriebes
– vor jeder Reinigung
– nach dem Gebrauch.
• Gerät nicht am Netzkabel ziehen oder
tragen!
Sicherheitshinweise
für die Reinigung und Pflege
• Bei Betriebsstörungen und vor jeder Rei-
nigung und Pflege, Netzstecker ziehen
und Gerät abkühlen lassen!
• Den Netzstecker nicht am Netzkabel
oder mit nassen Händen aus der Steck-
dose ziehen!
Achtung!
Gefahr durch elektrischen
Schlag!
Das Gerät vor Feuchtigkeit schützen!
Nicht ins Wasser tauchen!
Bestimmungsgemässer
Gebrauch
Das Gerät ist ausschliesslich zum
Trocknen und Stylen von mensch-
lichen Haupthaaren bestimmt.
Bei Zweckentfremdung, falscher Bedienung
oder nicht fachgerechter Reparatur wird
keine Haftung für evtl. Schäden übernom-
men. Ebenso sind Garantieleistungen in
solchen Fällen ausgeschlossen.
Achtung!
Gefahr durch elektrischen
Schlag!
Das Gerät nicht mit nassen Händen
in der Nähe oder in der Badewanne,
Dusche oder über einem gefüllten
Waschbecken benutzen. Sollte das
Gerät dennoch einmal ins Wasser
fallen, sofort den Netzstecker ziehen.
Keinesfalls ins Wasser greifen, wenn
das Gerät noch angeschlossen ist!
Achtung!
Gefahr durch elektrischen
Schlag!
Wenn das Gerät in einem Badezimmer
verwendet wird, ist nach Gebrauch
der Stecker zu ziehen, da die Nähe
von Wasser eine Gefahr darstellt, auch
wenn das Gerät ausgeschaltet ist!
• Das Gerät im Betrieb nie auf weiche
Kissen oder Decken legen!
• Gerät und Netzkabel nicht auf heisse
Flächen wie Herdplatten o.ä. stellen bzw.
legen und nicht in direkte Nähe von
offenen Flammen bringen!
• Um Beschädigungen des Haares zu ver-
meiden, Luftaustrittsöffnung niemals zu
dicht an das Haar halten!
• Während des Betriebes die Luftansaug-
und Austrittsöffnung nicht abdecken!
• Gerät während längerer Unterbrechung
des Trockenvorganges abschalten!
• Das Gerät ist mit einem Überhitzungs-
schutz ausgerüstet, der bei Überlastung
(z.B. wenn Luftaustritts- oder Ansaug-
öffnung verdeckt wird) abschaltet.
• Einen zusätzlichen Schutz bietet der Ein-
bau einer Fehlerstrom-Schutzeinrichtung
mit einem Nennauslösestrom von nicht
mehr als 30 mA in der Hausinstallation.
Fragen Sie Ihren Elektroinstallateur!
4
D D
Solis_DesignLine_Betreibsanleitung.indd 4-5 06.10.09 11:01


DD
6
Geräte-Entsorgung
EU 2002/96/EC
Entsorgung:
In Übereinstimmung mit der Richtlinie
2002/96/EC für die Entsorgung von
Elektro- und Elektronik-Altgeräten (EEAG)
bringen Sie bitte Ihr Gerät am Ende der
Lebensdauer zur Entsorgung und zum
Schutz der Umwelt zu einer Sammelstelle
für Elektrogeräte.
Reinigung und Pflege
• Stromschlaggefahr!
Vor jeder Reinigung
den Netzstecker ziehen.
• Verbrennungsgefahr!
Gerät unbedingt
vollständig abkühlen
lassen.
i ABBILDUNGEN 1 - 4
• Das Gerät vor Staub, Schmutz und
Fusseln schützen. Von Zeit zu Zeit das
Lufteinlassgitter
A
abnehmen und
reinigen. Lufteinlassgitter reinigen
(siehe
Seite 3).
Vor dem Einsetzen müssen alle Elemente
trocken sein.
• Vor dem Reinigen stets den Netzstecker
ziehen oder am Ein-/Ausschalter aus-
schalten
• Das Gerät nie in Wasser tauchen.
• Geräteschutz!
Keine scharfen oder scheuernden Putz-
mittel verwenden.
• Das Gerät nur mit einem leicht feuchten
Tuch abwischen und mit einem weichen
Tuch nachtrocknen.
Schaltstufen WANDHALTERUNG
Typ 435
Bedienungsanleitung
7
Verschiedene
Gebläse- und
Heizstufen
Ein-/Ausschalter
Öffnung
für Netzleitung
Spiralkabel
(Haartrockner)
Solis_DesignLine_Betreibsanleitung.indd 6-7 06.10.09 11:01

8
D
9
D
Montageanleitung
für Wandhalter
- Markieren Sie mit einem Bleistift die
Positionen der zwei Dübellöcher
(Bohrschablone, Fig. 3).
- Bohren Sie mit einem 4 mm-Bohrer die
beiden Löcher.
- Setzen Sie die mitgelieferten Dübel in
die Löcher.
- Drehen Sie eine der beigelegten
Schrauben in den oberen eingesetzten
Dübel, bis der Abstand zwischen
der Wand und dem Schraubenkopf
ca. 6,5 mm beträgt (siehe Fig. 1).
- Die Wandhalterung kann jetzt an der
oberen Schraube eingehängt werden,
und wird mit der unteren Schraube
fest gezogen.
Wichtiger Hinweis:
Diese Wandhalterung muss ausserhalb
der Reichweite einer die Badewanne oder
Dusche benutzenden Person befestigt wer-
den (siehe Fig. 2).
Beachten Sie bei der Montage auch die
Länge des Netzkabels und den Standort der
Steckdose.
min. 60 cm
min. 60 cm
ca. 130 cm
Fig. 2
20 mm 6,5 mm
4 mm
Fig. 1
Bohrschablone
4
Fig. 3
Bohrung
79 mm
Bohrung
Solis_DesignLine_Betreibsanleitung.indd 8-9 06.10.09 11:01

10 11
D
Fig. 4
Fig. 5
TECHNOLOGY
CERAMIC
TOURMALINE
2
1
3
1
3
3
2
SOLIS AG
Solis-Haus • CH-8152 Glattbrugg-Zürich • Schweiz
Telefon +41 44 874 64 54 • Telefax +41 44 874 64 99
[email protected] • www.solis.ch • www.solis.com
September 2009
Elektrischer Anschluss
Die Montage darf nur von einem qualifizierten Fachmann durchgeführt werden.
1. Frontabdeckung lösen und entfernen (siehe Fig. 4).
2. Elektrischer Anschluss mittels Netzleitung: Netzleitung in Klemme (2) befestigen und
Netzleitung mittels Kabelbride (3) festklemmen (siehe Fig. 5).
Elektrischer Anschluss mittels Unterputzanschluss: Basis an der vorbestimmten Stelle öffnen
(1) und die Anschlussdrähte (230/240V) an der Klemme (2) anschliessen (siehe Fig. 5).
3. Montage nochmals überprüfen und Frontabdeckung montieren.
4. Strom und Ein-/Ausschalter einschalten.
1 Stellen Sie den Ein-/Ausschalter auf
Position “0”.
2 Entriegeln Sie die Frontabdeckung in-
dem Sie mit zwei spitzen Gegenständen
in die beiden Öffnungen am unteren
Ende der Frontabdeckung hineindrücken.
3 Ziehen Sie die Frontabdeckung nach
oben ab.
1 Drahteingangsöffnung
2 Klemme
3 Kabelbride
Solis_DesignLine_Betreibsanleitung.indd 10-11 06.10.09 11:01

12
F
13
F
Caractéristiques
Modèle: 435
Tension: 220-240 VAC ~ / 50 – 60 Hz
Puissance: 1400-1700 Watts
Classe de protection: II
Antiparasitage: Cet appareil est an-
tiparasité conformément aux directives
d’antiparasitage.
CEM: Cet appareil est antiparasité confor-
mément aux directives CEM (Compatibilité
électromagnétique).
Pour votre sécurité!
Le présent mode d’emploi vous four-
nit des consignes de sécurité et in-
formations importantes nécessaires
pour un fonctionnement correct de
l’appareil!
Lire complètement le présent mode
d’emploi, le conserver et le remettre
le cas échéant au propriétaire suivant!
Toutes les consignes de sécurité sont
toujours destinées à assurer votre
sécurité personnelle!
Consignes de sécurité
pour le raccordement de l’appareil
• Le présent appareil correspond aux règles
de la technique reconnues et aux consi-
gnes de sécurité applicables aux appareils
électroniques!
• Pour éviter les éventuels dommages et
dangers causés par une utilisation non
correcte, il faut respecter le mode d’emploi
et le conserver à un endroit sûr!
• En cas de remise de l’appareil à d’autres
personnes, ce mode d’emploi doit égale-
ment être remis!
• Lorsque le cordon électrique est endom-
magé, celui-ci ne doit être remplacé que
par un atelier de réparation désigné par
le fabricant pour éviter tout risque! Veuillez
contacter le fabricant ou son service clients!
• La tension du secteur doit être conforme
à la tension (V) indiquée sur l’appareil!
• Ne brancher l’appareil que sur des prises
de courant alternatif ou sur une prise de
terre.
Ce faisant, ne pas faire passer le cordon
électrique par des arêtes vives, ne pas
le coincer ou ne pas le laisser pendre.
Protéger le cordon électrique contre la
chaleur et l’humidité!
• Contrôler avant chaque mise en service
si l’appareil présente un état correct,
l’appareil ne doit pas être mis en service, si:
– l’arrivée d’air est endommagée
– l’appareil présente des dommages visibles
• Ne jamais enrouler le cordon électrique
autour du manche!
• N’insérer le cordon électrique dans la
prise que si l’appareil est arrêté.
Consignes de sécurité
pour l’utilisation de l’appareil
• Utiliser l’appareil conformément à son
emploi prévu!
• Les personnes ayant des déficiences
motrices ne devraient pas mettre en
service l’appareil sans accompagnant
pour éviter tout risque!
• Tenir les matériaux d’emballage tels que
les sacs en plastique hors de la portée
des enfants!
• La fiche doit être retirée:
– en cas de dysfonctionnements
pendant le fonctionnement
– avant chaque nettoyage
– après l’emploi.
• Ne jamais tirer ou porter l’appareil
moyennant le cordon électrique!
Consigne de sécurité
pour le nettoyage et l’entretien
• En cas de dysfonctionnements et avant
chaque nettoyage et entretien, retirer
la fiche et laisser refroidir l’appareil!
• Ne jamais retirer la fiche de prise de
courant en tirant sur le cordon électrique
ou avec des mains humides!
Attention!
Risque de choc électrique!
Protéger l’appareil contre l’humidité!
Ne pas le plonger dans l’eau!
Utilisation conforme
L’appareil est exclusivement utilisé
pour sécher et donner du style aux
cheveux humains.
En cas d’utilisation non conforme, utilisation
incorrecte ou réparation non conforme, nous
déclinons toute responsabilité en ce qui
concerne les éventuels dommages. De même,
les garanties sont également exclues en cas
pareils.
Attention
Risque de choc électrique!
Ne pas utiliser l’appareil avec des mains
humides, à proximité de ou dans la
baignoire, la douche ou au-dessus
d’un lavabo rempli d’eau. Si jamais
l’appareil tombe dans l’eau, immé-
diatement retirer la fiche. Éviter tout
contact avec l’eau lorsque l’appareil
est encore branché!
Attention!
Risque de choc électrique!
Lorsque l’appareil est utilisé dans une
salle de bain, la fiche doit être retirée
après l’emploi, la proximité d’eau
représentant un risque, même
si l’appareil est arrêté.
• Ne jamais poser l’appareil sur des coussins
doux ou des couvertures lorsqu’il est en
service!
• Ne jamais poser l’appareil et le cordon
électrique sur des surfaces chaudes telles
que les plaques de cuisson ou similaires
et ne pas le mettre à proximité directe de
flammes ouvertes!
• Pour éviter des endommagements des
cheveux, ne jamais mettre l’orifice de
sortie d’air trop près des cheveux!
• Ne pas couvrir l’arrivée et/ou la sortie
d’air pendant que l’appareil est en service!
• Arrêter l’appareil pendant une interruption
prolongée du séchage!
• L’appareil est équipé d’une protection
contre la surchauffe mettant l’appareil
hors service en cas de surcharge (p.ex.
lorsque la sortie d’air ou l’arrivée d’air
est couverte).
• Une protection supplémentaire est
assurée par le montage d’un disjoncteur
de sécurité avec un courant nominal de
déclenchement ne dépassant pas 30 mA
dans l’installation domestique. Demander
à votre électro-installateur!
Solis_DesignLine_Betreibsanleitung.indd 12-13 06.10.09 11:01

14
F
15
Élimination de l’appareil
EU 2002/96/EC
Élimination:
En conformité avec la directive 2002/96/CE
relative aux déchets d’équipements électriques
et électroniques (DEEE), veuillez apporter
votre appareil à un point de collecte pour
appareils électriques à la fin de sa durée de
vie afin d’assurer son élimination correcte et
la protection de l’environnement.
Nettoyage et entretien
• Risque de choc
électrique!
Retirer la fiche avant
chaque nettoyage!
• Risque de brûlures!
Impérativement laisser
refroidir complètement
l’appareil!
i FIGURES 1 - 4
• Protéger l’appareil contre la poussière,
les impuretés et les peluches.
Enlever de temps en temps la grille
d’entrée d’air A et la nettoyer (voir
page 3).
Avant de réinsérer la grille, s’assurer
que tous les éléments sont secs.
• Retirer toujours la fiche ou arrêter
l’appareil à l’aide de l’interrupteur
marche/arrêt avant le nettoyage
• Ne jamais plonger l’appareil dans l’eau.
• Protection de l’appareil!
Ne jamais utiliser des détergents acides
ou abrasifs.
• N’essuyer l’appareil qu’avec un chiffon
légèrement humide et le sécher avec
un chiffon doux.
Positions de réglage SUPPORT MURAL
Type 435
Mode d’emploi
Différentes positions
de ventilation
et de chauffage
Interrupteur
marche/arrêt
Trou d’entrée
du cordon
Câble spiralé
(sèche-cheveux)
Solis_DesignLine_Betreibsanleitung.indd 14-15 06.10.09 11:01

16
F
17
F
Instructions de
montage pour
le support mural
- Marquez les positions des deux trous de
chevilles à l‘aide d‘un crayon (gabarit de
perçage, figure 3).
- Percez les deux trous à l’aide d’un foret
de 4 mm.
- Insérez les chevilles livrées dans les trous.
- Tournez une des deux vis jointes dans la
cheville insérée supérieure jusqu’à ce que
la distance entre le mur et la tête de vis
soit d’environ 6,5 mm (voir figure 1).
- Maintenant, le support mural peut être
accroché sur la vis supérieure et est
resserré avec la vis inférieure.
Note importante:
Ce support mural doit être fixé hors de la
portée d‘une personne utilisant la baignoire
ou la douche (voir figure 2).
Pour le montage, respectez également
la longueur du cordon électrique et
l‘emplacement de la prise.
min. 60 cm
min. 60 cm
ca. 130 cm
20 mm 6,5 mm
4 mm
Fig. 1
Gabarit de perçage
4
Fig. 3
Perçage
79 mm
Perçage
Fig. 2
Solis_DesignLine_Betreibsanleitung.indd 16-17 06.10.09 11:01

18
F
19
TECHNOLOGY
CERAMIC
TOURMALINE
SOLIS AG
Solis-Haus • CH-8152 Glattbrugg-Zurich • Suisse
Téléphone +41 44 874 64 54 • Téléfax +41 44 874 64 99
[email protected] • www.solis.ch • www.solis.com
Septembre 2009
Raccordement électrique
Le montage ne doit être effectué que par un spécialiste qualifié.
1. Resserrer et retirer le couvercle frontal (voir fig. 4).
2. Raccordement électrique au moyen du cordon électrique: Fixer le cordon électrique dans la
borne (2) et coincer le cordon électrique à l‘aide d‘un collier de serrage.
Raccordement électrique au moyen d’un raccordement sous-crépi: Ouvrir la base à l‘endroit
prédéterminé (1) et raccorder les fils de raccordement (230/240V) à la borne (2) (voir fig. 5).
3. Vérifier encore une fois le montage et monter le couvercle frontal.
4. Mettre en marche le courant et l’interrupteur marche/arrêt.
Fig. 4
Fig. 5
2
1
3
1
3
3
2
1 Mettez l’interrupteur marche/arrêt sur
la position «0».
2 Déverrouillez le couvercle frontal en
pressant avec deux objets pointus dans
les deux trous à l’extrémité inférieure du
couvercle frontal.
3 Retirez le couvercle frontal vers le haut.
1 Trou de fil d’entrée
2 Borne
3 Collier de serrage
Solis_DesignLine_Betreibsanleitung.indd 18-19 06.10.09 11:02

20
I
21
I
Dati tecnici
Modello: 435
Tensione: 220-240 VAC ~ / 50 - 60 Hz
Potenza: 1400-1700 Watt
Tipo di protezione: II
Soppressione delle perturbazioni
radioelettriche: il presente apparecchio è
radioschermato conformemente alle direttive
antidisturbi.
CEM: il presente apparecchio è schermato
conformemente alle direttive sulla compati-
bilità elettromagnetica (CEM).
Per la vostra sicurezza!
Il presente manuale d’uso fornisce
importanti avvertenze e informa-
zioni per la sicurezza necessarie
per un perfetto funzionamento
dell’apparecchio!
Leggere tutte le istruzioni, conservarle
e consegnarle all’eventuale successivo
proprietario!
Inoltre, tutte le informazioni di
sicurezza servono sempre alla vostra
sicurezza personale!
Informazioni di sicurezza per
il collegamento dell’apparecchio
• Il presente apparecchio è conforme alle
regole riconosciute della tecnica e alle
relative norme di sicurezza in materia di
apparecchiature elettriche!
• Per evitare danni e pericoli dovuti ad un
utilizzo non corretto, osservare le istru-
zioni per l’uso e conservarle con cura!
• Nella consegna dell’apparecchio a terzi,
consegnare anche le presenti istruzioni
per l’uso!
• In caso di danneggiamento del cavo
di alimentazione lo stesso deve essere
sostituito solo da un’officina di riparazione
raccomandata dal costruttore per non in-
correre in rischi! Vi preghiamo di rivolgervi
al costruttore o alla sua assistenza clienti!
• La tensione di rete deve corrispondere alla
tensione indicata (V) sull’apparecchio!
• Collegare l’apparecchio soltanto ad una
presa di corrente alternata con contatto
di terra. Non posare il cavo di alimentazi-
one lungo bordi affilati, non schiacciarlo
o lasciarlo pendere. Proteggere il cavo di
alimentazione dal calore e dall’umidità!
• Prima della messa in funzione
dell’apparecchio verificare sempre che
lo stesso sia in condizioni perfette.
L’apparecchio non deve essere messo in
funzione se:
– il cavo di collegamento è danneggiato
– l’apparecchio mostra segni di danneg-
giamento visibili
• Non avvolgere mai il cavo di alimentazione
intorno all’apparecchio!
• Inserire la spina di alimentazione nella
presa solo ad apparecchio spento.
Informazioni di sicurezza per
l’utilizzo dell’apparecchio
• Utilizzare l’apparecchio conformemente
alle disposizioni!
• Per non incorrere in rischi, le persone con
disturbi motori non devono mai mettere
in funzione l’apparecchio senza essere ac-
compagnate da una persona responsabile!
• I bambini non sono consapevoli dei
pericoli ai quali vanno incontro maneg-
giando apparecchi elettrici, perciò non
permettere mai ai bambini di far uso degli
apparecchi elettrici senza una supervisione
adeguata.
• Il materiale d’imballaggio, ad esempio
le buste di plastica, deve essere tenuto
lontano dalla portata dei bambini!
• Staccare la spina dalla presa di corrente:
– in caso di guasti durante l’uso
– prima di ogni pulizia
– dopo l’uso.
• Non tirare né sollevare mai l’apparecchio
per il cavo di alimentazione!
Informazioni di sicurezza per
la pulizia e la manutenzione
• In caso di anomalie di funzionamento
e prima di ogni pulizia e manutenzione
staccare la spina e lasciare raffreddare
l’apparecchio!
• Non staccare la spina dalla presa di corrente
tirando il cavo di alimentazione o con le
mani bagnate!
Avvertenza!
Pericolo di folgorazione!
Proteggere l’apparecchio dall’umidità!
Non immergerlo nell’acqua!
Uso conforme
alla destinazione
L’apparecchio è destinato esclusivamente
all’asciugatura e all’acconciatura di
capelli umani.
In caso di uso non conforme alla destinazione,
utilizzo non appropriato o riparazione non
a regola d’arte non viene assunta alcuna
responsabilità per eventuali danni. In tali
casi non si applica la garanzia.
Avvertenza!
Pericolo di folgorazione!
Non utilizzare l’apparecchio con le mani
bagnate nelle vicinanze di o all’interno
della vasca da bagno, della doccia o di un
lavandino pieno di acqua. Se nonostante
tali precauzioni l’apparecchio dovesse
cadere nell’acqua, staccare immediata-
mente la spina. Non mettere assolu-
tamente le mani nell’acqua quando
l’apparecchio è ancora collegato!
Avvertenza!
Pericolo di folgorazione!
Se l’apparecchio viene utilizzato in
bagno, staccare sempre la spina
dopo l’utilizzo in quanto la vicinanza
dell’acqua rappresenta un pericolo
anche quando l’apparecchio è spento!
• Non mettere mai in funzione l’apparecchio
sopra cuscini soffici o coperte!
• Non appoggiare l’apparecchio e il cavo
di alimentazione su superfici calde come
piastre di fornelli o simili e non collocarlo
nelle immediate vicinanze di fiamme libere!
• Per evitare di danneggiare i capelli non
tenere mai l’apertura per l’uscita dell’aria
troppo vicina agli stessi!
• Non coprire l’apertura di aspirazione
dell’aria e l’apertura per l’uscita dell’aria
quando l’apparecchio è in funzione!
• Spegnere l’apparecchio in caso d’interruzione
prolungata del processo di asciugatura!
• L’apparecchio è dotato di una protezio-
ne anti-surriscaldamento che ne causa
lo spegnimento automatico in caso di
sovraccarico (ad es. quando l’apertura di
aspirazione o di uscita dell’aria vengono
coperte).
• Ad ulteriore protezione, l’apparecchio
è dotato di un dispositivo di sicurezza
per correnti di guasto con una corrente
d’intervento nominale non superiore a
30 mA negli impianti interni. Per ulteriori
informazioni rivolgersi al proprio elettricista!
Solis_DesignLine_Betreibsanleitung.indd 20-21 06.10.09 11:02

22
I
23
Smaltimento
dell’apparecchio
EU 2002/96/EC
Smaltimento:
In conformità alla Direttiva 2002/96/CE
sui rifiuti di apparecchiature elettriche ed
elettroniche (RAEE), per uno smaltimento
rispettoso dell’ambiente al termine della
vita del vostro apparecchio portatelo in un
centro per la raccolta di apparecchi elettrici.
Pulizia e manutenzione
• Pericolo di scosse
elettriche!
Prima di cominciare
la pulizia scollegare
l’apparecchio dalla rete
elettrica.
• Pericolo di ustioni!
Lasciare sempre raffred-
dare completamente
l’apparecchio prima di
procedere alla pulizia o
alla manutenzione.
i FIGURE 1 - 4
• Proteggere l’apparecchio da polvere,
sporcizia e pelucchi. Rimuovere di tanto
in tanto la griglia d’ingresso dell’aria A e
pulirla. Pulire la griglia d’ingresso dell’aria
(vedi a pagina 3). Lasciare asciugare tutti i
componenti prima dell’utilizzo.
• Prima di cominciare la pulizia staccare
sempre la spina o scollegare l’apparecchio
dalla rete elettrica.
• Non immergere mai l’apparecchio in
acqua.
• Protezione dell’apparecchio!
Per la pulizia non utilizzare detergenti
aggressivi o abrasivi.
• Pulire unicamente l’apparecchio con uno
strofinaccio umido e asciugarlo con un
panno soffice.
Posizioni di regolazione SUPPORTO A PARETE
Tipo 435
Istruzioni per l’uso
Varie regolazioni
del flusso dell’aria
e della temperatura
Interruttore
ON/OFF
Apertura per
la linea di rete
Cavo a spirale
(asciugacapelli)
Solis_DesignLine_Betreibsanleitung.indd 22-23 06.10.09 11:02

24
I
25
I
Istruzioni di
montaggio per
il supporto a parete
- Segnare con una marita le posizioni
dei due fori per tasselli (maschera di
foratura, fig. 3).
- Praticare due fori con un trapano
con una punta da 4 mm.
- Inserire nei fori i tasselli compresi
nella fornitura.
- Avvitare una delle viti incluse nella
fornitura nel tassello superiore finché la
distanza tra la parete e la testa della vite
ammonta a 6,5 mm circa (vedi fig. 1)
- Ora si può appendere il supporto a
parete alla vite superiore e fissarlo con
la vite inferiore.
Avvertenza importante:
Fissare il supporto a parete fuori della portata
di chi utilizza la vasca da bagno o la doccia
(vedi fig. 2).
In fase di montaggio tenere in considerazione
la lunghezza del cavo di alimentazione e la
posizione della presa di corrente.
min. 60 cm
min. 60 cm
ca. 130 cm
fig. 2
20 mm 6,5 mm
4 mm
fig. 1
Maschera di foratura
4
fig. 3
Foro
79 mm
Foro
Solis_DesignLine_Betreibsanleitung.indd 24-25 06.10.09 11:02

26
I
27
TECHNOLOGY
CERAMIC
TOURMALINE
SOLIS AG
Solis-Haus • CH-8152 Glattbrugg-Zurigo • Svizzera
Telefono +41 44 874 64 54 • Fax +41 44 874 64 99
[email protected] • www.solis.ch • www.solis.com
Settembre 2009
Allacciamento elettrico
L’installazione deve essere effettuata solo da personale specializzato.
1. Allentare e rimuovere la protezione anteriore (vedi fig. 4).
2. Allacciamento elettrico con cavo di alimentazione: fissare il cavo di alimentazione al
morsetto (2) e bloccare il cavo di alimentazione mediante la staffa per cavi (3) (vedi fig. 5).
Allacciamento elettrico con attacco a incasso: aprire la base nel punto prestabilito (1)
e collegare i fili di collegamento (230/240 V) al morsetto (2) (vedi fig. 5).
3. Verificare nuovamente la correttezza delle operazioni di montaggio e rimontare la protezione
anteriore.
4. Inserire l’alimentazione e accendere l’interruttore ON/OFF.
Fig. 4
Fig. 5
2
1
3
1
3
3
2
1 Regolare l’interruttore ON/OFF sulla
posizione «0».
2 Sganciare la protezione anteriore
facendo leva con due oggetti appuntiti
infilati nelle due aperture presenti sul lato
inferiore della protezione anteriore stessa.
3 Estrarre la protezione anteriore tirandola
verso l’alto.
1 Apertura d’ingresso del filo
2 Morsetto
3 Staffa per cavi
Solis_DesignLine_Betreibsanleitung.indd 26-27 06.10.09 11:02

28 29
EE E
Appliance specifications
Model: 435
Voltage: 220-240 VAC ~ /50-60 Hz
Power: 1,400-1,700 Watt
Protection class: II
Radio interference elimination: This
appliance is suppressed against interference
in accordance with the provisions on radio
interference elimination.
EMC:This appliance is suppressed in
accordance with the provisions on
EMC (electromagnetic compatibility).
For your safety!
The instructions of use include
important safety instructions and
information which are required for
the faultless operation of the device!
Please read the instructions of use
completely, keep them and pass
them on to subsequent owners, if
necessary!
All the safety instructions also serve
for your personal safety!
Safety instructions for the connection
of the appliance
• This appliance corresponds to the recognized
codes of practice and the relevant safety
provisions for electronic appliances!
• The instructions for use have to be
observed and kept carefully in order to
avoid damages and dangers because of
improper use!
• If the appliance is passed on to others,
the instructions of use also have to be
handed over!
• If the power cord is damaged, it may only
be replaced by a repair shop authorized
by the manufacturer in order to avoid any
danger! Please contact the manufacturer
or the manufacturer’s customer service!
• The line voltage must correspond to the
voltage indicated on the appliance (V)!
• Only connect the appliance to AC on an
earthed wall socket. Do not guide the
power cord over sharp edges, clamp it or
let it hang down. Protect the power cord
against heat and moisture!
• Check the proper state of the appliance
prior to any use. It may not be taken into
operation if:
– the feed line is damaged
– the appliance shows visible damages
• Never wrap the power cord around the
appliance!
• Only connect the power plug to the socket
with the appliance being switched off.
Safety instructions for the operation
of the appliance
• Only use the appliance as intended!
• Persons with impaired motor nerves
should never take the appliance into
operation unattended in order to avoid
danger!
• Children do not recognize the dangers in
connection with the handling of electronic
appliances. Therefore, children should
never work with electronic appliances
unattended!
• Keep packaging materials such as foil
bags away from children!
Safety instructions for cleaning
and care
• Pull the power cord and let the appliance
cool down in case of malfunctions and
prior to any cleaning and care!
• Do not pull the power plug out of the
socket on the power cord or with wet
hands!
Attention!
Danger of electric shock!
Protect the appliance against moisture!
Do not dip it into water!
Intended use
The appliance shall only be used for drying
and styling human head hair.
In case of unintended use, wrong operation
or unprofessional repairs, no liability for
possible damages is assumed. Moreover, in
such cases, guarantees are excluded.
Attention!
Danger of electric shock!
Do not use the appliance with wet
hands, near or in the bath tub, shower
or over a filled wash basin. If the appli-
ance falls into the water, immediately
pull the power plug. Never reach into
the water as long as the appliance is
still connected!
Attention!
Danger of electric shock!
If the appliance is used in a bath room,
the socket must be pulled after use be-
cause the near of water is dangerous,
even if the appliance is switched off!
• Never place the appliance on soft cushions
or blankets!
• Do not place the appliance and power
cord on hot surfaces such as hotplates or
similar and never get in the near of open
flames!
• Never hold the air outlet too close to the
hair in order to avoid damages to the hair!
• Do not cover the air inlet and outlet during
operation!
• Switch the appliance off in case of longer
interruptions of the drying process!
• The appliance is equipped with an over-
heating protection which switches off in
case of overload (e.g. if the air inlet or
outlet is covered).
• Additional protection is provided by the
installation of a fault current protection
with a nominal release current of a maxi-
mum of 30 mA for household appliances.
Contact your electrician!
• The power plug has to be pulled:
– in case of malfunctions during operation
– prior to any cleaning
– after any use.
• Do not pull or carry the appliance on the
power cord!
Solis_DesignLine_Betreibsanleitung.indd 28-29 06.10.09 11:02

30
E
31
E
Disposal of
the appliance
EU 2002/96/EC
Disposal:
In accordance with the directive 2002/96/EC
on waste electrical and electronic equipment
(WEEE), please dispose your appliance at
the end of its life cycle and take it to a
collection point for electronic devices for
environmental protection.
Cleaning and care
• Danger of electric shock!
Pull the power cord
prior to any use!
• Danger of burning!
Let the appliance cool
down completely in
any case!
i FIGURES 1 – 4
• Protect the appliance against dust, dirt
and fluffs. Take off the air inlet grid A
from time to time and clean it. Clean the
air inlet grid (see page 3).
Prior to the installation, all the elements
must be dry.
• Always pull the power plug or switch off
the on/off switch prior to cleaning.
• Never dip the appliance into water!
• Protection of the appliance!
Do not use any aggressive or abrasive
cleaning agents.
• Only wipe the appliance with a moist
cloth and dry it with a soft cloth.
Switching steps WALL MOUNTING
Type 435
Instructions for use
Different blower
and heating steps
On/off switch
Opening for
the power cord
Spiral cable
(hair dryer)
Solis_DesignLine_Betreibsanleitung.indd 30-31 06.10.09 11:02

32
E
33
E
Assembly instructions
for the wall mounting
- Mark the positions of the two dowel
holes with a pen (boring template, fig. 3).
- Drill the two holes with a 4 mm drill.
- Put the supplied dowels in the holes.
- Screw one of the attached screws in the
upper dowel until the distance between
the wall and the screw head amounts to
ca. 6.5 mm (see fig. 1).
- The wall mounting can now be hung in
with the upper screw and is fixed with
the lower screw.
Important note:
This wall mounting has to be fixed out of
reach of a person using the bath tub or
shower (see fig. 2).
Please consider the length of the power cord
and the location of the socket when you
install the wall mounting.
min. 60 cm
min. 60 cm
ca. 130 cm
Fig. 2
20 mm 6,5 mm
4 mm
Fig. 1
Boring template
4
Fig. 3
Drilled hole
79 mm
Drilled hole
Solis_DesignLine_Betreibsanleitung.indd 32-33 06.10.09 11:02

34
E
Electrical connection
The assembly may only be carried out by a qualified expert.
1. Loosen the front cover and remove it (see fig. 4).
2. Electrical connection with mains: fix the mains in clamp (2) and clamp the mains with
the cable clamp (3) (see fig. 5).
Electrical connection with flush connection: open the basis at the defined place (1) and
connect the connection wires (230/240 V) to the clamp (2) (see fig. 5).
3. Check the assembly again and mount the front cover.
4. Switch on the power and the on/off switch.
SOLIS AG
Solis-House • CH-8152 Glattbrugg-Zurich • Switzerland
Phone +41 44 874 64 54 • Fax +41 44 874 64 99
[email protected] • www.solis.ch • www.solis.com
June 2009
Wir gewähren Ihnen für diesen SOLIS-Apparat
Nous vous accordons pour ce produit SOLIS
We grant you for this SOLIS appliance
Typ Nr.:
Type No:
Mod. No:
Fabr./Serie-Nr.:
No de fabrication/série:
Manuf./serial No:
Verkauft am:
Livré le:
Sold on:
durch:
Magasin de vente:
By:
Mit Ihrem Kauf wählten Sie ein erstklassiges Produkt, und das Gerät wird Ihnen
sicher lange Zeit Freude bereiten. Der Apparat hat eine sorgfältige Schlusskon-
trolle bestanden. Wir leisten hiefür eine Garantie für die Gratis-Reparatur aller
Bestandteile, wenn die Defekte nachweisbar infolge Materialfehler entstanden
sind. Die Garantie beginnt mit dem durch die Verkaufsfirma eingetragenen
Verkaufsdatum. Der Apparat muss in ungeöffnetem Zustand mit Garantieschein
bei uns eingehen. Schäden, welche durch normale Abnützung, Verschmutzung,
unsachgemässe Bedienung oder falschen Netzanschluss entstanden sind sowie
der Ersatz von zerbrochenen Teilen, fallen nicht unter Garantie und eine Haft-
pflicht für Sach- oder Personenschaden wird wegbedungen.
Bei gewerblichem Gebrauch beträgt die Garantiezeit 12 Monate.
En achetant un appareil SOLIS vous avez acquis un produit de la plus haute qua-
lité qui vous rendra certainement de bons services pendant longtemps. Avant
de quitter l’usine, l’appareil a été contôlé soigneusement. Nous nous engageons
à effectuer sans frais toutes les réparations résultant d’un défaut de fabrication
ou de matériel. La garantie commence avec la date de vente marquée par le re-
vendeur. L’appareil est à nous retourner sans avoir été ouvert et accompagné du
bon de garantie. Ne sont pas couverts les dommages qui résultent d’une usure
normale, d’un entretien laissant à désirer ou d’un emploi incorrect ou provenant
d’un choc ou d’une chute. La garantie écarte tout recours qui n’est pas spécifié
ci-dessus et ne peut en aucun cas donner lieu à des poursuites.
En cas d’usage industriel, la durée de garantie est de 12 mois.
By acquiring this unit you chose a first-class article. This item will surely provide
you lots of satisfaction for a long time. The apparatus has passed a very careful
final test. Our guarantee covers the free repair of any defective part which is
proven to be due to faulty material. The warranty commences as from the date
of delivery certified by the seller. The unit is to be returned to us without having
been opened, accompanied by this guarantee card. No indemnity is paid in case
of damage through normal wear, soiling, incorrect use, connection to the wrong
voltage supply or replacement of broken parts.We disclaim any responsibility for
damage caused to property or persons.
If the appliance is used commercially, the warranty period is 12 months.
2 JAHRE GARANTIE
2 ANS DE GARANTIE
2 YEARS GUARANTEE
nach unseren Lieferbedingungen
selon nos conditions de livraison
as per our delivery conditions
Fig. 4
Fig. 5
2
1
3
1
3
3
2
1 Set the on/off switch to the position “0”.
2 Unlock the front cover by pushing the two
openings at the lower end of the front
cover to the inside with two sharp items.
3 Take the front cover off to the top.
1 Wire entry opening
2 Clamp
3 Cable clamp
Solis_DesignLine_Betreibsanleitung.indd 34-35 06.10.09 11:02
Other manuals for IQ-7
1
Table of contents
Languages:
Other SOLIS Hair Dryer manuals

SOLIS
SOLIS HOME & AWAY User manual

SOLIS
SOLIS SWISS AIR 3802 User manual

SOLIS
SOLIS SWISS PERFECTION 360 ionicPRO 440 User manual

SOLIS
SOLIS SILENT & POWER 449 User manual

SOLIS
SOLIS 381 User manual

SOLIS
SOLIS 431 User manual

SOLIS
SOLIS SWISS PERFECTION 442 User manual

SOLIS
SOLIS AIRVOLUTION 3804 User manual

SOLIS
SOLIS FAST DRY 360 ionic User manual

SOLIS
SOLIS HOME & AWAY 3791 User manual