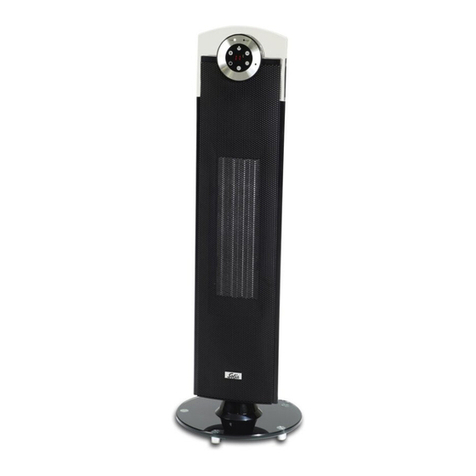
SOLIS CERAMIC 704 User manual

1
Bedienungsanleitung
Mode d’emploi
Istruzione per l’uso
User manual
CERAMIC
Heizlüfter
Radiateur
Termoventilatore
Fan Heater
Typ / Type / Tipo 704

2
D
1
Gehäuse-Oberteil
2
Bedienfeld
3
Gehäuse-Hinterteil
4
Hauptschalter
EIN/AUS
5
Frontabdeckung
6
Luftauslassgitter
7
Sockel
H
1
Boîtier, partie supérieure
2 Panneau de commande
3 Boîtier, partie postérieure
4 Interrupteur principal
MARCHE/ARRÊT
5 Face avant du boîtier
6 Grille sortie d’air
7 Socle
1
2
3
4
6
K
1
Carcassa superiore
2
Panello di commando
3
Carcassa posteriore
4
Interruttore principale
ACCESO/SPENTO
5
Rivestimento anteriore
6
Griglia fuoriuscita
dell aria
7
Zoccolo
G
1
Top cover
2
Control panel
3
Rear cover
4
Main switch
5
Front cover
6
Air-outlet grill
7
Base
5
7

3
D
8
Griffmulde
9
Herausnehmbarer,
waschbarer Filter
10
Lufteinlassgitter
H
8
Poignée
9
Filtre amovible
et lavable
10
Grille
d’admission d’air
K
8
Impugnatura
9
Filtro amovibile
e lavabile
10
Griglia entrata aria
G
8
Carry handle
9
Removable,
washable filter
protecting
the air inlet grille
10
Air intake grille
8
10
9

– Das Gerät darf nur in Betrieb genom-
men werden, wenn es auf einer festen,
ebenen Fläche aufgestellt ist (keine
hochflorigen Teppiche). Ein Freiraum von
mindestens 50 cm seitlich und oben und
120 cm nach vorn muss gewährleistet
sein.
–
Hängen Sie nichts über das Gerät
(z.B. Tücher oder Wäsche). Die Luftein-
tritts- und Luftaustrittsöffnungen müssen
immer frei bleiben, sonst besteht Über-
hitzungsgefahr.
Reinigen Sie die Lüftungsgitter in regel-
mässigen Abständen.
–
Der Heizlüfter soll nicht unmittelbar
unter einer Steckdose aufgestellt
werden.
– Wenden Sie sich zum Austausch des
Kabels nur an einen autorisierten
Kundendienst.
–
ACHTUNG:
Das Gerät nie in der Nähe
von Badewannen, Duschen, Wasch-
becken, Schwimmbädern installieren.
Bei der Installation im Badezimmer ist es
unabdingbar, dass die CEI-CEE normge-
rechten Sicherheitsabstände eingehalten
werden (s. Seite 7)
INSTRUKTIONEN
ZUM BETRIEB
• Gerät einschalten
1. Vor der Benutzung ist das Gerät auf
einen festen und ebenen Platz zu stellen.
2. Netzstecker in die Steckdose stecken,
Gerät am Hauptschalter einschalten, ein
Biepton ertönt. Das Gerät ist jetzt im
«Standby»-Betrieb.
3. Das Gerät einschalten mittels der
Taste .
Das Gerät kann nun entsprechend den
diversen Programmen (Drücken der Pro-
grammtasten) betrieben werden. Wird die
D
4
Liebe Kundin
Lieber Kunde
Wir gratulieren Ihnen zum Kauf des SOLIS
Heizlüfters Typ 704
Für optimale Leistung und Sicherheit lesen
Sie bitte diese Bedienungsanleitung vor
Inbetriebnahme des Gerätes aufmerksam
durch. Sie gibt wichtige Hinweise für den
Gebrauch, die Sicherheit sowie die Pflege
des Gerätes. Bewahren Sie die Bedienungs-
anleitung auf.
Personen, die mit der Bedienungs-
anleitung nicht vertraut sind, dürfen
den Heizlüfter nicht benutzen. Wir
wünschen Ihnen mit Ihrem neuen
SOLIS Gerät viel Freude.
WICHTIGE HINWEISE
– Um Schäden und Gefahren durch
nicht ordnungsgemässen Gebrauch zu
vermeiden, lesen Sie die Bedienungs-
anleitung aufmerksam durch.
– Das Gerät nur an Wechselstrom
230 Volt, 10 Ampere anschliessen.
–
Das Gerät darf nicht in Betrieb
genommen werden, wenn die
Zuleitung beschädigt ist, das Gerät
sichtbare Schäden aufweist oder einmal
heruntergefallen ist.
–
Der Heizlüfter ist als Zusatzheizung in
der Übergangszeit geeignet, er ist nicht
für den Dauerheizbetrieb ausgelegt.
–
Achten Sie darauf, dass der Heizlüfter
nicht mit Wasser in Berührung kommt.
– Das Gerät ausser Reichweite von Kindern
aufstellen. Keine Gegenstände in die
Lüftungsgitter stecken.

5
D
Taste erneut gedrückt, erlischt das
Display sofort, während der Ventilator (und
die Oszillation falls eingeschaltet) nach ca.
30 Sekunden abschaltet. Das Gerät ist jetzt
wieder im «Standby»-Betrieb.
Funktion «MODE»:
Taste «MODE» drücken um folgende Funk-
tionen zu wählen:
Im Display leuchtet das gewählte Symbol.
Funktion «AUTO»:
Die erste Funktion ist «AUTO». Im Display
erscheint nun «AUTO» und nach einigen
Sekunden blinkt «SELECT». Jetzt haben Sie
die Möglichkeit die gewünschte Tempera-
tur einzustellen (zwischen 7°C und 35°C)
indem die «
+
» respektive die «
–
» Taste
gedrückt wird. So können Sie die für Sie
ideale Temperatur einstellen. Die gewählte
Temperatur wird nach einer Wartezeit von
wenigen Sekunden automatisch gespei-
chert. Das Wort «SELECT» blinkt nicht mehr
und im Display erscheint dafür die effektive
Raumtemperatur.
Hinweis: Wenn die von Ihnen eingestellte
Temperatur tiefer als die effektive Raum-
temperatur ist, stoppt das Gerät automa-
tisch. In diesem Fall blinkt im Display das
Wort «AUTO». Das Gerät startet automa-
tisch wenn die Raumtemperatur unter den
Wert der eingestellten Temperatur sinkt.
Funktion
In diesem Modus arbeitet das Gerät als
reiner Ventilator, die austretende Luft ist
kalt. In diesem Modus kann keine Tempera-
tureinstellung vorgenommen werden.
Funktion «ECO»:
In diesem Modus arbeitet das Gerät mit
1000 Watt und das Gerät strebt eine Raum-
temperatur von 19°C an. Ist die Temperatur
im Raum höher als 19°C, stoppt das Gerät
automatisch und das Wort «ECO» im
Display blinkt.
In diesem Modus kann keine Tempera-
tureinstellung vorgenommen werden. Im
«HAUS» kann man die effektive Raumtem-
peratur ablesen.
Funktion «HIGH»:
In diesem Modus arbeitet das Gerät mit
1800 Watt und zwar konstant ohne Bezug
auf die Raumtemperatur. In diesem Modus
kann keine Temperatureinstellung vorge-
nommen werden. Im «HAUS» kann man
die effektive Raumtemperatur ablesen.
Funktion «OSC»:
Über die Taste kann die Oszillation
des Gerätes gestartet werden. Erneutes
Drücken dieser Taste stoppt die Oszillation.
Jedes Drücken der Taste erzeugt einen
Biepton.
Weitere Funktionen die mit den Tasten «
+
»
bezw. «
–
» möglich sind:
Funktion «TIMER» :
Die Taste mit dem Timer-Symbol einige
Sekunden gedrückt halten bis im Display
das Kästchen «TIMER» blinkt. Nun kann
die Einschaltdauer des Gerätes in Stunden
(H) eingestellt werden, indem die «
+
» Taste
wiederholt gedrückt wird. Ist die gewünsch-
te Zeit eingestellt, durch erneutes Drücken
der Taste «TIMER» bestätigen (oder ca.
7 Sekunden warten, dann übernimmt das
Gerät die eingestellte Zeit automatisch). Die
gewählte Zeit wird im Display angezeigt.

D
6
PROG.:
Dieses Gerät verfügt über ein
Programm für automatisches Einschalten
und Ausschalten.
Vorgehensweise:
1. Die Taste «
PROG
» so lange drücken bis
im Display der Name «PROG» blinkt.
2. Die Tasten «
+
» oder «
–
» drücken um die
gewünschte Einschaltzeit einzustellen.
3. Die Taste «
TIMER
» so lange drücken bis
im Display das Wort «TIMER» blinkt.
4. Die Tasten «
+
» oder «
–
» drücken um die
gewünschte Ausschaltzeit einzustellen.
5. Die Einstellungen bestätigen indem die
Taste «
TIMER
» gedrückt wird.
6. Nun kann der gewünschte Arbeitsmodus
gewählt werden indem die Taste «MODE»
gedrückt wird, auch die Oszillation
«
OSC
» kann gewählt werden.
7. Nun die Taste «
PROG
» drücken um
die gewählten Arbeitsmodi zu bestä-
tigen. Die Ventilation und die Oszilla-
tion (falls eingeschaltet) arbeiten jetzt
während ca. 30 Sekunden. Die program-
mierten Funktionen sind nun aktiviert,
alle gewählten Einstellungen sind im
Display angezeigt (ausgenommen die
Funktion «OSC»). Das Gerät schaltet nun
automatisch ein resp. aus gemäss der
gewählten Programmierung.
Hinweis: Nach dem Schritt 7 können
keine Aenderungen der Programmierung
vorgenommen werden, ausser durch langes
Drücken der Taste «
PROG
», damit startet
man die Programmierung erneut.
Wenn die Programmierung «PROG» akti-
viert ist, bestehen folgende Möglichkeiten:
• Programmfunktion ergänzen oder
ändern:
wieder wie oben beschrieben
mit dem 1. Schritt beginnen.
• Die Programmierung der vorge-
wählten Start- bezw. Endzeit
löschen:
Taste drücken, die
Start- bzw. Endzeit der Programmierung
wird gelöscht und das Gerät befindet
sich wieder im manuellen Modus.
• Sämtliche programmierten
Funktionen löschen:
Die Taste
für mind. 1 Minute gedrückt halten.
Reinigung des Filters
Der Filter sollte wie folgt periodisch gerei-
nigt werden (1 x pro Woche):
1. Befestigungsschraube des Filters auf der
Rückseite des Gerätes lösen.
2. Den Filter vom Gerät lösen und reinigen.
3. Nach erfolgter Reinigung den Filter
wieder montieren in umgekehrter
Reihenfolge.
ACHTUNG:
Den Filter erst montieren wenn
er trocken ist. Das Gerät nicht ohne
Filter in Betrieb nehmen.
Befestigungs-
schraube

GERÄTE-ENTSORGUNG
EU 2002/96/EC
Entsorgung:
In Übereinstimmung mit der Richtlinie
2002/96/EC für die Entsorgung von
Elektro- und Elektronik-Altgeräte (EEAG)
bringen Sie bitte Ihr Gerät am Ende der
Lebensdauer zur Entsorgung und zum
Schutz der Umwelt zu einer Sammelstelle
für Elektrogeräte.
7
D
Aufstellen des Gerätes
• Der Heizlüfter ist gegen
vertikale
Wassertropfen
geschützt gemäss
Schutzklasse IP21, er kann in allen
Badezimmern verwendet werden, auch
in jenen Räumen wo das Risiko von
vertikalen Wasserstropfen
möglich
ist (Küche, Badezimmer etc.).
• Entsprechend der oben gezeigten
Skizze darf das Gerät nur in Volume
3 aufgestellt werden. Die Sicherheits-
abstände sind ebenfalls auf dieser
Skizze ersichtlich.
Hinweis: Der Heizlüfter muss so
platziert sein, dass Personen die
in der Badewanne oder unter der
Dusche sind, keine Schalter oder
andere Bedienelemente berühren
können.
SICHERHEITSSYSTEM
• Der Heizlüfter verfügt über ein Sicher-
heitssystem welches das Gerät automa-
tisch abschaltet wenn eine Überhitzung
erfolgt. Nach erfolgter Abkühlung schal-
tet das Gerät automatisch wieder ein.
• Wenn der Heizlüfter erneut überhitzt,
ziehen Sie den Netzstecker aus der Steck-
dose und bringen Sie das Gerät zwecks
Kontrolle zu einer autorisierten Service-
stelle.
• Fällt der Heizlüfter um, sorgt ein spezi-
elles Sicherheitssystem dafür, dass das
Gerät automatisch abschaltet. Stellen Sie
das Gerät wieder auf (horizontal). Das
Gerät arbeitet jetzt wieder einwandfrei.
WARTUNG UND PFLEGE
• Der Heizlüfter benötigt lediglich eine
periodische Reinigung der äusseren
Gehäuseteile.
• Vor jeder Reinigung das Gerät am Haupt-
schalter ausschalten. Den Netzstecker
aus der Steckdose ziehen und warten bis
das Gerät abgekühlt ist.
• Benützen Sie ein feuchtes Tuch um das
Gehäuse des Gerätes zu reinigen.
• Bitte für die Reinigung kein Wasser oder
oder aggressive Reinigungsmittel ver-
wenden, auch keine chemischen Mittel
(Alkohol, Benzin, etc.).

8
F
tapis avec des longs poils). Ménager un
espace de sécurité (au moins de 50 cm
au-dessus et sur les côtés de l‘appareil et
de 120 cm devant).
– Ne jamais étendre de draps ou de linge
au-dessus de l‘appareil (par exemple
lingerie ou tissus) Les ouvertures d‘entrée
et de sortie d‘air doivent toujours rester
libres pour éviter toute surchauffe.
Dépoussiérer régulièrement les grilles
d‘aération.
– Le thermoventilateur ne doit pas être
positionné immédiatement sous une
prise de courant fixe.
– Pour le remplacement du cordon
adressez-vous au service après-vente.
–
ATTENTION:
Ne pas installer ni
employer l‘appareil près de baignoires,
douches, lavabos, piscines.
Si l‘appareil est installé dans une salle de
bains, respecter les distances de sécurité
indiquées par les normes CEI-CEE (voir
page 11).
MODE D‘EMPLOI
• Mise sous tension
1. Avant d‘utiliser l‘appareil, placez-le sur
une surface plane et stable.
2. Insérez la fiche dans la prise de courant
et mettez l‘appareil sous tension.
3. Enclencher l’appareil à l’aide de
l’interrupteur principale. Un signal
sonore et l’appareil se trouve en position
« standby ». Lorsque l‘appareil est
branché, il peut être commandé à l‘aide
des boutons placés sur le panneau de
commande.
Appuyez sur le bouton pour mettre
l‘appareil en marche ; le panneau
d‘affichage s’illumine. Remarque : un signal
sonore sera émis par l‘appareil chaque fois
que les boutons de contrôle sont utilisés ou
Chère cliente,
Cher client,
Nous vous félicitons pour l‘achat du radia-
teur soufflant SOLIS type 704.
Pour assurer des performances optimales
et pour votre sécurité, lisez attentivement
ce mode d‘emploi avant la mise en service
de l‘appareil. Il vous donne de précieux
renseignements concernant l‘utilisation, la
sécurité et l‘entretien. Aussi conservez-le
toujours à portée de main.
Les personnes non familiarisées avec
le mode d‘emploi ne devraient pas
utiliser le radiateur soufflant. Nous
vous souhaitons beaucoup de plaisir
lors de l‘utilisation de votre nouvel
appareil SOLIS.
IMPORTANT
– Lire le mode d‘emploi afin d‘éviter tout
dommage et tout risque engendré
par le non-respect des prescriptions
d‘utilisation.
– Raccorder l‘appareil à une prise de
courant 230 volts, 10 amperes.
– Ne pas utiliser l‘appareil si le cordon
de raccordement est endommagé, si
l‘appareil présente des détériorations
visibles ou s‘il a été abîme à la suite
d‘une chute.
– Le radiateur se prête au chauffage
d‘appoint, il n‘est pas destiné à être
utilisé comme appareil de chauffage
principal.
– Veiller à ce que le radiateur ne soit jamais
en contact avec de l‘eau.
– S‘assurer que les enfants ne puissent pas
jouer avec l‘appareil. Ne jamais introduire
aucun objet dans les grilles d‘aération.
– Utiliser l‘appareil toujours en position
horizontal; quand il est posé sur une
surface stable, bien horizontal (pas de
9
F
appuyés. Appuyez à nouveau sur :
le panneau d‘affichage s‘éteint immédiate-
ment, le ventilateur de l‘appareil et la fonc-
tion d‘oscillation (si elle est active) s‘arrêtent
après 30 secondes.
Mode :
Appuyez sur le bouton „MODE“, pour
sélectionner le mode de fonctionnement.
Indication sur le panneau de commande :
Les voyants d‘indication du mode de foncti-
onnement s‘allument.
Mode « AUTO » :
en utilisant les boutons «
+
» et «
–
»,
réglez la température entre 7°C et 35°C
selon vos besoins de confort. La tempéra-
ture est automatiquement validée après
quelques secondes.
Indication sur le panneau d‘affichage :
« SELECT » disparaît après quelques secon-
des, et vous pouvez alors lire la température
ambiante de la pièce sur l‘icône« HOUSE ».
Pour afficher le réglage de température que
vous avez effectué, appuyez simplement sur
les boutons «
+
» ou «
–
».
Remarque : si la température que vous
avez réglée est inférieure à celle de la pièce
(mesurée par l‘appareil), l‘appareil s‘arrête
automatiquement. L‘icône placée sous
AUTO sur le panneau d‘affichage clignote.
L‘appareil se remet à chauffer dès que
la température ambiante de la pièce est
inférieure à la température réglée.
Mode :
l‘appareil génère de l‘air froid. Il n‘est pas
possible de régler la température dans ce
mode de fonctionnement.
Mode « ECO » :
l‘appareil fonctionne à une puissance de
1000 W et la température est automatique-
ment réglée à 19°C. Si la température
ambiante (mesurée par l‘appareil) est
supérieure à la température par défaut,
l‘appareil s‘arrête automatiquement et
l‘icône « ECO » clignote. Il n‘est pas
possible de régler la température dans ce
mode de fonctionnement.
Le panneau d‘affichage indique la tempéra-
ture ambiante de la pièce sur l‘icône
« HOUSE ».
Mode « HIGH » :
l‘appareil fonctionne à une puissance non
régulée de 1800 W. Il n‘est pas possible
de régler la température dans ce mode de
fonctionnement.
Le panneau d‘affichage indique la
température ambiante de la pièce sur
l‘icône « HOUSE » .
Mode « OSC » :
Appuyez sur ce bouton, pour faire
osciller l‘appareil horizontalement.
Appuyez de nouveau sur le bouton pour
arrêter l‘oscillation. Un signal sonore est
émis chaque fois par l‘appareil.
Indication sur le panneau d‘affichage :
aucune icône pour la fonction d‘oscillation.
Les boutons «
+
» ou «
–
» permettent de
régler la température du mode de foncti-
onnement ainsi que les fonctions TIMER et
PROG.
Mode « TIMER » :
Appuyez longuement sur le bouton,
les heures de l‘horloge clignotent.
Appuyez sur «
+
» ou «
–
» pour régler
l‘heure souhaitée. La validation s‘effectue
en appuyant sur le bouton « TIMER » ou
automatiquement après 7 secondes.

10
F
PROG. :
Votre appareil est équipé d‘une
fonction qui permet de programmer la
mise en marche et l‘arrêt automatiques de
l‘appareil.
Les étapes de programmation de la fonction
«
PROG
» sont les suivantes :
1. Appuyez longuement sur le bouton
« PROG », pour commencer la program-
mation ; l‘heure et l‘indication PROG se
mettent à clignoter.
2. Appuyez sur «
+
» ou «
–
» pour régler
l‘heure de mise en marche souhaitée.
3. Appuyez longuement sur le bouton
«
TIMER
» pour régler l‘heure d‘arrêt ;
l‘indication des heures se met à clignoter.
4. Appuyez sur «
+
» ou «
–
» pour régler
l’heure d‘arrêt souhaitée.
5. Validez l‘heure d‘arrêt en appuyant de
nouveau sur le bouton «
TIMER
».
6. Vous pouvez régler simultanément le
mode de fonctionnement et la fonction
d‘oscillation mentionnés ci-dessus en
appuyant sur le bouton «
MODE
» et sur
ou
OSC
.
7. Validez l‘heure de mise en marche et la
programmation effectuée en appuyant
sur le bouton « PROG » ; le ventilateur
de l‘appareil et la fonction d‘oscillation (si
elle est active) s‘arrêtent après 30 secon-
des. La fonction PROG est maintenant
active et tous les réglages (excepté la
fonction d‘oscillation) sont indiqués
sur l‘affichage. L‘appareil se mettra en
marche et s‘arrêtera automatiquement
selon la programmation que vous avez
effectuée.
Remarque : pour modifier la programma-
tion après l‘étape n° 7, appuyez de nouveau
longuement sur le bouton « PROG ».
Lorsque la fonction PROG est active, vous
pouvez effectuer les opérations suivantes :
• Ajouter ou modifier une fonction
programmée :
procédez comme lors
de la première programmation (en com-
mençant par l‘étape n° 1 de la procédure
de programmation décrite ci-dessus).
• Annuler les heures de mise en
marche et d‘arrêt :
appuyez
brièvement sur ; les heures de
mise en marche et d‘arrêt sont annulées.
L‘appareil est de nouveau en mode
manuel.
• Annuler toutes les fonctions
programmées à la fois :
appuyez sur
le bouton de mise en circuit pendant plus
de 1 minute.
Comment nettoyer
le filtre
Le filtre doit être nettoyé régulièrement
(une fois par semaine) en procédant comme
indiqué ci-après :
1. Dévissez les vis (1) qui fixent le filtre sur
la partie arrière du radiateur.
2. Enlevez le filtre en suivant la direction de
la flèche et nettoyez-le.
3. Après le nettoyage, remettez le filtre en
place en effectuant en sens inverse les
étapes indiquées ci-dessus.
ATTENTION
Ne réinstallez pas le filtre avant
qu‘il ne soit sec. N‘utilisez pas
l‘appareil sans filtre.
Vis

ELIMINATION DE
L’APPAREIL
EU 2002/96/EC
Elimination de l’appareil:
Conformément à la Directive 2002/96/EC
concemant les déchets d’équipements
électriques et électroniques (DEEE), une
fois l’appareil arrivé à la fin de sa durée de
vie, pour une élimination respectueuse de
l’environnement, ramenez-le dans un centre
pour la collecte d’appareils électriques.
11
F
Positionnement
de l‘appareil
• Le radiateur est protégé contre
l‘égouttement vertical d‘eau et apparti-
ent à la classe d‘étanchéité IP21. Il peut
être utilisé dans toutes les pièces de la
maison, y compris dans celles qui pré-
sentent un risque d‘égouttement vertical
d‘eau (cuisine, salle de bains, etc.)
• Conformément au schéma ci-dessus, le
radiateur doit être utilisé uniquement
dans la section 3 (VOLUME 3) ; les
distances de sécurité à observer lors du
positionnement sont indiquées sur le
schéma.
Remarque : le radiateur doit être
installé de manière à éviter tout con-
tact inopiné avec les commutateurs
et autres dispositifs de commande
dans la salle de bain.
SYSTÈME DE SÉCURITÉ
• L‘appareil est doté d‘un système de
sécurité qui arrête automatiquement
l‘appareil en cas de surchauffe. L‘appareil
se remet automatiquement en marche,
lorsqu‘il s‘est refroidi.
• Si le problème mentionné ci-dessus
se répète plusieurs fois, débranchez
l‘appareil de la prise de courant et faites-
le contrôler exclusivement par un service
autorisé.
• Lorsque l‘appareil est incliné, un disposi-
tif de sécurité intégré l‘arrête automati-
quement. Placez alors l‘appareil en positi-
on verticale et actionnez-le de nouveau.
Nettoyage
• Le radiateur soufflant nécessite seu-
lement un nettoyage périodique des
parties externes.
• Déclancher l’appareil. Positionnez
l’interrupteur principale sur pos. « O ».
Retirez la fiche d’alimentation de la prise
murale. Attendre que l’appareil sera
refroidi suffisamment.
• Nettoyer l’exterieur de l’appareil avec un
chiffon umide.
• N’utilisez pas de l’eau, des produits
agressif ou chimique ( alcool, essence,
etc. )

I
12
mente folti). Lasciate ampio spazio
attorno al termoventilatore (almeno
cm 50 sopra ed ai lati e cm 120 di
fronte).
–
Non lasciate nulla appeso sopra o di
fronte all‘apparecchio (p. es. biancheria
o tessuti).
Per evitare un surriscaldamento
dell‘apparecchio, controllare che le
aperture di entrata e di uscita dell‘aria
siano libere. Di tanto in tanto togliere
la polvere da dette aperture.
– L‘apparecchio non deve essere posizio-
nato immediatamente sotto una presa
di corrente.
–
Per la sostituzione del cavo rivolgersi ad
un centro assistenza.
–
ATTENZIONE:
Non installare o usare
l‘apparecchio nelle immediate vicinanze
di vasche da bagno, docce, lavandini,
piscine. Se l‘apparecchio viene installato
in una stanza da bagno è necessario fare
attenzione alle distanze di sicurezza indi-
cate dalle norme CEI-CEE (pagina 15).
ISTRUZIONI D’USO
• Accensione e modi operativi
1. Per l’uso collocare l’apparecchio su una
superficie piana e stabile.
2. Inserire la spina dell’apparecchio nella
presa elettrica.
3. Accendere l’apparecchio al aiuto
dell’interruttore principale. L’apparecchio
emette un bip e si trova in posizione
«standby». I pulsanti sul pannello di
comando consentono la regolazione
dell’apparecchio dopo averlo collegato
alla rete di alimentazione.
Premendo questo pulsante
l’apparecchio si accende, il display si
illumina. Nota: l’apparecchio emette un bip
ad ogni pressione dei pulsanti; ripremendo
Gentile Cliente
Ci congratuliamo con lei per l‘acquisto del
termoventilatore SOLIS Tipo 704.
Per ottenere delle prestazioni ottimali e
per la sua sicurezza le raccomandiamo di
leggere attentamente le presenti istruzioni
prima di mettere in funzione l‘apparecchio.
Ci troverete importanti informazioni
sull‘uso, la sicurezza e la manutenzione
dell‘apparechio. Conservi con cura le pre-
senti istruzioni.
Le persone che non conoscono a
sufficienza le istruzioni per l‘uso
non devono utilizzare il termo-
ventilatore. Le auguriamo che il suo
nuovo apparecchio SOLIS sia per
lei motivo di gioia e soddisfazione
durante molti anni.
IMPORTANTE
– Per evitare danni e rischi causati dall‘uso
improprio, leggete attentamente le
istruzioni d‘uso.
– Collegare l‘apparecchio ad una presa di
alimentazione 230 V 10/A.
– Non accendere l‘apparecchio quando
il cavo di collegamento è difettoso,
la scocca è palesemente danneggiata
oppure è stato danneggiato a seguito
di caduta.
– Il termoventilatore è adatto come
riscaldamento supplementare, e non va
considerato come impianto di riscalda-
mento centrale.
– Controllate che il termoventilatore non
venga in contatto con l‘acqua.
– I bambini non devono giocare con il
termoventilatore. Non mettere nulla nelle
aperture di ventilazione.
– Usate l‘apparecchio sempre in posizione
orizzontale; posato su base stabile, ben
orizzontale (non su tappeti particolar-

13
I
il display diventa subito scuro, la
ventola e la funzione rotazione (se attiva) si
disattivano dopo 30 secondi.
Modo:
premere il pulsante MODE per selezionare il
modo operativo desiderato.
Sul pannello di comando:
la spia modo operativo si illumina.
Modo «AUTO»:
impostare la temperatura tra 7 °C e 35 °C
con i pulsanti «
+
» e «
–
» in funzione del
comfort termico desiderato. La temperatura
sarà automaticamente confermata dopo
pochi secondi.
Visualizzazioni sul pannello:
Dopo pochi secondi «
SELECT
» scompare,
l’icona «HOUSE» indica la temperatura
ambiente.
Per visualizzare la temperatura impostata
premere i pulsanti «
+
» «
–
».
Nota: se la temperatura impostata è infe-
riore alla temperatura ambiente (misurata
dall’apparecchio), l’apparecchio si ferma
immediatamente. L’icona sotto AUTO sul
display lampeggia. L’apparecchio riprende a
riscaldare non appena la temperatura ambi-
ente scende sotto la temperatura impostata.
Modo :
l’apparecchio funziona ad aria fredda. In
questo modo operativo non è possibile
impostare la temperatura.
Modo «ECO»:
l’apparecchio funziona alla potenza di
1000 W ed imposta automaticamente la
temperatura a 19 °C; se la temperatura
ambiente (misurata dall’apparecchio) è
superiore alla temperatura preimpostata,
l’apparecchio si ferma automaticamente e
l’icona «ECO» lampeggia. In questo modo
operativo non è possibile impostare la
temperatura.
Visualizzazioni sul pannello: l’icona
«HOUSE» indica la temperatura ambiente.
Modo «HIGH»:
l’apparecchio funziona alla potenza di
1800 W non regolati.
In questo modo operativo non è possibile
impostare la temperatura.
Visualizzazioni sul pannello: l’icona
«HOUSE» indica la temperatura ambiente.
«OSC.» :
premendo questo pulsante l’apparecchio
ruota in senso orizzontale. Ripremendo
il pulsante la rotazione si ferma; ad ogni
pressione l’apparecchio emette un bip.
Visualizzazioni sul pannello: nessuna icona
sulla funzione rotazione.
Pulsanti + e –: premendo questi pulsanti
è possibile impostare la temperatura e le
funzioni TIMER e PROG.
«TIMER» :
premendo a lungo questo pulsante le ore
dell’orologio lampeggiano; per impostare
l’ora desiderata premere i pulsanti «
+
»
o «
–
». La conferma avviene premendo il
pulsante «TIMER» oppure automaticamente
dopo 7 secondi.

I
14
PROG.:
l’apparecchio è dotato di funzione
accensione e spegnimento automatico.
Procedura per «PROG»:
1. Premere a lungo il pulsante «
PROG
»
per avviare la programmazione; appare
l’ora e «PROG» lampeggia.
2. Premere i pulsanti «+» o «–» per im-
postare l’ora di accensione desiderata.
3. Premere a lungo il pulsante timer per
impostare l’ora di spegnimento; l’ora
lampeggia.
4. Premere i pulsanti «+» o «–» per im-
postare l’ora di spegnimento desiderata.
5. Confermare l’ora di spegnimento
premendo nuovamente il pulsante
«
TIMER
».
6. È possibile impostare il modo operativo
sopra descritto e la funzione rotazione
premendo i pulsanti «
MODE
» e «
OSC
».
oppure il pulsante .
7. Confermando l’ora di accensione e
la programmazione scelta con una
pressione sul pulsante «
PROG
» la
ventola e la funzione rotazione
(se selezionata) si disattivano dopo
30 secondi; la funzione PROG ora è
attiva, tutte le impostazioni sono visu-
alizzate sul display (eccetto la funzione
«OSC»); l’apparecchio si accenderà e si
spegnerà automaticamente secondo la
programmazione scelta.
NOTA: Non è possibile cambiare le
impostazioni dopo il passo n. 7 a meno che
si prema a lungo il pulsante «
PROG
».
Con funzione PROG attiva è possibile
eseguire le seguenti operazioni:
• Aggiunta o modifica funzione
programmata:
seguire la procedura
usata per la 1a programmazione
(avvio programmazione, passo n. 1
precedente).
• Cancellazione ora di accensione
e spegnimento:
premere brevemente
il pulsante , l’ora di accensione
e di spegnimento vengono cancellate;
l’apparecchio ritorna in modo manuale.
• Cancellazione di tutte le opera-
zioni programmate in una sola
volta:
premere l’interruttore di accen-
sione per più di 1 minuto.
Pulizia del filtro
Il filtro deve essere pulito periodicamente
(una volta alla settimana) come segue:
1. Svitare le viti 1 di fissaggio del filtro sulla
parte posteriore del riscaldatore.
2. Rimuovere il filtro nel senso della freccia
e pulirlo.
3. Terminata la pulizia rimontare il filtro
invertendo la procedura.
AVVERTENZA:
Montare il filtro solo quando
asciutto. Non usare l’apparecchio
senza filtro.
Vite

SMALTIMENTO:
EU 2002/96/EC
Smaltimento:
In conformità alla Direttiva 2002/96/CE
sui rifiuti di apparecchiature elettriche ed
elettroniche (RAEE), al termine della vita del
Vs. apparecchio, per il suo smaltimento a
salvaguardia dell‘ambiente, portatelo in un
centro per la raccolta di apparecchi elettrici,
o, nel caso di riacquisto di un nuovo appa-
recchio, presso il rivenditore.
15
I
Installazione
dell‘apparecchio
•
Il riscaldatore è protetto dal
gocciola-
mento verticale
di acqua ed è dotato
di protezione impermeabilità IP21; può
essere usato in tutti i locali della casa,
compresi quelli a rischio di
gocciola-
mento verticale
di acqua (cucina,
bagno, ecc.).
•
Secondo il grafico, il riscaldatore può
essere usato solo in volumi 3 (VOLUME 3);
le distanze di sicurezza per l’installazione
sono indicate sul grafico.
Nota: Collocare il riscaldatore in
modo che gli interruttori e gli altri
comandi non possano essere toccati
da persone nella vasca da bagno o
nella doccia.
SISTEMA DI SICUREZZA
•
L’apparecchio è dotato di sistema
di sicurezza che lo spegne automatica-
mente in caso di surriscaldamento e
lo riaccende automaticamente quando
si è raffreddato.
•
Se il surriscaldamento si ripete, staccare
la spina dalla presa elettrica portare il
riscaldatore in un centro di assistenza
autorizzato.
•
Se l’apparecchio si è inclinato, il sistema
di sicurezza spegne automaticamente
l’apparecchio; porre l’apparecchio in posi-
zione verticale per rimetterlo in funzione.
Pulizia:
• Il termoventilatore necessita solamente
una pulizia periodica delle parti esterne
• Regolare l’interruttore principale sulla
posizione «O». Togliete la spina dalla
presa di corrente. Lasciate raffredare
l’apparecchio.
• Pulire la parte esterna dell apparecchio
con un panno umido.
• Per la pulizia non usare mai acqua,
prodotti aggressivi o solventi (alcool,
benzina, ecc.)

E
16
– Always use the heater in the horizontal
position; stand it on a firm, solid,
horizontal base (not on thick pile
carpets).
Leave plenty of room around the heater
(at least 50cm on top and round the
sides, 120cm at the front).
– Leave nothing hanging above or in front
of the heater (e.g. clothes or fabrics). Be
sure that the air inlets and outlets on the
heater are unhindered otherwise it will
overheat. Dust these openings every now
and again.
–
Do never position the appliance under an
outlet.
– For substitution of the cable please refer
to service centers only.
–
WARNING:
Never install or use the
appliance close to bath tubs, showers,
wash basins, swimming pools.
If the appliance is installed in a bath-
room, always comply with safety
distances as indicated by CEI-CEE
regulations (see page 19).
OPERATION
INSTRUCTION
• Power selection
1. Before use the appliance place it on
stable flat surface.
2. Insert the plug into the power socket.
3. Switch on the appliance with the main
switch. Note: a beep will be emitted by
the appliance.
Press the button , your appliance
starts, the display panel lights up, note: a
beep will be emitted by the appliance each
time that the control buttons are used or
Dear Customer
Congratulations on your purchase of this
SOLIS fan heater, type 704.
To get the most out of your fan heater in
complete safety, please read through these
instructions carefully before using it for the
first time. They contain important tips for
the use, safety and maintenance of this
appliance. Please keep these operating
instructions somewhere safe.
Please do not allow persons who are
not familiar with these operating in-
structions to use your fan heater. We
hope you will be completely satis-
fied with your new SOLIS appliance.
IMPORTANT
– Before operating the heater, please
read these instructions thoroughly to
avoid damage and hazardous situations.
– Connect the heater to a 230V, 10A
socket.
– Never turn the heater on if the lead
is damaged, if the heater‘s casing is
obviously damaged or was damaged
subsequent to being dropped.
– The fan heater is excellent to provide
additional heating: it should not be
considered as a centralized central
heating unit.
– Make sure that the heater never comes
into contact with water.
– Do not let children play with the heater.
Do not poke anything through the
ventilating slits.

E
17
pressed, press the once again, the
display panel gets dark immediately , the
fan of the appliance and oscillation function
(if active) will stop after 30 seconds.
Mode:
Press the «MODE» button to select your
operating mode.
On the control panel:
The operating mode indicator lights up.
«AUTO» mode:
set the temperature to between 7°C and
35°C using the «+» and «–» buttons;
this temperature depends on your idea of
comfort. It is automatically validated after a
few seconds.
You can see on the panel:
After a few seconds «
SELECT
» disappears,
you can then read the temperature of the
room in the «HOUSE» icon.
To display your temperature setting, simply
press «
+
» «
–
» buttons.
Note: if the temperature you have set is
lower than that of the room (measured at
the appliance) then the appliance stops
automatically. The icon underneath the
«AUTO» message on the display panel then
flashes. The appliance starts heating again
as soon as the temperature of the room
drops below the temperature set.
mode:
the appliance operates in cold air. You
cannot set the temperature in this operating
mode.
«ECO» mode:
the appliance operates at a power setting
of 1000W and automatically sets the tem-
perature to 19°C, if the room temperature
(measured at the appliance) is higher than
that of the default then the appliance stops
automatically and the «ECO» icon flashes.
You cannot set the temperature in this
operating mode.
You can see on the panel: the temperature
of the room in the «HOUSE» icon.
«HIGH» mode:
the appliance operates at a power setting
of 1800 unregulated.
You cannot set the temperature in this
operating mode.
You can see on the panel: the temperature
of the room in the «HOUSE» icon.
«OSC» :
Press the button to make the appliance
oscillate in horizontal direction. Press again
to stop oscillating, a beep will be emitted by
the appliance each time. You can see on the
panel: No icon on the oscillation function.
«
+
» and «
–
» buttons: 2 buttons for setting
the mode temperature and for setting the
«TIMER» and «PROG» functions.
«TIMER» :
Long press the button, you can see the
hours of the clock flashing, press the «
+
»
or «
–
» buttons to set the hours you desire,
then validate by pressing the «TIMER»
button or after 7 seconds automatically.

E
18
PROG.:
Your appliance is equipped with a
function permitting operation that ensure
automatic starting and stopping.
The programming steps for «
PROG
» are as
follows:
1. Long press the «
PROG
» button to start
the programming, you can see the time
and «PROG» message flash.
2. Press the «+» or «–» buttons to set the
start time you desire.
3. Long press the timer button to set stop
time, you can see the time message
flash.
4. Press the «+» or «–» buttons to set the
stop time you desire.
5. Validating the stop time by pressing
«
TIMER
» button again.
6. You can set the above mentioned ope-
ration mode and oscillation function by
pressing «
MODE
» button and «
OSC
»
button if you would like.
7. Validating the start time and program-
ming chosen by pressing «PROG»
button, then the fan of the appliance
and oscillation function (if chosen) will
stop after 30 seconds, the «PROG»
function is now active, all the sets will
show (except «OSC» function)in the
display, the appliance will start and stop
automatically according to the program-
ming you have selected
NOTE: You cannot change the sets after
step no. 7 unless long press «
PROG
»
button.
When the PROG function is active you can
carry out the following operations:
• Adding or modifying program-
med function:
Use the same method
as for the 1st programming (Starting the
programming step no. 1 above).
• Cancelling the start time and stop
time:
Short press the button,
the start time and stop time will be
cancelled, the appliance is again in
manual mode.
• Cancelling all the programmed
operations at once:
Press the power
switch knob for more than 1 minute.
How to clean the filter
The filters need regular cleaning
(once 1 week), following the steps below :
1. Unscrew the 1 screws which fix the
filters on the back of the heater.
2. Remove the filter according to the
arrow direction, and clean them.
3. After cleaning, follow the above
instructions in reverse order to assemble
the filters.
CAUTION:
Do not assemble the filter before
it is dry. Do not use the appliance
without its filter.
Screws

DISPOSAL
OF APPLIANCE
EU 2002/96/EC
Disposal:
In conformity with Directive 2002/96/EC
on waste electrical and electronic equip-
ment (WEEE), at the end of ist life the unit
should be taken to an electrical appliance
collection point for ist environmentally
friendly disposal.
E
19
USE IN THE BATHROOM
AND SIMILAR
•
The heater is protected from
vertically
dripping
water and its waterproof
classification is IP21, it can be used in
all the rooms in the house, including
those where there are risks of
vertically
dripping
water (kitchen, bathroom, etc)
•
Accordance with the above diagram, the
heater can be used in volumes 3 only,
and the safe distances for installation is
indicated in the above diagram.
Note: The heater shall be installed
so that switches and other controls
cannot be touched by a person in
the bath or shower.
SECURITY SYSTEM
•
The appliance has a security system,
which automatically switches the appli-
ance off, when it is overheating. And
then automatically restarts it once it has
cooled.
•
If you still notice the same defect above
mentioned remove the plug from socket-
outlet, and have the fan heater serviced
by authorized service personnel only.
•
If the appliance is tilted, a safety system
automatically cuts off the appliance,
place the appliance on a vertical position
and it can be operated again.
MAINTENANCE
•
The fan heater only needs regular
cleaning on the outside.
•
Before you clean the unit, turn the
switch to off «OFF». Remove the plug
from socket-outlet, and wait until the
fan heater cool down.
•
Use a damp cloth to wipe the fan heater
housing.
•
Do not use water, detergents, abrasive
cleaning liquids or chemical agents
(alcohol, gasoline etc.) to clean the unit.

SOLIS AG
Solis-Haus · CH-8152 Glattbrugg-Zürich · Telefon +41 44 874 64 54 · Fax +41 44 874 64 99 · [email protected] · www.solis.ch
002.95
Table of contents
Languages:
Other SOLIS Heater manuals

SOLIS
SOLIS KALAHARI User manual

SOLIS
SOLIS DF-HT5C08P User manual

SOLIS
SOLIS HC15-14AR User manual

SOLIS
SOLIS MINI CUBE HEATER User manual

SOLIS
SOLIS DF-HT5218P User manual

SOLIS
SOLIS DECO HEATER PLUS 687 User manual

SOLIS
SOLIS MINI-TOWER User manual

SOLIS
SOLIS DECO HEATER User manual

SOLIS
SOLIS SMART HEATER 689 User manual

SOLIS
SOLIS DECO HEATER CLASSIC User manual