SOLTOP Duraklick HSS-System User manual

Gebrauchsanleitung
HSS Absturz-Sicherungssystem
User manual
Instructions d’utilisation
Manuale di istruzioni
HSS Fall arrest system
Système de sécurité antichute HSS
Sistema di linea vita HSS
A brand of Soltop EU

2
HSS-System
Horizontales Schienensystem für bis zu
4 Personen DIN EN 795:2012 Typ D + E
CEN/TS 16415:2013
Das HSS-Sicherungssystem ist für die Benutzung von
Personen an absturzgefährdeten, horizontalen Standor-
ten entwickelt worden. Es besteht aus einer Laufschie-
ne (aus Aluminium), die je nach Länge des Systems von
mehreren Zwischenhaltern getragen wird. Der Benutzer
ist durch einen Auffanggurt, Höhensicherungsgerät sowie
einem Verbindungselement (Karabiner), das eine Zulas-
sung für den horizontalen und vertikalen Einsatz besitzt,
mit dem System über einen frei laufenden Fallschutzläufer
verbunden.
Das HSS-System wurde speziell für die Duraklick Photo-
voltaik-Unterkonstruktionen entwickelt. Es findet Einsatz
auf klassischen Flachdächern mit Folien- oder Bitumen-
abdeckung, Kiesdächern und auf allen Gründächern.
Sicherheitsvorschriften
•Das Produkt darf nur von unterwiesenen/ausgebildeten
Personal benutzt werden. Das Lesen dieser Bedie-
nungsanleitung gilt als Unterweisung!
•Das HSS-System darf nur zur Personensicherung und
für die dafür vorgesehenen Einsatzzwecke verwendet
werden. Verwenden Sie das System nie für Materi-
altransporte.
•Bei entsprechender Planung und Ausführung so-
wie der ausschließlichen Verwendung von Soltop
zugelassenen Komponenten kann das System
als Rückhaltesystem klasifiziert werden und ent-
spricht somit den höchsten Sicherheitsanforde-
rungen.
•Im Falle einer Klassifizierung als Affangsystem
(Standard) muss ein Rettungskonzept vorliegen.
•Der Bereich unterhalb der möglichen Absturzkante soll-
te frei von störenden Geräten, Bauten o. ä. sein.
•Die maximale Anzahl an Benutzern gleichzeitig ist strikt
einzuhalten. Sollte vom Hersteller für das System eine
geringere Nutzeranzahl angegeben werden, ist diese
einzuhalten.
•Dieses Produkt muss mit Verbindungselementen (ent-
sprechend EN 362) und einer persönlichen Schutzaus-
rüstung gegen Absturz, (z. B. Verbindungsmittel mit
Falldämpfer nach EN 354 und EN 355, Höhensiche-
rungsgerät nach EN 360 und Auffanggurt nach EN 361
und in einem Rückhaltesystem kann ein Haltegurt nach
EN 358 (mit Verbindungsmittellänge, die einen Absturz
ausschliesst) verwendet werden.
•Es darf sich ausschliesslich in den Fallschutzläufer ein-
gehangen werden (Ausnahme siehe „Anwendung“)
•Nach einem Sturz ist das Produkt dem weiteren Ge-
brauch zu entziehen und durch den Hersteller zu kon-
trollieren.
•Das System nicht mit Chemikalien oder anderen ag-
gressiven Stoffen in Verbindung bringen; im Zweifelsfall
an den Hersteller wenden.
Die Benutzer des Anschlagsystems müs-
sen diese Gebrauchsanleitung gelesen
und verstanden haben und sich an die
Herstelleranweisungen halten!
WICHTIG!
!
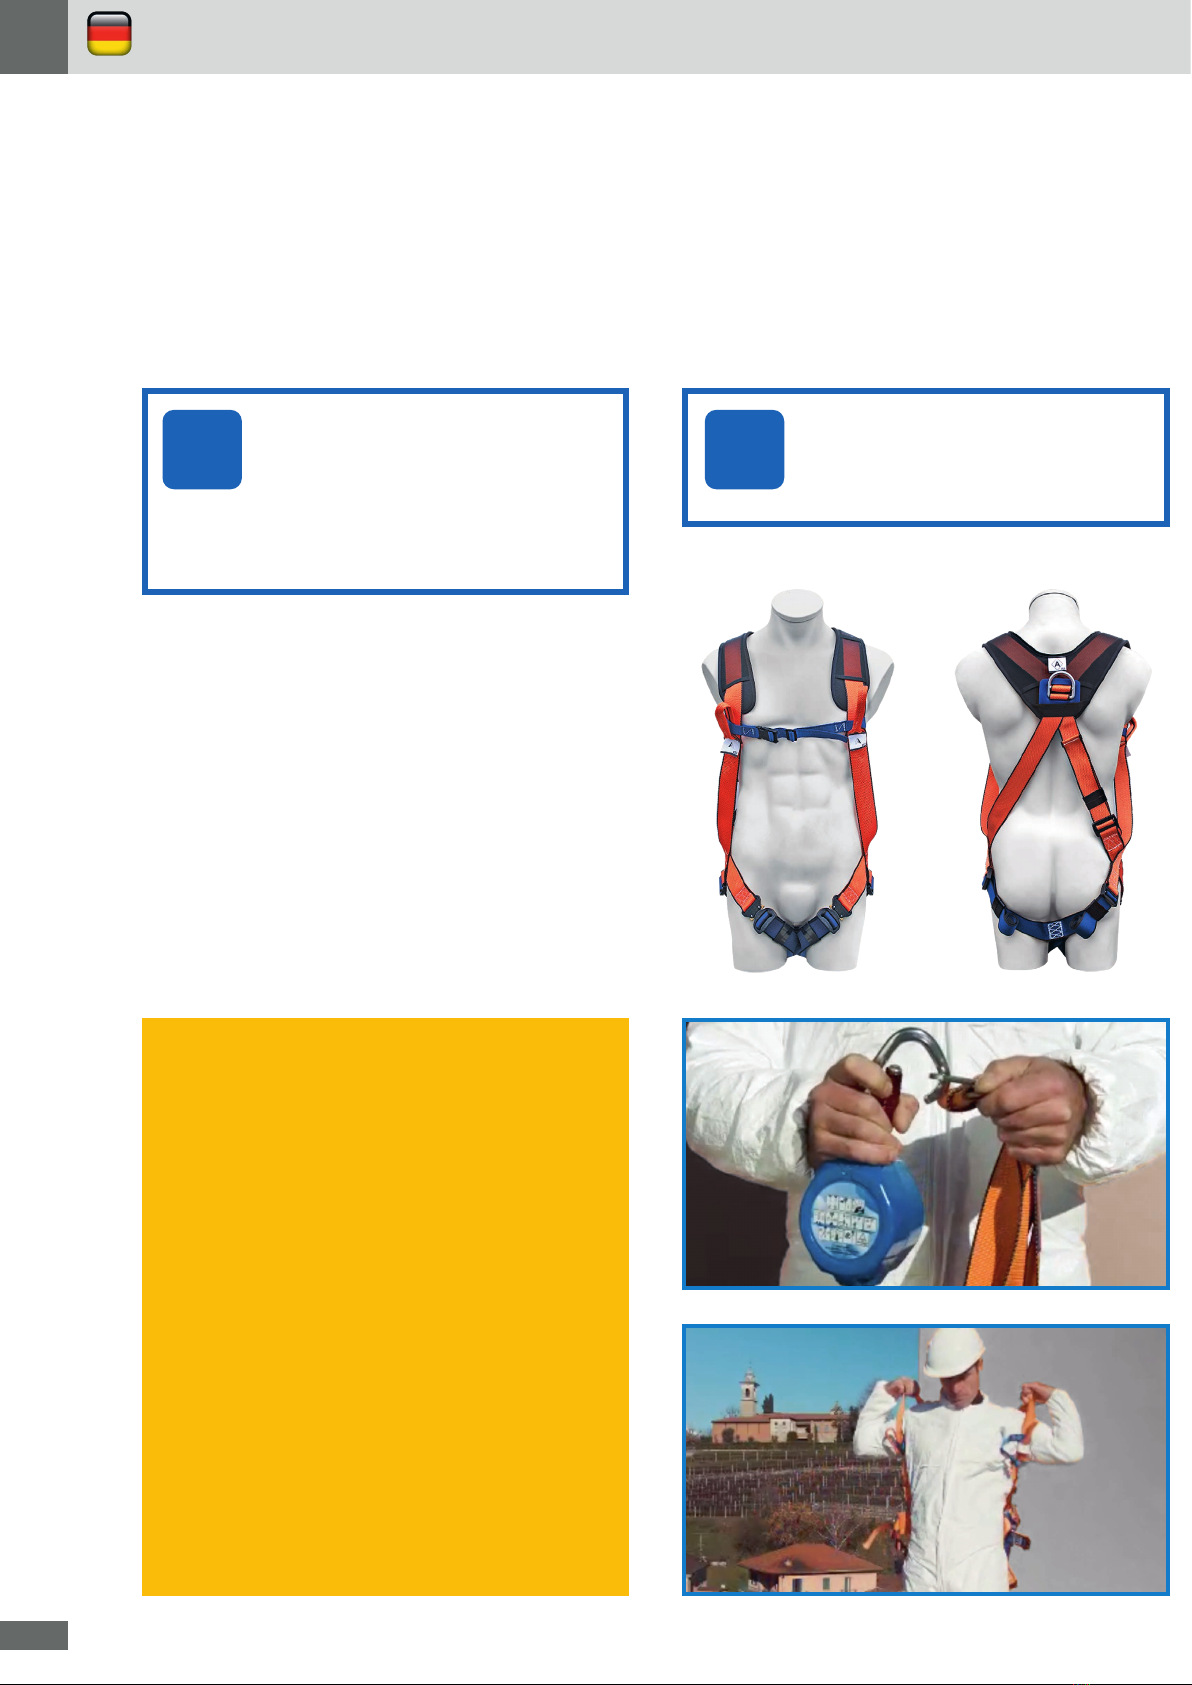
Gebrauchsanleitung
Fallschutzläufer
Führungsschiene
Auffanggurt
Höhensicherungsgerät
mit Bandauzug
Verbindungselement
•Bestehen Zweifel hinsichtlich der sicheren Funktion des
Systems ist dieses dem Gebrauch zu entziehen und
bedarf einer Kontrolle des Herstellers.
•Für das Ausland stehen die Herstellerangaben und Ge-
brauchsanleitung in der entsprechenden Landesspra-
che und auf jeden Fall in englischer Sprache (siehe Fol-
geseiten dieses Booklets) zur Verfügung.

3
Auszüge aus der DGUV
Regel 112-198:
Betriebsanweisung (DGUV 112-198, 9.1)
Für die Benutzung von persönlichen Schutzausrüstungen
gegen Absturz hat der Unternehmer eine Betriebsanwei-
sung zu erstellen, die alle für den sicheren Einsatz erforder-
lichen Angaben, insbesondere die Gefahren entsprechend
der Gefährdungsermittlung, das Verhalten bei Benutzung
der persönlichen Schutzausrüstungen und bei festgestell-
ten Mängel, enthält.
Unterweisung (DGUV 112-198, 9.2)
Der Unternehmer hat nach § 4 DGUV Vorschrift 1 der Un-
fallverhütungsvorschrift „Grundsätze der Prävention“ die
Versicherten vor der ersten Benutzung und nach Bedarf,
mindestens jedoch einmal jährlich, zu unterweisen.
Die Unterweisung muss mindestens umfassen:
- Die für die jeweilige Art bestehenden besonderen Anfor-
derungen der einzelnen Ausrüstung,
- die bestimmungsgemässe Benutzung,
- das richtige Anschlagen,
- die ordnungsgemässe Aufbewahrung,
- das Erkennen von Schäden.
Ordnungsgemässer Zustand
Prüfungen System (DGUV 112-198, 10.3)
10.3.1 Die Benutzer und Benutzerinnen haben persönliche
Schutzausrüstungen gegen Absturz PSAgA vor jeder Be-
nutzung durch Sichtprüfung auf ihren ordnungsgemässen
Zustand und auf einwandfreie Funktion zu prüfen.
10.3.2 Der Unternehmer hat persönliche Schutzausrüstun-
gen gegen Absturz entsprechend den Einsatzbedingungen
und den betrieblichen Verhältnissen nach Bedarf, mindes-
tens jedoch einmal jährlich, auf ihren einwandfreien Zu-
stand durch einen Sachkundigen prüfen zu lassen.
Gebrauchsanleitung
Kompatible Ausstattung
Nur durch SOLTOP geprüfte Ausrüstungen sollten in Ver-
bindung mit dem HSS-Schienensystem verwendet wer-
den.
SOLTOP haftet nicht für Vorfälle, die sich aus der Ver-
wendung nicht kompatibler Ausrüstungen ergeben ha-
ben. Die Benutzung von alternativen Ausrüstungen ist nur
nach schriftlicher Erlaubnis von SOLTOP möglich.
Zulassung
Das HSS-Absturzsicherungssystem ist zugelassen nach
DIN EN 795:2012 Typ D + E für bis zu 4 Personen
und entspricht den Anforderungen der gewerblichen Be-
rufsgenossenschaften. Es wird auch von der SUVA und
AUVA anerkannt.
Vorschriften
Es gelten die Unfallverhütungsvorschriften der Berufs-
genossenschaften sowie die Regeln für den Einsatz von
persönlichen Schutzausrüstungen gegen Absturz (DGUV
Regel 112-198).
Anforderungen an den Benutzer
Um Personen an ihren Arbeitsplätzen vor einem mögli-
chen Absturz zu schützen ist das HSS-Schienensystem
entwickelt worden. Bei einem Absturz werden die Be-
lastungen für den Benutzer auf einen aus medizinischer
Sicht akzeptablen Wert (6 kN) reduziert. Nur Personen
die mit dieser Gebrauchsanleitung vertraut und körperlich
gesund sind, dürfen das System benutzten.
Das System sollte nicht von Kindern, schwangeren Frau-
en oder unter Einfluss von Drogen (Medikamenten, Alko-
hol etc.) verwendet werden. Bei Zweifel an dem körper-
lichen Zustand, sollte vor Benutzung ein Arzt aufgesucht
werden.
Anwendung
Das HSS-Schienensystem wurde entwickelt, um dem
Benutzer grösstmögliche Bewegungsfreiheit zu gewähr-
leisten. Bei der Anwendung gleitet der Fallschutzläufer,
an dem der Benutzer gesichert ist, ohne Umhängen an
Zwischenhaltern und Kurven über die Schiene.
In einigen Situationen kann es vorkommen, dass sich der
Benutzer aus Sicherheitsgründen an der Schiene festhält.
Dies ist zulässig, jedoch sollte darauf geachtet werden,
dass keine zu hohe Kraft ausgeübt wird, da ansonsten
Deformationen an den tragenden Halterungen entstehen
können. Die Halterungen wurden speziell so entwickelt,
dass sie sich zum Schutze der Konstruktion und des Be-
nutzers vor übermässigen Kräften unter Belastung (bei ei-
nem Absturz) deformieren.
Zu jedem HSS gehören 2 PSA-Ausstattungs-Sets.
Jeder Sack beinhaltet die zur Sicherung erforderli-
che Ausrüstung für eine Person.
1 Fallschutzläufer
altern. Klapp-
Fallschutzläufer
optional:
Mitlaufendes
Auffanggerät +
Bandfalldämpfer
1Auffanggurt
Höhensiche-
rungsgerät
4
2. Anlegen des Auffanggurtes
In den Ausstattungs-Sets (roter Koffer/Sack) befindet sich
die Ausstattung. Als erstes das Höhensicherungsgerät in
den Auffanggurt einhängen. Dann den Auffanggurt anle-
gen und auf guten Sitz am Körper achten. (Siehe entspre-
chende Produkt-Gebrauchsanleitung).
1. Kontrolle (vor jedem Gebrauch)
Das komplette HSS-Schienensystem und Ausstattungs-
Set (Auffanggurt, Höhensicherungsgerät, Verbindungs-
mittel, Fallschutzläufer) muss vor jeder Benutzung auf
ordnungsgemässen Zustand sowie mind. einmal jährlich
durch einen Sachkundigen gemäss DGUV 112-198 über-
prüft werden. In Ausnahmefällen können – abhängig vom
jeweiligen Einsatzbereich – weitere Inspektionen erforder-
lich sein.
Prüf-Checkliste
Vor der Benutzung ist eine Sicht- und Funktionsprüfung
durchzuführen. (Die Gebrauchsempfehlungen anderer
Produkte im Zusammenhang mit diesem Produkt müs-
sen ebenfalls beachtet werden.)
Bei der Funktionsüberprüfung sind folgende Punkte laut
nebenstehender Checkliste zu beachten. Das Siche-
rungssystem darf nur benutzt werden, wenn diese erfüllt
werden:
Gebrauchsanleitung
!
Prüf-Checkliste
1. Alle Systemkomponenten müssen sich in
einem unbeschädigten Zustand und ohne
Korrosion befinden.
2. Die Befestigungen der Schienenhalter an der
Photovoltaik-Unterkonstruktion müssen in
einer einwandfreien Beschaffenheit sein.
3. Das System muss in einem guten Betriebs-
zustand und ohne Abnutzungen oder Verfor-
mungen sein.
4. Gängigkeit des Sicherungsstiftes am Ein-
stieg überprüfen: der Stift muss selbststän-
dig schliessen.
5. Der HSS-Fallschutzläufer muss sich leicht
und ohne Probleme einführen lassen.
6. Die Anschlagöse des Läufers muss sich frei
drehen lassen.
7. Der Karabinerhaken des Höhensicherungs-
geräts muss sich selbstständig schliessen.
8. Wenn ein Seilkürzer verwendet wird, ist er
so kurz einzustellen, dass ein möglicher Ab-
sturz verhindert wird.
!Achtung!
Es ist oftmals nicht möglich, das ge-
samte System zu überprüfen, be-
vor der Benutzer daran befestigt ist.
Sollten jedoch klare Anzeichen von
Beschädigungen, Korrosion, Defor-
mation etc. erkennbar sein, darf das
System nicht benutzt werden.
Achtung!
Im Falle eines Sturzes müssen alle
betroffenen Teile der PSA und der
HSS-Anlage ausgetauscht werden!

5
Gebrauchsanleitung
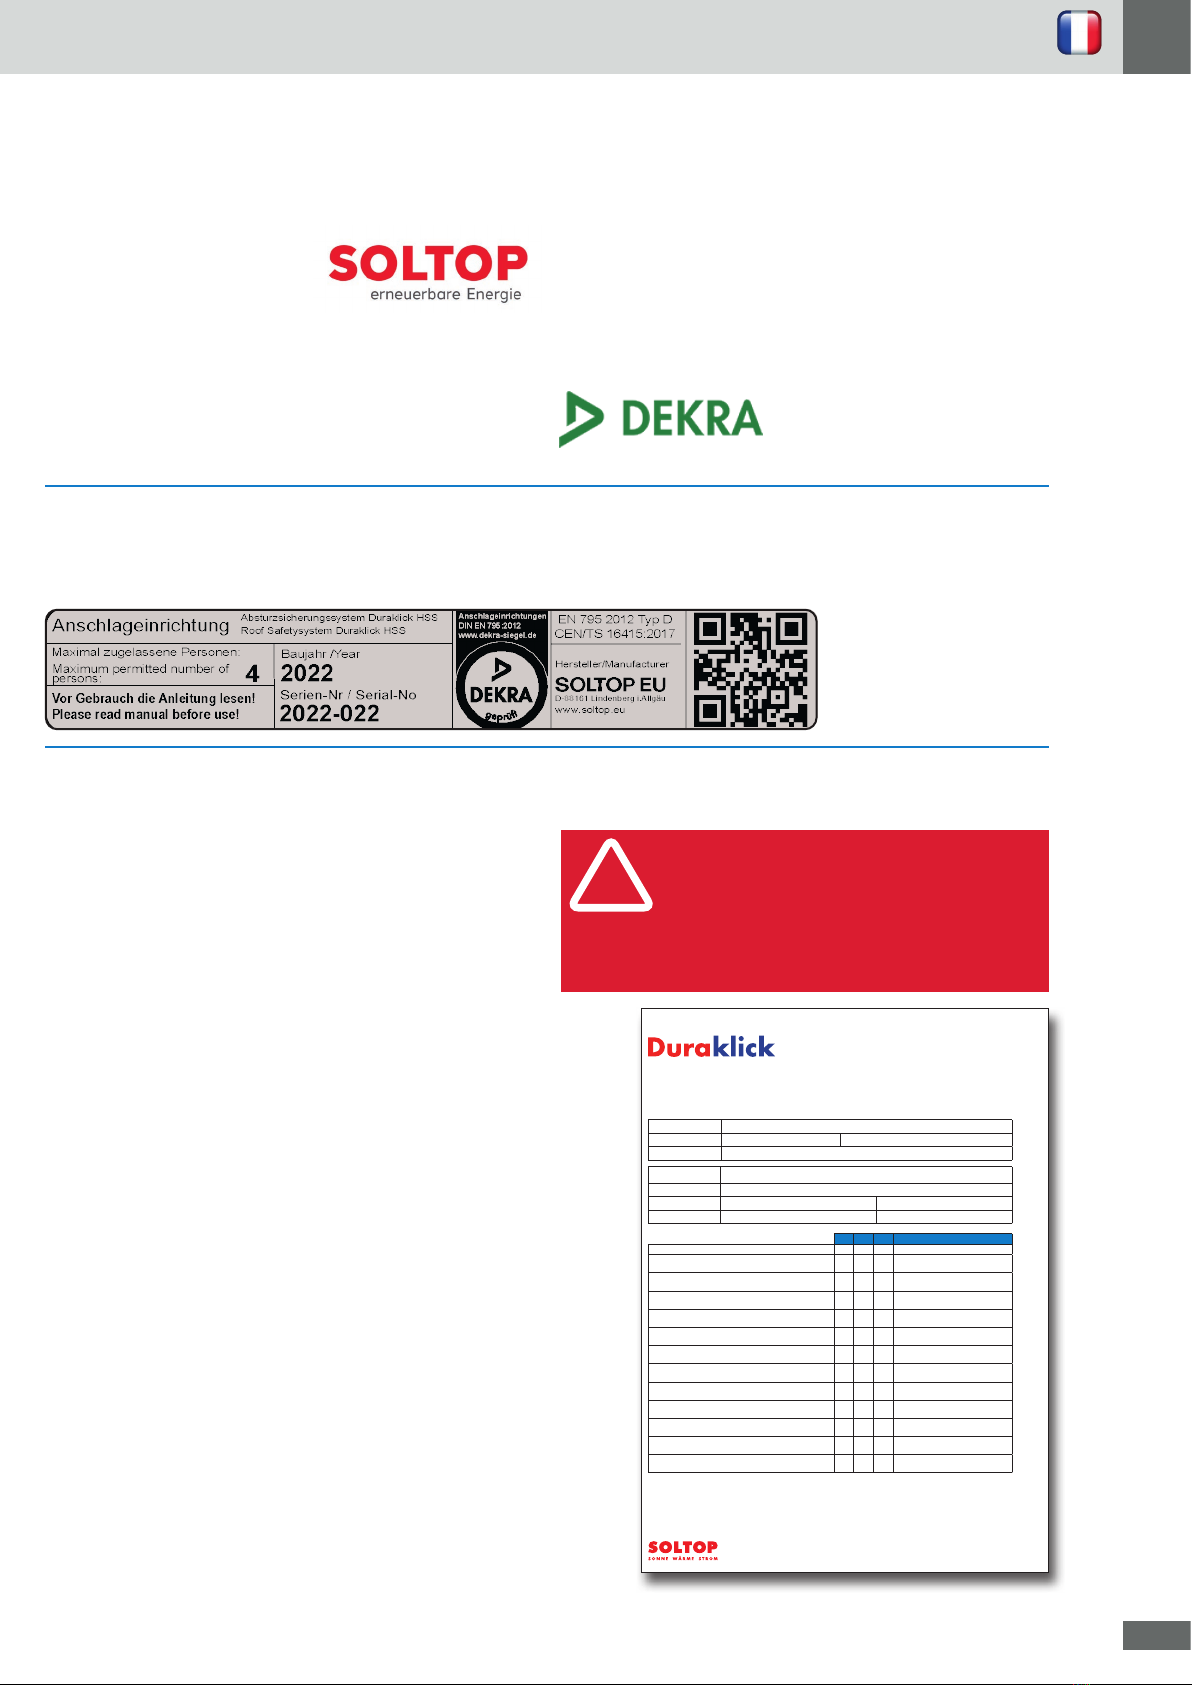
3. Einsetzen der Fallschutzläufer
Beim HSS gibt es 2 verschiedene Fallschutzläufer: den
normalen, der nur an einem Einstieg eingesetzt werden
kann, und einen Klapp-Fallschutzläufer, der überall an der
Führungsschiene eingesetzt werden kann. Nachfolgend
wird der Gebrauch dieser beiden beschrieben.
Einsetzen des Fallschutzläufers Standard
Den HSS-Fallschutzläufer auf die Schiene des Einstieges
aufsetzen. Den Sicherungsstift nach unten ziehen und
den Läufer einfahren. Der Fallschutzläufer sitzt fest auf
der Alu-Führungsschiene und muss sich frei hin und her
bewegen lassen.
Einsetzen des Klapp-Fallschutzläufers
Der Klapp-Fallschutzläufer kann dank eines Klappmecha-
nismus unabhängig von einem Einstieg an jeder Stelle auf
die Schiene gesetzt werden.
Dazu den Sicherungsstift (schwarze Kugel)
am Fallschutzläufer nach unten ziehen und durch
Zusammendrücken den Fallschutzläufer öffnen - die
beiden Läufterteile scheren auseinander.
Nun den so geöffneten Läufer auf der Schiene einsetzen
und loslassen. Der Fallschutzläufer sitzt fest auf der Alu-
Führungsschiene und muss sich frei hin und her bewegen
lassen.
4. Einklinken des
Höhensicherungeräts
Die Verbindung zwischen Auffanggurt und Schiene er-
folgt über das Höhensicherungsgerät (oder Falldämpfer
mit Seilkürzer), das an den Auffanggurt und die Anschla-
göse des Fallschutzläufers eingeklinkt wird. Der Karabi-
nerhaken wird in die Anschlagöse des Fallschutzläufers
eingeklinkt.
Das Ausziehband muss immer gespannt sein. Achten Sie
darauf, dass das Ausziehband nicht an Hindernissen hän-
gen bleibt, ansonsten besteht die Gefahr von Pendelstürzen!
Bei einem Rückhaltesystem mit Seil-
kürzer muss das Verbindungsmittel so
eingestellt werden, dass ein Absturz
unmöglich ist. Bei Nichtbeachtung
übernimmt SOLTOP keine Haftung!
ACHTUNG!
!
Sicherungsstift
nach unten ziehen
Läufer zusammen-
drücken
Sicherungsstift
nach unten ziehen

6
Gebrauchsanleitung
Alternative Verbindungsmittel
Persönliche Schutzausrüstung gegen Absturz (PSAgA nach
DGUV Regel 112-198) zum Betrieb der Duraklick Höhensi-
cherungsanlage HSS. Selbstverständlich kann jedes zuge-
lassene Sicherheitszubehör zum Betrieb verwendet werden,
je nach Zulassung ergibt sich aber eventuell eine Minderung
der Sicherheitsklassifizierung. Nur die Fallschutzläufer
HSS Duraklick sind obligatorisch.
Sicherungsstift
nach unten ziehen
5. Lösen vom System
Das Lösen von der Absturzsicherung ist nur in ungefährde-
ten Bereichen (mind. 2,50 m von der nächsten Absturzkante
entfernt) erlaubt. Es erfolgt über das Ausklinken des Ka-
rabinerhakens am Fallschutzläufer. Es sollte jedoch nicht
vergessen werden, dass die Sicherung der Person mit
dem Lösen vom System endet, und für den Fall eines
weiterhin bestehenden Absturzrisikos eine zweite Siche-
rungsausrüstung vorhanden sein sollte.
6. Entnahme des Fallschutzläufers
Zur Entnahme muss der normale HSS-Fallschutzläufer
zurück zum Ein- bzw. Ausstieg (bis Endanschlag) ge-
schoben werden. Den Sicherungsstift nach unten ziehen
und den Fallschutzläufer entnehmen.
Der Klapp-Fallschutzläufer kann an jeder Stelle aus der
Führungsschiene genommen werden. Einfach am Siche-
rungsstift (schwarz Kugel) ziehen und dann den Läufer
zusammendrücken (Siehe auch vorherige Seite Punkt 3)
7. Wartung und Pflege
Die Anschlageinrichtung HSS ist wartungsfrei. Die Füh-
rungsräder des Fallschutzläufers müssen sauber sein und
können gelegentlich mit etwas Silikonspray geschmiert
werden.
8. Aufbewahrung
Das HSS-Ausstattungs-Set sollte in sauberem und tro-
ckenem Zustand im dafür vorgesehene Koffer/Sack auf-
bewahrt werden und an einer geschützten Stelle nahe
dem Dachzugang deponiert werden. Ideal ist es, wenn es
dem Benutzer persönlich gehört.
9. Warnung
Veränderungen des Systems sind nicht zulässig. Es dür-
fen nur Orginalteile verwendet werden. Instandsetzungen
dürfen nur vom Hersteller oder zertifizierten Betrieben
durchgeführt werden. Prüfungsintervalle siehe Seite 7:
Regelmäßige Überprüfungen
Der Benutzer ist angewiesen, die Empfehlungen
des Hersteller/Lieferanten zu beachten.
Bandfalldämfper
Mitlaufendes
Auffanggerät -
Seilkürzer
Auffanggurt
HSS-Fallschutzläufer
7
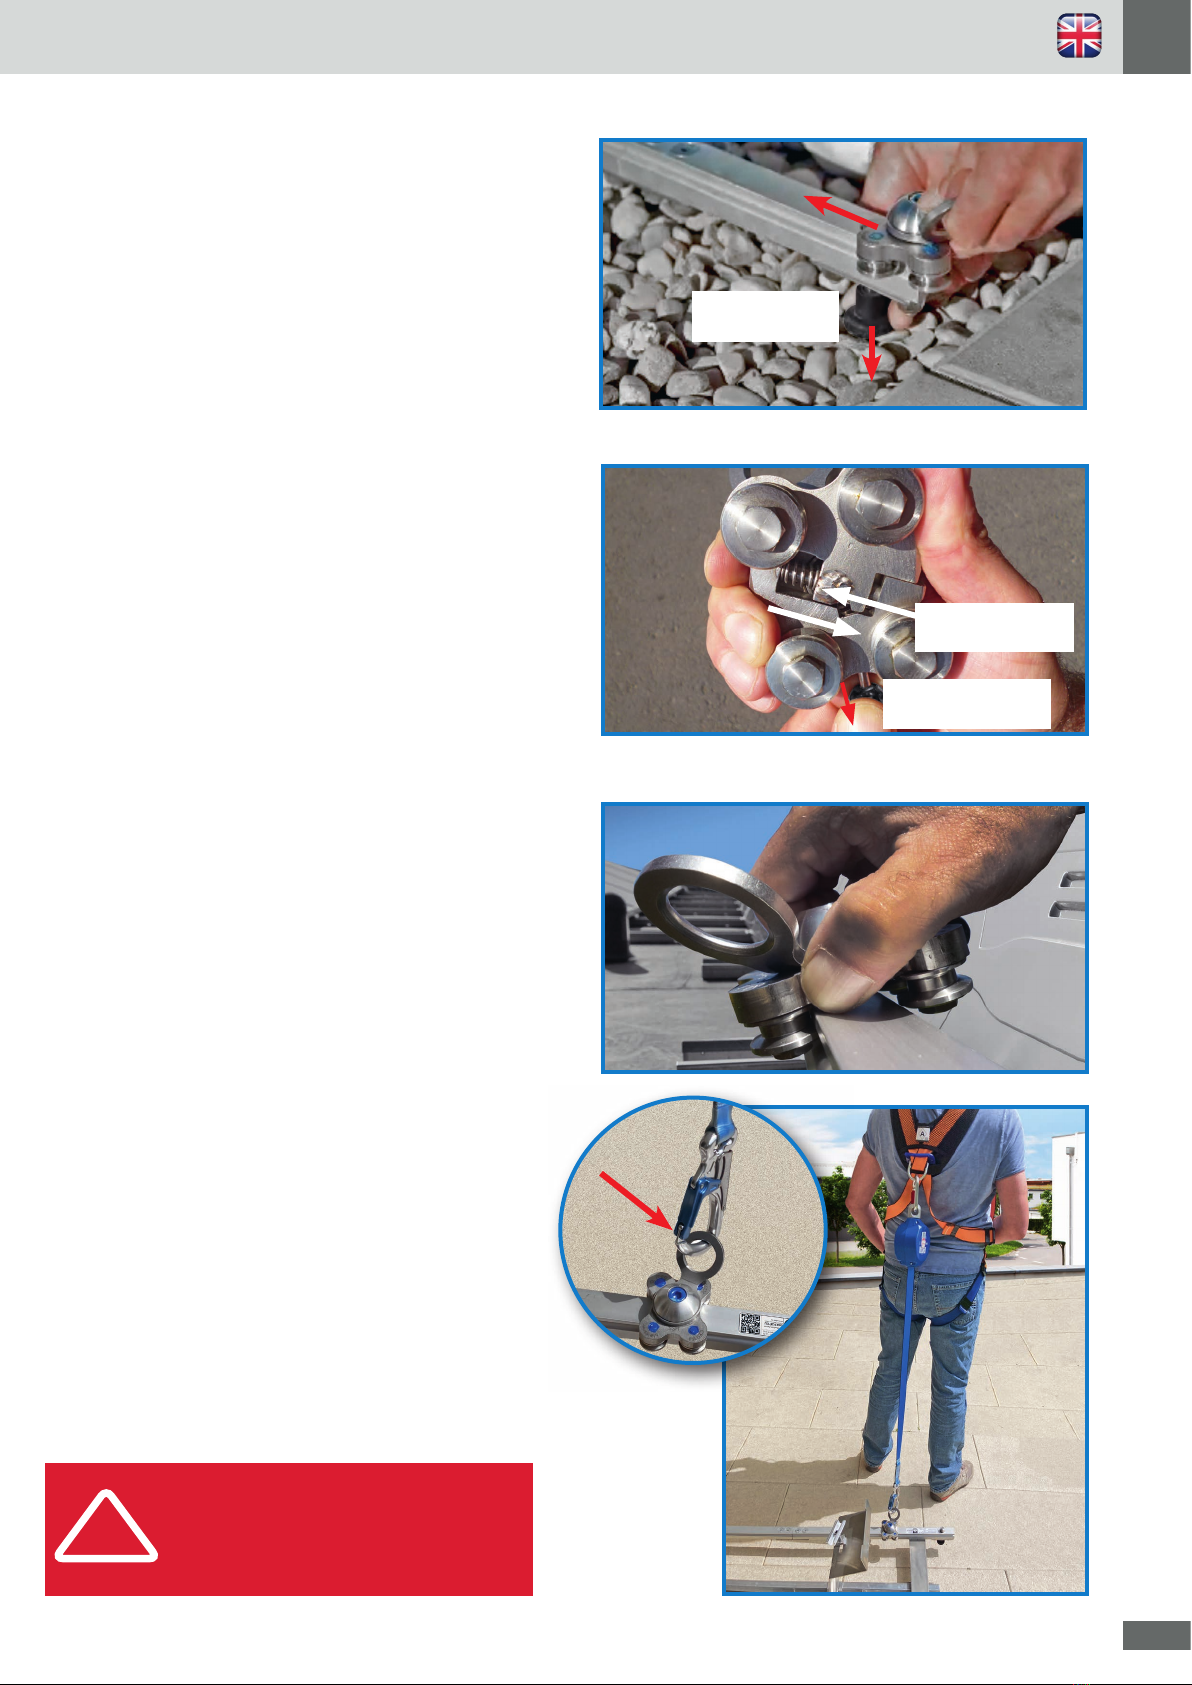
Hinweise zur Kennzeichnung
Regelmäßige Überprüfungen
Das System muss regelmässigen Überprüfungen unter-
zogen werden. Dazu dienen unsere Prüfprotokolle, diese
können auch aus der Soltop Prüf-App erstellt werden:
- Abnahmeprotokoll:
Nach der Installation des HSS wird damit das System
überprüft und abgenommen. Das Original verbleibt
beim Betreiber; SOLTOP erhält eine Kopie per Email.
- Prüf-Dokumentation:
Diese dient für die jährlichen bzw. zweijährlichen Kon-
trollen. Sie wird von einem zugelassenen Prüfer digital
erstellt und mit Fotos dem Betreiber ausgehändigt.
SOLTOP erhält eine Kopie per Email und lässt dem
Betreiber eine Plakette zukommen.
- Soltop EU hat zertifizierte Sachkundeprüfer für die
PSAgA und das HSS-Absturzsicherungssystem.
Prüfintervalle:
PSAgA..............................................alle 12 Monate
Gurte, Verbindungsmittel, Fallschutzläufer,
Höhensicherungsgerät
HSS Absturz-Sicherungssystem....alle 24 Monate
alle fest mit dem Duraklick-Montagesystem
verbundenen Komponenten.
Das HSS-System ist gekennzeichnet durch einen Aufkle-
ber am zum Dachausstieg nächstliegenden Systemein-
stieg. Dieser sieht wie folgt aus und enthält folgende An-
gaben:
Gebrauchsanleitung
Das System muss einer regelmäßigen
Überprüfungen durch eine sachkundi-
ge Person unterzogen und diese doku-
mentiert werden. Diese Überprüfung ist
unbedingt notwendig, da Wirksamkeit
und Haltbarkeit des Systems davon
abhängig sind und damit die Sicherheit
für den Benutzer.
WICHTIG!
!
Herstellerangaben
Das Duraklick Höhensicherungssystem (HSS) wurde her-
gestellt von:
SOLTOP EU GmbH
Sonnenhalde 5
D-88161 Lindenberg
www.soltop.eu
Das System wurde von folgendem Prüfinstitut geprüft
und zertifiziert:
DEKRA Testing and Certification GmbH
Dinnendahlstr. 9
44809 Bochum
Installiert wurde es durch ein von SOLTOP zertifiziertes
Unternehmen – in der Regel ein zertifizierter Installa-
teur, der auch die Photovoltaikanlage installiert hat.

8
HSS-System
Horizontal rail system for up to four
persons DIN EN 795:2012 Type D + E
CEN/TS 16415:2013
The HSS safety system has been developed for use by people
in horizontal areas where there is a fall risk. It consists of a run-
ning rail (aluminium) that, depending on the length of the sys-
tem, is supported by several intermediate mounts (single-point
anchors). The user is connected to the system via a freely glid-
ing runner by means of a safety harness, fall arrester and con-
necting element (snap hook) that is approved for horizontal and
vertical use.
The HSS system was specially developed for the Duraklick
photovoltaic mounting structures. It is used on flat roofs (max
roof slope of 5°) with membrane, bitumen gravel or granulate
coverings.
Safety regulations
•The HSS system must only be used to secure persons and in
accordance with its intended purpose. Never use the system
to transport materials.
•The area below the roof edge must be free of interfering de-
vices, structures, etc.
•A rescue plan must be in place that sets out the steps to be
taken in the event of a person falling.
•The maximum number of simultaneous users must be strictly
adhered to. If a lower number of system users is specified by
the manufacturer, this must be observed.
•The product may only be used by personnel that have been
trained and instructed.
•This product must be used in conjunction with connecting
elements (in accordance with EN 362) and personal protective
equipment against falls from a height, (e.g. shock-absorbing
lanyard in conformity with EN 354 and EN 355, fall arrester in
conformity with EN 360 and safety harness in conformity with
EN 361 and in a restraint system only a safety belt in accord-
ance with EN 358 (with the length of the lanyard short enough
to prevent a fall).
•It must only ever be hooked into the runner (for exceptions,
see “Application”)
•After a fall the product must be withdrawn and checked by
the manufacturer.
•The system must not come into contact with chemicals or
other aggressive agents.Contact the manufacturer if in doubt.
•If you are unsure whether the system is functioning properly,
withdraw it from use and contact the manufacturer.
•For users abroad, the manufacturer’s specifications and in-
structions for use may be available in the relevant language.
An English version is always provided.
Users of the sling system must have read
and understood this instruction manual
and strictly adhere to the manufacturer‘s
instructions!
ATTENTION!
!
Instructions for use
Fall protection runner
Guide rail
Safety harness
Fall arrester with strap
extension
Connecting element
•If there is any doubt about the safe functioning of the
system, it should be withdrawn from use and requires
inspection by the manufacturer.

9
Excerpts from DGUV
Rule 112-198:
Instructions for use (DGUV 112-198, 9.1)
Entrepreneurs must prepare operating instructions
containing all the information required for the safe use
of the PPE against falls from a height. In particular, the
hazards according to the hazard assessment as well as
the behavior during the use of the PPE against falls from
a height and in case of detected defects shall be taken
into account.
Unterweisung (DGUV 112-198, 9.2)
According to § 4 DGUV regulation 1 of the accident pre-
vention regulation „Principles of Prevention“, the employer
must instruct the insured persons before the first use and
as required, but at least once a year.
The instruction must include at least:
The special requirements of the individual equipment
existing for the respective species,
- the intended use,
- the correct attachment,
- proper storage,
- the detection of damage.
Ordnungsgemässer Zustand
Prüfungen System (DGUV 112-198, 10.3)
10.3.1 Before each use, users must visually inspect perso-
nal protective equipment against falls from a height to en-
sure that it is in proper condition and functioning correctly.
10.3.2 The employer must have personal protective equip-
ment against falls from a height inspected by an expert as
required, but at least once a year, depending on the con-
ditions of use and the operating conditions.
Instructions for use
Compatible equipment
Only use equipment in conjunction with the HSS rail system
which has been checked by SOLTOP. SOLTOP is not liable for
accidents caused by use of incompatible equipment. Alterna-
tive equipment may only be used with the written approval of
SOLTOP.
Approval
The HSS roof safety system has been approved in accordance
with DIN EN 795 types D + E for up to four persons and meets
the requirements of the relevant industrial trade associations. It
also has been approved by SUVA and AUVA.
Regulations
Accident prevention regulations of the industrial trade asso-
ciations and the regulations for the use of personal protective
equipment against falls from a height apply (German trade as-
sociation rules DGUV Rule 112-198).
User requirements
Um Personen an ihren Arbeitsplätzen vor einem mögli-
chen Absturz zu schützen ist das HSS-Schienensystem
entwickelt worden. Bei einem Absturz werden die Be-
lastungen für den Benutzer auf einen aus medizinischer
Sicht akzeptablen Wert (6 kN) reduziert. Nur Personen
die mit dieser Gebrauchsanleitung vertraut und körperlich
gesund sind, dürfen das System benutzten.
Das System sollte nicht von Kindern, schwangeren Frau-
en oder unter Einfluss von Drogen (Medikamenten, Alko-
hol etc.) verwendet werden. Bei Zweifel an dem körper-
lichen Zustand, sollte vor Benutzung ein Arzt aufgesucht
werden.
Application
The HSS rail system has been developed to provide the great-
est possible freedom of movement for the user. When in use,
the runner securing the user slides over the rail without having
to be reattached at intermediate brackets and curves.
In certain situations, the user may feel the need to hold on to the
rail in the interest of safety. Although this is permissible, the user
should avoid applying too much force, as otherwise this may
cause deformation of the load-bearing brackets. The brackets
have been specifically designed so as to become deformed in
order to protect the construction and the user from excessive
forces under load (in the event of a fall).
Each HSS includes two “Equipment Sets”.
Each of these cases contains the equipment
needed to secure one person.
standard runner
altern. folding
runner
optional:
fall arrester + belt
fall arrester
1 safety harness
retractable type
fall arrester

10
2. Putting on the harness
The equipment is stored in the equipment sets (red ca-
ses). Firstly, attach the fall arrester to the safety harness.
Then put on the safety harness,ensuring that it fits pro-
perly and sits well on the body. (See the corresponding
instructions for use).
1. Checks (before each use)
In accordance with BGR 198, the complete HSS rail
system and equipment set (safety harness, fall arrester,
connecting element, runner) must be checked and tested
before each use and at least once a year by a qualified
person to ensure that they are in good condition and pro-
per working order. In exceptional cases – depending on
the particular area of application – additional inspections
may be necessary.
Checklist
Before use, a visual check and function test must be per-
formed. (The recommendations for use of other products
in connection with this product must be also observed.)
When carrying out a function test, the requirements in to
the checklist opposite must be met.
The safety system may only be used if these requirements
are met.
Instructions for use
!
Checklist:
1. All system components must be undamaged
and corrosion-free.
2. The fixings for the rail mounts on the PV panel
mounting system must be in perfect condi-
tion.
3. The system must be in good working order
and without wear or deformations.
4. Ensure that the locking pin moves freely at
the end stop and that it closes automatically.
5. The HSS runner must be easily attached
without encountering any difficulties.
6. The connection eyelet of the runner must
rotate freely.
7. The snap hook on the fall arrester must close
automatically.
8. The rope adjuster must be adjusted to ensure
that a fall is limited to a maximum of 0.50 m
!Attention!
It is often not possible to check the enti-
re system before connecting the user to
it. If, however, clear indications of dama-
ge, corrosion, deformation, etc. are visi-
ble, the system must not be used.
Attention!
In case of a fall, all affected parts of the
PPE and the HSS system must be
replaced!
11
Instructions for use
3. Attaching the runner
There are two different runners for the HSS system: the
standard runner, which can only be attached at an end
stop, and the openable runner, which can be attached
anywhere on the guide rail. Instructions for use of these
two runners are given below.
Attaching the runner (standard)
Place the HSS runner on the rail at the end stop. Pull the
locking pin downwards and attach the runner. Ensure the
runner is firmly seated on the aluminium guide rail and
slides freely back and forth.
Attaching the openable runner
Thanks to its opening mechanism, this runner does not
need to be attached at an end stop, but can be attached
and removed at any point on the rail.
To do so, pull the locking pin downwards (black ball) on
the runner and open the runner by squeezing the sides
together– the two parts of the runner will then move
apart.
Now place the open runner on the rail and release it. En-
sure the runner is firmly seated on the aluminium guide rail
and slides freely back and forth.
4. Attaching the fall arrester
The safety harness and rail are connected to each other
via the fall arrester (shock absorber or rope adjuster),
which is attached to the safety harness and the connec-
tion eyelet of the runner. The snap hook is attached to the
connection eyelet of the runner.
The self-retracting webbing must always be taught. En-
sure that the self-retracting webbing does not get caught
on obstacles, otherwise there is a risk of a pendulum fall!
When using a restraint system with rope
adjuster, the connecting element must be
adjusted such that a fall is impossible. In
case of non-compliance, SOLTOP does not
accept
ATTENTION!
!
Pull locking pin
downwards
Push the runner
together
Pull locking pin
downwards

12
Instructions for use
Alternative lanyards
Personal protective equipment against falls from a height
(PPE according to DGUV regulation 112-198) for ope-
rating the Duraklick retractable type fall arrester HSS. Of
course, any approved safety accessory can be used for
operation, but depending on the approval, there may be
a reduction in the safety classification. Only the HSS Du-
raklick fall protection runners are mandatory.
Pull locking pin
downwards
5. Detach from the system
Detachment from the fall protection system must only be
carried out in safe areas (at least 2.5 m away from the ne-
arest roof edge). To detach, release the snap hook at the
runner. Remember that the person is no longer protec-
ted as soon as he/she detaches himself/herself from the
system and, if the risk of a fall remains, secondary safety
equipment must be available.
6. Removing the runner
To remove the HSS runner (standard), move it back to
the entry or exit point at the end stop. Pull the locking pin
downwards and remove the runner.
The openable runner can be removed at any point along
the guide rail. To do so, pull the locking pin downwards
(black ball) on the runner and open the runner by squee-
zing the sides together (see No. 3 on previous page).
7. Maintenance and care
The HSS anchorage system is maintenance-free. Occasi-
onally apply a drop of oil to the guide wheels of the runner.
8. Storage
The HSS equipment set must be stored in clean and
dry condition in the case provided for this purpose, in a
sheltered location near the roof access. Ideally, each user
should have his/her own personal equipment set.
9. Warning
Modifications must not be made to the system. Only ori-
ginal spare parts must be used. Repairs must be carried
out by the manufacturer only or by a certified installer.
Inspection intervals see next page.
The user must observe the recommendations of the
manufacturer/supplier.
shockabsorber
adjustable fall
arrester + belt fall
arrester
safety harness
HSS-runner

13
Identification plate information
Regular checks:
The system must be regularly checked and tested. For
this, our test report templates or testing app are used:
Acceptance protocol:
After installation of the HSS, this is used to check and
accept the system. The original remains with the opera-
tor; SOLTOP receives a copy by email.
- Inspection documentation:
This is used for the annual or biennial inspections. It is
created digitally by an approved inspector and handed
over to the operator with photos. SOLTOP receives a
copy by email and sends a sticker to the operator.
- Soltop EU has certified expert examiners for the PPE-
and the HSS fall protection system
Inspection intervals:
PSAgA...........................................every 12 months
harnesses, lanyards, fall protection runners,
Height safety device
HSS fall arrest system.................every 24 months
all components permanently connected to the Dura
klick mounting system
The HSS system is marked with an identification plate at
the system entry point nearest to the roof access. The
plate is shown below and contains the following informa-
tion:
Instructions for use
The system must be subjected to re-
gular checks by a competent person
and these checks must be documen-
ted. This check is absolutely necessa-
ry, as the effectiveness and durability
of the system depend on it and thus
the safety for the user.
ATTENTION!
!
Acceptance protocol
Control list for assembly and approval of the horizontal Duraklick-HSS security system according to DIN EN 795:2012 Typ D+E.
Please fill in the positions accordingly and hand over the signed protocol to the system operator. Please mail a scanned copy to the res-
pective SOLTOP specialist. Attach the inspection sticker to the system.
Operator:
Projectnumber: HSS-serialnumber:
Plantname / location:
Assembly company:
Adress:
Phone: Mounting date of HSS:
Certified fitter: Last test:
HSS
Version: 03 / 2021
SOLTOP EU GmbH
Sonnenhalde 5
D-88161 Lindenberg
www.soltop.eu
Hauptsitz Schweiz:
SOLTOP Schuppisser AG
St. Gallerstrasse 3 + 5a
CH-8353 Elgg
www.soltop.ch
Sitz der Gesellschaft: Linden-
berg
Registergericht: Kempten (All-
gäu)Geschäftsführer: Andreas
Zimmerer
Handelsregister: HRB 14331
MwSt: 127/137/60143
UID: DE300491338
EORI: DE314291943832627
yes no n/a. note
Stop sign at the roof access £ £
Type plate with serial number present
(indication of the maximum number of persons) £ £
Gap width at butt joints max. 5 mm £ £
Screw connections between system and fastening elements are
V2A / V4A and nuts are self-locking (Polystop) £ £
All screw connections secured against loosening (1.5 - 2 thread
turns protruding) £ £
Entry / exit openings available and self-closing £££
Overhang of the rail above the first / last
Single stop point maximum 300 mm £££
Constructive end stop / end stop (safety pins) at the end of the rail
end available (not applicable for revolving systems) £££
Rail free from dirt £££
System unit min. 3 x 4 modules with min. 480 kg £ £
Trial inspection carried out £ £
Rail course is straight £ £
No interference with existing infrastructure (rail and runner do not
collide with other components) £ £
Acceptance carried out by: __________________________________________ Date: ____________________________
Signature: __________________________________________ Date of next test: _____________________________
Acceptance protocol handed over to the operator _______________________
Manufacturer’s specifications
The Duraklick fall protection system (HSS) has been ma-
nufactured by:
SOLTOP EU GmbH
Sonnenhalde 5
D-88161 Lindenberg
www.soltop.eu
The system has been tested and certified by the following
testing institute:
DEKRA Testing and Certification GmbH
Dinnendahlstr. 9
44809 Bochum
It has been installed by a company certified by SOLTOP
– in general, this will be a certified installer that has also
installed the photovoltaic system.

14
Système HSS
Système de rail horizontal supportant
jusqu’à 4personnes
DIN EN 795:2012 Typ D + E
CEN/TS 16415:2013
Le système de sécurité HSS a été conçu pour sécuriser les
personnes lors de travaux en hauteur sur des structures hori-
zontales. Il est composé d’un rail de guidage (en aluminium),
soutenu par plusieurs points intermédiaires (points d’ancrage)
en fonction de la longueur du système. L’utilisateur y est attaché
par un harnais de sécurité, un enrouleur ainsi qu’un connecteur
(mousqueton) homologué pour une utilisation horizontale et ver-
ticale et fixé sur un chariot qui glisse librement sur le rail.
Le système HSS a été spécialement élaboré pour les
sous-constructions photovoltaïques Duraklick. Il peut être ins-
tallé sur les toitures plates (inclinaison de 5° maximum) revêtues
de films ou de bitume ou recouvertes de cailloux ou de granulés.
Consignes de sécurité
•Le système HSS doit uniquement être utilisé pour la sécuri-
sation des personnes et les objectifs prévus à cette fin. Ne
jamais utiliser ce système pour transporter du matériel.
•La zone située sous les éventuels bords de chute doit être
libre de tout obstacle (appareils, construction, etc.).
•En cas de chute, un plan de sauvetage indiquant la procédure
à suivre doit être prévu.
•Il convient de respecter scrupuleusement le nombre d’utili-
sateurs maximum que le système peut supporter en même
temps. Si le fabricant a indiqué un nombre moins élevé d’utili-
sateurs, c’est ce dernier qui fait foi.
•Ce produit ne doit être utilisé que par un personnel compé-
tent/ formé.
•Ce produit doit être utilisé avec des connecteurs (conformé-
ment à la norme EN362) ainsi qu’un équipement de protec-
tion individuelle anti-chute (par ex. une longe avec absorbeur
d’énergie conformes aux normes EN354 et EN355, un en-
rouleur conforme à la norme EN360, un harnais de sécurité
conforme à la norme EN361 et, dans un système de retenue,
une ceinture de sécurité conforme à la norme EN358 (la lon-
gueur de la longe devant être ajustée pour rendre toute chute
impossible)).
•Il doit uniquement être attaché au chariot (voir le paragraphe
«Utilisation» pour les exceptions)
•En cas de chute, le produit ne doit plus être utilisé et doit être
contrôlé par le fabricant.
•Aucun produit chimique ou aucune autre substance agressive
ne doit entrer en contact avec le système. En cas de doute,
s’adresser au fabricant.
•S’il subsiste un doute quant à la fonction de sécurité du sys-
tème, il convient de ne plus l’utiliser et de le faire contrôler par
le fabricant.
•Pour une utilisation du système à l’étranger, les directives et
les instructions d’utilisation du fabricant sont disponibles dans
les langues correspondantes et, dans tous les cas, en anglais
(voir les pages suivantes du présent livret).
Les utilisateurs du système doivent avoir
lu et compris ce mode d’emploi et se
conformer strictement aux instructions
du fabricant!
IMPORTANT!
!
Instructions d’utilisation
Chariot
Rail de guidage
Harnais de sécurité
Enrouleur avec
rappel automatique
Connecteur

15
Extraits de l’article DGUV Règle 112-198:
Instructions de fonctionnement (DGUV 112-198, 9.1)
Pour l’utilisation des équipements de protection individuelle
contre les chutes de hauteur, l’entrepreneur doit établir une
notice d’instructions contenant toutes les indications né-
cessaires à une utilisation en toute sécurité, notamment
les risques conformément à l’identification des dangers,
la conduite à tenir lors de l’utilisation des équipements
de protection individuelle et en cas de défauts constatés.
Instruction (DGUV 112-198, 9.2)
Conformément à l’article 4 de la directive DGUV 1 relative à
la prévention des accidents «Principes de prévention», l’entre-
preneur doit former les assurés avant la première utilisation et
selon les besoins, mais au moins une fois par an.
Cette formation doit comprendre au minimum:
- les exigences particulières pour chaque élément de l’équi-
pement individuel;
- l’utilisation attendue;
- la bonne façon de s’attacher;
- le bon rangement de l’équipement;
- la détection des dommages.
État conforme
Contrôles du système (DGUV 112-198, 10.3)
10.3.1 Les utilisateurs doivent vérifier le bon état et le bon fonc-
tionnementdeséquipementsdeprotectionindividuellecontreles
chutes de hauteur par un examen visuel avant chaque utilisation.
10.3.2 Le chef d’entreprise doit faire vérifier par un expert le bon
étatdeséquipementsdeprotectionindividuellecontreleschutes
de hauteur en fonction des conditions d’utilisation et des condi-
tionsd’exploitation,selonles besoins etaumoinsune fois paran.
Instructions d’utilisation
Equipement compatible
Equipement de protection individuelle contre les chutes (EPIgA
selon la règle DGUV 112-198) pour l‘utilisation du système anti-
chute Duraklick HSS. Bien entendu, tout accessoire de sécurité
homologué peut être utilisé pour le fonctionnement, mais selon
l‘homologation, il peut éventuellement en résulter une diminu-
tionde la classification de sécurité. Seuls les coulisseaux an-
tichute HSS Duraklick sont obligatoires.
Homologation
Le système de sécurité anti-chute HSS est homologué selon
la norme Din EN795 TypeD + E pour sécuriser jusqu’à 4per-
sonnes et répond aux exigences des associations industrielles
et commerciales. Il est également approuvé par la SUVA et l’AU-
VA.
Consignes
S’appliquent les consignes de prévention des accidents des
associations industrielles et commerciales ainsi que les règles
d’utilisation des équipements de protection individuelle an-
ti-chute (DGUV règle)
Recommandations à l’utilisateur
Le système de rail HSS a été conçu afin de protéger les per-
sonnes d’une éventuelle chute sur leur lieu de travail. En cas
de chute, la force exercée sur la personne est réduite à une
valeur acceptable du point de vue médical (6kN). Seules les
personnes ayant pris connaissance des présentes instructions
d’utilisation et en bonne condition physique sont autorisées à
utiliser ce système.
Ce système ne doit pas être utilisé par des enfants, des femmes
enceintes ou des personnes sous l’emprise de drogues (médi-
caments, alcool, etc.). En cas de doute sur la condition phy-
sique de la personne, il convient de consulter un médecin avant
d’utiliser le système.
Utilisation
Le système de rail HSS a été conçu pour assurer à l’utilisateur
la plus grande liberté de mouvement possible. Le chariot auquel
est assuré l’utilisateur coulisse sur les points intermédiaires et
suit le rail dans les courbes sans avoir besoin d’être retiré de son
emplacement et replacé dans un autre.
Il peut arriver, dans certaines situations, que l’utilisateur se
tienne au rail pour des raisons de sécurité. Cela est autorisé,
mais il faut tout de même veiller à ne pas exercer une trop
grande force, car cela pourrait entraîner des déformations des
structures porteuses. Celles-ci ont en effet été spécialement
conçues pour se déformer en cas de charge excessive (lors
d’une chute) afin de protéger la construction et l’utilisateur.
chariot HSS
En option:
chariot HSS
pliable
En option:
Longe réglable et
absorbeur d‘énergie
Harnais de sécurité
enrouleur
Chaque HSS est accompagné de 2 kits
d‘équipement EPI. Chaque sac contient
l‘équipement nécessaire à la sécurité d‘une per-
sonne.

16
1. Contrôles
(avant chaque utilisation)
Le bon état de l’ensemble du système de rail HSS et du kit EPI
(harnais, enrouleur, connecteurs, chariots) doit être vérifié avant
chaque utilisation et être contrôlé au minimum une fois par an
par un expert, conformément à l’article BGR198. D’autres ins-
pections peuvent être exigées dans des cas exceptionnels, en
fonction de chaque domaine d’utilisation.
Liste de contrôle
Un contrôle visuel et fonctionnel doit être effectué avant chaque
utilisation. (Les recommandations d’utilisation d’autres produits
en lien avec le présent produit doivent également être respec-
tées.)
Le contrôle fonctionnel doit tenir compte de la check-liste
ci-dessous. Le système de sécurité doit uniquement être utilisé
si tous les points sont respectés.
2. Mettre le harnais de sécurité
Le harnais de sécurité se trouve dans le kit EPI (caisse / sac
rouge). Attacher tout d’abord l’enrouleur au harnais de sécurité.
Puis enfiler le harnais en veillant à ce qu’il maintienne bien le
corps. (Voir les instructions correspondant au produit).
Attention!
Instructions d’utilisation
!Attention!
Il est souvent impossible de contrôler
l’ensemble du système avant que l’utili-
sateur ne s’y attache. En cas de traces
visibles de dommages, corrosion, défor-
mation, etc., il convient de ne pas utiliser
le système.
!Attention!
En cas de chute, toutes les pièces
concernées de l’EPI et de l’installa-
tion HSS doivent être remplacées!
Liste de contrôle
1. Tous les composants du système doivent
être en bon état et ne présenter aucune
trace de corrosion.
2. Les fixations du rail sur la sous-construction
photovoltaïque doivent être en parfait état.
3. Le système doit être en bon état de fonc-
tionnement et ne présenter aucune trace
d’usure ou de déformations.
4. Vérifier que la goupille de sécurité à l’entrée
du rail bouge librement: la goupille doit se
fermer automatiquement.
5. Le chariot HSS doit pouvoir s’insérer facile-
ment et sans accrocs.
6. L’anneau d’ancrage du chariot doit pouvoir
tourner.
7. Le crochet du mousqueton de l’enrouleur
doit se fermer automatiquement.
8. La corde d’assurage doit être ajustée de ma-
nière à limiter une éventuelle chute à 0,50m
maximum.

17
Instructions d’utilisation
3. Insérer le chariot
Il existe deux types de chariots HSS: le chariot normal, qui ne
peut être inséré que sur une entrée, et le chariot pliable qui peut
être inséré à n’importe quel endroit du rail de guidage. Leur uti-
lisation est décrite ci-après.
Insertion du chariot (normal)
Placer le chariot HSS au début du rail. Tirer la goupille de sé-
curité vers le bas et insérer le chariot. Le chariot est fixé sur le
rail de guidage en aluminium et doit pouvoir avancer et reculer
sans gêne.
Insertion du chariot pliable
Grâce à son mécanisme flexible, le chariot mobile peut être in-
séré et retiré de n’importe quel endroit du rail.
Tirer la goupille de sécurité (boule noire) vers le bas et ouvrir
le chariot en le pressant - les deux côtés du chariot s’écartent
l’un de l’autre
Placer le chariot ainsi ouvert sur le rail et relâcher la pression.
Le chariot est fixé sur le rail de guidage en aluminium et doit
pouvoir avancer et reculer sans gêne.
4. Attacher l’enrouleur
La liaison entre le harnais de sécurité et le rail est assurée par
l’enrouleur (absorbeur d’énergie ou corde d’assurage), qui est
attaché au harnais de sécurité et à l’anneau d’arrimage du cha-
riot. Le crochet du mousqueton est attaché à l’anneau d’arri-
mage du chariot.
La sangle déroulée doit toujours être tendue. Veiller à ce que la
sangle ne reste pas accrochée à des obstacles, car cela risquerait
de causer une chute pendulaire!
En cas d’utilisation d’un système de rete-
nue, le connecteur doit être ajusté de ma-
nière à empêcher toute chute. SOLTOP
décline toute responsabilité en cas de
non-respect des instructions!
ATTENTION!
!
Tirer la goupille de
sécurité vers le bas
Tirer la goupille de
sécurité vers le
bas
Presser le chariot

18
Instructions d’utilisation
5. Détacher le système
Il est uniquement autorisé de détacher la sécurité anti-chute dans
les zones ne présentant aucun danger (à min. 2,50m du prochain
bord de chute). Il suffit pour cela de détacher le crochet du mous-
queton du chariot. Cependant, n’oubliez pas que la personne
n’est plus sécurisée une fois qu’elle s’est détachée du système.
6. Retirer le chariot
Pour retirer le chariot HSS normal, le faire glisser vers l’entrée ou
la sortie du rail (butée de fin). Tirer la goupille de sécurité vers le
bas et retirer le chariot.
Le chariot pliable peut quant à lui être retiré de n’importe quel
endroit du rail de guidage. Tirer simplement la goupille de sé-
curité (boule noire) et presser le chariot pour le sortir du rail (voir
également le point3 de la page précédente).
7. Entretien et nettoyage
Le système d’ancrage HSS ne nécessite pas d’entretien. Appli-
quer de temps en temps une goutte d’huile sur les roues direc-
trices du chariot.
8. Rangement
Le kit EPI HSS doit être rangé dans un état propre et sec dans
la caisse/sac prévue à cet effet et être déposé dans un endroit
sûr, à proximité de l’accès au toit. L’idéal serait qu’il appartienne
à son utilisateur.
9. Avertissement
Il est interdit de modifier le système. Seules les pièces originales
doivent être utilisées. Les réparations ne peuvent être effectuées
que par le fabricant ou par un installateur certifié.
intervalles d’inspection voir page suivante
L’utilisateur est tenu de respecter les recommandations
du fabricant/ fournisseur.
Tirer la goupille de
sécurité vers le bas
Longes alternatives
Equipement de protection individuelle contre les chutes (EPIgA
selon la règle DGUV 112-198) pour l‘utilisation du système anti-
chute Duraklick HSS. Bien entendu, tout accessoire de sécurité
homologué peut être utilisé pour le fonctionnement, mais selon
l‘homologation, il peut éventuellement en résulter une diminution
de la classification de sécurité. Seuls les coulisseaux antichute
HSS Duraklick sont obligatoires.
19
Informations relatives à l’étiquetage
Vérifications régulières
Le système doit être soumis à des contrôles réguliers. Nos pro-
tocoles de contrôle servent à cela, ils peuvent également être
créés à partir de l’application de contrôle Soltop:
- Protocole de réception:
Après l’installation du HSS, il permet de contrôler et de récep-
tionner le système. L’original reste chez l’exploitant ; SOLTOP
en reçoit une copie par e-mail.
- Documentation de contrôle:
Elle sert aux contrôles annuels ou bisannuels. Elle est établie
sous forme numérique par un contrôleur agréé et remise à
l’exploitant avec des photos. SOLTOP en reçoit une copie par
e-mail et fait parvenir une plaquette à l’exploitant.
- Soltop EU dispose de contrôleurs de compétence certifiés pour
les EPI et le système antichute HSS.
Les intervalles de contrôle:
EPIgA......................................... tous les 12 mois Sangles
longes, coulisseaux antichute, Antichute à rappel automatique
Système antichute HSS............................tous les 24 mois
tous les éléments solidaires du système de montage
Duraklick.
Le système HSS est marqué d’une étiquette à l’entrée du sys-
tème située le plus près du point de sortie du toit. Elle ressemble
à l’étiquette ci-dessous et contient les informations suivantes:
Instructions d’utilisation
Le système doit faire l’objet d’un contrôle régu-
lier documenté par un expert. Cette vérification
est indispensable, étant donné que l’efficacité et
la durabilité du système en dépendent, et donc
la sécurité de l’utilisateur.
IMPORTANT!
!
Indications du fabricant
Le système de sécurité anti-chute Duraklick (HSS) a été fabriqué
par:
SOLTOP EU GmbH
Sonnenhalde 5
D-88161 Lindenberg
www.soltop.eu
Le système a été contrôlé et certifié par l’institut suivant:
DEKRA Testing and Certification GmbH
Dinnendahlstr. 9
44809 Bochum
Il a été installé par une entreprise certifiée par SOLTOP - en gé-
néral un installateur certifié.
qui a également installé le système photovoltaïque.
Procès-verbal de réception
Oui Non Dist. Remarque
Système d’interconnexion min. 3 x 4 modules de min. 480 kg £ £
Ecartement max. 5 mm aux jonctions bout à bout £££
Assemblages vissés entre l’installation et les éléments de fixation en
V2A / V4A et écrous autobloquants £££
Tous les assemblages vissés sont protégés contre tout desserrage
(1,5 - 2 pas de vis en saillie) £££
Accès / butées équipés
d’une goupille de sécurité fonctionnelle à fermeture automatique £££
Rails en saille sur le premier / dernier
point d’ancrage max. 300 mm £££
Butée de construction (goupille de sécurité)
au bout du rail (supprimée pour les systèmes circulaires) £££
Rails exempts de saletés £££
Utilisation exclusive de pièces originales neuves approuvées par
SOLTOP £££
Plaque constructeur
(Nombre de personnes max.) £££
Réalisation d’un test £££
Rails rectilignes £££
Aucune entrave avec la structure existante (les rails et les chariots
ne cognent pas contre les autres éléments de la construction) £££
Contrôle effectué par ___________________________________________________________________________________________________
le ___________________ Signature: ________________________________________________________________________________________
Date du prochain contrôle: _______________________________________________________________________________________________
Procès-verbal de réception remis à l’exploitant _____________________________________________________________________________
Liste de contrôle relative à la réception et au montage du système de sécurité horizontal HSS Duraklick.
Veuillez remplir les champs en conséquence et remettre le procès-verbal signé à l’exploitant de l’installation.
Veuillez envoyer un exemplaire scanné par e-mail au responsable SOLTOP correspondant.
Exploitant:
Numéro du projet: Numéro de série HSS:
Nom de l’installation / site:
Entreprise en charge du
montage:
Adresse:
Téléphone: Date du montage du système HSS:
Installateur certifié: Dernier contrôle :
HSS
Version: 10/2019
SOLTOP EU GmbH
Sonnenhalde 5
D-88161 Lindenberg
www.soltop.eu
Hauptsitz Schweiz:
SOLTOP Schuppisser AG
St. Gallerstrasse 3 + 5a
CH-8353 Elgg
www.soltop.ch
Sitz der Gesellschaft: Lindenberg
Registergericht: Kempten (Allgäu)
Geschäftsführer: Andreas Zimmerer
Handelsregister: HRB 14331
MwSt: 127/137/60143
UID: DE300491338
EORI: DE314291943832627
20
HSS-System
Sistema a barra orizzontale per massi-
mo 4 persone. DIN EN 795:2012 Tipo
D + E CEN/TS 16415:2013
Il sistema di sicurezza HSS è stato sviluppato per garantire
protezione in orizzontale al personale che opera in condizioni
a rischio di cadute dall’alto. Consiste in una guida (di allumi-
nio) che, a seconda della lunghezza del sistema, può essere
supportata da diversi supporti intermedi (ancoraggi a punto
singolo). L’operatore provvisto di un’imbragatura anticaduta, un
dispositivo anticaduta di tipo retrattile e un elemento di colle-
gamento (moschettone) omologati per l’impiego orizzontale e
verticale, è collegato al sistema mediante uno scorrevole di pro-
tezione anticaduta a scorrimento libero.
Il sistema HSS è stato appositamente sviluppato per le sotto-
strutture fotovoltaiche Duraklick. Può essere usato su tetti piani
(inclinazione massima del tetto 5°) con copertura a membrana o
bituminosa nonché con manto in ciottoli o granulato.
Norme di sicurezza
• Il sistema HSS può essere utilizzato soltanto per la sicurezza
personale ed esclusivamente per gli scopi di impiego previsti.
Non è consentito l’utilizzo del sistema per il trasporto di ma-
teriali.
• L’area sottostante al bordo a rischio di caduta deve essere
sgombera da apparecchiature, manufatti o simili che possano
essere di intralcio.
• Per i casi di caduta deve essere predisposto un piano di soc-
corso che stabilisca cosa occorre fare.
• È d’obbligo rispettare rigorosamente il numero massimo di op-
eratori contemporanei. Anche un eventuale numero inferiore
di operatori indicato dal produttore dovrà essere rispettato.
• Il prodotto può essere utilizzato soltanto da personale adde-
strato/formato.
• Questo prodotto deve essere usato in combinazione con el-
ementi di collegamento (a norma EN 362) e con un dispositi-
vo di protezione individuale contro le cadute dall’alto (ad es.
mezzi di collegamento con ammortizzatori di caduta a norma
EN 354 ed EN 355), dispositivo anticaduta di tipo retrattile a
norma EN 360 e imbragatura anticaduta a norma EN 361, e
in un sistema di trattenuta può essere utilizzata una cinghia
di posizionamento a norma EN 358 (con lunghezza degli ele-
menti di collegamento che escluda una caduta dall’alto).
• Può essere agganciato esclusivamente allo scorrevole di pro-
tezione anticaduta (per le eccezioni vedere “Uso”).
• Dopo una caduta sospendere l’impiego del prodotto e farlo
controllare dal produttore.
• Non porre il sistema a contatto con sostanze chimiche o ag-
gressive; in caso di dubbio rivolgersi al produttore.
• In presenza di dubbi sul funzionamento sicuro del sistema
sospendere l’impiego del prodotto e farlo controllare dal pro-
duttore.
• Le indicazioni del produttore e il manuale di istruzioni per l’es-
tero sono disponibili in alcune lingue oppure in inglese (vedere
le pagine seguenti di questo opuscolo).
Gli operatori che utilizzano il sistema di
ancoraggio devono aver letto e compreso
il presente manuale di istruzioni e devono
osservare rigorosamente le istruzioni del
produttore.
IMPORTANTE!
!
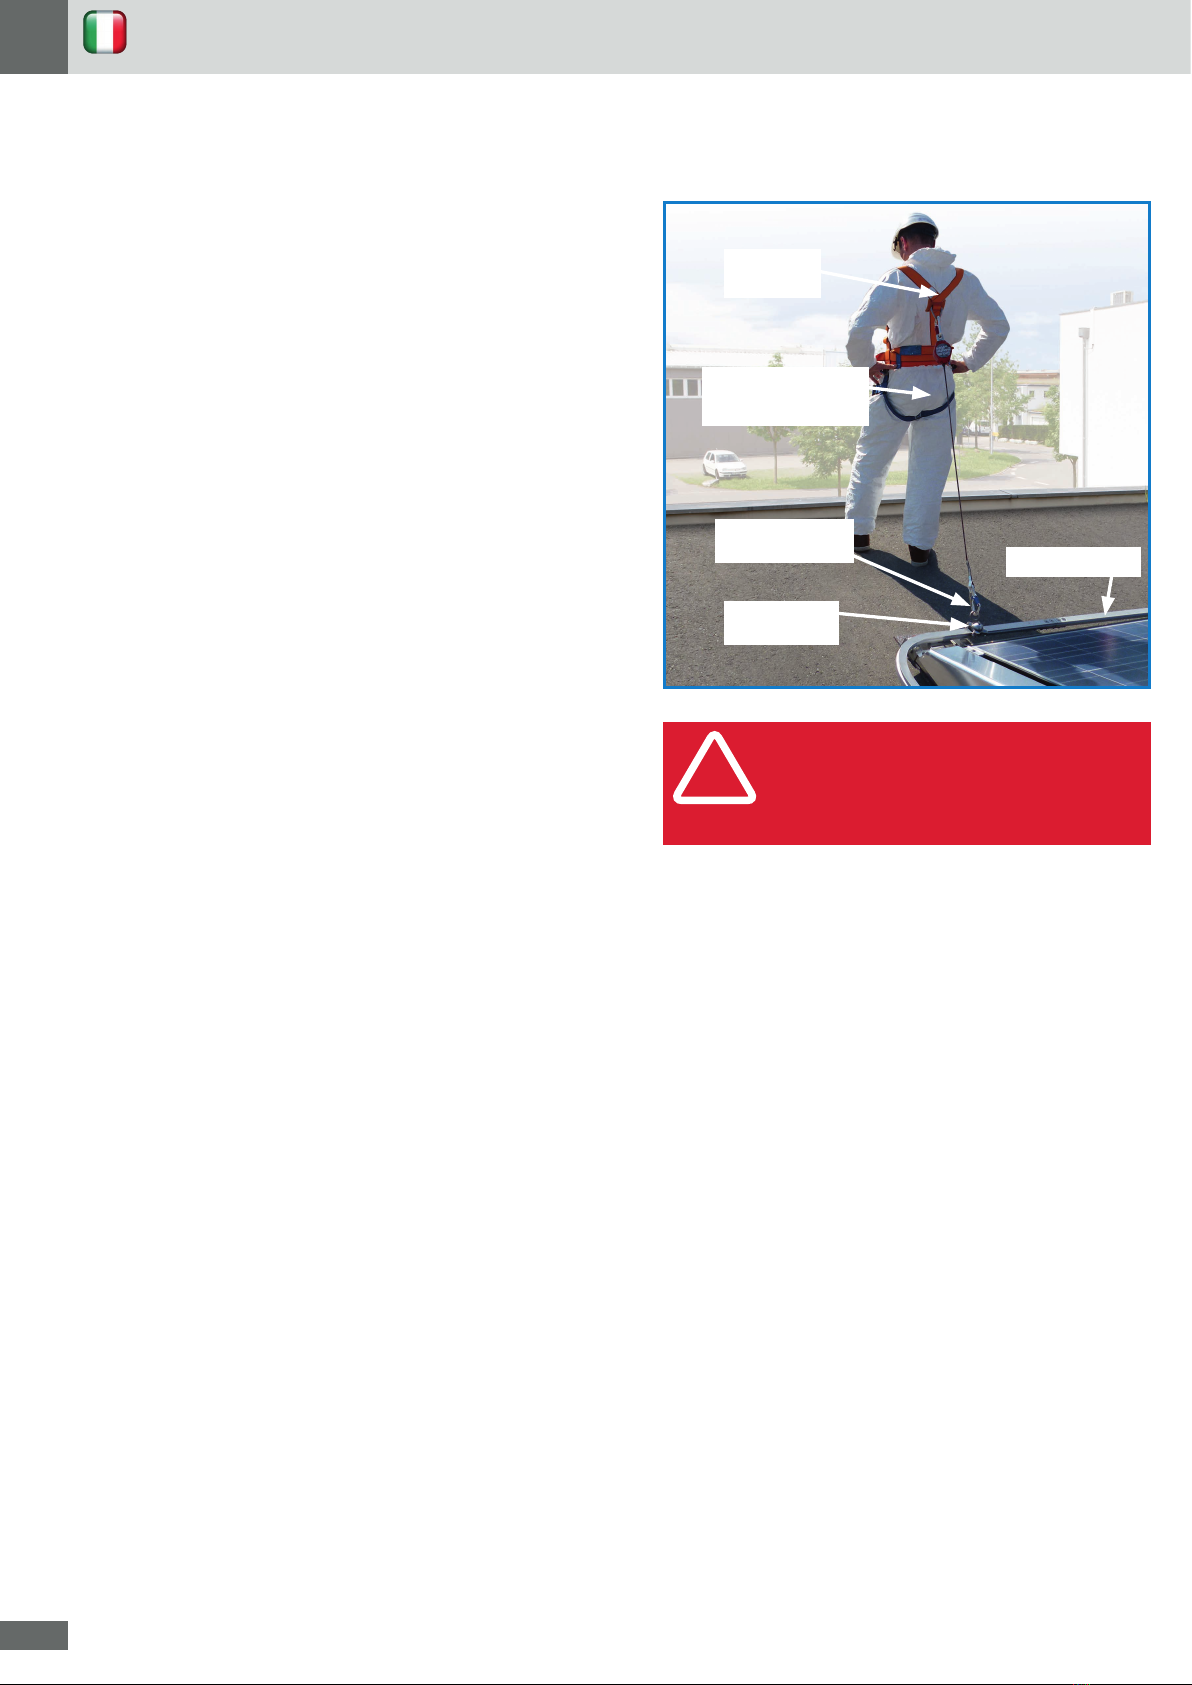
Manuale di istruzioni
Rotolo
anticaduta
Imbragatura
anticaduta
Dispositivo anticaduta
di tipo retrattile con
estrattore a nastro
• Se c‘è qualche dubbio sul funzionamento sicuro del
sistema, esso deve essere ritirato dall‘uso e richiede
un‘ispezione da parte del produttore.
Elemento di
collegamento Binario di guida
This manual suits for next models
1
Table of contents
Languages:
Other SOLTOP Safety Equipment manuals

Popular Safety Equipment manuals by other brands

Lanex
Lanex PB-20 instruction manual

SKYLOTEC
SKYLOTEC ANCHOR ROPES Instructions for use

Besto
Besto Buoyancy Aid 50N Instructions for use

TEUFELBERGER
TEUFELBERGER NODUS Manufacturer's information and instructions for use

Troy Lee Designs
Troy Lee Designs Tbone Product owners manual

Innova
Innova Xtirpa Instruction and safety manual

bolle SAFETY
bolle SAFETY B810 quick start guide

SHENZHEN FANHAI SANJIANG ELECTRONICS
SHENZHEN FANHAI SANJIANG ELECTRONICS A9060T instruction manual

Hiltron security
Hiltron security POWER8E Installation and use manual

Salewa
Salewa MTN SPIKE user manual

Hatco
Hatco B-950P installation guide

Sitec
Sitec TX MATIC operating manual


