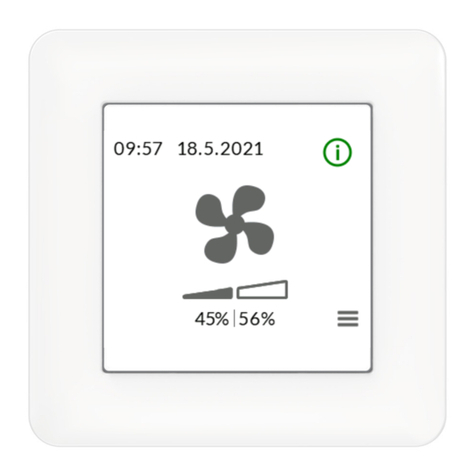
SOMFY Chronis RTS User manual

We reserve the right to make changes due to technical improvements. 1
Chronis RTS/RTS L
Supply:
Degree of protection:
Operating temperature:
Environmental conditions:
2x1,5VDC(Type:AAALR03)
IP30
+5°Cto+40°C
dry living areas.
80mm
80mm
27mm
INSTALLATION
guide
Ref.9007503B
inteoCHRONIS RTS / RTS “L”
1
Characteristics:
Chronis RTS/RTS Lhas severalfunctions,whichcanfulfil individualrequirementsat thetouchofa button:
Weekly program
setdifferenttimes for automaticopeningand closing of yourrollershutters everydayof the week.
Holiday security
setrandomtimes to givetheimpression of an occupiedhouse.
Cosmic
rollershuttersare activated automaticallyaccordingto the times thesunrises and sets.
OFF setting
Theautomaticcontrol can beturnedoff at the touchofa button.
Adetaileddescription of eachmodeof operation is givenunderpoint 4“Programming”.
Allfunctionsof the Chronis RTSalso apply fortheChronisRTSLforlight sensor.Pleasereadthe instructions included
withthelight sensor.
Chronis RTS/RTS L isthe programmableradiotime switch inthenewinteo-control range
fromSOMFY,whichcontrolsyour electrically operated rollershuttersor external blinds.
Operatingcommandsare transmitted byradiosignal,significantlyreducing the cost ofinstal-
lation.
Theradiosignal has arangeof up to 300metresin free field,or 20metresthrough two con-
cretewallsin buildings.
Hereby, SOMFY, declares that this equipment is in
compliancewiththeessentialrequirementsandother
relevant provisions of Directive 1999/5/EC.
ADeclarationofConformityisavailableatthewebad-
dress
www.somfy.com
Heading
CE

2.1
We reserve the right to make changes due to technical improvements.
Chronis RTS/RTS L
2
Assembly
1.)Fixwallmounting
platetothewall
usingtwoscrews
3.)Placethecover.2.)SlidetheChronis
RTS/RTSLonto
thewallmounting
platefromabove
Therangeofradiocontrolislimitedbylawsregulatingradiodevicesandbybuildingdesign. Whenplanning,pleaseensurethatthereisadequateradio
reception.
Inordernottoaffectqualityofreception,aminimumdistanceof30cmbetweenaChronisRTS/RTSLunitandaradioreceivershouldbemaintained.
ChronisRTS/RTSLshouldnotbeinstalledintheimmediatevicinityofmetalsurfaces. Powerfullocaltransmitterequipment(e.g.cordlessheadphones)
withatransmissionfrequencyidenticaltotheChronisRTS/RTSLcanaffectitsfunction.
Insulating strip
Theequipmentisdeliveredwiththebatteriesinstalled.
Aninsulatingstripisplacedbetweenthebattery pole and the contact.
Thismustberemovedbeforeinstallation,thenthetimeisshownonthedisplay.
Cover
ChronisRTS/ RTSL
Wallmounting plate
Tip: Before assembly,check that there is adequate radio reception at the intended location.
Programming button
TheprocedurefortuningaChronisRTSto a radio receiver depends on the type of recei-
verused. Itisimportanttofollowstepbystepthedetaileddescriptionoftherelevant
programmingprocedureintheinstructionswhichaccompanyeachindividualSOMFY
RTSradio receiver.
–Activateyourchosenreceiver(pleaserefertotheinstallationguideoftherelevantreceiver).
–PresstheprogrammingbuttonontheChronisRTS/RTSL.
–“Prog”willappearonthedisplay.Hold down the button until the RTSreceiverconfirmsthetuningprocess.
2
Installation:
3
Radio programming:
4.2 Setting operation mode3.1 Tuning

We reserve the right to make changes due to technical improvements. 3
Chronis RTS/RTS L
UP button
STOP/IP button
DOWN button
Display
SET button
Calendar button
Programming button
4.1 First use
Whensetting or changingvalues:
➜Valueswhich flash can be changed.
➜Alwayspress toendandstoreenteredvalues.
➜Ifnoinformationisenteredforapprox.20seconds,theprogrammingmenuquitsautomatically.
Informationenteredbeforethiswillnotbestored.
Beforesettingthetimeanddate,checkwhethertheequipment’s summer/winter time setting is correct.
Winter time is the factory default setting.
Setting the date
1.Press briefly➜datedisplayed(if no informationentered
within10seconds,displayjumpsbacktotime)
2.Press briefly➜dayflashes.
Setdayusing button
3.Press briefly➜monthflashes.
Setmonthusing button
4.Press briefly➜yearflashes.
Setyearusing button
5.Press briefly(save)➜time displayed.
Thedayoftheweekissetautomatically. Theday/month/year
selectioncanbegonethroughinreverseorderusing the DOWN
+
-
+
-
+
-
Setting summer or winter time
Thecorrespondingsettingisshownonthedisplayas“S”forsummertimeor
“W”forwintertime.
Changing from winter to summer time
1.Press briefly➜timeflashes.
2.Press formorethan5seconds➜displayshows“S”forsummertime.
3.Press briefly(save)➜timedisplayed
Changing from summer to winter time
1.Press briefly➜timeflashes.
2.Press formorethan5seconds➜displayshows“W”forwintertime.
3.Press briefly(save)➜timedisplayed.
Hour
Summer/Winter time
Next command
and time
Day Month
Year
Min.
Current day
1 : Monday
2 : Tuesday
3 : Wednesday
4 : Thursday
5 : Friday
6 : Saturday
7 : Sunday
4.2 Setting operation mode
TheChronisRTS/RTS L has5different operating modes:
4.2.1 Weeklyprogramme ( )
Rollershuttersareopenedorclosedautomaticallyatindividuallysettimes.
–Defaultopeningtimeissetat6:00,defaultclosingtimeis20:00.
–Differenttimescanbeenteredforevery dayoftheweek. Thedisplay alwaysshowsthedayoftheweek(orallweekdays)forwhichtheente-
redtimeapplies.
Changingtheweeklyprogramme(ifrequired)
1.Pressandmaintain untildisplayshowstheweeklyprogramme (ifnotalreadyset).
2.Press briefly➜timeflashes.
3.Press briefly➜UPswitchingtimeflashes.
4.Press untilthedesireddayoftheweekorallweekdaysareselected*
5.SetUPtimeusing button.
6.Press briefly➜DOWNswitchingtimeflashes.
7.SetDOWNtimeusing button.
Ifrequired,use buttontoselectthenextweekdayandrepeatsteps(3)to(7).
8.Press briefly(save)➜timedisplayed.
+
-
+
-
4
Timer programming:
Setting the date
1.Press briefly➜datedisplayed(ifnoinformationenteredwithin
10seconds,displayjumpsbacktotime)
2.Press briefly➜dayflashes.
Setdayusing button
3.Press briefly➜monthflashes.
Setmonthusing button
4.Press briefly➜yearflashes.
Setyearusing button
5.Press briefly(save)➜timedisplayed.
Thedayoftheweekissetautomatically. The day/month/year selec-
tioncanbegonethroughinreverseorderusingtheDOWNbutton.
+
-
+
-
+
-
Setting the time
1.Press briefly➜timeflashes
2.Settimeusing button
3.Press briefly(save)➜timedisplayed
+
-
4.2 Setting operation mode
1:Monday
2:Tuesday
3:Wednesday
4:Thursday
5:Friday
6:Saturday
7:Sunday
*

IftheUPorDOWNtimeissetbetween23:59and0:00usingthe button(seestep(5)and(7)),thedisplayshows .TheOFFsettingallows
theautomaticopeningandclosingofrollershutterstobeturnedoffintentionallyforspecificdays.
To speed up setting of your weekly programme:
a.)SettheUPandDOWNtimesforthewholeweek
Followsteps(1)–(8),butatstep(4)selectallweekdays.Savebypressing
b.)SettingtheUPandDOWNtimesfortheweekend
Followsteps(1)to(8)againfortheweekend,butatstep(4)selectSaturdayandSunday
Savebypressing
4.2.2 Holiday security setting (SEC)
–Tomakeyourhouseappearoccupiedwhileyouareaway,open and close the roller shutters at random times. The swit-
chingtimessetintheweeklyprogrammefortheautomaticopeningandclosingofyourrollershutterswillbedelayedorbro-
ughtforwardby+/-15minutesevery day.
Pressandmaintain until(SEC)appearsonthedisplay.
+
-
4.2.3 Cosmic 1 (COS 1)
–Openandcloseyourrollershuttersatsunriseandsunsetevery day. Additional differentialtimesandcut-offtimes
allowyoutoprogrammerollershutterstoopenandcloseaccordingtoyourindividualrequirements.
–Byenteringadifferentialtime,openingandclosingcanbeadjustedindependentlybyupto+/-1h59mins.relativeto
sunriseandsunsettimes.
Note
We reserve the right to make changes due to technical improvements.
Chronis RTS/RTS L
4
Jan. Apr. July Oct. Dec.
5:00
7:00
9:00
16:00
19:00
22:00
Differential tim
e
Sunrise
Sunset
Close
Open, e.g. 1 hour after sunrise,
with a differential time of +1h
5:00
Jan. Apr. July Oct. Dec.
7:00
9:00
16:00
19:00
22:00
Sunrise
Cut-off time for closing
Sunset
Shut-off time
Close
Cut-off time for opening
Ifyoudonotwishthesecut-offtimestoaffecttheopeningorclosing,andyouwanttherollershutterstobeoperatedatsunriseandsunsetand
onlywiththecorrespondingdifferentialtimes,youcansetthecut-offtimetoOFF. To switch the cut-off time to“OFF”,the cut-off time must be
settobetween23:59and0:00usingthe button.
+
-
Entering a differential time
1.Pressandmaintain untilthedisplayshows(COS1)(ifnotalreadyset)
2.Press briefly➜timeflashesandnextswitchingcommandisdisplayed
3.Press briefly➜UPdifferentialtimeflashes
4.ChangeUPdifferentialtimeusing button
5.Press briefly➜DOWNdifferentialtimeflashes
6.ChangeDOWNdifferentialtimeusing button
7.Press briefly(differentialtimesarestored)➜timeisdisplayed
There is no default differential time !
+
-
+
-
Entering cut-off times
1.Pressandmaintain untilthedisplayshows(COS1)(ifnotalreadyset)
2.Press briefly➜timeflashesandthenextswitchingcommandisdisplayed
3.Press twicequickly➜UPcut-offtimeflashes
4.ChangeUPcut-offtimeusing button
5.Press twicequickly➜DOWNcut-offtimeflashes
6.ChangeDOWNcut-offtimeusing button
7.Press briefly (cut-off timesare saved) ➜timeisdisplayed
The factory default setting is 6:00 for UP cut-off time and OFF for DOWN cut-off time !
+
-
+
-
4.2.4 Cosmic 2 (COS 2) Cosmic2alwaysopenstherollershuttersatthetimessetindividuallyintheweeklyprogrammeandclosesthemattheti-
messetforCosmic1.
Thecut-offanddifferentialtimessetinCosmic1areobserved.
NochangescanbemadeinCosmic2.

4.2.5 OFF mode Inthisoperatingmode,onlymanualcommandsarecarriedout.
–SwitchingtoOFFmode
Pressthe“+“onthe buttonbriefly➜displayshowsOFF.
–SwitchingfromOFFmodetoautomaticmode
Pressthe“-“onthe buttonbriefly➜displayshowsthetime.
+
-
+
-
We reserve the right to make changes due to technical improvements. 5
Chronis RTS/RTS L
ItispossibletooperatethesystemmanuallyatanytimeusingtheUP,DOWNandSTOP/IPbuttons.
Commands:
PressingtheUPorDOWNdirectionbuttonswillmovetheblindinthedesireddirection.
STOP command:
Whilethemotorisrunning,acommandcanbestoppedbypressingtheSTOP/IPbutton.
Dependingonthereceiverused,anintermediateposition(IP)canalsobecalledupusingthisbutton.
ChronisRTS/RTSLispoweredbytwostandard1.5Valkalinemanganesebatteries(Micro/AAAtype).
Battery life is approx.3 years with an average of 4 commands per day. Asthebattery power decrea-
ses,thedisplaycontrastwillfade. Ifthedisplayisillegible,thebatteriesmustbechanged.
Changing the batteries:
–CarefullyremovethecoveroftheChronisRTS/RTSLusingasmallscrewdriver(forRTSL,first dis-
connectthelightsensor).
–SlidetheChronisRTS/RTSLunitupwardsoutofthemountingplate.
–Changethedeadbatteries,whicharelocatedonthebackoftheChronisRTS/RTSLunit. Observe the polarity specified on the
unit!
–Pleasedisposeofthedeadbatteriesatanappropriatecollectionpoint.
After changing the batteries,the date and time must be reset.
The switching time settings will be stored permanently.
5
Manual operation
6
Battery

Checkwhethertheinsulatingstriphasbeenremovedfromthe
batteries.
Takeoutandreinstallthebatteries.
Takeoutandreinstallthebatteries.
Increasetransmissionrepeatrate.
(seechapter7“Diagnosismenu:rts”).
ChangethepositionoftheChronisRTS/RTSLunit.
Settransmissionrepeatratetozero.
Changetoblindsmode
(seechapter7“Diagnosismenu:rts”).
Nothingisshownonthedisplay
Theclockdoesnotwork
Automaticcommandsarenotcarriedout
Automaticcommandsarerepeatedunnecessarily
Blindsarenotalwaysoperatedbyautomaticcommands
We reserve the right to make changes due to technical improvements.
Chronis RTS/RTS L
6
What do I do if
Thismenuallowstheunittobecheckedandadditionalfunctionstobeset.
Toaccessthemenu,press + + simultaneouslyuntil appearsonthedisplay.To change the menu options,press . If no information is
enteredforapprox.20seconds,thediagnosismenuquitsautomatically.
7
Diagnosis menu
The menu options :
➜➜Displaytest.
➜➜ChangeweekdayGerman(dEU)/international(Int).
➜Savechangeandexit.
➜➜Changebetweenrollershutters(Stn)/venetianblinds(Eub).
➜➜Settransmissionrepeatrate.thesignalforautomaticcommandsisrepeatedaccordingtothenumberofbeamsshown.
➜ Savechangeandexit.
➜➜Showsthesoftwareversion.
➜ Exit.
+
-
This manual suits for next models
1
Table of contents
Other SOMFY Control Panel manuals
Popular Control Panel manuals by other brands
Renkforce
Renkforce 1713218 operating instructions
NAPCO
NAPCO LIBRA-P432EX Series Programming instructions

FOUND MOTOR
FOUND MOTOR 810-B1 user manual
2gig Technologies
2gig Technologies Go!Control Panel Installation and Programming Technical Training

AEG
AEG S6.88 operating instructions
Bentel Security
Bentel Security Absoluta Quick user guide
