8
FR
De la part de DDUUEETT EUROPE SL, nous vous remercions
de votre confiance dans l’achat des produits Sonia. Nous
espérons que ce manuel d’instructions vous aidera à tirer le
meilleur parti de ce produit.
En cas de doute sur son utilisation et / ou son
fonctionnement, contactez votre distributeur.
AVANTTOUT
●Lisez attentivement tout le manuel d’instructions avant
d’utiliser le produit. Observez les avertissements de ce
manuel.
●Conservez toujours ce mode d’emploi et, si vous transférez
l’appareil, remettez-le avec lui, car il constitue un élément
essentiel du produit.
●Certains composants du produit peuvent différer de
l’image apparaissant dans les catalogues, les sites Web,
les brochures commerciales, etc.
●Afin d’apporter des améliorations au produit, le fabricant
se réserve le droit de modifier les caractéristiques et / ou
les composants de celui-ci sans préavis.
UTILISATION CORRECTE DE L’APPAREIL
●Ce produit a été conçu pour être utilisé par des
professionnels de la beauté dans des centres de beauté et
ne doit pas être utilisé à d’autres fins.
●Veuillez noter que toute mauvaise utilisation de l’appareil
entraîne la perte de la garantie.
●N’effectuez aucune modification sur l’appareil sans
l’autorisation de DDUUEETT EUROPE SL.
●DDUUEETT EUROPE SL ne sera responsable d’aucun
dommage matériel ou personnel dû à une mauvaise
utilisation du produit.
PRÉCAUTIONS
●Avant la première utilisation de l’appareil et après
chaque utilisation, vérifiez que l’appareil et le cordon
d’alimentation ne sont pas endommagés.
●Débranchez l’appareil du secteur avant de commencer le
nettoyage ou tout type d’entretien.
●N’utilisez pas le produit à l’extérieur ou dans un endroit où
il pourrait être affecté par l’humidité ou les intempéries.
●Si le câble d’alimentation est défectueux, débranchez
immédiatement l’appareil et contactez votre distributeur
ou un technicien spécialisé.
●Placez le cordon d’alimentation correctement afin qu’il
ne puisse pas s’emmêler et branchez-le dans une prise
connectée à la terre.
●Tous les jours, après la fin de la journée, débranchez
l’appareil et le cordon d’alimentation du secteur.
●Si vous détectez une anomalie dans le fonctionnement
du produit, consultez votre distributeur ou un technicien
spécialisé.
CONSIGNES DE SÉCURITÉ
●L’appareil et les accessoires doivent être tenus hors de
portée des enfants.
●Connectez l’appareil uniquement à une prise de courant
correctement installée. La tension du réseau local doit
correspondre aux données techniques de l’appareil.
●La prise de courant doit être accessible au cas où vous
devriez débrancher l’appareil rapidement et à tout
moment.
●Tirez toujours sur la fiche et non sur le câble.
●Ne manipulez aucun composant électrique, n’ouvrez ou
réparez aucun composant de l’appareil.
●Seul votre distributeur ou un technicien spécialisé doit
réparer l’appareil.
●Ne démarrez pas l’appareil si celui-ci ou le câble réseau
sont endommagés.
●Ne touchez jamais l’appareil ou le câble réseau avec des
mains mouillées.
●N’exposez jamais vos mains ou une partie de votre
corps à un trou ou à un creux du divan pendant son
fonctionnement.
CONTENU DE LA BOÎTE
●Table de spa électrique x 1 unité
●Manuel d’instruction x 1 unité
CARACTÉRISTIQUES TECHNIQUES
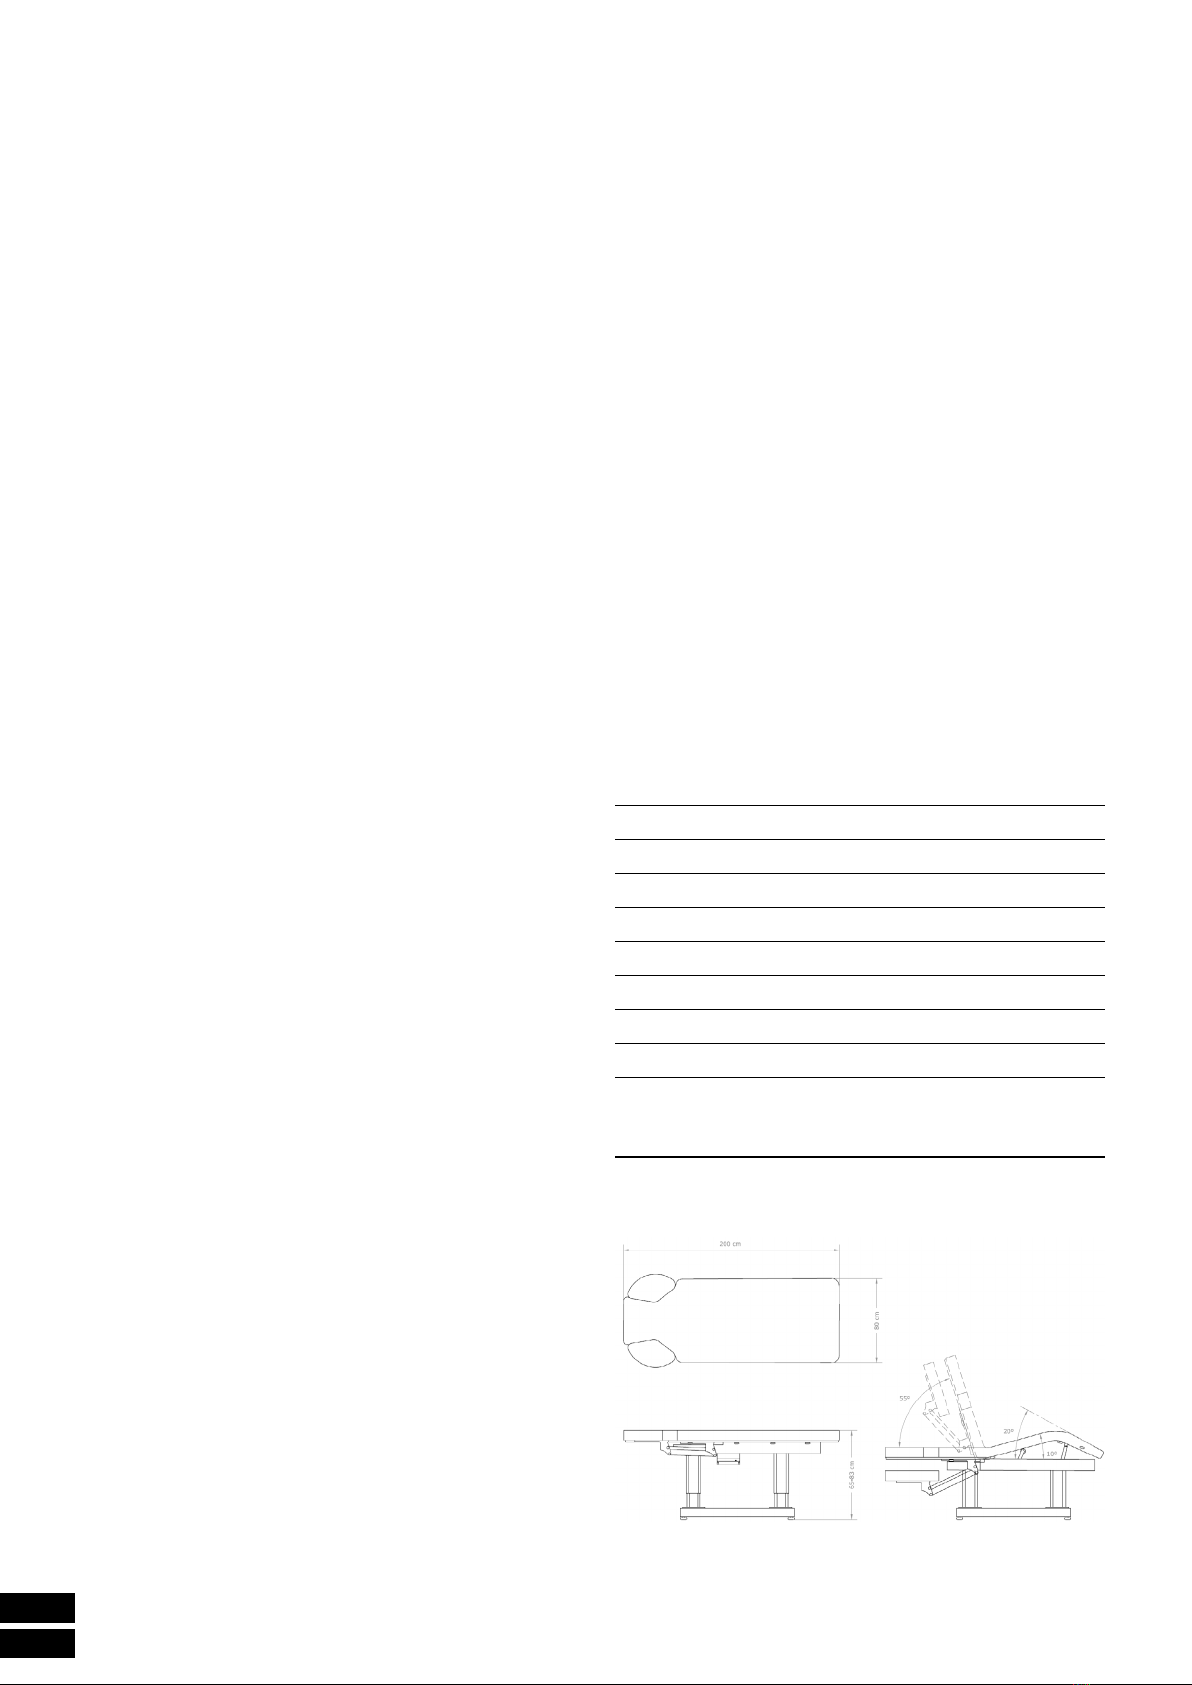
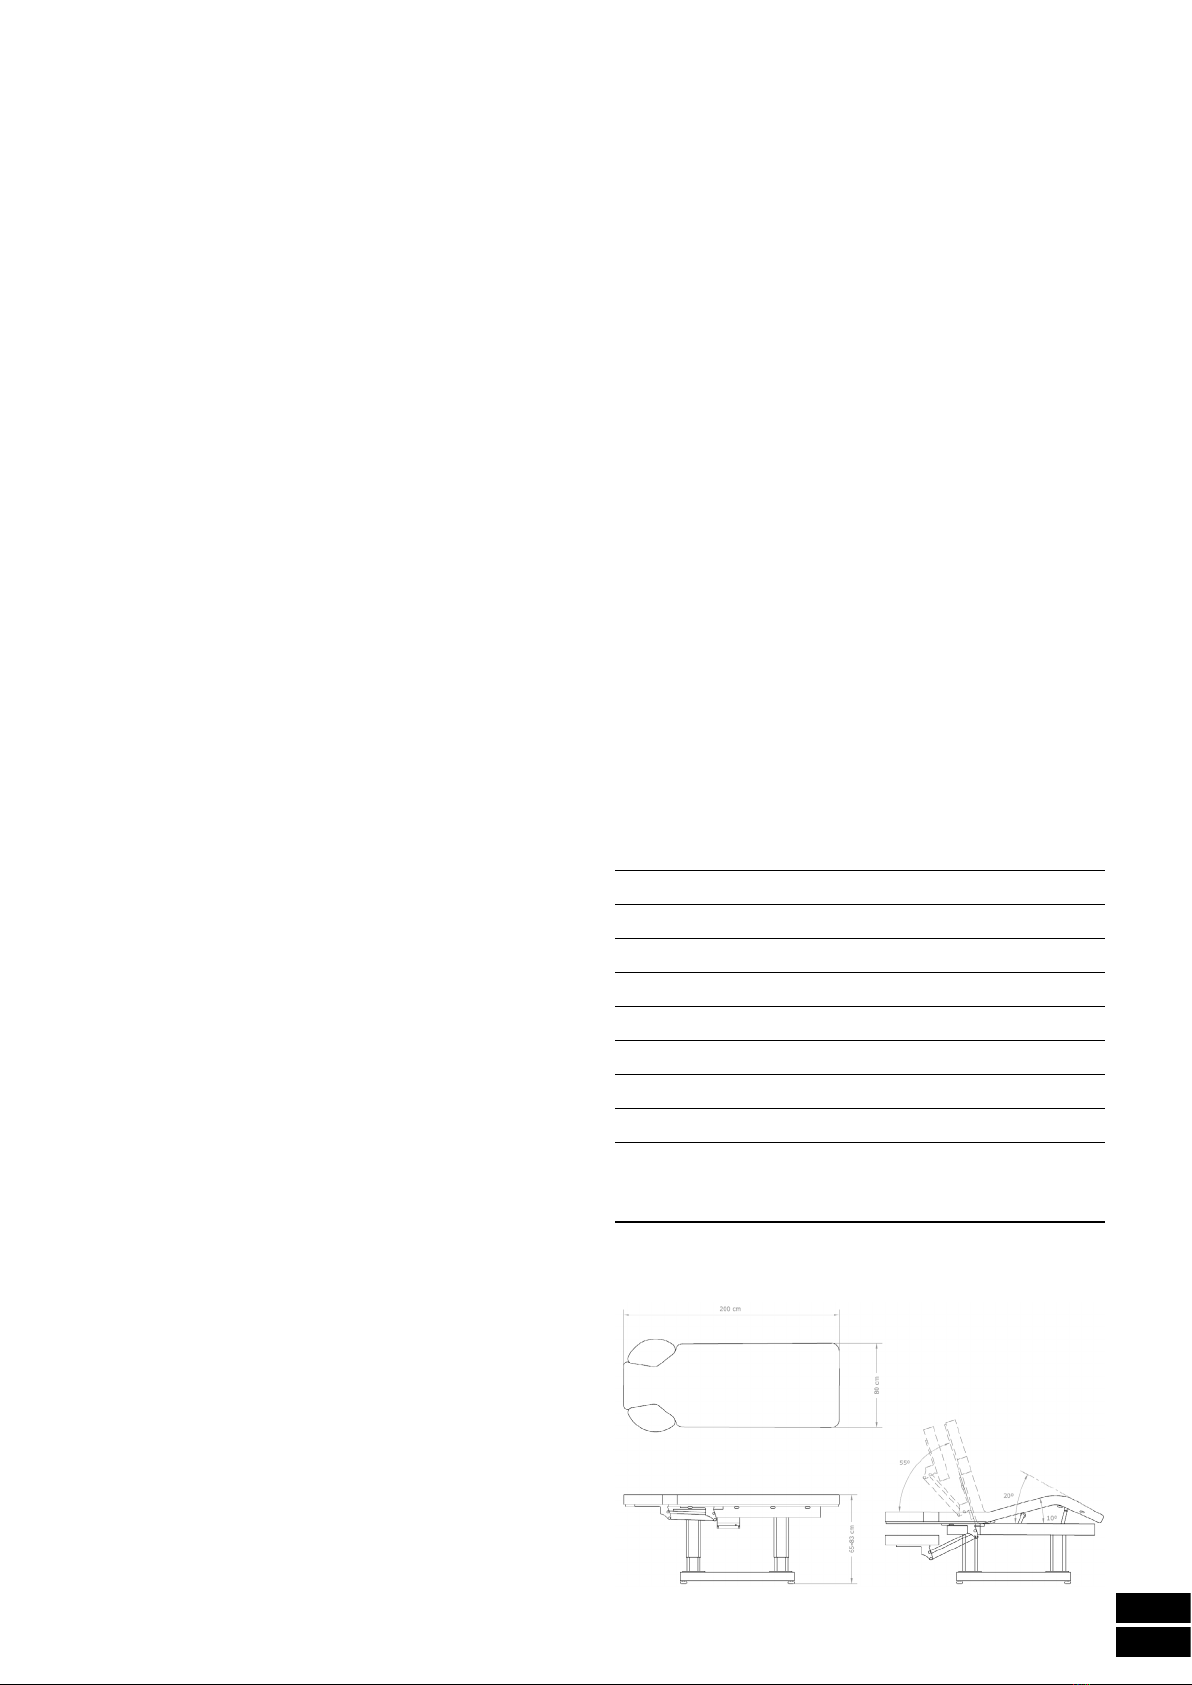
Dimensions 200x80x65-83 cm
Poids net 103 kg
Charge maximale 200 kg
Moteurs 4
Revêtement PU
Épaisseur de la mousse 9 cm
Tension 220-240 V
Fréquence d’entrée 50/60 Hz
Inclus
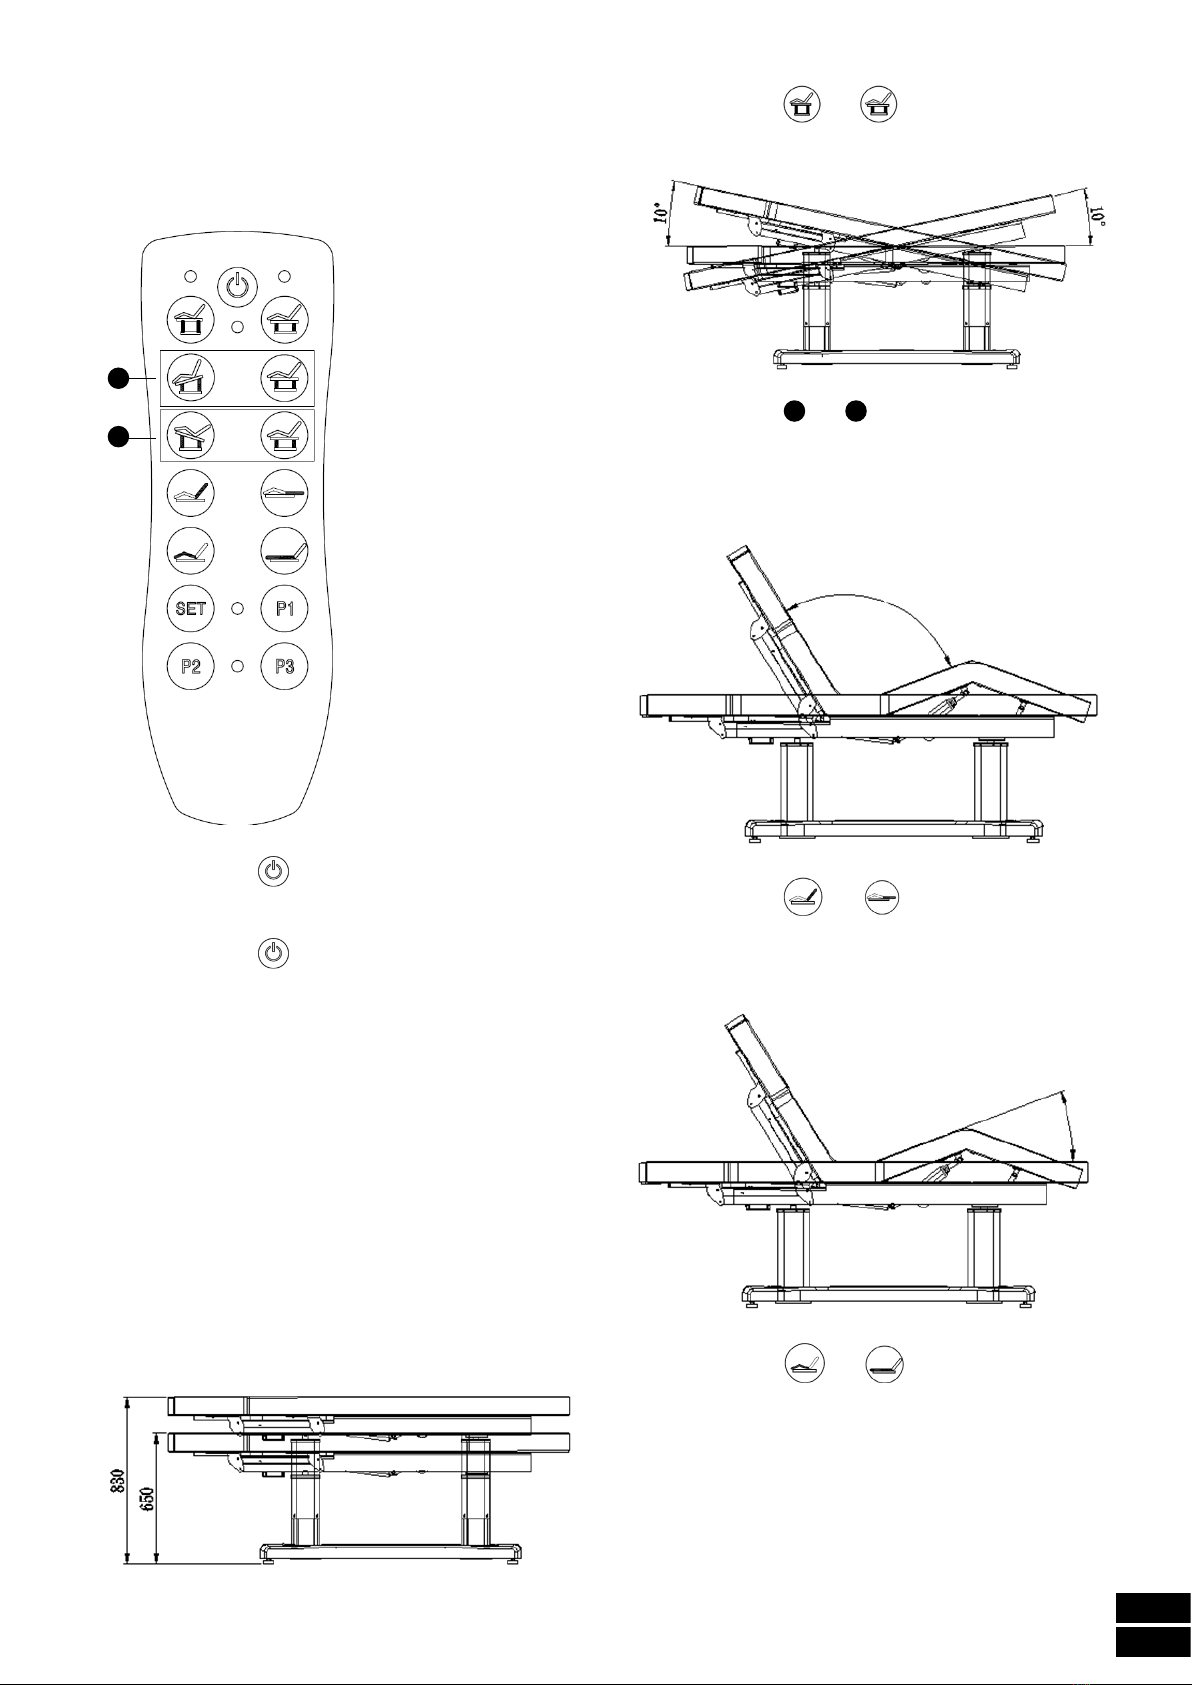
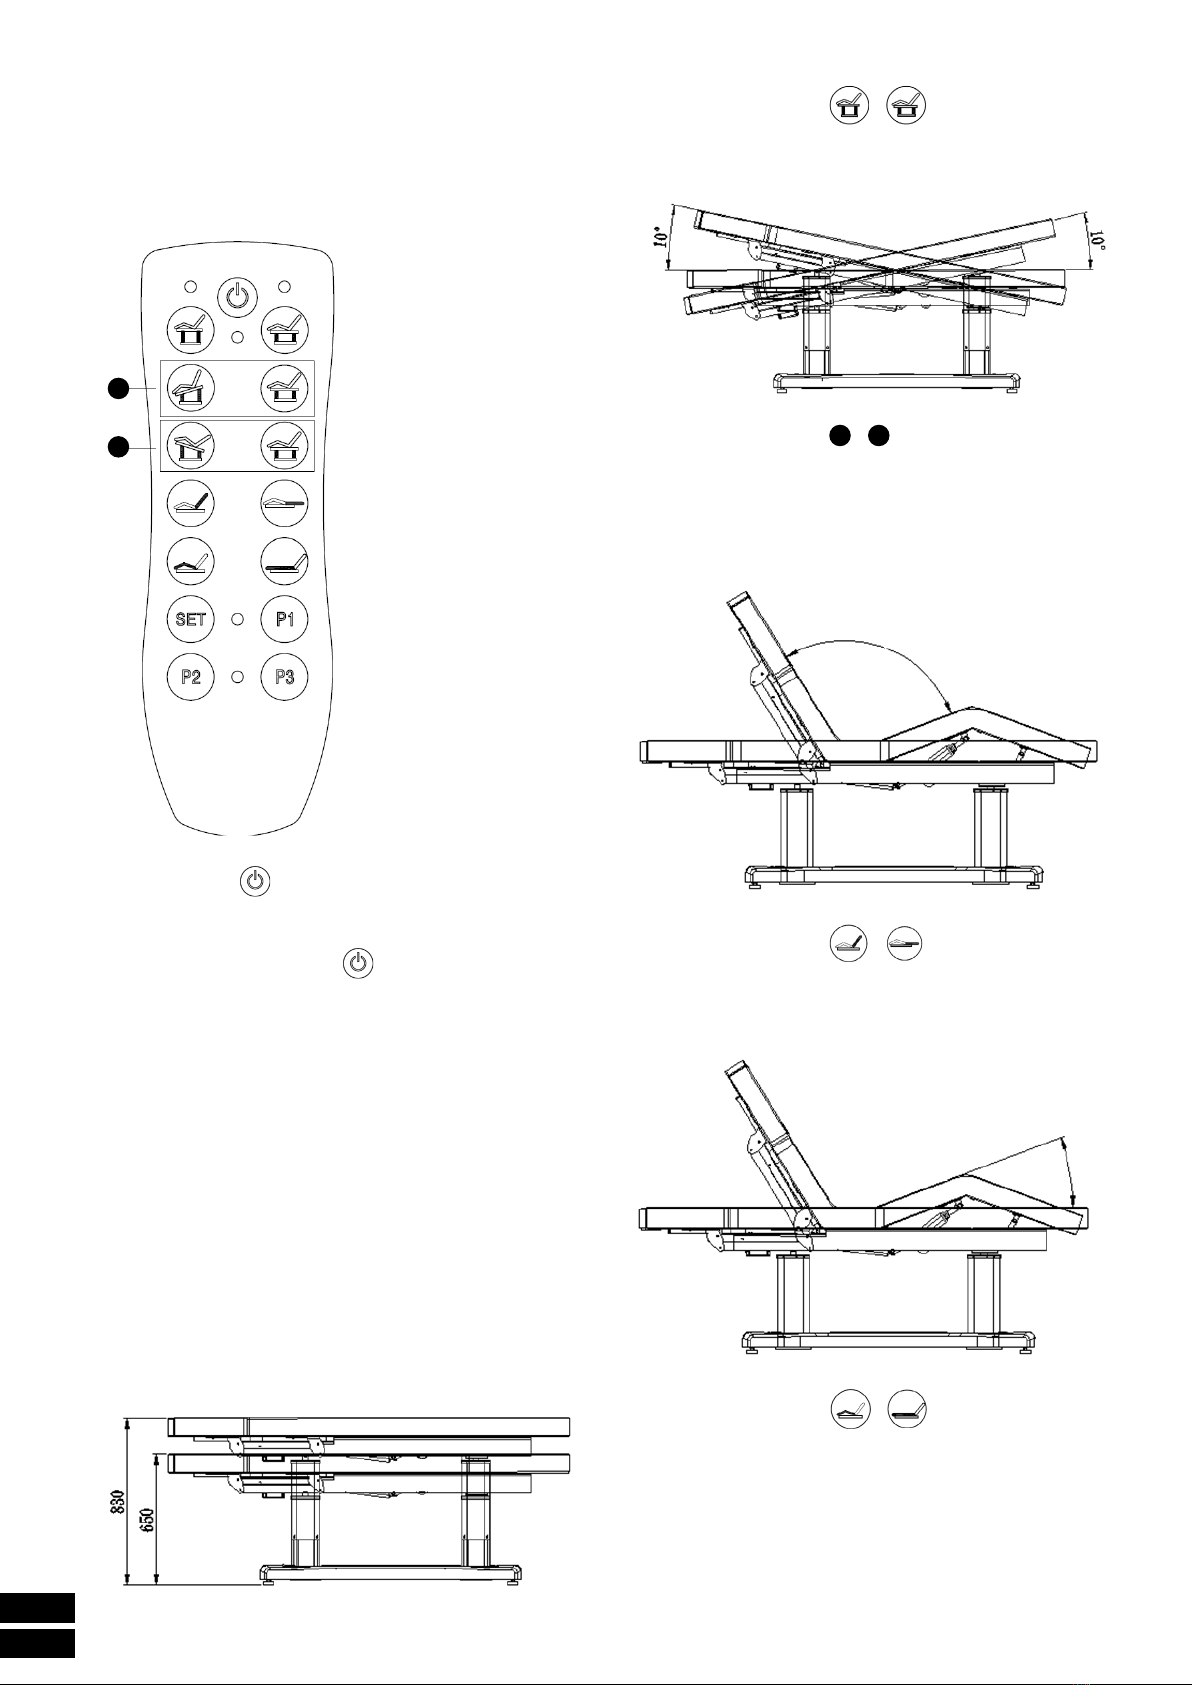
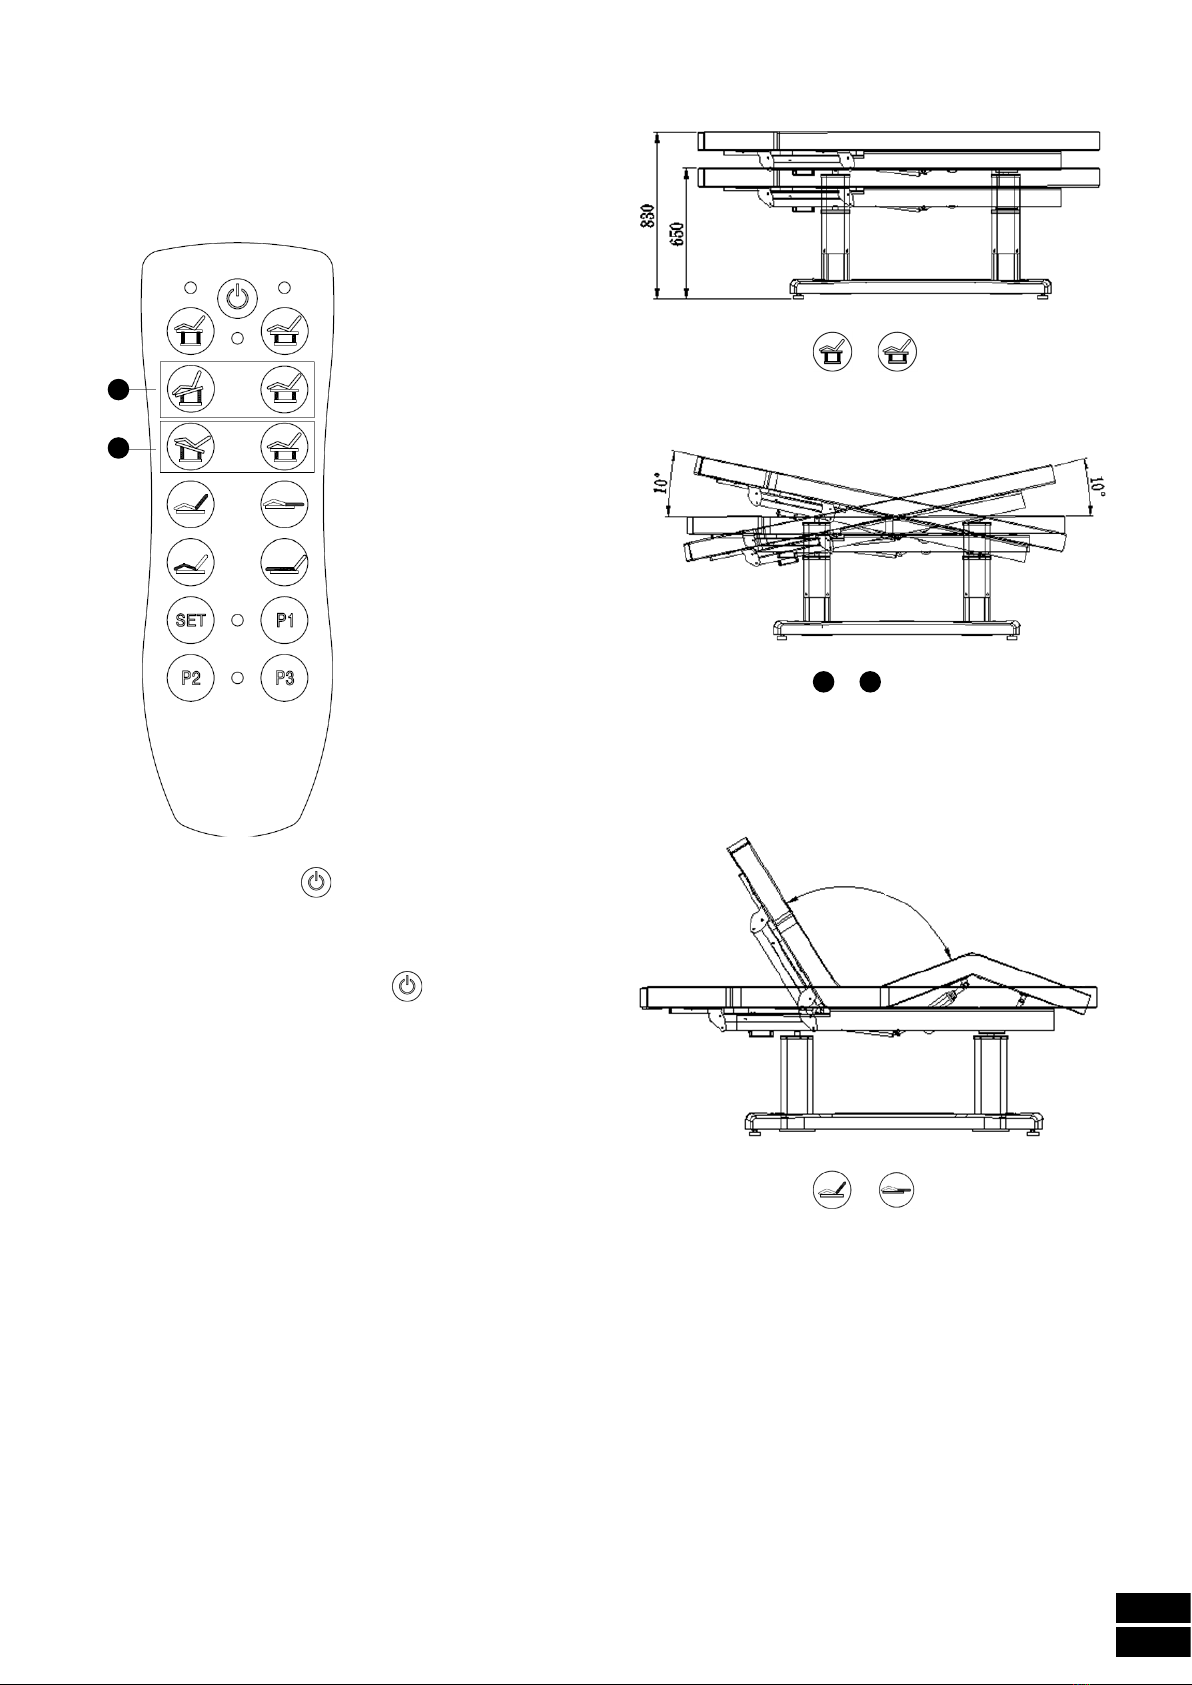
-Télécommande à main
-3 positions mémorisées et
personnalisables
CROQUIS ET DIMENSIONS