00010 English GB
Preparing the Update Files
[Notes]
Close any other applications before performing the update
procedure.
1 Download and save the unit update software
to the computer’s desktop (recommended).
Update_MCX500V***.exe (*** represents the
version number)
For Windows 8.1
Under the default settings for Internet Explorer,
files that are downloaded via [Save] are saved
to the [Downloads] folder. If the Start screen is
displayed, tap (click) the [Desktop] tile to
display the desktop. Open the [Downloads]
folder, and find the downloaded file.
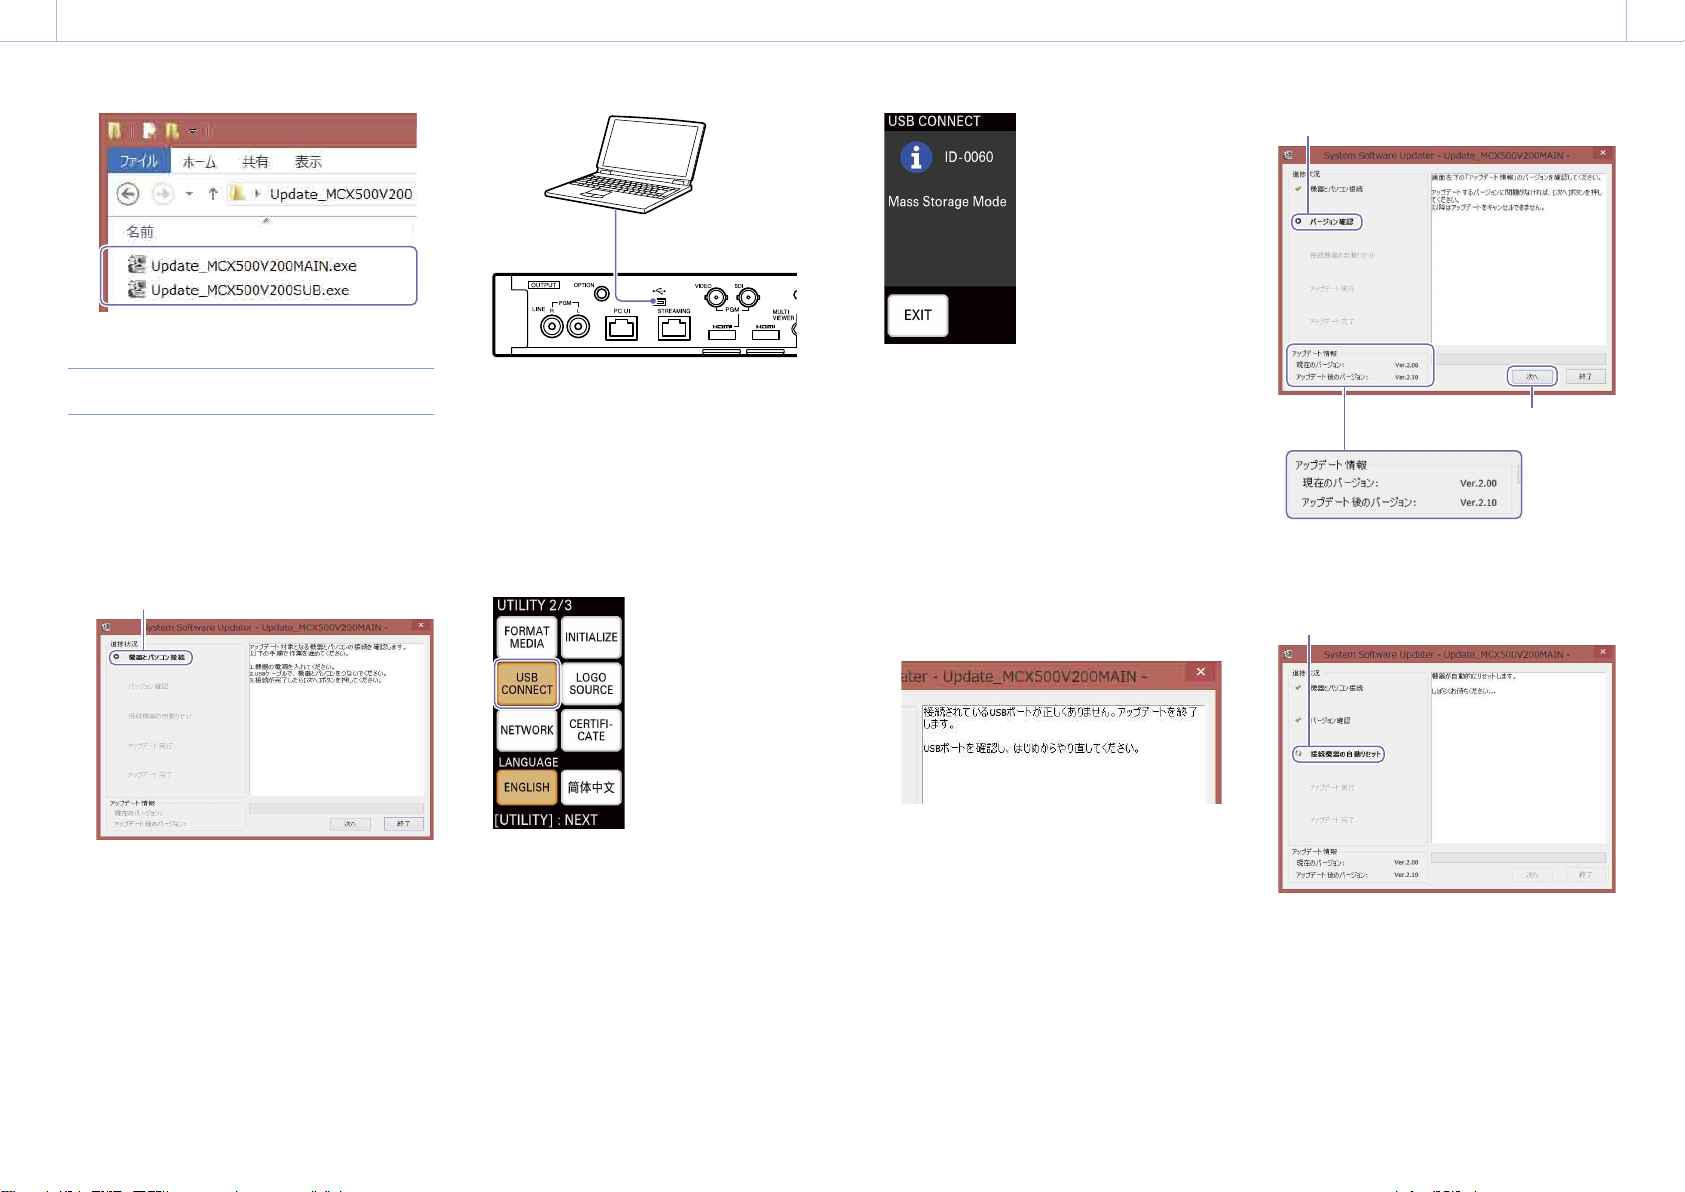
2 Extract the unit update file.
When you double-click the downloaded file,
the Firmware Update package is extracted and
two files (MAIN and SUB) appear.
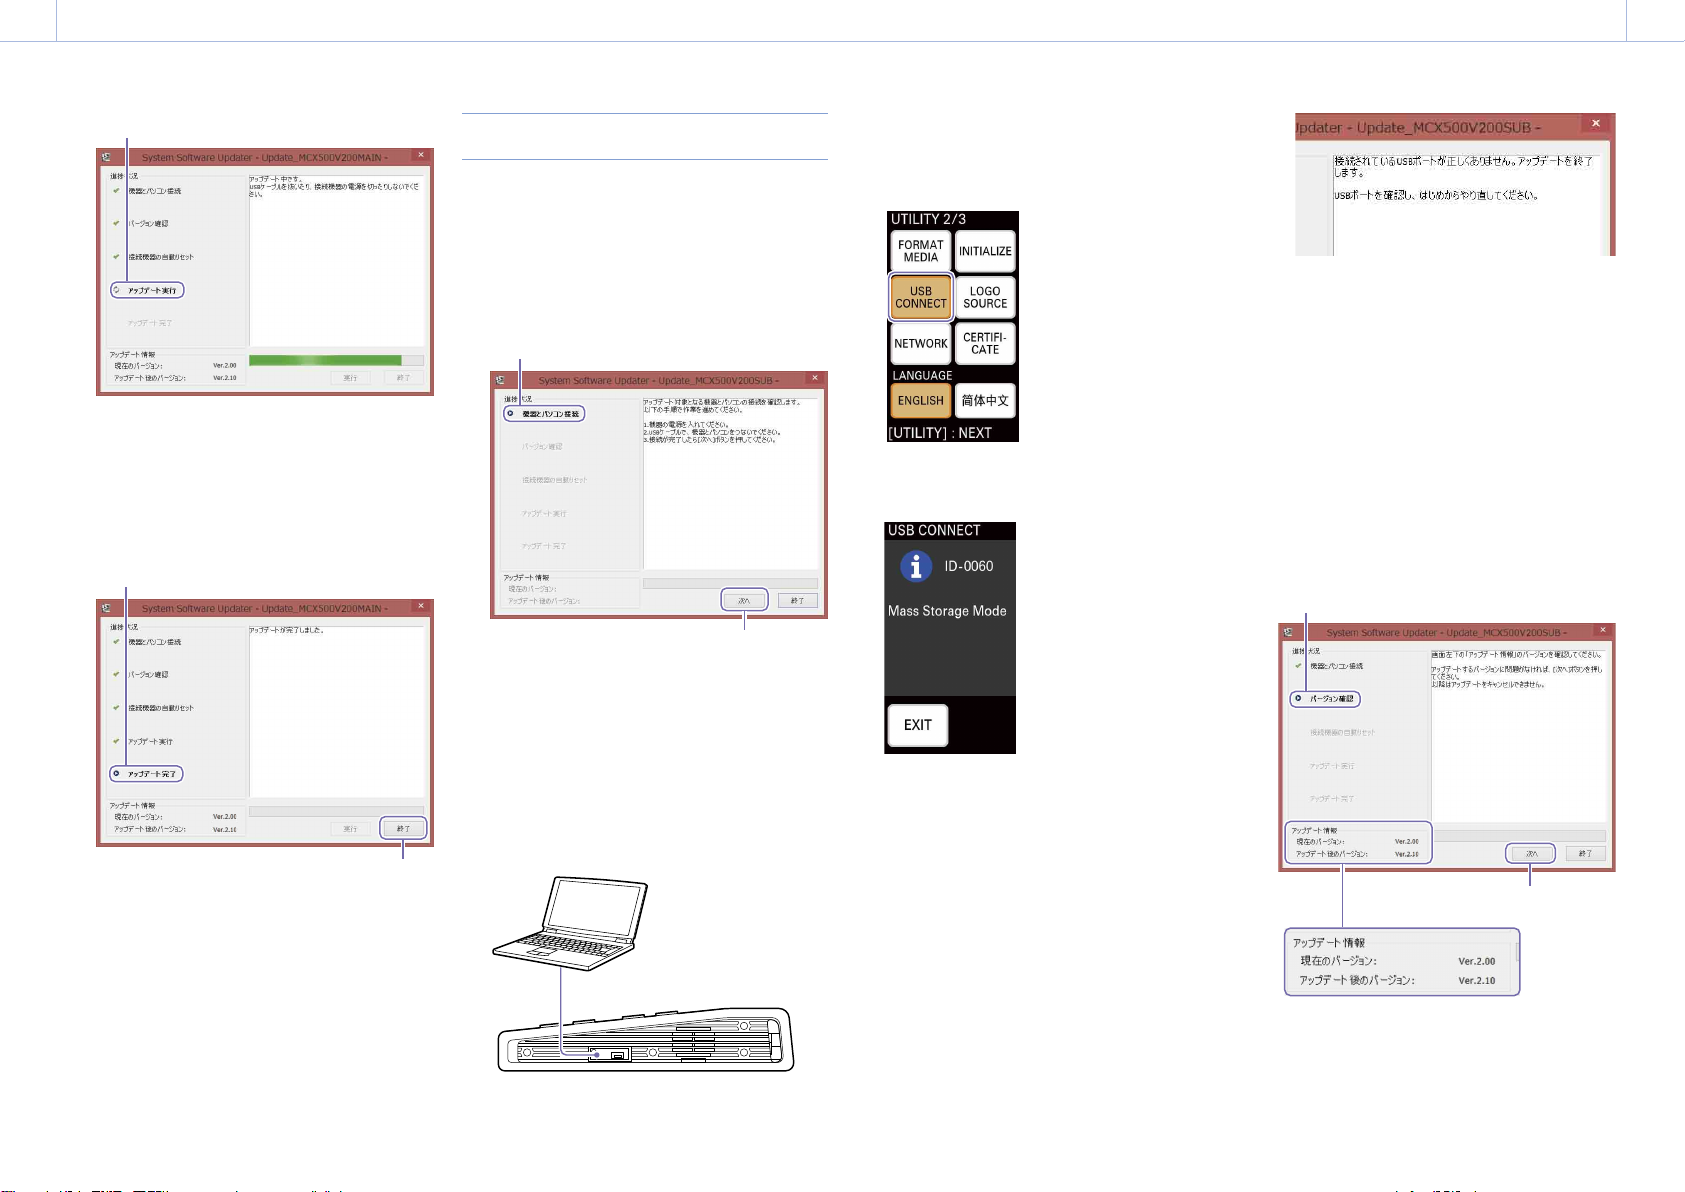
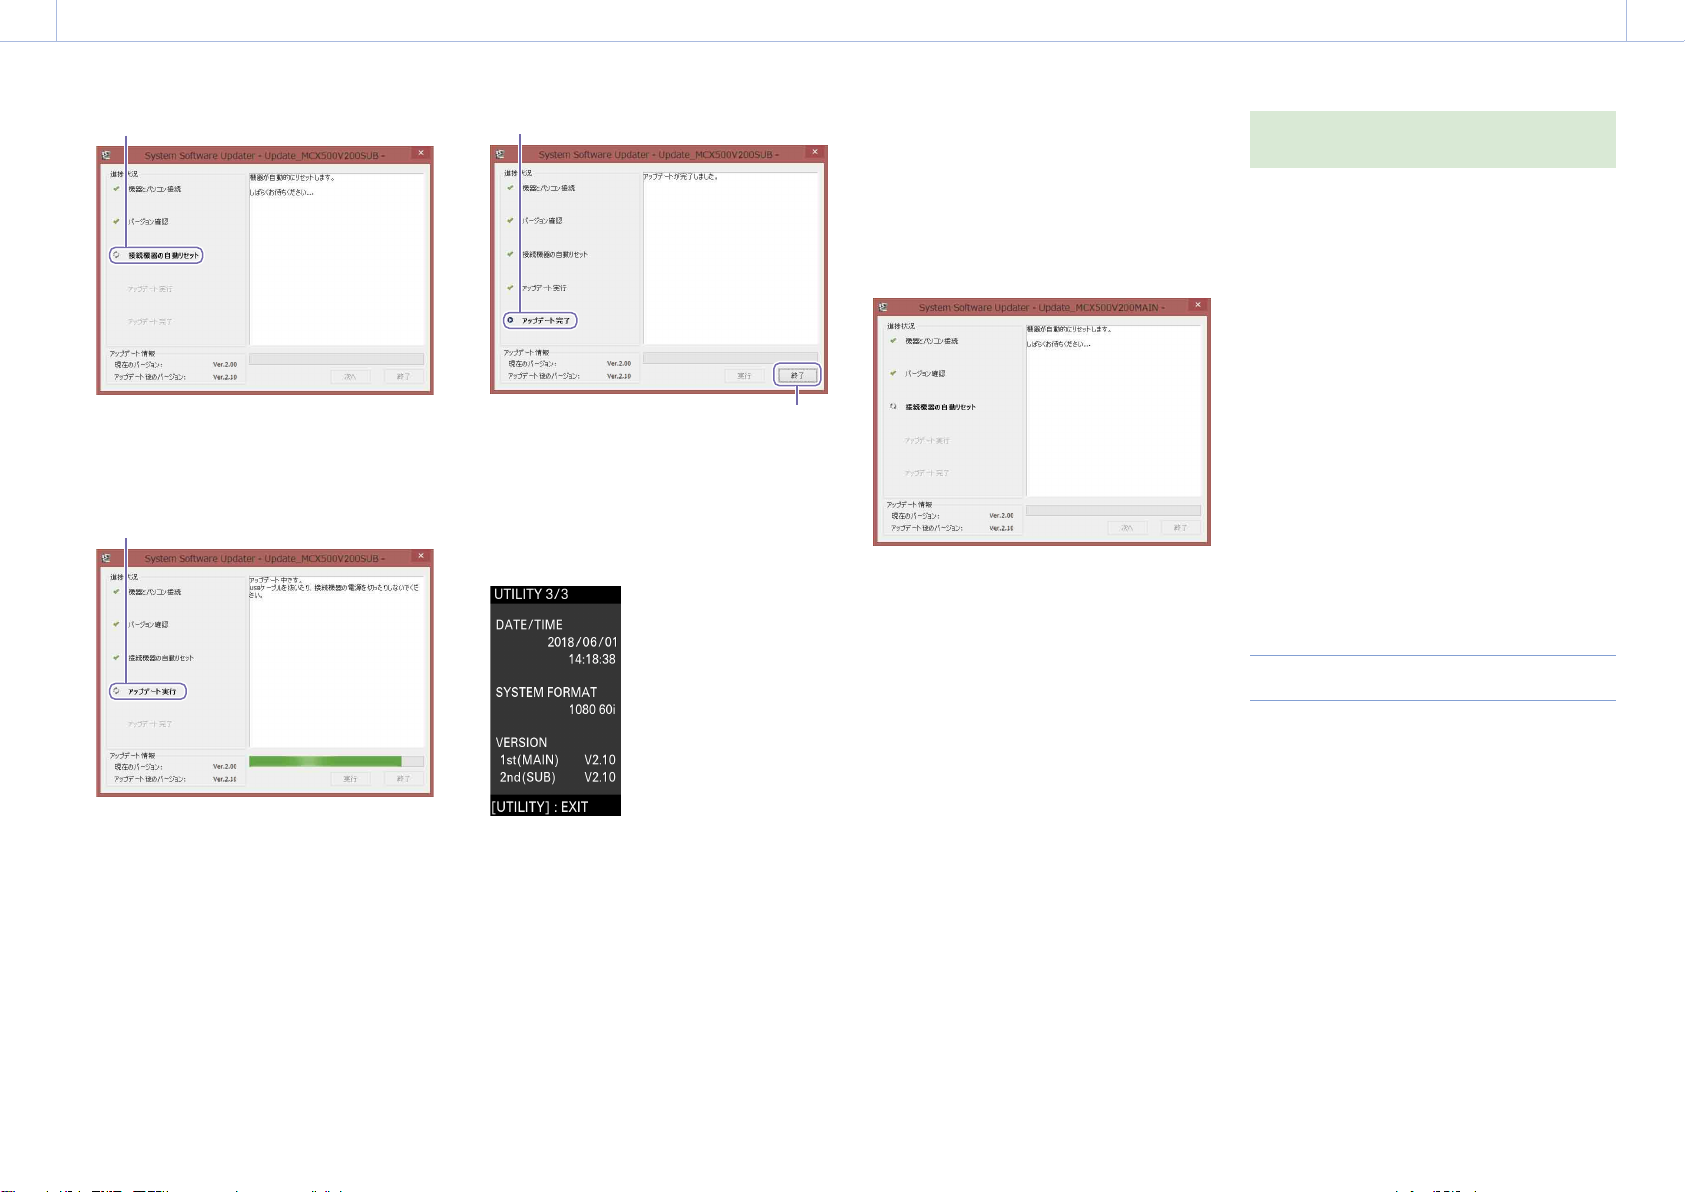
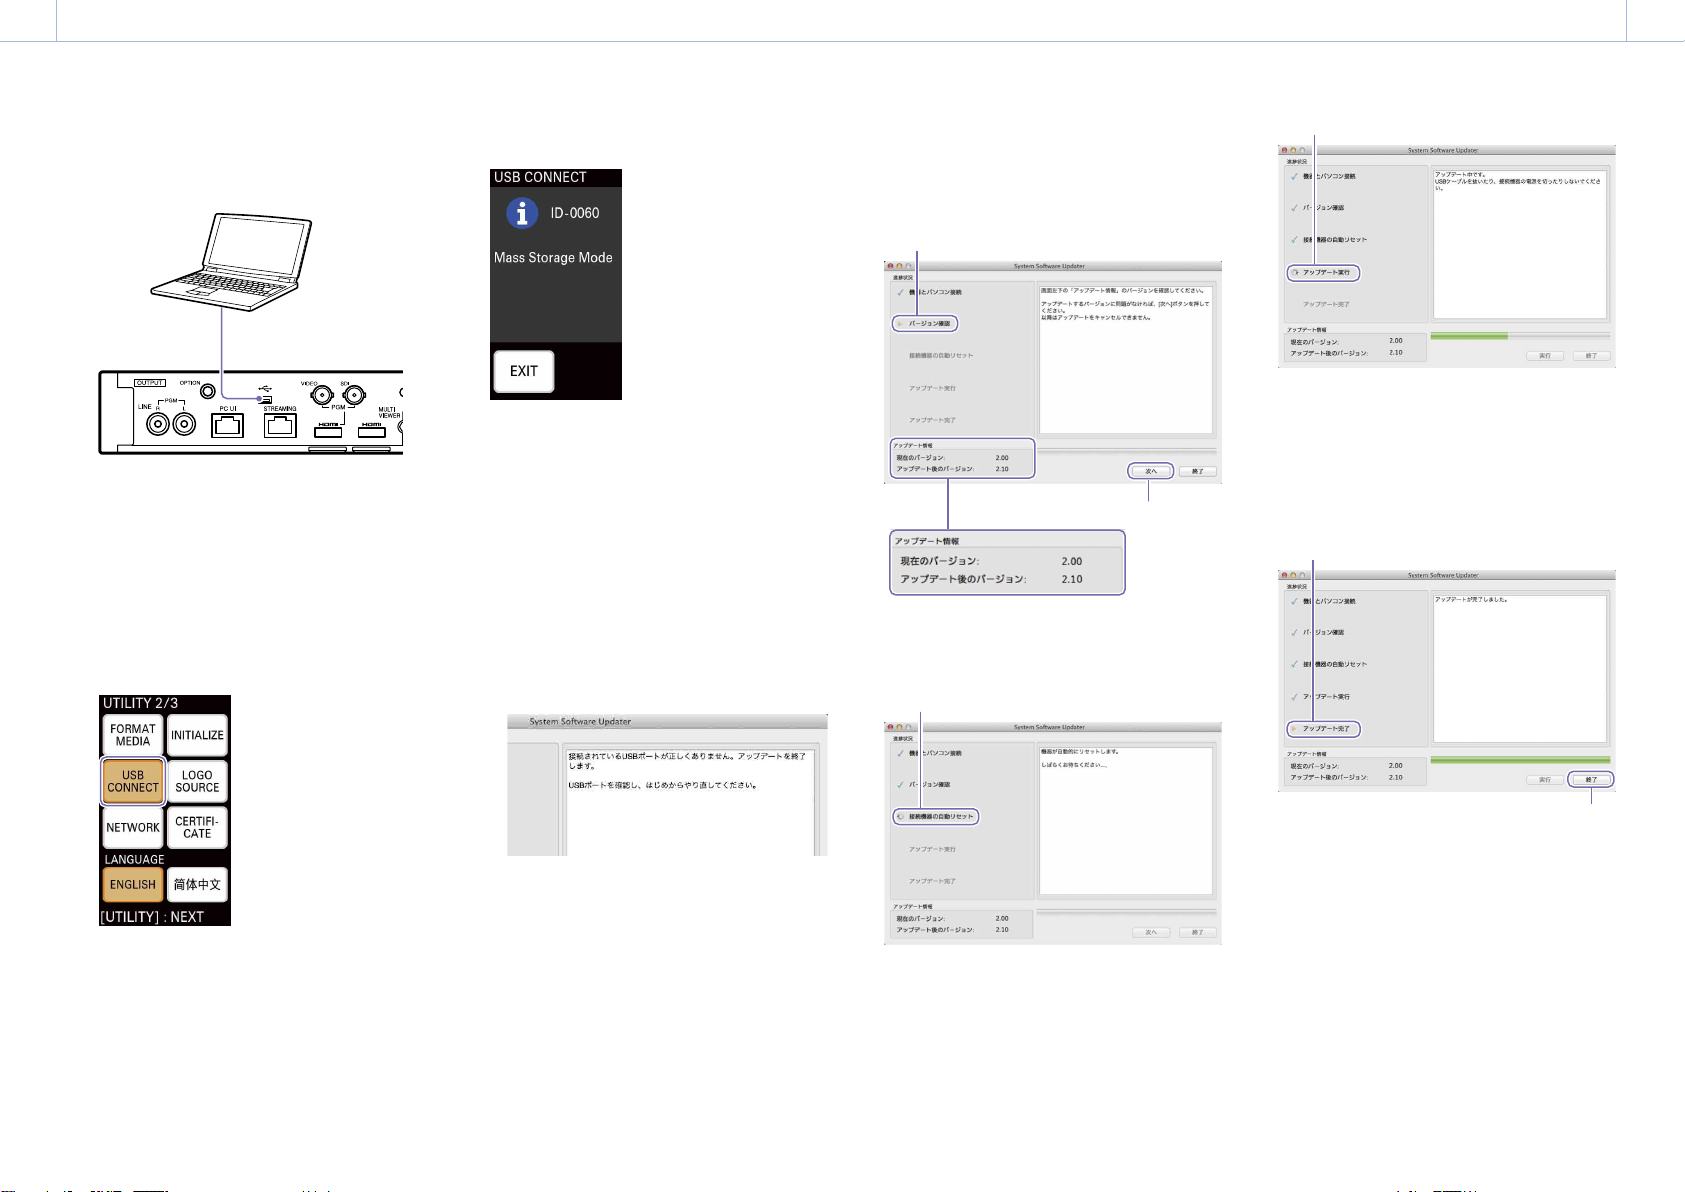
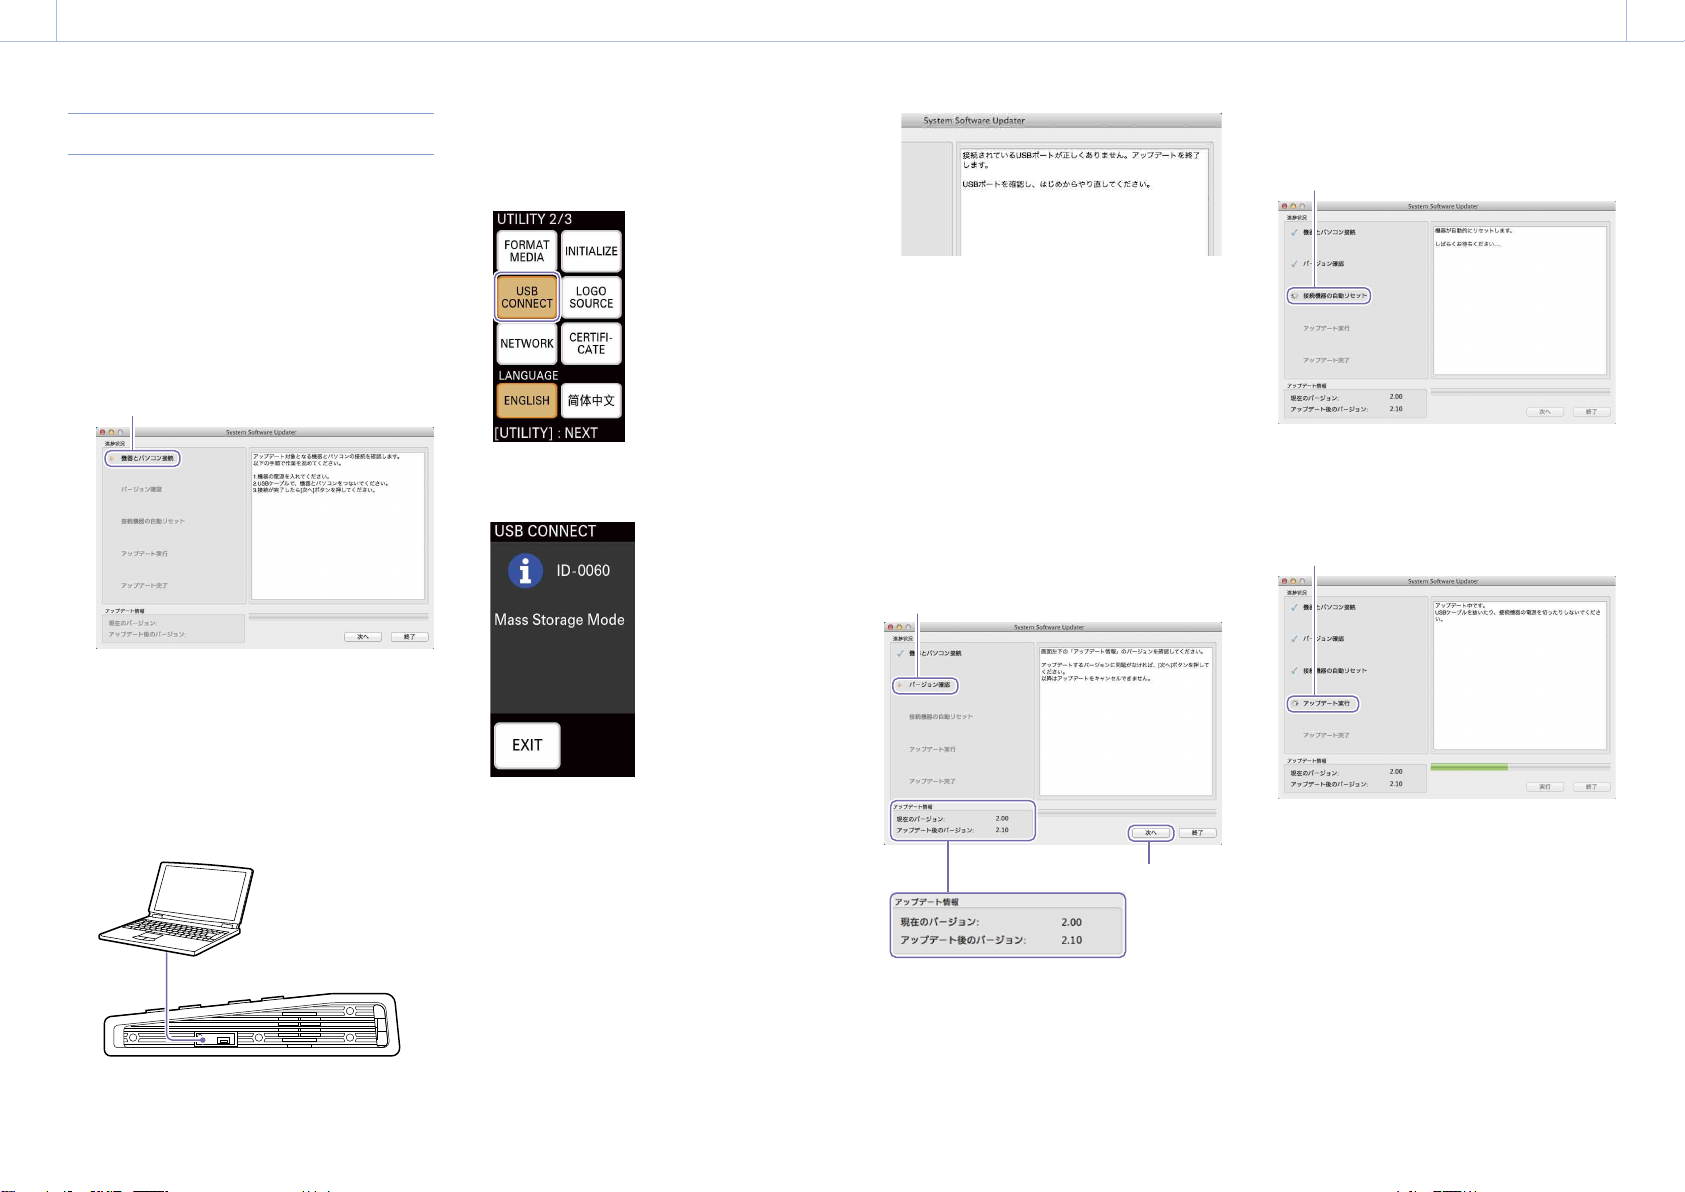
For Windows
The software update is performed via two USB
ports; the MAIN port (rear panel) and the SUB port
(right side panel).
[Notes]
Be sure the follow the updating procedure precisely.
If the power supply is cut off during the update
procedure, the unit may become inoperable. Be careful to
avoid disconnection of the AC adapter’s power cord and
the USB cable.
Remove any memory card from the unit beforehand.
The following settings will revert to their factory default
conditions after the update.
– Time
– Date
– Streaming settings (Ustream ID, password)
– Network settings (Streaming)
System Requirements
To update the MCX-500 unit’s software, prepare
a computer that meets the following system
requirements.
Operating system (OS):
Microsoft Windows 7 / 8.1 / 10
Hard disk capacity: 300MB or more
Memory (RAM) capacity: 512MB or more
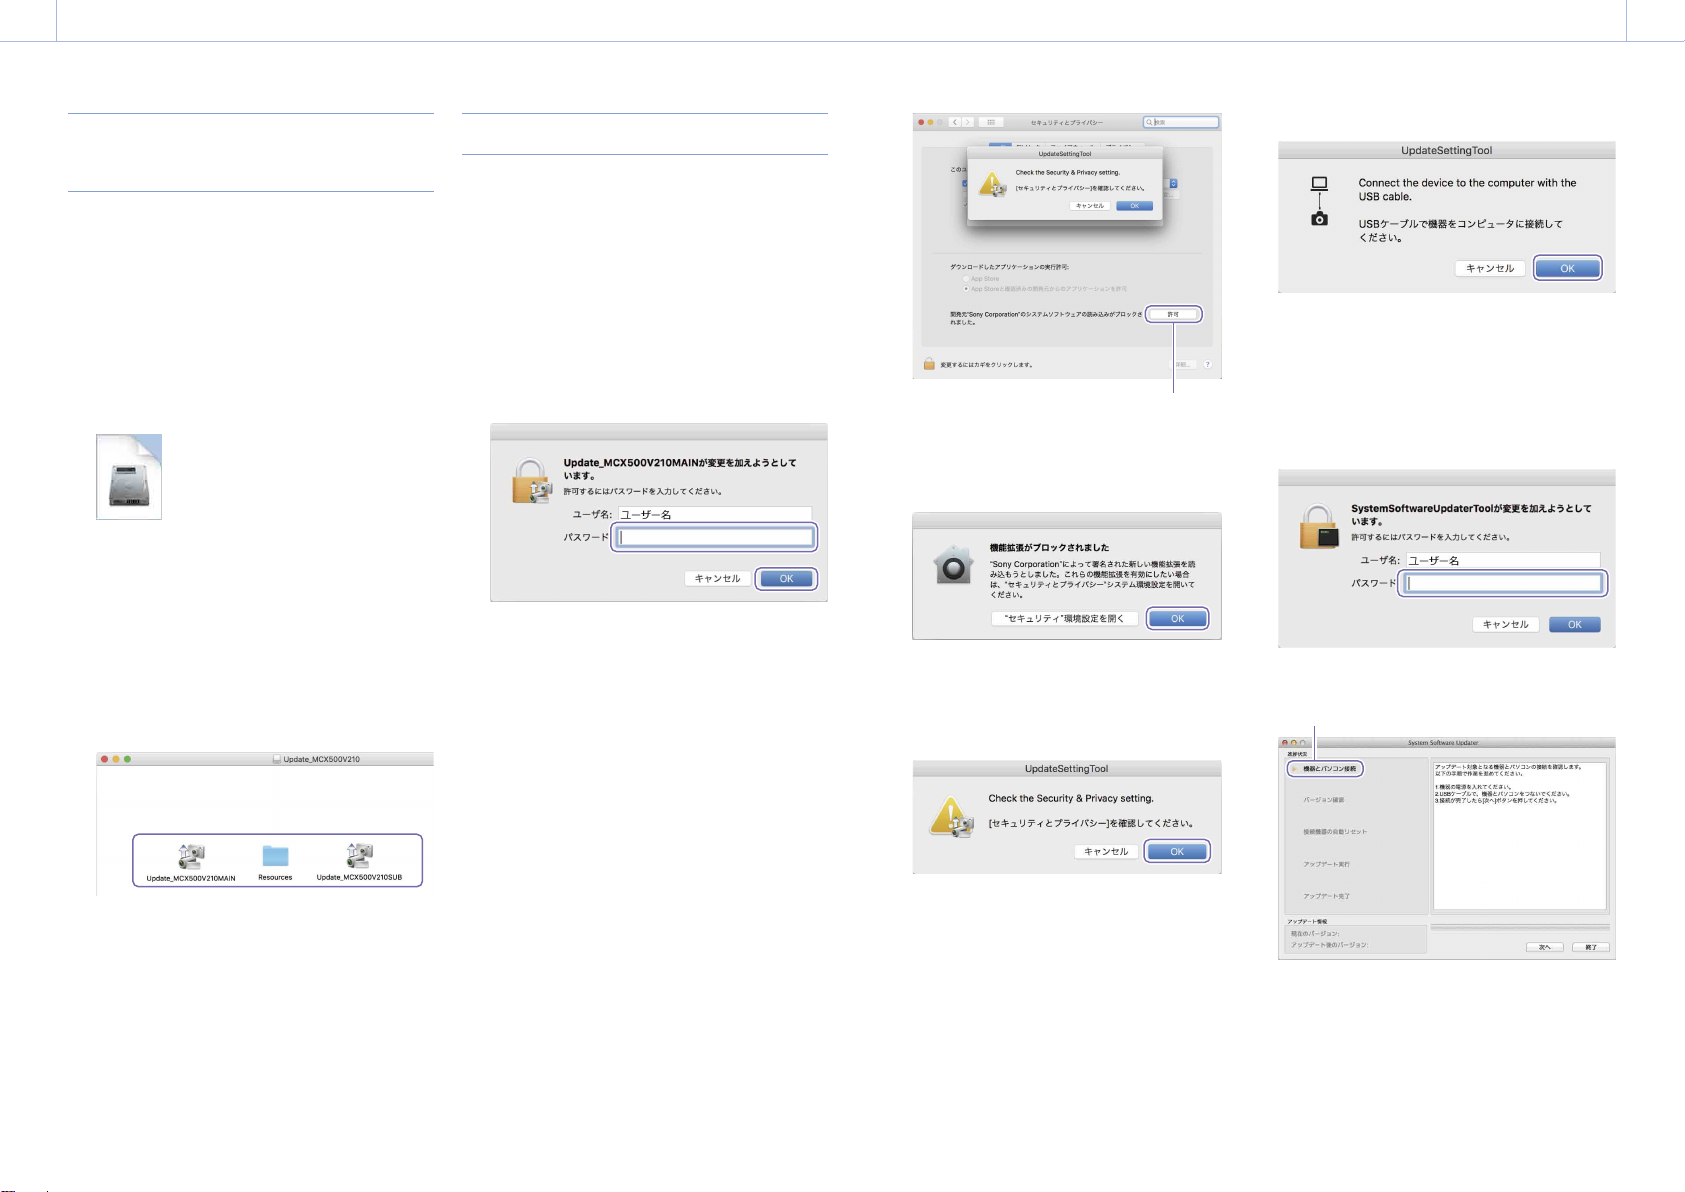
Preparation
Prepare the following in addition to the MCX-500.
Computer (Windows or Mac OS)
Supplied AC adapter and power cord
(AC-UES1230)
Supplied USB cable (Type A - Mini-B)
This document describes how to update the
MCX-500 unit’s software to the latest version.
For details on operating the MCX‑500, refer to the Operating
Instructions.
Trademarks
Microsoft, Windows, and Internet Explorer
are registered trademarks or trademarks of
Microsoft Corporation in the United States
and/or other countries.
Mac, Mac OS, OS X, and macOS are trademarks
of Apple Inc.
Intel and Intel Core are trademarks of Intel
Corporation in the United States and/or other
countries.
All other system names and product names are
registered trademarks or trademarks of their
respective owners. Further, the ® or ™ symbols
are not used in this document.
English