Sony VPL-VW290ES Service manual

E:\Works\Viking\5031133211\5031133211VPLVW290ESSYQ\01GB-
VPLVW290ESSYQ\010COV.fm
masterpage:Back
Cover
Video
Projector
VPL-VW290ES
5-031-133-21 (1)
5-031-133-21 (1)
Quick Reference Manual ____________ GB
Guide de référence rapide __________ FR
Manual de referencia rápida _________ ES
Kurzreferenz_______________________ DE
Guida rapida all’uso ________________ IT
______________________ CT
VPL-VW290ES
E:\Works\Viking\5031133211\5031133211VPLVW290ESSYQ\01GB-
VPLVW290ESSYQ\050BCO.fm
masterpage:Back
Cover
VPL-VW290ES
5-031-133-21(1)
©2021 Sony Corporation Printed in China

GB 2
This Quick Reference Manual explains the installation and basic operations for projecting
pictures. It also describes important notes and cautions to which you have to pay attention when
handling and using this unit.
Refer to “Warning Indicators” and “Replacing the Lamp,” as necessary.
For details on the operations, refer to the Operating Instructions.
About the Quick Reference Manual
Preparing ..................................................Page 12
Installing the Unit..................................Page 13
Connecting the Unit.............................Page 15
Selecting the Menu Language........Page 16
Projecting..................................................Page 17
Error Handling Warning Indicators.........................................Page 19
Maintenance Replacing the Lamp .......................................Page 20
Step 1
Step 2
Step 3
Step 4
Step 5
Downloading Manuals
Manuals that describes how to operate the unit can be downloaded from the Sony website.
Download the required manual by accessing the site using the following QR code or URL.
https://rd1.sony.net/help/vpl/vw290/h_zz/
Manuals are in PDF format. PDF files can be viewed on a computer with Adobe Reader
installed. You can download Adobe Reader for free from the Adobe website.

3GB
Before operating the unit, please read this
manual thoroughly and retain it for future
reference.
When using the product, do not use it for
purposes other than those described in the
instruction manual.
WARNING
To reduce the risk of fire or electric
shock, do not expose this apparatus
to rain or moisture.
To avoid electrical shock, do not open
the cabinet. Refer servicing to
qualified personnel only.
WARNING
This apparatus must be earthed.
WARNING
When installing the unit, incorporate a
readily accessible disconnect device in the
fixed wiring, or connect the power plug to an
easily accessible socket-outlet near the unit.
If a fault should occur during operation of
the unit, operate the disconnect device to
switch the power supply off, or disconnect
the power plug.
CAUTION
For safety, do not connect the connector for
peripheral device wiring that might have
excessive voltage to the following port:
LAN connector
WARNING
1. Use the approved Power Cord (3-core
mains lead) / Appliance Connector / Plug
with earthing-contacts that conforms to
the safety regulations of each country if
applicable.
2. Use the Power Cord (3-core mains lead) /
Appliance Connector / Plug conforming
to the proper ratings (Voltage, Ampere).
If you have questions on the use of the above
Power Cord / Appliance Connector / Plug,
please consult a qualified service personnel.
CAUTION
- Danger of explosion if battery is
incorrectly replaced. Replace only with
the same or equivalent type recommended
by the manufacturer.
- When you dispose of the battery or the
product, you must obey the law in the
corresponding area or country. Do not
dispose of the battery or the product in a
fire or a hot oven, or mechanically crush
or cut the battery. It may explode or cause
a fire. Do not subject the battery to
extremely low air pressure that may result
in an explosion or the leakage of
flammable liquid or gas.
- Do not place the battery in a high
temperature place, such as under direct
sunlight or near fire. It may ignite,
explode, or cause a fire. Do not immerse
or wet the battery in water or seawater.
This may cause an electric shock.
CAUTION
The following size and number of batteries
are required for the remote control.
•SizeAA(R6)
•Two
To avoid risk of explosion, use only the
following type of battery.
• Size AA (R6) manganese or alkaline
batteries
Caution on replacement/disposal of
the battery for the 3D glasses
Danger of explosion if battery is incorrectly
replaced.
Replace only with the same or equivalent
type recommended by the manufacturer.
When you dispose of the battery, you must
obey the law in the relative area or country.
About 3D Glasses
The 3D Glasses communicate with the
projector via Bluetooth technology to
display 3D signals.
(a) frequency band(s) in which the radio
equipment operates:
2.4 - 2.4835 GHz
(b) maximum radio-frequency power
transmitted in the frequency band(s) in
which the radio equipment operates:
4.30 dBm (E.I.R.P.)
GB
English

GB 4
As with any bright
light source, do not
stare into the beam,
RG2 IEC 62471-5:
2015.
For the customers in the U.S.A.
This equipment has been tested and found to
comply with the limits for a Class B digital
device, pursuant to part 15 of the FCC Rules.
These limits are designed to provide
reasonable protection against harmful
interference in a residential installation. This
equipment generates, uses and can radiate
radio frequency energy and, if not installed
and used in accordance with the instructions,
may cause harmful interference to radio
communications. However, there is no
guarantee that interference will not occur in
a particular installation. If this equipment
does cause harmful interference to radio or
television reception, which can be
determined by turning the equipment off and
on, the user is encouraged to try to correct
the interference by one or more of the
following measures:
- Reorient or relocate the receiving antenna.
- Increase the separation between the
equipment and receiver.
- Connect the equipment into an outlet on a
circuit different from that to which the
receiver is connected.
- Consult the dealer or an experienced
radio/TV technician for help.
You are cautioned that any changes or
modifications not expressly approved in this
manual could void your authority to operate
this equipment.
All interface cables used to connect
peripherals must be shielded in order to
comply with the limits for a digital device
pursuant to Subpart B of part 15 of FCC
Rules.
If you have any questions about this product,
you may call;
Sony Customer Information Service Center
1-800-222-7669 or http://www.sony.com/
This transmitter must not be co-located or
operating in conjunction with any other
antenna or transmitter.
For the customers the U.S.A.
Radiated Exposure Statement:
The product complies with the US portable
RF exposure limit set forth for an
uncontrolled environment and is safe for
intended operation as described in this
manual. The further RF exposure reduction
can be achieved if the product can be kept as
far as possible from the user body or if the
device is set to lower output power if such
function is available.
For the customers the U.S.A. and
Canada
Radiated Exposure Statement:
The product complies with the US/Canadian
portable RF exposure limit set forth for an
uncontrolled environment and is safe for
intended operation as described in this
manual. The further RF exposure reduction
can be achieved if the product can be kept as
far as possible from the user body or if the
device is set to lower output power if such
function is available.
For the customers in Canada
CAN ICES-3 (B)/NMB-3(B)
This symbol is intended to alert
the user to the presence of hot
surfaces.
Supplier’s Declaration of Conformity
Trade Name: SONY
Model: VPL-VW290ES
Responsible party: Sony Electronics Inc.
Address: 16535 Via Esprillo,
San Diego, CA 92127
U.S.A.
Telephone Number:858-942-2230
This device complies with part 15 of the
FCC Rules. Operation is subject to the
following two conditions: (1) This device
may not cause harmful interference, and
(2) this device mustaccept any interference
received, including interference that may
cause undesired operation.

5GB
For the customers in Canada
This device complies with Industry Canada's
applicable licence-exempt RSSs. Operation
is subject to the following two conditions:
(1) This device may not cause interference;
and
(2) This device must accept any interference,
including interference that may cause
undesired operation of the device.
For kundene i Norge
Dette utstyret kan kobles til et IT-
strømfordelingssystem.
Bulgarian
С настоящото, Sony Corporation декларира, че това оборудване е в
съответствие с Директива 2014/53/EU.
Цялостният текст на ЕС декларацията за съответствие може да се
намери на следния интернет адрес: http://www.compliance.sony.eu/
Croatian
Sony Corporation ovime izjavljuje da je ova oprema u skladu s Direktivom
2014/53/EU.
Cjeloviti tekst EU izjave o sukladnosti dostupan je na sljedećoj internetskoj
adresi: http://www.compliance.sony.eu/
Czech
Sony Corporation tímto prohlašuje, že toto zařízení je v souladu se směrnicí
2014/53/EU.
Úplné znění EU prohlášení o shoděje k dispozici na této internetové adrese:
http://www.compliance.sony.eu/
Danish
Herved erklærer Sony Corporation, at dette udstyr er i overensstemmelse med
direktiv 2014/53/EU.
Den fulde ordlyd af EU-overensstemmelseserklæringen er tilgængelig på
følgende internetadresse: http://www.compliance.sony.eu/
Dutch
Hierbij verklaart Sony Corporation dat deze radioapparatuur conform is met
Richtlijn 2014/53/EU.
De volledige tekst van de EU-conformiteitsverklaring kan worden geraadpleegd
op het volgende internetadres: http://www.compliance.sony.eu/
English
Hereby, Sony Corporation declares that this equipment is in compliance with
Directive 2014/53/EU.
The full text of the EU declaration of conformity is available at the following
internet address: http://www.compliance.sony.eu/
Estonian
Käesolevaga deklareerib Sony Corporation, et käesolev seade vastab direktiivi
2014/53/EL nõuetele.
ELi vastavusdeklaratsiooni täielik tekst on kättesaadav järgmisel
internetiaadressil: http://www.compliance.sony.eu/
Finnish
Sony Corporation vakuuttaa, että tämä laite on direktiivin 2014/53/EU
mukainen.
EU-vaatimustenmukaisuusvakuutuksen täysimittainen teksti on saatavilla
seuraavassa internetosoitteessa: http://www.compliance.sony.eu/
Greek

GB 6
Hungarian
A Sony Corporation igazolja, hogy ez a készülék megfelel a 2014/53/EU
irányelvnek.
Az EU-megfelelőségi nyilatkozat teljes szövege elérhetőa következőinternetes
címen: http://www.compliance.sony.eu/
Latvian
Lithuanian
Norwegian
Herved erklærer Sony Corporation at utstyrstypen er i samsvar med direktiv
2014/53/EU.
EU-erklæring fulltekst finner du på Internett under:
http://www.compliance.sony.eu/
Polish
Sony Corporation niniejszym oświadcza, że to urządzenie jest zgodne z
dyrektywą2014/53/UE.
Pełny tekst deklaracji zgodności UE jest dostępny pod następującym adresem
internetowym: http://www.compliance.sony.eu/
Portuguese
O(a) abaixo assinado(a) Sony Corporation declara que o presente equipamento
está em conformidade com a Diretiva 2014/53/UE.
O texto integral da declaração de conformidade está disponível no seguinte
endereço de Internet: http://www.compliance.sony.eu/
Romanian
Prin prezenta, Sony Corporation declarăcăacest echipament este în
conformitate cu Directiva 2014/53/UE.
Textul integral al declaraţiei UE de conformitate este disponibil la următoarea
adresăinternet: http://www.compliance.sony.eu/
Slovak
Sony Corporation týmto vyhlasuje, že zariadenie je v súlade so smernicou 2014/
53/EÚ.
Úplné vyhlásenie EÚ o zhode je k dispozícii na tejto internetovej adrese:
http://www.compliance.sony.eu/
Slovenian Sony Corporation potrjuje, da je ta oprema skladna z Direktivo 2014/53/EU.
Celotno besedilo izjave EU o skladnosti je na voljo na naslednjem spletnem
naslovu: http://www.compliance.sony.eu/
Swedish
Härmed försäkrar Sony Corporation att denna utrustning överensstämmer med
direktiv 2014/53/EU.
Den fullständiga texten till EU-försäkran om överensstämmelse finns på
följande webbadress: http://www.compliance.sony.eu/
Tu r kis h

7GB
For the customers in Europe
Manufacturer: Sony Corporation, 1-7-1
Konan Minato-ku Tokyo, 108-0075 Japan
For EU product compliance: Sony Belgium,
bijkantoor van Sony Europe B.V., Da
Vincilaan 7-D1, 1930 Zaventem, Belgium.
For the customers in the U.S.A.
SONY LIMITED WARRANTY - Please
visit http://www.sony.com/psa/warranty
for important information and complete
terms and conditions of Sony’s limited
warranty applicable to this product.
For the customers in Canada
SONY LIMITED WARRANTY - Please
visit http://www.sonybiz.ca/pro/lang/en/
ca/article/resources-warranty for
important information and complete
terms and conditions of Sony’s limited
warranty applicable to this product.
For the customers in Europe
Sony Professional Solutions Europe -
Standard Warranty and Exceptions on
Standard Warranty.
Please visit https://pro.sony/support-
services/primesupport/support-
professional-solutions-europe-standard-
product-warranty for important
information and complete terms and
conditions.
For the customers in Korea
SONY LIMITED WARRANTY - Please
visit http://bpeng.sony.co.kr/handler/
BPAS-Start for important information
and complete terms and conditions of
Sony’s limited warranty applicable to this
product.

GB 8
Precautions
On safety
• Check that the operating voltage of your
unit is identical with the voltage of your
local power supply.
• Should any liquid or solid object fall into
the cabinet, unplug the unit and have it
checked by qualified personnel before
operating it further.
• Unplug the unit from the wall outlet if it is
not to be used for several days.
• To disconnect the cord, pull it out by the
plug. Never pull the cord itself.
• The wall outlet should be near the unit and
easily accessible.
• The unit is not disconnected to the AC
power source (mains) as long as it is
connected to the wall outlet, even if the
unit itself has been turned off.
• Do not look into the lens while the lamp is
on.
• Do not place your hand or objects near the
ventilation holes. The air coming out is
hot.
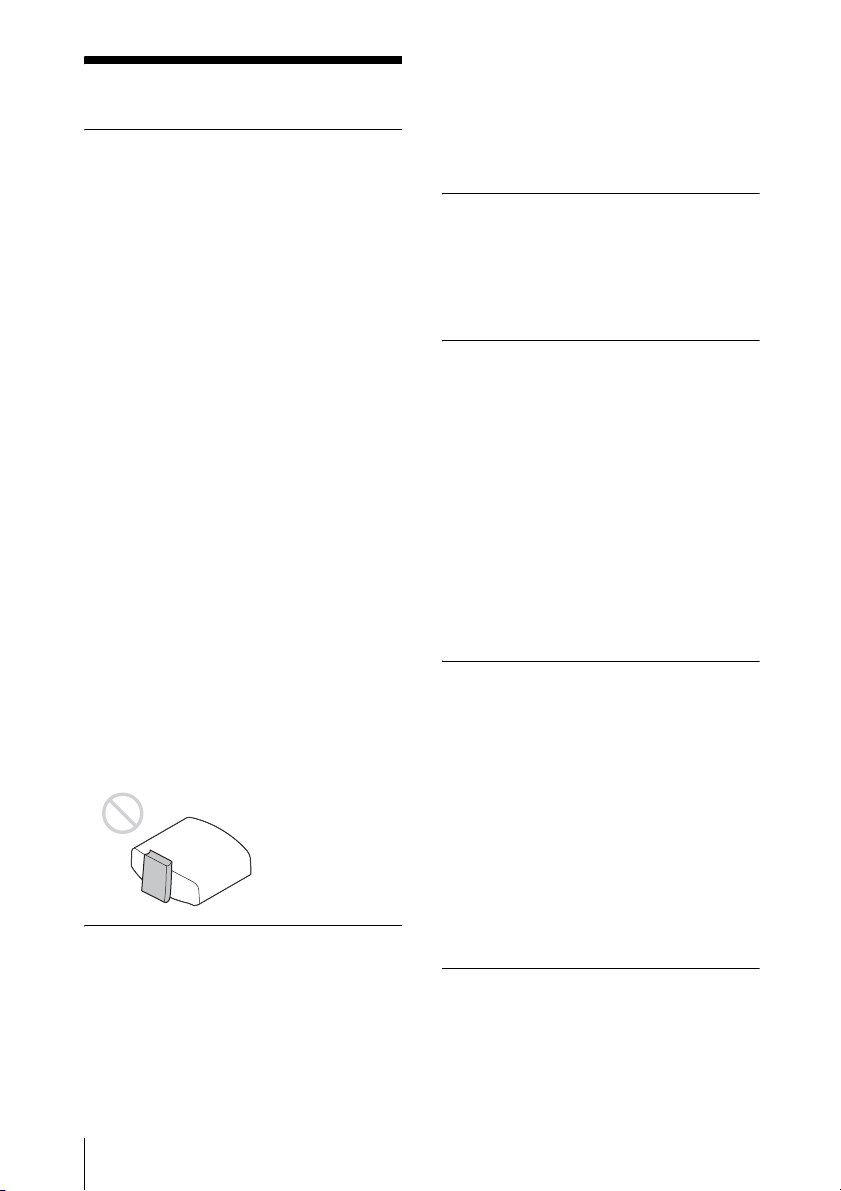
• Make sure to remove the protective
packaging lens cap before projection.
Projection with the cap attached may melt
the cap by heat.
• Do not place any object just in front of the
lens that may block the light during
projection. Heat from the light may
damage the object. Use the picture muting
function to cut off the picture.
On preventing internal heat build-
up
After you turn off the power with the ?/1
(ON/STANDBY) button, do not disconnect
the unit from the wall outlet while the
cooling fan is still running.
Caution
This unit is equipped with ventilation holes
(intake) and ventilation holes (exhaust). Do
not block or place anything near these holes,
or internal heat build-up may occur, causing
picture degradation or damage to the unit.
On repacking
Save the original shipping carton and
packing material; they will come in handy if
you ever have to ship your unit. For
maximum protection, repack your unit as it
was originally packed at the factory.
On watching 3D video images
Safety precautions
• You should only use the 3D glasses for
watching 3D video images.
• If you observe flickering or flashing, turn
off the lighting in the room.
• Not for use by children without proper
adult supervision.
• Be careful not to pinch your fingers in
hinges of the 3D glasses when bending the
temple frames.
• Do not drop or modify these 3D glasses.
• If these glasses are broken, keep broken
pieces away from your mouth or eyes.
On LCD Projector
The LCD projector is manufactured using
high-precision technology. You may,
however, see tiny black points and/or bright
points (red, blue, or green) that continuously
appear on the LCD projector. This is a
normal result of the manufacturing process
and does not indicate a malfunction.
Also, when you use multiple LCD projectors
to project onto a screen, even if they are of
the same model, the color reproduction
among projectors may vary, since color
balance may be set differently from one
projector to the next.
On condensation
If the room temperature where the projector
is installed changes rapidly, or if the
projector is moved suddenly from a cold to a
warm place, condensation in the projector
may occur. As the condensation may cause
malfunction, be careful in adjusting

9GB
temperature settings of the air conditioner. If
condensation occurs, leave the projector
turned on for about two hours before use.
Notes on security
• SONY WILL NOT BE LIABLE FOR
DAMAGES OF ANY KIND
RESULTING FROM A FAILURE TO
IMPLEMENT PROPER SECURITY
MEASURES ON TRANSMISSION
DEVICES, UNAVOIDABLE DATA
LEAKS RESULTING FROM
TRANSMISSION SPECIFICATIONS,
OR SECURITY PROBLEMS OF ANY
KIND.
• Depending on the operating environment,
unauthorized third parties on the network
may be able to access the unit. When
connecting the unit to the network, be sure
to confirm that the network is protected
securely.
• From a safety standpoint, when using the
unit connected with the network, it is
strongly recommended to access the
Control window via a Web browser and
change the access limitation settings from
the factory preset values.
Also, it is recommended that you set a
password with a sufficiently long
character string that is hard to guess by
others, and that you store it safely.
• Do not browse any other website in the
Web browser while making settings or
after making settings. Since the login
status remains in the Web browser, close
the Web browser when you complete the
settings to prevent unauthorized third
parties from using the unit or harmful
programs from running.
• When connecting this product to a
network, connect via a system that
provides a protection function, such as a
router or firewall. If connected without
such protection, security issues may occur.
Do not place this product close to
medical devices
This product (including accessories) has
magnet(s) which may interfere with
pacemakers, programmable shunt valves for
hydrocephalus treatment, or other medical
devices. Do not place this product close to
persons who use such medical devices.
Consult your doctor before using this
product if you use any such medical device.
SONY WILL NOT BE LIABLE FOR
DAMAGES OF ANY KIND
RESULTING FROM THE USE OF
THIS UNIT FOR PURPOSES OTHER
THAN GENERAL HOME USE,
EITHER DURING THE WARRANTY
PERIOD OR AFTER EXPIRATION OF
THE WARRANTY.

GB 10
Notes on Installation
and Usage
Do not place the unit in the following
situations, which may cause malfunction or
damage to the unit.
Near walls
To maintain the performance and reliability
of the unit, leave space between walls and
the unit as illustrated.
Air from air conditioners or the ventilation
holes of this unit or other devices, may cause
oscillation on the screen. Be sure not to
install this unit in the area where the air from
air conditioners or the ventilation holes of
these devices reach to the front side of this
unit.
Poorly ventilated location
Leave space of more than 30 cm (11 7/8
inches) around the unit.
Hot and humid
Locations subject to direct cool or
warm air from an air-conditioner
Installing the unit in such a location may
cause a malfunction of the unit due to
moisture condensation or rise in
temperature.
Near a heat or smoke sensor
Malfunction of the sensor may occur.
Very dusty and extremely smoky
locations
Do not do any of the following while using
the unit.
Tilting front/rear and left/right
Avoid using the unit tilted at an angle of
more than 15 degrees.
Unsuitable installation
1 cm (
13
/
32
inch)
30 cm
(11
7
/
8
inches)
30 cm
(11
7
/
8
inches)
15 cm
(6 inches)
30 cm
(11
7
/
8
inches)
30 cm
(11
7
/
8
inches)
Unsuitable Conditions

11GB
Do not install the unit anywhere other than
on a level surface or on the ceiling. Installing
the unit in such a location may result in
uneven color uniformity or reduce the
reliability of the effects of the lamp.
If the unit is tilted up or down, the image on
the screen may be trapezoidal.
Position the unit so that the lens is parallel to
the screen.
When installing the unit at high
altitudes
When using the unit at an altitude of
1,500 m (approx. 4,900 ft) or higher, set
“High Altitude Mode” on the Setup
menu to “On”. Failing to set this mode when
using the unit at high altitudes could have
adverse effects, such as reducing the
reliability of certain components.
• Never mount the projector on the ceiling
or move it by yourself. Be sure to consult
with qualified Sony personnel (charged).
• When installing the unit on a ceiling, be
sure to use a safety wire, etc., to prevent
the unit from falling. Entrust the
installation to an experienced contractor or
installer.
For dealers
• When the projector is mounted on the
ceiling, a Sony bracket or recommended
equivalent must be used for installation.
• Be sure to secure the cabinet cover firmly
when installing to the ceiling firmly.
15° or more
15° or
more
15° or more
15° or
more
15° or more
Safety precautions for
installing the unit on a ceiling

GB 12
Check the carton to make sure it contains the
following items:
• Remote control RM-PJ28 (1)
• Size AA (R6) batteries (2)
•Lenscap(1)
When you purchase the projector, a lens
cap is on the lens. Remove the lens cap
before you use the projector.
• AC power cord (1)
• Quick Reference Manual (this manual) (1)
Caution about handling the remote
control
• Handle the remote control with care. Do
not drop or step on it, or spill liquid of any
kind onto it.
• Do not place the remote control in a
location near a heat source, a place subject
to direct sunlight, or a damp room.
Preparing
Step 1
Checking the Supplied
Accessories
Inserting the Batteries into
the Remote Control
Push and slide to
open.
Insert the batteries E
side first.

13GB
1Position the unit so that the lens is
parallel to the screen.
2After connecting the AC power cord to
the unit, plug the AC power cord into
a wall outlet.
After connecting the AC power cord to the
unit, the ON/STANDBY indicator may
blink in orange.
You may not be able to control the unit
while the indicator is blinking, but this is
not a malfunction. Wait until it stops
blinking and remains lit in red.
3Press the ?/1(ON/STANDBY) button
to turn on the unit.
4Project an image on the screen, then
adjust the focus, size, and position.
aAdjust the focus.
Press the PATTERN button repeatedly to
display the Lens Focus adjustment
window (test pattern). Then adjust the
focus of the picture by pressing the M/m/
</,buttons.
bAdjust the picture size.
Press the PATTERN button repeatedly to
display the Lens Zoom adjustment
window (test pattern). Then adjust the
size of the picture by pressing the M/m/
</,buttons.
cAdjust the picture position.
Press the PATTERN button repeatedly to
display the Lens Shift adjustment
window (test pattern). Then adjust to the
proper position of the picture by
pressing the M/m/</,buttons.
Installing the Unit
Step 2
Note
Rear of the unit
Lights in red.
Front of the unit
Flashes in green for
tens of seconds and
then lights in green.
Front of the unit

GB 14
To adjust the tilt of the installation
surface
If the unit is installed on an uneven surface,
use the front feet (adjustable) to keep the unit
level.
• If the unit is tilted up or down, the projected
image may be trapezoidal.
• Be careful not to catch your finger when
turning the front feet (adjustable).
Lens adjustment window (test
pattern)
Notes
Front feet (adjustable)
Turn to
adjust.
1.78:1 (16:9)
2.35:1
1.85:1
1.33:1 (4:3)
The dashed lines show the screen sizes of each
aspect ratio.
For more information, refer to
“Connections and Preparations” in the
Operating Instructions.

15GB
When making connections, be sure to do the following:
• Turn off all equipment before making any connections.
• Use the proper cables for each connection.
• Insert the cable plugs properly; poor connection at the plugs may cause a malfunction or poor
picture quality. When pulling out a cable, be sure to pull it out from the plug, not the cable
itself.
• Refer to the operating instructions of the connected equipment.
Connecting the Unit
When you monitor and control the projector via the network, access the Setup page of the
projector (refer to “Using Network Features” in the Operating Instructions) via a Web browser
and enable the desired control protocol.
Step 3
Right side of the unit
AV amplifier Speakers
Equipment with HDMI
output connectors
Computer
to HDMI output
HDMI cable (not supplied)
: Video signal flow Use a Premium High Speed HDMI cable on which the cable
type logo is specified.
For more information, refer to “Connections and
Preparations” in the Operating Instructions.

GB 16
You can select the language for displaying
the menu and other on-screen displays. To
change the current menu language, set the
desired language with the menu screen.
1Press MENU.
The menu appears.
2Press M/mto select the Setup
menu, and press ,or .
The setting items of the selected menu
appear.
3Press M/mto select “Language,” and
press ,or .
4Press M/m/</,to select a
language, and press .
The menu changes to the selected
language.
To clear the menu
Press MENU.
Selecting the Menu Language
Step 4

17GB
1Turn on both the unit and the
equipment connected to the unit.
2Press INPUT to display the input
palette on the screen.
3Select the equipment from which you
want to display images.
Press INPUT repeatedly or press M/m/
(enter) to select the equipment from
which to project.
1Press the ?/1(ON/STANDBY)
button.
A message “POWER OFF?” appears on
the screen.
2Press the ?/1(ON/STANDBY) button
again before the message disappears.
The ON/STANDBY indicator flashes in
green and the fan continues to run to
reduce the internal heat.
The fan stops and the ON/STANDBY
indicator changes from flashing green to
remaining red.
The power is turned off completely, and you
can disconnect the AC power cord.
Never disconnect the AC power cord while the
indicator is flashing.
Tip
You can turn off the unit by holding the ?/1
(ON/STANDBY) button for about 1 second,
instead of performing the above steps.
Projecting
Step 5
Projecting the Picture
Turning Off the Power
Example: To view the picture from the
video equipment connected to the HDMI
1 connector of this unit.
Note
For more information, refer to
“Projecting” in the Operating
Instructions.

GB 18
Press one of the CALIBRATED PRESET
buttons.
Selecting the Picture Viewing Mode
CALIBRATED
PRESET buttons
Setting items Description
CINEMA FILM 1 Picture quality suited to reproducing the highly dynamic and
clear images typical of master positive film.
CINEMA FILM 2 Picture quality suited to reproducing the rich tone and color
typical of a movie theater, based on the Cinema Film 1.
REF A picture quality setup suitable for when you want to reproduce
faithfully the original image quality, or for enjoying image
quality, without any adjustment.
TV Picture quality suited for watching TV programs, sports,
concerts, and other video images.
PHOTO Ideal for projecting still images taken with a digital camera.
GAME Picture quality suited to gaming, with well-modulated colors
and fast response.
BRT CINE Picture quality suited for watching movies in a bright
environment, such as a living room.
BRT TV Picture quality suited for watching TV programs, sports,
concerts, and other video images in a bright environment, such
as a living room.
USER Adjusts the picture quality to suit your taste then saves the
setting. The factory default setting is the same as “REF.”
For more information, refer to “Projecting” in the
Operating Instructions.

19GB
The ON/STANDBY or WARNING indicator lights up or flashes if there is any trouble with
your projector.
If the symptom persists even after carrying out the above methods, consult with qualified Sony
personnel.
If the indicator starts flashing in a way of other than the above, turn off, and then turn on the power
with the [/1(On/Standby) button on the remote control or control panel of the unit.
If the symptom is shown again, consult with qualified Sony personnel.
Error Handling
Warning Indicators
Flashing/Lighting indicators The number of
flashes Cause and Remedy
Twice Close the lamp cover securely, then tighten
the screws securely.
Three times The temperature of lamp is unusually high.
Turn off the power and wait for the lamp to
cool, then turn on the power again.
If the symptom persists, the lamp may be at
the end of its service life. In this case,
replace the lamp with a new one.
Twice The internal temperature is unusually high.
Check to ensure that if nothing is blocking
the ventilation holes or whether or not the
unit is being used at high altitudes.
Three times The fan is broken. Consult with qualified
Sony personnel.
Note
ON/STANDBY
indicator WARNING
indicator
(Flashes in red)(Lights in red)
(Flashes in red) (Flashes in red)
Both indicators flash
If there is any problem or an error message appears on the
screen, refer to “Error Handling” in the Operating
Instructions.

GB 20
The lamp used for the light source has a
certain lifespan. When the lamp dims, the
color balance of the picture becomes
strange, or “Please replace the Lamp.”
appears on the screen, the lamp may be
exhausted. Replace the lamp with a new one
(not supplied) without delay.
Tip
The lifespan of the lamp used for the light
source changes depending on the installation
environment or use conditions. You can use the
lamp longer by avoiding turning the lamp off
until several minutes pass after turning the
lamp on.
Tools you need to get started:
• Projector Lamp LMP-H220 (Optional)
• Standard Phillips screwdriver
• Cloth (for scratch protection)
Caution
• The lamp remains hot after the unit is
turned off with the ?/1(ON/STANDBY)
button. If you touch the lamp, you may
burn your fingers. When you replace the
lamp, wait for at least 1 hour for the lamp
to cool.
• Do not touch the surface of the lamp. If
you touch it, wipe off the fingerprints with
a soft cloth.
• Pay special attention to replacing the lamp
when the unit is installed on the ceiling.
• When replacing the lamp of a unit which is
on the ceiling, do not stand directly under
the lamp cover. When removing the lamp
door (inner cover), avoid twisting it. If the
lamp explodes, fragments may cause
injury.
• When removing the lamp unit, make sure
it remains horizontal, then pull straight up.
Do not tilt the lamp unit. If you pull out the
lamp unit while tilted and if the lamp
breaks, the pieces may scatter, causing
injury.
• Be sure to use a specified projector lamp for
the replacement. If you use lamps other than
the specified projector lamp, the unit may
malfunction.
• Be sure to turn off the unit and unplug the
power cord before replacing the lamp, then
check the ON/STANDBY indicator has
already been turned off.
1Turn off the unit and unplug the AC
power cord.
2When setting the unit on a flat surface
such as a desk etc., put a cloth to
prevent the surface from being
scratched. Place the unit on the cloth.
Be sure that the unit is placed on a stable
surface.
3While pressing the part indicated
in the lamp cover illustration, slide 1
and then open 2the lamp cover.
4Loosen the lamp door (inner cover)
screw with a Phillips screwdriver, and
then open the lamp door.
Maintenance
Notes
Replacing the Lamp
Note
Other manuals for VPL-VW290ES
1
Table of contents
Languages:
Other Sony Projector manuals

Sony
Sony VPL-HS50 User manual

Sony
Sony VPL-GTZ1 User manual

Sony
Sony VPL-EX145 User manual

Sony
Sony SRX-T105 User manual

Sony
Sony KP 48S70 User manual

Sony
Sony VPL-VW675ES User manual

Sony
Sony VPL-CX100 Reference guide

Sony
Sony VPL-FX51 User manual

Sony
Sony VPL-CX11 User manual

Sony
Sony VPL-ES4 Service manual

Sony
Sony QUALIA 004 User manual

Sony
Sony KP-41T65 - 41" Rear Projection User manual

Sony
Sony VPL-X1000U User manual

Sony
Sony VPL-VW350ES User manual

Sony
Sony VPLFX37 User manual

Sony
Sony VPL-PX11 User manual

Sony
Sony VPL-EW276 User manual

Sony
Sony VPL-SW635C Service manual

Sony
Sony VPL-CW255 User manual

Sony
Sony Superlite VPL-DS100 User manual