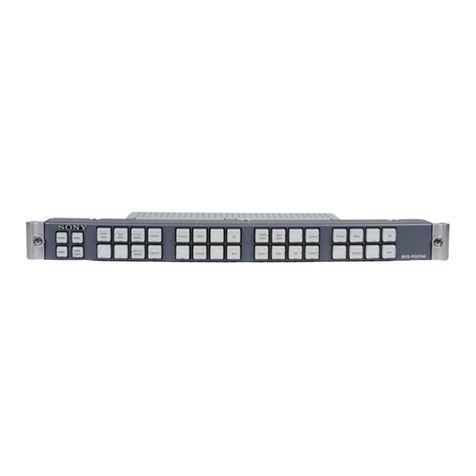
Sony DSRM-20 User manual

1998 by Sony Corporation
3-865-447-04(1)
Remote Control
Unit
取扱説明書 3ページ JP
Operating Instructions Page 13 GB
Mode d’emploi Page 23 FR
Bedienungsanleitung Seite 33 DE
Istruzioni per l’uso Pagina 43 IT
DSRM-20
電気製品は、安全のための注意事項を守らな
いと、火災や人身事故になることがありま
す。
この取扱説明書には、事故を防ぐための重要な注意事項と製品
の取り扱いかたを示しています。この取扱説明書をよくお読み
のうえ、製品を安全にお使いください。お読みになったあと
は、いつでも見られるところに必ず保管してください。
警告

目次
2
ソニー製品は安全に充分配慮して設計されています。しかし、電気製品は、まち
がった使いかたをすると、火災や感電などにより死亡や大けがなど人身事故につ
ながることがあり、危険です。
事故を防ぐために次のことを必ずお守りください。
安全のための注意事項を守る
このページの注意事項をよくお読みください。
定期点検をする
5年に1度は、内部の点検を、お買い上げ店またはソニーのサービス窓口にご依頼
ください(有料)。
故障したら使わない
すぐに、お買い上げ店またはソニーのサービス窓口にご連絡ください。
万一、異常が起きたら
安全のために
警告表示の意味
取扱説明書および製品では、次の
ような表示をしています。表示の
内容をよく理解してから本文をお
読みください。
警告
この表示の注意事項を守らない
と、火災や感電などにより死亡や
大けがなど人身事故につながるこ
とがあります。
注意を促す記号
火災
感電
行為を禁止する記号
分解禁止
•煙が出たら
•異常な音、においが
したら
•内部に水、異物が
入ったら
•製品を落としたり
キャビネットを破損
したときは
1電源コードや接続ケーブルを抜く。
2お買い上げ店またはソニーのサービ
ス窓口に連絡する。
/
分解禁止
分解や改造をしない
分解や改造をすると、火災や感電、けがの原因となることがあります。
内部の点検や修理は、お買い上げ店またはソニーのサービス窓口にご依頼くださ
い。
警告
感電火災
下記の注意を守らないと、
火災や感電により死亡や大けがにつながることがあります。

3
概要 ...........................................................................................3
各部の名称と働き .........................................................................4
接続 ...........................................................................................5
操作 ...........................................................................................6
ジョグ / シャトルサーチ ................................................................................6
頭出し......................................................................................................... 7
録画情報の表示.......................................................................................10
仕様 .........................................................................................11
保証書とアフターサービス .........................................................11
目次
日本語
JP
日
本
語
概要
リモートコントロールユニットDSRM-20は、ビデオカセットレコーダーDSR-40用のリモートコ
ントロールユニットです。
本機を接続すると、DSR-40に、次の機能が付加されます。
ジョグ/シャトルサーチ
シャトルダイヤルにより、静止画および−14〜+14倍速の再生画を、ジョグ ダイヤ ル によ
り、静止画および−2〜+2倍速の再生画を見ることができます。
頭出し機能
テープに記録されたインデックス信号や、カセットメモリーに記録された日付やフォト信号を
使って(カセットメモリー付きカセットの場合)、テープの特定の位置を素早く頭出しすること
ができます。
録画情報の表示
DSR-200/200A/PD1/PD100などのカムコーダーでの撮影に使用したテープを再生してい
るときは、テープに記録されたカムコーダー情報を表示することができます。

4
STOP REC
REW PLAY F FWD
JOG/SHUTTLE
PAUSE
DATA CODE SEARCH MODE
=
=
各部の名称と働き
6F FWD )(早送り)ボタン
VTRが停止しているときに押すと、テープの早送りが行われます。
再生/早送り中に押すと、押している間再生画を見ながらテープを
早送りすることができます。
7サーチダイヤル
右へ回すと順方向の再生、左へ回すと逆方向の再生になり
ます。
シャトルダイヤル(外側)
:ダイヤルを回して任意の位置で止める
と、その位置に対応した速度(−14〜+14倍速)でテープが
再生されます。中央の位置では静止画になります。
ジョグダイヤル(内側)
:ダイヤルの回転速度に応じた速度
(−2〜+2倍速)でテープが再生されます。
ご注意
ジョグ ダイヤ ル は 、シャトルダイヤルが中央のクリックする位置
にあるときだけ働きます。
3PAUSEボタン
1STOPボタン
2RECボタン
4REWボタン
6F FWDボタン
5PLAYボタン
8JOG/SHUTTLEボタン/
インジケーター
7サーチダイヤル
1STOP ■(停止)ボタン
テープの走行を止めるときに押します。
2REC ●(記録)ボタン
記録を行うときは、このボタンを押してVTRを記録一時停止状態
(レックポーズ)にしてから、PAUSEPボタン3を押します。
3PAUSE P(一時停止)ボタン
記録/再生を一時停止します。再度押すと一時停止が解除されま
す。
4REW 0(巻き戻し)ボタン
VTRが停止しているときに押すと、テープの巻き戻しが行われま
す。
再生/巻き戻し中に押すと、押している間再生画を見ながらテープ
を巻き戻すことができます。
5PLAY ((再生)ボタン
テープを再生するとき押します。
9DATA CODEボタン
0SEARCH MODEボタン
!¡ 接続ケーブル

5
8JOG/SHUTTLE (ジョグ/シャトル)ボタン/インジケー
ター
ジョグ /シャトルモードでテープを再生するとき押します。
押すとインジケーターが点灯し、DSR-40はジョグ/シャトルモードに
なります。ジョグ /シャトルモードを解除するときは、任意のテープ走
行ボタンを押します。
9DATA CODE (データコード)ボタン
録画情報をモニター表示します。
◆詳しくは、10ページの「録画情報の表示」をご覧ください。
0SEARCH MODE (サーチモード)=/+ボタン
場面を頭出しするときに押します。
◆詳しくは、7ページの「頭出し」をご覧ください。
!¡ 接続ケーブル(ステレオミニプラグ付き)
DSR-40のCONTROLS端子に接続します。
本機をDSR-40のCONTROLS端子に接続します。
本機をDSR-40に接続すると、DSR-40から本機に、自動的に電源
が供給されます。
DSRM-20
CONTROL S端子
接続

6
本機のテープ走行ボタンは、DSR-40のテープ走行ボタンと同じ働きをします。記録、再生、
早送り、巻き戻し、一時停止を本機からリモートコントロールすることができます。
ジョグ/シャトルサーチ
サーチ ダイヤ ルを 使 って 、ジョグ モード、シャトルモードでのサーチ操作を行います。
ジョグモード:ジョグダイヤルの回転速度に応じて、静止および−2〜+2倍速の再生
が可能。
シャトルモード:シャトルダイヤルの位置(ダイヤルを回す角度)に応じて、静止および
−14〜+14倍速の再生が可能。
ご注意
電源を入れた直後は、シャトルダイヤルを一度中央位置にしてから操作してください。
1JOG/SHUTTLEボタンを押し、ジョグ / シャトルモードにする。
JOG/SHUTTLEインジケーターが点灯します。
2ジョグモードでサーチするには
1) シャトルダイヤルを中央のクリックする位置にする。
2) ジョグダイヤ ルを 回 す。
ダイヤルの回転速度に応じた速度の再生画が現れます。
回転を止めると静止画になります。
操作
CONTROL S端子
DSRM-20
1
2-
1)
2-
2)
DUP
INPUT
SELECT
TC
TAPE
REMAIN
COUNTER
COUNTER
SELECT
CH-1/2
CH-3/4
MIX
AUDIO
MONITOR
REPEAT
REC
OFF
TIMER REMOTE
LOCAL
MENU
SET

7
インデックスサーチを選んだ場合
µ
シャトルモードでサーチするには
シャトルダイヤルを回す。
ダイヤルを回した角度に応じた速度の再生画が現れます。ダイヤルを中央のクリック
する位置にするとテープ走行が止まり、静止画になります。
ジョグ/シャトルモードを解除するには
任意のテープ走行ボタンを押します。
JOG/SHUTTLEインジケーターが消灯し、押したボタンに対応して動作します。
頭出し
本機を使って、以下の頭出しができます。
−録画の開始位置を探す:インデックスサーチ
−撮影日で探す:日付サーチ
−フォトモード撮影の場面を探す:フォトサーチ
カセットメモリーの付いたカセットで頭出しするには
カセットメモリーの付いたカセットを使用すると、記録した日付の順に場面の一覧が表示さ
れます。表示された一覧を使って頭出しができます。
1SEARCHMODEボタンを押して、頭出しの種類を選ぶ。
録画日時順に場面の一覧が表示されます。
2=/+ボタンを押して、頭出しする場面を選ぶ。
選んだ場面まで巻き戻しまたは早送りし、通常の再生(フォトサーチの場合は一時停
止)になります。

8
操作
インデックスサーチを選んだ場合
INDEX 0
SEARCH
カセットメモリーのないカセットで頭出しするには
カセットメモリー のな い カセットを使用しているときは、DSR-40のメニューの「CASSETTE
MEMORYSEARCH」の設定に関わらず、現在のテープ位置から前後の場面が順に頭出
しされます。
◆ メニュー操作については、DSR-40の取扱説明書をご覧ください。
1SEARCHMODEボタンを押して、頭出しの種類を選ぶ。
2=/+ボタンを繰り返し押して、頭出しする場面を選ぶ。
押した回数だけ先または前の場面が頭出しされます。いくつ先(前)の場面が数字で
表示されます。「0」になるまで巻き戻しまたは早送りされると、通常の再生(フォトモー
ドの場合は一時停止)になります。
頭出し信号について
頭出し信号は「RECボタンを押して録画を始めたとき」に付きます。
3種類の頭出し信号があります。頭出し信号はテープ上とカセットメモリーに 記 録されます
が、カセットメモリーの有無や、録画した機器によって記録される信号が異なります。信号
がないときは、その信号を使った頭出しはできませんので、ご注意ください。
デジタルカムコーダー(DSR-200/200A、DSR-PD100)で撮影したとき
信号の種類 カセットメモリー テープ上
インデックス信号a) 記録しない 記録しない
日付信号 記録する 記録する
フォト信号 記録する 記録する
a)停止状態から録画を開始したときのみ記録されます。

9
DSR-40で録画したとき
信号の種類 カセットメモリー テープ上
インデックス信号a) 記録する 記録する
日付信号 記録しない 記録する
フォト信号 記録しない 記録しない
a)停止状態から録画を開始したときのみ記録されます。
ご注意
DSR-40で録画したとき、インデックス信号に曜日情報は含まれません。
カセットメモリーの容量について
•マーク表示のあるカセットを使うと、DSR-40では頭出し信号を135個まで記録できま
す。ただし、一本のテープにインデックス信号、日付信号、フォト信号が混ざって記 録され
ているときは、この数値は変化します。DSR-40では、カセットメモリー 1 6 キロビットまで対
応しています。
•カセットメモリーに入りきらない場面を頭出しするときや、テープ上の位置の順番に頭出し
したいときは、メニューの「CASSETTEMEMORYSEARCH」を「OFF」にしてください。
カセットメモリーのないカセットと同じ頭出しができます。
◆ メニュー操作については、DSR-40の取扱説明書をご覧ください。
ご注意
•頭出し用の信号は録画を開始した時点で記録されます。開始位置の上に他の場面を録
画した場合、カセットメモリー上の元の画面の頭出し信号は消え、元の画面は頭出しでき
なくなります。
•頭出し信号のみを後から付けることはできません。オートリピートのためにインデックスを付
けたいときは、インデックスを 付けた い 位 置から新 たに 録 画してください。
•頭出し信号のみを後から消すことはできません。オートリピートのためにインデックスを消
したいときは、メニューの「INDEXWRITE」を「OFF」に設定してから、消したいインデッ
クスの上に録画してください。
•ソニー製以外のデジタルビデオで記録されたテープでは、頭出しが行えないことがありま
す。
◆ メニュー操作については、DSR-40の取扱説明書をご覧ください。
インデックス信号
DをBの開始位置
に録画すると…
Bの頭出しはでき
ません。
ABC
ABCD

10
操作
1999 / 12 / 25
12:59 AM LINE
AWB
60 MANUAL
F 1.6 0 dB
日付情報
通常画面
カムコーダー
情報
シャッタースピード
アイリス
ホワイトバランス
プログラムAEモード
ゲイン
録画情報の表示
ソニー製のデジタルカムコーダーDSR-200/200A、DSR-PD100で撮影したテープには、カ
ムコーダー情報(シャッタースピード、アイリス、ホワイトバランス、プログラム AE モード、ゲ
イン)が記録されます。これらを再生中に表示して確認できます。
再生中に本機のDATACODEボタンを押してください。押すたびに、表示は通常画面n
「日付情報」n「カムコーダー情報」n通常画面……の順に切り換わります。
ご注意
•カメラ情報が記録されていない場合は、画面に「---」が表示されます。
•DSR-40でのカムコーダー情報の表示は、カムコーダー側の表示と一部異なります。

11
仕様
リモートコントロール ステレオミニプラグ(接続ケーブル付き、
ケーブル長:3m)
電源電圧 DC5V(DSR-40より供給)
消費電力 50mW
保存温度 −20℃〜+60℃
動作温度 5℃〜40℃
外形寸法(幅/高さ/奥行き)
90×46×182mm(接続ケーブル含まず)
質量 約360g
付属品 取扱説明書(1)
保証書(1)
仕様および外観は、改良のため予告なく変更することがあります
が、ご了承ください。
保証書とアフターサービス
保証書について
•この製品には保証書が添付されていますので、お買い上げの際
にお受け取りください。
•所定事項の記入および記載内容をお確かめのうえ、大切に保管
してください。
アフターサービスについて
調子が悪いときはまずチェックを
この説明書をもう一度ご覧になってお調べください。
それでも具合の悪いときはサービスへ
お買い上げ店にご相談ください。
保証期間中の修理は
保証書の記載内容に基づいて修理させていただきます。詳しくは
保証書をご覧ください。
保証期間経過後の修理は
修理によって機能が維持できる場合は、ご要望により有料修理さ
せていただきます。
「
Sony online
」は、インターネット上のソニーのエレク
トロニクスとエンターテインメントのホームページです。
この説明書は再生紙を使用しています。

12
For the Customers in the U.S.A.
Note:
This equipment has been tested and found to comply with
the limits for a Class B digital device, pursuant to Part 15 of
the FCC Rules. These limits are designed to provide
reasonable protection against harmful interference in a
residential installation. This equipment generates, uses, and
can radiate radio frequency energy and, if not installed and
used in accordance with the instructions, may cause harmful
interference to radio communications. However, there is no
guarantee that interference will not occur in a particular
installation. If this equipment does cause harmful
interference to radio or television reception, which can be
determined by turning the equipment off and on, the user is
encouraged to try to correct the interference by one or more
of the following measures:
— Reorient or relocate the receiving antenna.
— Increase the separation between the equipment and
receiver.
— Connect the equipment into an outlet on a circuit different
from that to which the receiver is connnected.
— Consult the dealer or an experienced radio/TV technician
for help.
The shielded interface cable recommended in this manual
must be used with this equipment in order to comply with the
limits for a digital device pursuant to Subpart B of Part 15 of
FCC Rules.
For the customers in Europe
This product with the CE marking complies with the EMC
Directive (89/336/EEC) issued by the Commission of the
European Community.
Compliance with this directive implies conformity to the
following European standards:
• EN55103-1: Electromagnetic Interference (Emission)
• EN55103-2: Electromagnetic Susceptibility (Immunity)
This product is intended for use in the following
Electromagnetic Environment(s):
E1 (residential), E2 (commercial and light industrial), E3
(urban outdoors) and E4 (controlled EMC environment, ex.
TV studio).

13
Contents
English
General............................................................................ 13
Parts Identification......................................................... 14
Connection ..................................................................... 15
Operation ........................................................................ 16
Jog/Shuttle Search ............................................................ 16
Searching Using the Index Function ................................. 17
Displaying Tape Information............................................. 20
Specifications..................................................................21
GB
English
General
The DSRM-20 Remote Control Unit is designed to control the DSR-40/
40P. When used with the DSR-40/40P, the DSRM-20 adds the following
functions.
Jog/shuttle search
With the shuttle dial, the playback image can be viewed at –14 to +14 (for
DSR-40) or –17 to +17 (for DSR-40P) times normal speed as well as in
still mode. With the jog dial, the playback image can be viewed at –2 to +2
times normal speed as well as in still mode.
Index search
You can quickly find desired points using index signals or date and photo
mode information. The index signals are recorded on the tape and the date
and photo mode information is recorded in the cassette memory (if it is
equipped with the tape).
Tape information display
You can display information about the camcorder during playback if the
tape was used for shooting on the DSR-200/200A/PD1/PD100 (or DSR-
200P/200AP/PD1P/PD100P) camcorder.

14
Parts Identification
1STOPpbutton
Press to stop the tape.
2REC r(recording) button
To perform recording, press this button to put the VCR
into recording pause mode, and then press the PAUSE
Pbutton 3.
3PAUSE Pbutton
Press to pause recording or playback. Press again to
cancel the pause mode.
4REW 0(rewind) button
When the VCR is in stop mode, press to rewind the
tape.
When the tape is being played back or rewound, press
and hold this button to rewind the tape with displaying
the playback picture.
5PLAY (button
Press to play the tape back.
6F FWD )(fast forward) button
When the VCR is in stop mode, press to fast forward
the tape.
When the tape is being played back or fast forwarded,
press and hold this button to fast forward the tape with
displaying the playback picture.
7Search dials
Clockwise rotation plays the tape in the forward
direction and the counterclockwise rotation plays it in
the reverse direction.
Shuttle dial (outer): The speed of playback is
determined by the position of the dial, in the range
from –14 to +14 (for DSR-40) or –17 to +17 (for
DSR-40P) times normal speed. When the shuttle
dial is in its center position, a still image is
obtained.
Jog dial (inner): The speed of playback is
determined by the speed of turning the dial, in the
range from –2 to +2 times normal speed.
Note
The jog dial only operates when the shuttle dial is
in its center click position.
7Search dials
STOP REC
REW PLAY F FWD
JOG/SHUTTLE
PAUSE
DATA CODE SEARCH MODE
=
=
1STOP button
2REC button
3PAUSE button
4REW button
5PLAY button
6F FWD button 8JOG/SHUTTLE button/indicator
9DATA CODE button
0SEARCH MODE buttons
!¡ Connection cable

15
8JOG/SHUTTLE button/indicator
Press to play the tape in jog/shuttle mode. The
indicator lights and the DSR-40/40P enters jog/shuttle
mode.
Press any tape transport button to return to the normal
operating mode.
9DATA CODE button
Press this button to display the tape information on the
monitor screen.
For details, see “Displaying Tape Information” on page 20.
0SEARCH MODE =or +buttons
Press these buttons to search for scenes using the index
function.
For details, see “Searching Using the Index Function” on
page 17.
!¡ Connection cable (with stereo miniplug)
Connect this to the CONTROL S connector of the
DSR-40/40P.
Connection
Connect this unit to the CONTROL S connector of the
DSR-40/40P.
Power is automatically supplied to this unit from the
DSR-40/40P.
CONTROL S connector
DSRM-20

16
Operation
1
2-1)
2-2)
DUP
INPUT
SELECT
TC
TAPE
REMAIN
COUNTER
COUNTER
SELECT
CH-1/2
CH-3/4
MIX
AUDIO
MONITOR
REPEAT
REC
OFF
TIMER REMOTE
LOCAL
MENU
SET
Operation
The tape transport buttons of this unit function the same as those on the
DSR-40/40P. Recording, playback, fast forward, rewind and pause can be
remotely controlled from this unit.
Jog/Shuttle Search
Using the search dials, a search operation can be performed in either jog or
shuttle mode.
Jog mode: The speed of playback is determined by the speed of turning
the jog dial, in the range from –2 to +2 times normal speed.
Shuttle mode: The speed of playback is determined by the position of
the shuttle dial, in the range from –14 to +14 (for DSR-40) or –17 to
+17 (for DSR-40P) times normal speed. When the shuttle dial is in its
center position, a still image is obtained.
Note
When operating immediately after the power is turned on, be sure to first
return the shuttle dial to its center position.
1Press the JOG/SHUTTLE button to activate jog/shuttle mode.
The JOG/SHUTTLE indicator lights.
2To search in jog mode
1) Set the shuttle dial to the center click position.
2) Turn the jog dial.
Each time you turn the jog dial by a discrete amount, this jogs the
playback one frame at a time, either forward or backward.
CONTROL S connector
DSRM-20

17
To search in shuttle mode
Turn the shuttle dial.
A playback image appears at the speed according to the angle of the
dial rotation. When the dial is set at the center click position, the tape
stops and still image is obtained.
To exit from jog/shuttle mode
Press any tape transport button.
The JOG/SHUTTLE indicator goes off, and the recorder or player changes
to the operation corresponding to the pressed button.
Searching Using the Index Function
Three kinds of search are available using this unit.
– Searching for the beginnings of recordings: Index search
– Searching for a point on the tape where the recorded date changes:
Date search
– Searching for scenes recorded in the photo mode with a digital
camcorder: Photo search
When using a cassette with cassette memory
If the cassette has a cassette memory, the recordings are listed in the
chronologically in the order they were made. You can search using this
chronological list.
1Press SEARCH MODE to select the search type: INDEX, DATE or
PHOTO SEARCH.
The chronological list appears on the monitor screen.
µ
2Press =or +to select a recording.
The VCR starts searching and when it locates the recording, begins
playback. During Photo search, the VCR pauses.
When selecting INDEX SEARCH

18
Operation
When using a cassette without cassette memory
When you use a cassette without cassette memory, the VCR searches in
the order of the actual positions of the recordings, regardless of the setting
of CASSETTE MEMORY SEARCH in the DSR-40/40P’s menu.
For more information about menu operations, refer to the operating instructions
for the DSR-40/40P.
1Press SEARCH MODE to select the search type.
INDEX 0
SEARCH
2Press =or +repeatedly to locate the recording you want.
The VCR starts searching backwards or forwards until the index
number comes to zero, then plays back the recording. During Photo
search, the VCR pauses.
How signals are recorded
The VCR marks the tape when REC is pressed.
There are three different signals for each search method. The type of signal
recorded and where it is recorded (on the tape or in the cassette memory)
depends on the video equipment used for recording. Please note that if the
signals for certain search type are not recorded, you cannot do that type of
search.
When you record with a Sony digital camcorder
(DSR-200/200P, DSR-200A/200AP or DSR-PD100/PD100P)
a) The signals for Index search are recorded when you start recording in stop
mode.
When selecting INDEX SEARCH
Signals for In cassette memory On tape
Index search a) No No
Date search Yes Yes
Photo search Yes Yes

19
When you record on the DSR-40/40P
a) The signals for Index search are recorded when you start recording in stop
mode.
Note
When recording on the DSR-40/40P, signals for index search do not have
information on a day of the week.
About the cassette memory
•If you use a cassette with mark, the cassette memory stores up to 135
index signals. (The number changes depending on the data size
combination of index, date, and photo data stored on a tape.) The DSR-
40/40P is capable of storing and retrieving up to 16 kbits of cassette
memory.
•To locate recordings whose signals are disabled to be stored in the
cassette memory, or to locate recordings in order of their position on the
tape, set CASSETTE MEMORY SEARCH in the menu to OFF. You can
use the same procedure to search for a recording on a cassette without
cassette memory.
For more information about menu operations, refer to the operating instructions
for the DSR-40/40P.
Notes
•Each program is indexed at its beginning. If you record another program
over the beginning of the first program, you will not be able to locate the
original program.
•You cannot add indexes after recording.
To add indexes only for Auto Repeat, start recording from the point you
want to start indexing.
•You cannot erase indexes after recording.
To delete indexes for Auto Repeat, set INDEX WRITE in the menu to
OFF. Then record over the index signal you want to erase.
•Searching may not be done correctly if the signals were not recorded on a
Sony-brand digital video equipment.
For more information about menu operations, refer to the operating instructions
for the DSR-40/40P.
Signals for In cassette memory On tape
Index search a) Yes Yes
Date search No Yes
Photo search No No
If D is recorded
over the beginning of B...
Index signal
B cannot be searched
ABC
ABCD

20
Operation
Data display off
Recording
date and time
Sony camcorder
settings
Shutter speed
Iris
White balance
Program AE mode
Gain
DisplayingTape Information
If you record on a tape using a Sony digital camcorder DSR-200/200A/
PD100 (or DSR-200P/200AP/PD100P), camcorder data (the shutter speed,
program AE mode, white balance, iris and gain) can be recorded on the
tape. You can check this data during playback on the DSR-40/40P.
Press DATA CODE during playback.
Each time you press DATA CODE, the display changes as follows.
1999 / 12 / 25
12:59 AM LINE
AWB
60 MANUAL
F 1.6 0 dB
Notes
•When the information was not recorded, “- - -” appears instead.
•The camcorder data displayed on the monitor screen by the DSR-40/40P
are partially different from those shown by the digital camcorder.
Table of contents
Languages:
Other Sony Remote Control manuals

Sony
Sony RM-IP500 User manual

Sony
Sony RM-AX4000 - Integrated Remote Commander User manual
Sony
Sony NHS-703 User manual

Sony
Sony RM-S1AM User manual

Sony
Sony RM-PCM1 User manual

Sony
Sony RM-V302T User manual

Sony
Sony RM-X11M User manual

Sony
Sony RM-NX7000 Navitus User manual

Sony
Sony Remote Commander RM-V18A User manual

Sony
Sony RM-VS10TV Instruction Manual