Sony CMT-PX5 User manual

Operating Instructions
Micro Hi-Fi
Component
System
4-231-125-21(1)
© 2000 Sony Corporation
CMT-PX5

2
WARNING
To prevent fire or shock hazard, do not
expose the unit to rain or moisture.
To avoid electrical shock, do not open the cabinet.
Refer servicing to qualified personnel only.
Do not install the appliance in a confined space,
such as a bookcase or built-in cabinet.
US and foreign patents licensed from Dolby
Laboratories.
This appliance is
classified as a CLASS 1
LASER product.
The CLASS 1 LASER
PRODUCT MARKING
is located on the bottom
exterior.
IN NO EVENT SHALL SELLER BE LIABLE
FOR ANY DIRECT, INCIDENTAL OR
CONSEQUENTIAL DAMAGES OF ANY
NATURE, OR LOSSES OR EXPENSES
RESULTING FROM ANY DEFECTIVE
PRODUCT OR THE USE OF ANY PRODUCT.
Table of Contents
Getting Started
Step 1: Hooking up the system ................ 4
Step 2: Setting the time ............................ 6
Step 3: Presetting radio stations ............... 7
Basic Operations
Playing a CD ............................................. 9
Recording a CD on an MD
— CD-MD Synchro Recording........ 10
Playing an MD ........................................ 12
Listening to the radio
— Preset Tuning............................... 13
Recording from the radio
— Manual Recording ....................... 14
The CD Player
Playing CD tracks repeatedly
— Repeat Play.................................. 16
Playing CD tracks in random order
— Shuffle Play ................................. 16
Programming CD tracks
— Programme Play .......................... 17
Using the display..................................... 19
Labelling a CD — Disc Memo ............... 20
The MD Deck — Play
Playing MD tracks repeatedly
— Repeat Play.................................. 22
Playing MD tracks in random order
— Shuffle Play ................................. 22
Programming MD tracks
— Programme Play .......................... 23
Using the display..................................... 24

3
The MD Deck —Recording
Before you start recording....................... 25
Recording your favourite CD tracks
on an MD —CD-MD Synchro
Recording ......................................... 26
Recording a CD on an MD at high speed
—High-Speed CD-MD Synchro
Recording ......................................... 28
Recording only the first track
—Hit Parade .................................... 30
Recording the current track
—Rec It ........................................... 31
Recording for long times......................... 32
Recording on an MD manually
—Manual Recording ....................... 33
Starting recording with 6 seconds of
prestored audio data
—Time Machine Recording ............ 34
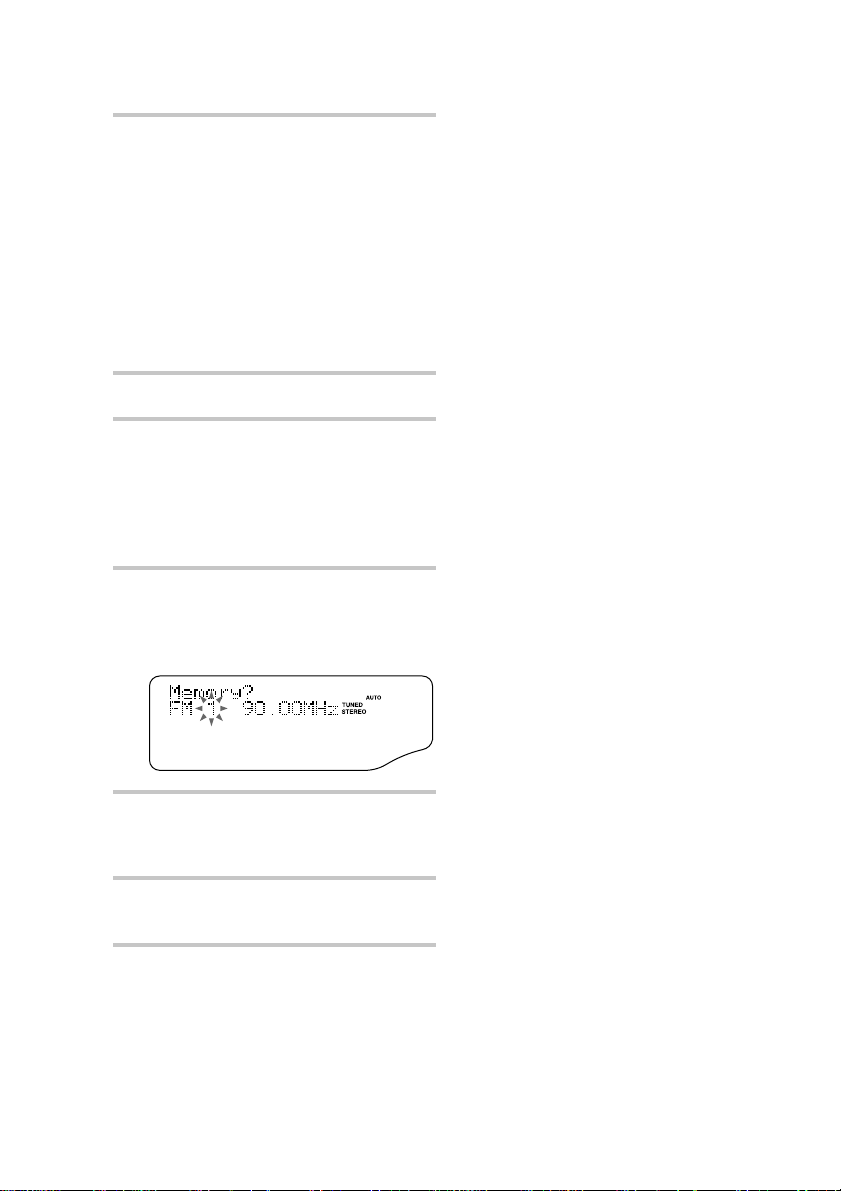
Marking track numbers ........................... 35
Making a space between tracks 3 seconds
long —Smart Space ......................... 37
Adjusting the recording level .................. 39
The MD Deck —Editing
Before you start editing........................... 40
Labelling an MD —Name Function ...... 41
Erasing recordings —Erase Function .... 43
Moving recorded tracks
—Move Function ............................ 46
Dividing recorded tracks
—Divide Function ........................... 47
Combining recorded tracks
—Combine Function ....................... 49
Undoing the last edit
—Undo Function ............................. 50
Changing the recorded level after recording
—S.F Edit Function ......................... 51
Sound Adjustment
Reinforcing the bass sound
—DBFB........................................... 54
Selecting the Preset Equalizer menu ....... 54
Other Features
Labelling the preset stations
—Station Name ............................... 55
Falling asleep to music
—Sleep Timer ................................. 56
Waking up to music
—Daily Timer ................................. 57
Timer recording radio programmes ........ 58
Connecting optional
components
Connecting optional A/V components .... 60
Connecting external aerial ...................... 62
Additional Information
Precautions .............................................. 63
System limitations of MDs ..................... 64
Troubleshooting ...................................... 65
Self-diagnosis Display ............................ 68
Messages ................................................. 69
Specifications .......................................... 71
Parts descriptions for the remote............. 73
Index ........................................................ 76

4
Getting Started
Step 1: Hooking up the system
Perform the following procedure 1to 4to hook up your system using the supplied cords and
accessories.
Grey (3)
AM loop aerial
Right speaker CMT-PX5
rear panel
FM aerial
Left speaker
1Connect the speakers.
Connect the speaker cords to the SPEAKER
terminals on the system and to the terminals
on the speakers as shown below.
+
_
Insert this portion
Notes
•Keep the speaker cords away from the aerials to
prevent noise.
•The supplied speakers can be used as either the left
or right speakers. Place the speaker connected to the
SPEAKER R terminals on the right side, and the
speaker connected to the SPEAKER L terminals on
the left side of the system.
Black (#)

5
Getting Started
3(For models with a voltage selector)
Set the VOLTAGE SELECTOR on the
rear of the system to the position of
your local mains voltage.
4Connect the mains lead to the mains.
(For models with a plug adaptor)
If the plug does not fit your mains, detach the
supplied plug adaptor.
Inserting two R6 (size AA)
batteries into the remote
Tip
With normal use, the batteries should last for about
six months. When the remote no longer operates the
system, replace both batteries with new ones.
Notes
•If you do not use the remote for a long period of
time, remove the batteries to avoid possible damage
from battery leakage.
•Be sure to insert the battery in correct direction.
•Do not mix a new battery with an old one.
•Do not use different types of batteries together.
•Do not use a battery that is leaking.
•If the battery leaks, clean the battery compartment
and replace all the batteries with new ones.
2Connect the FM/AM aerials.
Set up the AM loop aerial, then connect it.
AM
FM
75
COAXIAL
AM loop
aerial
Extend the FM
lead aerial
horizontally

6
Step 2: Setting the time
You must set the time beforehand to use the timer
functions.
3,4,5
3,4,5 3,4,5
21
DISPLAY
TCURSOR CURSORt
1Turn on the system.
2Press CLOCK/TIMER SET.
The time setting display appears, and the day
indication “SUN”flashes.
3Press –or + to set the day, then press
ENTER/YES or CURSORt.
The hour indication flashes.
(Noon is indicated as 12:00 PM, and
midnight as 12:00 AM.)
4Press –or + to set the hour, then press
ENTER/YES or CURSORt.
The minute indication flashes.
5Press –or + to set the minute, then press
ENTER/YES.
The clock starts.
If you made a mistake
Press TCURSOR or CURSORtuntil the
indication you wish to change (day, hour, minute)
flashes, then change the setting.
To cancel setting the time
Press CLOCK/TIMER SET.

7
Getting Started
Step 3: Presetting radio
stations
You can preset up to 30 stations, 20 for FM and
10 for AM.
5,7
3,5,6 3,5,6
4
2
1
1Press TUNER/BAND repeatedly to
select “FM”or “AM”.
2Press TUNING MODE repeatedly until
“AUTO”appears.
continued
Showing the time
In consideration of reducing standby power, this
system can select whether or not to display the
clock in standby mode. The system is set at the
factory to not display the clock when the system is
off (Power Saving Mode). To display the clock
even when the system is off, press DISPLAY or
TIME while the system is off. Press the button
again to turn the clock display off and activate the
Power Saving Mode.
While the system is on, the information that
appears at the upper level of the display changes
as follows each time you press DISPLAY.
tPreset Equalizer name tClock
Name* TVolume T
* Displayed only when disc title, track title, radio
station name or other name information is labelled.
Nothing appears when this information is not
labelled.
Tip
The upper dot of the clock display flashes for the first
half of a minute (0 to 29 seconds), and the lower dot
flashes for the last half of a minute (30 to
59 seconds).
Changing the preset time
1Press CLOCK/TIMER SET, then press –or +
until “CLOCK SET?”appears. Press ENTER/
YES.
2Repeat steps 3 to 5 of “Setting the time”.
You can change the preset time while the system
is off. In this case, perform steps 2 to 5 of “Setting
the time”.

8
3Press –or +.
The frequency indication changes and the
scanning stops when the system tunes in a
station. “TUNED”and “STEREO”(for a
stereo programme) appear.
If “TUNED”does not appear
and the scanning does not
stop
Press TUNING MODE repeatedly until
“MANUAL”appears, then press –or + to
tune in the desired station.
4Press MENU/NO.
5Press –or + repeatedly until
“Memory?”appears, then press
ENTER/YES.
The preset number starts flashing. Perform
steps 6 and 7 while the preset number is
flashing.
6Press –or + repeatedly to select the
desired preset number.
Select from 1 to 20 for FM and 1 to 10 for
AM.
7Press ENTER/YES.
“Complete!”appears, and then the station is
stored.
8Repeat steps 1 to 7 to preset other
stations.
To stop scanning
Press MENU/NO.
To tune in a station with a weak
signal
Press TUNING MODE repeatedly until
“MANUAL”appears in step 2, then press –or +
repeatedly to tune in the station manually.
To change the preset number
Start over from step 1.
To change the AM tuning interval
The AM tuning interval is factory-set to 9 kHz
(10 kHz in some areas). To change the AM tuning
interval, tune in any AM station first, then turn off
the system. While holding down the FUNCTION,
turn the system back on. When you change the
interval, all the AM preset stations are erased. To
reset the interval, repeat the same procedure.
Tips
•The preset stations are retained for about a day even
if you disconnect the mains lead or if a power failure
occurs.
•You can label the preset stations (see page 55).
Step 3: Presetting radio
stations (continued)

Getting Started/Basic Operations
9
Basic Operations
Playing a CD
You can play up to 3 CDs in a row. To turn on the
system, press ?/1 (power).
3Press PLAY MODE repeatedly to select
playing of either ALL DISCS or
1DISC.
To start playing from the first track, press
PLAY MODE repeatedly until “SHUFFLE”
or “PROGRAM”disappears.
4Press CD HS.
The CD HS button lights green, and play
starts from the CD whose CD 1 –3 button is
lit green.
Disc tray number Playing time
Track number
To Do this
Stop play Press s.
Pause Press CD HS. The CD HS
button lights orange. Press again to
resume play.
Select a track Turn –l/L+ clockwise (to
go forward) or counterclockwise
(to go back).
Press the same Aagain to close the tray. To
load other CDs, press a different Aand place
the CD on the disc tray.
2Press FUNCTION repeatedly to switch
the function to CD.
With the label side
up. When you play
a CD single (8 cm
CD), place it on the
inner circle of the
tray.
?/1
(power) 4
13
s
2j/J
CD 1 – 3
VOLUME –l/L+
1Press any CD 1 –3 Aand place a CD
on the disc tray.
Find a point in a
track Turn j/J during play and
release it when you reach the
desired point. “—OVER—”
appears at the end of the CD.
Select a CD •Press CD 1 –3. The CD changes
automatically and the selected
CD starts playing.
•Press D.SKIP on the remote
repeatedly so that the CD 1 –3
button is lit green. Press CD
HS to play the selected CD.
If you press CD 1 –3 during
play, the CD changes
automatically and the selected
CD starts playing.
continued

10
To Do this
Remove a CD Press one of CD 1 –3 Ato open
the tray that contains the CD you
want to remove. You cannot
change a CD on another disc tray
unless you stop playing.
Recording a CD on an
MD — CD-MD Synchro Recording
You can make a digital recording of a CD on an
MD, marking track numbers in the same sequence
as the original CD.
In addition to normal-speed recording, you can
also record at high speed (approximately four
times the normal speed).
You can also select the recording method to suit
your purpose (see page 25).
To turn on the system, press ?/1 (power).
?/1 (power)
Turn VOLUME.
Tips
•You can switch from another source to the CD
player and start playing a CD just by pressing CD
HS or CD 1 –3 (Automatic Source
Selection). However, if a CD is used in a
programme, play does not start even if you press
CD 1 –3.
•The CD 1 –3 button indicators have the following
meanings when lit,
Green: The disc tray is selected or the CD loaded
on the tray is playing.
Orange: A CD is loaded on the tray.
All of the CD 1 –3 button indicators light orange at
first, and then turn on/off if the system determines
that a CD is not loaded after the CD tray is opened
and closed, etc.
•If there is no CD in the player, “No Disc”appears
in the display.
•You can also select and start playing a track in step
4.
1Press D.SKIP on the remote and select the
desired CD.
2Turn –l/L+ until the desired track number
appears.
3Press CD HS.
Or, press the number buttons on the remote.
The playback automatically starts. To enter track
numbers 10 or over, press >10 and the track
number. To enter 0, use the 10/0 button.
•You can start play from a different CD. After
performing step 3, press CD 1 –3 for the tray
containing the desired disc. Play starts from the CD
whose button was pressed.
Notes
•Do not use a CD with tape, seals or paste on it as
this may damage the CD player.
•Do not push the disc tray to close it, as this may
damage the CD player. Press CD 1 –3 Ato close
the disc tray.
Adjust the
volume
7
5
s
6ENTER/
YES
3CD SYNC
HIGH SPEED
4
2MDA
1Insert a recordable MD.
With the arrow
pointing toward
the deck
With the label
side up, and the
shutter on the
righthand side
Playing a CD (continued)

Basic Operations
11
To stop recording
Press s.
If you stop recording or the MD
runs out of recording time during
high-speed recording
The partial high-speed recorded track is not
recorded on the MD. Record the track again.
Tips
•The procedure described here explains how to
record from CD 1 on an MD. To record from any
other CD on an MD, see “Recording your favourite
CD tracks on an MD”on page 26.
•If you use a partially recorded MD, recording starts
after the recorded tracks.
•Depending on the disc, CD TEXT information may
also be recorded. If “CD TEXT”flashes during
recording, press NAME EDIT/SELECT on the
remote, and then press ENTER/YES to record the
title of the current track. (If “CD TEXT”is lit, it is
automatically recorded.)
•You can switch the recording mode before step 6
and record for long times. For details, see
“Recording for long times”on page 32.
•The CD 1 –3 buttons may light regardless of
whether discs are placed on the trays just after
purchase or if you have unplugged the mains lead
for some time.
Before pulling out the mains lead
MD recording is completed when the MD Table
of Contents (TOC) is updated. The TOC is
updated when you eject the MD or press ?/1 to
turn off the system. Do not pull out the mains lead
before updating the TOC (while “TOC”is lit) or
while updating the TOC (while “TOC”is flashing)
to ensure a complete recording.
Notes
•If the play mode is set to Repeat Play or Shuffle
Play, it automatically switches to normal play at
step 6.
•If the MD is record protected, “C11”and
“Protected”appear alternately and the MD cannot
be recorded. Remove the MD, then slide the record
protection tab to the closed position (see page 26).
•If “Retry”flashes in the display, a reading failure
has occurred, and the system is trying to read the
data again (see page 29).
2Press CD 1 Aand place a CD on the
disc tray.
With the label side
up. When you play
a CD single (8 cm
CD), place it on the
inner circle of the
tray.
Press CD 1 Aagain to close the tray.
3Press FUNCTION repeatedly to switch
the function to CD.
4Press PLAY MODE repeatedly until
“1DISC”appears.
5Press SYNC MODE until “HIT
PARADE”disappears.
6Press CD SYNC NORM SPEED.
To record at high speed, press CD SYNC
HIGH SPEED.
“NORMAL SPEED”(“HIGH SPEED”for
high-speed recording) appears. The MD deck
stands by for recording and the CD player
pauses for play.
7Press MD HS.
Recording starts.
You cannot monitor the recorded signal
during high-speed recording. When the
recording is completed, the CD player and
the MD deck stop automatically.

12
To Do this
Stop play Press s.
Pause Press MD HS. The MD HS
button lights orange. Press again to
resume play.
Select a track Turn –l/L+ clockwise (to
go forward) or counterclockwise
(to go back).
Find a point in a
track Turn j/J during play and
release it when you reach the
desired point.
Remove the MD Press MD A.
Adjust the
volume Turn VOLUME.
Tips
•You can start playing from the desired track in
step 2.
1Turn –l/L+ until the desired track
appears.
2Press MD HS.
Or, press the number buttons on the remote.
The playback automatically starts. To enter track
numbers 10 or over, press >10 (press twice to enter
100 or over) and the track number. To enter 0, use
the 10/0 button.
•You can switch from another source to the MD
deck and start playing an MD just by pressing MD
HS (Automatic Source Selection).
Note
Do not use an MD on which the label sticks out from
the edge or on which the label is not positioned
correctly. Such labels can cause the MD deck to
malfunction.
Playing an MD
To turn on the system, press ?/1 (power).
?/1 (power) 2s
MDAj/J
–l/L+
VOLUME
1Insert an MD.
With the arrow
pointing toward
the deck
With the label
side up, and the
shutter on the
righthand side
2Press MD HS.
Play starts. The MD HS button lights
green.
Track number Playing time

Basic Operations
13
Listening to the radio
—Preset Tuning
Preset radio stations in the tuner’s memory first
(see page 7).
To turn on the system, press ?/1 (power).
?/1 (power)
2STEREO/MONO
3
VOLUME
1
1Press TUNER/BAND repeatedly to
select “FM”or “AM”.
2Press TUNING MODE repeatedly until
“PRESET”appears.
3Turn –l/L+ to select the desired
preset station.
Station name*
Preset number Frequency
*The station name appears only if you have
labelled the station (see page 55).
To Do this
Turn off the radio Press ?/1 to turn off the
system.
Adjust the volume Turn VOLUME.
To select the preset number
using the remote
Press the number buttons on the remote in step 3.
To enter preset numbers 10 or over, press >10 and
the preset number. To enter 0, use the 10/0 button.
continued

14
Recording from the
radio — Manual Recording
You can analogue record a radio programme on an
MD. If you use a partially recorded MD, recording
starts after the recorded tracks. To erase the
recorded contents, see “Erasing recordings” on
page 43.
To turn on the system, press ?/1 (power).
?/1 (power)
6s
MDA35
24
1Insert a recordable MD.
With the arrow
pointing toward
the deck
With the label
side up, and the
shutter on the
righthand side
Listening to non-preset radio
stations
• Press TUNING MODE repeatedly until
“MANUAL” appears in step 2, then turn
–l/L+ to tune in the desired station
(Manual Tuning).
• Press TUNING MODE repeatedly until
“AUTO” appears in step 2, then turn –l/
L+. The frequency indication changes and
the scanning stops when the system tunes in a
station (Automatic Tuning).
To cancel Automatic Tuning
Press TUNING MODE.
Tips
• You can switch from another source to the tuner
just by pressing TUNER/BAND (Automatic
Source Selection).
• To improve broadcast reception, adjust the supplied
aerials, or connect a commercially available
external aerial (see page 62).
• When an FM stereo programme has static noise,
press STEREO/MONO repeatedly until “MONO”
appears. There will be no stereo effect, but the
reception will improve. Press the button again to
restore the stereo effect.
Listening to the radio
(continued)

Basic Operations
15
2Press TUNER/BAND repeatedly to
select “FM”or “AM”.
3Press TUNING MODE repeatedly until
“PRESET”appears.
4Turn –l/L+ to select the desired
preset station.
Station name*
Preset number Frequency
*The station name appears only if you have
labelled the station (see page 55).
You can also select the preset numbers with
the number buttons on the remote.
5Press REC/REC IT.
The MD deck stands by for recording.
6Press MD HS.
Recording starts.
To stop recording
Press s.
Tips
•If noise is heard while recording an AM radio
programme, move the AM loop aerial to reduce the
noise or connect a ground wire to the Uterminal
(see page 62).
•You can switch the recording mode before step 5
and record for long times. For details, see
“Recording for long times”(page 32).
•You can adjust the recording level to the desired
volume after performing step 5 (see page 51).
Before pulling out the mains lead
MD recording is completed when the MD Table
of Contents (TOC) is updated. The TOC is
updated when you eject the MD or press ?/1 to
turn off the system. Do not pull out the mains lead
before updating the TOC (while “TOC”is lit) or
while updating the TOC (while “TOC”is flashing)
to ensure a complete recording.
Note
If the MD is record protected, “C11”and “Protected”
appear alternately and the MD cannot be recorded.
Remove the MD, then slide the record protection tab
to the closed position (see page 26).

16
The CD Player
Playing CD tracks
repeatedly —Repeat Play
You can repeat a disc or all discs in normal play,
“1DISC”Shuffle Play and Programme Play.
REPEAT
,Press REPEAT during play until
“REPEAT”or “REPEAT 1”appears.
REPEAT*: For all the tracks on the CD.
You cannot perform Repeat Play for “ALL
DISCS”during Shuffle Play.
REPEAT 1: For a single track only.
* The CD player repeats the tracks up to five
times.
To cancel Repeat Play
Press REPEAT until “REPEAT”or “REPEAT 1”
disappears.
Playing CD tracks in
random order —Shuffle Play
You can play all the tracks on a CD in random
order.
31
32
1Press FUNCTION repeatedly to switch
the function to CD.
2Press PLAY MODE repeatedly until
“ALL DISCS SHUFFLE”or “1DISC
SHUFFLE”appears in stop mode.
ALL DISCS SHUFFLE: The tracks on all
the CDs play in random order.
1DISC SHUFFLE: A single CD whose
button is lit green plays in random order.

The CD Player
17
3If you selected “ALL DISCS
SHUFFLE”, press CD HS.
If you selected “1DISC SHUFFLE”,
press CD 1 –3 for the tray containing
the desired CD.
Shuffle Play starts.
To cancel Shuffle Play
Press sto stop Shuffle Play, then press PLAY
MODE repeatedly until “SHUFFLE”and
“PROGRAM”disappear.
Tip
To skip a track, turn –l/L+ clockwise.
Programming CD tracks
—Programme Play
You can make a programme of up to 25 tracks
(steps) from 3 CDs in the order you want them to
be played. You can also make a Synchro
Recording of the programme on an MD (see
page 26).
2
1
73
4
4
5CLEAR
1Press FUNCTION repeatedly to switch
the function to CD.
2Press PLAY MODE repeatedly until
“PROGRAM”appears in stop mode.
continued

18
7Press CD H.
All the tracks play in the order you selected.
To check the total number of
programmed tracks
Press TIME in stop mode. The total number of
programmed tracks (steps) appears, followed by
the last programmed track number and the total
playing time of the programme.
Total playing time
of the programme
To check the programme order
Press .or >during Programme Play.
To Do this
Cancel
Programme Play Press x, then press PLAY
MODE repeatedly until
“PROGRAM”and
“SHUFFLE”disappear.
Add a track to the
programme (in
stop mode)
Perform steps 3 to 5.
Last programmed
track number
Erase the last
programmed track Press CLEAR in stop mode.
Each time you press the
button, the last programmed
track is erased.
To select the desired track using
the number buttons
Press number buttons instead of performing steps
4 to 6.
To enter track numbers 10 or over, press >10 and
the track number. To enter 0, use the 10/0 button.
Tips
•The programme you made remains after
Programme Play finishes. To play the same
programme again, press CD H.
•“Step Full!”appears when you try to programme 26
or more tracks (steps).
•“--.--”appears when the total CD programme time
exceeds 100 minutes, or when you select a CD track
whose number is 21 or over.
3Press D.SKIP repeatedly to select the
desired CD.
You can also use CD 1 –3 to select a CD.
To programme all of the tracks on a single
CD at once, proceed to step 5 with “AL”
displayed.
Selected CD number
4Press .or >repeatedly until the
desired track appears.
Selected CD and
track number Playing time of
the selected track
5Press ENTER/YES.
The track is programmed. The number of the
track in the programmed sequence (the Step
number) appears, followed by the last
programmed track number and the total
playing time of all the programmed tracks.
If you made a mistake, you can clear the last
programmed track from the programme by
pressing CLEAR.
Last programmed
track number Total playing
time
6To programme additional tracks, repeat
steps 3 to 5.
Programming CD tracks
(continued)

The CD Player
19
Using the display
You can check the time remaining in a single
track, or on an entire CD. You can also check the
disc title or a track title of a CD. Use the
DISPLAY button (upper level) and the TIME
button (lower level) to switch the display.
TIME
DISPLAY
Use the DISPLAY button to
switch the display
Use the TIME button to switch the display
Checking the remaining time
,Press TIME during play.
Each time you press the button, the display
changes as follows:
tElapsed playing time on the current track
r
Remaining time on the current track
r
Remaining time on the current CD*
* The remaining time on the CD is not
displayed during Programme or Shuffle Play.
Checking a track title or a
disc title
,Press DISPLAY during play or in stop
mode.
Each time you press the button, the display
changes as follows:
tPreset Equalizer name
r
Clock
r
Volume
r
Track title or disc title*
* The track title appears during play (only for a
CD with CD text), and the disc title appears
in stop mode. If a CD that has no title is
loaded, nothing appears.
To scroll a long name
Press SCROLL on the remote.
The title appears scrolling in the display.
Tips
•If you press TIME for a CD with CD text
containing the artist name in stop mode, the artist
name appears scrolling in the display.
•“--.--”appears when you check the remaining time
of a CD track whose number is 21 or over.
•To label a disc title to a CD, see “Labelling a CD”
on page 20.

20
3Press NAME EDIT/SELECT.
The text input screen appears, and the cursor
flashes.
Cursor
4Press NAME EDIT/SELECT to select
the desired type of character.
Each time you press the button, the display
changes as follows:
Selected AB* (Upper cases) tSelected ab*
(Lower cases) tSelected 12 (Numbers) t
Selected AB (Upper cases) t…
* Press number 1 repeatedly to display the
following symbols.
′–/ , . ( ) : ! ?
In addition, when the symbols above appear in
the display, press –or + repeatedly to display
the following symbols.
& + < > _ = ”; # $ % @ `
5Enter a character.
If you have selected
uppercase or lowercase
letters
1Press the corresponding letter button
repeatedly until the character to be entered
flashes.
Or, press the button once and press –or +
repeatedly.
2Press CURSORt.
The flashing character is entered and the
cursor shifts to the right.
If you have selected numbers
Press the corresponding number button.
The number is entered and the cursor shifts
to the right.
To enter a blank space
1Press NAME EDIT/SELECT to select
upper case or lower case letters.
2Press 10/0.
A blank space is entered and the cursor
shifts to the right.
Labelling a CD —Disc Memo
You can label up to 100 CDs with titles of up to
20 symbols and characters. Whenever you load a
labelled CD, the title appears in the display.
Note
When labelling CDs for the first time, be sure
to perform the operations in “Erasing all disc
titles stored in the system memory” on
page 21 beforehand.
3,4
2
7
1
5
PLAY
MODE
CLEAR
CURSOR
t
TCURSOR +
–
1Press FUNCTION repeatedly to switch
the function to CD.
2Press D.SKIP repeatedly to select the
desired CD.
Make sure the total number of tracks and the
total playing time appear in the display in
stop mode. If “SHUFFLE”or “PROGRAM”
appears in the display, press PLAY MODE
repeatedly until both disappear.
Selected CD and total
number of tracks Total playing time
Table of contents
Other Sony Stereo System manuals

Sony
Sony HCD-G101 User manual

Sony
Sony H.ear go SRS-HG1 User manual

Sony
Sony CX-JN88 User manual

Sony
Sony LBT-ZX8 - Mini Hi-fi Component System User manual

Sony
Sony CMT-EH55DAB User manual

Sony
Sony CMT-MX500i User manual

Sony
Sony XES-Z50 User manual

Sony
Sony MHC-GRX2 User manual

Sony
Sony NAS-CZ1 M-Crew User manual

Sony
Sony CMT-SPZ90DB User manual

Sony
Sony 4548736019614 User manual

Sony
Sony SRS-X55 User guide

Sony
Sony DHC-MD55 User manual

Sony
Sony SRS-XB3 User manual

Sony
Sony MHC-GN660 User manual

Sony
Sony CMT-GPX5 User manual

Sony
Sony Muteki XROSSFADE LBT-DJ2i User manual

Sony
Sony MEX-BT3100P User manual

Sony
Sony Giga Juke NAS-50HDE User manual

Sony
Sony CMT-SE9 User manual