ASSEMBLY INSTRUCTIONS
1. Wall-mounting hardware not included.
2. Mounting this platform is a two-person operation.
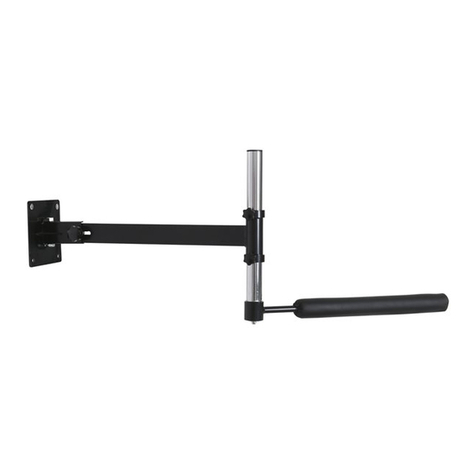
3. Determine the mounting height and distance, bearing in mind this platform has
8" of adjustment. The bottom of the bag should be level with the user's chin.
Ensure the selected location coincides with the studs if you're mounting to a stud
wall. This unit is designed for use with studs on 16" centres.
4. Attach top stringer (R1) to the wall at desired location. Use two 5/16" bag
screws for the wood stud walls: use masonry anchors for masonry walls. Mounting
hardware is not provided. Mounting holes are two outside holes.
5. Loosely attach the h.R slider bar (R2) to the mounted top stringer (R1) with
5/16” x 2 ¼” hex head bolt.
6. Place the bottom stringer (R1) between slider bars (R2 & R3) and wall - attach it
to slider bars (R2 & R3), as shown in step 5.
7. Ensure slider bars (R2 & R3) hang vertically and the bottom stringer (R1)
mounting holes coinside with the wall studs. If mounting on a stud wall, attach the
bottom stringer to the wall, as shown in step 4.
8. Remove slider bars (R2 & R3) from the stringers (R1).
9. Place slider tube (R4) over l.H slider bar (R3) and reattach l.H slider bar (R3) to
stringers, this time using 5/16" lockwashers under the bolt heads and fasten
securely.
10. Place adjustment slider tube over R.H slider bar (R2) and reattach the slider
bar (R2) to the stringers, then tighten the 5/16" lock washers and bolts securely.
11. Move both slide tubes (R4 & R5) all the way to the bottom stringer (R1).
12. Attach swivel (R8) to drum (R9) using wood screws provided.
13. Attach the drum (R9) to slider tube (R4 & R5) using four ¼" x 2 ¼ " head car-
riage bolts, four ¼ lock washers and four ¼ hex nuts. Lock washers and nuts are
on the angle iron side. The bolt goes up through the pre-drilled holes in the drum
(R9) from the bottom. Tighten securely.
14. Hold the quick release pin (R6) to move the drum (R9) and slider tubes (R4 &
R5) all the way to the top – tighten the r.H slider bar (R2) bolts securely. The drum
(R9) and slide tubes (R4 & R5) should slide up and down the bars (R2 & R3)
smoothly. Place drum at desired height and engage the quick release pin (R6).
15. Thread four hand knobs (R7) into nuts welded to slide tubes (R4 & R5) and
tighten.
16. Check all fasteners to be sure they’re securely tightened. Hang your speed
bag – it is now ready for use.
