Soundoff Signal PSRNHHC Series Owner's manual

1.800.338.7337 / www.soundoffsignal.com
Slide Switch Mode:
1. Press and Hold Auxiliary Button #1 and #4 until Level 2 LED
flashes.
2. Press Auxiliary switch 1, 2, or 3 depending on required mode of
operation.
Aux 1: Progressive 1,2,3
Level 1 selected: Active Outputs: 1
Level 2 selected: Active Outputs: 1,2
Level 3 selected: Active Outputs: 1,2,3
Aux: 2 Progressive 1,2,3 with option to turn off lower levels
Level 1 selected: Active Outputs: 1
Level 2 selected: Active Outputs: 1,2 (Level 1 may be turned OFF)
Level 3 selected: Active Outputs: 1,2,3 (Level 1 and 2 may be
turned OFF)
Aux 3: Individual 1,2,3
Level 1 selected: Active Outputs: 1
Level 2 selected: Active Outputs: 2
Level 3 selected: Active Outputs: 3
Toggle ON/OFF
Momentary ON
8 Second Delay
Left Arrow
Right Arrow
Center Out - Arrow
Alley Left
Alley Right
Single Button Arrow
Single Button Alley
4. Press and release Auxiliary Button until desired mode is
selected.
5. Continue steps 2-4 for any other Auxiliary Buttons needing to
be programmed.
LEGEND:
ON =
Denotes Factory Default Setting
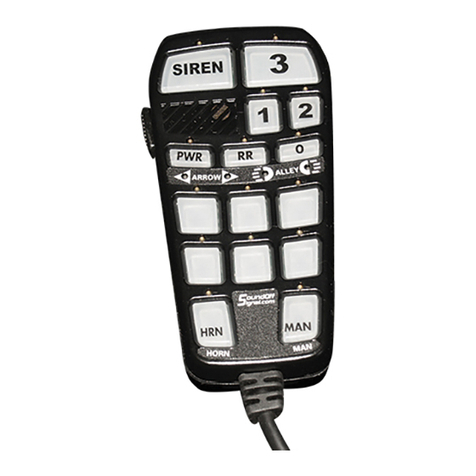
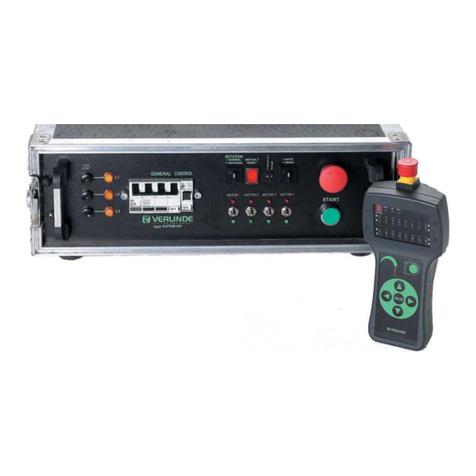
HANDHELD REMOTE
PSRNHHC(x)
PSRNHHC1
PSRNHHC2
1
PROGRAMMING MANUAL
NOTE:
For All programming modes: Momentarily depress Radio
Rebroadcast push-button to save and exit.
To hear samples of all the tones available go to
www.soundoffsignal.com website.
Programming Modes
Auxiliary Button Programming:
1. Press and Hold Auxiliary Button #1 and #6 until Level 1 LED Flashes.
2. Press the auxiliary button which setting is going to be viewed/
changed.
3. Monitor the Arrow/Alley LED’s to determine setting for Auxiliary
Button
Input Settings:
1. Press and Hold Auxiliary Button #1 and #3 until LEVEL #3
LED flashes.
1. Park Kill Polarity Mode: Determines what voltage level will
activate park kill functions. Disables AUX Input
ON = Activated when Ground is applied to Park
Kill input wire.
OFF = Activate when +V is applied to Park Kill
input wire
2. Horn Ring Polarity Mode: Determines what voltage level will
activate Horn Ring functions.
ON = Activated when Ground is applied to Horn
Ring input wire.
OFF = Activated when +V is applied to Horn
Ring input wire.
3. PA Volume Control (see Setting PA Volume)
ON = RR Button Adjustable
OFF = Programmed
4. Level 3 Tone Activation: Determines when the siren tone
push-buttons on control panel are enabled.
ON = Tone push buttons always enabled
OFF = Tone push button only enabled with slide
switch is in position #3.
5. 8 Second Buzzer alert: Provides audible beep when
ever any auxiliary switches are ON or level 1, 2 or 3
is active.
ON = Enabled
OFF = Disabled
PSRNHHCI 2.19.14
IMPORTANT INFORMATION:
Warning devices are strictly regulated and governed by Federal, State and Municipal ordinances. These devices shall be used ONLY on approved vehicles. It is the sole responsibility of the user of these devices to ensure compliance.
To review our Limited Warranty Statement & Return Policy for this or any SoundOff Signal product, visit our website at www.soundoffsignal.com/sales-support.
If you have questions regarding this product, contact Technical Services, Monday - Friday, 8 a.m. to 5 p.m. at 1.800338.7337 (press #4 to skip the automated message).
SUPERIOR CUSTOMER RELATIONSHIPS. SMARTLY DESIGNED LIGHTING & ELECTRONIC SOLUTIONS.
CONTROLS THESE SIREN AMPS:
ETSA380R
ETSA385HR
ETSA461HPP
ETSA462HPP
ETSA461HPP-EXT
ETSA462HPP-EXT
PSRN4ANR1
PSRN4ANR2
6. Air Horn Button Output Channels
ON = In standby mode, Air Horn tone is
output on Spkr A & B. When Warning
Tone is Active, Warning Tone continues
on Spkr A & Air Horn Button Tone is
output on Spkr B
OFF = Air Horn Button Tone always
produced on Spkr A & B.

1.800.338.7337 / www.soundoffsignal.com
MASTER ON / OFF
(Siren Standby)
Control LEDs
AUXILLARY BUTTON #s
1 2 3
4 5 6
LEVEL Switches (1,2,3
with indicators)
HORN LED
MANUAL LED
‘Ø’ LED
ALTERNATE HORN RING CONTROL
OPTION 1 OPTION 2
STANDBY OEM HORN OEM HORN
LEVEL 1 OEM HORN OEM HORN
LEVEL 2 Air Horn or Wail Button
Tone while Pressed *Tap to Turn On Warning Tone, Tap
again to Change Warning Tone. Press
and Hold for Air Horn Tone
LEVEL 3 Tap to turn ON Warning
Tone, Tap again to
change Warning Tone.
Press and Hold for Air
Horn Tone
TONE SWITCH
OFF:
Air Horn Tone or
Wail Button Tone
while Pressed *
TONE SWITCH
ON:
Tap to change
Warning Tone,
Press and Hold
for Air Horn Tone
Horn Ring Program:
1. Press and Hold Auxiliary Button #3 and #4 until ‘Ø’ LED
flashes.
2. Press Auxiliary Buttons depending on the required settings
1Horn Ring Scroll - Not used on Hand Held version
ON =Tone will advance through
tones programmed on Wail, Yelp,
and Tone push-buttons each time
vehicle horn is pressed.
OFF = Tone will advance through
tones pregrammed on Wail and Yelp
push-buttons each time the vehicle
horn is pressed.
2. Hands Free Mode: (Alternate Horn Ring Control Must be Diasabled)
Activates the siren tone when operator momentarily presses on
Vehicle Horn.
ON = Enabled
OFF = Disabled
3. Horn Ring Standby Tone: (Hands Free Mode must be
disabled for this function to work). (Altenate
Horn Ring Control Must be Disabled). Determines
which tone to output when siren is in standby and
vehicle horn is pressed.
ON = Air Horn Tone
OFF = Wail Tone
4. Horn Ring Timeout: (Alternate Horn Ring control must be
disabled and hands free mode must be enabled for
function to have any effect). When vehicle
horn is pressed and tone changes, determines how
tone will change back to pre-vehicle horn press tone.
ON = Siren tone will revert back to pre-
vehicle horn tone after 8 seconds.
OFF = Siren tone will not revert back to
pre-vehicle horn press tone.
5. Alternate Horn Ring Control: Custom operation of vehicle
horn when pressed. Refer to figure left for details.
ON = Enabled
OFF = Disabled
Other Modes:
1. Press and Hold Auxiliary Button #1 and #5 until LEVEL #1 and
LEVEL #3 indicator LED flashes.
1. Horn Ring Activation: Determines when pressing the Vehicle
Horn will activate siren to
ON = Enabled only when level 3 is
activated.
OFF = Enabled whenever siren is on.
2. Buzzer: Audible tone from control panel whenever operator
presses push-button or changes position of slide/rotary
switch.
ON = Enabled
OFF = Disabled
3. Park Kill Latch: When Park Kill input is triggered, determines how
siren tone proceeds once park kill input is no longer active.
ON = Tone remains disabled until operator
selects other tone.
OFF = Tone resumes once Park Kill input is
no longer active
4. Power Down: Determines whether siren will operate when
ignition input has no voltage
ON = Siren will operate w/o voltage on
ignition input
OFF = Siren is disabled when no voltage is
present on ignition input
5. Auxiliary Input: Determines which siren tone will activate when
auxiliary input is activated.
ON = Air Horn tone
OFF = Tone which is programmed on Wail
push-button
2. When finished, momentarily depress Radio Rebroadcast (RR)
button to exit programming mode.
HANDHELD REMOTE
PSRNHHC(x)
SIREN LED
RADIO
REBROADCAST LED
PSRNHHCI 2.19.14
*Set in “Horn Ring Program”
3. Horn Ring Standby Tone
6. Alternate Horn Ring Control Option:
(Alternate Horn Ring Control must be enabled).
Custom operation of vehicle horn when pressed.
Refer to figure left for details.
ON = Option 2
OFF = Option 1

1.800.338.7337 / www.soundoffsignal.com
3
Setting PA Volume:
1. PA Volume Control (see Input Settings, 1-3)
If set to “Programmed”
2. Press and Hold Auxiliary Button #1 and #2 until LEVEL #2
and LEVEL #3 LED flashes.
a. Depress and hold PA switch on microphone and press
Pushbutton 1-6 depending on volume required. When
correct volume is determined, press Radio Rebroadcast
and the volume setting will be permanently stored.
If set to “RR Button Adjustable”
3. Momentarily press RR Button to select PA Volume. PA Volume
will be displayed on indicators below RR Button.
1-(LOW)
2
3
4
5-(HIGH)
LOW 2
5
4
3
HIGH
HANDHELD REMOTE
PSRNHHC(x)
PSRNHHCI 2.19.14
Tones Program:
1. Press and Hold Buttons #2 and #5 until Level 1, Level 2 and
Level 3 LEDs flash.
2. Press SIREN button to program the tones (each press of the
SIREN button will advance to next TONE mode). Note:
in operation, each press of the SIREN button will scroll
between the 3 programmed tones.
3. SIREN Mode
SIREN LED: Siren Tone #1
PWR LED: Siren Tone #2
SIREN LED and PWR LED: Siren Tone #3
4. Press Auxiliary Buttons to get required tone
POWER LED SIREN LED HORN LED MANUAL LED CONDITION
ON FLASHING ON ON OVER-TEMPERATURE (380R ONLY)
ON FLASHING OFF ON UNDER-VOLTAGE
ON FLASHING ON OFF OVER-VOLTAGE
ON FLASHING FLASHING - COMM FAULT - RELAY
ON FLASHING - FLASHING COMM FAULT - AMP
ON FLASHING FLASHING FLASHING COMM FAULT -RELAY AND AMP
ON OFF - - STANDBY MODE
OFF ON ON - SPKR 1 IS ACTIVE
OFF ON OFF - SPKR 1 IS NOT-FUNCTIONING
OFF ON - ON SPKR 2 IS ACTIVE
OFF ON - OFF SPKR 2 IS NOT-FUNCTIONING
SIREN AMPLIFIER DIAGNOSTIC
INDICATORS:
LED INDICATOR CONDITION
OFF RELAY OUTPUT IS OFF
ON RELAY OUTPUT IS ON
FLASHING RELAY OUTPUT HAS A FAULT
AUXILILARY AND LEVEL SWITCH LED
INDICATORS:
AUX
BUTTON #4
AUX
BUTTON #5
AUX
BUTTON #6
PRIMARY
SPKR 1 TONE
SECONDARY
SPKR 2 TONE
OFF OFF OFF Disabled Disabled
OFF OFF ON WAIL 1 WAIL 2
OFF ON OFF Yelp 1 Yelp 2
OFF ON ON ALERT A YELP 1
ON OFF OFF Piercer 1 Yelp 1
ON OFF ON HiLo Super HiLo Tone
ON ON OFF Super HiLo Tone Super HiLo Tone
ON ON ON Cycle Tone
(Wail 1, Yelp 1, Alert A, Piercer)
Cycle Tone
(Yelp 1, Alert A, Piercer, Yelp 1)
Tone #1
5. HORN Button:
Press Horn Button and HORN 1 LED will turn ON
Press Auxiliary Buttons to get required tone.
6. Man Button:
Press MAN Button and MANUAL LED will turn ON
Press Auxiliary Buttons to get required tone.
MANUAL BUTTON TONE DURATION
MOMENTARY: When played solo
LATCHED: When played over other tones.

1.800.338.7337 / www.soundoffsignal.com PSRNHHC1 2.19.14
4
Level Switch Mapping:
1. Press Auxiliary Buttons #4 and #5 until RR LED Flashes
2. Press Level 1,2, or 3 switch to select level to be programmed
3. Press Auxiliary Buttons #1-#6 as required. LED ON =
function will turn ON when Level
is active
4. Press siren button for desired tone to be generated for level
Alley Left = Tone 1
Alley right = Tone 2
Alley Left and Right = Tone 3
Setting Backlight/Indicator LED Intensity:
1. Press and Hold Radio Rebroadcast (RR) Button.
2. Then press Aux Buttons 1-6 to select intensity.
1 = Low Intensity
6 = High Intensity
Default - All level #’s produce no tone
AUX
BUTTON #4
AUX
BUTTON #5
AUX
BUTTON #6
PRIMARY
SPKR 1 TONE
SECONDARY
SPKR 2 TONE
OFF OFF OFF Disabled Disabled
OFF OFF ON WAIL 1 WAIL 2
OFF ON OFF Yelp 1 Yelp 1
OFF ON ON ALERT A YELP 1
ON OFF OFF Piercer 1 Yelp 1
ON OFF ON HiLo Super HiLo Tone
ON ON OFF Super HiLo Tone Wail 1
ON ON ON Cycle Tone
(Wail 1, Yelp 1, Alert A, Piercer)
Cycle Tone
(Yelp 1, Alert A, Piercer, Yelp 1)
Tone #2
AUX
BUTTON #4
AUX
BUTTON #5
AUX
BUTTON #6
PRIMARY
SPKR 1 TONE
SECONDARY
SPKR 2 TONE
OFF OFF OFF Disabled Disabled
OFF OFF ON WAIL 1 WAIL 2
OFF ON OFF Yelp 1 Yelp 2
OFF ON ON ALERT A YELP 1
ON OFF OFF Piercer 1 Wail1
ON OFF ON HiLo Wail 1
ON ON OFF Super HiLo Tone Piercer 1
ON ON ON Cycle Tone
(Wail 1, Yelp 1, Alert A, Piercer)
Cycle Tone
(Yelp 1, Alert A, Piercer, Yelp 1)
Tone #3
BUTTON
#4
BUTTON
#5
BUTTON
#6
SPKR 1
TONE
SPKR 2
TONE
OFF OFF OFF HORN 1 HORN 1
OFF OFF ON HORN 2 HORN 2
OFF ON OFF HORN 3 HORN 3
OFF ON ON HORN 4 HORN 4
ON OFF OFF HORN 1 HORN 2
ON OFF ON HORN 2 HORN 3
ON ON OFF HORN 3 HORN 4
ON ON ON HORN 4 HORN 2
HORN BUTTON
BUTTON
#4
BUTTON
#5
BUTTON
#6
SPKR 1 TONE SPKR 2 TONE
OFF OFF OFF WAIL 1 (W/FREQ. DECREASE) WAIL 1 (W/FREQ. DECREASE)
OFF OFF ON WAIL 1 (IMMEDIATE OFF) WAIL 1 (IMMEDIATE OFF)
OFF ON OFF YELP 1 YELP 1
OFF ON ON PIERCER PIERCER
ON OFF OFF ALERT A ALERT A
ON OFF ON HiLo HiLo
ON ON OFF SUPER HiLo SUPER HiLo
ON ON ON WAIL 1 (IMMEDIATE OFF) WAIL 1 (IMMEDIATE OFF)
MANUAL BUTTON (SOLO PLAY ONLY)
This manual suits for next models
2
Other Soundoff Signal Remote Control manuals
