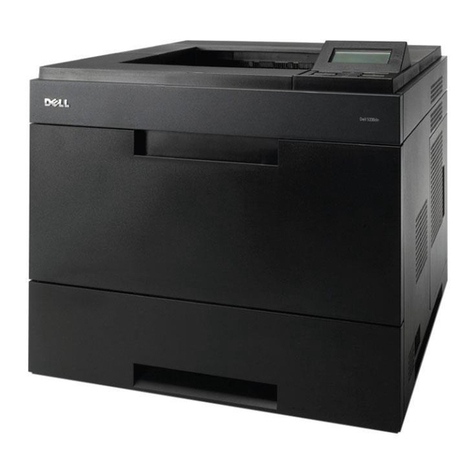
Source Technologies STI MICR ST9335 ST9335 ST9335 User manual

ST9335
Secure MICR Printer
User’s Guide
SourceTechnologies
2910Whitehall ParkDrive
Charlotte,NC 28273
www.sourcetech.com
800-922-8501

Thismanual servesasareferencefor SourceTechnologiesSecureMICRPrinters.Theuser
manualthat shipswithyourprintercontains detailsonprinter setupand operations andshould
beread first.This manualshould beusedasareference forlearning moreabout MICR
technology,and developingMICR printingapplications.Thisguidewasproduced toassist IS
TechniciansandEngineersin theuse SourceTechnologies’programmedprinters withtheir
customMICR applications. Theguide alsocontainsinformation onMICR relatederror
messagesthat postto theoperator panel.
SourceTechnologies
All rights reserved.
WrittenandproducedbySourceTechnologies
July2000 (Updated July2003)
Every effort has been made to ensure that all the information contained in this booklet is
complete and accurate. Changes, typos, and technical inaccuracies will be corrected in
subsequent publications. This publication is subject to change without notice. The
information and descriptions contained in this manual cannot be copied, disseminated, or
distributed without the express written consent of Source Technologies, Inc. No liability,
expressed or implied, will be assumed by Source Technologies, Inc. or its dealers or
affiliates for any damage resulting from use of this information. Additional copies of this
publication can be received through the Marketing Department of Source Technologies.
Allother tradenames orproducts usedinthismanualare foridentification purposesonly and
maybe trademarksorregisteredtrademarksoftheirrespective companies.
©

Table of Contents
1 Printer Installation .......................................................... 1
2 MICR Overview................................................................ 2
The Check Processing System ....................................2
MICR Printing Today.................................................... 2
3 MICR Check Design........................................................ 4
GeneralFeatures ofCheck Design ...............................4
Position and Dimension Gauge.....................................4
Design Elements in Detail ............................................4
Figure 3.1 Sample Check .............................................9
4 Quality Issues .................................................................. 10
PrinterFeatures ............................................................ 10
MICRToner ................................................................... 10
MICRCheck Stock........................................................11
5 Security Issues................................................................ 13
Check StockSecurity Features .....................................13
SecurityNote ................................................................14
6 MICR Features................................................................. 16
MICRMode...................................................................16
MICRFonts...................................................................16
SecureFonts ................................................................ 16
MicroPrint .....................................................................16
Bi-Directional Feedback ............................................... 17
ResourceStorage......................................................... 17
MICRMenu ................................................................... 18
Entering MICR Mode....................................................18
MICRMode Commands................................................20
DES andAES Decryption ............................................. 24
MFP Copy Defeat Commands......................................25
CustomCharacter ConversionCommands ...................26
SpecialAlert and Custom Beep Command ...................27
7 IBM Host Programming Features and Examples ......... 28
HexTransfer..................................................................28
Figure7.1: MICRMode CommandExample .................30
Figure 7.2: Sample Check ............................................31
EscapeCharacterTranslation .......................................33
Secure MICR Printer User’s Guide ©Source Technologies
July 2003 All rights reserved

8 Audit Trail Report ............................................................ 34
ReportDetails...............................................................34
AuditTrailMenu ............................................................ 34
AuditTrail CommandSet ..............................................36
Figure8.1:AuditTrail CommandExample ....................40
Figure8.2:AuditTrail CheckSample ............................ 41
Figure8.3AuditTrailReport..........................................44
9 Error Messages ...............................................................45
MICRError Messages ..................................................46
AppendixA: E-13BMICR FontMapping .................................A1
Appendix B: CMC7 MICR Font Mapping................................A2
Appendix C: Secure Numeric Font Mapping .......................... A3
Appendix D: ICR Secure Numeric Font Mapping................... A5
Appendix E: MICR Mode Command Summary......................A6
AppendixF:AuditReport CommandSummary .......................A7
AppendixG: PJLBased MICRCommands ............................. A8
Secure MICR Printer User’s Guide ©Source Technologies
July 2003 All rights reserved

Secure MICR Printer User’s Guide ©Source Technologies
July 2003 Page 1 All rights reserved
1 PrinterInstallation
Forcomplete informationon howtounpack andsetup yourprinter,see yourprinter’suser’s
guide. Pleaseread thefollowing ifyou aregoing toinstall theprinterdrivershippedwithyour
printer.
1.Locate theCD thatwas shippedwith yourprinter.
Note:If youdonothavea CD-ROMdriveonthehost PC,locateanothercomputer with
aCD-ROM drive,starttheCD-ROM utility,andthen followtheinstructionson thescreen
tocreate printerdriver diskettes.
2. Followthe instructionsin theCD bookletto startthe printersetuputilityappropriate
foryour operatingsystem, i.e.Windows 95,NT,etc. Thesetuputilitywillinstall
printer driverand utilitiesto manageSourceTechnologies printer(s)attachedtoyour
PC or Network.
3. TheSourceTechnologies,inmost cases,assumes theprinter driver
isset totheinternalDEFAULTvalues. The followingDefaultvaluesshouldnot be
changedfor bestoverall printerperformanceand datastream requirementsofthe
STSecureMICR printer.
-PrintResolution undertheGraphicTabshouldbeset totheDefaultvalueof 600
DPI.
-FormSource underthe PaperTabshouldbe setto Defaultvalue ofBy Source.
-PrintQuality andPictureGradeundertheGraphicTab shouldbesettothe
Defaultvalues of UsePrinterDefault.
TheST SecureMICR Printerrequires aPCL5 orPCL5e datastream. Currentlevel
printerdrivers requireGraphic Modeunder theGraphicTab beset toeither Raster
orGL/2. WerecommendRaster. Thisistheonly requirednon-Defaultvaluethat
needsto beset inthe printerdriver.
Amajority ofother driveroptionscanbeset foryour particularrequirements. The most
obviousof thesewould bea PaperTrayselection ifyour applicationusesthePrintDriver
Setting.
Section 1: Printer Installation

Secure MICR Printer User’s Guide ©Source Technologies
July 2003 Page 2 All rights reserved
2 MICR Overview
MICR stands for Magnetic Ink Character Recognition. All MICR documents have a MICR
line with numbers and symbols printed in a MICR font with magnetically chargeable toner.
Each character of the MICR font has a unique waveform when sensed magnetically.
Financial institutions and the Federal Reserve use the MICR line to identify and sort
checks. The high-speed automated processing of checks and other financial documents
depends on the accuracy and the integrity of the data printed in the MICR line. Your new
Source Technologies’ Secure MICR Printer is specifically designed to produce high quality
MICR documents.
The Check Processing System
As a MICR document travels through the check clearing system it is processed an average
of about seven times by high speed reader/sorter machines. Some checks are read up to 30
times or more by these machines. Reader/sorter machines charge the toner in the MICR
line and then read the line with a magnetically sensitive reader.
The MICR line contains numbers and symbols to indicate the check serial number, the
routing number of the drawee institution and the makers’ account number. The institution
of first deposit encodes the check amount in the MICR line to be read by the reader/sorter
equipment. Checks travel through reader/sorters at up to 20 miles-per-hour (2,400
documents per minute) with each MICR line read in three hundredths of a second.
MICR Printing Today
Congress established the Federal Reserve System (FRS) in 1913. Today most commercial
banksin theUnited Statesbelong totheFRS. Manyotherdepository institutionsprovide
banking and checking account services to the public. These other institutions, such as
some credit unions, savings and loan associations and nonmember banks, are not formally
part of the FRS. However, they have access to the payment services it provides and are
subject to many of the FRS regulations.
In 1958, because of the explosive growth of check usage, the American Bankers
Association selected the E-13B MICR font and the MICR system as the technology for
high-speed check processing. Today, check standards are determined by the American
NationalStandards Institute(ANSI) AccreditedStandards Committee(ASC) X9Bof which
Source Technologies is a voting member. The latest versions of the standards and
technicalguidelines areavailablefromGlobalEngineering Documents.
HardcopyStandards SoftcopyStandards
GlobalEngineering Documents X9 Electronic Bookstore
Phone 800-854-7179 or 303-397-7956 www.x9.org -click ESS
Fax 303-397-2740 www.ansi.org -click ESS
http://global.ihs.com http://webstore.ansi.org
Section 2:MICROverview

Secure MICR Printer User’s Guide ©Source Technologies
July 2003 Page 3 All rights reserved
Thekey standardsthat addresscheckdocuments areas follows:
ANSI X9.7 Specifications for Bank Check Background and Convenience Amount Field
ANSI X9.13 Specifications for Placement and Location of MICR Printing
ANSI X9.18 Paper Specifications for Checks
ANSI X9.27 Print and Test Specifications for Magnetic Ink Character Recognition (MICR)
Section 2:MICROverview

Secure MICR Printer User’s Guide ©Source Technologies
July 2003 Page 4 All rights reserved
3 MICRCheckDesign
General Features of Check Design
To be a legal and negotiable document, the necessary elements required on a check are
the date, amount, payee, drawee institution, and payer’s signature.
Other elements included in a good check design are: the amount in words, account title,
check serial number, fractional routing number and MICR line.
A good check design contains security features and is formatted to be easily read by both
machines and the human eye. If the format is complicated, the depositor, bank employee
or reader/sorter machine may make an error in reading the data.
Position and Dimension Gauge
AMICR positionanddimension gauge(Source Technologies’partnumber 205-1000MGEor
220-M1027-34)isanimportanttool foruse indesigning checks. Duringcheck design,check
youroutput againstthis gaugeto determineifthedataelements arecorrectly positionedon
yourdocument.
Design Elements in Detail
Paper
Theideal paperforcheckproductionis24lb. laserbond. Our MICRlab hastested
paperstock frommost majormanufacturers andhas compiledalistofproducts that
producesuperior results. Contactyour salesrepresentativeforthisinformation. For a
fee,SourceTechnologies willtest yourpaperfor properMICR adherenceandcheck
reader/sorterperformance. There arealso manysecurityfeaturesavailableto aidin
theoverall securityofyourMICR documents. SeeChapter 3formore informationon
checkstock specificationsand securityfeatures.
Size
Thesize ofcheckdocumentsmustbe:
Between6.00 inchesand 8.75inchesinlength
Between 2.75 inches and 3.66 inches in height
We recommend standard 8.5" X 11" letter size stock or 8.5" X 14" legal size stock for
properfeeding throughyour STSecure MICRPrinter.The numberof checksperpage
isdetermined byyour application. Customsize stockother thanletter orlegal canbe
donewith properplanning andapplication programmingwithinthepapersize
specificationsfor thebase printer.
Section3: MICR Check Design

Secure MICR Printer User’s Guide ©Source Technologies
July 2003 Page 5 All rights reserved
Duplexing
Wedo notrecommend printingonbothsidesof thepaper (duplexing)when printing
checks. MICRtoner onthe backof acheck cancause readfailures intheMICRLine.
Orderyour checkstockwithanynecessary informationpreprintedontheback. If
duplexis necessary,we suggesta moreaggressive testplan bedeveloped toensure
printquality consistentlyconformsto theANSI/ABAspecifications.
MICR Clear Band
TheMICR clearband isanareaatthe bottomof thecheckwheretheMICR lineprints.
Noother magneticprinting shouldappear inthis areaon boththe fontandbackof
document. Theclear bandis anarea 0.625(5/8) incheshigh fromthe bottomofthe
checkrunning theentirelengthofthe check. ExactMICRlineplacementin thisareais
veryimportant. See Figure3.1 formoreinformation onMICR lineplacement.
Data Elements
Date
Thedate isa requireddata elementfor acheck. Itrepresents theday onor afterthe
transferof thecheckamountmaytake place. Itisusually placedin theupperright
portionof thecheck soitdoes notinterfere withtheconvenienceamountfield. The
commonformat isMonth,Day andYear,however,the militaryformat ofDay,Month and
Year is also acceptable.
Amount
Theamount ofthecheckisa requiredelement. Theamount usuallyappears atleast
twiceon thecheck. Theamount printedinnumbers iscalledtheconvenienceamount.
Theamount printedin wordsis sometimesreferred toas thelegal amount,since thisis
theamount thatapplies ifthereisadifference betweenthe twoamountfields. The
amountmay alsobe printeda thirdtime onthe checkin asecure font,intended tomake
alterationof theamount fielddifficult.See Chapter5 andAppendixC forinformation on
SourceTechnologies’SecureNumeric Font.
Convenience Amount
Theconvenience amountlocation isspecified inANSI X9.7. Thebasic locationis
illustratedin Figure3.1. Sincethis amountcanbemachinescanned, itslocation and
design should be kept within the specifications. The amount beginning with the
dollar sign should be left justified within the scan area with numbers spaced normally
to the right. The dollars and cents should be separated by a decimal point with the
cents printed in the same size font as the rest of the field. Embedded commas
should not be used. The convenience amount background should have good
reflectance so it does not interfere with optical scanning (see ANSI X9.7).
Theconvenience amountshouldbeprintedin asimple,fixedpitchfont. Werecommend
ourICR SecureNumericFont (seeAppendix D). Itwas designedto beeasily readby
Section 3: MICR Check Design

Secure MICR Printer User’s Guide ©Source Technologies
July 2003 Page 6 All rights reserved
imagecapture equipmentandisalsoafrauddeterrent. Afixed pitchcourier font,or if
availableOCR-B, arealsoacceptablefontsto printtheconvenienceamount.
Note:TheSource Technologies’Secure NumericFont (seeAppendix C)should notbe
usedin theconvenience amountsinceitisnot amachine readablefont.
Amount In Words
Theamount inwords(sometimes calledthe legalamount)is normallylocatedeither
above or below and to the left of the convenience amount. The area for the amount
in words should be entirely filled to make alteration difficult. The amount should start
at the far left of the line with the words placed immediately adjacent to each other.
The cents need not be written out. They may be expressed as a fraction (60/100),
and should be placed immediately to the right of the dollar amount and followed by a
line or other space filler to inhibit alteration.
Example: One hundred forty-four and 62/100---------------DOLLARS
Given the available area on the document, you may need to use a smaller font when
printing larger value amounts.
Payee Area
Thepayee isa necessaryelement fora negotiabledocument. The payeearea is
generally to the left side of the document either above or below the amount in words.
It is often preceded by the words “Pay to the Order Of.” The payee data should not
enter the MICR clear band which extends 5/8 of an inch above the bottom of the
check.
Signature Area
Asignature isa requiredelement fora negotiabledocument. The signatureor
signatures authorize the bank to honor the check; therefore, it must match the
bank’s records. The signature area should be beneath the convenience amount area
but the signatures should not enter the convenience amount area nor the MICR
clear band. This is especially true if you print the signature with MICR toner.
We recommend using our MicroPrint font for the signature line as a fraud deterrent.
Information on how to utilize this font is in section 5: MICR Features.
Drawee Institution Name
Thename ofthe institutionwhere themaker’s accountis locatedis referredto asthe
draweeinstitution. The bank’sname,city, andstateare required.
Section 3: MICR Check Design

Secure MICR Printer User’s Guide ©Source Technologies
July 2003 Page 7 All rights reserved
Account Title
Theaccount titleisnormally printedinthe upperleftcornerofthe check. Itincludesthe
nameof theaccountholderand otherinformation suchasaddresses, telephone
numbers,and logos. Thedata inthetitleshouldbe legibleand sufficientlycomplete so
thatif theMICRdataaccountnumber isdestroyed,thedraweeinstitution canreferto
theaccount titleinorder totracethe accountnumber.
Memo Line
Thisline islocated inthe lowerleft quadrantof thecheck, andis notrequired. Data
printedhere doesnot containany legalsignificance. Printing inthis areawith magnetic
tonershould notextenddownwardintothe MICRclearbandwhichis 5/8ths ofan inch
abovethe bottomof thecheck.
Check Serial Number
Thecheck serialnumberisgenerallyprinted intheupperrightquadrant ofthecheck.
Althoughthe checknumberisnotrequired forthe checktobe negotiable,the account
holderand financialinstitutionusethese numbersto reconcilestatementsand stop
payments. Thecheck serialnumber shouldalso appearasecond timein theMICR
line,and thesenumbersshould match.Thenumberofdigits inthecheck serialnumber
iscontrolled bythefinancialinstitutionand theMICRline format.Consultyour banking
institutionfortheirrequirements.
Fractional Routing Number
Thefractional routingnumbershould beprinted inafractional formatintheupperright
quadrantof thecheck. This numberis assignedto identifythe FederalReserve District
anddrawee institution.Consultwith yourbankfor theproperrouting numberandformat
foreachofyour accounts.
MICR Line
Accuratehigh-speedprocessingof yourchecks byfinancial institutionsisenabledby
theaccuracy andintegrity ofthedatainthe MICRline. Refer tofigure3.1 forthe
locationof thefollowing MICRlinefields. The MICRline isreadfromrightto leftwith
positionone beingthe rightmost positionproceeding toposition sixty-fiveon theleft.
TheMICR linemustbe printedatexactlyeightcharacters perinch.
Auxiliary On-Us Field Positions 65 to 45
Thisfield usuallycontainsthecheckserial numberforcommercialsizechecks and
possiblyaccount controlinformation. Itis boundedbyOn-Us symbols.(;).Itis not
includedon personal,smallsize checks.
External Processing Code (EPC) Field Position 44
Thisone digitfield isposition 44of theMICR line. Thisfield isusually leftblank. The
use of this field is controlled by theASC X9B Standards Committee.
Section 3: MICR Check Design

Secure MICR Printer User’s Guide ©Source Technologies
July 2003 Page 8 All rights reserved
Routing Field Positions 43 to 33
Therouting fieldis boundedbyTransit Symbols(:)inpositions43 and33. It
containsfixed formatinformationabout thedraweeinstitution. Consult withyour
bankfor thespecificdatafieldto beplaced herefor eachof youraccounts.
On-Us Field Positions 32 to 14
TheOn-usfieldcontainsthemakers’accountnumber.Thestructure andcontentof
thisfield isleft tothe draweebank. On personalchecks thisfield alsocontains the
checkserial numbers. TheOn-Us fieldmaynot consistof morethan19 characters.
AnOn-Us (;) symbolmustappear immediatelytothe rightoftheaccountnumber.
Blank Field Position 13
Position13 isalways leftblank.
Amount Field Positions 1 to 12
Theamount fieldis therightmostfieldin theMICR line. Itremainsblankuntilit is
printedby thebank offirstdeposit. Whenthecheck entersthe bankingsystem,the
bankof firstdeposit encodesthis fieldfrom datain theconvenienceamountfield. It
willbe boundedbyAmount Symbols(/).
Section 3: MICR Check Design

Secure MICR Printer User’s Guide ©Source Technologies
July 2003 Page 9 All rights reserved
Figure 3.1: Sample Check
A. Serial Number: Mustbe inthe upperrightcornerandmatch theserial numberin theMICR
line(see Dforfurtherexplanation).
B. Fractional Routing Transit Number: Shouldbe inthe upperright cornerand mustmatch
the routing transit number in the MICR line with the exception of the state prefix number
(ex. 66 = NC, 67 = SC, 64 = GA, etc.) and the preceding zeros.
C. Bank Name, State, City: The bank logo is optional. Name of bank, city and state
where the account will be assigned/opened is a required field.
D. Aux On Us (46-55): This is a required field if the customer desires services offered by
the bank which require a serial number. The serial number format is controlled by the
payor’s bank. A& D should match.
E. Routing Number (34-42): Designates the Federal Reserve district and financial
institution. Each city, state or region that the bank serves has a unique institution
identifier. IMPORTANT: positions 35-42 is the Routing Number, position 34 is the
check digit.
F. Account Number: Thisis aunique numberassigned tothecustomer’s account.
G. Optional Serial Number: Used for personal accounts (checks only). A 4 digit zero
filledfield thatshouldmatch theserialnumber intheupperrightcorner.
H. Convenience Amount Area shouldbe inthe generallocation shownabove inthe
diagram. Theillustrated boxin thediagram isoptional andif used,should conformto ANS
X9.7. A single stroke dollar sign is required.
Section 3: MICR Check Design

Secure MICR Printer User’s Guide ©Source Technologies
July 2003 Page 10 All rights reserved
4 Quality Issues
A high quality MICR document can be read by bank reader/sorter equipment many times
with no readability issues and does not result in damage to bank equipment. This quality is
the result of a well designed printer, an originally manufactured MICR toner cartridge and
high quality check stock.
Printer Features
YourSecure MICRPrinter isequippedwith somefeaturestoensure highquality MICR
documents.
Paper Type
Werecommend papertrayswithcheckstockbeset to“bond” papertype. The
associated“weight” and“texture”settingsshouldbe setto“heavy”and“rough.” See the
baseprinters User’sGuide. Ifmorethanone inputtray hascheck stockandtheyare
thesame stock,set allto “bond”and theywill belinked. If differentstock isused in
morethanoneinput tray,use“custom” type,“rough”and “heavy”toblock Linking.
MICR Toner Low Alarm
When MICR toner is low, the printer stops and the user is prompted to load a new
MICR toner cartridge. We do not recommend shaking the cartridge to prolong its
life. Once low toner is sensed, there may not be enough MICR toner left to produce
quality MICR documents.
MICR Toner Sensing
Whenthe printerenters MICRmodeand attemptsto printaMICRfont,it checksto
ensurea MICRtoner cartridgeis loadedin theprinter. Ifa regularcartridge ispresent,
analarm willsound andthe usermustloadaMICR cartridgebefore theirprint jobwill
resume. Amessage “loadMICRToner” willappear ontheOperator’sPanel.
MICR Toner
Useonly SourceTechnologiesMICRtonerwhenprintingMICRdocuments. Itis specifically
engineeredto printqualityMICR documentswithyourprinter.The printers’MICR tonersensor
isdesigned towork withthe SourceTechnologies MICRtoner cartridgetopreventprinting
checkswith regulartoner present.Youmaychoosetouse thisprinter forgeneraloffice
printing,which isacceptable. If aMICR printjobbeginsandthe printerhas aregular toner
cartridgepresent, theprinter willstop andpromptthe operatorto installa MICRtoner
cartridge.
Source Technologies does not recommend the use of refilled MICR toner cartridges.
Although refilled cartridges are generally less expensive, they may result in expensive
printerrepairs andbank checkrejectfeesdueto inferiorMICR tonerformulation.
Section 4: Quality Issues

Secure MICR Printer User’s Guide ©Source Technologies
July 2003 Page 11 All rights reserved
MICR Check Stock
Checkstock hasalarge impacton theresultingquality andsecurityofyourMICR document.
Hereare afewfeaturesthatshouldbeconsidered whenselecting acheck stock. Pleasesee
Chapter4 formore informationoncheckstocksecurity features.
Quality
QualityMICR checkprintingwith yourSTSecureMICR Printerrequirescheckstock
that matches the printer’s requirements. Source Technologies can supply paper
specifically made for our printers. If you wish to order check stock from other
suppliers, please show the following requirements to your sales representative. We
willtest othersuppliers’ paperfor anominal fee.
Layout
Layoutyour checkdesign beforeanypaperispurchased orlayout yourdesignto
existing check stock. Keep in mind, perforations, orientation, special logos and any
color elements. The printer can print just about anything as long as it is black.
Weight
We recommend 24 lb. - 29 lb. paper.
Stiffness
Werecommend taberM.D. 2.5and C.D.1.1minimum.
Smoothness
Forbest tonerfusing,werecommendrougher surfaceswithinthebaseprinters’
specifications and the Paper Specifications for Checks X9.18. We recommend a
smoothnessrange of150to200-Sheffield.
Paper Grain Direction
Whenusing 24lb. -29 lb.bond paperwe generallysupport eitherlongorshortpaper
grain. Overallperformance inthebanksreader/sorters isbest whentheresultant grain
directionis leftto rightwhenviewing thecheck.
Perforations
Allperforations inthe stockshouldbeMicro-Perfs(20ormorecutsperinch). Larger
perforationscan produceexcessive paperchaff andresult indamagetothetoner
cartridge. Perforationsshould beironed bythe papersupplier toreduce nestingand
potentialdouble feeding.
Section 4: Quality Issues

Secure MICR Printer User’s Guide ©Source Technologies
July 2003 Page 12 All rights reserved
Moisture
Thepaper moisturecontentshouldbebetween 4.7and 5.5%. Storage conditionshave
muchto dowith thefinal moisturecontent ofmost papers. Storeyour checkstock ina
cool,dry, environmentallystableand securearea. Protective wrappingsshouldbe
removedjust priortouse.
Section 4: Quality Issues

Secure MICR Printer User’s Guide ©Source Technologies
July 2003 Page 13 All rights reserved
5 Security Issues
Printing negotiable documents from blank paper on desktop MICR laser printers makes
security a top priority for any company embarking on a desktop check printing project.
Good security programs integrate hardware, software, your employees and your financial
institution into a secure check production system. Recent changes relative to the
responsibilities of banks and their customers have a bearing on the ultimate liability for
fraudulent documents. Customers must have systems designed and documented to show
“Ordinary Care and Good Faith Effort” is in place to avoid liability. In the past, financial
institutions generally credited corporations when fraud was discovered. New regulations
attempt to define who may have been negligent in the transaction and put the liability on
that party or parties. Clearly, if a fraudulent occurrence can be traced to a corporation’s
lack of security procedures, or the design of their negotiable documents, the regulations will
protect the banks, or at best case the loss will be shared.
Check Stock Security Features
We have found the following check stock security features to be of merit:
Artificial Watermarks - White on white printing generally on the back reveals words
or patterns when held at an angle. You should state on the front of the check that
this feature is present. It cannot be copied.
Laid Lines -Evenlyspacedbackground linesthat makecut andpaste alteration
difficult.
Void Pantograph - Background printing of the word VOID or COPY which appears
on photocopies. Some paper suppliers offer enhanced versions of pantographs
whichprovide moreprotection fromthelatestincolor copiertechnology.
Chemical Additives -Ifaninkeradicator(bleach,acetone,etc.)isappliedto the
document,the eradicatorcreates apermanentstain.
Numbered Check Stock - Sequential numbering printed in dye that penetrates to
thereverse sideofthecheckcan beusedtoverifyauthenticity. This numbermaynot
relateto thecheck serialnumber. Thisalso providesforinventory controlof blank
checkstock.
NOTE: These quality issues serve as a general guide for check production. You should not
consider these features as an all inclusive list. We recommend consulting with your local
paper supplier for any additional comments or suggestions.
Section 5: Security Issues

Secure MICR Printer User’s Guide ©Source Technologies
July 2003 Page 14 All rights reserved
Security Note
Checkfraud inthe UnitedStates isa continuingproblem.Wehaveattempted toidentify
security features that can be incorporated into the base check stock. However, these may
not prove 100% fraud preventative. Over time, technology will continue to develop new and
improved measures to address check fraud.
The following internal and external security measures will help minimize your risk of check
fraud.
1. Financial institutions should train tellers to look at the check, not the person
presenting the check. The check, not the person, is the item that must be verified.
2. Firms accepting checks should be aware of damaged MICR lines. Intentionally
damaging the MICR line can increase the time necessary to process an item, giving
the forger enough time to leave town. Also be sensitive to discoloration, this could
be an indication of alteration.
3. Incorporate security features into your base check stock and utilize printed
security features that address both alteration and counterfeiting of original items. A
short list of these features would be:
• Warning Bands, or other methods that alert recipients to visual security
features;
• Artificial or genuine watermarks in the base paper;
• Chemical additives in the base paper that react to chemical alteration
attempts;
• Void Pantographs that address attempts to copy original items;
• Unique security fonts that deter attempts to alter payee or amount
information.
4. When generating final negotiable items,
• The document always includes the amount value in words;
• The document should not include information that limits the value range, i.e.
“Not valid over $500.” This only guides the fraudulent attempt. Use your
application software to detect out of range items;
• All levels of hardware and software password protection should be utilized.
5. Safeguard check stock paper, and limit access only to necessary employees.
6. Understand and approve the security procedures of your check stock suppliers to
safeguard stock in their custody.
7. Use “Positive Pay” check services from your financial institution that match check
number and dollar amounts to known information. Financial institutions should
encourage full participation of corporate clients.
Section 5: Security Issues

Secure MICR Printer User’s Guide ©Source Technologies
July 2003 Page 15 All rights reserved
8.Movemethodsof frauddetection totheitem’spointof entryinto theclearingsystem.
Forexample, lowcost readerscandetect lowmagnetic strengthinthe MICRline which
is a good indication of attempts to copy an original.
9. Always verify the home address and place of employment of new account
applicants. Use public sources such as phone books to verify phone numbers. Ask
new account applicants why they are opening an account with your institution. Be
suspect of unusual answers or delays in responding.
10. Stay abreast of current check fraud methods and the latest in fraud detection.
Offer seminars to educate corporate clients.
11. Review and document your internal negotiable document printing procedures.
Investigate employee backgrounds before assigning security authority. Split
responsibilities, for example, an accounts payable production/security officer should
not also balance the account.
Section 5: Security Issues

Secure MICR Printer User’s Guide ©Source Technologies
July 2003 Page 16 All rights reserved
6 MICR Features
Source Technologies’ Secure MICR Printers are designed to allow both general office
document printing and secure MICR document printing. You may print a variety of
conventional jobs with regular Lexmark toner using all of the printer features available such
as MarkNet and MarkVision network attachment interfaces and network printer utilities.
Theseprinterscome standardwith HPPCL5, PCL6and PostScript Level2 emulationsand
others. SourceTechnologieshas designedfeaturestoenhance theseprinters withMICR
modespecific operationthatallowsyouto securelyprinthighqualitynegotiable documents.
MICR Mode
Your Secure MICR Printer has two operational states: normal and MICR mode. When the
printer is in normal printing mode your MICR resources cannot be accessed. Once the
printerenters intoMICR modeyoursecure resourcesare availableandthe printerstarts the
processof confirmingreadiness toprint anegotiable document. Thereare twoconditions
whichmust bemet beforeMICR modeis activated:
If the front panel combination lock feature is activated, the correct eight digit
combinationmust beenteredfrom thefrontpanel.
The correct password command must be received by the printer from the software
application prior to printing any MICR documents.
MICR Fonts
The E-13B and CMC7 MICR fonts are resident in your printer. Examples of these fonts are
in the Appendix of this manual. They can only be accessed after MICR mode is activated
byyour software. AMICRtonercartridge mustbe presenttoprint theMICRfonts.
Secure Fonts
Two Source Technologies designed secure fonts: Secure Numeric Font and ICR Secure
Numeric Font are resident in your printer. Examples of these fonts are in the Appendix of
this manual. Like the MICR fonts, these secure fonts can only be accessed after MICR
mode is activated by your software.
The ICR Secure Numeric Font is designed for the convenience area of your check. It can
be read by the imaging equipment used by many financial institutions. The Secure
Numeric Font should not be used in this area since the reverse image aspect of this font
prevents it from being read by this equipment. We recommend using both of these fonts
on your checks as they are designed to deter check fraud.
MicroPrint
YourSecure MICRPrinter alsocontainstheMicroPrintfont. MicroPrint istextlessthan.010”
tall. Itcaneasily beread withamagnifying glassbut appears tobe asolid line toan unaided
Section 6: MICR Features
Table of contents
Other Source Technologies Printer manuals
Source Technologies
Source Technologies STm.117w User manual
Source Technologies
Source Technologies ST9817 User manual
Source Technologies
Source Technologies STm.57w User manual
Source Technologies
Source Technologies ST9510 User manual
Source Technologies
Source Technologies STm.117b User manual
Source Technologies
Source Technologies ST9612 User manual
Source Technologies
Source Technologies ST9530 User manual
Source Technologies
Source Technologies ST9720 User manual
Source Technologies
Source Technologies ST9822 User manual
Source Technologies
Source Technologies SECURE MICR PRINTER ST9630 User manual
