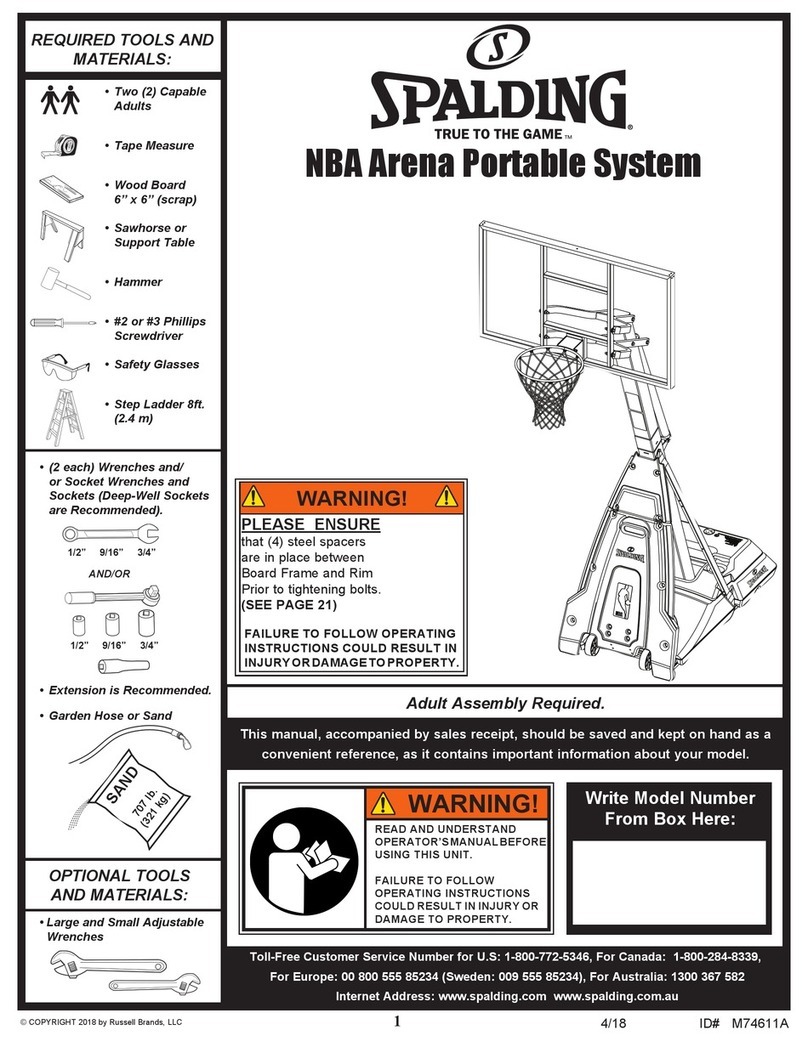
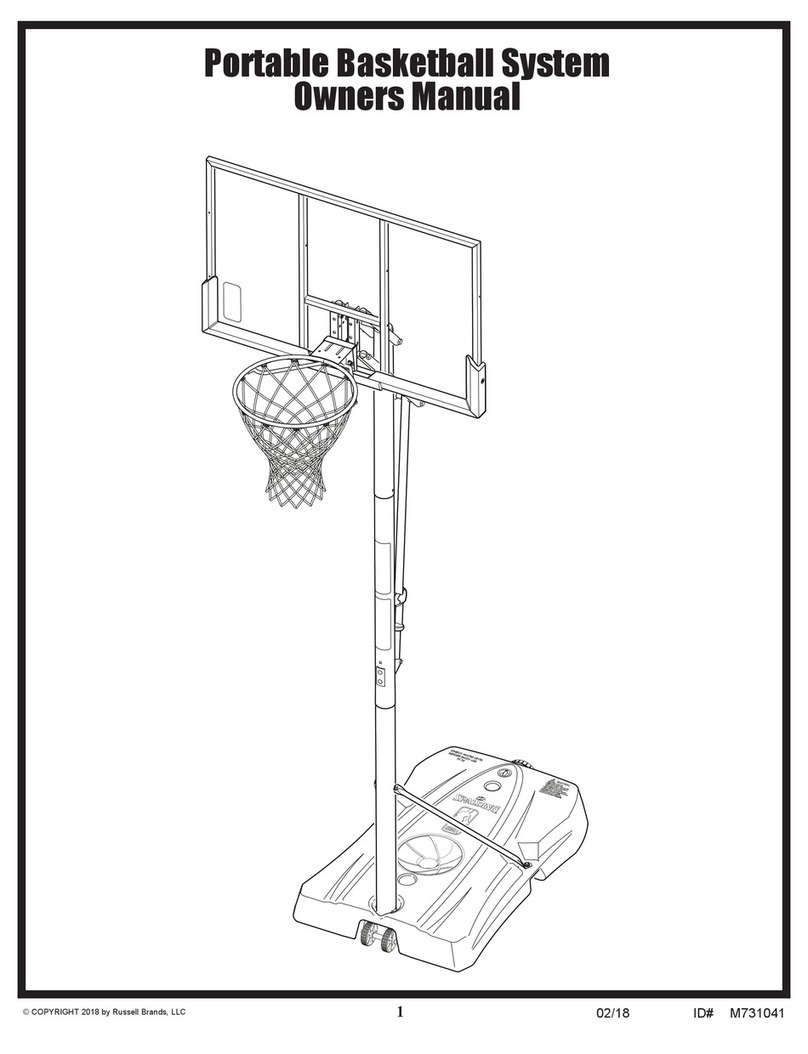
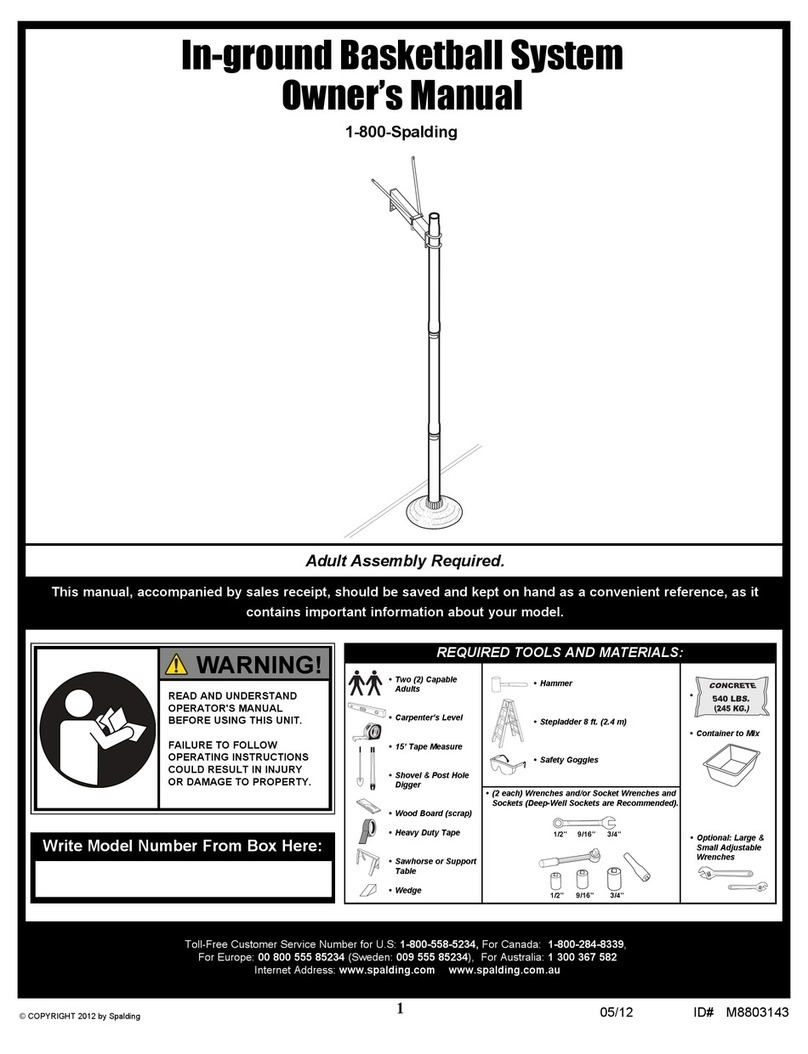
SPALDING M886548 User manual

110/18 ID# M886548
© COPYRIGHT 2018 by Russell Brands, LLC
In-Ground Basketball System
Owners Manual
Im Boden verankertes Basketballsystem
Benutzerhandbuch
Sistema de baloncesto de piso
Manual del Propietario
Système de basket-ball à fixation dans le sol
Manuel d’utilisation
Para la última información de garantía del sistema de baloncesto
Por favor visite el sitio web de Spalding Basketball en www.Splading.com
Póngase en contacto con servicio al cliente de Spalding en teléfono # 1-800-558-5234
Système de basket-ball dans le sol
Propriétaires Manuel garantie
FRANÇAIS
DEUTSCH
ESPANOL
ENGLISH

2
Write Model Number From Box Here:
Inscrivez ici le numéro de modèle qui apparaît sur la boîte :
Die Modellnummer vom Verpackungskarton hier eintragen:
Escriba aquí el número de modelo que se encuentra en la caja:
This manual, accompanied by sales receipt, should
be saved andkept on hand as a convenient reference,
as it contains important information about your model.
Ce manuel, accompagné du justificatif d’achat, devra être conservé pour
référence ultérieure, dans la mesure où il contient
des informations importantes sur votre modèle.
Diese Anleitung sollte zusammen mit dem Kaufbeleg griffbereit
aufbewahrt werden, da sie wichtige Informationen über Ihr Modell enthält.
Debe conservar este manual junto con el recibo de la compra y tenerlo
disponible como conveniente referencia, ya que contiene información
importante sobre su modelo.
WARNING!
AVERTISSEMENT!
WARNUNG!
¡ADVERTENCIA!
READ AND UNDERSTAND OPERATOR’S
MANUAL BEFORE USING THIS UNIT.
FAILURE TO FOLLOW OPERATING
INSTRUCTIONS COULD RESULT IN INJURY
OR DAMAGE TO PROPERTY.
LISEZ LE MODE D’EMPLOI
AVANT D’UTILISER CE SYSTÈME
SOUSPEINED’ENCOURIRDESBLESSURES
OU DES DÉGÂTS MATÉRIELS.
DAS BENUTZERHANDBUCH VOR
GEBRAUCH DIESES PRODUKTS
SORGFÄLTIG DURCHLESEN.
EIN MISSACHTEN DIESER
BETRIEBSANLEITUNG KANN
VERLETZUNGEN ODER
SACHSCHÄDEN ZUR FOLGE
HABEN.
LEA Y ENTIENDA EL MANUAL DEL
OPERADORANTESDEUSAR ESTA UNIDAD.
SI NO SE SIGUEN LAS
INSTRUCCIONES DE OPERACIÓN SE
PODRÍAOCASIONARUNALESIÓNODAÑOS
A LA PROPIEDAD.
PLEASE ENSURE
that (4) steel spacers are in place between board fFrame and rim prior to tightening bolts.
FAILURE TO FOLLOW OPERATING INSTRUCTIONS COULD RESULT IN INJURY OR DAMAGE TO PROPERTY.
(SEE PAGE 17)
VEUILLEZ VOUS ASSURER
Que (4) entretoises en acier sont en place entre la carte du châssis et de la jante avant de serrer les boulons.
OMISSION DE SUIVRE LES INSTRUCTIONS D’UTILISATION EST SUSCEPTIBLE D’ENTRAÎNER DES BLESSURES OU DES DOMMAGES À LA
PROPRIÉTÉ. (VOIR PAGE 17)
BITTE STELLEN SIE SICHER
(4) Distanzstücke aus Stahl sind in zwischen Board und Rim Vor dem Anziehen der Schrauben.
FAILURE TO FOLLOW OPERATING INSTRUCTIONS COULD RESULT IN INJURY OR DAMAGE TO PROPERTY.
(SIEHE SEITE 17)
POR FAVOR
(4) los separadores de acero están en su lugar entre la Junta y llanta, antes de apretar los tornillos.
SI NO SE SIGUEN LAS INSTRUCCIONES DE FUNCIONAMIENTO PODRÍA RESULTAR EN LESIONES O DA—OS
A LA PROPIEDAD. (Consulte la página 17)
WARNING! / AVERTISSEMENT ! / WARNUNG! / ¡ADVERTENCIA!

3
Toll-Free Customer Service Number for U.S: 1-800-558-5234, For Canada: 1-800-284-8339, For Europe: 00 800 555 85234
(Sweden: 009 555 85234), For Australia: 1300 367 582, Internet Address: www.spalding.com www.spalding.com.au
Numéro sans frais du service clientèle (États-Unis) : 1-800-558-5234 ; Canada : 1-800-284-8339 ; Europe : 00 800 555 85234
(Suède : 009 555 85234), Pour l’Australie : 1300 367 582 - Site Internet : www.spalding.com www.spalding.com.au
Gebührenfreie Kundendienstnummer für Anrufer in den USA: 1-800-558-5234
Für Anrufer in Kanada: 1-800-284-8339 Für Anrufer in Europa:
00 800 555 85234 (Schweden: 009 555 85234) Für Australien: 1300 367 582
Internet-Adresse: www.spalding.com www.spalding.com.au
Número telefónico gratuito de servicio al cliente en EE. UU.: 1-800-558-5234, para Canadá: 1-800-284-8339,
para Europa: 00 800 555 85234 (Suecia: 009 555 85234), para Australia: 1300 367 582
Dirección en Internet: www.spalding.com www.spalding.com.au
Adult Assembly Required.
Assemblage exclusivement réservé à un adulte.
Zusammenbau nur durch Erwachsene ALLE Verpackungsmaterialien sofort wegwerfen.
Il montaggio va eseguito da persone adulte.
REQUIRED TOOLS AND MATERIALS:
•3CapableAdults
•15’TapeMeasure
•WoodBoard(scrap)
•Carpenter’sLevel
•(2)Stepladders8ft.
(2.4m)
•PhillipsScrewdriver
•(1)UtilityKnife
•Shovel&Post
Hole Digger
•SafetyGoggles
•
•ContainertoMix
•Optional:Large&
Small Adjustable
Wrenches
•(2each)Wrenchesand/orSocket
WrenchesandSockets(Deep-
WellSocketsareRecommended).
1/2”3/8” 9/16” 3/4” 15/16”
1/2”3/8” 9/16” 3/4” 15/16”
Concrete
1250 LBS
(567 KG)

4
OUTILS ET MATÉRIEL
REQUIS:
•Deuxcléset/ouclésàdouilleset
deuxdouilles(douilleslongues
recommandées).
•Uneextensionestrecommandée.
•Petitesetgrandesclésanglaises
OUTILS ET MATÉRIEL
FACULTATIFS:
•
Trois (3) adultes capables
•Mètre
•Plancheenbois(chute)
•Niveauàbulle
•(2)Échellede2,4m
•
Tournevis cruciforme
•Pelleetbêchetarière
•Lunettesdesécurité
•Récipient pour mélanger
BENÖTIGTEWERKZEUGEUND
MATERIALIEN:
•(je2)Schraubenund/oderSteckschlüssel
(tiefeEinsätzeempfohlen).
•Verlängerungwirdempfohlen
•Großeundkleineverstellbare
Schraubenschlüssel
WEITERENÜTZLICHE
WERKZEUGEUNDMATERIALIEN:
•
Drei (3) zur Ausführung dieser
Arbeit fähige Erwachsene
•Maßband
•Holzstück(Ausschuß)
•Wasserwaage
•(2)Stufenleiter,2,4m(8Fuß)
•
Kreuzschlitzschraubenzieher
•SchaufelundErdlochbohrer
•Schutzbrille
HERRAMIENTAS Y
MATERIALES REQUERIDOS:
•(2decadauna)llavesdetuercasy/o
llaves de tuercas de boca tubular
ycasquillos(serecomiendan
casquillosprofundos).
•Serecomiendaunaextensión
•Llavesdetuercasajustables
grandes y pequeñas
HERRAMIENTAS Y
MATERIALESOPCIONALES:
•
Tres (3) adultos capaces
•Cintademedir
•Tablademadera(un
trozo)
•Niveldecarpintero
•(2)Escalerademanode
8 pies (2.4 m)
•
Destornillador Phillips
•Palayexcavadordel
orificio para el poste
•Gafasdeseguridad
ET/OU
UND/ODER
Y/O
Béton
567 KG.
1250 LBS.
•Behälter zum Mischen
Beton
567 KG.
1250 LBS.
•Recipienteparamezclar
Concreto
1250 LIBRAS
(567 KG)
1/2”3/8” 9/16” 3/4” 15/16”
1/2”3/8” 9/16” 3/4” 15/16”
1/2”3/8” 9/16” 3/4” 15/16” 1/2”3/8” 9/16” 3/4” 15/16”
1/2”3/8” 9/16” 3/4” 15/16”
1/2”3/8” 9/16” 3/4” 15/16”

5
SAFETY INSTRUCTIONS
Most injuries are caused by misuse and/or not following instructions.
Use caution when using this system.
•Ifusingaladderduringassembly,useextremecaution.
•Three(3)capableadultsarerecommendedforthisoperation.
•Seatthepolesectionsproperly.Failuretodosocouldallowthepole
sections to separate during play.
•Beforedigging,contactutilitycompanytolocateundergroundpower
cables, gas, and water lines. Ensure there are no overhead power
lines within 20 ft. (7 m) radius of pole location.
•Climate,corrosion,excessiveuse,ormisusecouldresultinsystem
failure.
•Iftechnicalassistanceisrequired,contactCustomerService.
•Minimumoperationalheightis6’6”(1.98m)tothebottomof
backboard.
•ThisequipmentisintendedforhomerecreationaluseonlyandNOT
excessive competitive play.
•Readandunderstandthewarninglabelaffixedtopole.
•Thelifeofyourbasketballpoledependsonmanyconditions.The
climate, placement of the pole, the location of the pole, exposure to
corrosives such as pesticides, herbicides, or salts are all important.
•Adultsupervisionisrecommendedwhenadjustingheight.
•Seriousinjurycouldoccurifteeth/facecomeincontactwith
backboard, net, or rim.
FAILURE TO FOLLOW THESE SAFETY INSTRUCTIONS MAY RESULT IN SERIOUS
INJURY, PROPERTY DAMAGE AND WILL VOID WARRANTY.
Owner must ensure that all players know and follow these rules for safe operation
of the system.
To ensure safety, do not attempt to assemble this system without following the
instructions carefully. Proper and complete assembly, use and supervision is
essential for proper operation and to reduce the risk of accident or injury. A high
probability of serious injury exists if this system is not installed, maintained, and
operated properly. Check entire box and inside all packing material for parts and/or
additional instructional material. Before beginning assembly, read the instructions
and identify parts using the hardware identifier and parts list in this document.
CONSIGNES DE SÉCURITÉ
La plupart des blessures sont causées par une utilisation impropre et/ou le non-respect
des instructions.
Soyez prudent lorsque vous utilisez ce système.
• Sivousutilisezuneéchelleencoursdemontage,soyezextrêmementprudent.
• Ilestrecommandédes’yprendreàtrois(3)(adultes)pourréalisercette
opération.
• Emboîtezcorrectementlessectionsdepoteau.Ellesrisquentsinondese
déboîter en cours de jeu.
• Avantdecreuser,contactezlesfournisseursd’électricité,gazeteaupour
situer les câbles d’alimentation et les conduites de gaz et d’eau enfouis.
Assurez-vous qu’aucune ligne aérienne d’électricité ne se trouve dans un
rayon de 7 m de l’emplacement du poteau.
• Lesconditionsclimatiques,lacorrosion,uneutilisationexcessiveouune
mauvaise utilisation risquent de provoquer la panne du système.
• Pourtouteassistancetechnique,contactezleserviceclientèle.
• Lahauteurminimaled’utilisationestde1,98m(6’6”)jusqu’àlabasedu
panneau.
• CematérielestréservéàunbutrécréatifàdomicileetNONPASàunjeu
extrêmement compétitif.
• Lisezetcomprenezl’étiquetted’avertissementfixéeaupoteau.
• Laduréedeviedevotrepoteaudebasket-balldépenddebiendesfacteurs.Le
climat,lapositiondupoteau,sonemplacement,sonexpositionàdesagents
corrosifs tels que des pesticides, des herbicides ou des sels sont tous des
facteurs importants.
• Lasupervisiond’unadulteestrecommandéepourleréglagedelahauteur.
• Risquedeblessuresgravessilesdentsoulevisageviennentheurterle
panneau, le cerceau ou le filet.
SUIVEZ CES CONSIGNES DE SÉCURITÉ SOUS PEINE DE PROVOQUER DES
BLESSURES GRAVES, DES DÉGÂTS MATÉRIELS ET L’ANNULATION DE LA
GARANTIE..
Lepropriétairedoits’assurerquetouslesjoueursconnaissentetsuiventces
règlesd’utilisationsûredusystème.
Par mesure de sécurité, n’essayez pas de monter ce système sans suivre
scrupuleusement les instructions. Un montage, une utilisation et une supervision
correctsetcompletssontindispensablesàunbonfonctionnementetàlaréduction
des risques d’accident ou de blessure. Il existe un haut risque de blessures graves
si ce système n’est pas correctement installé, entretenu et utilisé. Vérifiez bien le
carton et tout le matériel d’emballage pour y trouver toutes les pièces et/ou d’autres
instructions. Avant de commencer le montage, lisez les instructions et identifiez les
piècesàl’aidedelalisted’identificationetdelalistedespiècesdecedocument.

6
SICHERHEITSHINWEISE
Die meisten Verletzungen werden durch einen Fehlgebrauch bzw. ein Missachten der
Anleitungen verursacht.
Bei der Verwendung dieses Systems vorsichtig vorgehen.
• BeiGebraucheinerLeiterwährenddesZusammenbausextremvorsichtig
vorgehen.
• DieseArbeitsolltevondrei(3)dazufähigenErwachsenenausgeführtwerden.
• DieeinzelnenStangenteilerichtigzusammenfügen,umeineTrennungder
Stangenteile voneinander beim Spielbetrieb zu vermeiden.
• VorirgendwelchenGrabungendieentsprechendenVersorgungsunternehmen
verständigen, um sich über den Verlauf unterirdischer Strom-, Gas- und
Wasserleitungeninformierenzulassen.Sicherstellen,dassineinem7m(20Fuß)-
Radius vom Aufstellort der Stange keine Oberleitungen verlaufen.
• KlimatischeBedingungen,Korrosion,übermäßigerGebrauchoderFehlgebrauch
kann zu Systemstörungen führen.
• TechnischeUnterstützungkannvomKundendienstangefordertwerden.
• DieMindestspielhöhebeträgt1,98m(6,5Fuß)biszumunterenRandder
Korbwand.
• DieseVorrichtungistnurfürdenFreizeitgebrauchzuHause,NICHTaberfürein
übermäßigwettkampfbetontesSpielvorgesehen.
• DenanderStangeangebrachtenWarnaufkleberaufmerksamlesen.
• DieNutzungsdauerIhrerBasketballstangehängtvonzahlreichenäußeren
Umständen ab. Klimabedingungen, Platzierung und Aufstellort der Stange, Angriffe
durch korrodierende Substanzen wie Ungeziefer- und Pflanzenvernichtungsmittel
oder Salz - all das sind wichtige Faktoren.
• AlleHöhenverstellungensolltenvonErwachsenenbeaufsichtigtwerden.
• DerKontaktvonZähnen/GesichtmitderKorbwand,demKorbrandoderdemNetz
kann schwere Verletzungen zur Folge haben.
EIN MISSACHTEN DIESER SICHERHEITSHINWEISE KANN ZU SCHWEREN
VERLETZUNGEN UND/ODER SACHSCHÄDEN FÜHREN UND MACHT DIE
GARANTIE UNWIRKSAM.
DerEigentümermusssicherstellen,dassalleSpielerdieseRegelnfüreinen
sicherenBetriebdesSystemskennenundbefolgen.
Aus Sicherheitsgründen darf dieses System nur unter sorgfältiger Beachtung
der Anleitung zusammengebaut werden. Eine ordnungsgemäße und vollständige
Montage, Verwendung und Aufsicht ist für den richtigen Betrieb und zur Reduzierung
desUnfall-oderVerletzungsrisikosabsoluterforderlich.Beieinerunsachgemäßen
Installation und Wartung und bei einem falschen Betrieb dieses Systems besteht
ein hohes Risiko schwerer Verletzungen. Den ganzen Karton und alle darin
befindlichen Verpackungsmaterialien auf Bauteile und/oder zusätzliche Anleitungen
inspizieren. Vor Beginn des Zusammenbaus die Anleitung durchlesen und anhand
des Schlüssels zur Identifizierung der Befestigungsteile und der Teileliste in diesem
Dokument die einzelnen Bauteile bestimmen.
INSTRUCCIONES DE SEGURIDAD
La mayoría de las lesiones son causadas por el uso inadecuado y/o por el
incumplimiento de las instrucciones. Tenga cuidado cuando use este sistema.
• Siutilizaunaescalerademanoduranteelmontaje,tengamuchocuidado.
• Serecomiendaquetres(3)adultoscapacesrealicenestaoperación.
• Asientecorrectamentelasseccionesdelposte.Sinolohace,lasseccionesdel
poste podrían separarse durante el juego.
• Antesdeexcavar,comuníqueseconlascompañíasdeserviciospúblicospara
ubicar los cables eléctricos y las tuberías de gas y de agua subterráneos.
Asegúrese de que no haya líneas eléctricas suspendidas en un radio de
20 pies (7 m) de la ubicación del poste.
• Elclima,lacorrosión,elusoexcesivoyelmalusopodríanocasionarlafalladel
sistema.
• Sirequiereasistenciatécnica,comuníqueseconelDepartamentodeServicioal
Cliente.
• Laalturamínimadeoperaciónesde6piesy6pulgadas(1.98m)hastalaparte
inferior del respaldo.
• EsteequipoestádiseñadoúnicamenteparausorecreativoenelhogaryNOpara
juego competitivo excesivo.
• Leayentiendalaetiquetadeadvertenciaadheridaenelposte.
• Lavidaútildesupostedebaloncestodependedemuchascondiciones.El
clima, la colocación del poste, la ubicación del poste, la exposición a sustancias
corrosivas tales como pesticidas, herbicidas o sales son factores importantes.
• Serecomiendaqueelajustedelaalturaserealicebajolasupervisióndeun
adulto.
• Silosdientesolacaraentranencontactoconelrespaldo,laredoelborde,se
puede sufrir una lesión grave.
EL INCUMPLIMIENTO DE ESTAS INSTRUCCIONES DE SEGURIDAD PUEDE DAR
COMO RESULTADO LESIONES GRAVES, DA—OS MATERIALES Y ANULARÁ LA
GARANTÍA.
Elpropietariodebeasegurarsedequetodoslosjugadoresconozcanyobedezcan
estasreglasparalaoperaciónseguradelsistema.
Por su seguridad, no intente montar este sistema sin seguir cuidadosamente las
instrucciones. Es esencial el montaje completo, y el uso y la supervisión adecuados
para la operación correcta del sistema y para reducir el riesgo de accidentes o
lesiones. Existe una alta probabilidad de sufrir lesiones graves si este sistema no
se instala, mantiene y opera adecuadamente. Revise toda la caja y el interior de
todo el material de embalaje para encontrar todas las piezas y/o material instructivo
adicional. Antes de comenzar el montaje, lea las instrucciones e identifique las
piezas usando el identificador de herraje y la lista de piezas contenidos en este
documento.

7
7-3/8" High
3-3/4" Wide
PMS 021 for Warning
MUNSELL NOTATION
Hue Value Chroma
5.0 YR 6.0/15
Equiv. CIE Data
(Y%) xy
30.05 0.5510 0.4214
Approx. PMS Color
13 parts yellow
3 parts Warm Red
1/4 part Black
Warning Area = Orange
Size = 3.75" x 7-3/8"
Corner Radius = 3/8"
Die Cut Label
3.25 Mil Vinyl
All Temp. Permanent Adhesive
1 Mil. Polypropolyne Overlaminate
Illustrator CS2 = EPS
Backing + 1/16 Circumference
Rolls of 500
In the U.S.: 1-888-713-5488
In the U.S.: 1-800-558-5234
In Canada: 1-800-284-8339
In the U.S.: 1-800-334-9111
8-1/2" High
4" Wide
PMS 021 for Warning
MUNSELL NOTATION
Hue Value Chroma
5.0 YR 6.0/15
Equiv . CIE Data
(Y%) xy
30.05 0.5510 0.4214
Approx. PMS Color
13 parts yellow
3 parts Warm Red
1/4 part Black
Warning Area = Orange
Corner Radius = 3/8"
Die Cut Label
3.25 Mil Vinyl
All Temp. Permanent Adhesive
1 Mil. Polypropolyne Overlaminate
Illustrator 8.0 = EPS
Backing + 1/16 Circumference
Rolls of 500
8-1/2" High
3.75" Wide
PMS 021 for Warning
Lisez les avertissements indiqués
ci-dessous avant d'utiliser ce
produit.
sous peine d'encourir des blessures
graves et/ou des dégâts matériels.
Le propriétaire du système doit s’assurer que tous les
joueurs connaissent et suivent ces
consignes d’utilisation sûre du système.
• NE VOUS SUSPENDEZ PAS sur le cerceau ou sur toute
autre partie du système, y compris le panneau, les supports
ou le filet.
• Durant le jeu, en particulier lorsque vous faites des smash,
gardez le visage à l’écart du panneau, du cerceau et du
filet. Des blessures graves sont possibles si les dents ou le
visage venaient à entrer en contact avec le panneau, le
cerceau ou le filet.
• Ne glissez et ne montez pas sur le poteau, ne le secouez
pas et ne jouez pas dessus.
• Lorsque vous réglez la hauteur ou que vous déplacez le
système, gardez les mains et les doigts à l’écart des pièces
en mouvement.
• Ne laissez pas des enfants déplacer ou régler le système.
• Avant le jeu, retirez vos bijoux (bagues, montres, colliers,
etc.). Ces objets risquent de se prendre dans le filet.
• Maintenez les substances organiques à l’écart du socle du
poteau. L’herbe, les déchets, etc. risquent de causer la
corrosion et/ou la détérioration du système.
• Vérifiez l’état du système (signes de corrosion comme
rouille, piqûres, écaillage) et repeignez avec de la peinture
émail pour extérieur. Si la rouille a pénétré en tout point de
l’acier, remplacez immédiatement le poteau.
• Vérifiez le système avant chaque utilisation (lest, visserie
mal serrée, usure excessive et signes de corrosion) et
réparez avant utilisation.
• Vérifiez la stabilité du système avant chaque utilisation.
• Ne jouez jamais sur du matériel abîmé.
• Maintenez le poteau bouché à tout moment.
• Pour les instructions d’installation et d’entretien,
reportez-vous au guide fourni.
AVERTISSEMENT
MUNSELL NOTATION
Hue Value Chroma
5.0 YR 6.0/15
Equiv. CIE Data
(Y%) xy
30.05 0.5510 0.4214
Approx. PMS Color
13 parts yellow
3 parts Warm Red
1/4 part Black
Warning Area = Orange
Size = 3.75" x 8-1/2"
Corner Radius = 3/8"
Die Cut Label
3.25 Mil Vinyl
All Temp. Permanent Adhesive
1 Mil. Polypropolyne Overlaminate
Illustrator CS2 = EPS
Backing + 1/16 Circumference
Rolls of 500
Réf.: 50004301 02/12
Aux États-Unis : 1-800-772-5346 In the U.S.: 1-800-558-5234
Au Canada: 1-800-284-8339
Aux États-Unis : 1-800-334-9111
Aux États-Unis : 1-800-772-5346
Au Canada: 1-800-284-8339
En Australie : 1-300-367-582
Les marques commerciales
ont enregistré dans l'USA
t les autres pays.

8
CRANK : U-Turn Pro
HYDRA-RIB IN-GROUND
516000
3" High
4" Wide
ID# 516000 06/05
CRANK : U-Turn Pro
HYDRA-RIB IN-GROUND
516000
3" High
4" Wide
ID# FR516000 05/07
RÉGLAGE DE LA HAUTEUR
Tournez la manivelle pour
soulever et abaisser
le panneau.
Retirez
la goupille
de sûreté
pour enlever
la poignée.
CRANK : U-Turn Pro
HYDRA-RIB IN-GROUND
516000
3" High
4" Wide
ID# GE516000 05/07
HÖHENEINSTELLUNG
Den Kurbelgriff drehen, um
die Rückplatte anzuheben
oder abzusenken.
Entfernen Sie
den Haltestift,
um den Griff
zu entfernen.
CRANK : U-Turn Pro
HYDRA-RIB IN-GROUND
516000
3" High
4" Wide
ID# SP516000 05/07
AJUSTE DE LA ALTURA
Gire la manivela para subir
y bajar el tablero.
Quite el
pasador de
fijación para
quitar la manija.
31
ENREGISTREMENT DU PRODUIT :
Rappelez-vous de remplir votre formulaire d’inscription du produit
en ligne sur la page www.huffysports.com/customer_support/
product_registration.
PRODUCT REGISTRATION:
Please remember to complete your product registration form
on-line at: www.huffysports.com/customer_support/product_
registration.
PRODUKTREGISTRIERUNG:
Bitte vergessen Sie nicht, das Produktregistrierungsformular
online unter www.huffysports.com/customer_support/product_
registration auszufüllen.
REGISTRO DEL PRODUCTO:
Por favor recuerde completar en línea el formulario de registro
de su producto en: www.huffysports.com/customer_support/
product_registration.

9
BEFORE YOU START!
AVANT DE COMMENCER !
VORBEREITENDE MASSNAHMEN
¡ANTES DE COMENZAR!
To ensure optimal playability of backboard system, a close tolerance fit between the elevator components and hardware is required. Test-
fit large bolts into large holes of elevator tubes, backboard brackets, and triangle plates. Carefully rock them in a circular motion to ream
out any excess paint from holes if necessary.
Not all items pictured are included with every model.
Pour garantir l’utilisation optimale du panneau, les composants du système élévateur et la visserie doivent être bien ajustés (serrés).
À titre d’essai, insérez les gros boulons dans les gros trous des tubes du système élévateur, des supports du panneau et des plaques
triangulaires. Basculez-les avec précaution en imprimant un mouvement circulaire pour éliminer l’excédent de peinture des trous, si
nécessaire.
Les composants illustrés ici ne sont pas tous fournis avec chaque modèle.
Um sicherzustellen, dass das Korbwandsystem optimal für den Spielbetrieb geeignet ist, müssen die Komponenten der
Verlängerungsvorrichtung und die verschiedenen Befestigungsteile fest miteinander verschraubt werden. Große Schrauben zur Probe in
die großen Löcher der Verlängerungsrohre, Korbwandklammern und Dreiecksplatte stecken und diese vorsichtig in einer Kreisbewegung
hin- und herbewegen, um eventuelle Farbrückstände aus den Bohrungen zu entfernen.
Nicht jedem Modell sind alle abgebildeten Teile beigepackt.
Para asegurar el óptimo rendimiento del sistema del respaldo en el juego, se requiere un ajuste de tolerancia estrecha entre los
componentes del elevador y el herraje. Pruebe el ajuste de los pernos grandes en los orificios grandes de los tubos elevadores, soportes
del respaldo y placas triangulares. Cuidadosamente muévalos en círculos para eliminar cualquier exceso de pintura de los orificios, si es
necesario.
No todos los artículos ilustrados se incluyen con cada modelo.
NOTICETOASSEMBLERS
AdultAssemblyRequired.DisposeofALLpackagingmaterialspromptly.Aswithallproducts,periodicallyinspectforloosesmallparts.
ALL basketball systems, including those used for DISPLAYS, MUST be assembled and installed according to instructions. Failure to follow
instructions could result in SERIOUS INJURY. It is NOT acceptable to devise a makeshift support system.
AVISAUXPERSONNESCHARGÉESDUMONTAGE
Assemblageexclusivementréservéàunadulte.JetezTOUTlematérield’emballagedanslesplusbrefsdélais.Commepourtouslesproduitspour
enfants,inspectezpériodiquementleserragedespiècesdepetitetaille.
TOUSlessystèmesdebasket-ball,ycomprisceuxutilisésenEXPOSITION,DOIVENTêtreassemblésetinstallésconformémentauxinstructions.
Suivezcesinstructionssouspeined’encourirdesBLESSURESGRAVES.IlestINACCEPTABLEdecomposerunsystèmedesoutiendefortune.
HINWEISFÜRDIEPERSONEN,DIEDENZUSAMMENBAUDURCHFÜHREN
ZusammenbaunurdurchErwachsene.ALLEVerpackungsmaterialiensofortwegwerfen.WiealleProduktemussauchdiesesregelmäßigauflose
Kleinteileinspiziertwerden.
ALLEBasketballsysteme,einschließlichderzuAUSSTELLZWECKENbenutztenSysteme,MÜSSENgemäßdenAnleitungenzusammengebaut
undaufgestelltwerden.EinMissachtendieserAnleitungenkannSCHWEREVERLETZUNGENzurFolgehaben.ZumBeschwerendarfNICHTzu
irgendwelchenNotbehelfsmaßnahmengegriffenwerden.
AVISOPARALASPERSONASQUEREALIZANELMONTAJE
Esnecesarioqueelmontajesearealizadoporadultos.DesecheinmediatamenteTODOSlosmaterialesdeembalaje.Aligualqueconcualquier
producto,inspeccioneperiódicamenteparaverificarquetodaslaspiezaspequeñasesténfirmementeapretadas.
TODOSlossistemasdebaloncesto,inclusivelosdeEXHIBICIÓN,DEBENestarmontadoseinstaladosdeacuerdoconlasinstrucciones.Sinose
siguenlasinstruccionessepodríaocasionarunaLESIÓNSERIA.NOesaceptableimprovisarunsistemadesoportetemporal.
Fragen oder fehlende Teile?
Rufen Sie die GEBÜHRENFREIE Telefonnummer
(in den USA und Kanada) auf der Vorderseite an!
HALT!
Fragen oder fehlende Teile?
Rufen Sie die GEBÜHRENFREIE Telefonnummer
(in den USA und Kanada) auf der Vorderseite an!
Gehen Sie NICHT zum Laden zurück!
HALT!
Des questions ou des
pièces manquantes?
Appelez le numéro du service clientèle
(NUMÉRO GRATUIT) qui figure en première page!
STOP!
Des questions ou des
pièces manquantes?
Appelez le numéro du service clientèle
(NUMÉRO GRATUIT) qui figure en première page!
STOP!
NE RETOURNEZ PAS au magasin!
¿Tiene preguntas o le faltan piezas?
¡Llame al número telefónico GRATUITO de Servicio
al Cliente que se indica en la primera página!
¡ALTO!
¿Tiene preguntas o le faltan piezas?
¡Llame al número telefónico GRATUITO de Servicio
al Cliente que se indica en la primera página!
¡NO regrese a la tienda!
¡ALTO!

10
ID# M8809542 05/07
For the very latest Basketball System Warranty information
Please visit the Spalding Basketball website at www.Spalding.com
Contact Spalding Customer Service at phone # 1-800-558-5234
Basketball System
Warranty
Para la última información de garantía del sistema de baloncesto
Por favor visite el sitio web de Spalding Basketball en www.Spalding.com
Póngase en contacto con servicio al cliente de Spalding en teléfono # 1-800-558-5234
Sistema de baloncesto
Garantía de dueños
Die neuesten Basketball System-Garantie informationen
Besuchen Sie bitte die Spalding Basketball-Website unter www.Spalding.com
Spalding-Kundendienst am Telefon # 1-800-558-5234
Basketball-System
Garantie
Pour l'information de garantie de système de basket-ball plus tard
Visitez le site Web de Spalding Basketball à www.Spalding.com
Contacter le Service clientèle Spalding au # de téléphone 1-800-558-5234
Système de basket-ball
garantie
05/2013

11
IMPORTANT!
Remove all contents from boxes.
Be sure to check inside pole sections,
hardware and additional parts are packed inside.
IMPORTANT!
Videz entièrement les boîtes.
Veillezàvérifierl’intérieurdessectionsdepoteau.Laquincaillerieet
despiècessupplémentairessontemballéesàl’intérieur.
WICHTIG!
Die Kartons vollständig auspacken.
Den Hohlraum in den Stangenteilen inspizieren. Dort sind Befestigungs-
und andere Kleinteile verpackt.
¡IMPORTANTE!
Saque todo el contenido de las cajas.
Asegúrese de revisar el interior de las secciones del poste. Ahí se han
empacado herraje y piezas adicionales.
Questions or Missing Parts?
Call TOLL-FREE Customer Service
number listed on the front page!
STOP!
DON'T go back to the store!
Questions or Missing Parts?
Call TOLL-FREE Customer Service
number listed on the front page!
STOP!
DON'T go back to the store!
STOP!
Des questions ou des
pièces manquantes?
Appelez le numéro du service clientèle
(NUMÉRO GRATUIT) qui figure en première page!
STOP!
NE RETOURNEZ PAS au magasin!
Fragen oder fehlende Teile?
Rufen Sie die GEBÜHRENFREIE Telefonnummer
(in den USA und Kanada) auf der Vorderseite an!
HALT!
Fragen oder fehlende Teile?
Rufen Sie die GEBÜHRENFREIE Telefonnummer
(in den USA und Kanada) auf der Vorderseite an!
Gehen Sie NICHT zum Laden zurück!
HALT!
¿Tiene preguntas o le faltan piezas?
¡Llame al número telefónico GRATUITO de Servicio
al Cliente que se indica en la primera página!
¡ALTO!
¿Tiene preguntas o le faltan piezas?
¡Llame al número telefónico GRATUITO de Servicio
al Cliente que se indica en la primera página!
¡NO regrese a la tienda!
¡ALTO!
WARNING!
IF YOUR SYSTEM IS EQUIPPED WITH AN ACRYLIC BACKBOARD, EXAMINE BACKBOARD FOR ANY DAMAGE
THAT MAY HAVE OCCURRED DURING SHIPMENT. CRACKS IN THE BACKBOARD COULD RESULT IN SUDDEN
BREAKAGE. IF BACKBOARD IS DAMAGED IN ANY WAY PRIOR TO OR AFTER ASSEMBLY, CALL TOLL-FREE
NUMBER:
U.S. 1-800-558-5234; CANADA: 1-800-284-8339; http://www.huffysports.com
AVERTISSEMENT!
SI VOTRE SYSTÈME EST ÉQUIPÉ D’UN PANNEAU EN ACRYLIQUE, EXAMINEZ-LE BIEN POUR VOUS ASSURER QU’IL
N’A PAS ÉTÉ ENDOMMAGÉ EN COURS DE TRANSPORT. S’IL EST FISSURÉ, IL RISQUE DE SE CASSER SUBITEMENT.
SI LE PANNEAU EST ENDOMMAGÉ D’UNE QUELCONQUE MANIÈRE AVANT OU APRÈS L’ASSEMBLAGE, APPELEZ
LE NUMÉRO SANS FRAIS:
États-Unis 1-800-558-5234 ; CANADA : 1-800-284-8339 ; http://www.huffysports.com
WARNUNG!
BEI EINEM MIT EINER ACRYL-RÜCKWAND AUSGESTATTETEN SYSTEM DIE KORBWAND AUF EVENTUELLE SCHÄDEN
UNTERSUCHEN, DIE WÄHREND DES VERSANDS EINGETRETEN SEIN KÖNNEN. SPRÜNGE IN DER KORBWAND
KÖNNEN ZU DEREN PLÖTZLICHEM BRUCH FÜHREN. WENN DIE KORBWAND VOR ODER NACH DEM ZUSAMMENBAU
IN JEGLICHER WEISE BESCHÄDIGT WIRD, RUFEN SIE DIE FOLGENDE GEBÜHRENFREIE TELEFONNUMMER AN:
Innerhalb der USA: 1-800-558-5234; innerhalb KANADAS: 1-800-284-8339; http://www.huffysports.com
¡ADVERTENCIA!
SI SU SISTEMA ESTÁ EQUIPADO CON UN RESPALDO DE ACRÍLICO, EXAMINE EL RESPALDO PARA VERIFICAR
QUE NO HAYA SUFRIDO DA—OS DURANTE EL TRANSPORTE. LA PRESENCIA DE GRIETAS EN EL RESPALDO
PODRÍA OCASIONAR SU ROMPIMIENTO REPENTINO. SI EL RESPALDO SE DA—A DE ALGUNA MANERA ANTES O
DESPUÉS DE SU MONTAJE, LLAME AL NÚMERO TELEFÓNICO SIN COSTO:
EE. UU. 1-800-558-5234; CANADÁ: 1-800-284-8339; http://www.huffysports.com

12
1. Make sure ground is level with playing surface, then dig pole hole.
S’assurer que le sol est au même niveau que la surface de jeu, puis commencer à creuser le trou pour le
poteau.
Sicherstellen, daß der Boden auf einer Ebene mit der Spielfläche ist, dann das Loch für die Stange
graben.
Asegure que la tierra esté nivelada con respecto a la superficie de juego, después haga el orificio para el
poste.
24" (61 cm)
24" (61cm)
6" (15.2 cm)
PLAYING
SURFACE
SURFACE DE JEU
SPIELFLÄCHE
SUPERFICIE DE
JUEGO
Maximum distance from edge of hole to edge
of playing surface 6” (15.2 cm).
La distance maximum entre la circonférence
du trou et la surface de jeu est 15,2 cm.
Maximaler Abstand vom Rand des Loches bis
zur Spielfläche:15,2 cm (6”).
Distancia máxima desde el borde del orificio al
borde de la superficie de juego 15.2 cm. (6”).
NOTE:
REMARQUE:
HINWEIS:
NOTA:
XG02.EPS
CONTACT UTILITIES BEFORE DIGGING.
CONTACTEZLESRÉSEAUXLOCAUX(GAZ,
ÉLECTRICITÉ...) AVANT DE CREUSER.
VOR DEM GRABEN ENTSPRECHENDE
INFORMATIONENVONDENZUSTÄNDIGEN
VERSORGUNGSWERKEN EINHOLEN.
COMUNÍQUESE CON LAS COMPA—ÍAS DE
SERVICIO ANTES DE EXCAVAR.
WARNING!
AVERTISSEMENT!
ACHTUNG!
¡ADVERTENCIA!
Check building codes for your location to determine apropriate hole depth for cement.
Consultez les codes du bâtiment de votre région afin de déterminer apropriate profondeur du trou pour le ciment.
Prüfen Bauvorschriften für Ihren Standort zu apropriate Lochtiefe für Zement zu bestimmen.
Consulte los códigos de construcción para su ubicación para determinar la profundidad del agujero apropriate para el cemento.
NOTE: / REMARQUE:
HINWEIS: / NOTA:
36” (91 cm)
24” (61 cm)
24" (61 cm)
48" (121.9 cm)
24" (61 cm)
2
6" (15,2 cm)
PLAYING SURFACE
GROUND SURFACE
36” (91 cm)
24” (61 cm) 6” (15,2 cm)
36” (91 cm)

13
2.
HR83002.EPS
211560
3
2
2
1
Install nut (2) to J-bolt (1) as shown. Repeat procedure for other three J-bolts (1).
Vissez l’écrou (2) au boulon en J (1) comme indiqué. Répétez la même procédure pour les trois autres boulons en J (1).
Schrauben Sie Mutter (2) auf Hakenschraube (1), siehe Abbildung. Wiederholen Sie dieses mit den anderen drei
Hakenschrauben (1).
Instale la tuerca (2) al perno en “J” (1) como se muestra. Repita el procedimiento para los otros tres pernos en “J” (1).
HR83002.EP
S
211560
2
1
2-1/2”
(6.35 cm)
IMPORTANT!
IMPORTANT!
WICHTIG!
¡IMPORTANTE!
Make sure nuts are 2-1/2” (6.35cm) from top of
J-Bolts.
Assurez-vousquelesécroussoientà6.35cm
du haut des boulons en J.
Stellen Sie sicher, dass die Muttern vom
oberen Ende der Hakenschrauben einen
Abstand von 2-1/2” (6.35cm) haben.
Asegúrese de que las tuercas estén a 2-1/2”
(6.35cm) de la cabeza de los pernos en J
Make sure J-bolts (1) are in the illustrated position.
VeillezàcequelesboulonsenJ(1)soient
placés comme dans l’illustration.
Stellen Sie sicher, dass sich die Hakenschrauben
(1) in der abgebildeten Position befinden.
Asegúrese de que los pernos en J (1) estén en
la posición ilustrada.
NOTE: / REMARQUE:
HINWEIS: / NOTA:
Install threaded ends of J-bolts (1)
through holes in mounting plate (3) and
secure as shown.
Faites glisser les embouts filetés des
boulons en J (1) dans les trous du
panneau de montage (3) et serrez
comme indiqué.
Stecken Sie die Gewindeenden der
Hakenschrauben (1) durch die Löcher
in der Montageplatte (3) und befestigen
diese, wie abgebildet.
Instale las orillas roscadas de los pernos
en J (1) a través de los agujeros en la
placa de montaje (3) y fíjelas como se
muestra.
Nuts on the top of plate are used for leveling the pole after system is fully
assembled.
Les écrous au-dessus du panneau sont utilisés pour aligner le poteau une
fois que le système a été assemblé.
Die Muttern an der Oberseite der Platte werden für das Ausrichten der
Stange benutzt, nachdem das System vollständig zusammengesetzt ist.
Las tuercas en la parte superior de la placa se utilizan para nivelar el poste
una vez que el sistema esté totalmente armado.
NOTE: / REMARQUE:
HINWEIS: / NOTA:
3.

14
Fill hole with concrete. Tamp down concrete to release air pockets and build drainage hill.
Remplissez le trou de ciment. Damez le béton pour libérer les poches d’air et construisez une butte de drainage.
Füllen Sie das Loch mit Beton. Drücken Sie den Beton nach unten, um eventuelle Luftlöcher zu vermeiden, und formen
Sie einen kleinen Hügel zur Dränung.
Llene el agujero con hormigón. Atasque el hormigón para liberar paquetes de aire, y construya la pendiente de drenaje.
4.
HR83005-101.EPS
1" (2.54 cm)
FILL TO
HERE
1" (2.54 cm)
DRAINAGE HILL
DRAINAGE COLLINE
ENTWÄSSERUNGSHÜGEL
DRENAJE COLINA
GROUND SURFACE
Surface terrain
BODEN
SUPERFICIE DE TIERRA
PLAYING SURFACE
SURFACE DE JEU
Spielfläche
SUPERFICIE DE JUEGO

15
Insert J-bolts (1) from mounting plate (3) into cement as shown. Move assembly around to release any air pockets in cement,
then rest mounting plate on cement drainage hill. Apply some pressure to level mounting plate on top of drainage hill. Level
mounting plate and square with playing surface. Clean off any excess cement on mounting plate at this time.
Insérez les boulons en J (1) du panneau de montage (3) dans le ciment comme indiqué. Faites bouger l’assemblage pour
libérer les poches d’air du ciment et posez le panneau de montage sur la butte de drainage du ciment. Faites pression pour
niveler le panneau de montage au-dessus de la butte de drainage. Nivelez le panneau de montage et alignez-le avec la
surface de jeu. Nettoyez l’excédent de ciment qui se trouve sur le panneau de montage.
Setzen Sie die Hakenschrauben (1) der Montageplatte (3) in den Zement ein, siehe Abbildung. Bewegen Sie die Vorrichtung
hin und her, um Luftlöcher aus dem Zement zu entfernen, und lassen Sie die Montageplatte danach kurz auf dem Zementhügel
ruhen. Drücken Sie etwas auf die Montageplatte, um diese richtig einzuebnen. Bringen Sie die Montageplatte parallel zur
Spielfläche an. Entfernen Sie überschüssige Zementreste von der Montageplatte.
Inserte los pernos en J (1) de la placa de montaje (3) en el cemento, como se muestra. Mueva el conjunto para liberar
paquetes de aire en el cemento, luego descanse la placa de montaje en la pendiente de drenaje de cemento. Aplique
algo de presión para nivelar la placa de montaje encima de la pendiente de drenaje. Nivele la placa de montaje y
escuadre con la superficie de juego. Aquí limpie el exceso de cemento en la placa de montaje.
5.
HR83003.EPS
211560
3
1
IMPORTANT! / IMPORTANT!
WICHTIG! / ¡IMPORTANTE!
Check leveling of mounting plate several times with
carpenter’s level while concrete is curing.
Pendant que le ciment sèche, vérifiez plusieurs fois le niveau du
panneau de montage en vous aidant d’un niveau de menuisier.
Überprüfen Sie die richtige Ausrichtung der Montageplatte mit
Hilfe einer Wasserwaage, während der Beton aushärtet.
Revise el nivelado de la placa de montaje varias veces con el
nivel de burbuja mientras se endurece el hormigón.
IMPORTANT! / IMPORTANT!
WICHTIG! / ¡IMPORTANTE!
Front of mounting plate (3) must be parallel with playing surface.
L’avantdupanneaudemontage(3)doitêtreparallèleàlasurfacedejeu.
Die Vorderseite der Montageplatte (3) muss parallel zur Spielfläche sein.
La parte frontal de la placa de montaje (3) debe estar paralela con la superficie de juego.
HR83004.EPS
211560
DO NOT PROCEED UNTIL CONCRETE HAS CURED A MINIMUM OF 72 HOURS !
ALLOW ADDITIONAL TIME FOR COLD, WET OR HUMID WEATHER.
NE CONTINUEZ PAS TANT QUE LE CIMENT N’EST PAS SEC!ATTENDEZ AU MOINS 72 HEURES ET PRÉVOYEZ
PLUS DE TEMPS EN CAS DE FROID, PLUIE OU HUMIDITÉ.
WARTEN SIE NUN BIS DER BETON VOLLSTÄNDIG AUSGEHÄRTET IST! MINDESTENS 72 STUNDEN.
BEIKALTEM,FEUCHTEN ODERSCHWÜLEMWETTERMUSSDIESE ZEITNOCHMALSVERLÄNGERTWERDEN.
NO CONTINÚE HASTA QUE EL HORMIGÓN SE HAYA SECADO. UN MÍNIMO DE 72 HORAS.
ESPERE UN TIEMPO ADICIONAL EN TIEMPOS FRÍOS O HÚMEDOS.
STOP! / STOP! / HALT! / ¡ALTO!

16
WARNING!
AVERTISSEMENT!
WARNUNG!
¡ADVERTENCIA!
THREE CAPABLE ADULTS REQUIRED FOR
THIS PROCEDURE. FAILURE TO FOLLOW THIS
WARNING COULD RESULT IN SERIOUS INJURY
AND/OR PROPERTY DAMAGE.
TROIS ADULTES CAPABLES REQUIS
POUR CETTE PROCÉDURE. SUIVEZ CET
AVERTISSEMENT SOUS PEINE D’ENCOURIR
DES BLESSURES GRAVES ET/OU DES DÉGÂTS
MATÉRIELS.
DIESER VERFAHRENSSCHRITT MUSS VON DREI
DAZU IN DER LAGE BEFINDLICHEN PERSONEN
AUSGEFÜHRT WERDEN. EIN MISSACHTEN
DIESER WARNUNG KANN ZU SCHWEREN
VERLETZUNGEN UND/ODER SACHSCHÄDEN
FÜHREN.
SE REQUIEREN TRES ADULTOS CAPACES
PARA REALIZAR ESTE PROCEDIMIENTO. SI NO
SE OBSERVA ESTA ADVERTENCIA SE PODRÍA
OCASIONAR UNA LESIÓN GRAVE Y/O DA—OS A
LA PROPIEDAD.
TWO people are required to upright pole (5). While the THIRD person
assembles lower pole flange onto protruding J-bolts (1) as shown. The
flange will then rest on the nuts (2).
DEUXpersonnes sont nécessaires au poteau droit (5). Tandis que la
troisième personne assemble sur la bride en saillie inférieures pôle J-vis
(1), comme indiqué. La bride alors reposer sur les écrous (2).
Zwei Personen sind erforderlich, um aufrecht polig (5). Während die dritte
Person auf den Flansch montiert vorstehenden unteren Pol J-Schrauben
(1) wie gezeigt. Der Flansch wird dann ruhen auf den Muttern (2).
Se necesitan DOS personas para poste vertical (5). Mientras que la persona
reúne TERCERA polo inferior que sobresale de la brida ontológicas pernos
en J (1) como se muestra. La brida será luego descansar en las tuercas (2).
6.
Secure pole (5) flange to mounting plate (3) as shown. Tighten
completely.
Verrouillez la bride du poteau (5) au panneau de montage (3) comme
indiqué.
Befestigen Sie den Stangenflansch (5) an der Montageplatte (3), siehe
Abbildung. Richtig festziehen.
Asegure la brida del poste (5) a la placa de montaje (3) como se muestra.
Apriete completamente.
7.
PLAYIN
G
SURFACE
5
6
6
2
1
2
6
6
HR83007PoleGusset
3
2
6
6
2
2
6
1
5
6
Playing Surface
Surface de jeu
Spielfläche
Superficie de juego
Position crank jack mounting
as shown.
Placez le support du cric à
manivelle comme indiqué.
Montieren Sie das
Kurbelstück, wie abgebildet.
Posicione el montaje del gato
con manivela como se muestra.
NOTE:
REMARQUE:
HINWEIS:
NOTA:

17
7
14
27
13
27
12
12
27
27
27
27
14
27
13
7
27
27
27
27
13
12
14
8
9
13 27
27
8.
IMPORTANT!
IMPORTANT!
WICHTIG!
¡IMPORTANTE!
DO NOT OVER TIGHTEN!
NE SERREZ PAS TROP!
NICHT ZU FEST ANZIEHEN!
¡NO APRIETE EXCESIVAMENTE!
NON SERRARE ECCESSIVAMENTE!
TWO adults, position the upper yoke (8), while the third adult secures the yoke to the pole and then the lower yoke (9) similar
to upper yoke.
DEUX adultes, positionner la culasse supérieure (8), tandis que le troisième adulte sécurise le joug à la perche, puis la
chape inférieure (9) proche de culasse supérieure.
ZWEIErwachsene, positionieren Sie den oberen Joch (8), während die dritte erwachsene sichert das Joch auf den Pol und
dann das untere Joch (9) ähnlich obere Joch.
DOS adultos capaces colocar en posición la brida superior (8) y el adulto capaz tercero se conecta yugo de polo. Continúe
uniendo inferior del yugo (9) como se muestra.
WARNING!
AVERTISSEMENT!
WARNUNG!
¡ADVERTENCIA!
THREECAPABLEADULTSREQUIREDFORTHISPROCEDURE.FAILURE
TO FOLLOW THIS WARNING COULD RESULT IN SERIOUS INJURY AND/
OR PROPERTY DAMAGE.
TROIS ADULTES CAPABLES REQUIS POUR CETTE PROCÉDURE.
SUIVEZ CET AVERTISSEMENT SOUS PEINE D’ENCOURIR DES
BLESSURES GRAVES ET/OU DES DÉGÂTS MATÉRIELS.
DIESER VERFAHRENSSCHRITT MUSS VON DREI DAZU IN DER LAGE
BEFINDLICHEN PERSONEN AUSGEFÜHRT WERDEN. EIN MISSACHTEN
DIESER WARNUNG KANN ZU SCHWEREN VERLETZUNGEN UND/ODER
SACHSCHÄDEN FÜHREN.
SE REQUIEREN TRES ADULTOS CAPACES PARA REALIZAR ESTE
PROCEDIMIENTO. SI NO SE OBSERVA ESTA ADVERTENCIA SE PODRÍA
OCASIONAR UNA LESIÓN GRAVE Y/O DA—OS A LA PROPIEDAD.

18
WARNING!
AVERTISSEMENT! WARNUNG! ¡ADVERTENCIA!
1. Place foam pad on flat surface with adhesive side facing up and remove protective film.
Placez le coussinet en mousse sur une surface plane, côté adhésif vers le haut et retirez le film protecteur.
Setzen Sie den Schaumstoff auf einer ebenen Fläche mit der Klebeseite nach oben und entfernen Sie die Schutzfolie.
Coloque la almohadilla de espuma sobre una superficie plana con adhesivo en el lado hacia arriba y retirar la película protectora.
2. Individually align (4) steel spacers with the (4) holes of the foam pad and firmly press the spacers onto the adhesive of foam pad.
Individuellement aligner (4) entretoises en acier avec les (4) trous de la mousse et appuyez fermement sur les entretoises sur l’adhésif de protection en mousse.
Individuell ausrichten (4) Distanzstücke aus Stahl mit den (4) Löcher an den Schaumstoff und drücken Sie fest auf den Distanzstücken auf den Kleber von
schaumstoff.
Alinear individualmente (4) separadores de acero con las (4) orificios de la almohadilla de espuma y presione firmemente los espaciadores en el adhesivo de la
almohadilla de espuma.
3. Align (4) steel spacers from the spacer and foam pad assembly from step 2 into mounting holes on backboard and firmly press into position.
Aligner (4) entretoises en acier provenant de la pièce d’écartement et mousse assemblé à l’étape 2 dans les trous de fixation sur panneau et appuyez sur chambre
croit fermement en position.
Richten Sie (4) Distanzstücke aus Stahl aus dem Distanzstück und Schaumstoffpolster aus Schritt 2 in die Befestigungsbohrungen auf Rückwand und irmly drücken
Sie sie in Position.
Alinear (4) separadores de acero por el separador y la almohadilla de espuma del paso 2 asamblea en los agujeros de montaje en tablero y irmly pulse en su
posición.
IMPORTANT! - IMPORTANT! - WICHTIG! - ¡IMPORTANTE!
Instructions for GLASS BACKBOARD - ONLY!
Instructions pour le verre pannenau - UNIQUEMENT !
Anweisungen für Glas RÜCKWAND - NUR!
Instrucciones de VIDRIO TABLERO - SÓLO!
PLEASE ENSURE that foam pad and all 4 steel spacers are in position BEFORE attaching yokes.
Failure to follow these instructions could result in personal injury or damage to property.
VEUILLEZ VOUS ASSURER que la mousse pad et tous les 4 entretoises en acier sont en position AVANT de fixer les chapes.
Lenon-respectdecesinstructionspeutentraînerdesblessuresoudesdommagesàlapropriété.
BITTE STELLEN SIE SICHER dass Schaumstoff und alle 4 Distanzstücke aus Stahl sind in Position befindet BEVOR mit der installation gabeln.
Bei Nichtbeachtung dieser Anweisungen kann zu Verletzungen oder Schäden an Eigentum.
POR FAVOR, ASEGÚRESE de que almohadilla de espuma y los 4 separadores de acero están en su posición correcta ANTES de conectar las horquillas.
Elincumplimientodeestasinstruccionespuederesultarenlesionespersonalesodañosalapropiedad.
glass backboard
surmontoir verre
glas rückwand
tablero de vidrio
CAUTION STEEL SPACERS LABEL
P/N 500046
Size = 1.75 W X 1.44 H
COLORs = Black printed
with PMS 115 background
Die Cut Label
All temp. Permanent Adhesive
(For use on closed cell Polyurethane foam)
1 Mil. Polypropolyne Overlaminate
Illustrator CS5 = EPS
Backing + 1/16 Circumference
Rolls of 500
peel
peel
schalen
pelar
foam pad
mousse
schaumstoff
espuma
spacer
entretoise
distanzstück
espaciador
1. 2.
3.
SPACERS IN POSITION
LES ENTRETOISES EN POSITION
DISTANZSTÜCKE IN POSITION
LOS ESPACIADORES EN LA POSICIÓN
glass side up
verre côté haut
glas seite nach oben
un cristal lateral
foam pad
mousse
schaumstoff
espuma
foam pad
mousse
schaumstoff
espuma
glass backboard
surmontoir verre
glas rückwand
tablero de vidrio

19
Secure backboard to support arms (8 and 9) as shown. Use same hardware
combination for attaching both elevator tubes to the backboard.
Arrimez le panneau aux bras de support (8 et 9) comme indiqué. Utilisez la
même combinaison de matériel pour attacher les deux tubes d’élévation au
panneau.
Bringen Sie das Korbbrett an den Haltearmen an (8 und 9), siehe Abbildung.
Benutzen Sie die selben Geräte, um beide Hebestangen am Korbbrett
anzubringen.
Asegure el tablero a los brazos de soporte (8 y 9) como se muestra. Utilice
la misma combinación de accesorios para anexar ambos tubos elevadores al
tablero.
8
14
13
27
27
10
13
27
27
9
IMPORTANT!
IMPORTANT!
WICHTIG!
¡IMPORTANTE!
DO NOT OVER TIGHTEN!
NE SERREZ PAS TROP!
NICHT ZU FEST ANZIEHEN!
¡NO APRIETE EXCESIVAMENTE!
9.
WARNING!
AVERTISSEMENT!
WARNUNG!
¡ADVERTENCIA!
THREECAPABLEADULTSREQUIREDFORTHISPROCEDURE.FAILURE
TO FOLLOW THIS WARNING COULD RESULT IN SERIOUS INJURY AND/
OR PROPERTY DAMAGE.
TROIS ADULTES CAPABLES REQUIS POUR CETTE PROCÉDURE.
SUIVEZ CET AVERTISSEMENT SOUS PEINE D’ENCOURIR DES
BLESSURES GRAVES ET/OU DES DÉGÂTS MATÉRIELS.
DIESER VERFAHRENSSCHRITT MUSS VON DREI DAZU IN DER LAGE
BEFINDLICHEN PERSONEN AUSGEFÜHRT WERDEN. EIN MISSACHTEN
DIESER WARNUNG KANN ZU SCHWEREN VERLETZUNGEN UND/ODER
SACHSCHÄDEN FÜHREN.
SE REQUIEREN TRES ADULTOS CAPACES PARA REALIZAR ESTE
PROCEDIMIENTO. SI NO SE OBSERVA ESTA ADVERTENCIA SE PODRÍA
OCASIONAR UNA LESIÓN GRAVE Y/O DA—OS A LA PROPIEDAD.

20
PL
AYING
SURFACE
10. Secure jack brackets (21) to to mounting bracket as shown.
Vissez les vis de calage (21) au support de montage comme indiqué.
Befestigen Sie die Träger (21) an der Stütze, siehe Abbildung.
Asegure los soportes del gato (21) al soporte de montaje como se muestra.
21
21
11 13
13 14 IMPORTANT!
IMPORTANT!
WICHTIG!
¡IMPORTANTE!
Hold Here.
Bloquez ici.
Halten Sie hier fest.
Aquí sostenga.
Position U-joint of crank jack (20) as shown. Where tubes on crank jack join,
hold steady to keep both tubes from rotating. Rotate handle clockwise on
crank jack to the fully extended position.
Placez le joint de cardan du cric à manivelle (20) comme indiqué. Lorsque
les tubes du cric à manivelle se rejoignent, stabilisez-les pour les empêcher
de pivoter. Tournez la poignée du cric à manivelle dans le sens des aiguilles
d’une montre jusqu’à ce qu’elle bloque.
Positionieren Sie die U-förmige Verbindung des Kurbelstücks (20), siehe
Abbildung. Halten Sie die Verbindungsstelle der Stangen fest, um ein Drehen
der beiden Stangen zu verhindern. Drehen Sie den Griff auf dem Kurbelstück
im Uhrzeigersinn bis dieses komplett ausgefahren ist.
Posicione la junta universal del gato de manivela (20) como se muestra.
Donde se unen los tubos en el gato de manivela, sostenga firmemente para
evitar que los tubos giren. Gire la manija hacia la derecha en el gato de
manivela hasta la posición de extensión total.
11.
Playing Surface
Surface de jeu
Spielfläche
Superficie de juego
20
REAR VIEW
VUE ARRIÈRE
RÜCKANSICHT
VISTA POSTERIOR
Table of contents
Other SPALDING Accessories manuals
Popular Accessories manuals by other brands

Power Master
Power Master 708429 manual

Life Fitness
Life Fitness M051-00K58-A034 installation instructions

Silvercrest
Silvercrest B69PF operating instructions

wattstopper
wattstopper HBP-111 Installation instruction

Chef's Choice
Chef's Choice DIAMOND HONE ULTRA instructions

4x4 TOUGH
4x4 TOUGH 18-22543 instruction manual