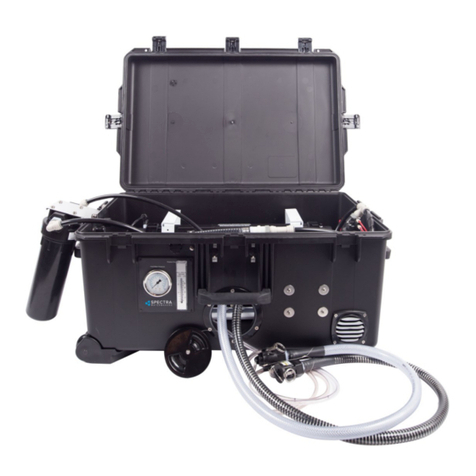
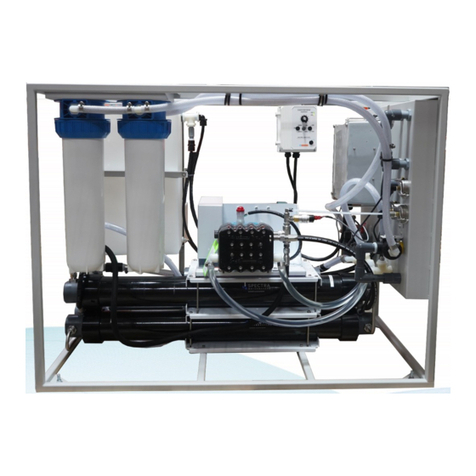
Spectra Watermakers MONTEREY 1000 Specification sheet

page 1
Monterey Installation Quick Start
Important Details for Installer and Owner
•It is imperative that the system have a dedicated sea water inlet
to guarantee a solid flow of water to the system. The inlet should
be as low in the boat as possible and a scoop type forward facing
through hull fitting installed. Do not operate the system in rough
conditions if the intake through hull is taking in air or damage
may result.
•Make sure to follow the wire gauge charts in the instructions.
Using larger wire than specified is acceptable.
•The MPC control must have DC power continuously to achieve
the full benefits of the fresh water flush system. The domestic
fresh water pressure must be on and the fresh water tank level
maintained. If these operational conditions present a problem,
consult factory.
•The MPC control must be de-powered after the system is put in
“storage” or “pickled” where a storage chemical or antifreeze is
run through the system.
•If you are remote mounting the membrane array, please follow
the high pressure tube assembly instructions. These fittings
must be tight!
•Run test then “sea trial” the complete system before assuming
the system is operational. If the boat is in fresh or dirty water
see “Operation Procedures, New System Start Up and Testing”.
•If you are a Spectra dealer we ask that you spend time with the
vessels’ owner and operator so that they understand the
operation and maintenance of the system.
•Please have the owner fill out the warranty card.
•Please read the Installation Instructions.

page 2
MONTEREY 1000
OPERATION AND INSTALLATION
MANUAL
Spectra Watermakers Inc.
20 Mariposa Road, San Rafael CA 94901
Phone 415-526-2780 Fax 415-526-2787
E-mail: spectra@spectrawatermakers.com
www.spectrawatermakers.com
1/2/02

page 3
Introduction
Thank you for choosing a Spectra Watermaker! It is our sincere wish for you to be
completely satisfied with our product. We have inspected and tested all of the components
before shipping and are confident we have produced one of the finest products available.
Your long term satisfaction with this system will depend greatly on how the Spectra
system is installed. The unique performance is obtained not only by our new pressurization
process, but by careful attention to reducing flow restriction, mechanical friction and electrical
resistance. All of this is affected by the final installation, and that is ultimately up to you. By
reading, understanding, and following this manual, even if you are not doing the installation
yourself, you will be completely satisfied with your new Spectra system.
With years of experience installing and repairing many different kinds of watermakers,
we have seen nearly everything that can happen to marine watermakers. This manual includes
the summation of that knowledge, tailored for the Spectra Watermakers.
Warning!
It is very important to read and follow the instructions in this manual. Unsatisfactory
performance, property damage, or personal injury may occur if the installation and operating
procedures are not completely understood and executed properly.
Caution!
If someone else is installing the watermaker for you, review all aspects of the system
with them before the installation begins. Pay special attention to how easy it will be for you to
service the system. If you have any questions, please contact us. It is important the new system
be checked by the owner/operator for proper installation, completely tested in seawater, and
thoroughly understood before leaving on a cruise. Do not rely on the word of the installer that
the system is fully operational.
All watermakers will suffer damage if they are run then left to sit with salt water in them.
The Spectra MPC 3000 controller can automatically fresh water flush after use and even re-flush
every five days. Do not let the auto flush feature drain the fresh water tank. Damage to the
fresh water pump may occur. The system can also be long term stored if necessary by flushing
with a storage (pickling) solution. All the valves and plumbing necessary for servicing are
included.
In conclusion, having a reliable and adequate watermaker will improve the quality of life
on board more than almost any other piece of equipment. This manual is designed help you take
full advantage of your new Spectra Watermaker. You have indeed made the best choice!

page 4
Table of Contents
Shipping list page 5
Features page 6
Living With a Watermaker page 7
Component Description page 11
Clark Pump Diagram page 12
Operating Procedures page 15
Service Valve Position Photos page 18
DC Main Breaker & Manual Control Switches page 19
Long Term Storage page 20
Maintenance page 22
Membrane Cleaning Procedures page 23
Membrane Element Replacement page 25
Installation Instructions page 26
Installation Basics page 28
General Plumbing page 29
Component Placement page 31
Component Dimensions page 33
Clark Pump Mounting Diagram page 34
Monterey Plumbing Block Diagram page 35
Plumbing Connection Photo page 36
Monterey Plumbing Layout Diagram page 37
High Pressure Tube Assembly page 38
Parker Tube Assembly page 39
Electrical Component Placement and Wiring page 40
Feed Pump and Control Power Connections page 45
MPC 3000 Circuit Board Wiring page 46
Specifications page 47
Troubleshooting Procedures page 48
Warranty page 50

page 5
Shipping List
Frame System
(1) Operation and Installation Manual
(1) Main Module Aluminum Frame including:
Clark Pump
Feed pump
Membrane and Housing Array
Automatic salinity control plumbing
Automatic fresh water flush plumbing
Flush pump
20 and 5 micron pre-filter assembly with pressure sensors
Manual override controls
(1) MPC 3000 Remote Control Panel including
Wiring harness
(1) Installation Kit Including:
(10’) high pressure tube
50’ of 5/8” hose
25’ of 1/4” product tubing
Hose and tube fittings
Hose clamps
One container of SC-1 storage chemical
Hand held salinity monitor
Modular System Same components without the aluminum frame
Options
Basic Cruise Kit
Includes three 20-micron filters, three 5-micron filters, and two SC-1 storage
chemical containers
Offshore Kit
Includes Clark pump seals, tools, two SC-2 and 2 SC-3 cleaning chemical
containers, and overhaul instructions
Spare Feed Pump Head
Ultraviolet Product Sterilizer
Additional Remote Panels

page 6
Features
The Spectra Monterey 1000 with the unique Spectra MPC 3000
automatic controller is the full featured flagship of the Spectra line. It is ideal for
large sailing and motor yachts. Systems are available in modular or frame styles.
Using the proven Clark Pump, the Spectra Monterey 1000 operates on a
fresh water to power ratio that surpasses everything in the marine industry. The
AC or DC current power draw is so low, a generator set is not always necessary.
The system makes an average of 42 gallons per hour on less than 3/4 horse power,
with about as much noise as a refrigerator. Operating pressures are self-
regulating, eliminating the need for adjustments, even when operating in brackish
waters.
The Spectra MPC 3000 automatic controller is the most advanced marine
watermaker control system available. The self regulating pressure feature of the
Monterey allows it to be operated solely from the MPC 3000 remote panel even if
the feed water changes from full sea water to even fresh water. Unlike
conventional systems, no access to the system hardware for adjustments are
necessary. Standard features include a salinity control system with product
diversion valve, programmable automatic fresh water flush system, and readouts
for operating conditions. It monitors all system parameters and will alarm if a
fault is present and will stop the system if necessary. Operated in the Auto Mode,
the MPC 3000 can be set for a desired run time then will automatically fresh
water flush the system and re-flush every five says. The MPC 3000 controller is
operated from the ships DC power supply, even on AC systems, allowing the
system to operate in the auto re-flush mode without having to start a generator.
The production of fresh water is stable through the system’s normal
operating sea water temperature and salinity range. Only the working pressures
change with the water conditions. A conventional 1000 gallon per day unit
running in 61 degree F water will only make 700 gallons per day. The Spectra
Monterey will still be producing 1000 gallons per day on a fraction of the power.
The frame design allows for easy installation. All of the pumps, pre-filters,
automatic systems, gauges, controls, and service valves are mounted in a
lightweight frame. The system’s feed and flush pumps are self priming so they
can be mounted up to 4 feet above the water line!
A single self priming vane pump is all that drives the system. No additional
boost pump is needed, or even helpful.
A separate small DC driven prime/flush pump is used for the automatic
flushing.
A 20-micron and 5-micron dual pre-filter assembly is provided standard for
maximum system life and reduced filter maintenance.
The system’s noise level is exceptionally low and unobtrusive, as compared
to other systems of similar capacity, and almost no vibration.

page 7
Living With a Watermaker
Now that you own a watermaker, what do you do with it? Making good drinkable water
for sure, but there is more to it. You may not think it now but your watermaker will probably
become a “mission critical” component for you. Like your engine, sails, and safety gear you
will not want to go to sea without it. The following is to help you better understand the process
of water making and making water reliably.
Theory of Reverse Osmosis
“Semi Permeable Membrane” You may remember that term from some science class.
Each cell in our bodies is covered with one. It’s designed to be able to exchange desired
chemicals in and out but reject unwanted ones. “Osmosis” (another science class term) is a
phenomenon where a solution with a high concentration of “something” (lets say salt water)
and a solution with a low concentration of the same dissolved “something” (fresh water) happen
to be separated by a semi permeable membrane, a very strange thing happens. The fresh water
wants to force itself through the membrane to dilute the salt water and the salt wants to migrate
to fresh water side. “Osmotic pressure” is created by the fresh water forcing itself into the salt
water side where there isn’t enough room for it. With sea water, osmotic pressure can build up
to almost 400 pounds per square inch (psi). “Reverse Osmosis” (RO) happens when an
artificial pressure, higher that the osmotic pressure, is applied to the sea water side. This will
force fresh water back through the membrane. A little salt does go through but is highly diluted
by the fresh water. There is a rub however. On the sea water side, as the fresh water passes
through the membrane, the salts molecules crowd up against the membrane surface which starts
to block the flow of fresh water. To stop this, a constant flow of new sea water must flow along
the membrane surface to wash away the concentrating salts. So to have reverse osmosis we
must have sea water flowing, at a pressure much higher than 400 psi, along the membrane
surface. The spiral wound “thin film composite” membrane “element” that is in your pressure
vessel was developed for this.
The Modern Marine Reverse Osmosis Watermaker
A water maker system must deliver a filtered high pressure flow of seawater through the
membrane. That’s it. Some may have more bells and whistles than others but they all generate
the high pressure flow. The trick is to do it efficiently, quietly, and reliably. Your Spectra
system, with its 21st century Clark Pump technology, does it all.
There are several things that can hamper a system, most caused by poor installation,
and/or operator error and neglect. With the system set up properly, there has to be an
unrestricted supply of seawater without air bubbles to the inlet of the system, the sea water must
be filtered to 5 microns, the power wiring must be the right size with good connections, the
system should be flushed with fresh water after use, if the system isn’t going to be used for a
while it has to be properly stored or “pickled” to stop bio-fouling and/or freezing which will
damage the membrane, and all service points placed in a convenient position.
Installing Your Watermaker
The installer must read the manual even if he or she has installed other Spectra systems.
New information is constantly being added to our documentation. A lot comes from customer
input. Pay special attention to the intake instructions, they must be followed. Even if you are
not installing the watermaker yourself, read through the whole introduction and operation
sections of the manual before starting. This will help you plan the layout of your watermaker.→

page 8
You are the one who will live with and service it; make it as easy as possible to take care if it.
Caution! Watermakers contain high pressure salt water. A small leak can generate a water jet.
Take care to prevent possible salt water damage to surrounding equipment or surfaces. Have
the installer go over the complete system with you.
Using a Watermaker
A good watermaker is a significant investment but if used properly will pay for itself
and more. First of all, make sure that it really is functioning properly before going to sea. A
new installation should be thoroughly “sea trialed” in rough conditions at all points of sail or
speeds to make sure the intake flow is OK. After that the system should always be run tested
before leaving.
A watermaker doesn’t like to sit idle with salt water in it. It wants to run. The best way
to use it is to run it until the tanks are full then flush it. It can sit flushed for several days. Your
fresh water usage pattern can typically adapt to allow for a watermaker run every 3 to 5 days on
average.
Use water! The water you make and how you use it is the payback on your investment.
It’s hard to break old habits of water conservation on board but really try. Install a fresh water
deck wash down system. By keeping the salts off the boat and gear, like you would in port after
a day sail, the watermaker will pay for itself in less maintenance costs and resale value of the
ship. By using more water for you and the crew, the quality of life on board is greatly enhance.
One of the biggest benefits is the freedom it offers. It is easy to carry enough fuel and
food to last a month or more but with a limited water supply the sailing itinerary is dictated by
where you can get the next load of water. With an unlimited supply a whole new set of choices
emerge.
Once you get used to the benefits of a watermaker it is easy to think of it as a “mission
critical” piece of equipment. But it is a complex system with several components subject to
failure, though unlikely with proper maintenance. Always carry enough water to make it to
your destination without the watermaker. The supply carried in reserve can be lessened as the
passage goes to reduce weight but carry enough to get there. Have enough spare filters and
storage/cleaning chemicals. Periodically check the system performance especially the electrical
supply at the system under load.Electrical connections can go bad. This is especially true for
high load and charging circuits. Inspect your charging system regularly.
With the Spectra there is very little to wear out as long as the system is properly
maintained. One of the most important components is the final 5 micron pre-filter. Do not
scrimp there. If there is any doubt as to the condition of the filter element, replace it. It’s cheap
insurance on your investment. Any filters in front of the 5 micron filter are not critical as they
don’t have to be there for the system to work properly. Just the 5 micron has to be good. Filter
elements are cleanable if they are cleaned before they start to resist the water flow. If the filters
get really packed up don’t bother cleaning them as the particles have been pushed too far into
the filter material.
Get to know your system. Listen to all the different sounds it makes as it’s running
normally. Literally put your ear on the Clark pump and listen to its heart beat. Get close to the
feed pump and get to know it’s tone. Most problems with a watermaker have an associated
change of sound. If you can notice subtle changes in it’s sound and feel, it can go along way to
stop a small problem before it becomes a big problem. Fix any leak no matter how small right
away especially if it’s coming from a metal fitting. If you can’t see it use your finger to feel for
wetness. The extensive use of plastics and composites in the Spectra systems greatly reduce
corrosion problems.
Living with a Watermaker cont.

page 9
Just a reminder. A watermaker system is bringing in a significant flow of seawater.→
The flow is well below the capacity of a typical bilge pump when working properly. A good
test is to divert the full flow of the watermaker into the bilge and make sure your bilge pump
system is up to the task. It doesn’t take much dirt in the bilge to completely stop a centrifugal
bilge pump!
RO Product Water.
The water your system makes should be very good water. Most people want to know
how good it is. A “Total Dissolved Solids” (TDS) meter reading in “parts per million” (ppm)
is supplied with each system. Unfortunately reading errors can occur that may alarm you.
Hand held meters must have a good battery and re-calibrated periodically. Built in ones have
to have the probe cleaned and re-calibrated also. The basic problem with a TDS meter is it is
reading the “total” impurities of the water your making. This total is dictated by the feed water
you happen to be floating in.
Salt is what you can taste the most. Other minerals might not have a taste at all but will
affect the meter. Most of us have a higher quality, more discerning TDS meter in our taste
buds. Product water readings below 500 ppm in standard sea water are considered OK by most
peoples taste buds. The rule of thumb is if the water is tasting OK to you and your crew it is
OK no mater what the meter reads.
Product water quality will degrade slightly as the membrane ages. But whether it is
producing 150 ppm or 450 ppm, it really doesn’t matter if it tastes good.
Membranes rarely fail catastrophically but there are several circumstances that can
degrade a membrane, such as poor maintenance, or exposure to oil and aggressive chemicals
like chlorine. Most of the time a good cleaning will improve quality and production to a
satisfactory level. If a poor membrane doesn’t respond to cleaning, don’t go straight to hauling
water or putting your dream cruise on hold.
A poor membrane usually will work fine if it processes brackish water. Make water
into the largest container you have then flush the system with some of it. Put both the intake,
brine, and product service hoses (see instructions) into the container and place all the service
valves to the service position. You are now using the water in the container as the “ocean”.
Start the system and let it run normally. Taste the product water, it should be good. Now it can
be directed to the tank or drinking water bottles. The mini ocean will slowly drain from the
container, what’s left getting saltier as it goes. When there is about 1/10th of the water left,
switch the brine discharge back to the run position and dump it. Repeat this until you have
enough water to get where you need to go. Don’t let a poor performing watermaker stop you.
Where to Run Your Watermaker
Ideally, a watermaker wants to run in the cleanest water possible. This is mostly for the
life of the pre-filters. Running in turbid water typically doesn’t hurt the system especially if
the run time is short. Many more problems are created by not testing a system because the boat
was in a harbor with murky water than discovering a problem with the system 300 miles out to
sea, down wind. A system must be tested in real seawater to prove anything. If the water you
are in is so bad that divers are melting before they can finish cleaning your boat’s bottom, you
can make you own sea water with aquarium salts in a bucket. All storage chemicals must be
flushed from a system before it can be run from an “ocean” in a bucket. Many people use their
system in areas like the Chesapeake where the water is murky and only have extra pre-filter
maintenance to deal with; they've done so for years. If there is no other way to test the→
Living with a Watermaker cont.

page 10
system until the boat is in open water, assume it’s not going to work and plan the your trip
accordingly. Most of the time when a boat is being prepared for a cruise, several systems must
be sea trialed so leave enough time in your plans for this.
How to Store Your Watermaker
This is one of the most confusing aspects of living with a watermaker. You can’t just
turn it off and leave for a month or two without damaging it. You might hear stories from
people who do just that all the time and their watermaker is “fine”. The strange thing is it
might be true but for every one that gets away with it a hundred will eventually damage their
systems. The fact is, membrane maintenance is a very inexact science. You can read all the
different watermaker manuals and will get a different version of how to maintain a membrane
in each one. All we can do is give you the benefit of our experience in this field with the hope
that our version will give you the best performance with the least aggravation.
With that said what you need to do is pretty simple once you become familiar with it.
First, don’t let the system sit with salt water in it at all….ever. It has been a common belief that
running a watermaker a couple of hours a day without flushing in between will maintain it.
The reality is sometime different. Temperature and sea water variables may cause a slow
degradation of the membrane. So why not flush it every time? Your Spectra system is set up
to do this automatically if you like.
Next, how long can you leave it flushed? To be conservative, we say up to 5 days.
After that it depends. If the temperature is cool it could last much longer but if you already
have bio-fouling in the membrane the 5 day interval may be the maximum no matter what.
Now that you have decided to store or “pickle” your system-what does that mean? Just
this; you remove the salt water and replace it with fresh water mixed with a chemical that will
stop biological growth. In a little more detail, you flush the system, get some flush water in a
bucket, add the chemical to the bucket, then mix the solution in the bucket with the flush water
already in the system. There are “service” valves built into your system just for this. The
instructions give the full details but the basic concept is simple.
When To Clean the Membrane
The rule of thumb is: if the system is performing 10% below what’s normal for the
conditions and is not caused by an electrical or mechanical problem, clean the membrane.
Keeping a log of the system performance really helps in making this decision. You look at
operating pressure, water quality, power draw, and production rate. Higher than normal
pressures for the conditions and/or degradation of water quality without a significant drop in
feed and product flow rate are indicators. As mentioned earlier the membrane will slowly
degrade over time so cleaning can bring some performance back but not all. Like a pre-filter,
the idea is not to let a large build up of fouling occur before you try to clean the membrane
which is hard or impossible to get off. On the other hand, cleaning itself is a bit hard on the
membrane so you don’t want to do it more than you have to. Cleaning is similar to pickling
except that you re-circulate the chemical longer and try to heat it if you can. Heating the
cleaning chemical is something that has been largely ignored by the marine watermaker
industry but is done routinely for commercial land based watermakers Heating the cleaning
solution makes it work better just like with your laundry. If you can’t heat it, just give the
chemical more time to do it’s job and hope for the best (this has been the standard practice in
the marine industry for years).
Living with a Watermaker cont.

page 11
Component Description
Note: The Monterey frame components are pre-plumbed and wired at the factory. All
installation plumbing connections are inside the frame. Main power, control power, and
remote panel wiring connections are made inside the power control module. The
Membrane array, pre-filter assembly, and power control module may be removed and
mounted remotely if necessary.
Clark Pump
This is the heart of the system. The Clark Pump uses two opposing cylinders and
pistons that share a single rod through a center block. A reversing valve, controlled by a
pilot valve actuated by the pistons, allows the cylinders to alternate between driving and
pressurizing. Pressurization is achieved by the rod being driven into the other cylinder.
As the rod enters the cylinder, it pushes the piston which circulates the water out through
the membrane and back to the reversing valve. The valve directs the water back into the
same cylinder behind the piston, creating a closed loop.The rod displaces water as it
enters the cylinder, raising the pressure enough for reverse osmosis to occur in the
membrane, thus fresh water equal to the volume of the rod is produced on every stroke.
The driving cylinder has feed pressure pushing on the top of the piston which has ten
times the surface area than the end of the rod. The water under the piston (brine) is
discharged overboard. This gives the piston a 10-to-1 advantage over the rod, allowing
it to drive the rod into the pressurizing cylinder. When the piston bottoms out on the
center block, it actuates the pilot valve and the process is instantly reversed. High
efficiency is achieved because there is no "back stroke," allowing one cylinder to always
be under pressure.
The speed of this process is determined by the water flow from the feed pump. The feed
pump has a nearly constant flow rate at a given voltage so the production of fresh water
is nearly constant, only the pressures change with changes in sea water temperature and
salinity. (see "Membrane" section)
A pressure relief valve is incorporated in the Clark Pump to depressurize the system for
service.
Feed Pressure In
Pilot Spool
Check Valves
Pressure Cylinder
Function Dia
g
ram
Rod
Pistons
Pilot Valve
Spool Pistons
Spool
Membrane
Driving Cylinder
Pilot pins
Reversing Valve
Product out
Brine out
→

page 12
End block B
End cap
Cylinder ring
Stainless steel tube
End block A
Valve block
Alternate brine outlet port
High pressure inletn or
Accumulator port
Center block
Clark Pump
High pressure outlet
Front View
Composite cylinder
and base
Pressure relief valve
End block A
End Cap
Cylinder ring
Stainless steel tube
End block B
Stroke sensor
Valve block
Brine outlet port
HP accumulator tank port
or HP inlet port
Center block
Clark Pump
Feed in
Back View
Composite cylinder
and base
Component Description cont.
→

page 13
Reverse Osmosis Membrane Elements and Pressure Vessel Array
The “RO” membrane elements do the real work. An element is made from membrane
and separating layers attached and wrapped around a center catch tube then encased in
fiberglass. The ends of the windings are open, allowing water to freely pass through
from end to end. An element is installed into a high pressure vessel that directs the
pressurized salt water to flow through the element and lets the product (fresh) water that
passes through the membrane escape from the center catch tube. Threaded ports are
provided for hose connections in the end caps of the pressure housings. The Monterey
uses three membranes plumbed in series. As high pressure salt water flows across the
membrane layer, fresh water is forced through the membrane and lead by a capillary
layer to the catch tube. The excess salt water flowing out of the membranes is saltier
and is called “brine.” No salts are collected in the membranes.
Membrane element function is affected by sea water temperature and salinity. The
warmer or less salty the water, the easier it is for the fresh water to pass through the
membrane material. This means that since the water production of the Spectra systems
are nearly constant, warmer water lowers the operating pressures. The membranes are
carefully sized to handle typical sea water temperatures and salinity, keeping the
pressures within limits set by the membrane manufacturers.
MPC 3000 System Control
The Spectra MPC 3000 gives the operator complete control of the watermaker during
normal operation through a remote touch pad control panel. Four power outputs are
available for optional devices such as an ultra violet sterilizer, a Zeta Rod water
pretreatment device, etc. Two inputs are available for optional tank full indicator float
switches The system monitors and displays product flow, product salinity, feed
pressure, pre-filter condition, and total hours. There are alarms for a stall condition,
high and low voltage, high feed pressure, continuous high product salinity, pressure
differential across the pre-filters, and power interruption. An intake line blockage sensor
can be added. If service is needed or a fault occurs, audio and visual alarms will sound
and the proper message will be displayed. The system will automatically shut down if
needed. Power feed wires connect inside the enclosure. The control module is
powered by the ships DC system. The feed pump may be a different voltage.
The MPC circuit board is housed in a control box with three switches located on the
cover. One is an emergency shut off. The other two directly power the feed pump and
the flush pump for servicing the system as in pickling procedures, cleaning the
membrane, or emergency override if the controller fails. For normal operation both
pump switches must be on “AUTO”.
Feed Pump
The feed pump is an 120V or 240V AC or 24 volt DC driven self priming stainless steel
vane type with an adjustable pressure bypass. The full bypass pressure is preset at 260
psi. Partial bypass begins at approximately 220 psi. The electronic high pressure cut
out is set at 240 psi. →
Component Description cont.

page 14
Flush Pump
A 12 or 24 volt DC powered flush pump is used to fresh water flush the system at shut
down. It is also used to help the priming of the main feed pump at start up.
The ships domestic fresh water pressure is connected to the flush pump. An adequate
supply of pressurized fresh water must be maintained for the flush system to function.
20 and 5 Micron Dual Pre-filter Assembly
The pre-filters do the essential job of cleaning the sea water before it gets to the Clark
Pump and R.O. membranes. High quality replaceable pleated fiber filters are used.
Filter maintenance is crucial to the efficiency and life of the system. Five micron
filtered sea water is mandatory. Do not use sub-standard filters.
The 20 micron filter is plumbed in front of the 5 micron to reduce filter maintenance.
The system can be run on a single 5 micron pre-filter if necessary.
The MPC 3000 monitors filter condition and will alarm when filter service is needed.
Analog Feed Pressure Gauge
The dial type feed pressure gauge mounted on the output of the feed pump is used for
system trouble shooting. Higher than normal pressures indicates the need for pre-filter
service or a system blockage.
Service Valves
The service valves are in the feed, brine discharge, and product lines to provide easy
access for proper maintenance. The service hoses attach to the panel face (frame style)
or to the service valves directly (modular systems) and are lead to a cleaning container.
IMPORTANT: The intake and discharge service valves will close off all the ports if
the levers are moved to the “Off” or middle position.
The product service valve cannot close the ports when the lever is moved half way.
This precludes the possibility of blocking the product flow and causing an over pressure
condition that could burst the tube.
Always verify the valves are in the proper position for the mode of operation desired
before starting the system.
Component Description cont.

page 15
Operating Procedures
New System Start Up and Testing
Caution! If possible, avoid running the system if the vessel is in contaminated water, such as
in a harbor or canal. That said, we suggest that the system be fully run tested before leaving
port. We think that is preferable the sacrifice a filter by running in turbid water rather than
waiting to get offshore to discover a problem or deficiency in the installation. Another
alternative is to test the system with an artificial ocean. Open the pressure relief and flush the
system by running the fresh water flush cycle 6 times with the pressure relief valve open and
again 5 times with the pressure relief valve closed and the product water diverted. This will
flush the storage solution from the membrane. The system can now be run using a clean source
of sea water in the cleaning container. Unchlorinated fresh water mixed with aquarium salt
purchased from a pet store can be used. Use the intake, brine discharge, and product service
hoses to recirculate the salt water from the container.
First Check That:
•Thru- hull valve is open. See caution about feed water condition above.
•Power is on. If you have an AC system both the AC power and the DC control voltage
to the unit needs to be on.
•Service valves are in the “run” position. See photos on page 18.
•Domestic fresh water pressure system must be on.
Next:
•“OPEN PRESSURE RELIEF VALVE” is displayed on the remote panel
•Locate the Clark pump and the pressure relief valve. See drawing on page 12.
•Open the pressure relief valve one turn counter clockwise.
•Push the Start/Stop or Auto Run button to start the system. The control will prompt:
“STARTING” then “PURGING STORAGE SOLOUTION”.
Warning! A system is always purged or serviced with the pressure relief valve open.
The control will go into an starting mode and the feed pump will start shortly after. The
system should prime within 60-90 seconds. Check the strainer and the brine discharge for water
flow. There should be no bubbles anywhere in the intake hoses and the feed pump should
sound smooth after the prime. If the feed pump continues to sound rough find the reason before
continuing.
Then:
•Inspect for leaks. After 20 minutes the system will stop, “alarm” and prompt:
“CLOSE PRESSURE RELIEF VALVE”.
•Close the pressure relief valve on the Clark pump and restart the system in Auto Run
or with the Start/Stop button (manual mode).
The system will now start in a normal operating mode but will continue to divert the
product for ten minutes.
•Inspect for leaks again! The system is now operating under pressure →

page 16
Note. If you must stop the purge sequence for any reason, the control will default back to
the beginning of the current operating purge mode to protect your system. If you know it’s OK
you can bypass the purge sequence and enable a normal start. Pressing both Auto Run and
Start/Stop simultaneously anytime during the purge sequence will bypass the purge sequence
and enable a normal start.
Warning! Damage may occur if the purge sequence is bypassed and the membrane is
pressurized with storage chemical in it.
Caution! Do not assume the system is operational without a complete run test at sea,
preferably in rough conditions.
Normal start up using the Auto Run button
•Press Auto Run button once and the system will prime and run for 1 hour. The display
reads "AUTO RUN MODE" then "STARTING" with a 30 second priming countdown
timer. After the prime, the display reads "AUTO RUN MODE" with a countdown
timer. An hour of run time is added, up to 12 hours, with each successive momentary
press of the Auto Run button. An hour can be added at any time. The display shows
the default readout unless there is an alarm condition. Successive presses of the Alarm/
Displ button will scroll through the displays starting with "GPH PRODUCT". Upon
auto shut down by the timer or by the optional tank full float switches, the system will
automatically fresh water flush and re-flush every five days.
•Pressing the Stop/Start button stops the system at any time with no flush sequence.
Normal start up using the Start/Stop button.
•Pressing the Start/Stop button will prime and start the system in a manual mode.
Display defaults to the product gph meter. The system will continue running until
stopped by pressing the Start/Stop again with no flush or by the optional tank full
switches with a 1 time flush.
Normal operation
•For optimum performance, run the system as long as possible then flush. Never let the
system sit with salt water in it. Never allow continuous air leaks in the intake. If pre-
filters are going to be cleaned, do so when the first bar shows in the filter condition bar
graph.
Normal shut down
•If the system was started using the Auto Run button the system will shut off on its own
when the selected run time is over and will auto flush and re-flush every 5 days
•Pressing the Start/Stop button at any time will shut off the system with no auto flush
function.
•The optional tank full float switches will shut off the system from any mode. If the
system was started by the Auto Run button the system will flush and then re-flush every
5 days. If the system was started by the Start/Stop button it will do a 1 time flush. The
display reads "TANK(S) FULL. Once one of the tank full float switches open, the
alarm and "TANK(S) FULL" display ceases on its own. →
Operating Procedures, cont.

page 17
Flushing
Warning! Proper operator understanding of the Spectra flush system and the vessel’s fresh
water system configuration is mandatory for extended automatic flush cycles. The flush cycle
must not be allowed to drain all the fresh water from the vessel or damage to the vessel’s fresh
water pump may occur. Adding a low pressure cutout switch on the vessel’s fresh water pump
is recommended if the vessel is to be left unattended during the Spectra “re-flush every 5
days” program.
•Make sure that there is enough water in the fresh water supply system to supply the
watermaker for more than the expected time of operation in the “re-flush every 5 days”
mode.
•Make sure that the pressure water supply is on and will stay on during the flush mode.
•Make sure that the pressure relief valve is closed. It should be if the system was just
used to make water. The auto flush may not operate if the valve is open
•The DC power for the MPC 3000 must remain on during the auto flush mode. Turning
off the DC power will disable the auto flush function and damage may occur.
•Pressing the Auto Store button will engage a flush and then the every 5 day re-flush.
The flush pump starts and the flush water solenoid opens for 3.5 minutes and then
shuts down. The display reads "FLUSHING" with countdown timer" then "AUTO
FLUSH EVERY 5 DAYS" when the flush is finished.
•Pressing and holding the Auto Store button for 3 seconds will engage a 1 time flush.
The system flushes as described above but will not re-flush every 5 days. Display
reads "FLUSHING" with countdown timer” then the default display when finished.
•Pressing the Start/Stop button will cancel the auto flush mode.
•Approximately 5 gallons of fresh water is used for flushing.
Emergency Operation
•In the event of a MPC control failure, the system may be operated manually using the
manual feed and flush pump switches on the MPC 3000 control box.
•In manual operation the salinity control system is inoperative. Product water is
available through the product service valve.
•If length permits, the product tube to the tank may be removed from the diversion
valve in the frame and connected to the product service valve’s service port.
•Always discard the product water for the first few minutes of operation. The initial
product water from the system may not be potable. Taste the product water before
sending to a tank.
•For manual start up, switch on the feed pump using the feed pump switch. Monitor the
feed pressure gauge on the feed pump for proper feed pressure. Shut down the system
immediately if the feed pressure is 240 psi or above and the Clark pump is not cycling.
Shut down if air is continuously present in the intake line or the feed pump is
excessively noisy. The automatic safety controls are disabled in manual mode.
•For manual flushing, switch on the flush pump using the flush pump switch. Make
sure the system is taking in fresh water by checking for operation of the ships pressure
pump. Run the flush pump a minimum of 4 minutes.
Operating Procedures, cont.

page 18
Service Valves in Run Position
Service Valves in Service Position with Hoses Attached

page 19
Monterey DC Main Breaker, Emergency Stop & Manual Control Switches

page 20
Long Term Storage Procedures
Watermakers are best run continuously. When not in use, biological growth in the
membrane is the leading cause of membrane fouling. A warm environment will cause more
growth than a cold environment. The auto fresh water flush system will greatly reduce
biological growth but will not stop it. The 5 day re-flush feature allows the system to be shut
down without any service procedures for extended periods of time but it doesn’t replace
performing a storage procedure for long periods of non-use. If an optional “Zeta Rod” is
installed in the system, the 5 day re-flush will maintain the system as long as unchlorinated
pressurized fresh water is provided.
Storage Shutdown or "Pickling"
If the system is to be left unused for more than 2 weeks, perform the following pickling
procedure. The procedure introduces a chemical compound into the system that prevents
biological growth. Do not allow the system to empty the water tanks; a good charcoal filter is
mandatory. Charcoal filters last a maximum of 6 months once wetted.
Warning! The Spectra SC-1 Storage compound is specially formulated to be
used as a Spectra system preservative. Sodium bisulfite or metabisulfite
should not be used as a preservative in the Spectra systems. Use of
sodium bisulfite will attack materials used in the Spectra systems and
void the warranty.
Warning! The pressure relief valve on the Clark pump must be open for this
procedure or membrane damage may result. Maximum pressure 50 psi!
The SC-1 Storage Compound has to be mixed at a ratio of 2 Spectra containers to 6 gallons
of fresh water to have the proper solution. An average of 4 gallons in a Monterey system.
This water has to be included in the mixture.
Caution! Avoid contact with skin, eyes, or lungs with the storage chemical.
•Make sure the system has already flushed itself. If unsure of the system status, start the
flush cycle with the MPC control. Once flushed, attach the service hoses to the face of
the unit and direct them to a clean, 3 gallon or larger, plastic or SS mixing container.
•Turn only the brine discharge service valve to the “Service” position. Re-start the flush
cycle and allow two gallons to flow into the container then turn press the Start/Stop
button. Do not use tap water or any water that might have chlorine in it.
•With the system flushed and unchlorinated fresh water in the container, thoroughly mix
two containers of the SC-1 storage chemical into the mixing container. Warning! Re-
check that the pressure relief valve is open or membrane damage may result. Turn
all the “Service” valves to the service position. Start the main feed pump manually
using the manual switch on the MPC control box.. Run for 10 minutes to completely
mix up the storage solution. Light discoloring of the solution is acceptable.
•After 10 minutes, turn the brine discharge valve to the “Run” position. When the
container is empty, shut off the system.→

Table of contents
Other Spectra Watermakers Water Filtration System manuals

Spectra Watermakers
Spectra Watermakers NEWPORT 400 Mk II Operating instructions

Spectra Watermakers
Spectra Watermakers Aquifer Series User manual

Spectra Watermakers
Spectra Watermakers AQUIFER 150 User manual

Spectra Watermakers
Spectra Watermakers Newport 400c User manual

Spectra Watermakers
Spectra Watermakers Bimini 300 User manual

Spectra Watermakers
Spectra Watermakers Catalina 340 Z User manual

Spectra Watermakers
Spectra Watermakers VENTURA 150 User manual

Spectra Watermakers
Spectra Watermakers Newport 700C User manual

Spectra Watermakers
Spectra Watermakers Ventura 150R User manual

Spectra Watermakers
Spectra Watermakers AQUIFER 360 EXPEDITION User manual