3
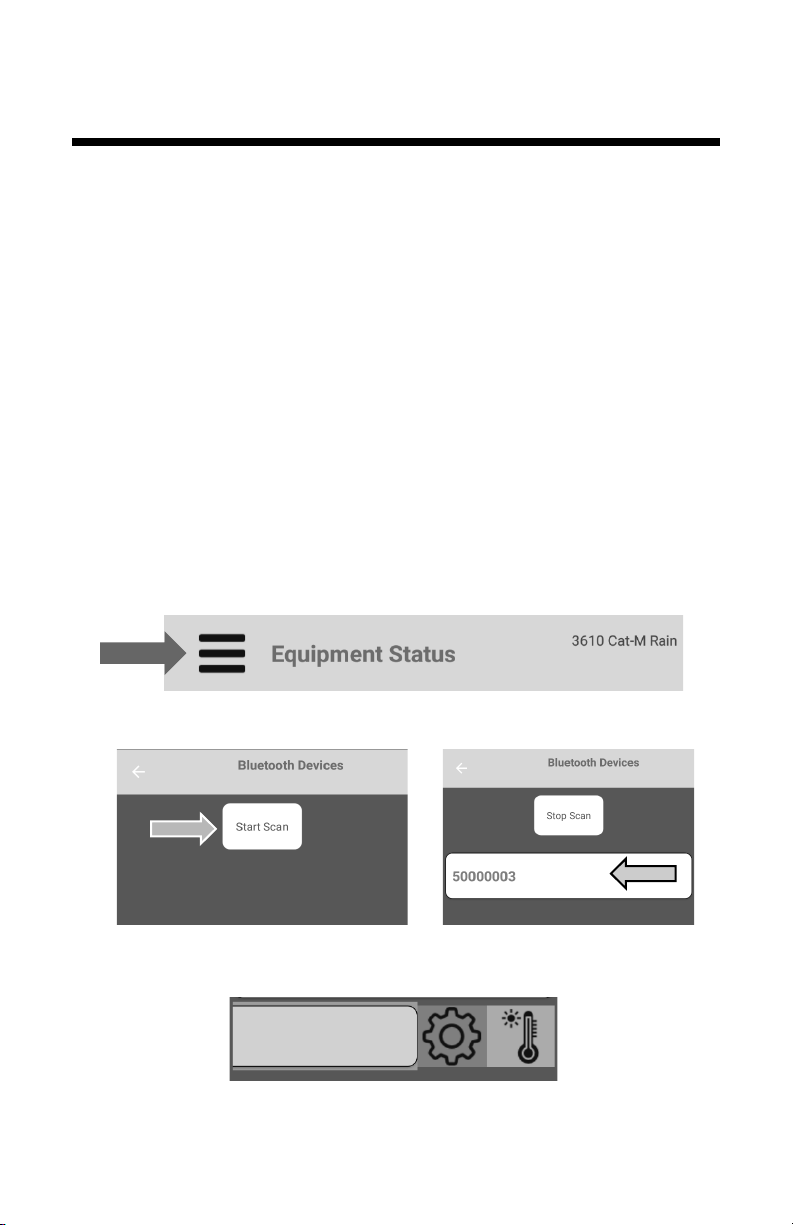
Installation
Preparation
The weather station should be located in an open, unobstructed,
grassy area to ensure accurate measurement of wind, rainfall,
sunlight, and evapotranspiration.
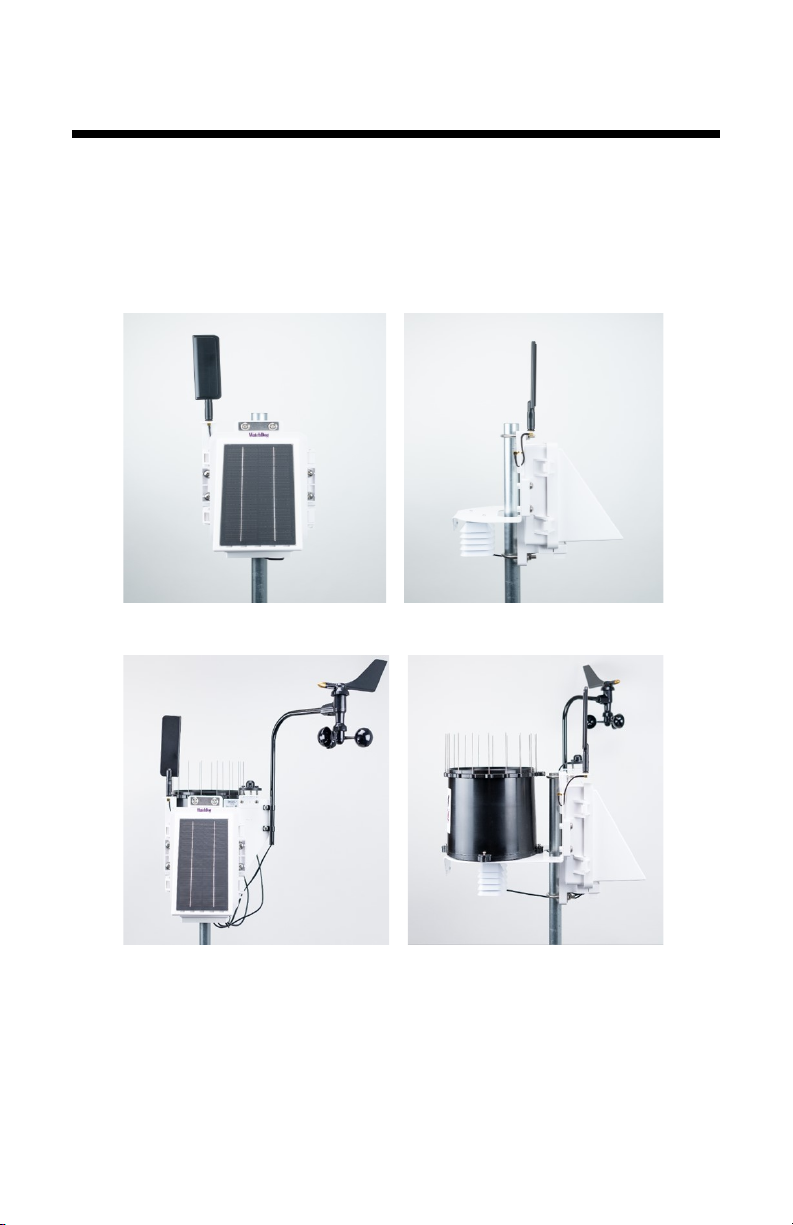
Mounting hardware is provided to attach the weather station to a
mast/pole with a 1.25 to 1.66” (32 to 42mm) outside diameter and
a wall thickness of at least 0.13” (3.3mm). The mounting pole
should be securely anchored perpendicular to the ground.
For mounting at an approximately 6 foot (1.8m) height, a 1.5 inch
(40mm) OD or larger pole should be used for any station with a
rainfall sensor. If that size is not available, then the station should
be mounted on a tripod, such as Spectrum Technologies item #
3396TPS. Mounting the station at a greater height requires both
the 1.5 inch (40mm) OD or larger pole and guy wires to keep the
station from swaying in the wind.
If you are using the mounting tripod, open it and place it where the
weather station is to be located. The tripod feet can also serve as
mounting brackets if the unit is located on a solid surface. Slide
the 3’ post through both center screw clamps, adjust the height as
desired and tighten the screws so that the post is perpendicular to
the ground.
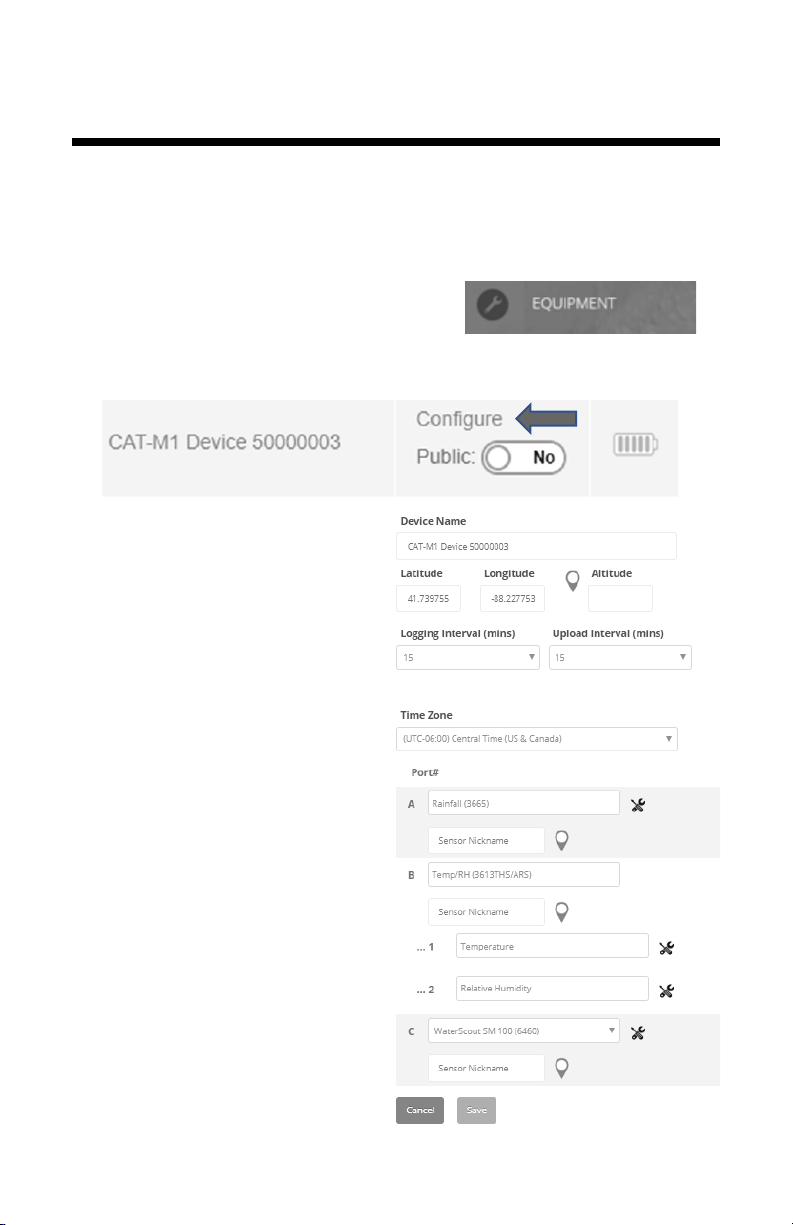
Assembly
Tools Required: 1/2 inch (13mm) wrench
#2 Phillips screwdriver
The majority of the assembly of each 3000 Series Wireless Sta-
tion is completed prior to shipment. Some parts are not attached
to protect them from damage in shipping. The final assembly can
be done either at the installation site or on a table for conven-
ience.
If final assembly is being done at the installation site, mount the
station to the pole with the provided U-bolts. Use a 1/2 inch
(13mm) wrench to tighten the nuts. Face the solar panel south in
the Northern Hemisphere or north in the Southern Hemisphere.