manuals.online logo
Brands
  1. Home
  2. •
  3. Brands
  4. •
  5. Sportline
  6. •
  7. Pedometer
  8. •
  9. Sportline 346 User manual

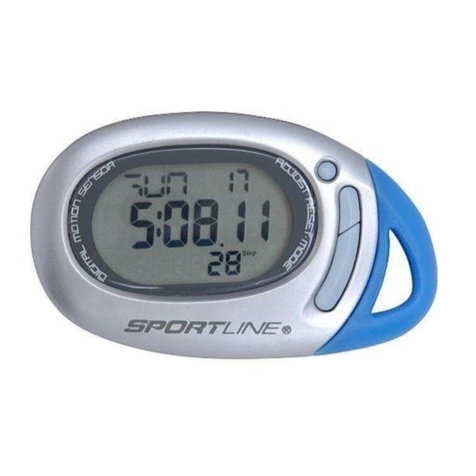
Sportline 346 User manual

Other Sportline Pedometer manuals

Sportline 344 User manual

Sportline

Sportline 344 User manual

Sportline 370 User manual

Sportline

Sportline 370 User manual

Sportline Anytouch S12 User manual

Sportline

Sportline Anytouch S12 User manual

Sportline 346 User manual

Sportline

Sportline 346 User manual

Sportline 3101 User manual

Sportline

Sportline 3101 User manual

Sportline 310 User manual

Sportline

Sportline 310 User manual

Sportline 363 User manual

Sportline

Sportline 363 User manual

Sportline SnapShot Pedometer User manual

Sportline

Sportline SnapShot Pedometer User manual

Sportline 2806 User manual

Sportline

Sportline 2806 User manual

Sportline Solo 960 User manual

Sportline

Sportline Solo 960 User manual

Sportline 343 User manual

Sportline

Sportline 343 User manual

Sportline Pocket Pedometer User manual

Sportline

Sportline Pocket Pedometer User manual

Sportline Belly Fat Blasting User manual

Sportline

Sportline Belly Fat Blasting User manual

Sportline 345 User manual

Sportline

Sportline 345 User manual

Sportline ThinQ XA 305 User manual

Sportline

Sportline ThinQ XA 305 User manual

Sportline ShrinQ 304 User manual

Sportline

Sportline ShrinQ 304 User manual

Sportline Walking Advantage 350 User manual

Sportline

Sportline Walking Advantage 350 User manual

Sportline 4191 User manual

Sportline

Sportline 4191 User manual

Sportline 330 User manual

Sportline

Sportline 330 User manual

Sportline Anytouch S12 User manual

Sportline

Sportline Anytouch S12 User manual

Sportline 355 PULSE User manual

Sportline

Sportline 355 PULSE User manual

Sportline 3107 User manual

Sportline

Sportline 3107 User manual

Sportline GoWalking User manual

Sportline

Sportline GoWalking User manual

Sportline 345 User manual

Sportline

Sportline 345 User manual

Popular Pedometer manuals by other brands

Rubicson 47981 manual

Rubicson

Rubicson 47981 manual

Trojan JS-208B manual

Trojan

Trojan JS-208B manual

Accusplit 1590 operating instructions

Accusplit

Accusplit 1590 operating instructions

OZO Fitness SC2 manual

OZO Fitness

OZO Fitness SC2 manual

Franklin Electric 3673-WHF-SF10 Operation manual

Franklin Electric

Franklin Electric 3673-WHF-SF10 Operation manual

Accusplit Eagle AE140SXL operating instructions

Accusplit

Accusplit Eagle AE140SXL operating instructions

A-rival sQip user manual

A-rival

A-rival sQip user manual

Crivit KH 260 operating instructions

Crivit

Crivit KH 260 operating instructions

Oregon Scientific PE829A user manual

Oregon Scientific

Oregon Scientific PE829A user manual

Ultima UT-608 user guide

Ultima

Ultima UT-608 user guide

HighGear BodyFat user guide

HighGear

HighGear BodyFat user guide

Hama PM-Pro 3 Operating	 instruction

Hama

Hama PM-Pro 3 Operating instruction

CSX 341 instruction manual

CSX

CSX 341 instruction manual

iSport W227 Instructions for use

iSport

iSport W227 Instructions for use

HighGear FitWare user guide

HighGear

HighGear FitWare user guide

Accusplit Alliance 1520 operating instructions

Accusplit

Accusplit Alliance 1520 operating instructions

Freestyle Tracer 593 instructions

Freestyle

Freestyle Tracer 593 instructions

Omron HJ-320 instruction manual

Omron

Omron HJ-320 instruction manual

manuals.online logo
manuals.online logoBrands
  • About & Mission
  • Contact us
  • Privacy Policy
  • Terms and Conditions

Copyright 2025 Manuals.Online. All Rights Reserved.

346 NIGHT VIEW PEDOMETER
IMPORTANT: READ THROUGH ALL INSTRUCTIONS BEFORE BEGINNING TO USE YOUR PEDOMETER
BATTERY CAUTION:
• Non-rechargeable batteries are not to be recharged
• Rechargeable batteries must be removed before recharging
• Rechargeable batteries only to be recharged under adult supervision
• Different types of batteries must not be mixed
• New and used batteries not to be mixed
• Exhausted batteries to be removed
• Do not dispose of battery in fire; battery may explode or leak
• Do not dispose of product in fire; battery may explode or leak
TO OPERATE YOUR NEW PEDOMETER
1. Remove the plastic film from the LCD display on the front of the pedometer.
2. Slowly pull the battery protector from the battery door located n the back to activate your pedometer.
EXPLANATION OF BUTTON FUNCTIONS
Your new pedometer has been designed for your easy use and the accurate measurement of the distance you travel and the steps you take while you walk or jog or hike.
Also included is a convenient "automatic stride measurement" feature or "manual stride measurement" to assist you with accurate stride length setting.
The pedometer will measure your distance in MILES and fractions of MILES as well as in KILOMETERS.
This pedometer also includes a bright electro-luminescent blue light for easy viewing of the display in poor lighting conditions.
EXPLANATION OF SYMBOLS
BUTTONS:
Button A – SET: Used for setting your personal stride length either manually or automatically.
Button B – MODE: Allows you to choose between STEP and DISTANCE modes.
Button C – RESET: Resets your pedometer to zero in both STEP and DISTANCE modes.
This button is also used to switch from the Imperial Measurement System (Miles/Feet) to the Metric Measurement System (Kilometers/Centimeters).
Button D – LIGHT: Light up the display for easy viewing.
DISPLAY:
STEP – You are in STEP mode (Counts up to 99999 Steps).
MIL – You are in DISTANCE mode with MILE measurement (Measures up to 999.99 miles).
FT – You are in STRIDE setting mode for MILES.
KM – You are in DISTANCE mode with KM measurement (Measures up to 999.99 kilometers).
CM – You are in STRIDE setting mode for KM.
TO SET YOUR PEDOMETER
1. Decide first whether you want your pedometer’s DISTANCE mode to operate in miles or kilometers.
2. Determine if the DISTANCE mode is currently set to MILE or KM by hitting the MODE button. If already set to your desired measurement, please skip to "HOW TO MEASURE YOUR STRIDE LENGTH”
3. If you need to change from MILE to KM or vice versa, press and hold the RESET button for 5 seconds. This will change STRIDE setting measurements from feet to centimeters.
4. You will need to give your pedometer some information for it to operate properly. In the sections below, you will see how to enter your personal Stride Length and properly use your pedometer.
HOW TO MEASURE YOUR STRIDE LENGTH
Manual Stride Adjustment (Range 1 – 8 ft or 30 – 240 cm; defaults are 2.5 ft or 75 cm)
1. Walk 10 steps.
2. Measure the distance you have walked either from heel-to-heel or toe-to-toe.
3. Divide the distance covered by the number of steps.
4. Example: Distance covered in 10 steps = 360 inches. Divide the number of inches by the number of steps (360 inches divided by 10) = 36 inches.
IMPORTANT: Please remember that the length of your stride while walking is different than the length of your stride while running. If you plan to use this pedometer for both types of exercise, you will have to reprogram your stride length when
you go from one to the other.
HOW TO ENTER YOUR "MANUAL" STRIDE LENGTH INTO THE PEDOMETER (as determined above)
1. Press the MODE button (B) on the display panel to show MIL/KM mode.
2. Press the SET button (A) to enter the STRIDE setting mode, and then PRESS repeatedly to enter your personal stride length. Each press advances your stride by .1 foot (1.2 inches) or 5 centimeters depending on which measurement system you
have chosen.
NOTES: After five seconds, the display will return to the MIL (or KM) mode. If you want to go to the MIL mode immediately, simply press the RESET button (C) to exit or MODE button (B) back to STEP mode.
The pedometer will only count up. It will count up to 8.0 feet or 240 cm before dropping to 1.0 foot or 30 cm to count up again.
HOW TO MEASURE YOUR STRIDE LENGTH
Automatic Stride Adjustment
This pedometer allows a quick set up to enter your stride length automatically as an alternative to measuring your footsteps to determine your personal stride length.
1. Press the MODE button (B) on the display panel to show MIL/KM mode
2. Press SET button (A) to show stride length window. "FT" or "CM" will be displayed.
3. Walk a measured 25-foot (7.62 meters) distance, and then press the SET button (A). Your personal stride length is now automatically entered into your pedometer. The display will flash for 5 seconds and then stop.
NOTES: If you walk or jog less than five (5) steps, or greater than twenty (20) steps the pedometer will keep the previously entered stride length.
TO START YOUR EXERCISE
1. Press and hold the RESET button (C) for 2 sec. The display will show all 0.00 in STEP and MILE/KM measurement.
2. Press SET button (A) repeatedly to set your average stride length (in FT or CM) in DISTANCE mode. The digits will flash 5 times and then be entered into the pedometer’s "memory".
3. Start your exercise.
TO RESET YOUR PEDOMETER
Press and hold RESET button (C) to reset all the accumulated data to zero.
HOW TO SET DISTANCE COUNTER
Your Stride Length and How to Measure It
Your pedometer automatically records your exercise distance based upon your walking or hiking movements. It's important to walk or hike consistently. If you vary your walking pace, your stride length will vary and distance traveled will be
different. The maximum distance reading is 999.99 MILES or KILOMETERS. The numbers to the right of the decimal point are fractions of MILES or KILOMETERS (just like your car's odometer).
10
9
8
7
6
5
4
3
20
1
Step Distance
Ideal Distance
A
B
C
D
346 NIGHT VIEW PEDOMETER Instructions Cont…
If at any time within one (1) year from the purchase date of this product, it fails to perform properly because of defects in material or manufacturing, return it prepaid to:
E&B GIFTWARE, LLC, 585 Oak Ridge Road, Hazleton, PA 18202
Complete this Guarantee Certificate and enclose it (or a copy of it) with the product. To expedite replacement or repair,
do not return
the defective unit to the store
from which it was purchased but return it directly to SPORTLINE. (PLEASE PRINT CLEARLY)
REPLACEMENT
This product has been carefully designed, manufactured and packaged. If any parts are missing or damaged, please contact us at the address above and we will replace
unit at no charge. (Guarantee does not cover crystal or battery.) By contacting SPORTLINE, Inc. rather than the company from which you purchased this product, we will
be able to more rapidly service your needs.
AFTER WARRANTY
If the warranty period has expired and the unit is returned to Sportline for servicing, enclose $7.50 for postage
and handling. Send your unit insured to our Service Department at the address shown. If you are located outside
the United States either return the unit by insured mail or to the dealer/distributor where purchased. E&B GIFTWARE, LLC, 585 Oak Ridge Road, Hazleton, PA 18202
THE PROFESSIONAL’S CHOICE
GUARANTEE CERTIFICATE
NAME TEL
ADDRESS
CITY
STATE ZIP
STORE PURCHASED FROM
DATE OF PURCHASE PURCHASE PRICE
PROBLEM WITH PRODUCT
STEP COUNTER FUNCTION
This feature allows you to count the steps you take during an exercise period or all day, if you wish. Your goal should be to take 10,000 steps each day, try it!
1. Press MODE button (B) to STEPS.
2. Press the RESET button (C) and begin walking or jogging. The display will show 00000 and begin to record up to 99,999 steps.
MILE/KILOMETER CONVERSION
To change from MILES to KILOMETERS, press and hold RESET button (C) for 5 seconds in ‘MIL/KM mode’. This will also automatically change the distance measurements from MILES to KILOMETERS (or vice versa).
BRIGHT NIGHT LIGHT
Press the LIGHT button (D) on the display panel, the display will give you a bright blue back light for 3 seconds for easy reading under poor lighting conditions.
HOW TO WEAR YOUR PEDOMETER
1. Pedometer case must be closed in order to operate properly.
2. Your pedometer clips easily and snugly to either side of your trousers or shorts. For best results keep the unit in line with the "crease line" of your trousers.
3. The pedometer must always be horizontal and be parallel to the ground. Do not attach at an angle or false readings will occur.
SENSITIVITY ADJUSTMENT
Everyone's walking "style" is different. The pedometer has an automatic Sensitivity Adjuster that compensates for the different walking and jogging styles.
BATTERY REPLACEMENT
1. The battery hatch is on the rear side of your pedometer. Open the battery door with a coin to access the battery.
2. Replace with type LR1154 or equivalent battery when display dims.
3. RESET the pedometer and re-enter the STRIDE length.
OTHER INFORMATION
1. Treat your pedometer with care.
2. Pedometer is NOT waterproof.
3. This pedometer is designed to remain on continuously.
4. Battery life is approximately 1 year.
346 NIGHT VIEW PEDOMETER Instructions Cont…
Please note: Before using your
pedometer, remove battery
insulation strip. (Insulation strip
designed to preserve battery power)