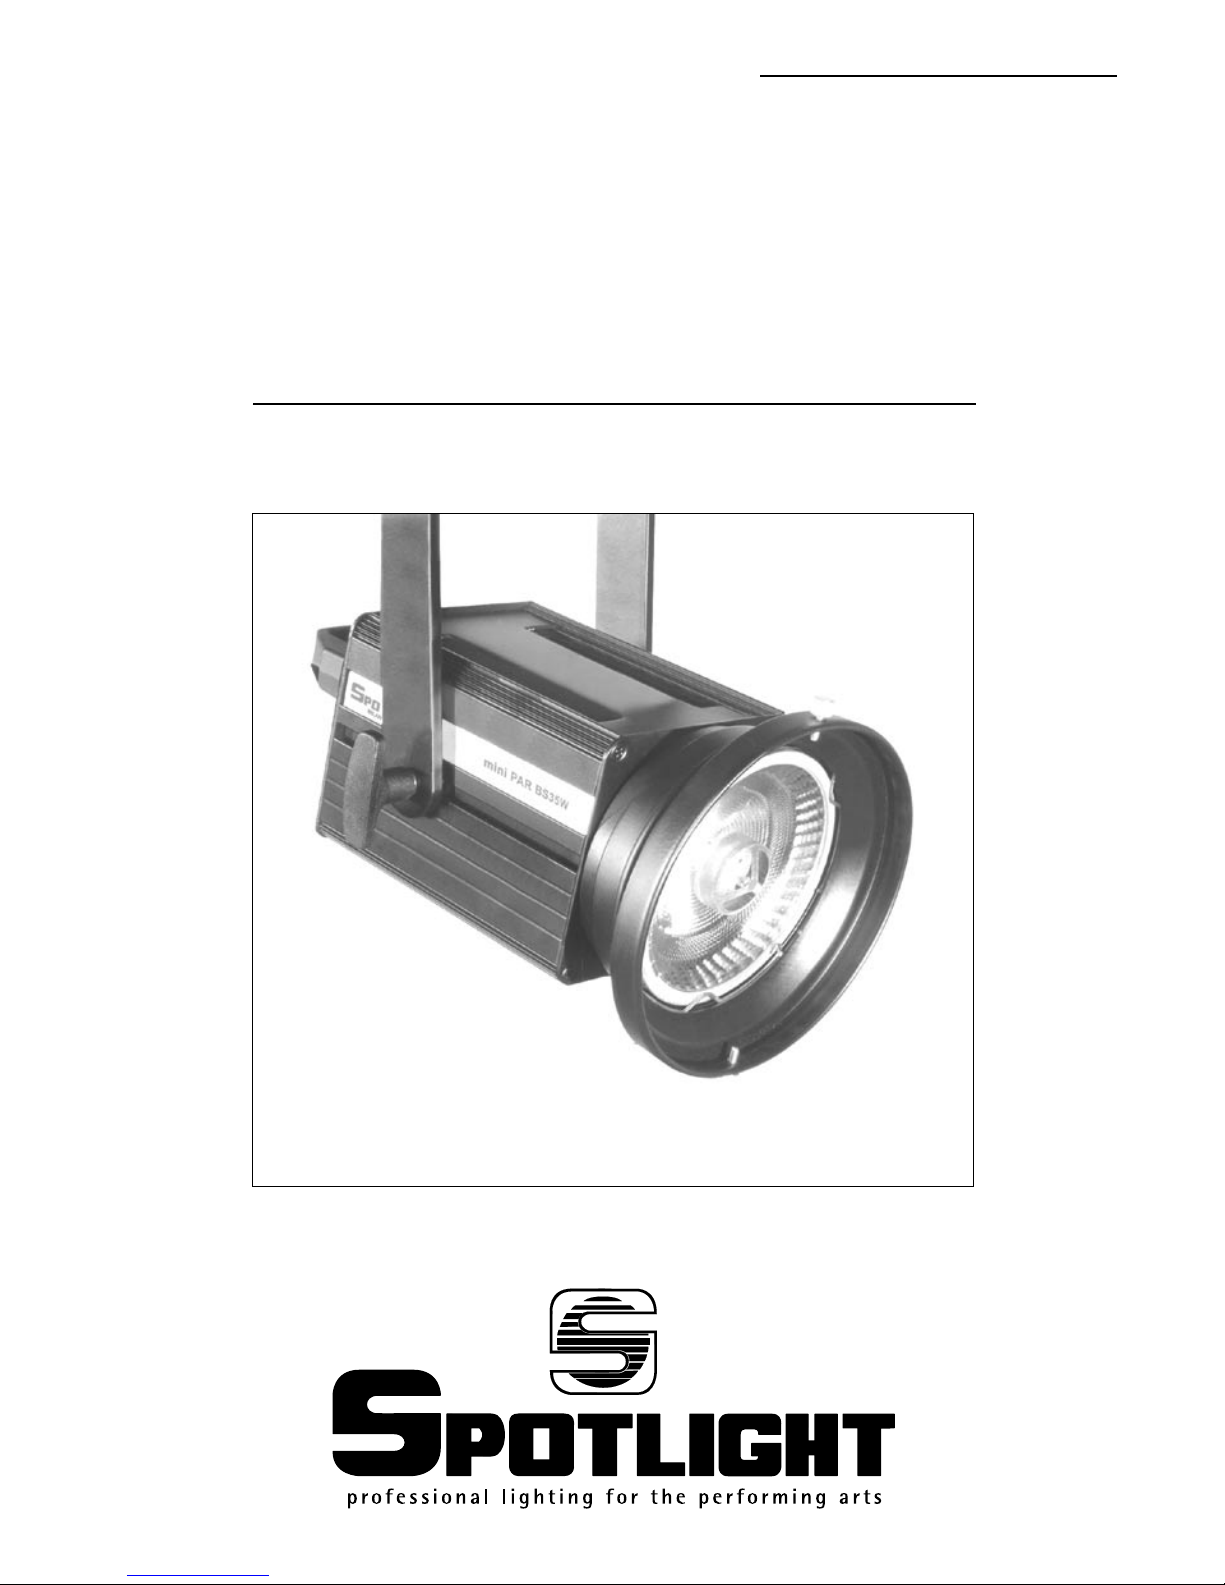
Spotlight mini par n100 User manual
Manuale utente - User manual
MI PAR N100 - MI PAR T75 - MI PAR T75 A - MI PAR T100 A - MI PAR BS35
mini
PAR
mini PAR
mini PAR
1
3
2
5
4
6
8
7
2
ATTENZIONE: Prima di usare questi apparecchi,
leggere attentamente le istruzioni che seguono.
Spotlight srl non potrà essere ritenuta responsabile
di danni derivanti dalla non osservanza di dette
istruzioni.
SAFETY WARNING: Before using this
product, read the present instructions carefully.
Spotlight srl will not be responsible for damage
resulting from instructions not being followed.
MI PAR T75 - MI PAR T75 A
MI PAR T100- MI PAR T100 A
MI PAR N100
MI PAR BS35

mini PAR
mini PAR
CONNESSIONI ELETTRICHE
I vostri fari sono stati progettati per una tensione di
alimentazione di:
- MI PAR N100, MI PAR T75, MI PAR T100, MI PAR BS35:
230V, 50/60 Hz
-
MI PAR T75 A. MI PAR T100 A:
120V, 50/60 Hz
Prima e durante l’installazione osservare le seguenti
norme:
• Vericare sempre l’efcienza del collegamento a terra
della linea in uso.
• Vericare che il voltaggio dell’apparecchio
corrisponda al voltaggio di rete
• Non impiegare lampade diverse da quelle indicate
nella tabella lampade.
• Sull’apparecchio non sono montati fusibili che se necessari
dovranno essere installati sulla linea di alimentazione.
• Il modello MI PAR BS35 non può essere collegato a
un dimmer.
3
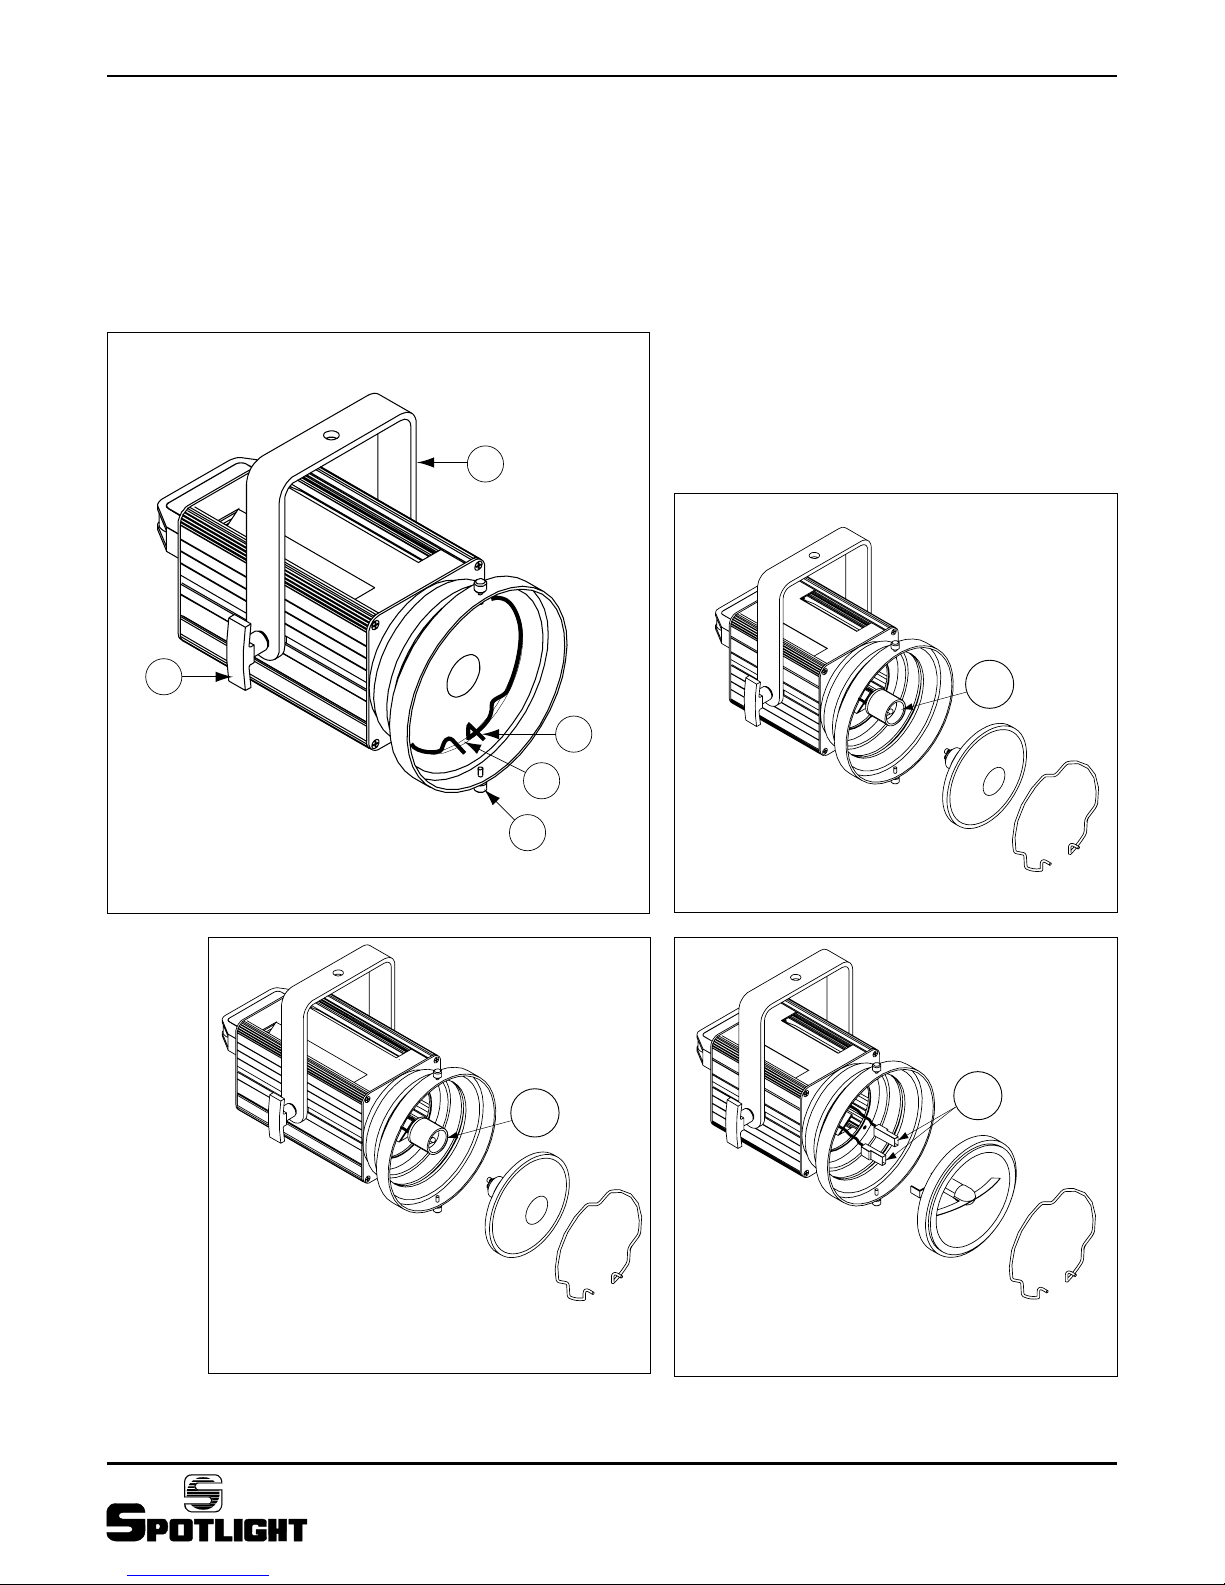
DESCRIZIONE DEI PROIETTORI
Riferendosi ai disegni nella pagina a anco:
① Staffa di sospensione
② Anello fermalampada
③ Gola per anello fermalampada
④ 2 pomelli per bloccaggio accessori
⑤ Maniglia per regolazione inclinazione faro
⑥ Portalampada (per MI PAR N100)
⑦ Portalampada (per MI PAR BS35)
⑧ Faston alimentazione lampada (per MI PAR T75
- MI PAR T75 A - MI PAR T100 - MI PAR T100 A)
INDICAZIONI GENERALI
I proiettori ora in Vs possesso rispondono alle direttive
73/23 CEE in quanto conformi alle norme EN 60598-1
e EN 60598-2-1.
Le targhette sistemate sui anchi dei proiettori,
contengono le seguenti informazioni:
• Modello
• Tensione di alimentazione in V
• Potenza della lampada in W
• Indice di protezione IP
• Massima temperatura ambiente ammissibile in °C
• Massima temperatura del corpo del proiettore in °C
• Distanza minima da ogni supercie inammabile
INSTALLAZIONE
• I proiettori sono progettati esclusivamente per
impiego professionale e quindi vanno installati ed
usati da personale qualicato.
• Gli apparecchi sono previsti per uso all’interno:
pertanto devono essere protetti dall’umidità e dalla
pioggia se usati in condizioni diverse (IP 20)
• Non installare il proiettore a contatto o vicino ad una
supercie inammabile.
• Si prega di prestare la dovuta attenzione alle note
riportate sulle etichette degli apparecchi.
• Ricordarsi di collegare la fune di sicurezza, se previsto
dalle norme di sicurezza locali.
• l proiettori possono essere usati sia sospesi, sia
montati su cavalletto o su basetta, ribaltando la
forcella; tramite adattatore possono essere usati su
binario elettricato.
ATTENZIONE: Gli apparecchi devono essere
sempre collegati a terra
ATTENZIONE: sostituire immediatamente la
lampada e/o la lente se visibilmente dan-
neggiate, anche se ancora funzionanti.
mini PAR
mini PAR
INSTALLAZIONE E CAMBIO DELLA LAMPADA
Tramite gli appositi terminali stringere e slare l’anello
fermalampada ②.
Estrarre delicatamente la lampada dalla sua sede
evitando di strappare i cavi di alimentazione.
- MI PAR N100 e MI PAR BS35: ruotare la lampada
sul portalampada ⑥-⑦ in senso antiorario per
rimuoverla, e in senso orario per inserirla;
- MI PAR T75, MI PAR T75 A, MI PAR T100, MI PAR
T100 A: scollegare i due faston ⑧ dalla lampada da
sostituire e collegarli alla nuova lampada.
Reinserire la nuova lampada nella sua sede e bloccarla
con l’anello fermalampada ② controllando che
questo sia inserito nella apposita gola ③ e blocchi
correttamente la lampada.
IMPORTANTE: per MI PAR BS35
• ATTENZIONE: accensione della lampada con innesco
ad alta tensione: non cercare mai di inserire o
disinserire la lampada con l’apparecchio alimentato.
Pericolo alta tensione.
• ATTENZIONE: spegnere e sostituire immediatamente
la lampada in caso di rottura del vetro frontale
di protezione anche se la lampada risulta ancora
funzionante.
• La lampada, all’accensione a freddo, impiega alcuni
minuti per raggiungere la piena luce.
• Dopo lo spegnimento della lampada occorrerà
attendere circa 5 minuti prima di poterla riaccendere.
• Attendere il completo raffreddamento della lampada
prima di aprire il proiettore.
4
ACCENSIONE E PUNTAMENTO
I proiettori devono essere collocati rispettando la
distanza minima dall’oggetto che si deve illuminare,
indicata sulle etichette dei fari.
Tramite la maniglia laterale ⑤ si può allentare il
bloccaggio del faro e modicare la sua inclinazione.
Lo stesso si può fare riguardo alla rotazione dell’asse
verticale , facendolo ruotare sul perno di aggancio.
L’ampiezza del fascio luminoso dipende dal modello di
lampada scelto: fascio stretto, medio, largo.
PULIZIA
Per una maggiore resa dei fari, occorre tener pulita la
supercie delle lampade utilizzando un panno inumidito
con alcool.
MANUTENZIONE
Sottoporre i fari a revisione almeno una volta all’anno
per controllare l’integrità delle parti elettriche e
meccaniche. A tal ne utilizzare solo rivenditori
qualicati, a garanzia di un corretto e completo
intervento.
RICICLAGGIO
Il prodotto deve essere riciclato o smaltito
secondo la direttiva 2002/96/CE
ATTENZIONE: per motivi di sicurezza, scollegare
sempre gli apparecchi dalla rete di alimentazione
prima di aprirli per cambiare le lampade.

mini PAR
mini PAR
5
DESCRIPTION OF THE LUMINAIRES
Refer to gures on page 2:
① Suspension clamp
② Lamp retaining ring
③ Slot for lamp retaining ring
④ 2 accessory retaining knobs
⑤ Lever handle for tilt regulation
⑥ Lamp holder (for MI PAR N100)
⑦ Lamp holder (for MI PAR BS35)
⑧
Lamp supply faston (for MI PAR T75 - MI PAR T75 A
- MI PAR T100 - MI PAR T100 A)
INTRODUCTION
The luminaire you have bought conforms to 73/23/EEC,
EN 60598-1 and EN 60598-2-1 directives and
regulations.
The labels on the side of the luminaire list the following
information:
• model
• mains supply voltage (V)
• lamp wattage (W)
• IP protection index
• maximum allowed ambient temperature in °C
• maximum temperature of the body in °C
• minimum distance from ammable surface
INSTALLATION
• The luminaires are intended for professional use only
so they have to be installed and used by qualied
technicians.
• The products are intended for indoor use:
consequently they have to be protected from humidity
and rain, if used in different conditions (IP 20)
• Do not mount the luminaire on or near a ammable
surface
• Please note carefully the notes written on the labels
of the luminaires.
• Do not forget to connect a safety rope, if required by
local country safety regulations
• The luminaires can be either suspended, or mounted
on a stand or base plate, positioning the yoke upside-
down; they can also be mounted on an electried
track using an adapter.
ELECTRICAL CONNECTIONS
The luminaires is designed to operate with a mains of:
- MI PAR N100, MI PAR T75, MI PAR T100, MI PAR BS35:
230V, 50/60 Hz
-
MI PAR T75 A, MI PAR T100 A:
120V, 50/60 Hz
Before and during the installation, make sure you
follow the guidelines below:
• Always check the earth wiring for the line being used.
• Ensure the luminaire voltage is the same as the mains
one
• Do not use lamps other than indicated on the lamp
table
• There are no fuses inside the units, if it is necessary
they should be installed in the mains
• Model MI PAR BS35 cannot be connected to a
dimmer.
WARNING: The luminaires must always be
earthed
WARNING: replace immediately the lamp
and/or the lenses if visibly damaged,
even if still working.

mini PAR
mini PAR
INSERTING AND CHANGING THE LAMP
Using the appropriate ends, tighten and take off the
lamp retaining ring ②.
Extract carefully the lamp from its lodging paying
attention not to tear off the supply cables.
- MI PAR N100 and MI PAR BS35: rotate the lamp on
its holder ⑥-⑦ counter clockwise to remove it, and
clockwise to insert it;
- MI PAR T75, MI PAR T75 A, MI PAR T100, MI PAR
T100 A: disconnect the two faston ⑧ of the lamp to
be replaced and connect them to the new lamp.
Place the new lamp in its loding an block with the
retaining ring ② checking that it is duly inserted in
the appropriate slot ③ and that it is blocking the lamp
correctly.
IMPORTANT NOTICE for MI PAR BS35
• WARNING: Start off of high voltage lamp: never
insert or remove the lamp when xture is powered on.
• WARNING: Immediately switch off and replace the
lamp when the front safety glass breaks, even though
the lamp is still working.
• On cold start, the lamp will take a few minutes to
attain full brighness.
• Once switched off, wait approximately 5 minutes
before relamping.
• Let the lamp cool down completely before opening
the luminaire.
6
SWITCHING ON AND FOCUSING
The luminaires should be at the minimum distance
from the object it is illuminating, as indicated on the
label.
Using the side handle ⑤ it is possible to loosen the
luminaires when they are locked and thus change their
inclination.
In the same way, the luminaires can be rotated with
respect to their vertical axis by rotating on their
hooking hinge.
The light beam width depends on the lamp model
chosen: narrow, medium, wide beam
CLEANING
For the best results, the reectors must be kept as clean
as possible, using a soft cloth dampened with alcohol.
MAINTENANCE
At least once a year, the luminaire should be serviced
to ensure the integrity of the electrical and mechanical
components. For this purpose, please address only to
qualied dealer to ensure proper service.
RECYCLING
The product must be recycled or disposed of,
according to Directive 2002/96/CE.
WARNING: For safety reasons always
disconnect the projectors from the mains
before opening them to change the lamps

mini PAR
mini PAR
7
Kg 1,5
160 270
200
160 220
200
Kg 2,1
MI PAR BS35 Kg 1,5
MI PAR T75 - MI PAR T75 A Kg 2,1
MI PAR T100 - MI PAR T100 A Kg 2,3
MI PAR N100 Kg 1,2
Modello / Model Codice / Code V W t(h) K
MI PAR T75 - MI PAR T75 A HASP/75 12 75 G53 8° - 24° - 45° 3000 3000
MI PAR T100 - MI PAR T100 A HASP/100 12 100 G53 8° - 24° - 45° 3000 3000
MI PAR N100 ESD111 H 100/10
ESD111 H 100/24 230 100 GZ10 10° - 24° 2000 2900
MI PAR BS35
CDM-R 111 35/830 86 35 GX8.5 10° - 24° - 40° 6000 3000
CDM-R 111 35/942 86 35 GX8.5 10° - 40° 6000 4200
Lampade - Lamps
Dimensioni (mm) e peso - Dimensions (mm) and weight
ACCESSORI ACCESSORIES
Telaio porta gelatina per miniPAR Colour lter frame TC MINI PAR
Paraluce 4 alette per miniPAR 4 leaf barndoor PL 4 MINI PAR
Basetta per montaggio in appoggio Base mounting plate BASE-QI22 AS
Gancio di sospensione per tubi ø 30 mm Hook clamp for 30 mm diameter tubes T58830
Gancio di sospensione per tubi ø 50 mm Hook clamp for 50 mm diameter tubes HC/075
Filtri dicroici Dichroic lter dicrospot
Adattatore per binario elettricato Adaptor for electrical track a richiesta

Spotlight s.r.l.
Via Sardegna 3
20098 S. Giuliano Milanese
Milano - Italy
Tel. +39.02.98830.1
Fax +39.02.98830.22
E-mai: info@spotlight.it
www.spotlight.it
certified quality management system ISO 9001 : 2008
mini PAR
This manual suits for next models
4
Table of contents
Languages:
Other Spotlight Floodlight manuals


