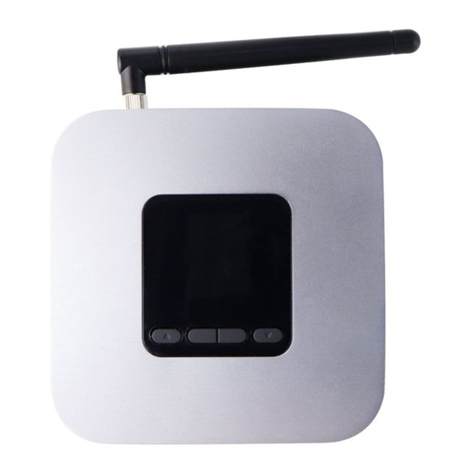
Sprint Phone Connect 3 User manual

Sprint Phone Connect 3
User Guide
©2014 Sprint. Sprint and the logo are trademarks of Sprint. Other marks are trademarks of their
respective owners.

TOC i
Table of Contents
Introduction ................................................................................................................................ 1
Package Contents .............................................................................................................. 1
Your Sprint Phone Connect 3 ............................................................................................. 2
Installation and Operation .......................................................................................................... 4
Installing the Battery ........................................................................................................... 4
Battery Information ...................................................................................................... 4
Installing the Antenna ......................................................................................................... 5
Installing the Power Adapter ............................................................................................... 5
Connecting a Telephone to Sprint Phone Connect 3........................................................... 6
Powering Sprint Phone Connect 3 On and Off.................................................................... 7
Understanding the Indicators .............................................................................................. 7
Using Bluetooth .................................................................................................................. 8
Turning Bluetooth On and Off ...................................................................................... 8
Pairing Bluetooth Devices............................................................................................ 8
Viewing Device List...................................................................................................... 8
Making Calls ....................................................................................................................... 8
Receiving Calls ................................................................................................................... 9
Adjusting the In-Call Volume............................................................................................... 9
Adjusting the In-Call Volume in Standby Mode ............................................................ 9
Adjusting the In-Call Volume During a Call .................................................................. 9
General Functions.....................................................................................................................11
Positioning the Device .......................................................................................................11
Using Call Waiting .............................................................................................................11
Making a Three-Way Call...................................................................................................12
Using Voicemail .................................................................................................................12
Set Up Voicemail ........................................................................................................12
Retrieve Voicemail Messages.....................................................................................13
Using Call Forwarding........................................................................................................13
Assistive Communication Devices .....................................................................................13
Clearing Voicemail Icon .....................................................................................................14

TOC ii
Update Device ...................................................................................................................14
Keyboard Codes ................................................................................................................14
Settings.....................................................................................................................................15
Display Settings.................................................................................................................15
Changing the Screen Wallpaper .................................................................................15
Changing the Brightness.............................................................................................15
Changing the Backlight Settings .................................................................................15
Setting TTY Mode..............................................................................................................15
Setting Display Language ..................................................................................................16
Resetting Your Device ................................................................................................16
Checking Device Information .............................................................................................16
Troubleshooting ........................................................................................................................17
Safety Information.....................................................................................................................19
Electronic Device ...............................................................................................................19
Interference with Medical Equipment .................................................................................19
Areas with Flammables and Explosives.............................................................................19
Traffic Security...................................................................................................................19
Operating Environment ......................................................................................................20
Child's Safety.....................................................................................................................21
Accessories .......................................................................................................................21
Charger safety ...................................................................................................................21
Battery Safety ....................................................................................................................22
Sécurité de la batterie........................................................................................................23
Cleaning and Maintenance ................................................................................................24
Emergency Calls................................................................................................................25
FCC Regulatory Compliance .............................................................................................25
Radiofrequency radiation exposure Information..........................................................25
Certification information (SAR)....................................................................................25
FCC statement ...........................................................................................................25
Legal Notice..............................................................................................................................27

Introduction 1
Introduction
The following topics introduce you to the features of your new Sprint Phone Connect 3.
Package Contents
Your Sprint Phone Connect 3
Package Contents
After opening the package, check to make sure that you have all the parts shown below. If any
item is missing or broken, please contact Sprint.
Sprint Phone Connect 3 Antenna Backup Battery Recycling Envelope
Power Adapter Get Started Guide Important Information Booklet
Note:The figures in this document are provided only for your reference. The actual shape and
color of the product may differ slightly.
Note: The Sprint Phone Connect 3 does not include a telephone. You must provide your own
home telephone. It can be either a traditional corded phone or a cordless phone with a
wired base.

Introduction 2
Your Sprint Phone Connect 3
The following illustrations outline your device's primary external features.
Top View
Number
Description
1 Up navigation key
2 Left function key
3 Right function key
4 Down navigation key
5 Power button
6 DC 12V power port
7 Telephone port 1
8 Telephone port 2
9 USB port*(see Important note)
10 Antenna port
Important: Never place a USB-based device into the USB port of the Sprint Phone Connect
3 under any circumstances. Doing so may damage the device and negate its
warranty. The port was designed for diagnostic purposes only; it is not intended
for customer use.

Introduction 3
Bottom View
Number
Description
1 Battery cover
2 Battery port
3 Battery slot

Installation and Operation 4
Installation and Operation
Installing the Battery
Installing the Antenna
Installing the Power Adapter
Connecting a Telephone to Sprint Phone Connect 3
Powering Sprint Phone Connect 3 On and Off
Understanding the Indicators
Using Bluetooth
Making Calls
Receiving Calls
Adjusting the In-Call Volume
Installing the Battery
The following steps illustrate how to insert the battery into the Sprint Phone Connect 3.
1. Press and slide the cover to remove the battery cover.
2. With the battery label facing up and the connector wires to the left, insert the battery
connection cable into the battery port.
3. Place the battery in the battery slot and slide the battery cover back into place.
Battery Information
The guidelines listed below provide battery information for your Sprint Phone Connect 3.

Installation and Operation 5
●In order to avoid damage, charge the battery only in temperatures that range from 0 ℃
to 45 ℃.
●Talk time is approximately 2 hours and standby time is approximately 36 hours. Actual
values will vary with the network environment.
●The battery is intended for backup purposes only (in the event of a power failure).
●When the power adapter is connected the battery will automatically charge.
●When fully charged the battery will automatically stop charging.
●Remove the battery if the device is not in use for a long time.
Installing the Antenna
The following steps illustrate how to install the antenna.
1. Make sure the device is turned off.
2. Align the antenna with the antenna port on the device as illustrated below.
3. Screw the antenna into the port, ensuring that the connection is secure.
Installing the Power Adapter
The following steps illustrate how to install the power adapter. Under normal usage, the device
relies on the external power adapter for its power supply.
1. Insert the power adapter into the DC input port.
2. Plug the unit into a standard AC electrical outlet.
Note: Backup battery power will only be used during power failure or if the external power
adapter is not in use.

Installation and Operation 6
Connecting a Telephone to Sprint Phone Connect 3
The Sprint Phone Connect 3 device provides ports for up to two telephones. The ports use the
same telephone number.
1. Unplug your telephone from your wall's telephone jack.
2. Plug one end of your telephone's cord into one of the telephone ports. (The other end of
the cord must remain plugged into the phone or the telephone base unit, depending on
the type of phone you're connecting).
Warning: Do not plug Sprint Phone Connect 3 into your telephone wall jack.

Installation and Operation 7
Note: The telephone and telephone cord are not included. You must provide your own
telephone and telephone cord.
Note: The device and telephone cord are for indoor use only.
Note: Only telephones connected directly to the Sprint Phone Connect 3 will receive service. If
the Sprint Phone Connect 3 is connected to a cordless phone base station, any
extension phones compatible with that base station will also receive service.
Powering Sprint Phone Connect 3 On and Off
Use the power button to turn the Sprint Phone Connect 3 on and off.
►To power the device on, press and hold the power button until screen turns on.
►To power the device off, press and hold the power button until screen turns off.
Understanding the Indicators
The indicators on the front of your device let you know your device’s status at any given time.
Light
Indicator
Meaning
Bluetooth
On Paired with Bluetooth devices
Off Bluetooth function disabled or during a call
On for 0.5s and
off for 0.5s
Pairing with Bluetooth devices
Alert
On for 0.5s and
off for 0.5s
During E911 call
On for 1s and off
for 6.5s
New voice mail
On for 1s and off
for 9s
Low Charge

Installation and Operation 8
Using Bluetooth
Your Sprint Phone Connect 3 is Bluetooth-capable, allowing you to connect to other Bluetooth-
enabled phones. When using Bluetooth, stay within 10 meters (33 feet) of other Bluetooth
devices.
Turning Bluetooth On and Off
Turning Bluetooth on enables your device's Bluetooth functions.
1. Press Menu > Bluetooth > Bluetooth On/Off.
2. Press On to turn on Bluetooth. Press Off to disable Bluetooth.
Pairing Bluetooth Devices
The Bluetooth pairing process allows you to establish trusted connections between your Sprint
Phone Connect 3 to other Bluetooth devices.
1. Press Menu > Bluetooth > Pair Device.
2. Place mobile phone close to Sprint Phone Connect 3, and then search for Sprint Phone
Connect 3.
3. Enter PIN code (8888) and confirm to connect on your mobile phone.
Note: You can pair a maximum of two mobile phones with the Sprint Phone Connect.
Note: Disconnect mobile phone from any Bluetooth headsets before you pair mobile phones
with Sprint Phone Connect 3.
Viewing Device List
Press Menu > Bluetooth > Device List to display a list of paired devices with your Sprint
Phone Connect.
►Press Options > Connect/Disconnect to connect or disconnect the paired device.
►Press Options > Remove to remove the paired device.
Making Calls
Making calls with your Sprint Phone Connect 3 is as easy as making calls using traditional wired
telephone service.
1. Place a call by entering the desired telephone number.
2. When your call is complete, hang up or return the phone to the receiver to ensure that
you can receive calls.

Installation and Operation 9
Note: When you making calls with your Sprint Phone Connect 3, the paired mobile phones will
disconnect until you hook off.
Receiving Calls
If you are using a new telephone number with your Sprint Phone Connect 3, simply share your
new number with friends & family. When they call, answer the phone connected to your Sprint
Phone Connect 3 device. If you're using your existing number, simply answer the phone as
usual when the phone rings.
Note: When you receiving calls with your Sprint Phone Connect 3, the paired mobile phones
will disconnect until you hook off.
Adjusting the In-Call Volume
You can adjust the in-call volume in standby mode or during a call. Four volume levels are
available, with level 1 being the lowest and level 4 the highest.
Adjusting the In-Call Volume in Standby Mode
The following steps illustrate how to adjust the in-call volume in standby mode.
1. Pick up the handset.
If you hear the dial tone, telephone service is available.
2. Enter # # 1 to adjust the in-call volume.
3. Press a key (1-4) to select the desired volume level.
4. Press the *key to save the volume level.
If you hear the confirm tone "beep", you have successfully set the volume level.
If you hear the dial tone again, the device has returned to the off-hook state, and you
can proceed to configure other settings.
Note: If you hear the reject tone "beep, beep", you have pressed an incorrect key and failed to
adjust the in-call volume. Wait until the device returns to the off-hook state and you hear
the dial tone again. Then repeat steps 2-4to adjust the in-call volume again.
Adjusting the In-Call Volume During a Call
The following steps illustrate how to adjust the in-call volume during a call.
1. While engaged in a call, enter # # 1 to adjust the in-call volume.
2. Press a key (1-4) to select the desired volume level.
3. Press the *key to save the volume level.

Installation and Operation 10
If you hear the confirm tone "beep", you have successfully set the volume level.
4. Continue with your call.
Note: If you hear the reject tone "beep, beep", you have pressed an incorrect key and failed to
adjust the in-call volume. Continue with your call, and repeat steps 1-4.

General Functions 11
General Functions
Positioning the Device
Using Call Waiting
Making a Three-Way Call
Using Voicemail
Using Call Forwarding
Assistive Communication Devices
Clearing Voicemail Icon
Update Device
Keyboard Codes
Positioning the Device
Place the device on a smooth surface with good ventilation. Place it at least 4 inches away from
other objects.
Note: Avoid placing Sprint Phone Connect 3 near other electrical equipment, such as a
refrigerator, television, or microwave.
Using Call Waiting
When you are on a call, Call Waiting alerts you to incoming calls.
To use call waiting:
1. When you hear a beep from the receiver on any connected phone during a call, it means
a second caller is trying to connect.
2. Press the FLASH key to answer the second call.
3. Press the FLASH key again to return to the first call.
Note: Depending on the type of phone you are using with your Sprint Phone Connect 3, you
may need to press a different key to answer a waiting call. Consult your phone's
documentation for details.

General Functions 12
Making a Three-Way Call
You can talk with two parties at the same time by using the Three-Way Calling feature on your
Sprint Phone Connect 3. Please refer to the following steps to make a three-way call:
1. While in the conversation of the first call, press the FLASH key to hold the 1st party.
2. Dial the number of the 2nd party (the #key will be recognized as part of number if
entered).
3. Press the FLASH key within 10 seconds, then the sprint phone will originate the 2nd
party call.
4. When the 2nd party answers, press the FLASH key to initiate the three-way call (if the
2nd party reject, sprint phone will return to the 1st party automatically).
5. While in the three-way call, press the FLASH key to end the 2nd party and return to the
1st party.
6. To end both conversations, hang up the phone.
Note: The FLASH key will vary by telephone type.
Using Voicemail
With your Sprint Phone Connect 3 and your Sprint service, you have access to the Sprint
Voicemail system.
Set Up Voicemail
You should set up your Sprint Voicemail and personal greeting as soon as your phone is
activated. Always use a password to protect against unauthorized access. Your device
automatically transfers all unanswered calls to your voicemail, even if the device is in use or
turned off.
1. Dial *86 to access the Sprint Voicemail system.
2. Follow the system prompts to:
Create your password.
Record your name announcement.
Record your greeting.
Note: Voicemail Password – Sprint strongly recommends that you create a password when
setting up your voicemail to protect against unauthorized access. Without a password,
anyone who has access to your phone is able to access your voicemail messages.

General Functions 13
Retrieve Voicemail Messages
The following steps outline how to access and manage your voicemail messages.
1. The voicemail indicator ( ) will blink green to indicate that you have one or more
unheard voicemail messages.
2. Dial *86 to access your voicemail.
3. Follow the system prompts to listen to and manage your voicemail messages.
Note: Please refer to the Troubleshooting section for additional details on accessing voicemail,
or if you would like to use a home telephone answering machine as your preferred
method to manage your voicemail messages.
Using Call Forwarding
Sprint Phone Connect 3 allows you to forward calls to another phone number, including your
mobile phone or office number. Your home phone will not ring until you deactivate the service.
Airtime applies to forwarded calls even if you send the call to landline telephones.
To activate Call Forwarding:
1. Dial *72.
2. Immediately enter the phone number where you want calls to be forwarded (e.g. *72-
212-123-4567).
3. You will hear a confirmation tone.
4. Hang up your home phone or return the phone receiver to its base.
To deactivate Call Forwarding:
1. Dial *720.
2. You will hear a confirmation tone.
3. Hang up your home phone or return the phone receiver to its base.
Assistive Communication Devices
TTY (Text Telephony) and TDD (Telecommunications Device for the Deaf) allow individuals
who are deaf, hard of hearing, or have speech or language disabilities to communicate by
telephone.
When a user types his or her conversation on a TTY keyboard, it is transmitted as tones through
the telephone. Tones are received by the other person’s TTY, translated into text and displayed
on the screen. In order to use the TTY network, you must have a TTY-compatible phone and be

General Functions 14
in the TTY mode to place or receive calls. Note that most digital wireless devices are TTY-
compatible.
Clearing Voicemail Icon
To clear the unread voicemail icon in standby mode, press Menu > Clear Voicemail Icon.
Update Device
To update your device, press Menu > Update Device.
Keyboard Codes
You may use the keyboard codes under certain conditions. The following table lists and
describes the keyboard codes messages.
Item Keyboard code Meaning
Volume adjustment
##11* Setting the voice volume to level 1
##12* Setting the voice volume to level 2
##13* Setting the voice volume to level 3
##14* Setting the voice volume to level 4
Voicemail quick codes
*86 Accessing the voicemail
Call forwarding activate *72+NUM Activating Call Forwarding
Call forwarding
deactivate
*720 Deactivating Call Forwarding
TTY
##56*0# Activating TTY off mode
##56*1# Activating TTY full mode
##56*2# Activating VCO (voice carry over) mode
##56*3# Activating HCO (hearing carry over) mode
Turn off voicemail
indicator
##54*0# Turning off voicemail indicator from device
Note: NUM is the phone number where you want calls to be forwarded.

Troubleshooting 15
Settings
This section provides an overview of items you can change using your Sprint Phone Connect
3’s settings menus.
Display Settings
Setting TTY Mode
Setting Display Language
Checking Device Information
Display Settings
This section provides an overview of items you can change using your phone’s display settings.
Changing the Screen Wallpaper
You can set a screen wallpaper to display while in standby mode.
1. Press Menu > Settings > Display > Wallpaper.
2. Select a screen wallpaper option by pressing up or down navigation key.
3. Press right function key to confirm the selection.
Changing the Brightness
You can adjust the brightness on the handset screen.
1. Press Menu > Settings > Display > Backlight brightness.
2. Select a brightness level and press right function key to confirm.
Changing the Backlight Settings
Select how long the display screen remains backlit after any keypress is made.
1. Press Menu > Settings > Display > Backlight duration to change the handset screen
backlight setting.
2. Select a preset length of time to elapse before the screen backlights turn off.
Note: Long backlight settings reduce the battery’s talk and standby times.
Setting TTY Mode
To set the TTY (Text Telephony) mode, press Menu > Settings > TTY. You can set the TTY
mode.

Troubleshooting 16
TTY Off mode: The standard voice speaking mode and the listening mode. This is the default
setting.
TTY Full mode: Transmit and receive the TTY characters.
HCO (hearing carry over) mode: Transmit TTY characters but receive by listening to the
receiver.
VCO (voice carry over) mode: Receive TTY characters but transmit by speaking into the
speaker.
Setting Display Language
You can choose a language to display your phone’s onscreen menus.
1. Press Menu > Settings > Language.
2. Select a language, and press right function key to confirm.
Resetting Your Device
You can reset your personal settings to factory default settings.
1. Press Menu > Settings > Reset Settings.
2. Read the message and press right function key to confirm.
Checking Device Information
To check the device information, press Menu > Settings > About Device.

Troubleshooting 17
Troubleshooting
If problems occur during the use of the device, refer to the following sections for suggested
solutions. If the problems persist, please contact Sprint.
Why am I not getting a dial tone on my handset?
1. Ensure that the power adapter is properly connected and that the power indicator is
illuminated.
2. Check to make sure the signal indicator is green on.
3. Check to make sure the telephone cable is securely plugged in.
Can I create a shortcut to access my voicemail?
The availability of a shortcut feature to access voicemail messages depends solely on the
capabilities of the corded or cordless phone that you use with Sprint Phone Connect 3. Please
refer to the user material that came with your phone. If your home phone does not support a
shortcut feature to access voice messages, you may have the option to save your voicemail
number into the address book on the handset and assign that number to the #1 speed dial
position on your phone's keypad. Remember, you can always dial *86 to access your voicemail.
Can I use my telephone answering device instead of voicemail?
Yes. Set the answering device to fewer rings in order to pick up the call before voicemail.
Alternatively, turn off your home answering machine or increase the number of rings if you
would like to use the voicemail service. Please refer to the user material provided by the home
answering machine manufacturer for instructions.
Does 911 work on this device?
Yes, but since the Sprint Phone Connect 3 is designed for an indoor environment, please be
prepared to provide your location inside the premises to public service personnel. The GPS
chipset embedded in this device will work best if the device is located near a window or other
opening.
Does this product work during a power outage?
While the Sprint Phone Connect 3 has a backup battery, if the landline device requires external
power to operate, service (including the ability to make and receive 911 calls) will not be
available during a power outage.
Service will only be available during a power outage if the home telephone connected to the
device does not rely on external power to operate (as is the case with many corded phones).
Other manuals for Phone Connect 3
2
Table of contents
Other Sprint Wireless Access Point manuals
Popular Wireless Access Point manuals by other brands
Extreme Networks
Extreme Networks ExtremeWireless AP560h installation guide

TRENDnet
TRENDnet TEW-230APB Specifications
Edge-Core
Edge-Core EAP101 user manual

Riverbed
Riverbed STEELCONNECT Let's get started
Grandstream Networks
Grandstream Networks GWN7600LR Quick installation guide
IP-COM
IP-COM AP615 user guide
Ruijie
Ruijie Reyee RG-RAP2260 Hardware installation and reference guide

Ruckus Wireless
Ruckus Wireless C500 Quick setup guide
TP-Link
TP-Link Omada Pro Quick installation guide

NETGEAR
NETGEAR WN802Tv1 - Wireless-N Access Point user guide
Xirrus
Xirrus X2 Series Regulatory guide
Ubiquiti
Ubiquiti AmpliFi MeshPoint HD quick start guide
