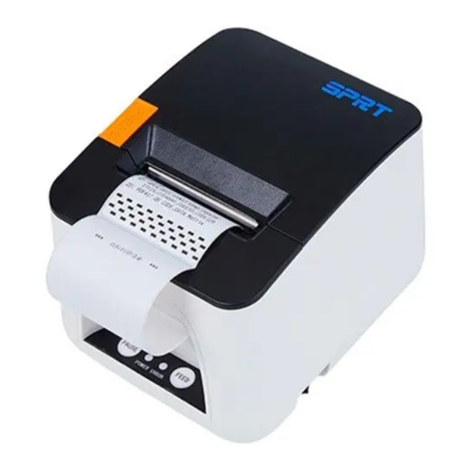
SPRT SP-TL21N User manual

SPRT®
SP-TL21N
Thermal Label Receipt Printer
User’s Manual
VER 1.01
Beijing Spirit Technology Development Co., Ltd
www.sprt-printer.com

Content
NOTICE........................................................................................................................1
Chapter 1 Outer Appearance and Model No......................................................... 2
1.1 Outer Appearance............................................................................................... 2
1.2 Operation Panel................................................................................................... 3
1.3 Model No............................................................................................................... 3
Chapter 2 Performance Characteristics..................................................................5
2.1 Printing Specification...........................................................................................5
2.2 Physical Parameters........................................................................................... 5
2.3 Environmental Parameters.................................................................................5
2.4 Other Specification.............................................................................................. 6
Chapter 3 Operation Method............................................................................. 6
3.1 Using Preparation................................................................................................ 6
3.1.1 Paper Roll Installation............................................................................... 6
3.2 Basic function usage........................................................................................... 7
3.2.1 Switch On....................................................................................................7
3.2.2 Switch Off....................................................................................................7
3.2.3 Self-Test......................................................................................................7
3.2.4 Paper Feeding (Manual Feeding)........................................................... 8
3.2.5 Hexadecimal Printing................................................................................ 8
3.2.6 Printer Parameters Setting.......................................................................8
3.2.7 Printer Factory Reset................................................................................ 9
3.2.8 Printer Sensor Sensitivity Calibration..................................................... 9
3.2.9 Set Into Upgrading Mode....................................................................... 10
3.2.10 Switch Working Mode...........................................................................11
3.3 Printer Interface Connection and Printing......................................................11
3.3.1 Power Connection................................................................................... 11
3.3.2 USB Connection...................................................................................... 11
3.3.3 Bluetooth Connection............................................................................. 11
3.3.4 Serial Interface Connection................................................................... 12
3.3.5 Cash Drawer Interface............................................................................13
3.4 Buzzer................................................................................................................. 13
3.5 Indicator light...................................................................................................... 13
Chapter 4 Other Information...................................................................................14
4.1 Commands Manual........................................................................................... 14
4.2 Description of pre-printed Black Mark............................................................ 14
Appendix A................................................................................................................ 16

1
NOTICE
Please read this manual carefully before using the printer!
Notice of Safety
Be sure to use the power supply provided by our company. Otherwise it may
cause damage to the product.
Please do not open the paper case cover when it is printing or just when
printing is finished, do not touch the printer head with hand or any part of body
to avoid excessive temperatures leading to burns.
Notice of Using
Do not print the receipt with over 1m length. as this may damage the printer
core.
Do not immerse the printer in water, or expose it to rain, as this can cause
damage to the printer.
Do not open the paper case cover when it is printing, otherwise the printer may
work improperly.
If printer is using USB connection to work, should not unplug the USB cable, or
else some printing data may be lost. When printer is using bluetooth
connection to work, the distance of communication should be within 10 meters,
otherwise the printer doesn’t print or prints rubbish codes.
Although the printer can work steadily when the environment temperature is
between 0℃to 50℃, too high(45℃)or too low(5℃) environment temperature
and too high (above 85% relative humidity) or too low (below 20% relative
humidity) environment humidity both effect the printing quality.
The printer paper roll with poor quality or stored for too long time also may
result in poor print quality even damage the printer.
Under the black mark detecting mode, the printer requires that the pre-printed
black mark is accordant with the printing rule of black mark (please refer to
details in Chapter 4.2), otherwise the black mark can not be detected correctly.

2
When the printer prints label paper, label should not over the maximum of the
printer, otherwise the printer may work improperly.
Notice of Storing
The printer should be stored at a temperature of -20 ° C to 60 ° C and a
relative humidity of 10% to 90%.
Declaration
It is A class product, which may cause radio interference in
the living environment. In this situation, users need to take
feasible and effective measures to interfere with it.
Chapter 1 Outer Appearance and Model No.
1.1 Outer Appearance
1
Printer cover
2
Cover open key
3
Backing paper outlet
4
Label paper outlet
5
Operation Panel
6
Power Switch
7
Power Interface
8
Cash Drawer Interface
9
DB9 Serial Port

3
10
USB Interface
1.2 Operation Panel
1.3 Model No.
SP-TL21N :default support USB, serial and Bluetooth three communication
interfaces.
Model
Description
SP-TL21N
Support RS-232 and USB
SP-TL21NBTDM
Support RS-232, USB and Bluetooth(Double Mode)
SP-TL21NBTMM
Support RS-232, USB and Bluetooth(One to Many)
SP-TL21NWF
Support RS-232, USB and WIFI
SP-TL21NE
Support USB and Ethernet

4
Chapter 2 Performance Characteristics
2.1 Printing Specification
Printing Method: Thermal line
Paper Width: Max 57.5mm±0.5mm; Min 20mm±0.5mm
Effective Printing Width: Max 56mm
Max Label: 56x45mm;
Resolution: 8dots/mm(203dpi)
Dots in each line: 448mm/line
Printing Speed: Max 127mm/s
Paper Thickness: 0.06mm~0.08mm for normal paper and black mark
paper
0.12mm~0.14mm for label paper
Printable Content:
Character set: GB18030(Chinese) BIG5(traditional Chinese),
GB12345(traditional Chinese), Shift+JIS(Japanese):24x24 and 16x16 dot
matrix
ASCII: 12x24, 8x16, and 9x17 dot matrix
International character set and Code page: 12x24 and 9x17 dot matrix
Self-defined character and figure
Barcode:
1D:UPCA,UPCE,EAN13,EAN8,CODE39,ITF25,CODABAR,CODE93,CODE
128
2D: PDF417,QR CODE,DATA Matrix
2.2 Physical Parameters
Dimension (W×L×H): 197(L) X126(W) X132(H) mm
Physical Weight: 970g (excluding roll paper)
Paper Roll: 57.5x φ80mm (max)
Interface: USB, RS-232, Bluetooth
Printing Head Life: 100km
2.3 Environmental Parameters
Operating Temp: 0℃~50℃
Operating Humidity: 10%~80%
Storage Temp: -20℃~60℃
Storage Humidity: 10%~90%
2.4 Other Specification
● Paper Loading Method: please refer to details in 3.1.1 Paper Roll
Installation.

5
● Black Mark Location: available(details please see 4.2 pre-printed black mark
manual).
● Printing Control Command: ESC/POS compatible command set, CPCL
command set, TSC/TSCL command set
(Refer to<SP-TL21 Printer Command Program Manual >for details).
● Power Supply: DV12V±5%, 2A
Chapter 3 Operation Method
3.1 Using Preparation
3.1.1 Paper Roll Installation
1. Press the cover open button. (Pic.1)
2. Take out the used paper roll and prepare a new one, and please mind the
right direction of the paper. (Pic2)
3. Put the paper roll into the installation and pull out a part of paper, then
shut down the cover.(Pic.3)
4. When use the function of automatic peel, please install as Pic.4 shows.
(Pic.1) (Pic.2)

6
(Pic.3) (Pic.4)
3.2 Basic function usage
Paper Type: Thermal paper, Black mark paper and Label paper.
Label Mode: Max 56mm wide, 45mm high paper supported, use label paper as
default under label mode.
Receipt Mode: 48mm wide normal paper supported, use normal paper as
default under receipt mode.
Set the Paper type by Setting Tool.
3.2.1 Switch On
Press ‘ - ’ on the button to turn on the printer, you will hear ‘one low one
high ’prompt tone, then the printer begin to work.
3.2.2 Switch Off
Press ‘ 0 ’ on the button to turn off the printer.
3.2.3 Self-Test
After receiving the printer, users can check its current setting and status at
anytime. Self-test method is as below: In the status of power off, then hold
down the [FEED] button and press the power button at the same time. Then
loosen the[FEED]button and Power button when you hear ‘one low one
high ’prompt tone, the current setting and status will be printed out.
3.2.4 Paper Feeding (Manual Feeding)
Under the normal work status and using the thermal receipt paper,
press[FEED]button, the paper feeding begins, and stops when loosen [FEED]
button. When the printer uses black mark paper and label paper,

7
press[FEED]button, the printer begins to feed paper and stops over the
position of black mark or label spacing. If the paper is not the black mark or
label paper, the printer stops automatically after feeds paper for 4
inches(about 101mm). And also alarm the error of paper out if use label paper
or black label mode. [FEED]button confirmed as paper feed button by default,
which can be shielded or changed into print button by command.
3.2.5 Hexadecimal Printing
The function of hexadecimal printing is to print the information received from
host machine by hexadecimal numbers and corresponding characters. It will
be convenient to debug application.
Into hexadecimal printing: Power off, press the[PAUSE]button and
[MODE]button then press the power button at the same time. Then loosen
these two buttons when you hear ‘one low one high’ prompt tone of power on.
The printer print ‘ Hexadecimal Dump’, printer prompted into hexadecimal
printing mode.
Quit hexadecimal printing :The way to quit hexadecimal printing mode is
switch off the printer or press the [FEED] button for three times to enter the
normal working mode. When quit by pressing [FEED]button,
‘***Completed***’ can be showed to indicate.
3.2.6 Printer Parameters Setting
Printer support two methods to set printing parameters, button operation and
setting tools. The method for setting tools can refer to documents for setting
tool.
Under the status of power off, hold down the [PAUSE]button and
[FEED]button,
then press the power button. Then loosen the [FEED] button when you hear
‘one low one high prompt tone of power on. Hold the [PAUSE] button and
press the [FEED]button twice, the printer print ‘Parameter setup mode’
indicating into parameter setting mode. (Refer to Appendix A.)
Quitting parameter setting:hold down the [PAUSE]button, press
the[FEED]buttons, then loosen [PAUSE] button and [FEED] button. Printer will
save the set parameter and print ‘Exit Set Mode’, then exit the parameter
setting mode and enter the normal working mode. The setting parameters
won’t be saved if you press the [POWER] button directly to turn off the printer.
B. Users can set more parameters by using the specification
〈SP-TL21 Setting
Tools〉
software through computer. The setting includes: language, font, default
code page, Bluetooth device name and password, printing mode etc. About
the setting method please refer to the <SP-TL21Setting Tools Software Help>,
offered with the software together.

8
3.2.7 Printer Factory Reset
If printer can’t work because of false parameter setting, please use the factory
reset function to restore the setting parameter. Hold down the [PAUSE]button
and [FEED]button, then press the power button. Then loosen the [FEED]
button when you hear ‘one low one high prompt tone of power on. Hold the
[PAUSE] button and press the [FEED]button for three times, printer will print
the current set parameter and indicate finally: ‘Notice: it will restore system
settings as default, press [FEED]once to confirm, power off directly to cancel.’
3.2.8 Printer Sensor Sensitivity Calibration
Sensor have a default when printer leave factory. When the default don’t
match the paper, printer will have fault that can’t detect paper status(for
example: can’t differentiate paper out status for thermal paper, can’t
differentiate the black mark or not, can’t differentiate gap and label). Users can
make the printer match with paper according calibration function.
In the status of power off, open the paper cover. Hold down the [PAUSE]button
and power button, loosen the [PAUSE] button when you hear ‘one low one
high prompt tone, then close the cover when the buzzer ring. Printer will print
‘Sensor Calibration Mode’, which indicate the printer has entered sensor
calibration mode. Press [FEED]button to calibrate, if the paper is compatible
with printer, printer will calibrate the sensor to suitable value automatically after
operating based on the printer suggestion, otherwise will not calibrate. Pinter
will print different parameter based on the current paper mode, and the
operation mode also will be different.
Label paper mode: Printer stops when feeds paper for 50cm. If the test passed,
printer will print the detected sensor voltage information, and indicate ‘label
sensor test: normal’, then quit after saving the parameter. If the test didn’t pass,
printer will indicate ‘label sensor test: abnormal’ and won’t save any
information.
Black mark paper: Printer stops when feeds paper for 50cm. If the test passed,
printer will print the detected sensor voltage information, and indicate ‘front
side sensor test: normal’(front side is black mark in the current setting) or ‘back
side sensor test: normal’(back side is black mark in the current setting), then
quit after saving the parameter. If the test didn’t pass, printer will indicate ‘front
side sensor test: abnormal’ or ‘back side sensor test: abnormal’ and won’t
save any information.
C. Thermal paper: Printer stops when feeds paper for 1cm and will indicate
‘Please take the paper out and put the paper back when the buzzer ring’.
Please operate based on printing indication. If the test passed, printer will print
the detected sensor voltage information, and indicate ‘continual paper test:
normal’, then quit after saving the parameter. If the test didn’t pass, printer will
indicate ‘continual paper test: abnormal’ and won’t save any information.
9
3.2.9 Set Into Upgrading Mode
In the status of power off, press the [PAUSE]button and[FEED]button, then
press the Power button. Loose the [FEED]button immediately when hearing
‘one low one high ’prompt tone of power on, the[ERROR]indicator light
flickering with the rate of 0.5Hz, then the printer enters upgrading mode,
Please note that only USB and RS-232 interface can support online procedure
upgrading.
3.2.10 Switch Working Mode
In the status of power off, press the [PAUSE]button and[FEED]button, then
press the Power button, hear ‘one low one high ’prompt tone, wait about
5seconds, printer print ‘ switch to receipt print mode’ or ‘switch to label print
mode’ ( printer will print different message according to the present working
mode), then loose the button, printer will work on the indicated mode after
restarting automatically.
3.3 Printer Interface Connection and Printing
3.3.1 Power Connection
Rated voltage is DC 12V±5%, rated current is 2A. Printer use desk type power
socket, which the inner electrode is positive, the outside electrode is negative.
Please use the standard configuration power adapter supplied by the
manufacturer.
3.3.2 USB Connection
The standard accessories of SP-TL21 printer includes one standard USB
D-type port cable which connects printer and host device. The USB of printer
belongs to the slave device type. Pins appearance and definitions are as
below:
PIN
NO
Function
Remarrk
1
V Bus
Power+5V
2
Data -
Data-
3
Data +
Data+
4
GND
ground
USB socket & definition
3.3.3 Bluetooth Connection
Hand-held device, laptop and other information terminal devices with

10
Bluetooth can drive SP-TL21 to print by the Bluetooth interface. SP-TL21
printer is compatible with Bluetooth2.0 standard. Power class is CLASS
1.5(SP-TL21BTMM) or CLASS 2.0(SP-TL21BTDM), effective communication
distance is 10meters. The Bluetooth of the printer belongs to the slave device.
The initial name of the printer is TL21 BT Printer, the initial password is ‘1234’;
users can change the printer name and password by using<SP-TL21 Setting
Tools> software. Please see the details in help file of <SP-TL21 Setting
Tools>.
Before working, SP-TL21 Printer needs to be paired with bluetooth host device.
Pairing begins from the host device. Usual pairing steps are as below:
1. Power on printer;
2. Host device searches for the outer Bluetooth device;
3. If there are other Bluetooth devices, please select TL21 BT Printer;
4. Enter the password ‘1234’;
5. Pairing finished.
Please see details in host device Bluetooth function instruction for reference.
Illustration:
The Bluetooth of SP-TL21 divided into dual mode Bluetooth and one-to-many
Bluetooth. Dual mode Bluetooth supports one Android device and one IOS 4.0
device, only one device can connect with the printer at the same time.
One-to-many Bluetooth supports three Android devices and one IOS device
connect printer simultaneously.
Notice:
1. When pairing, please make SP-TL21 printer switch on.
2. Once the Bluetooth of SP-TL21 has paired with the host Bluetooth device
successfully, it can’t be paired with other Bluetooth device until it unconnected
with the host device.
3.3.4 Serial Interface Connection
The serial interface of TL21 is compatible with RS-232C, which support
RTS/CTS & XON/XOFF handshake protocol.Its socket is DB-9 holes type. Pin
definition are below:
PIN
NO
Signal
Name
Origin
Definition
2
TXD
Printer
Printer send control code
X-ON/X-OFF and data to host
3
RXD
Host
Printer receive data from host
6
DSR
Printer
Same as CTS
8
CTS
Printer
When the signal is ‘Mark’, it
means printer is too busy to
3-3-4

11
receive data, when the signal is
‘SPACE’, it means printer is
ready to receive data
5
GND
——
GND
3.3.5 Cash Drawer Interface
PIN NO
Signal
Directi
on
1
Structure
ground
——
2
Cash drawer
driver signal
outpu
t
3
Cash drawer
on/off status
signal
input
4
+12V DC
——
5
NC
——
6
Signal ground
——
Fig 3-3-5 Cash drawer interface
3.4 Buzzer
There is also a buzzer to indicate various status of the printer. The meanings
are as below:
One low one high: power on;
Circulation continuous two lows: printer at error status
3.5 Indicator light
SP-TL21 has two indicator lights, the green one[ONLINE] is power light, the
red one[ERROR] is status light.
The green indicator light[ONLINE] on when the printer on. The [ONLINE]light
will flicker when the printer turn on the auto peel mode and paper left on the
paper-taking position.
The red light[ERROR]off when the printer work properly, the meaning of red
light are as below:
False
Status
Illustration
Paper out
On
Change paper or
use the proper label
paper
Paper
cover open
Flicker twice
and off for 1s
Close the paper cover
Over-heat
printing
head
Flicker once
and off for 1s
Print after for a while

12
Bluetooth
module
error
Flicker for five
times and off
for 1s
Use the setting tools
to set the matching
Bluetooth module or
return to
manufacturer
Chapter 4 Other Information
4.1 Commands Manual
<SP-TL21N Commands Manual> is a technical manual for engineer to
develop printer utility, and users can ask our company for it.
4.2 Description of pre-printed Black Mark
If user use pre-printed black mark to locate the receipt, please be sure to abide
by the following pre-printed black mark regulation when print the black mark
paper. Otherwise, it will cause that the printer cannot identify the black mark.
The black mark pre-print regulations are as below:
Printing Position: As the picture above, the black mark should be printed on
the right edge of the side of words
Width range: width≥7mm
Height range: 4mm≤height≤6mm
Reflectivity of infrared ray : <10% (infrared ray reflectivity of other parts of the
black mark paper is>65%)
HPS: It is the distance between edges of black mark and edges of print
beginning position.
4.5mm≤Hps≤6.5mm

13
Appendix A
Setting introduction: Press[PAUSE]button to choose setting,when press it
once , the set become the next one and it will print the present set value;
use[FEED]button to set the set value, when press it once , the set become the
next one and it will print the present set value.
After setting, press[PAUSE]and[FEED]button together, it’ll save the current
value, and printer enters into normal operation state. Otherwise it won’t save
the value.
1. General Setting:
2. Baud Rate Setting:
3. Language Setting

14
4. Font Setting:
5. Print Density Setting:
6. Paper sensor sensitivity setting:
7. Paper Type Setting:
8. Black Mark Position Setting
9. Printing Direction Setting:

15
10. Black Mark Sensitivity Setting:
11. Enable Black Mark Setting:
12. Paper-taking Sensor Sensitivity Setting:
Same as Enable Black Mark Setting
13. Printing Mode Setting:
14. Paper Near-End Sensor Sensitivity Setting
Same as Black Mark Sensitivity Setting
15. Paper Out Reprint Setting:
Same as Enable Black Mark Setting
16. Paper-taking Sensor Sensitivity Setting:
Same as Black Mark Sensitivity Setting
Table of contents
Other SPRT Printer manuals

SPRT
SPRT pos76 II User manual

SPRT
SPRT SP-L31 User manual

SPRT
SPRT POS58VI User manual

SPRT
SPRT SP-POS5IV User manual

SPRT
SPRT SP-RMD11A User manual

SPRT
SPRT POS8810 Series User manual

SPRT
SPRT SP-POS587 User manual

SPRT
SPRT SP-POS801 User manual

SPRT
SPRT TL24 Installation instructions

SPRT
SPRT SP-POS88III User manual