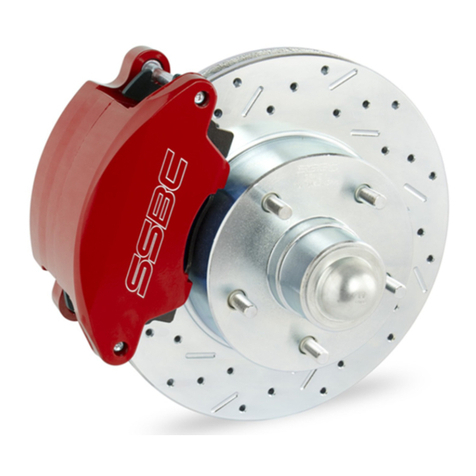
SSBC A117 User manual

INSTALLATION INSTRUCTIONS
REAR DISC BRAKE CONVERSION KIT A117
GM S-SERIES TRUCKS & SUVS
_____________________________________________________________________
Thank you for choosing STAINLESS STEEL BRAKES CORPORATION for your braking
needs. Pleases take the time to read and carefully follow these instructions to insure the ease of
your installation as well as the proper performance of the complete system.
Before beginning your installation, please verify you have received all the parts indicated on
the packing slip. If you believe anything to be missing or incorrect, please call our Customer Service
Department at 716-759-8666.
To assure your installation will go safely and smoothly, have the following items on hand to
assist you:
JACK & JACK STANDS WRENCH SET
LUG WRENCH TUBE WRENCH
TORQUE WRENCH MALLET
SOCKET SET BRAKE FLUID
BRAKE CLEANER
Stainless Steel Brakes Corporation • 11470 Main Road • Clarence, NY 14031
Phone: (800) 448-7722 • (716) 759-8666 • Fax: (716) 759-8688
Revision 3 4/3/12
These kits use the following pads:
SSBC#: 1047
FMSI#: D-347

BEFORE INSTALLING, PLEASE LAY OUT ALL OF THE CONTENTS OF THIS KIT
AND THOROUGHLY READ THROUGH THIS INSTRUCTION MANUAL TO ENSURE
THAT YOU HAVE ALL OF THE PARTS NEEDED TO COMPLETE THE INSTALL!
IF YOU FIND YOU ARE MISSING ITEMS, PLEASE CONTACT SSBC IMMEDIATELY,
REGARDLESS OF WHAT DEALER YOU PURCHASED THIS KIT FROM.
IF YOU HAVE ANY QUESTIONS REGARDING MISSING ITEMS, WARRANTY CLAIMS,
DEFECTIVE ITEMS, OR SIMPLY INSTALLATION ISSUES, PLEASE CONTACT SSBC DIRECTLY.
TOLL FREE: 800-448-7722
M-F: 9AM-5PM EST

1
A117 Revision 3
TIP: BE CAREFUL THAT ALL HYDRAULIC COMPONENTS ARE KEPT CLEAN AND FREE
OF DEBRIS INSIDE AND OUT. REMEMBER: DIRT IS THE ENEMY OF HYDRAULIC
SYSTEMS. SSBC WILL NOT BE RESPONSIBLE FOR SYSTEM FAILURES DUE TO AN
UNCLEAN INSTALLATION.
1. Raise the vehicle until the tires and wheels clear the floor and support the vehicle on jack
stands. Make sure parking brake is in the off position. Remove the tire and wheel
assemblies from the drum.
2. Remove drum brake assembly as follows:
a) Remove brake drums.
b) Disconnect parking brake cable from drum assembly.
c) Disconnect rigid brake lines at rear axle junction block.
BE CAREFUL NOT TO GET BRAKE FLUID ON THE PAINT. IT CAN CAUSE
SEVERE DAMAGE.
3. Remove axles and backing plates as follows:
a) Remove differential cover, a drain pan will be necessary.
b) Working through the opening of the case, remove the side gear piston shaft lock bolt.
c) Push the side gear pinion shaft (pin) out.
d) Push the axle shafts inward and remove the "C" locks from the inner end of the axle
shafts.
e) Remove axle shafts.
f) Remove backing plate and shoes from axle flange as an assembly, after removing
anchor bolt and lower cap screws; discard bolts and nuts.
4. Caliper mounting brackets (left and right side are different):
a) Attach tie bracket to bottom of each axle flange (tube side), using two 1/4"-28 socket
head (allen) screws and lock washers (6mm-1 x 25mm for late models) both types
supplied. (Plate also acts as a spacer between axle flange and caliper mounting
bracket.) Mount with radial cut-out facing up.
b) Install caliper mounting bracket from inboard side of axle housing making sure that
spacer/thrust plug (pressed onto bracket) enter large hole in flange bracket from
inboard side with caliper mounting holes at the rear. Secure bracket to flange using
special 5/8" x 2" cap screw, lock washers and nut (inboard) and two 7/16" cap screws
at the bottom which thread into tie bracket.
5. Splash shields (optional).
a) No splash shields are provided due to the size of the caliper mounting brackets which
effectively protect the rotor from road debris. Nonetheless, in the event that splash
shields are desired, they may be ordered from SSBC at an extra cost and secured with
two 1/4-20x1/2" screws and lock washers per side. Torque to 5 ft/lbs.
6. Re-install axles.
a) Slide axle shafts back into housing and follow step 3 in reverse.
b) Fill differential with hypoid gear lubricant.

2
A117 Revision 3
7. Mounting calipers and rotors.
a) Mount rotors onto axle flanges, temporarily securing with lug nuts to assure retention.
b) Place caliper assembly over rotor with the bleeder valve on top and bolt to mounting
bracket with 12mm-1 bolts supplied. Rear screw has flanged head. Torque bolts to
50 ft/lbs.
c) Adjust caliper piston as follows:
1) Rotate parking brake lever several full strokes (against spring), or turn piston
with spanner wrench, until brake pad to rotor clearance is approximately 1/16".
2) Use a feeler gage or 1/16" drill for a measuring gage.
8. Parking brake cables.
a) Remove parking brake cable from equalizer and lengthen threaded rod by installing
supplied metric to SAE adapter and 5/16"-24 threaded rod. Factory stud on end of
cable is 8mm-1.25 and must be converted to 5/16"-24.
b) Route parking brake cables under axle (adjust cable coil spring so that cable itself
does not ride on axle). Connect cable end to parking brake lever.
c) Adjust parking brake cable at equalizer by tightening 5/16"-24 nut until parking brake
levers just begin to leave stops on caliper in released parking brake pedal position.
Lock adjusting nut with second 5/16"-24 nut supplied.
9. Brake lines.
a) Screw male end of flex hoses into brass block and torque to 20-30 ft/lbs.
b) Attach brass banjo fitting with special hollow bolt and two copper washers (one on top,
one on the bottom) to caliper. Torque to 30-40 ft/lbs.
c) Connect (short )left and right adapter lines between female ends of hoses and axle
junction block.
Before tightening, make sure that the flex hoses are not kinked.
Secure right line to axle housing by opening original line clips and closing gently on
flex line.
10. Proportioning valve (optional)
a) The factory installed fixed proportioning valve is incorporated into the rear circuit of the
master cylinder. Our road tests indicate that it is not necessary to remove or disable
this valve. However, should the user feel that rear wheel lock up occurs under some
service conditions, requiring additional control, an adjustable proportioning valve is
available from SSBC.
b) If a valve is used, install it in the brake line from the master cylinder serving the rear
brakes. The Out port goes to the rear brake side.
c) When bleeding the system, adjust the valve by turning the knob clockwise until it stops.
DO NOT OVERTIGHTEN, THIS COULD DAMAGE THE VALVE.

11. Filling and Bleeding system
a) It is advisable to replace the brake fluid if the color is brown or muddy. This is due to
water that has been absorbed by the fluid which will eventually corrode the brake lines
and master cylinder. This absorbed moisture can also cause a vapor lock situation
under extreme braking conditions. Flush system with clean brake fluid and replace
with a good grade of disc brake fluid. DOT 3 or DOT 4 fluids are acceptable.
b) The simplest and most effective way to bleed your brakes is to use the gravity bleeding
approach as follows:
1) With calipers installed, make sure all fittings are tight and master cylinder is
topped off.
2) Open one bleeder screw at a time starting at the wheel farthest from the master
cylinder and working your way back around the wheel closest to the master.
With bleeder screw open, observe bleeder. At first the fluid will begin to escape
with intermittent air bubbles. When the air bubbles stop and a steady flow of
fluid is observed for several seconds, close the bleeder valve and move on to
the next wheel.
MAKE SURE TO KEEP A CLOSE WATCH OVER THE FLUID LEVEL INSIDE THE
MASTER CYLINDER DURING THE BLEEDING PROCESS. NEVER LET THE
RESERVOIR RUN DRY. ALWAYS KEEP IT AT LEAST 1/3 FULL.
3) After bleeding both wheels and topping of the master cylinder make 20-30
applications of the brake pedal. If a hard pedal is experienced, no further
bleeding is required. If pedal is spongy, repeat bleeding process until a hard
pedal is achieved.
4) With all bleeding complete, there should be approximately 3/4” to 1” of end play.
5) Power brake cars will experience a “drop off” of the pedal when the engine is
started. This is a normal condition that signifies the booster is working.
6) Pedal end play can be adjusted by lengthening or shortening the pushrod
between the pedal rod (or power brake output shaft) and the master cylinder.
This is best accomplished under the dash on standard brake cars and between
the booster and the master cylinder on power brake cars.
3
A117 Revision 3

4
A117 Revision 3
FINAL INSPECTION
a) Once a hard pedal is achieved, all fittings and connections must be inspected to make
sure there are no leaks. Also check the level in both reservoirs of the master cylinder
and top off, if needed.
b) Put wheels back on the car and turn wheel by hand to insure that the wheel spins
freely and does not interfere with any brake components. If any interferences are
detected, DO NOT drive vehicle until problem can be identified and corrected. An
optional wheel spacer kit is available from SSBC (P/N A2309-1).
c) If the caliper interferes with the wheel, it may be necessary to use the 3/16” wheel
spacers to clear the wheels. Do not use more than two of the spacers on each wheel.
d) When you are sure there are no interferences and the pedal is firm, torque the lug nuts
and lower the car back onto the ground. Test drive the car and apply the brakes
frequently to seat the pads.
e) The rear brake pressure can be adjusted by turning the knob on the adjustable
proportioning valve. It should be adjusted so the rear brakes do not lock up before the
fronts.
NOTE: DO NOT USE ANTI-SQUEAK ADHESIVE ON BACKS OF PADS. THIS
WILL DEGRADE THE PERFORMANCE OF THE CALIPER!
DO NOT DRIVE IN TRAFFIC UNTIL THE BRAKES SAFELY STOP THE CAR A SAFE DISTANCE
WITHOUT A SPONGY PEDAL FEEL!
BRAKING TESTS SHOULD ALWAYS BE DONE IN A SAFE OPEN AREA!
NOTE: For frequently asked questions and technical reference information please visit
the tech section of our website at www.ssbrakes.com.
TECH LINE -- If technical help is required, please call 716-759-8666.
NOW ENJOY TRUE PERFORMANCE BRAKING!!

A117 Revision 3 5

5.76
5.89
6.20
6.40
6.56
WHEEL MOUNTING SURFACE
C
L
1.05
.40
.69
Ph: 716-759-8666 800-448-7722 ~ Fx: 716-759-8688
WWW.SSBRAKES.COM
T-041 -
TEMPLATE NO.
SSBC
REV
DRAWING
STAINLESS STEEL BRAKE CORP.
CLARENCE, NEW YORK 14031-1720
DO NOT SCALE
DIMENSIONS ARE IN INCHES
Table of contents
Other SSBC Automobile Accessories manuals
