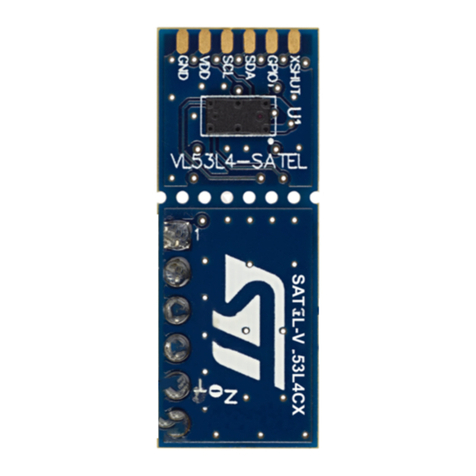
ST VL6180X Installation and operating instructions

June 2014 DocID026571 Rev 1 1/27
AN4545
Application note
VL6180X basic ranging application note
Introduction
The VL6180X is a proximity sensor based on ST’s patented FlightSense™ technology. The
VL6180X interfaces to your micro-controller via the industry standard I²C bus. The module
also includes an ambient light sensor (ALS).
This application note describes how to set up the VL6180X and perform range
measurements with the sensor.
Note: Settings presented in this document are for test purpose only. Performance and reliability
not guaranteed.
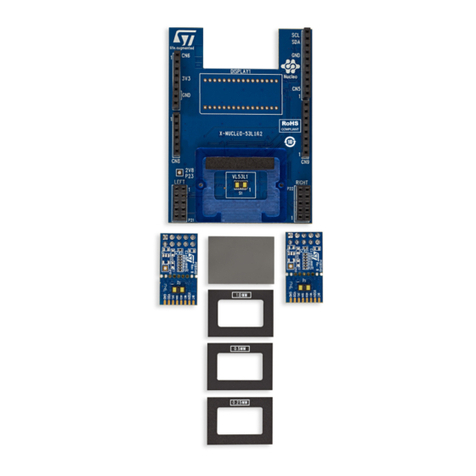
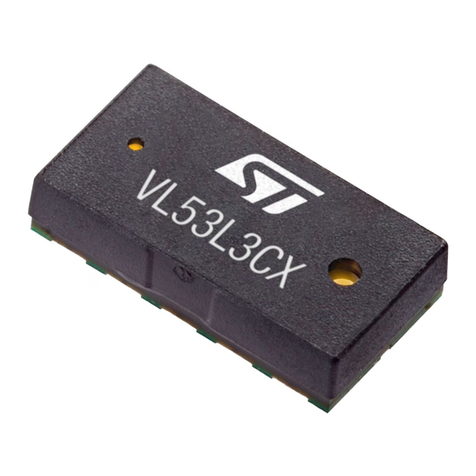
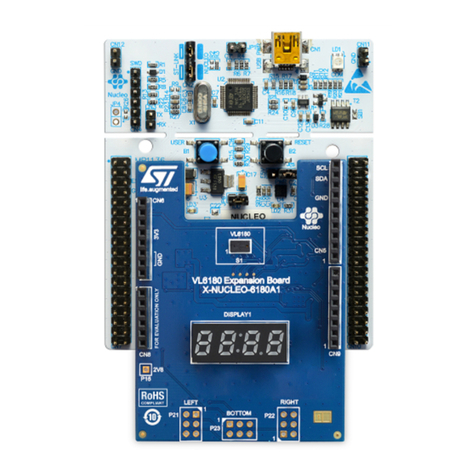
Figure 1. VL6180X
www.st.com

Contents AN4545
2/27 DocID026571 Rev 1
Contents
1 Set-up . . . . . . . . . . . . . . . . . . . . . . . . . . . . . . . . . . . . . . . . . . . . . . . . . . . . . 4
1.1 Powering the module . . . . . . . . . . . . . . . . . . . . . . . . . . . . . . . . . . . . . . . . . 4
1.2 Communication with the VL6180X . . . . . . . . . . . . . . . . . . . . . . . . . . . . . . . 4
1.3 Initialisation . . . . . . . . . . . . . . . . . . . . . . . . . . . . . . . . . . . . . . . . . . . . . . . . . 5
2 Performing range measurements . . . . . . . . . . . . . . . . . . . . . . . . . . . . . . 6
2.1 Performing a range measurement in single-shot mode . . . . . . . . . . . . . . . 7
2.2 Performing a range measurement in continuous mode . . . . . . . . . . . . . . . 7
3 Other ranging outputs . . . . . . . . . . . . . . . . . . . . . . . . . . . . . . . . . . . . . . . 8
3.1 Range error codes . . . . . . . . . . . . . . . . . . . . . . . . . . . . . . . . . . . . . . . . . . . 8
3.2 Return array statistics . . . . . . . . . . . . . . . . . . . . . . . . . . . . . . . . . . . . . . . . . 8
3.2.1 Return signal rate . . . . . . . . . . . . . . . . . . . . . . . . . . . . . . . . . . . . . . . . . . 8
3.2.2 Return convergence time . . . . . . . . . . . . . . . . . . . . . . . . . . . . . . . . . . . . . 9
3.2.3 Return signal count . . . . . . . . . . . . . . . . . . . . . . . . . . . . . . . . . . . . . . . . . 9
3.2.4 Return ambient count . . . . . . . . . . . . . . . . . . . . . . . . . . . . . . . . . . . . . . . 9
3.3 Reference array statistic . . . . . . . . . . . . . . . . . . . . . . . . . . . . . . . . . . . . . . . 9
3.3.1 Reference signal rate . . . . . . . . . . . . . . . . . . . . . . . . . . . . . . . . . . . . . . . . 9
3.3.2 Reference convergence time . . . . . . . . . . . . . . . . . . . . . . . . . . . . . . . . . 10
3.3.3 Reference signal count . . . . . . . . . . . . . . . . . . . . . . . . . . . . . . . . . . . . . 10
3.3.4 Reference ambient count . . . . . . . . . . . . . . . . . . . . . . . . . . . . . . . . . . . . 10
4 Typical ranging output . . . . . . . . . . . . . . . . . . . . . . . . . . . . . . . . . . . . . . 11
4.1 Range output . . . . . . . . . . . . . . . . . . . . . . . . . . . . . . . . . . . . . . . . . . . . . . .11
4.1.1 Manual offset calibration procedure . . . . . . . . . . . . . . . . . . . . . . . . . . . . 12
4.2 Signal rate . . . . . . . . . . . . . . . . . . . . . . . . . . . . . . . . . . . . . . . . . . . . . . . . 12
4.3 Convergence time . . . . . . . . . . . . . . . . . . . . . . . . . . . . . . . . . . . . . . . . . . 13
5 Cover glass . . . . . . . . . . . . . . . . . . . . . . . . . . . . . . . . . . . . . . . . . . . . . . . 15
5.1 Range output . . . . . . . . . . . . . . . . . . . . . . . . . . . . . . . . . . . . . . . . . . . . . . 15
5.1.1 Cross ross talk calibration procedure . . . . . . . . . . . . . . . . . . . . . . . . . . 16
5.1.2 Range ignore . . . . . . . . . . . . . . . . . . . . . . . . . . . . . . . . . . . . . . . . . . . . . 17
DocID026571 Rev 1 3/27
AN4545 Contents
27
6 Device settings . . . . . . . . . . . . . . . . . . . . . . . . . . . . . . . . . . . . . . . . . . . . 18
6.1 Performance tuning . . . . . . . . . . . . . . . . . . . . . . . . . . . . . . . . . . . . . . . . . 18
6.1.1 Max convergence time . . . . . . . . . . . . . . . . . . . . . . . . . . . . . . . . . . . . . . 18
6.1.2 Inter-measurement period . . . . . . . . . . . . . . . . . . . . . . . . . . . . . . . . . . . 19
6.1.3 Readout averaging period . . . . . . . . . . . . . . . . . . . . . . . . . . . . . . . . . . . 19
6.2 Additional error checks . . . . . . . . . . . . . . . . . . . . . . . . . . . . . . . . . . . . . . . 19
7 Example code . . . . . . . . . . . . . . . . . . . . . . . . . . . . . . . . . . . . . . . . . . . . . 20
8 Acronyms and abbreviations . . . . . . . . . . . . . . . . . . . . . . . . . . . . . . . . . 23
9 SR03 settings . . . . . . . . . . . . . . . . . . . . . . . . . . . . . . . . . . . . . . . . . . . . . . 24
10 Revision history . . . . . . . . . . . . . . . . . . . . . . . . . . . . . . . . . . . . . . . . . . . 26

Set-up AN4545
4/27 DocID026571 Rev 1
1 Set-up
1.1 Powering the module
To power the module, we recommend connecting a 2v8 supply to AVDD and
AVDD_VCSEL. AVSS and AVSS_VCSEL must be connected to ground.
Note: GPIO-0 is set as a shut down pin by default hence must be pulled high to avoid shutting
down the device.
Note: AVDD_VCSEL must be applied before or at the same time as AVDD to ensure internal error
check on the IR emitter passes.
Figure 2. VL6180X block diagram
1.2 Communication with the VL6180X
Communication with the VL6180X is via the I²C bus. The default 7-bit address of the
VL6180X is 0x29. It can be changed by the user to any 7-bit addresses by writing to the
I2C_SLAVE__DEVICE_ADDRESS {0x212} register. The SCL and SDA lines should each
have a pull-up resistor on the I²C bus.
Note: The VL6180X uses a 16-bit register index.

DocID026571 Rev 1 5/27
AN4545 Set-up
27
1.3 Initialisation
The latest Standard Ranging (SR) settings must be loaded onto VL6180X after the device
has powered up. The following is the recommended procedure for loading the settings into
the VL6180X.
1. Check device has powered up (Optional)
a) Check SYSTEM__FRESH_OUT_OF_RESET {0x16} register is equal to 0x01.
2. Load settings onto VL6180X
a) See Section 9 for the settings.
3. Apply other specific settings e.g. cross talk, GPIO, max convergence time etc.
(Optional)
4. Write 0x00 to SYSTEM__FRESH_OUT_OF_RESET {0x16} (Optional)
a) Help host determine if settings have been loaded.
5. VL6180X is ready to start a range measurement.
Note: This procedure must be repeated if the VL6180X has been power cycled or if GPIO-0 has
been toggled. SYSTEM__FRESH_OUT_OF_RESET {0x16} will reset to 0x01 if the
VL6180X has been power cycled or if GPIO-0 was toggled.
Figure 3. Initialisation steps
Device powerup
Check {0x16} is
equal to 0x01
Load settings onto
VL6180X
Load other specific
settings
Set {0x16} to 0x00
Device ready for
range measurement

Performing range measurements AN4545
6/27 DocID026571 Rev 1
2 Performing range measurements
After the settings have been loaded, range measurements can be started in one of two
modes, Single-shot mode and Continuous mode.
In Single-shot mode, the VL6180X will perform a single range measurement and will enter
software standby once the measurement has completed.
In continuous mode the VL6180X will perform back to back range measurements at a user
determined rate until the stop command is issued. Section 2.1 and Section 2.2 outline the
recommended procedure on performing a range measurements. Section 7 contains
example code on how to initialise the device and perform range measurements with the
sensor.
Figure 4. Flowchart for performing range measurements
Device ready for
range measurement
Ranging
mode
Start a ranging
measurement. Write
0x01 to {0x18}
Poll for New Sample
Ready threshold
event at {0x4f}
Read {0x62} for
range result
Clear Interrupt
Write 0x07 to {0x15}
Device ready for
range measurement
Start range
measurements.
Write 0x03 to {0x18}
Poll for New Sample
Ready threshold
event at {0x4f}
Read {0x62} for
range result
Continue
ranging?
Stop ranging.
write 0x01 to {0x18}
No
Yes
Single-shot
Clear Interrupt
Write 0x07 to {0x15}
Continuous

DocID026571 Rev 1 7/27
AN4545 Performing range measurements
27
2.1 Performing a range measurement in single-shot mode
1. Check device is ready to start a range measurement. (Optional)
a) Check bit 0 of RESULT__RANGE_STATUS {0x4d} is set.
2. Start a range measurement.
a) Write 0x01 to SYSRANGE__START {0x18}.
3. Wait for range measurement to complete.
a) Poll RESULT__INTERRUPT_STATUS_GPIO {0x4f} register till bit 2 is set to 1.
(New Sample Ready threshold event).
4. Reading range result.
a) Read RESULT__RANGE_VAL {0x62}.
b) This is the range measurement between the VL6180X and target in mm
5. Clear the Interrupt status.
a) Write 0x07 to SYSTEM__INTERRUPT_CLEAR {0x15}.
6. Repeat the previous steps 1 to 4 for more range measurements.
2.2 Performing a range measurement in continuous mode
1. Check device is ready to start range measurement. (Optional)
2. Check bit 0 of RESULT__RANGE_STATUS {0x4d} is set.
3. Start range measurements.
a) Write 0x03 to SYSRANGE__START {0x18}.
4. Wait for range measurement to complete.
a) Poll RESULT__INTERRUPT_STATUS_GPIO {0x4f} register till bit 2 is set to 1.
(New Sample Ready threshold event).
5. Reading range result.
a) Read RESULT__RANGE_VAL {0x62}.
b) This is the range measurement between the VL6180X and target in mm.
6. Clear the Interrupt status.
a) Write 0x07 to SYSTEM__INTERRUPT_CLEAR {0x15}.
7. Repeat the steps 2 to 4 for more range measurements.
8. Stop range measurements.
a) Write 0x01 to SYSRANGE__START {0x18}.

Other ranging outputs AN4545
8/27 DocID026571 Rev 1
3 Other ranging outputs
As well as the range output, the following can also be read along with each range
measurement.
3.1 Range error codes
Register RESULT__RANGE_STATUS {0x4d} returns an error code after each range
measurement. Table 13 gives a summary of the range error codes:
Table 1. Range error codes
3.2 Return array statistics
3.2.1 Return signal rate
Register RESULT__RANGE_RETURN_RATE {0x66} contains the signal rate from the
return array recorded during the range measurement.
To convert the return rate into Mcps, read {0x66} and divide the value by 128.
Note: {0x66} is a 16-bit register.
Bits [7:4] Error code Description Range
0 No error Valid measurement 0 - 200(1)
1. Range overflow occurs typically around 200 mm.
1-5 System error System error detected. No
measurement possible. 255
6 Early convergence estimate ECE check failed 255
7 Max convergence System did not converge before the
specified max. convergence time limit
No target detected 255
8 Range ignore Ignore threshold check failed 255
9-10 Not used - -
11 SNR Ambient conditions too high.
Measurement invalidated 255
12 Raw range algo underflow Range < 0
(because offset is programmable a
negative range result is possible) 0
13 Raw range algo overflow Result is out of range. This occurs
typically around 200 mm 255
14 Ranging algo underflow Range < 0
(because offset is programmable a
negative range result is possible) 0
15 Ranging algo overflow Result is out of range. This occurs
typically around 200 mm 255

DocID026571 Rev 1 9/27
AN4545 Other ranging outputs
27
3.2.2 Return convergence time
Register RESULT__RANGE_RETURN_CONV_TIME {0x7c} contains the time in µs it took
for the return array on VL6180X to settle or converge on a target distance during the range
measurement.
Note: If Return convergence time is equal to the max convergence time, then VL6180X was not
able to detect a target during the last measurement.
{0x7c} is a 32-bit register.
3.2.3 Return signal count
Register RESULT__RANGE_RETURN_VCSEL_COUNT {0x6c} contains the number of
counts recorded during the convergence time(a) from the return array during the range
measurement.
The following equation show the relationship between count, signal rate and convergence
time.
Note: {0x6c} is a 32-bit register.
3.2.4 Return ambient count
Register RESULT__RANGE_RETURN_AMB_COUNT {0x74} contains the number of
ambient counts recorded during the convergence time(a) during the range measurement.
The ambient counter is only active for 1/6th of the convergence time, hence the count value
must be multiplied by 6.
See the following equation of how to convert the ambient count into Mcps.
Note: {0x74} is a 32-bit register
3.3 Reference array statistic
3.3.1 Reference signal rate
Register RESULT__RANGE_REFERENCE_RATE {0x68} contains the signal rate from the
reference array recorded during the range measurement.
To convert the reference rate into Mcps, read {0x68} and divide the value by 128.
Note: {0x68} is a 16-bit register.
a. The count register continues to increment till both return and reference array have converged. This means for
the Convergence time [µs], the maximum value between {0x7c} and {0x80} should be used in the equation.
Under normal operation, {0x7c} should be the larger number value.
Return Signal Rate [Mcps] Return Signal Count
Convergence Time [µs]
--------------------------------------------------------------=
Return Ambient Rate [Mcps] Return Ambient Count 6×
Convergence Time [µs]
---------------------------------------------------------------------=

Other ranging outputs AN4545
10/27 DocID026571 Rev 1
3.3.2 Reference convergence time
Register RESULT__RANGE_REFERENCE_CONV_TIME {0x80} contains the time in µs it
took for the reference array to settle or converged on a target distance during the range
measurement.
Note: {0x7c} is a 32-bit register.
3.3.3 Reference signal count
Register RESULT__RANGE_REFERENCE_SIGNAL_COUNT {0x70} contains the number
of counts recorded during the convergence time(1) from the reference array during each
range measurement.
The following equation show the relationship between count, signal rate and convergence
time.
Note: {0x70} is a 32-bit register.
3.3.4 Reference ambient count
Register RESULT__RANGE_REFERENCE_AMB_COUNT {0x78} contains the number of
ambient counts recorded during the convergence time(1) from the reference array. The
ambient counter is only active for 1/6 of the convergence time, hence the count value must
be multiplied by 6.
See the following equation of how to convert the ambient count into Mcps.
Note: {0x78} is a 32-bit register
Reference Signal Rate [Mcps] Reference Signal Count
Convergence Time [µs]
---------------------------------------------------------------=
Reference Ambient Rate [Mcps] Reference Ambient Count 6×
Convergence Time [µs]
------------------------------------------------------------------------------=

DocID026571 Rev 1 11/27
AN4545 Typical ranging output
27
4 Typical ranging output
4.1 Range output
Figure 5 shows the typical ranging output from VL6180X for different targets(b) at different
distances.
Figure 5. Graph of range output vs. target distance. The test was performed in the
dark and with no cover glass.
The range output of VL6180X with each of the targets should be linear with range. There
could however be an offset error(c). This error can be corrected by performing a manual
offset calibration, see Section 4.1.1.
Note: At <10mm the interaction between the target and VL6180X will prevent the range output
from reaching 0mm. This is due to a number of physical effects:
•
Separation between VCSEL and return array
•
Multiple reflections between target surface and VL6180X
•
VCSEL output penetrating the target surface and scattering off the layers inside the
target
b. Munsell gray target.
c. See section 4 in the VL6180X dataset for the spec on offset error.

Typical ranging output AN4545
12/27 DocID026571 Rev 1
4.1.1 Manual offset calibration procedure
This section describes a procedure for calibrating offset.
1. Clear the system offset
a) Write 0x00 to SYSRANGE__PART_TO_PART_RANGE_OFFSET {0x24}.
2. Place a target at 50mm away from VL6180X.
a) Using a target with 17% reflectance or higher is recommended.
b) When calibrating with cover glass we recommended using a target with
reflectance of 88% or higher to minimise error from cross talk, cross
3. Collect a number of range measurements with the target in place and calculate mean
of the range results.
a) For a reliable measurement, take at least 10 measurements.
4. Calculate the offset required:
5. Apply offset:
a) Write the calculated offset value to
SYSRANGE__PART_TO_PART_RANGE_OFFSET {0x24}.
Note: {0x24} is in 2s complement representation. For offset value 0 to127, write 0x00 to 0x7f.
For offset value -1 to -128, write 0xff to 0x80, e.g -30 = 0xe2
4.2 Signal rate
Figure 6 shows the return signal rate output from VL6180X for different targets at different
distances. The return signal rate can provide useful information on how optimised VL6180X
settings to perform more efficiently and reliably.
The return signal rate from a target will generally follow the inverse square law as the target
moves away from VL6180X. Assume the target fills the VL6180X’s field of view(d) and is at a
distance >10mm.
As target distance drops below 10mm, the target will start to block off the optical path
between the VCSEL and the return array. A target at <10mm can reduce the signal to a level
that can prevent the VL6180X from completing a range measurement.
Note: Cover glass can alter the return signal rate characteristics. We therefore recommend the
signal rate be re-characterized once the VL6180X has been integrated into the final system
before attempting to perform any system optimisation.
Offset Target Distance [mm] Average range [mm]–= Offset 50 Average range [mm]–=
d. The field or view of VL6180X is approximately ±12.5°.

DocID026571 Rev 1 13/27
AN4545 Typical ranging output
27
Figure 6. Graph of return signal rate vs. target distance. The test was performed in the
dark and with no cover glass.
4.3 Convergence time
Figure 7 shows the typical convergence time output from VL6180X for different targets at
different distances. The convergence time can provide useful information on how to
optimise VL6180X settings to perform more efficiently and reliably.
Note: Cover glass can alter the return convergence time characteristics. We therefore recommend
the convergence time be re-re-characterized once the VL6180X has been integrated into
the final system before attempting to perform any system optimisation.

Typical ranging output AN4545
14/27 DocID026571 Rev 1
Figure 7. Graph of convergence time vs. target distance. The test was performed in
the dark and with no cover glass.

DocID026571 Rev 1 15/27
AN4545 Cover glass
27
5 Cover glass
The VL6180X can be used with a cover glass. The cover glass can cause internal reflection
and this can be detected by VL6180X as unwanted signals. This is known as the cross talk.
The cross talk can affect the range output, hence we recommend the user perform the cross
talk calibration procedure when using the VL6180X with cover glass (see Section 5.1.1).
The range ignore function should also be enabled to remove false detections from the cover
glass, see Section 5.1.2.
5.1 Range output
Figure 8 shows the impact of the cover glass on the range output of VL6180X. The internal
reflection between the glass and the VL6180X causes the ranging output to decrease at
longer distances.
This error in range is a ratio of the target signal rate and magnitude of the cross talk, hence
the range output from a darker target are more susceptible to the effect of cross talk.
Figure 9 shows the range output from VL6180X with the cross talk calibration procedure
implemented. The range error caused by the cover glass is corrected.
Note: The offset might need to be re-calibrated when ranging though cover glass.
The cross talk rate depends on the glass type and its placement relative to VL6180X. If the
glass type or its position changes, then cross talk calibration might need to be re-done.
Figure 8. Graph of range output vs. target distance without cross talk calibration. The
test was performed in the dark and with cover glass

Cover glass AN4545
16/27 DocID026571 Rev 1
Figure 9. Graph of range output vs. target distance with cross talk calibration. The
test was performed in the dark and with cover glass
5.1.1 Cross ross talk calibration procedure
This section describes a procedure for calibrating system cross talk.
1. Perform the offset calibration (recommended)
a) See Section 4.1.1.
Note: If the offset is incorrectly calibrated, cross talk calibration will be inaccurate.
2. Place a dark target at 100mm away from VL6180X.
a) Low reflectance target recommended, e.g. 3% target.
3. Ensure SYSRANGE__CROSSTALK_COMPENSATION_RATE {0x1e} is set to 0.
4. Collect a number of range measurements with the target in place and calculate mean
of the range results and Return signal rate.
a) For a reliable measurement, take at least 10 measurements.
5. Calculate the cross talk:
6. Apply offset:
a) Write the calculated cross talk value to
SYSRANGE__CROSSTALK_COMPENSATION_RATE {0x1e}.
Note: {0x1e} is a 316-bit register in 9.7 format:
For cross talk value of 0.4 Mcps = 0.4 x 128 =51.2, register value to be written = 0x33.
cross-talk [Mcps] Average Rtn Rate [Mcps] 1 Average range
Target Distance
------------------------------------------–
×=
cross-talk [Mcps] Rtn Rate [Mcps] 1 Average range 100⁄–()×=

DocID026571 Rev 1 17/27
AN4545 Cover glass
27
5.1.2 Range ignore
The range ignore function in VL6180X can be enabled by setting bit 1 of
SYSRANGE__RANGE_CHECK_ENABLES {0x2d}. If enabled, the ignore threshold must
be specified.
We recommend setting the ignore threshold to at least 1.2x cross talk.
e.g. SYSRANGE__RANGE_IGNORE_THRESHOLD {0x26} = cross talk (Mcps) x 1.2
A range ignore error will be flagged if the return signal rate is less than the ignore threshold.

Device settings AN4545
18/27 DocID026571 Rev 1
6 Device settings
6.1 Performance tuning
Changing the settings in this section can affect the performance of the overall system.
6.1.1 Max convergence time
The SYSRANGE__MAX_CONVERGENCE_TIME {0x1c} register sets an upper limit for the
max convergence time. See Figure 10.
Figure 10. System timing diagram for a signal ranging measurement
The max convergence time is made up of the convergence time and sampling period. By
default the max convergence time is set to 49ms during device power-up.
Reducing the max convergence time will reduce the maximum time a measurement will be
allowed to complete and can reduce the power consumption when no target is present. We
recommend a value of 30ms for the max convergence time as a suitable starting point.
Note: Reducing the max convergence time will reduce the distance the VL6180X is able to range
to.
Since the max convergence time controls maximum duration of each range measurement, it
effectively controls the minimum signal rate required by the VL6180X to complete a range
measurement.
During a range measurement, the signal from the return array is counted within the
convergence time window. The VL6180X will only report an valid range when a threshold of
15360 has been reached. The minimum signal rate required for convergence is therefore
related to the Max convergence time via the following equation.
The sampling period is set to 4.4ms by default.
If the return signal from a target is lower than the minimum signal rate then the VL6180X will
return a range output of 255 and a max convergence will be flagged.
Min signal rate [cps] 15360
Max Conv time [s] Sampling period [s]–
---------------------------------------------------------------------------------------------------------=

DocID026571 Rev 1 19/27
AN4545 Device settings
27
Note: {0x1c} is a 8-bit register.
Maximum value for the Max convergence time is 63ms. Minimum value should be set to a
value of 2 or higher for range measurement to be successful.
1 code = 1 ms.
6.1.2 Inter-measurement period
The SYSRANGE__INTERMEASUREMENT_PERIOD {0x1b} register sets the Inter-
measurement period between each measurement when in continuous mode. The inter-
measurement period needs to be set to a value that is above the maximum allowable full
ranging cycle period. The following equations define the minimum inter-measurement
period to ensure correct operation:
Inter-measurement period*0.9 > Full ranging cycle = Max convergence time + 5ms.
Note: {0x1b} is a 8-bit register.
A value of 0x00 for {0x1b} equals to a inter-measurement period 10ms. Each code will add
10ms to the inter-measurement period. e.g. inter-measurement period 50ms = 0x04.
6.1.3 Readout averaging period
The READOUT__AVERAGING_SAMPLE_PERIOD {0x10a} register sets the internal
readout averaging sample period. Increasing the sampling period decreases noise but
increases max convergence time and power consumption. Each code corresponds to
around 64.5µs additional processing time and there is a fixed 1.3ms of overhead during
readout.
Sampling period = 1.3ms + 64.5µs * READOUT__AVERAGING_SAMPLE_PERIOD
By default {0x10a} is set to 0x30 which will give a sampling period of 4.4ms.
6.2 Additional error checks
VL6180X has three additional system error checks which can be enabled to help filter out
invalid range results. See the VL6180X data sheet on how to set these error checks as well
as enabling and disabling them.

Example code AN4545
20/27 DocID026571 Rev 1
7 Example code
Below is example code on how to perform ranging with VL6180X using single shot mode.
The code is based on the STM32 F401 Nucleo board and can be compiled using the mbed
Compiler.
///////////////////////////////////////////////////////////////////
// Beginning of code
///////////////////////////////////////////////////////////////////
#include "mbed.h"
Serial pc(SERIAL_TX,SERIAL_RX); // set-up serial to pc
I2C i2c(I2C_SDA,I2C_SCL); // Set up I²C on the STM32 NUCLEO-401RE
#define addr (0x52) // I²C address of VL6180X shifted by 1 bit
//(0x29 << 1) so the R/W command can be added
///////////////////////////////////////////////////////////////////
// Split 16-bit register address into two bytes and write
// the address + data via I²C
///////////////////////////////////////////////////////////////////
void WriteByte(wchar_t reg,char data){
char data_write[3];
data_write[0]=(reg >> 8)&0xFF;; // MSB of register address
data_write[1]=reg &0xFF;// LSB of register address
data_write[2]=data &0xFF;
i2c.write(addr,data_write,3);
}
///////////////////////////////////////////////////////////////////
// Split 16-bit register address into two bytes and write
// required register address to VL6180X and read the data back
///////////////////////////////////////////////////////////////////
char ReadByte(wchar_t reg){
char data_write[2];
char data_read[1];
data_write[0]=(reg >> 8)&0xFF;// MSB of register address
data_write[1]=reg &0xFF;// LSB of register address
i2c.write(addr,data_write,2);
i2c.read(addr,data_read,1);
return data_read[0];
}
///////////////////////////////////////////////////////////////////
// load settings
Table of contents
Other ST Accessories manuals