manuals.online logo
Brands
  1. Home
  2. •
  3. Brands
  4. •
  5. SunSetter
  6. •
  7. Accessories
  8. •
  9. SunSetter EASYSHADE Use and care manual

SunSetter EASYSHADE Use and care manual

For Technical Support visit us at www.sunseer.com/ownerscorner
or Call Toll Free 800-670-7071 • Fax 877-224-4944
EASYSHADE®
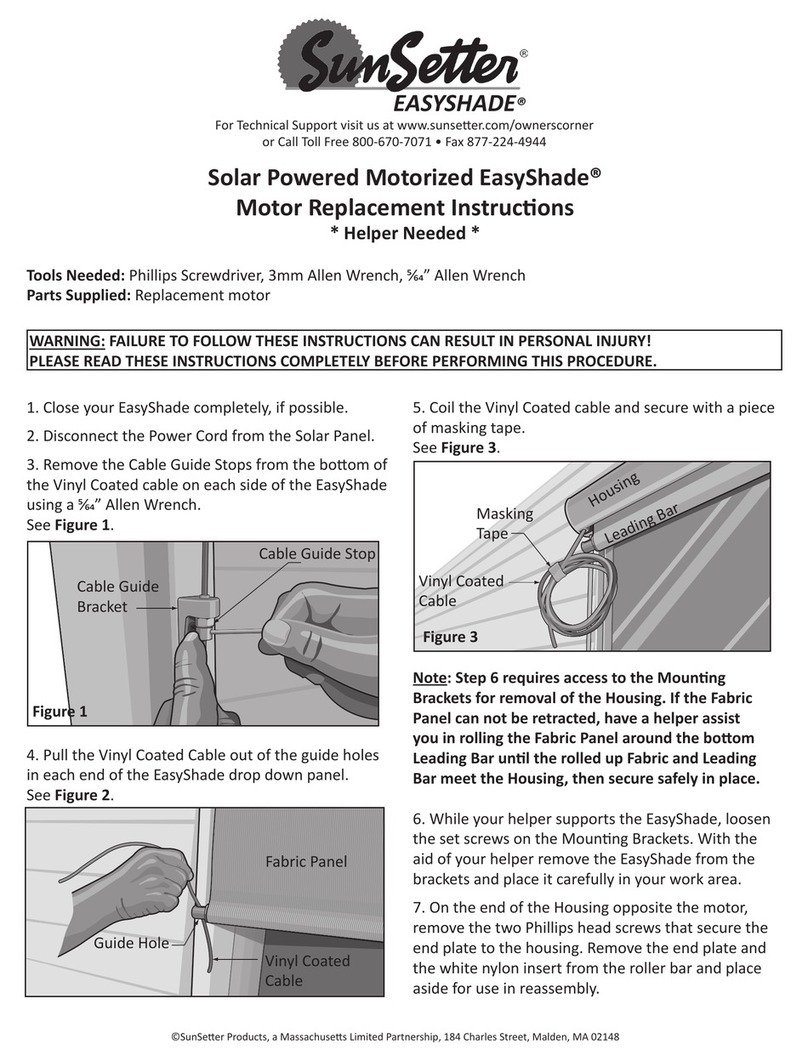
Motorized EasyShade® Fabric Replacement
*Helper Needed*
Tools Needed:
Parts Supplied: 
WARNING: FAILURE TO FOLLOW THESE INSTRUCTIONS CAN RESULT IN PERSONAL INJURY!
PLEASE READ THESE INSTRUCTIONS IN ITS ENTIRETY BEFORE ATTEMPTING TO COMPLETE THIS PROCEDURE.








1.
Cable Guide
Stop
Cable Guide
Bracket
Figure 1



EasyShade
Solar Screen
Vinyl Coated
Cable
Guide
Hole
Figure 2


Masking
Tape
Vinyl Coated
Cable
Figure 3
CAUTION: USE EXTREME CARE WHILE PERFORMING
STEP 6, TO ENSURE THE EASYSHADE DOES NOT
FALL FROM THE BRACKETS WHEN THE MOUNTING
SCREWS ARE LOOSENED. FAILURE TO USE CAUTION
CAN RESULT IN PERSONAL INJURY OR DAMAGE TO
THE EASYSHADE.














Leading Bar
Leading Bar

Figure 4
Set Screw in Bracket
2






 5.







 6.





WARNING: THE SPRING CLIPS COULD HAVE
SHARP EDGES. TO PREVENT THE RISK OF INJURY,
USE SAFETY GLOVES WHEN REMOVING OR
REPOSITIONING THE SPRING CLIPS ON THE ROLLER
BAR. FAILURE TO DO SO COULD CAUSE PERSONAL
INJURY.





Figure 5
Figure 6
NOTE: While installing the provided Double Sided
Adhesive Tape, Do Not Remove the backing from the
tape unl instructed to do so.
Housing
End Plate/Motor
Fabric on
Roller Bar
Leading Bar Inside
Boom Pleat
Figure 8
Roller Bar


Roll the Fabric onto
the Leading Bar
Figure 7
Spring Clip
Roller
Bar
Raised Guide
Fabric




Do not remove the backing of the tape, yet.
See 
Figure 8
Figure 9
3






See 
Note: You may choose to use tape or have your
helper temporarily hold the Fabric in place on the
Roller Bar as you complete the following step.




Figure 11
Roller Bar
FIGURE X
Roller Bar
FIGURE X
FIGURE X
Spring
Clip
Fabric
Roller Bar
Spring Clip
Installation
Spring Clip
Removal
Figure 13
Roller Bar
FIGURE X
Roller Bar
FIGURE X
FIGURE X
Spring
Clip
Fabric
Roller Bar
Spring Clip
Installation
Spring Clip
Removal
Figure 13a
Figure 10
Figure 11
Double
Sided
Tape
Raised
Guide
Notched End
of Roller Bar
Fabric Rolled on
the Leading Bar
Fabric
Roller Bar





NOTE: The Roller Bar has a Notch cut into one end,
this is the end of the Roller Bar that the Motor will
be installed. If your Motor will be on the right when
you face your installed EasyShade, then the Notch
in the Roller Bar will be on the right for the Fabric
installaon. If your Motor will be on the le when
you face your installed EasyShade, then the Notch
in the Roller Bar will be on the le for the Fabric
installaon. Le and right references are as you face
the Roller Bar, with the Fabric on the opposite side.
Note: One (1) Clip will be installed over the Fabric
on each end of the Roller Bar, approximately one
(1) inch from the outer edge of the Roller Bar. All
remaining Clips will be installed equally distanced
along the Roller Bar, between the two (2) End Clips.
See Figure 13.





WARNING: THE SPRING CLIPS COULD HAVE
SHARP EDGES. TO PREVENT THE RISK OF INJURY,
USE SAFETY GLOVES WHEN REMOVING OR
REPOSITIONING THE SPRING CLIPS ON THE ROLLER
BAR. FAILURE TO DO SO COULD CAUSE PERSONAL
INJURY.
Figure 12
4





NOTE: The Motor Cord has a small white Plasc Cord
Protector just below the Motor Head. See Figure 19.

14.


Note


















.




Figure 17
Notch in
Roller Bar
Vinyl
Coated
Cable
Cord
Protector
Cord
Protector
Notch
Open End
Figure 19
Locking Tabs on
the Motor Collar
Locking Tabs
Notch in
Roller Bar
Figure 18
Figure 19a
Housing
Fabric on
Roller Bar
Leading Bar
with End Plugs
Sloed Opening
(Fabric Slot) in
the Housing
Figure 16
Notched end
of Roller Bar
Figure 14
Fabric
Roller
Bar
Housing
Fabric on
Roller Bar
Motorized End of Roller Bar
Leading Bar with
End Plugs
Figure 15
5






NOTE: DO NOT OVER TIGHTEN THE CABLE.












(my)


Figure 20
EasyShade
Solar Screen
Vinyl Coated
Cable
Guide Hole
Figure 22
Cable
Guide Stop
Cable Guide
Bracket
Figure 23
Nylon
Roller Bar
Insert
End Plate
Mounng Bracket
Top Groove
Set Screw
EasyShade
Assembly
Figure 21
- - - - - - - - - - - - -
- - - - - - - - - - - - - - - - -
- - - - - - - - - - - - - - - - -
- - - - - - - - - - -








carefully






















End Plate
EasyShade
Assembly
6
To Change the UP Limit:




To Change the DOWN Limit:




my
my
my
APPENDIX A
Adjusng Exisng Up and Down Posions for a Motorized EasyShade



NOTE: Do Not exceed the 84” DOWN Limit as this will cause the screen to roll up backwards
in the housing.
my
7
APPENDIX B
Reseng the Communicaon Between the Remote Transmier and the Motor



Note:


1. 
2. my
3. 
4. 
5. 
6. 
7. Programming



UPDOWN
Programming
Rear View
ADD
 

 
DELETE
Add/Delete a Control Device (Transmier)
 UPDOWN
9. DOWN
DOWN
my
DOWN
Front View
my
UP
WARNING: ALL STEPS MUST BE FOLLOWED EXACTLY AND COMPLETELY
Channel
Selector
11. UP
12. myDOWN
DOWN
13. myDOWN
14. UPDOWNDOWN
15. myUP
UP
16. myUPDOWN
17. Programming
UPDOWN
SET PROPER DIRECTION OF MOTOR ROTATION
PREPARE MOTOR
SET THE UP AND DOWN POSITIONS
FINALIZE PROGRAMMING OF THE MOTOR
 ©SunSeer Products, a Massachuses Limited Partnership, 184 Charles Street, Malden MA 02148 ES_M_Fabric_Replacement
A Place for Your Notes

Other manuals for EASYSHADE

7

Other SunSetter Accessories manuals

SunSetter Oasis Guide

SunSetter

SunSetter Oasis Guide

SunSetter 900XT Use and care manual

SunSetter

SunSetter 900XT Use and care manual

SunSetter Oasis Use and care manual

SunSetter

SunSetter Oasis Use and care manual

SunSetter Oasis Guide

SunSetter

SunSetter Oasis Guide

SunSetter Platinum Plus Guide

SunSetter

SunSetter Platinum Plus Guide

SunSetter EASYSHADE Guide

SunSetter

SunSetter EASYSHADE Guide

SunSetter 900XT Installation guide

SunSetter

SunSetter 900XT Installation guide

SunSetter VISTA Operating instructions

SunSetter

SunSetter VISTA Operating instructions

SunSetter PRO Operating and safety instructions

SunSetter

SunSetter PRO Operating and safety instructions

SunSetter 900XT User manual

SunSetter

SunSetter 900XT User manual

SunSetter EASYSHADE Original instructions

SunSetter

SunSetter EASYSHADE Original instructions

SunSetter Platinum Plus Series Original instructions

SunSetter

SunSetter Platinum Plus Series Original instructions

SunSetter 900XT User manual

SunSetter

SunSetter 900XT User manual

SunSetter Oasis Guide

SunSetter

SunSetter Oasis Guide

SunSetter VISTA Quick start guide

SunSetter

SunSetter VISTA Quick start guide

SunSetter Vista Series User manual

SunSetter

SunSetter Vista Series User manual

SunSetter EASYSHADE Use and care manual

SunSetter

SunSetter EASYSHADE Use and care manual

SunSetter Oasis Guide

SunSetter

SunSetter Oasis Guide

SunSetter Oasis Guide

SunSetter

SunSetter Oasis Guide

SunSetter Motorized Series Original instructions

SunSetter

SunSetter Motorized Series Original instructions

SunSetter Oasis Guide

SunSetter

SunSetter Oasis Guide

SunSetter OASIS Series User manual

SunSetter

SunSetter OASIS Series User manual

SunSetter VISTA Original instructions

SunSetter

SunSetter VISTA Original instructions

SunSetter Motorized PRO Guide

SunSetter

SunSetter Motorized PRO Guide

Popular Accessories manuals by other brands

Hytronik HMW21 Installation and instruction manual

Hytronik

Hytronik HMW21 Installation and instruction manual

IFM Electronic VNB001 operating instructions

IFM Electronic

IFM Electronic VNB001 operating instructions

airBee HOME Use and maintenance manual

airBee

airBee HOME Use and maintenance manual

Waterpik WF-07 user manual

Waterpik

Waterpik WF-07 user manual

TEKTELIC Communications Kona All-in-One Home Sensor user guide

TEKTELIC Communications

TEKTELIC Communications Kona All-in-One Home Sensor user guide

Omron Z550 Operation manual

Omron

Omron Z550 Operation manual

aci A/CTA2-5 Installation and operation instructions

aci

aci A/CTA2-5 Installation and operation instructions

Lenovo Active Pen 3 LP-251 quick start guide

Lenovo

Lenovo Active Pen 3 LP-251 quick start guide

Tektronix P7225 user manual

Tektronix

Tektronix P7225 user manual

BST CLS Pro 600 Installation and operating manual

BST

BST CLS Pro 600 Installation and operating manual

Dynatron iKom operating instructions

Dynatron

Dynatron iKom operating instructions

Fino Edge FE-PSS01 user manual

Fino Edge

Fino Edge FE-PSS01 user manual

Mutsy Spider instruction manual

Mutsy

Mutsy Spider instruction manual

Leuze SET-AC manual

Leuze

Leuze SET-AC manual

Fishman Archtop Guitar Pickup user guide

Fishman

Fishman Archtop Guitar Pickup user guide

Lexicon I-O|FW810S owner's manual

Lexicon

Lexicon I-O|FW810S owner's manual

SensComp Cricket-A Installation and operation manual

SensComp

SensComp Cricket-A Installation and operation manual

Gogen PBS 40002 user manual

Gogen

Gogen PBS 40002 user manual

manuals.online logo
manuals.online logoBrands
  • About & Mission
  • Contact us
  • Privacy Policy
  • Terms and Conditions

Copyright 2025 Manuals.Online. All Rights Reserved.