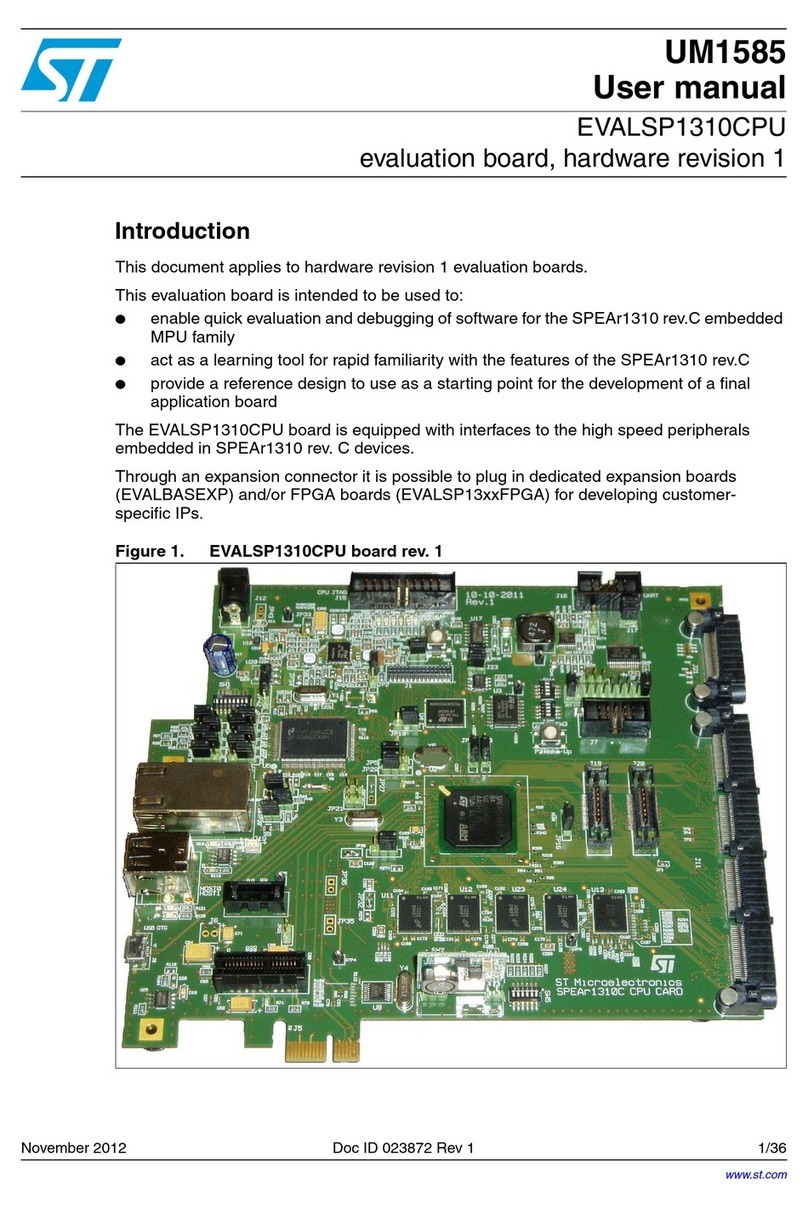
ST STEVAL-IPE005V1 User manual

March 2008 Rev 1 1/21
UM0509
User manual
STEVAL-IPE005V1, STPM01 programmer board - hardware
Introduction
The STPM01 - programmer kit works in conjunction with the STPM01 energy meter ASSP
device and with the STPM01 manager software. It is an integrated system designed to
provide the user with a complete, ready-to-use energy meter application. The reference
design is a high-end solution for power metering based on the STR710 microcontroller with
an embedded RTC and an external memory interface (EMI) ready to drive 1Mbyte of on-
board SRAM.
The kit also integrates an on-board optical insulated serial line allowing isolation of the
board ground reference in order to avoid propagation of overvoltage on the PC side.
Moreover, the on-board charge pump allows burning the STPM01 energy meter ASSP
device registers.
Access to the STPM01 device registers is ensured using a dedicated SPI bus interface.
The STPM01 programmer kit demonstrates how effectively the STPM01 can be used in
real-world energy meter applications and it helps the user to develop his own application.
The STPM01 programmer kit can be used in two ways:
■For demonstration purposes, by connecting the reference design to an AC power source
and changing all the settings parameters through the GUI interface and the hardware
programmer/reader board
■To evaluate and develop a custom application
www.st.com
www.BDTIC.com/ST

Contents UM0509
2/21
Contents
1 Overview . . . . . . . . . . . . . . . . . . . . . . . . . . . . . . . . . . . . . . . . . . . . . . . . . . 4
1.1 Recommended reading . . . . . . . . . . . . . . . . . . . . . . . . . . . . . . . . . . . . . . . 4
1.2 Getting technical support . . . . . . . . . . . . . . . . . . . . . . . . . . . . . . . . . . . . . . 4
2 STPM01 kit components . . . . . . . . . . . . . . . . . . . . . . . . . . . . . . . . . . . . . . 5
2.1 Package checklist . . . . . . . . . . . . . . . . . . . . . . . . . . . . . . . . . . . . . . . . . . . . 5
2.2 Debug . . . . . . . . . . . . . . . . . . . . . . . . . . . . . . . . . . . . . . . . . . . . . . . . . . . . . 5
2.3 Reset . . . . . . . . . . . . . . . . . . . . . . . . . . . . . . . . . . . . . . . . . . . . . . . . . . . . . 5
2.4 Power supplies . . . . . . . . . . . . . . . . . . . . . . . . . . . . . . . . . . . . . . . . . . . . . . 5
2.5 Opto-isolated RS-232 . . . . . . . . . . . . . . . . . . . . . . . . . . . . . . . . . . . . . . . . . 5
2.6 SPI connector . . . . . . . . . . . . . . . . . . . . . . . . . . . . . . . . . . . . . . . . . . . . . . . 5
2.7 Status LEDs . . . . . . . . . . . . . . . . . . . . . . . . . . . . . . . . . . . . . . . . . . . . . . . . 6
2.8 Jumper placement . . . . . . . . . . . . . . . . . . . . . . . . . . . . . . . . . . . . . . . . . . . 6
2.9 Jumper position . . . . . . . . . . . . . . . . . . . . . . . . . . . . . . . . . . . . . . . . . . . . . 7
2.10 Description of push-buttons and default value . . . . . . . . . . . . . . . . . . . . . . 8
2.11 Description of connectors . . . . . . . . . . . . . . . . . . . . . . . . . . . . . . . . . . . . . . 8
2.12 Boot configuration . . . . . . . . . . . . . . . . . . . . . . . . . . . . . . . . . . . . . . . . . . . 9
3 Connectors . . . . . . . . . . . . . . . . . . . . . . . . . . . . . . . . . . . . . . . . . . . . . . . 10
3.1 Power . . . . . . . . . . . . . . . . . . . . . . . . . . . . . . . . . . . . . . . . . . . . . . . . . . . . 10
3.2 UARTx . . . . . . . . . . . . . . . . . . . . . . . . . . . . . . . . . . . . . . . . . . . . . . . . . . . 10
3.3 Debug . . . . . . . . . . . . . . . . . . . . . . . . . . . . . . . . . . . . . . . . . . . . . . . . . . . . 11
4 STPM01 programmer kit schematics . . . . . . . . . . . . . . . . . . . . . . . . . . 12
4.1 Microcontroller and main parts schematic . . . . . . . . . . . . . . . . . . . . . . . . 12
4.2 Power management . . . . . . . . . . . . . . . . . . . . . . . . . . . . . . . . . . . . . . . . . 13
4.3 Reset and clock circuits . . . . . . . . . . . . . . . . . . . . . . . . . . . . . . . . . . . . . . 14
4.4 Boot management and Jtag circuit . . . . . . . . . . . . . . . . . . . . . . . . . . . . . . 15
4.5 External RAM memory . . . . . . . . . . . . . . . . . . . . . . . . . . . . . . . . . . . . . . . 17
4.6 SPI signals buffering . . . . . . . . . . . . . . . . . . . . . . . . . . . . . . . . . . . . . . . . 18
4.7 Charge pump and SPI connector . . . . . . . . . . . . . . . . . . . . . . . . . . . . . . . 19
5 Revision history . . . . . . . . . . . . . . . . . . . . . . . . . . . . . . . . . . . . . . . . . . . 20
www.BDTIC.com/ST

UM0509 List of figures
3/21
List of figures
Figure 1. STPM01 programmer kit option jumper placement . . . . . . . . . . . . . . . . . . . . . . . . . . . . . . . 6
Figure 2. Jumper position . . . . . . . . . . . . . . . . . . . . . . . . . . . . . . . . . . . . . . . . . . . . . . . . . . . . . . . . . . 7
Figure 3. STPM01 programmer kit: placement of connectors. . . . . . . . . . . . . . . . . . . . . . . . . . . . . . . 8
Figure 4. Power jack connector: CN2 . . . . . . . . . . . . . . . . . . . . . . . . . . . . . . . . . . . . . . . . . . . . . . . . 10
Figure 5. RS232 transmit and receive connectors. . . . . . . . . . . . . . . . . . . . . . . . . . . . . . . . . . . . . . . 10
Figure 6. JTAG standard interface: CN1 . . . . . . . . . . . . . . . . . . . . . . . . . . . . . . . . . . . . . . . . . . . . . . 11
Figure 7. Microcontroller and main parts schematic . . . . . . . . . . . . . . . . . . . . . . . . . . . . . . . . . . . . . 12
Figure 8. Power management schematic . . . . . . . . . . . . . . . . . . . . . . . . . . . . . . . . . . . . . . . . . . . . . 13
Figure 9. Reset and clock circuits . . . . . . . . . . . . . . . . . . . . . . . . . . . . . . . . . . . . . . . . . . . . . . . . . . . 14
Figure 10. Boot management and Jtag circuits . . . . . . . . . . . . . . . . . . . . . . . . . . . . . . . . . . . . . . . . . . 15
Figure 11. Opto-isolated UART . . . . . . . . . . . . . . . . . . . . . . . . . . . . . . . . . . . . . . . . . . . . . . . . . . . . . . 16
Figure 12. External RAM memory . . . . . . . . . . . . . . . . . . . . . . . . . . . . . . . . . . . . . . . . . . . . . . . . . . . . 17
Figure 13. SPI signals buffering. . . . . . . . . . . . . . . . . . . . . . . . . . . . . . . . . . . . . . . . . . . . . . . . . . . . . . 18
Figure 14. Charge pump and SPI connector . . . . . . . . . . . . . . . . . . . . . . . . . . . . . . . . . . . . . . . . . . . . 19
www.BDTIC.com/ST

Overview UM0509
4/21
1 Overview
1.1 Recommended reading
This documentation describes how to configure and use the STPM01 programmer kit
hardware. Additional information can be found in the following documents:
●Datasheets of ST devices
●Datasheets of third party devices
●Dedicated application notes
●STPM01 programmer firmware user manual
●STPowerMeter user manual
1.2 Getting technical support
Technical assistance is provided free to all customers. For technical assistance,
documentation, information and upgrades about products and services, please refer to your
local ST distributor/office.
STMicroelectronics offers its customers a free technical support service at
www.BDTIC.com/ST

UM0509 STPM01 kit components
5/21
2 STPM01 kit components
2.1 Package checklist
The STPM01 kit package includes the following items:
●The STPM01 board
●A CD-ROM with software and documentation
2.2 Debug
Software debug is via a standard 20-pin JTAG connection.
2.3 Reset
The reset sources are:
●Power-on reset
●Push-button reset
●JTAG reset from an in-circuit emulator
2.4 Power supplies
Power to the board is supplied using a lump in cord power supply providing 5 V to the board.
All other required voltages are provided by on-board voltage regulators or voltage
convectors.
An isolated 5 V DC/DC provides the isolated voltage supply for the opto-coupler devices.
2.5 Opto-isolated RS-232
A general-purpose, asynchronous serial I/O data port is connected through 9-pin D-type
male connectors. The port is opto-isolated in order to avoid overvoltage on the PC side.
2.6 SPI connector
A devoted SPI connector allows interfacing the STPM01 device. It provides all the SPI
signals required to communicate with the STPM01 interface registers. Moreover it provides
a 24 V line which allows burning the STPM01 configuration registers.
www.BDTIC.com/ST

STPM01 kit components UM0509
6/21
2.7 Status LEDs
2.8 Jumper placement
Figure 1. STPM01 programmer kit option jumper placement
Table 1. Status LEDs
LED Description
D1 +5 V power
D2 +3.3 V power
D3 1.8 V power
www.BDTIC.com/ST

UM0509 STPM01 kit components
7/21
2.9 Jumper position
Figure 2. Jumper position
Table 2. Jumpers (refer to Figure 1)
Jumper Description Default
J1
3.3 V power supply for external SRAM
– Fitted: power to the SRAM
– Not fitted: no power to the SRAM
Fitted
J2
Enable VBKP (stabitization for low power voltage)
– Fitted: stabilization enabled
– Not fitted: stabilization disabled
Not fitted
J3
Enable 1.8 V to microcontroller
– Fitted: 1.8 V to microcontroller enabled
– Not fitted: 1.8 V to microcontroller disabled
Fitted
J8
Power supply to the charge pump:
– Fitted (1-2): Internal power supply to charge pump and SPI signals
buffer
– Fitted (2-3): power supply to charge pump and SPI signals buffer
from STPM01 board
Fitted (1-2)
SW8
BOOT EN:
– Fitted (1-2): GND
– Fitted (2-3): 3.3 V
Not fitted
SW9
BOOT1:
– Fitted (1-2): 3.3 V
– Fitted (2-3): GND
Not fitted
SW10
BOOT0:
– Fitted (1-2): 3.3 V
– Fitted (2-3): GND
Not fitted
www.BDTIC.com/ST

STPM01 kit components UM0509
8/21
2.10 Description of push-buttons and default value
2.11 Description of connectors
Figure 3. STPM01 programmer kit: placement of connectors
Table 3. Push-buttons (refer to Figure 1)
Jumper Description Default
SW1 Wakeup:
– When pushed, wakes up microcontroller
SW2 Application default:
– When pushed, forces default conditions
SW3 Reset button:
– When pushed, forces microcontroller reset Fitted
Table 4. Connectors (refer to Figure 3)
Connector Description
P1 Opto - isolated RS232 female connector
J4 DC-IN 5 V connector
CN2 DC-IN 5 V connector
CN1 JTAG connector
J7 SPI connector
P1
J4 CN2 CN1
J7
www.BDTIC.com/ST

UM0509 STPM01 kit components
9/21
2.12 Boot configuration
Table 5. Boot mode
BOOT EN
SW8
BOOT1
SW9
BOOT0
SW10 Mode BOOT memory
mapping Note
0 (1-2)) Any Any User Flash mapped
at 0h System executes code from Flash
1 (2-3) 0 (2-3) 0 (2-3)
1 (2-3) 0 (2-3) 1 (1-2) System
memory
System memory
mapped at 0h
– System executes a factory
installed boot loader from
system memory (reserved
mode)
– Clock frozen
1 (2-3) 1 (1-2) 0 (2-3) RAM RAM mapped at 0h
– System executes code from
internal RAM
– For lab development
1 (2-3) 1 (1-2) 1 (1-2) EXTMEM EXTMEM mapped at
0h
– System executes code from
external memory
– Not allowed
www.BDTIC.com/ST

Connectors UM0509
10/21
3 Connectors
3.1 Power
Figure 4. Power jack connector: CN2
3.2 UARTx
Figure 5. RS232 transmit and receive connectors
Table 6. RS232 connector pinout P1
Pin Description
1 Shorted to pins 6 and 2
2 Shorted to pins 1 and 6
3TX-0_PC(R1IN)
4 RX-0_PC (T1OUT)
5GND
6 Shorted to pins 1 and 2
7 Shorted to pin 8
8 Shorted to pin 7
9 Not connected
www.BDTIC.com/ST

UM0509 Connectors
11/21
3.3 Debug
Figure 6. JTAG standard interface: CN1
Table 7. JTAG interface pinout: CN10
Pin Description
Even pins Ground
1 VTref+3.3 V
2 Vsupply+3.3 V
3 notTRST
5TDI
7TMS
9TCK
11 RTCK (ground)
13 TDo
15 noTReset
17 DBGRQS - pulled down
19 Pulled down
www.BDTIC.com/ST

STPM01 programmer kit schematics UM0509
12/21
4 STPM01 programmer kit schematics
4.1 Microcontroller and main parts schematic
Figure 7. Microcontroller and main parts schematic
not Reset
BOOTEN
+3V3
GND
TX_1_I/0
0_xT 0_xT
JTMS
DBGRQS
not Reset
JTCK
not JTRST
JTDO
JTDI +3V3
GND
A1
A3
A4
A5
A6
A7
A8
A9
A10
A11
A12
A13
A16
A17
A18
CS.1
A15
A14
D0
D12
D8
D9
D14
D5
D4
D7
D11
D3
D1
D10
D2
D15
D6
D13
+3V3
GND
A2 nWE0
nWE1
nRD
A19
VOUT
+1V8
VBKP
+5V
+3V3
GND
GND
+3V3
+5V
+1V8
WAKEUP
GND
JTDI
JTDO
not JTRST
JTMS
JTCK
MOSI SCLK
MISO
GND
not Reset
DBGRQS
Rx_0
+5V
+3V3
GND
+5V
P1.0
P1.1
P1.2
P0.10
P0.7
+5V
+3V3
P0.0
P0.6
P0.2
P0.4
P0.5
+3V3
GND
+3V3
GND
CK ITXCTRITXCTR
OTXCTROTXCTR
SYSTEM_DEFAULT
WAKEUP
+3V3
VBKP
GND
not Reset
GND
Tx_0
GND
RTCXTI
JTMS
126 P0.2
P0.4
P0.0
RTCXTO
P0.1
SYSTEM_DEFAULT
CK
P0.7
P0.6
JTDI
JTCK
BOOTEN
not JTRST
JTDO
P0.10
P0.5
Rx_0
DBGRQS
CS.1
nRD
rn12
A23
A22
A0
A1
A2
A3
A4
A5
A6
A7
A8
A9
A10
A11
A12
A13
A14
A15
A16
A17
A18
A19
A20
A21
D15
D14
D13
D12
D11
D10
D9
D8
D7
D6
D5
D4
D3
D2
D1
D0
Cn
P1.6
+1V8
VBKP
rn13
nWE0
nWE1
rn14
ORANGE
TX_1_I/0
P1.0
P1.1
P1.2
7
11
12
18
23
24
25
26
27
28
29
75
76
85
19
20
37
39
41
43
48
10
4
111
108
107
89
88
74
45
90
91
106
105
110
109
87
70
69
68
60
57
56
53
66
VBKP
+5V
+1V8 +3V3
+3V3
+3V3
+3V3
POWER
ESD
POWER MANAGEMENT
GND
+3V3
+5V
+1V8
VBKP
R4
560
R4
560
U2
ESDA6V1-5W6-SOT323-6L
U2
ESDA6V1-5W6-SOT323-6L
I/O1
1
I/O2
3I/O3 4
I/O4 5
I/O5 6
GND
2
CHARGE PUMP
ChargePump
+5V0
STR7_OTP_EN
STR7_SBS
STR7_SBG
GND
STPM01_SDA
STPM01_SCS
STPM01_SYN
STPM01_SCL
J9
Enable UART0 TX
J9
Enable UART0 TX
1
2
EMI_SRAM
not CS_SRAM
not OE
WE1
WE0
D0
D1
D2
D3
D4
D5
D6
D7
D13
D15
D12
D8
D14
D10
D9
D11
GND
+3V3
A1
A2
A3
A4
A5
A6
A7
A8
A9
A11
A10
A12
A13
A14
A15
A16
A17
A18
A19
VOUT
R1
560
R1
560
R5
22
R5
22
R7 22
R7 22
SW1
MOMENTARY
SW1
MOMENTARY
R9 22
R9 22
BOOT
BOOT
BOOT_EN
SW2
SW1
+3V3
GND
U3
ESDA6V1-5W6-SOT323-6L
U3
ESDA6V1-5W6-SOT323-6L
I/O1
1
I/O2
3
I/O3 4
I/O4 5
I/O5 6
GND
2
R3
560
R3
560
GENERALUSB
SYSTEM
RTC
STS
ADC
CAN
I2C0
SPI0
SPI1
UART0
UART1
UART2
DEBUG
TIMER1 GPIO PORT
EMI
SUPPLY
U1
STR710FZ2T6-TQFP144
GENERALUSB
SYSTEM
RTC
STS
ADC
CAN
I2C0
SPI0
SPI1
UART0
UART1
UART2
DEBUG
TIMER1
GPIO PORT
EMI
SUPPLY
U1
STR710FZ2T6-TQFP144
P2.0/CS.0
7P2.1/CS.1
8
P2.2/CS.2
11 P2.3/CS.3
12
A.0
98 A.1
99 A.2
100 A.3
101 A.4
102
A.5
114
A.6
115 A.7
116
A.8
117
A.9
118 A.10
119
A.11
120
A.12
121
A.13
122 A.14
130
A.15
131
A.16
132 A.17
133
A.18
134
A.19
135 P2.4/A.20
13
P2.5/A.21
14
P2.6/A.22
15 P2.7/A.23
17
D.0
61
D.1
62 D.2
63
D.3
64
D.4
65 D.5
78
D.6
79
D.7
80 D.8
81
D.9
82
D.10
92 D.11
93
D.12
94
D.13
95 D.14
96 D.15
97
RD
2WE.0
137 WE.1
136
P2.8
18 P2.9
23 P2.10
24 P2.11
25 P2.12
26 P2.13
27 P2.14
28
P2.15
29
P1.4/T1.ICAPA
75 P1.5/T1.ICAPB
76 P1.6/T1.OCMPB
77 P1.7/T1.OCMPA
85
VSS1
42 VSS2
59 VSS3
84 VSS4
103
VSS5
112
VSS6
128 VSS7
139
VSS8
5
VSS9
21
P0.15/WAKEUP 47
STBY
51
V33.1 6
V33.2 22
V33.3 40
V33.4 83
V33.5 104
V33.6 113
AVDD 66
V18.1 58
V18.2 129
V18BKP 55
CK 46
P1.8 86
P1.9 105
P1.10/USBCLK 106
USBDN 91
USBDP 90
RSTIN
52
CKOUT 45
RTCXTI 49
RTCXTO 50
BOOTEN 16
JTDI 30
JTMS 31
JTCK 32
JTDO 33
JTRST
34
P1.0/T3.OCMPB/AIN.0 71
P1.1/T3.ICAPA/AIN.1 72
P1.2/T3.OCMPA/AIN.2 73
P1.3/T3.ICAPB/AIN.3 74
P1.11/CANRX 88
P1.12/CANTX 89
P1.13/HCLK/IO.SCL 107
P1.14/HCLK/IO.SCL 108
P1.14/HTXD 111
P0.0/S0.MISO/U3.TX 123
P0.1/S0.MOSI/U3.RX 124
P0.2/S0.SCLK/I1.SCL 125
P0.3/S0.SSN/I1.SDA 126
P0.4/S1.MISO 127
P0.5/S1.MOSI 140
P0.6/S1.SCLK 141
P0.7/S1.SSN 142
P0.8/U0.RX/U0.TX 143
P0.9/U0.TX/BOOT.0 144
P0.10/U1.RX/U1.TX 1
P0.11/U1.TX/BOOT.1 3
P0.12/SCCLK 4
P0.13/U2.RX/T2.OCMPA 9
P0.14/U4.TX/T2.ICAPA 10
DBGROS 44
NC 35
TEST1 36
TEST2 38
VSSBKP
54
AVSS
67
NC 19
NC 20
NC 37
NC 39
NC 41
NC 43
NC 48
NC
53
NC
56 NC
57
NC
68
NC
69 NC
70
NC
87
NC
109 NC
110
NC
60
V33.7 138
R8 22
R8 22
RESET
RESET
GND
+3V3
CLK - RTC
CLK
CK
RTCXTI
RTCXTO
+3V3
GND
TP10
TP10
1
C49
10uF
C49
10uF
SW2
MOMENTARY
SW2
MOMENTARY
C1
100n
C1
100n
C2
100n
C2
100n
R2
560
R2
560
OPTO ISOLATED UART
UARTx
GND
+3V3
+5V
TX_0
RX_0
JTAG
JTMS
not JTRst
JTDI
JTCK
JTDO
DBGRQS
not Reset
+3V3
GND
R6
560
R6
560
SPI_BUFFER
SPI_BUFFER
GND
STR7_READ_EN
STR7_SCS
STR7_WRITE_EN
STR7_MOSI
STR7_MISO
STR7_SCL
STR7_SYN
STPM01_SCS
STPM01_SDA
STPM01_SCLK
STPM01_SYN
5V
3.3V
www.BDTIC.com/ST

UM0509 STPM01 programmer kit schematics
13/21
4.2 Power management
Figure 8. Power management schematic
+5V
+3V3
+1V8
+1V8
+5V
+3V3
GND
VBKP
+5V
VBKP
+1V8
+5V +3V3
+5V
J2
Enable VBKP
J2
Enable VBKP
1 2
J3
Enable 1V8
J3
Enable 1V8
1 2
D6
1N4001
D6
1N4001
C11
10n
50V
C11
10n
50V
R25
560
R25
560
CN2
DC-IN9V
CN2
DC-IN9V
1
2
C13
10n
50V
C13
10n
50V
C25
100n
25V
C25
100n
25V
D2
BLU
D2
BLU
J4
DC-IN9V
J4
DC-IN9V
1
2
C22
10n
50V
C22
10n
50V
TP3
TEST POINT
TP3
TEST POINT
1
R26
560
R26
560
C17
100n
25V
C17
100n
25V
C24
47uF
C24
47uF
L1 FBEADL1 FBEAD
1 2
D3
YELLOW
D3
YELLOW
C20
10n
50V
C20
10n
50V
C15
100n
25V
C15
100n
25V
R24
560
R24
560
U5
LD108518 - D2PAK-A
U5
LD108518 - D2PAK-A
VOUT 3
VIN
2
GND
1
TP4
TEST POINT
TP4
TEST POINT
1
LF01
BNX002
LF01
BNX002
B
3
PSG
1CG 2
CG 5
CG 6
CB 4
D1
GREEN
D1
GREEN
U6
LD108533 - D2PAK-A
U6
LD108533 - D2PAK-A
VOUT 3
VIN
2
GND
1
www.BDTIC.com/ST

STPM01 programmer kit schematics UM0509
14/21
4.3 Reset and clock circuits
Figure 9. Reset and clock circuits
www.BDTIC.com/ST

UM0509 STPM01 programmer kit schematics
15/21
4.4 Boot management and Jtag circuit
Figure 10. Boot management and Jtag circuits
www.BDTIC.com/ST

STPM01 programmer kit schematics UM0509
16/21
Figure 11. Opto-isolated UART
www.BDTIC.com/ST

UM0509 STPM01 programmer kit schematics
17/21
4.5 External RAM memory
Figure 12. External RAM memory
www.BDTIC.com/ST

STPM01 programmer kit schematics UM0509
18/21
4.6 SPI signals buffering
Figure 13. SPI signals buffering
STR7_SCS
STR7_WRITE_EN
STR7_MOSI
scs3V
STR7_MISO miso3V
sda5V
STR7_SCL
STR7_SYN STPM01_SCS
read_en3Vread_en
sclk5V
syn5V
scs5V
rev_0_c8
STPM01_SDA
mosi3V
R41
4.7k
sda5V
STPM01_SCLK
3.3V
write_en3V
rev_0_c10
STPM01_SYN
5V5V
3.3V
syn3V
FROM STR7 TO STPM01
FROM STPM01 TO STR7
SPI BUFFER
sclk3V
5V
5V
3.3V
3.3V
CHARGE PUMP
SPI SIGNALS BUFFER
SPI BUFFER
U15
M74HC126
1G
1
1A
2
1Y
3
2G
4
2A
5
2Y
6
GND
7
VCC 14
4G 13
4A 12
4Y 11
3G 10
3A 9
3Y 8
U14
M74HC126
1G
1
1A
2
1Y
3
2G
4
2A
5
2Y
6
GND
7
VCC 14
4G 13
4A 12
4Y 11
3G 10
3A 9
3Y 8
GND
STR7_READ_EN
www.BDTIC.com/ST

UM0509 STPM01 programmer kit schematics
19/21
4.7 Charge pump and SPI connector
Figure 14. Charge pump and SPI connector
VOTP
STR7_SBG
STR7_SBS
SCS
STPM01_SDA
SYN
VOTPVOTPVOTPVOTPVOTP
SCL
STR7_SBG
STR7_OTP_EN
STR7_SBG
STR7_SBG
STPM01_SCS
SCS
STPM01_SCL
SCL
STPM01_SYN
SYN
STPM01_SYN
STR7_OTP_EN
STPM01_SCS
STR7_SBS
STR7_SBG
STPM01_SCL
STPM01_SDA
GND
+5V0
STPM01_SYN
STR7_OTP_EN
STR7_SBS
STPM01_SCS
STR7_SBG
STPM01_SCL
STPM01_SDA
GND
VCC
VCC
VCC
VCC
VCC
R30
12K
R30
12K
D5
BAS70-04/SOT
D5
BAS70-04/SOT
3
1 2
D4
BAS70-04/SOT
D4
BAS70-04/SOT
3
1 2
C38
10n
C38
10n
C37
10n
C37
10n
C35
10n
C35
10n
R29
1K
R29
1K
R28
330
R28
330
R27 47KR27 47K
J8
CON3
J8
CON3
1
2
3
C32
1u
C32
1u
Q4
BC807-25
Q4
BC807-25
3
2
1
Q3
BC807-25
Q3
BC807-25
3
2
1
C33100nF C33100nF
C34
100nF
C34
100nF
+
C31
10uF
+
C31
10uF
C30100nF C30100nF
U11
M74HC126
U11
M74HC126
1G
1
1A
2
1Y
3
2G
4
2A
5
2Y
6
GND
7
VCC 14
4G 13
4A 12
4Y 11
3G 10
3A 9
3Y 8
J7
CON10
J7
CON10
1
3
5
7
9
2
4
6
8
10
U12
M74HC126
U12
M74HC126
1G
1
1A
2
1Y
3
2G
4
2A
5
2Y
6
GND
7
VCC 14
4G 13
4A 12
4Y 11
3G 10
3A 9
3Y 8
U13
M74HC14
U13
M74HC14
1A
1
1Y
2
2A
3
2Y
4
3A
5
3Y
6
GND
7
VCC 14
6A 13
6Y 12
5A 11
5Y 10
4A 9
4Y 8
R31
12K
R31
12K
C36
56p
C36
56p
www.BDTIC.com/ST

Revision history UM0509
20/21
5 Revision history
Table 8. Document revision history
Date Revision Changes
14-Mar-2008 1 Initial release
www.BDTIC.com/ST
This manual suits for next models
1
Table of contents
Other ST Motherboard manuals

ST
ST STEVAL-ILL059V1 User manual

ST
ST SPC574KADPT144S User manual

ST
ST STEVAL-IPP003V1 Quick start guide

ST
ST STM32 Nucleo-64-P Series User manual

ST
ST UM0527 User manual

ST
ST STM3210E-EVAL User manual

ST
ST ST7 Series User manual

ST
ST STM32F3DISCOVERY User manual

ST
ST STEVAL-MKI019V1 User manual

ST
ST STM32F746G-DISCO User manual